
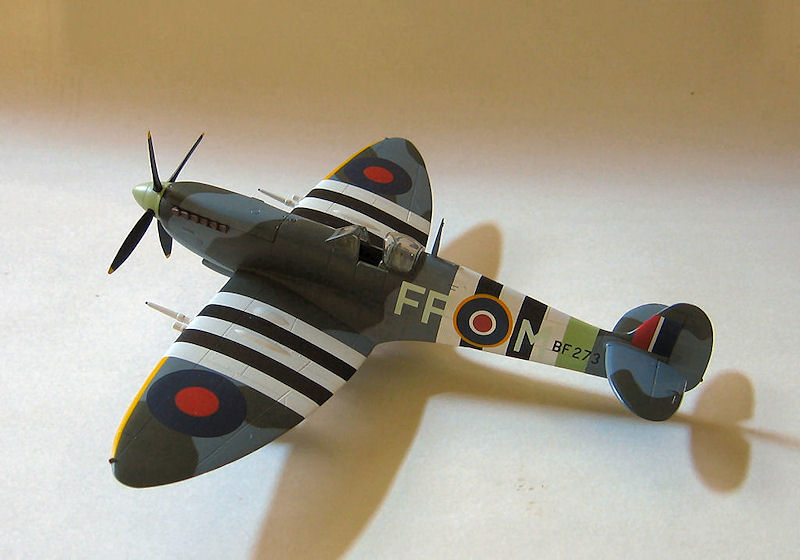
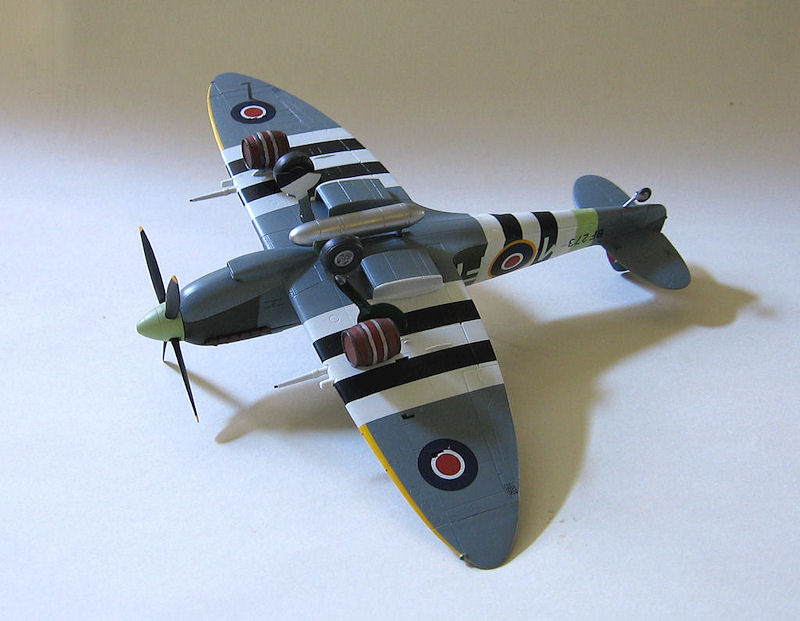
Spitfire Mk. IXc "Beer Truck"
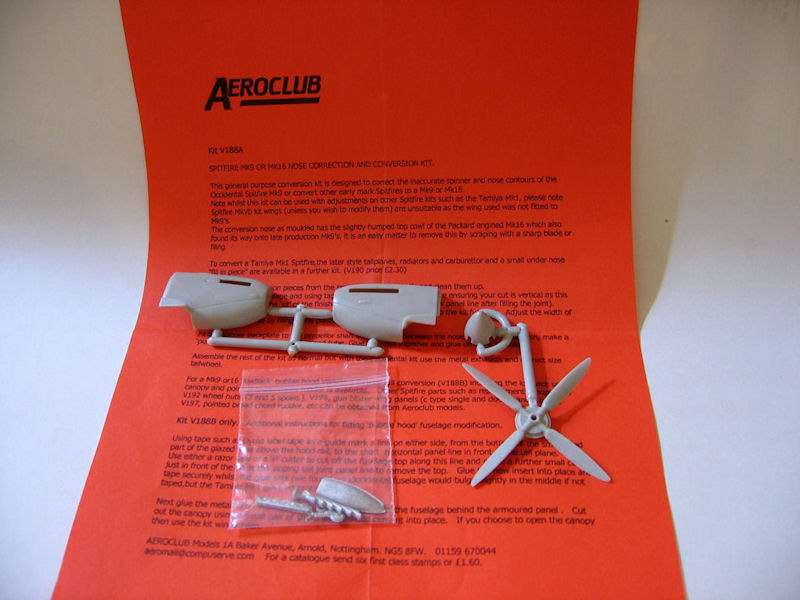
The basis of this kit is the old Occidental kit, with extra parts added for the beer barrels and a beautiful Cartograf decal sheet with five options (4 RAF and 1 Dutch). The box states that these are “upgraded moulds”, but when I compared it to the MPM boxing of the Occidental kit it was obvious that the molds are basically the same. The Italeri kit only has the option of the rounded, narrow-chord rudder. Much has been written about the nose of the Occidental kit being too long, and since the Italeri kit uses the same molds, the nose is still too long. I think that the finished model looks like a Spitfire, but for you purists there is a correction set available from Aeroclub which shortens the nose by about 2mm.
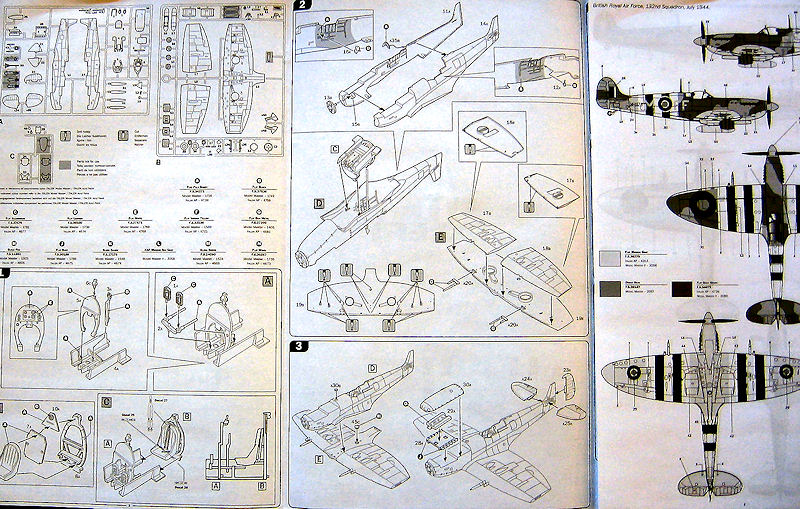
The instruction sheet is very well done. There is a parts map, a color guide with the name of each color used, its F.S. number, Model Master paint number and Italeri AP paint number. The diagrams are clear and easy to follow, with color call-outs throughout. There are a lot of holes to open up on the wings, so follow the instructions closely to be sure you have all of the proper holes opened up. All five marking options have painting and decal instructions in four views.
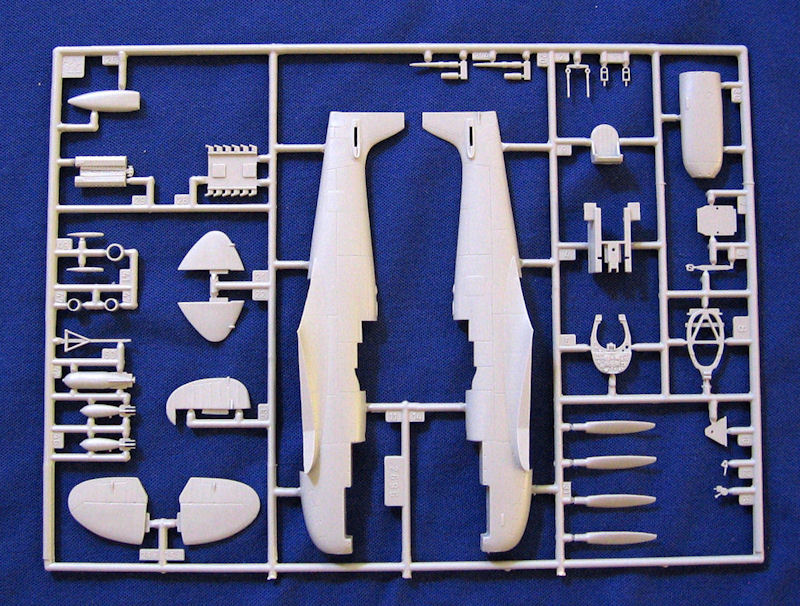
The kit is molded in a very light grey. Surface detailing is good and the panel lines are crisp, if not slightly overdone. There was no flash present on any of the parts. The plastic is soft, so care must be taken when sanding seams and rescribing panel lines that you don’t overdo it. All in all, I was impressed with the fit of the kit. As with any kit, test fitting is always recommended, but for the most part only slight adjustments were required to achieve an optimal fit.
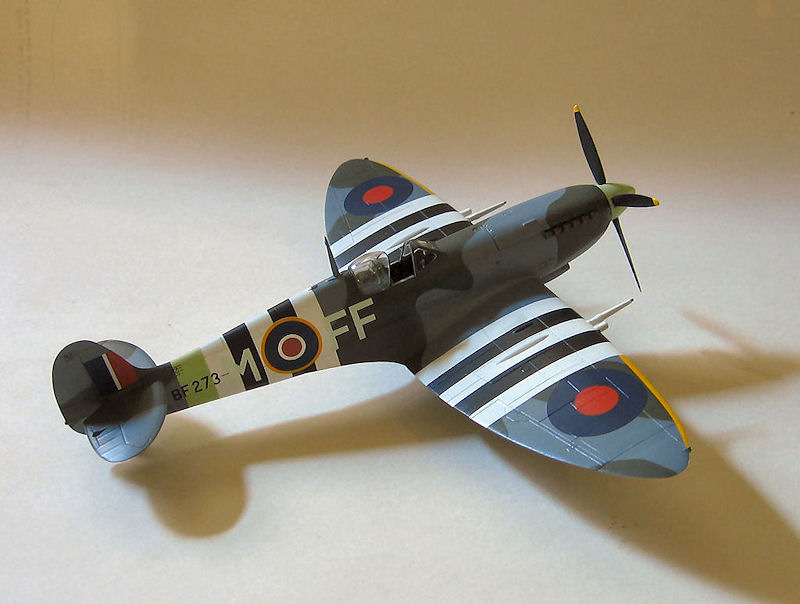
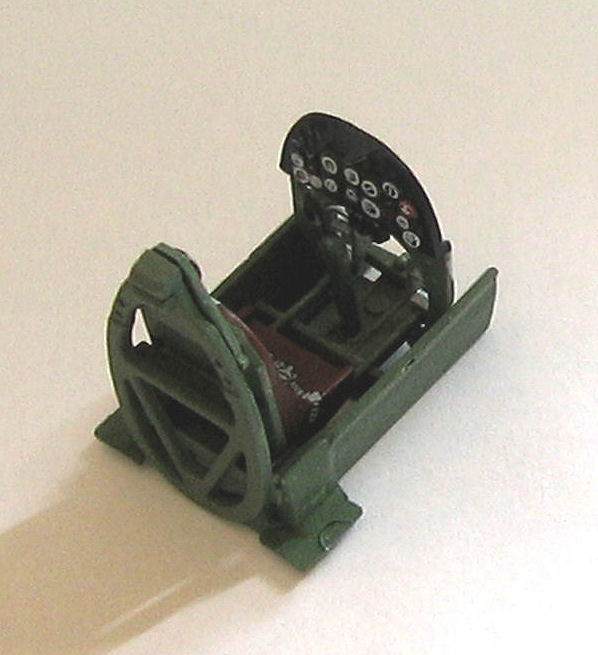
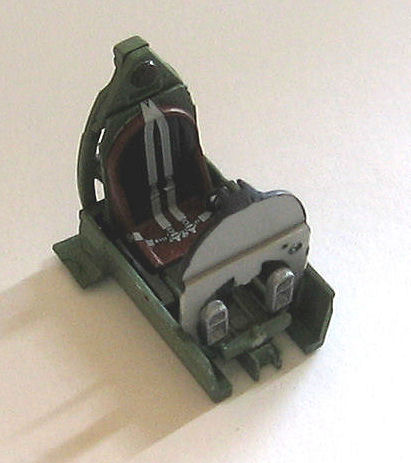
The instrument panel was a bit of a disappointment. There is plenty of detail on it, but the dials do not have any faces on them, which in 1/48 scale is inexcusable, in my opinion. I dug into my decal dungeon and found an old Pro-Modeler British instrument panel decal sheet that has several individual dials and tried to dress up the kit panel as much as possible. The instructions would have you paint the entire instrument panel interior grey-green, but I have never seen a Spitfire painted that way. Only the open portion below the actual instrument panel should be painted interior grey-green. I painted the seat with Model Master rust to represent Bakelite, and the seat back padding black. I added the kit supplied seatbelt decals, and they look fairly decent. Cockpit sidewall detail is OK, but could definitely be improved upon. It looks like the cockpit entry door could be cut out and posed open, but there is no option for it in the instructions.
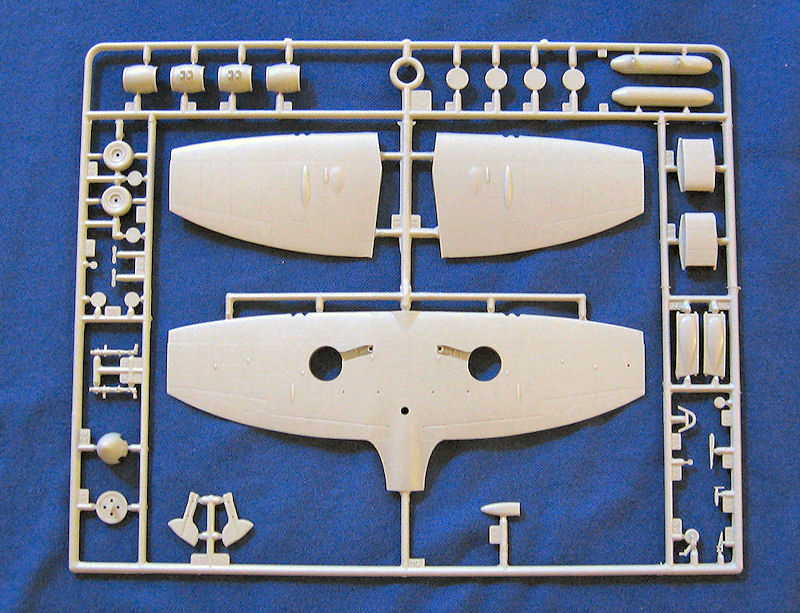
Moving on to the wings, all of the shell ejection ports are flashed over, so you need to open up the appropriate ones for this particular version. This was somewhat tedious, especially when it came to the “L” shaped openings. The openings that the cannons fit into are slightly large and the gaps around the cannons will need to be filled in. The two outboard machine gun openings are also flashed over, and I made the mistake of opening them up before gluing the wing halves together. If I had to do it again I would simply mark the openings and then drill them out after the wing halves are glued together. As it was, I filled the poorly shaped holes that I made with styrene rod. After the glue dried I drilled new holes to represent the machine guns.
The wingtips are provided as separate pieces, but they fit nicely with just a touch of sanding. The fuselage-to-wing joint was very good, and only a small amount of sanding was required to make the fit excellent. Don’t forget to attach clear part #45c to the inside of the lower wing before gluing the wing assembly to the fuselage.
The exhaust is a single piece which will be trapped underneath the upper cowl when the cowl is glued into place. There is a piece that goes on top of the exhaust part and represents the top of the engine, but since it is not visible I left it off. A small amount of sanding and test fitting is needed to achieve a perfect fit for the upper cowling. I waited until after painting to glue the exhaust and cowling in place. I used Blue Tak to hold the upper cowling in place during the painting process.
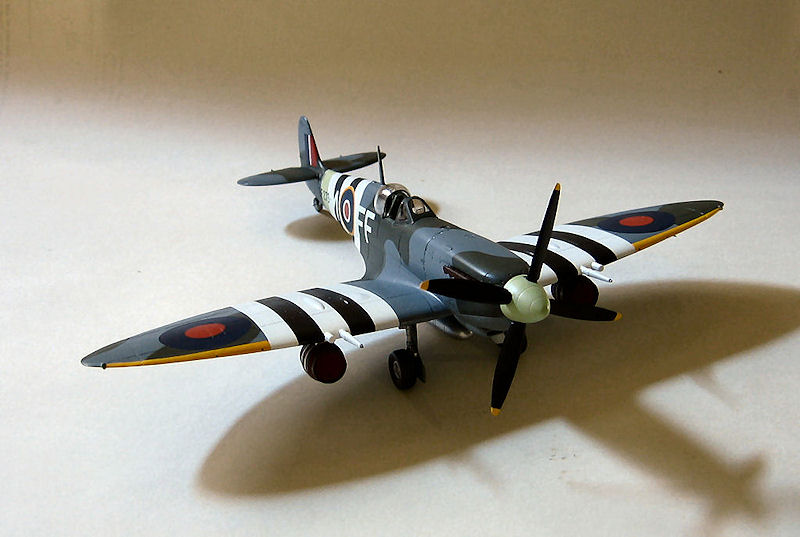
The landing gear are nicely molded and they fit snugly into their attachment points so that the model sits right. The oleo scissors are provided as separate parts that you have to fold and glue to the gear leg. They look a tad oversized to me. The tires also look to me like they are a little fat, but they do have separate hubs which makes painting easier.
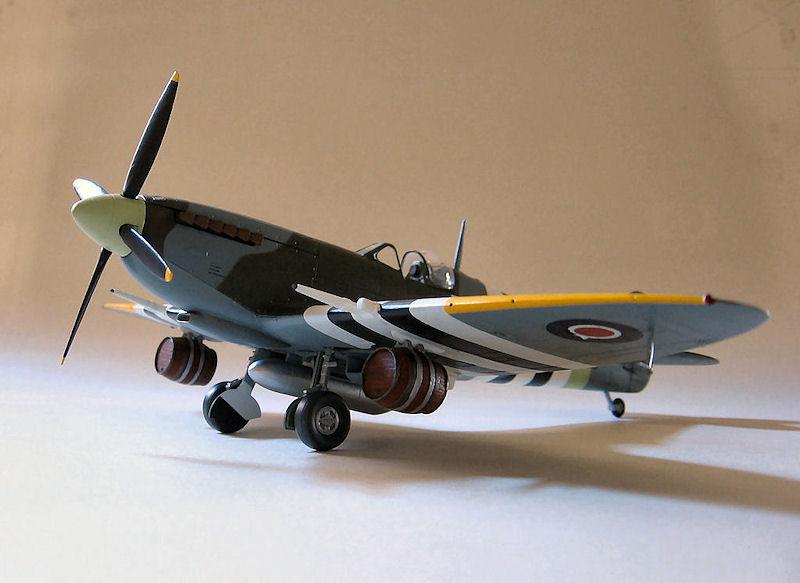
The beer barrels are molded in four pieces – two halves and a top and bottom. The wood grain molded into the parts is nicely done and they look convincing once they are painted. They don’t quite fit into the slots in the underwing racks, but the way they hang looks good. Bombs are also provided on the sprues, but they are marked “not for use”. A centerline fuel tank is provided and I painted and attached it per the instructions.
The clear parts are thin and clear. The canopy framing on the center sliding section could have been a little heavier, but presented no real problems as far as masking was concerned. The rear view mirror is provided as a clear part. I put it in my tweezers and placed a dab of Gator glue on it and as I began to place it in its hole on the top of the windscreen it shot out of my tweezers never to be seen again. Luckily I have a Tamiya Spitfire V in my stash which has both the rectangular and rounded mirrors. I borrowed the rounded mirror from that kit and glued it into place. Unfortunately, I knocked it off during painting and have not been able to locate it. So if you look closely you will notice that my Spitfire is currently lacking a rear view mirror. I will have to spend some serious time with my spares box and see what I can come up with.
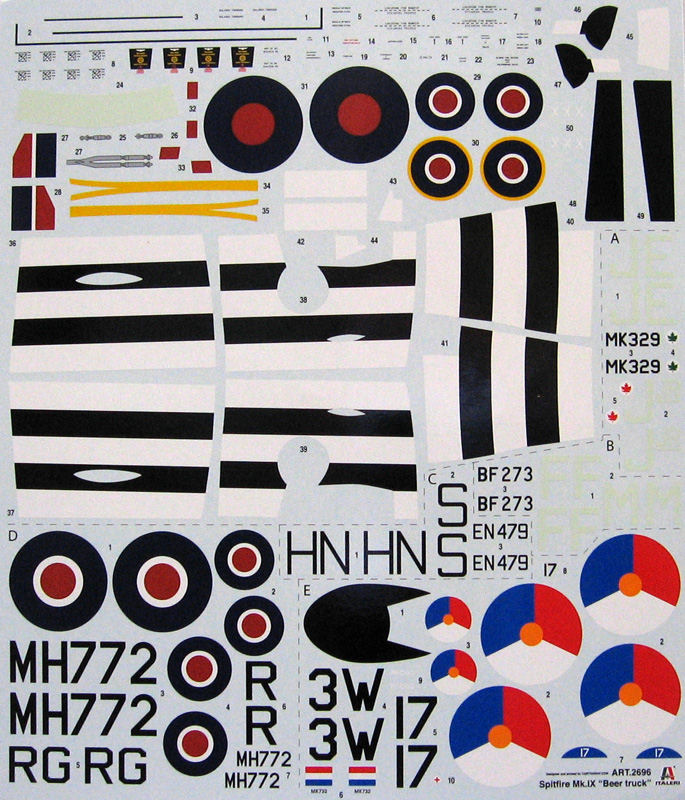
The decals are by Cartograf and are of high quality. My only complaint is that the yellow on the fuselage roundels was slightly out of register. I opted to replace them with the “register-it-yourself” roundels from Aeromaster sheet 48-244 RAF Late War Fighter Roundels. The rest of the kit decals performed beautifully using Micro Set and Sol. The instructions indicate that the prominent wing walk markings go over the invasion stripes, but I’m not sure whether or not that is the case. I decided to leave them off.
While applying the decals I did find one error, and I don’t know if the error is in the instructions or the decals. The instructions indicate that the particular aircraft that I modeled has a serial of MH978, but the serial number that is provided on the decal sheet is BF273.
Decals are provided for the invasion stripes and the yellow stripes on the leading edge of the wings, but I decided to paint them instead. I used Gunze Super White and Tamiya Flat Black for the invasion stripes, and an old bottle of Aeromaster ID Yellow for the leading edge stripes. I used Model Master enamel paints for the camouflage. I also made the mistake of using an old bottle of Aeromaster Sky for the spinner and fuselage stripe. It wasn’t until I was putting the fuselage code decals on that I noticed how big of a difference there was between the Sky color of the decals and the Aeromaster paint that I used.
A final coat of Acryl Flat and the usual tedious gluing-on of the fiddly bits and then it was done. I’m sure there will be a few curious glances from people when they see barrels hanging from the wings of a Spitfire.
I must say that I really enjoyed building this kit, and was impressed with the overall quality of the molding and the fit of the parts. I can recommend this kit highly to all modelers.
My sincere thanks to MRC-Academy and Italeri for the opportunity to build and review this very good kit.

Comments
Add new comment
This site is protected by reCAPTCHA and the Google Privacy Policy and Terms of Service apply.
Similar Reviews