
Soviet Tupolev TB-1 Heavy Bomber
History
The Tupolev TB-1 heavy bomber was a historically significant aircraft, in that it was the world’s first all-metal multi-engined bomber. After World War I, Dr. Hugo Junkers established an aircraft plant in the Soviet Union, and Russian designers, notably Andrei Tupolev, learned from the Germans’ techniques of building metal aircraft, and began design and construction of a twin engine prototype bomber in 1925. The prototype was built in Moscow, but in November, 1925, the aircraft was flown, and the decision was made to place the plane in production as the TB-1. A former Junkers plant in Fili, near Moscow, was used for production. Powered originally by British Lion engines, the production models had 680 hp. Russian Mikulin M-17 water cooled engines, which were developed from German BMW VI’s.
The TB-1 was a six place bomber carrying two pilots, three gunners, and a bombardier/navigator, who was the only crew member who wasn’t left out in the cold. Almost 60 ft. long, the plane had a wingspan of 94 ft. 2 in., and a gross weight of slightly over 15,000 lbs. Cruising speed was 97 mph. Just over 2,000lbs. of bombs could be carried for a range of 621 miles.
The first few TB-1’s were completed as civil aircraft for propaganda record-breaking purposes, as it certainly was a very advanced aircraft. The TB-1 became the Soviets’ standard heavy bomber, and a total of 218 was built between 1928 and 1932. A floatplane version, the TB-1P, was also developed for the torpedo bombing role. In the mid thirties, newer types became available, and the TB-1’s were retired to transport and other special purpose roles. Some survived up into World War II, where they were used mainly as transports. Aeroflot also used them for this role. Only one has survived, and is now displayed at the Ulyanovsk Aircraft Museum.
References
There are a number of references that can be used in building this model. The Duffy and Kandalov book Tupolev: the Man and his Aircraft, is useful, as is Bill Gunston’s The Osprey Encyclopedia of Russian Aircraft, 1875-1995. Other sources are available on line
Instructions
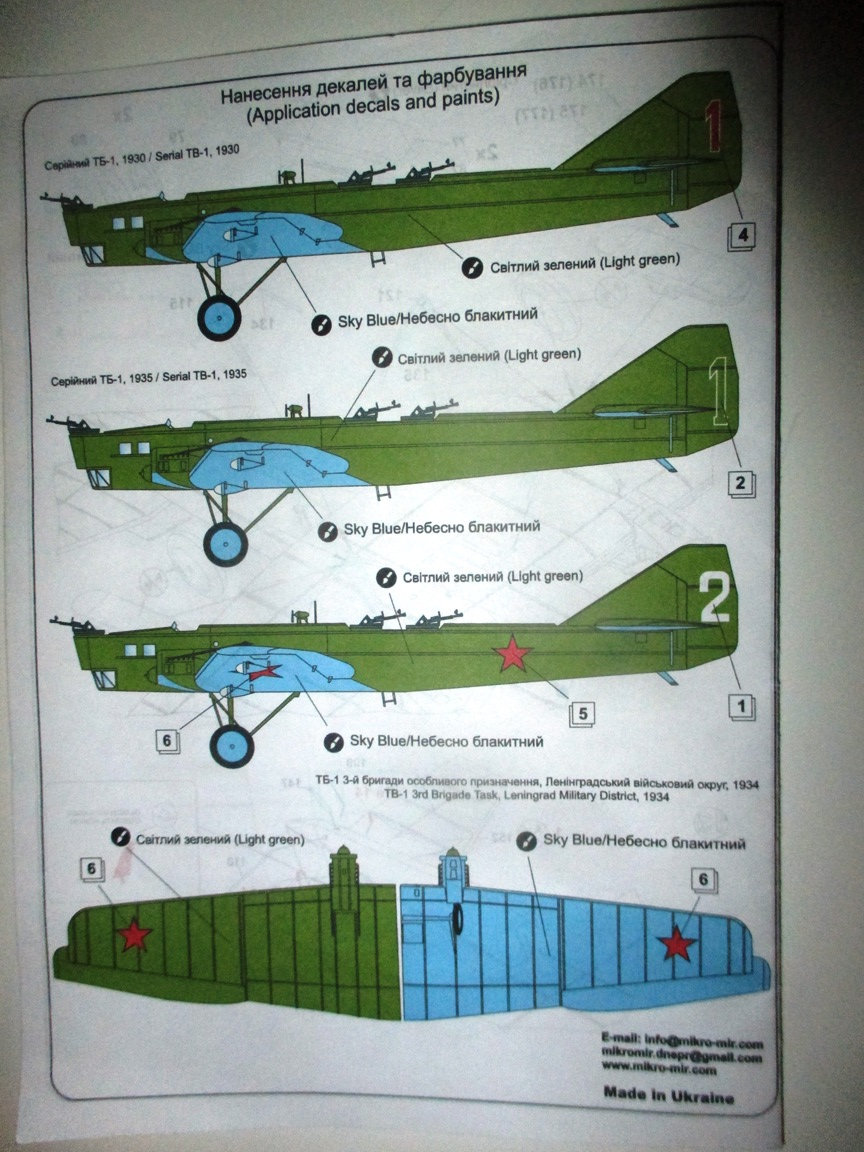
The instructions are printed on half-size sheets of paper, and confusion results from the pages not being numbered. The first page has a short historical summary in Russian and English. The next four pages include a sprue diagram showing part numbers, and the beginning of the series of drawings showing how the parts are to be assembled. The sheets are not stapled together, and the instructions are very confusing at times. Most of the parts are numbered, and for the most part, the drawings are fairly clear as to what goes where. There are, however, few references as to color, and even some of the drawings are not completely clear. The last two pages show color drawings of three camouflaged bomber variants, and two silver civilian models, both with the same registration number. The drawings probably show the first aircraft in several different paint schemes.
The drawings do not show any rigging details, and the only way you can get this information is to look at the box art,
The Kit
The kit is, at first, very impressive, and consists of 172 light grey plastic parts (How quaint?), one small sheet of clear plastic parts, and a very small sheet of photo etch brass. There is very little flash, but this has to be removed in a few places. There are a LOT of parts in this kit, and I would suggest only removing parts from the sprues as they are to be used. Parts are easy to remove, but need to be carefully trimmed, as the parts do not always come away cleanly. Some parts are very small and very fragile, so be careful not to break or lose anything. Only one part was missing in my kit, a gun mounting ring for one of the turrets. I scratch built it easily.
Assembly
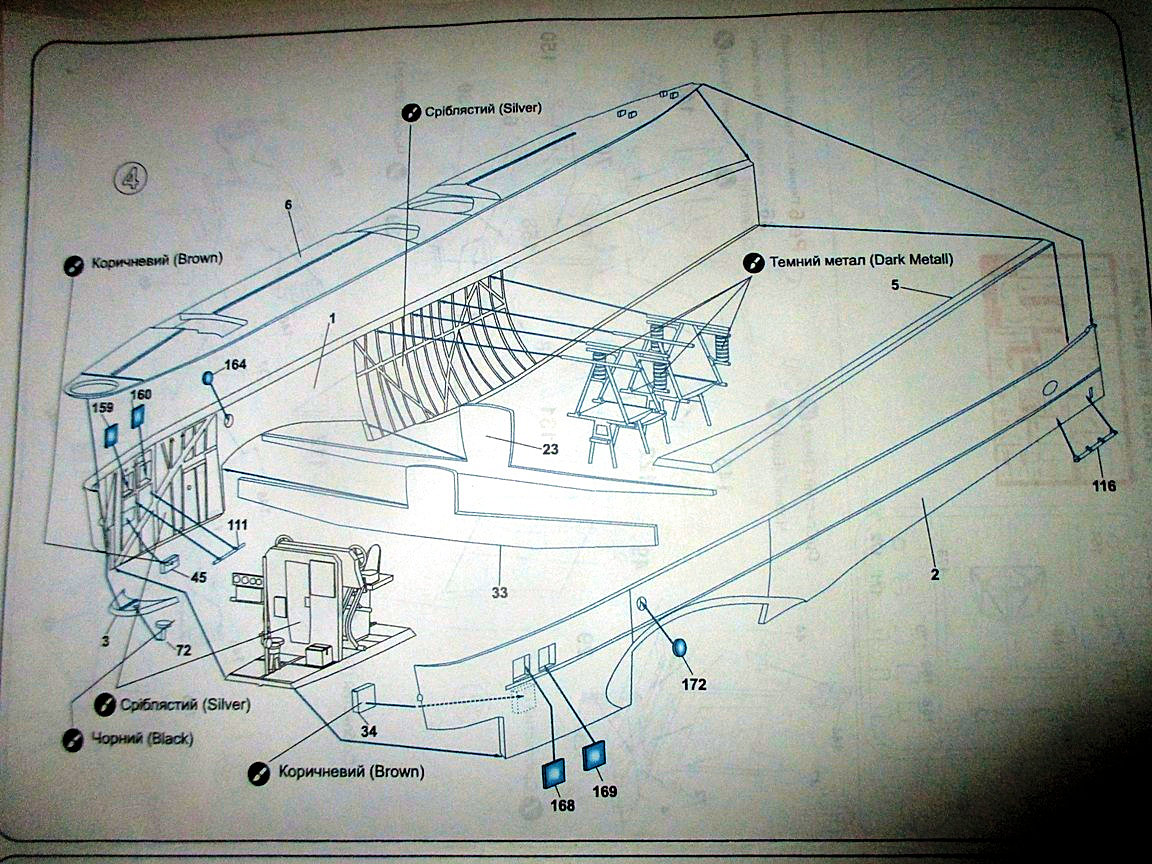
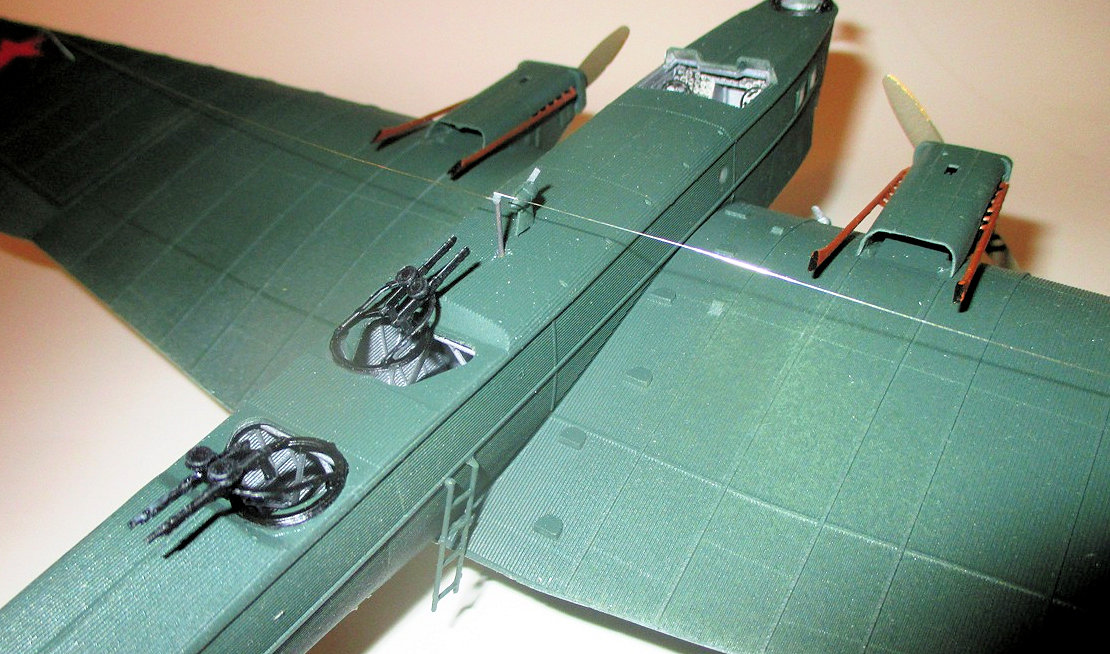
The first assembly step, according to the instructions, is to build up the fuselage structure. This consists of three major assemblies which represent, I believe, the structure in the rear fuselage where the gunners are stationed. These are very intricate assemblies, with no real attachment points. After I got these assembled, I discovered that they did not fit inside of the fuselage. There were attachment points, but nothing seemed to line up. I eventually remedied the situation by cutting them apart and gluing them in place individually after joining the fuselage halves. Four parts in these structures are shown but not identified, parts # 140-143. . They are small cylinders, and given the nature of the armament, I would suspect that they are spare ammunition disks for the Lewis-type machine guns mounted in the aircraft. It would be nice had the kit producers identified some of these parts. I recall that as a kid building model airplanes, my main purpose was to learn as much as I could about airplanes, and this meant being able to identify the parts. Here, I had to guess. Once the fuselage halves are joined together, you can’t see much of them anyway. I glued the fuselage sides together, and then joined them by attaching the small strip that makes up the bottom of the fuselage. Then I cut the inside parts to size and glued them in place. They are supposed to be the positions where the gunners stand (no seats?) The forward fuselage has the pilots’ cockpit, and this consists of a platform which contains the pilots’ seats and the instrument panel. This is a substantial structure and forms the main strength of the forward fuselage. However, the way it is set up, neither pilot has a floor less than 10 feet below, and crews must have been very wary of dropping anything. After all the interior parts are in place, attach the top decking and things will eventually work out.
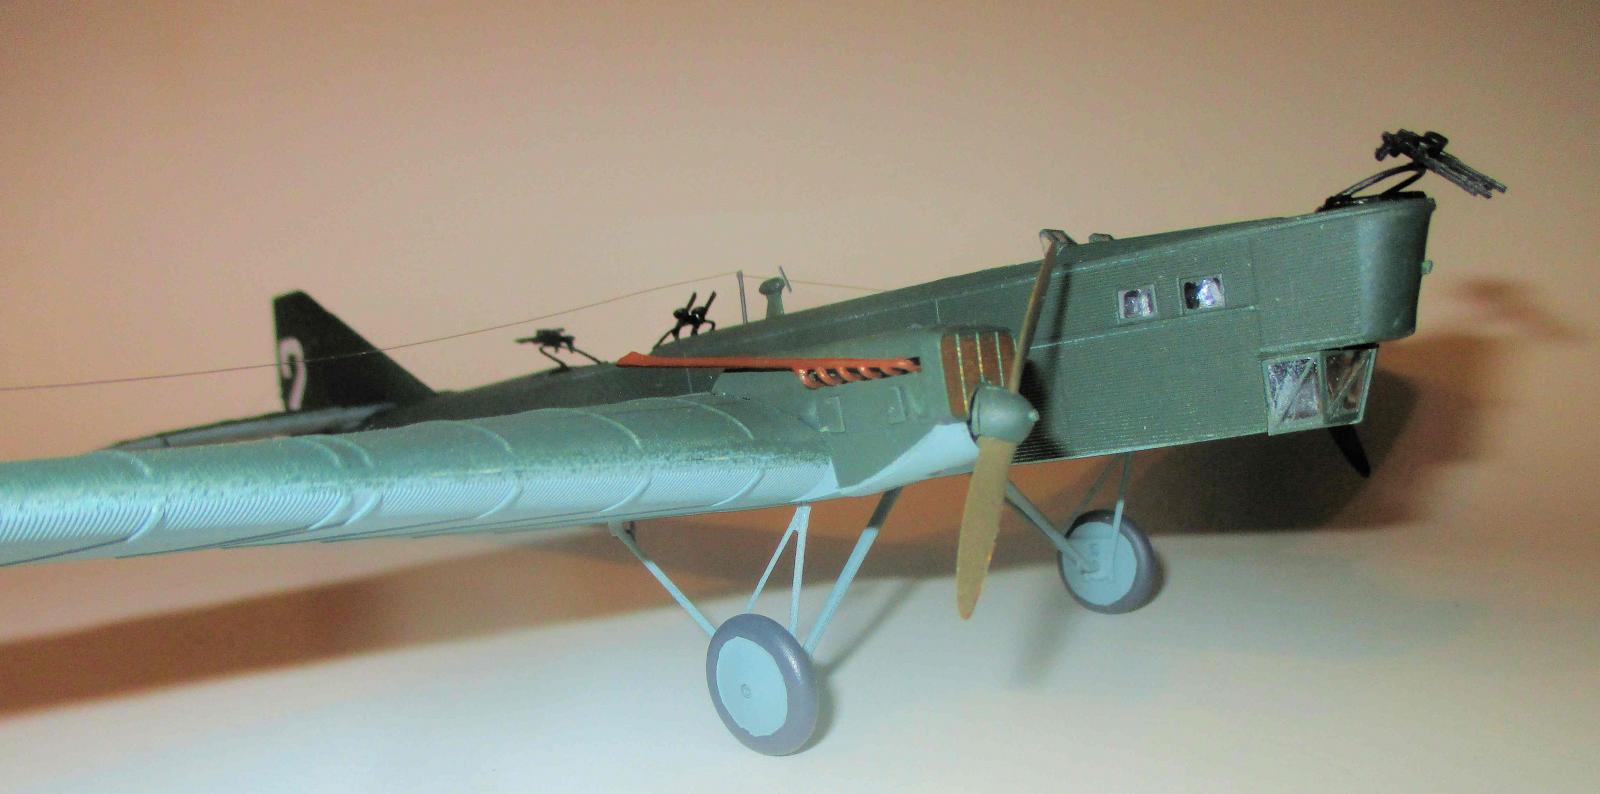
There are six small windows in the fuselage. The four square windows fit, but the small circular windows behind them do not fit, so I just left them open and filled the holes with white glue There is a small bombardier’s window in the lower forward fuselage, and this fits very nicely. There is a mask provided for all of these windows, and they go on easily. However, after painting, when it came to removing the masks, they were very difficult to pry loose, and I had to use the tip of an Xacto knife rather than the pointed tweezers I usually use to remove masking tape after painting.
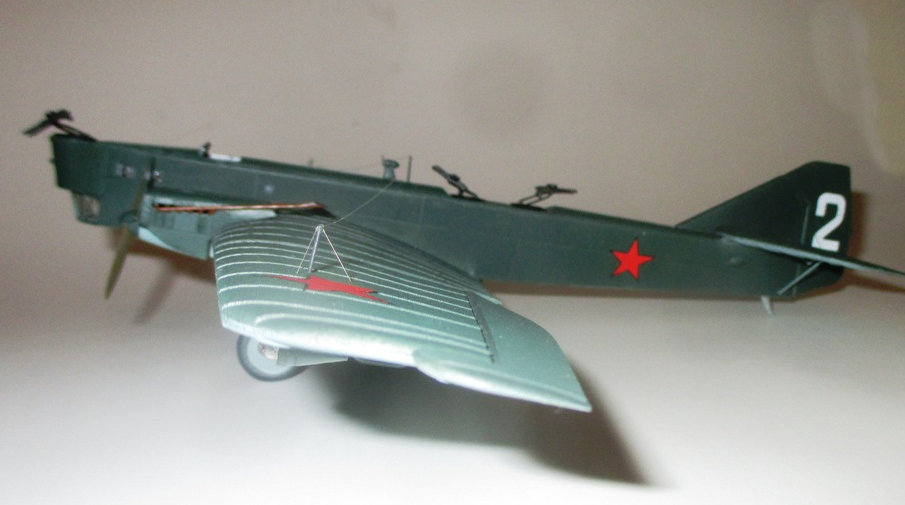
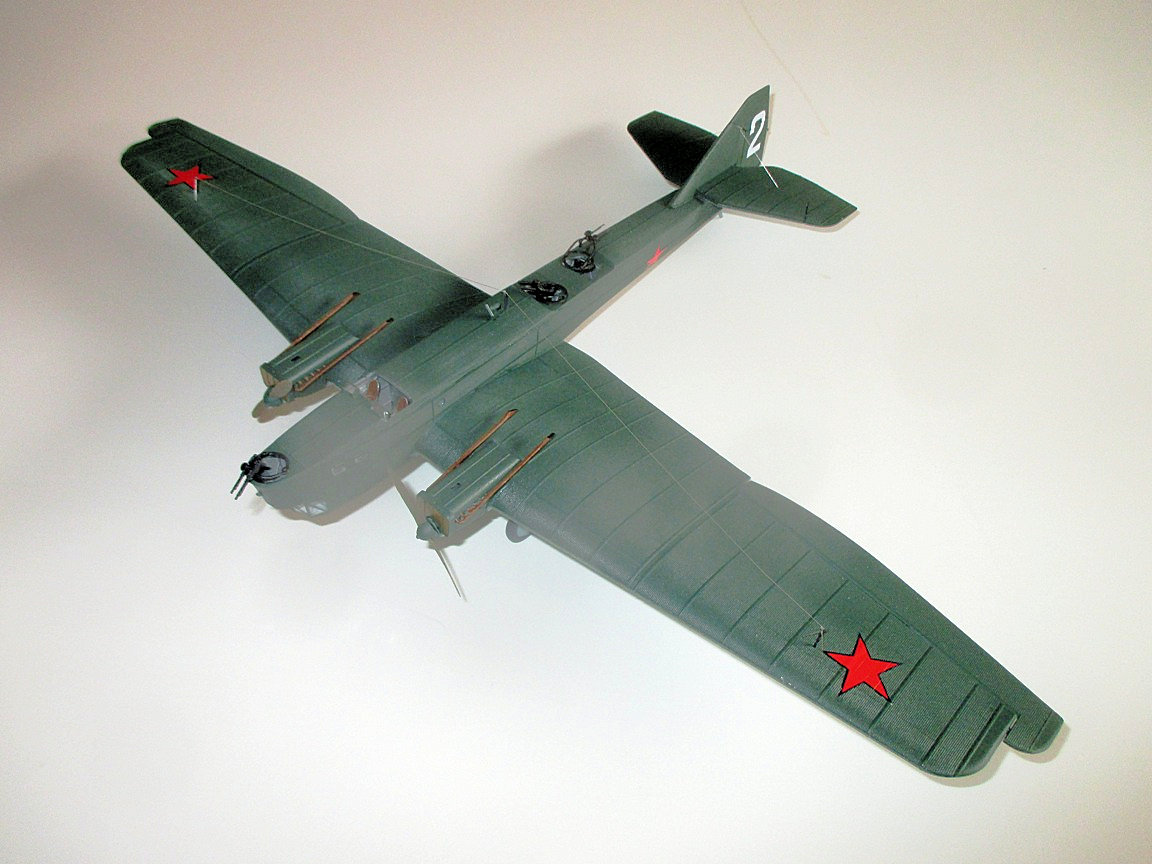
The wings are strengthened by two large spars which attach to the fuselage. These should be glued in place as per instructions. Then the wing lower belly section can be glued in position, and after that, the lower wing halves should be attached. The spars may not line up, or at least mine didn’t, so I bent them slightly and clamped them in their marked positions. After they dried, they were permanently attached. I had to trim the top of the forward spar slightly, as it was a little too thick for the wing. Then the upper wing halves can be attached. They are a very close fit, and very little filler or trimming were needed. The wings will come out with the perfect dihedral angle. Then the rear horizontal stabilizer can be attached, so lining it up is very simple.
The engines are another story. The main powerplants consist of two crankcase halves, two cylinder banks, two small blocks and tubes, and two long exhaust stacks. These engines are nice intricate units, but they are covered by five piece cowling assemblies that make the engines completely invisible once in place. The only visible part is the forward crankcases where the propellers attach, and this could be replaced by a small piece of plastic with a hole for the crankshaft. I wondered why they went to such trouble to make such a nice engine if it can’t be seen. Maybe they thought that if you built the model under maintenance, with the cowling off, it would be visible.
The tail unit goes on very easily. The horizontal stabilizer glues right on to the rear fuselage, and the other surfaces attach easily. There is little flash.
Decals
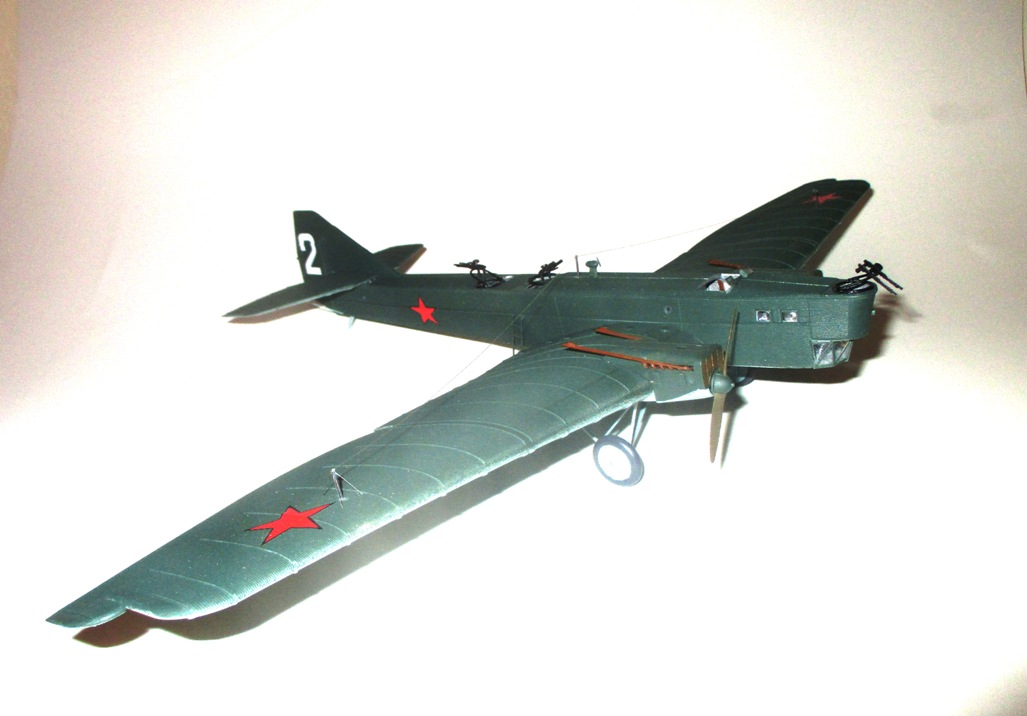
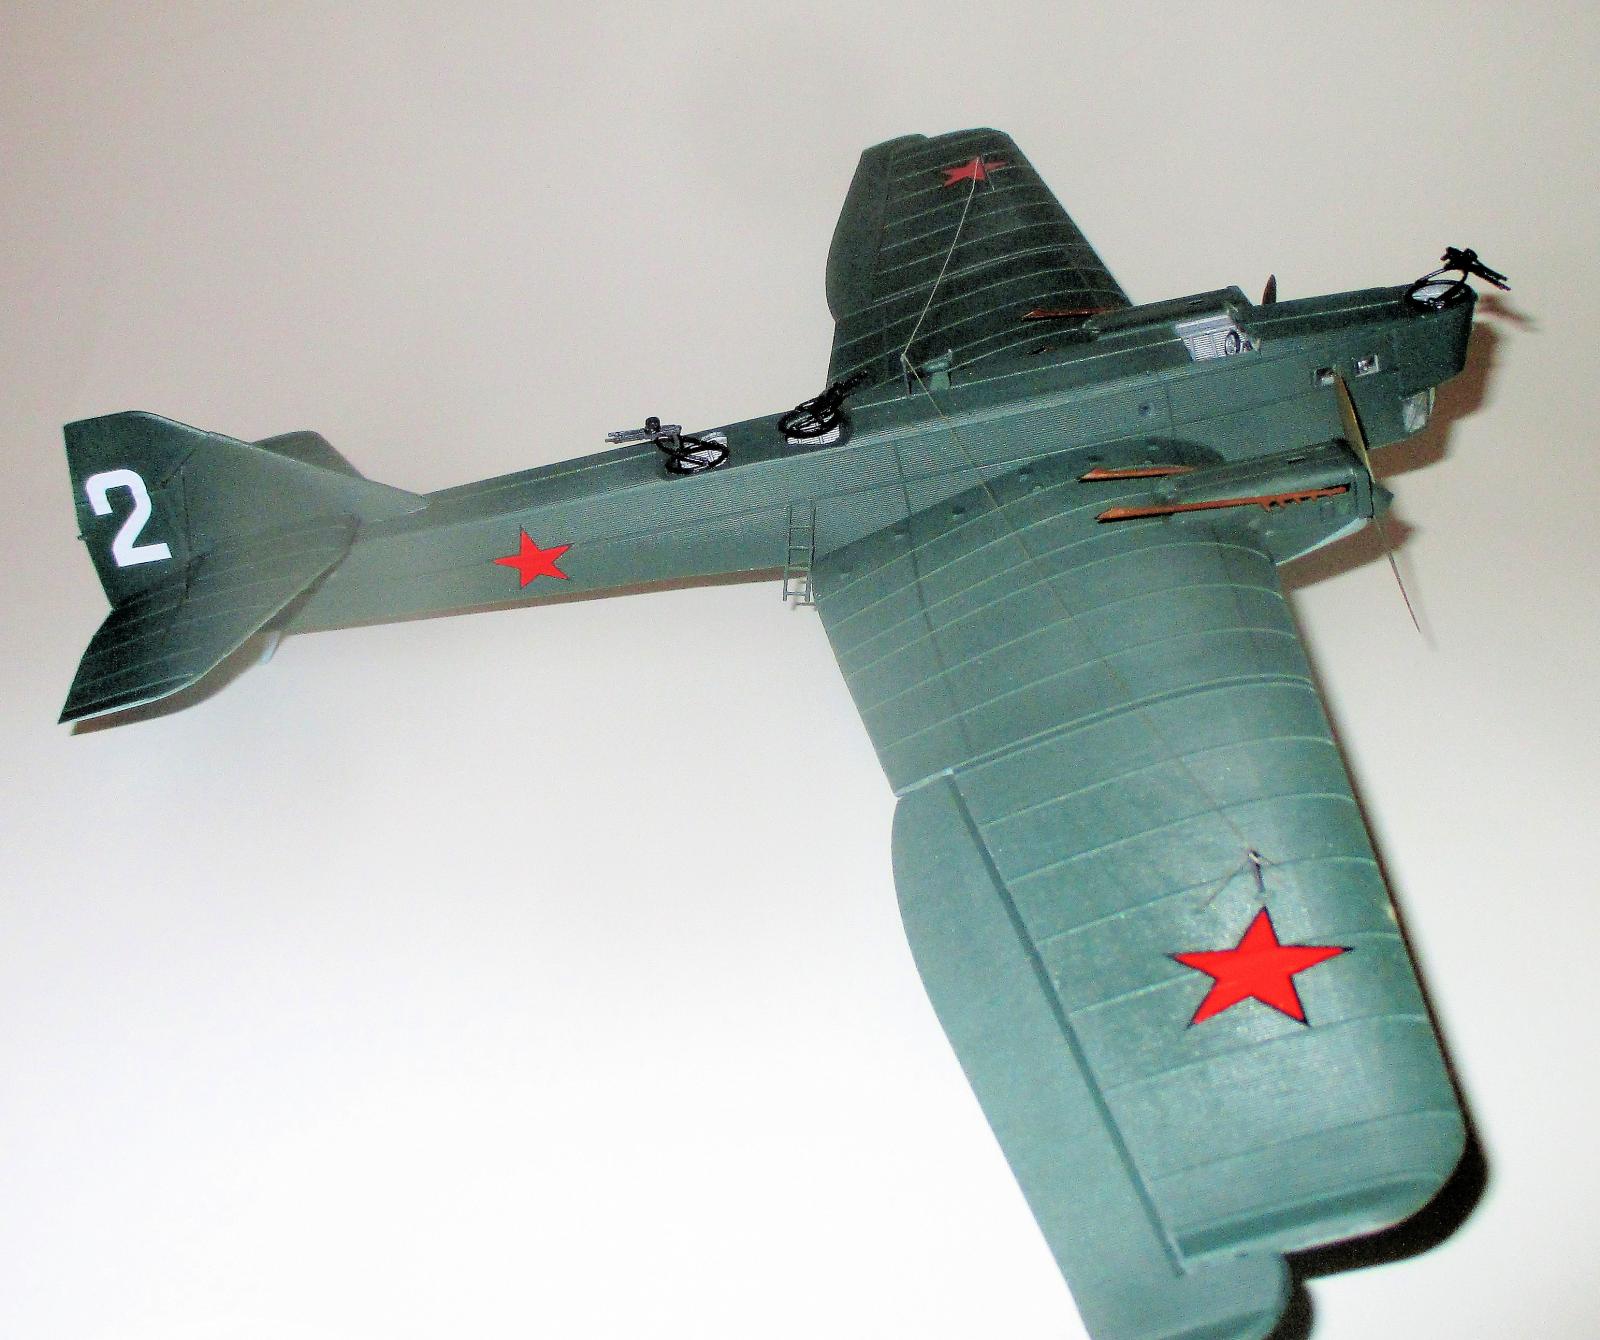
The decals consist of two main sheets, one of military markings for that version, and one sheet of numbers and markings for #URSS-300, the prototype. The decals are thin, and are ready for installation after a short soaking period. However, they did not seem to want to conform very well to the corrugated surfaces, a failing of a lot of decals these days. Even with decal softeners, they did not squat down on the surfaces very well. There was very little clear film surrounding the decals, and the white tail number “2” had no backing film at all, making it very difficult to line it up without breaking the decal. And you couldn’t blot the decal down with Kleenex, as the tissue would stick to the decal and pull it up. The decals were on register, and they seemed to fit the subject very well. Just be very careful when applying them.
Painting and Finishing
The instructions hint that the entire interior of the airplane was aluminum, so that’s what I did. There is no decal provided for the instrument panel, so I had to improvise and make my own. Once the main airframe was assembled, I painted the engine cowlings, propellers, landing gear struts, wheels, and other miscellaneous parts. I then pushed some foam rubber scrap into the turrets and cockpit interior, masked all of the windows, and painted the underside Russian light blue. There is no indication whether the rear fuselage bottom should be light blue or green. It was a very narrow strip, so I left it green. After masking those surfaces, I painted the upper surfaces medium green, another Russian color from Model Masters.
When dry, I attached the landing gear, engine cowlings, tailskid, tail bracing struts, gun turret rings, and machine guns. At this point, I sprayed the entire aircraft in Glosscote and applied the decals. Although I tried a decal softening solution, it didn’t seem to have much effect. The decals did stick, but I’ve seen a lot better. After a coat of Dullcote, I attached the tail bracing wires, radio aerial struts, and a couple of wind driven generators and props. Using my technique of electronic wire, I rolled out several short pieces to brace the wing antenna attachment struts and then rolled out a long piece when runs almost from the wingtip to the strut just ahead of the forward rear gun turret. At last, the airplane was finished.
Recommendations
I would certainly not recommend this kit to beginners, but an experienced modeler should have no trouble making a decent model of it. According to my on-line research, this may be a re-boxing of an older A-Model kit. But this box was clearly marked Mikro-Mir, and that is how it is being marketed today. If you are into Russian aircraft of the twenties and thirties, this model fills a gap that needs to be filled. It would be especially impressive sitting next to an ICM Tupolev TB-3 four engined bomber, and better yet next to one of the Zvedza Petylyakov PE-8 heavy bombers of World War II. And for the modelers of civil types, one in Aeroflot markings would be nice, although I haven’t see a color scheme for that one. So although it certainly will present a challenge, it is certainly worth getting at least one of these. You’ll probably be the only kid on the block to have one.


Comments
Add new comment
This site is protected by reCAPTCHA and the Google Privacy Policy and Terms of Service apply.
Similar Reviews