
Soviet Submarine Project 628
Project 628 was a design study, circa 1952-1953, to fit a Vladimir Nikolayevich Chelomei (Влади́мир Никола́евич Челоме́й) sub-sonic cruise missile to the 1,500-ton diesel-electric Soviet XIV series K-Class sub. The Russian Project 628 proposal is similar to what the US Navy did with a ‘Loon’ launching from a Gato Class submarine, the USS Cusk SSG-348. The original K-Class design was approved in 1936 as a long range "cruiser submarine" with a heavy torpedo and gun armament. The boats could operate as a "fleet submarine" working with the battle fleet or as long range commerce raiders. The double hull was divided into seven compartments. It was originally planned to carry a small floatplane for scouting but this concept was abandoned when the planned aircraft proved too flimsy. Twelve submarines were built, although seven of them ended up being trapped in Leningrad by the Germans, and were not finally completed until after the end of the war. Of the five that saw operations during the war, only K-21 survived, and now is the only survivor of the entire class, becoming a memorial. Although it is evident from period photographs that the details changed on K-21 throughout its service, the submarines that were completed after the war had a noticeable change in the nose profile.
What the exact cruise missile that the proposal included is elusive. The 10KhN series (referred to in some sources as the 10XN) sub-sonic cruise missiles were developed by Chelomei. A Chelomei pulse jet engine was based on the work of Paul Schmidt’s 1928 pulse jet engine designs that became the Argus AS 014. Chelomei developed his own version of the AS 014 and was testing it on a variety of aircraft by 1942. When Germany unveiled their V-1 in 1944, Chelomei was charged with developing a Soviet version which became the 10Kh ‘Volna’ (Wave) series of cruise missiles. This series of cruise missiles tested various concepts and included using a single pulse jet engine as well as twin pulse jet engines. Several references refer to the twin pulse jet engined cruise missile as being selected for Project 628. Given the design study timeframe of 1952-1953, the variant proposed could have known with the 17KhN nomenclature and could have easily have been a twin jet pulse engine model. Alternatively, several Russian references cite that the intended missile for Project 628 was planned to be a supersonic ramjet variant, which of course looks nothing like the V-1.
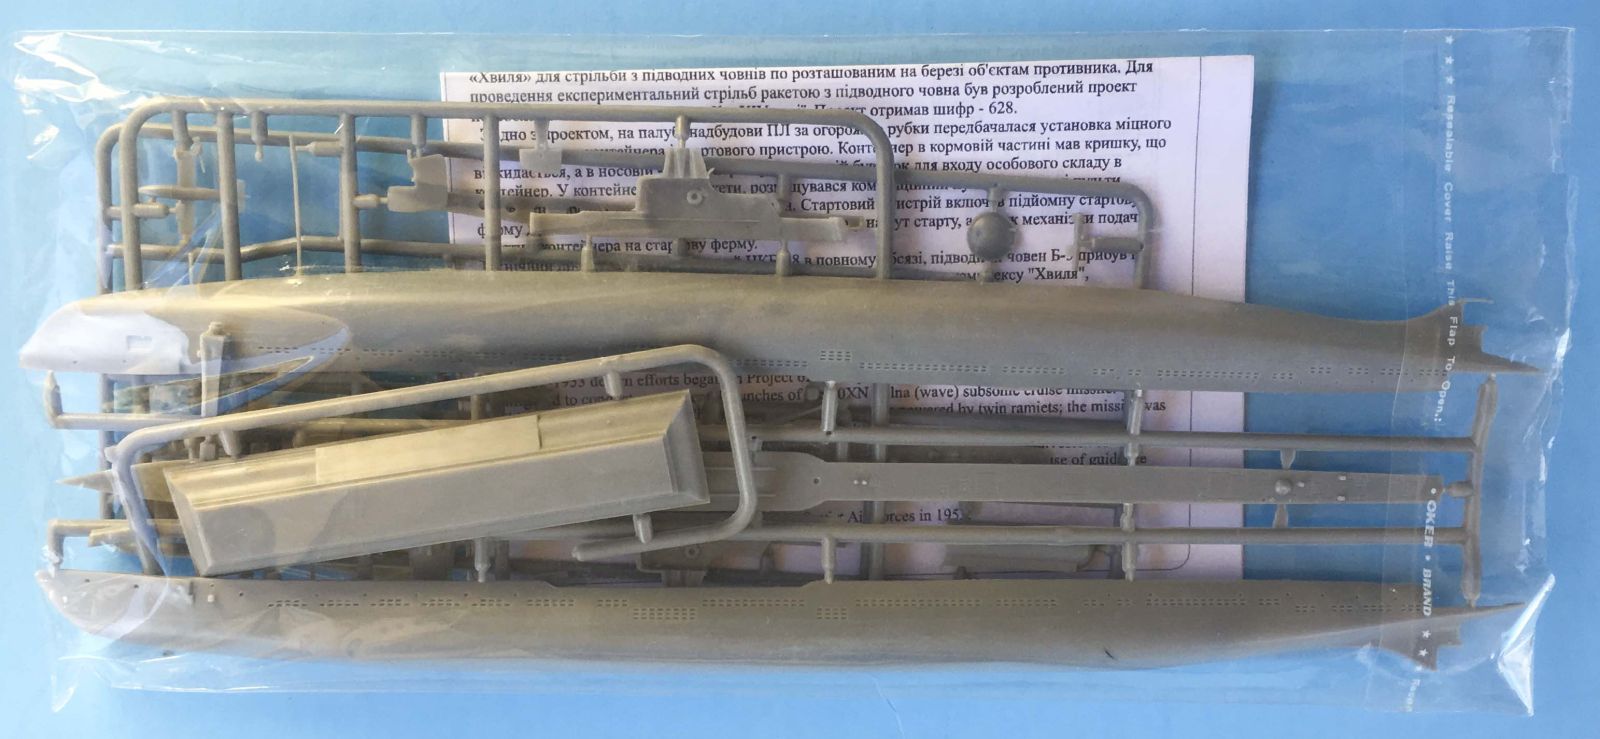
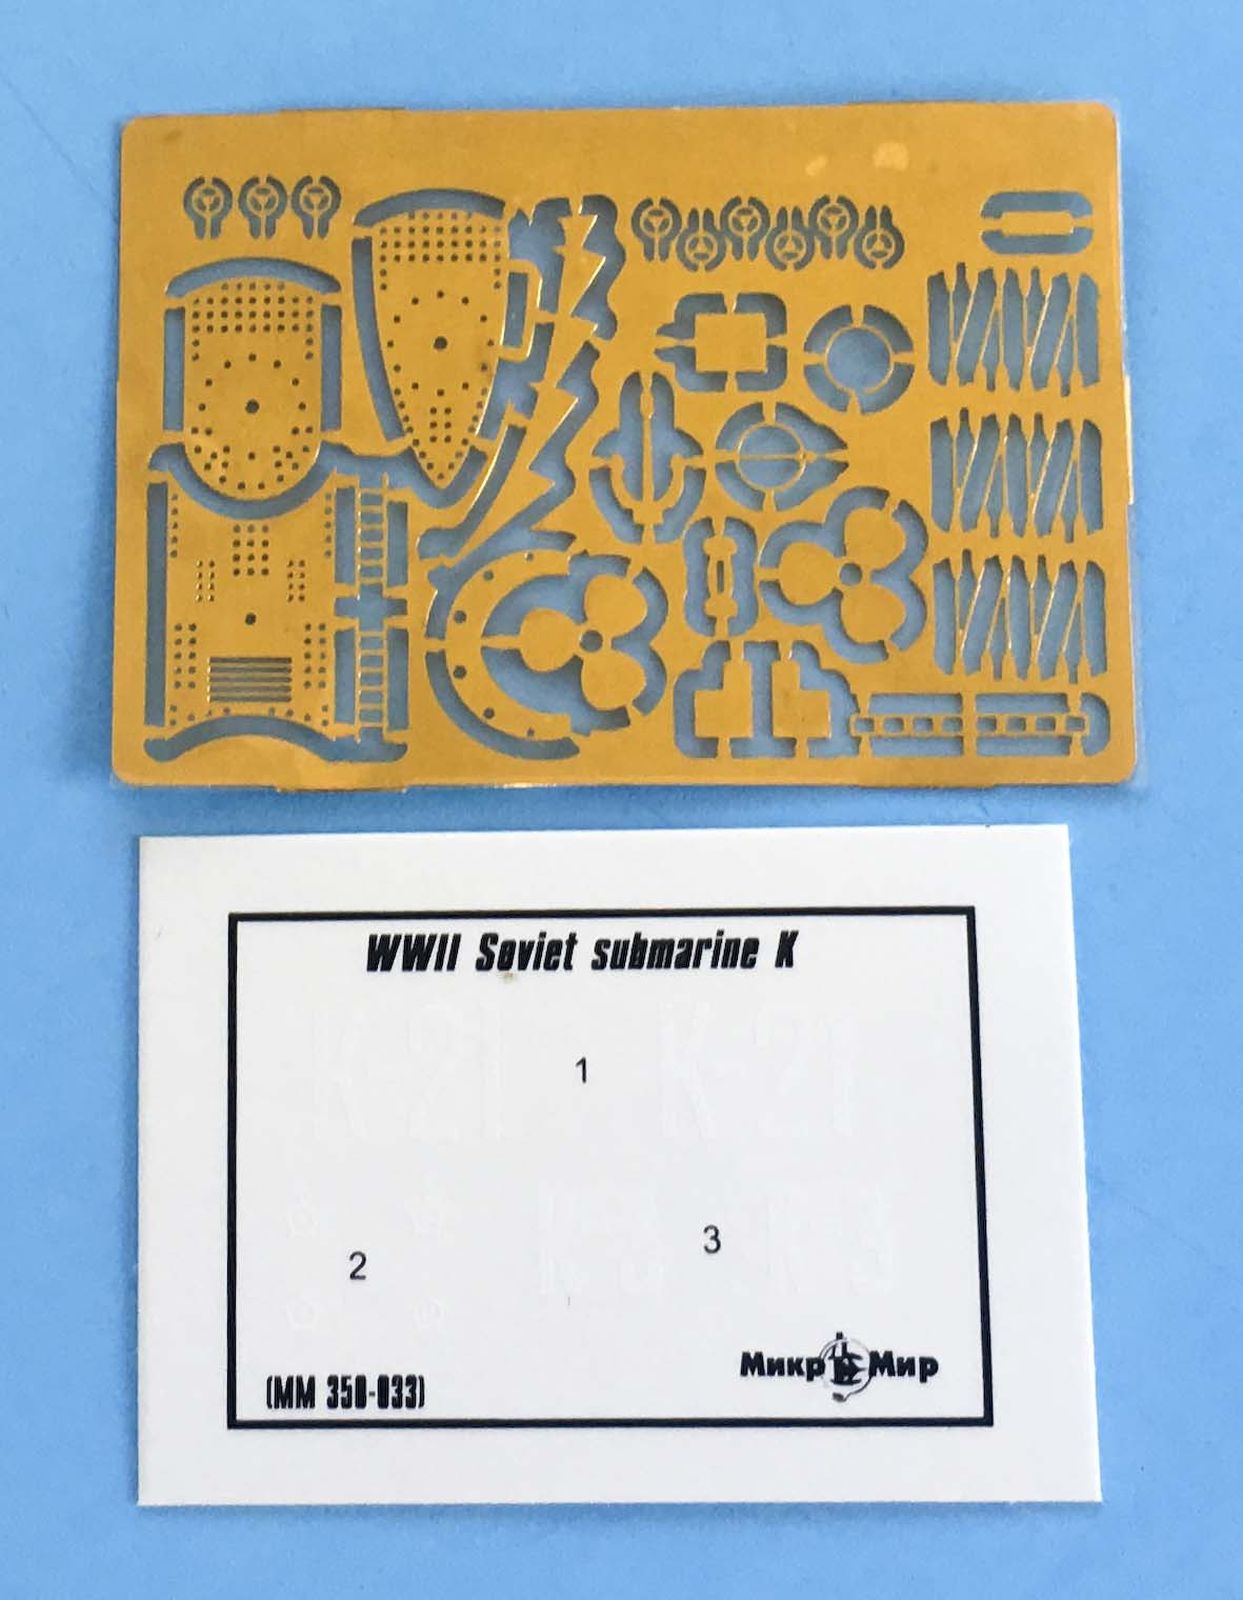
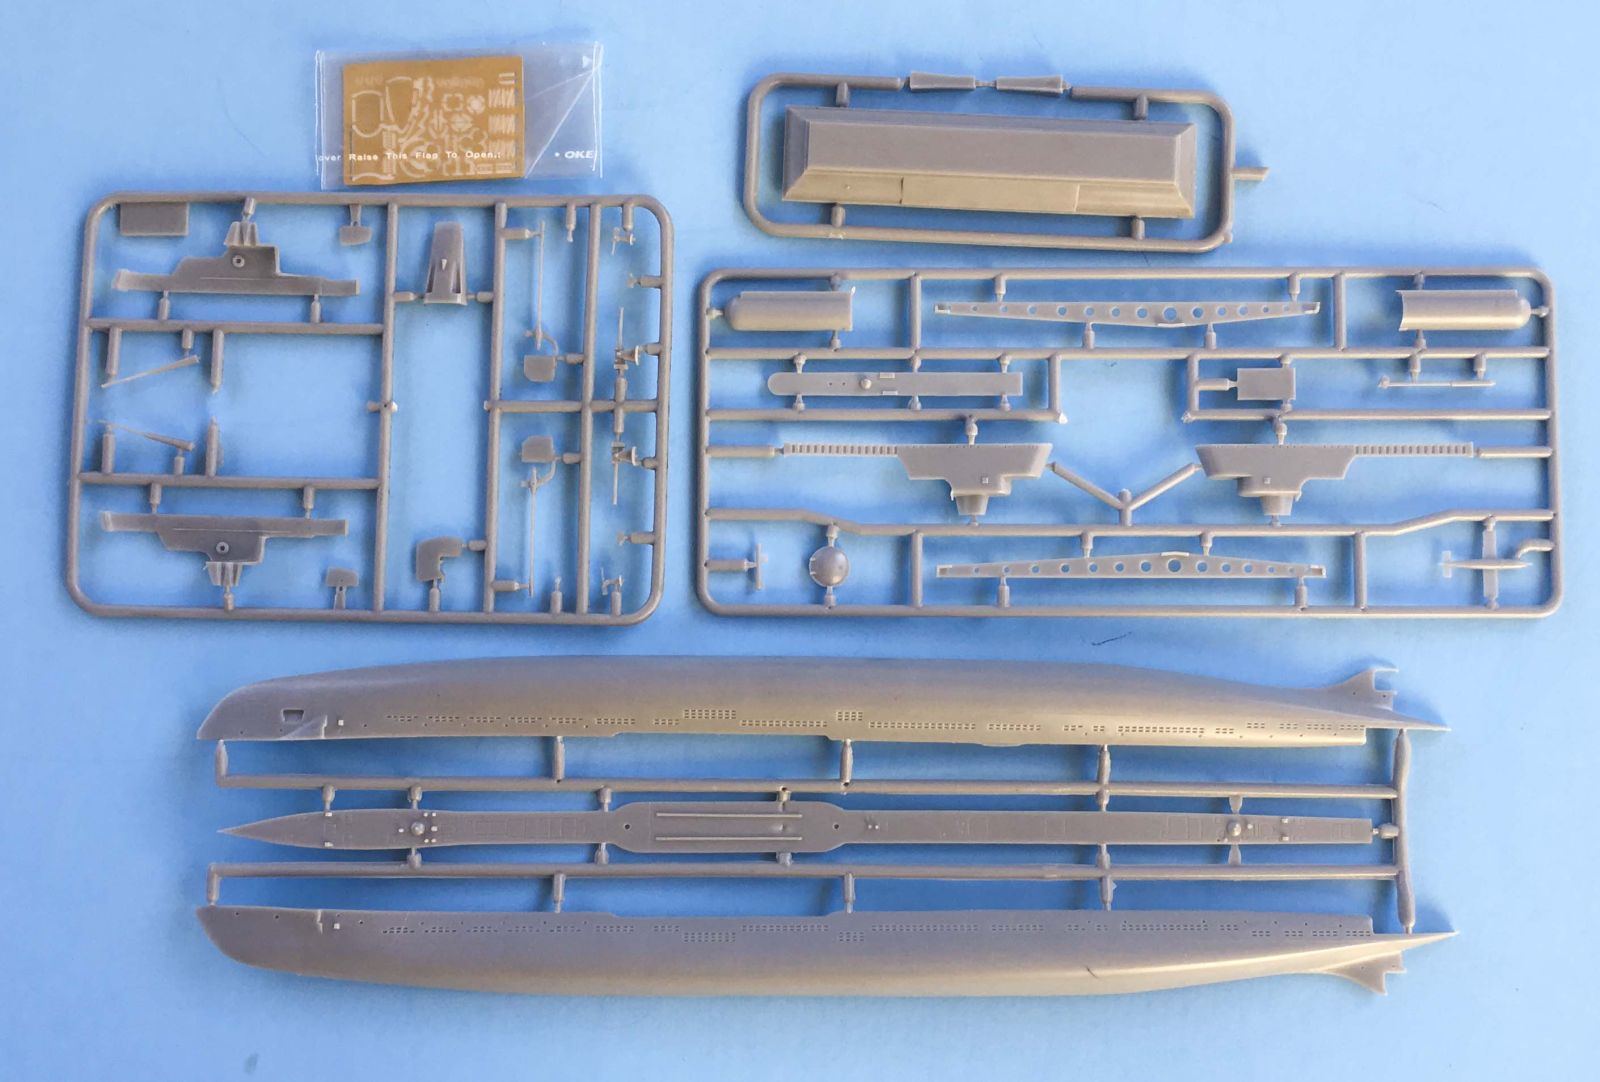
Mikro-Mir has added a new sprue to their previously released K-Class kit (350-003) to produce this new kit. The outer packaging is your typical upper and lower tray type boxing. The parts and instructions are all loose in a re-sealable plastic bag. A nice touch is that the photoetch fret and the decal sheet are carefully protected in a separate plastic enclosure. I would recommend that you wash all the parts to remove any remaining mold release. There are mold lines present on the parts, but they are easily cleaned up with sandpaper or a scalpel blade. There are a few sink marks that will require filling, notably on the forward hull near the dive planes and on where the propeller shaft interacts with the horizontal surfaces.
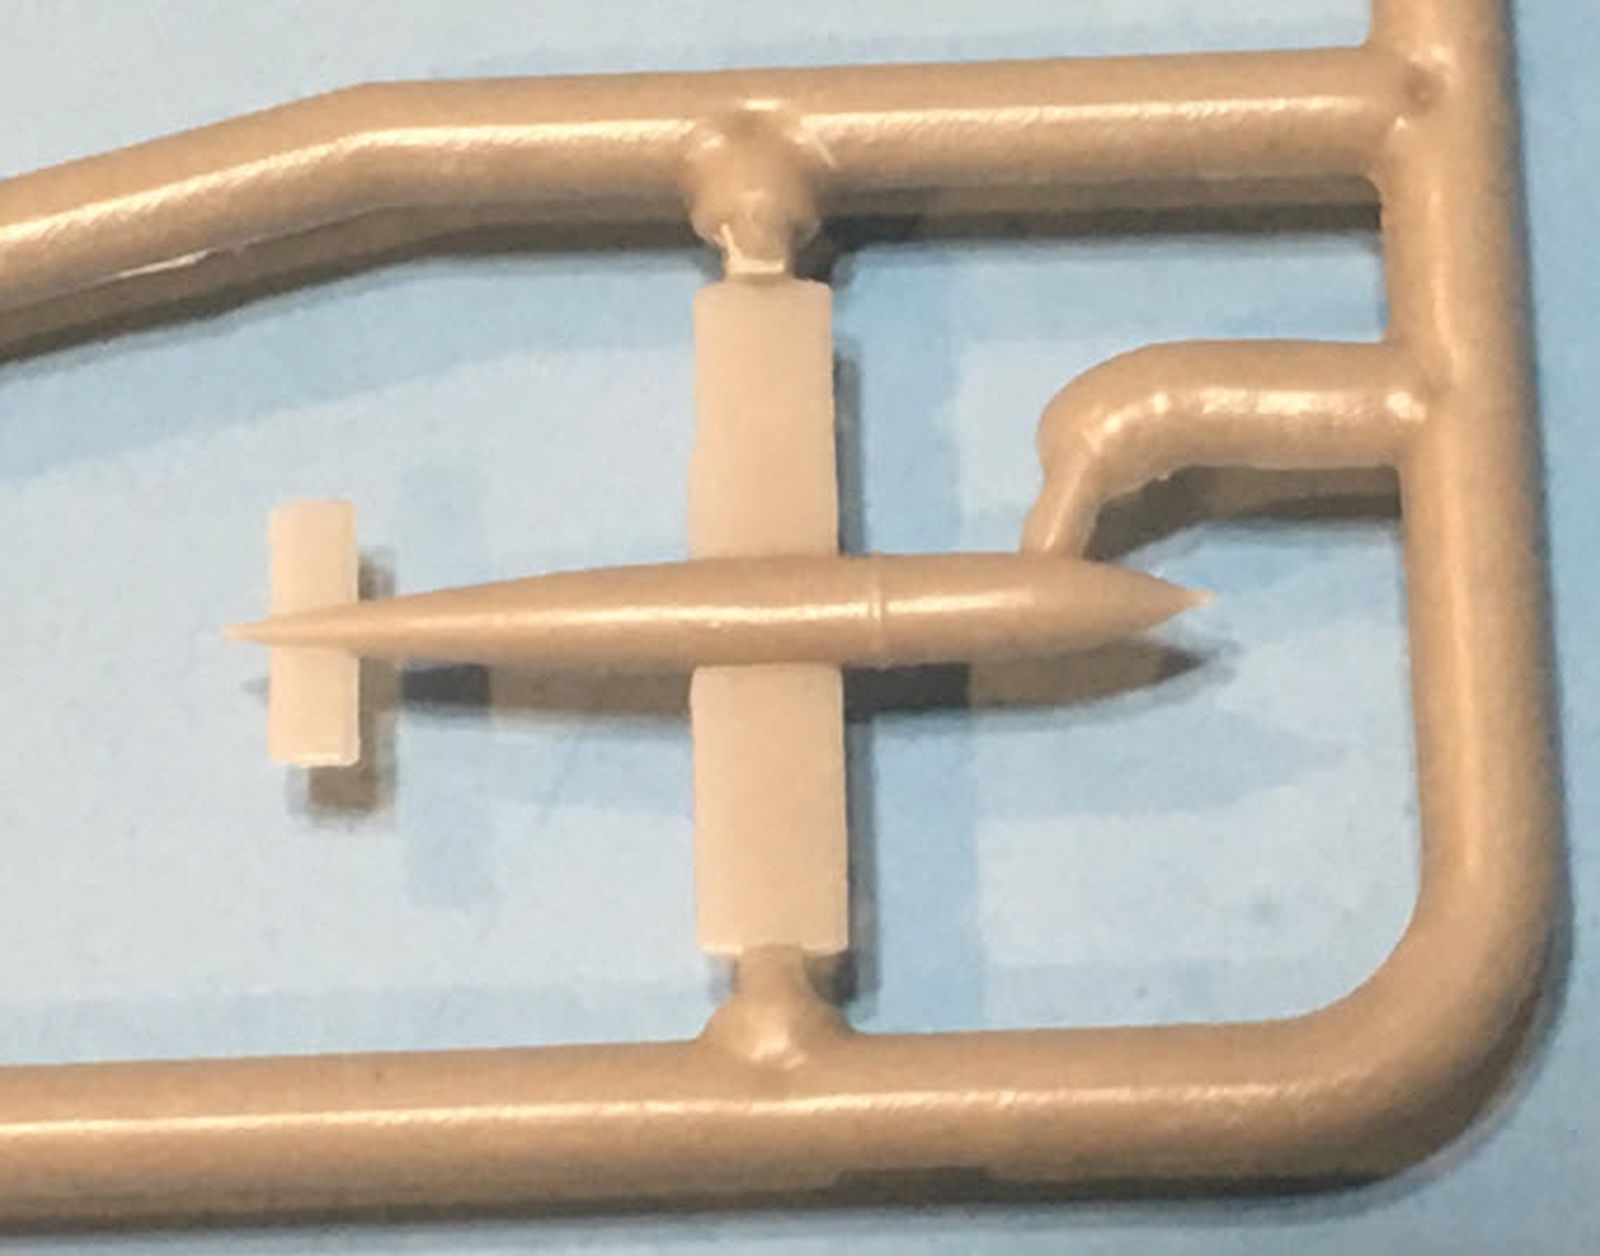
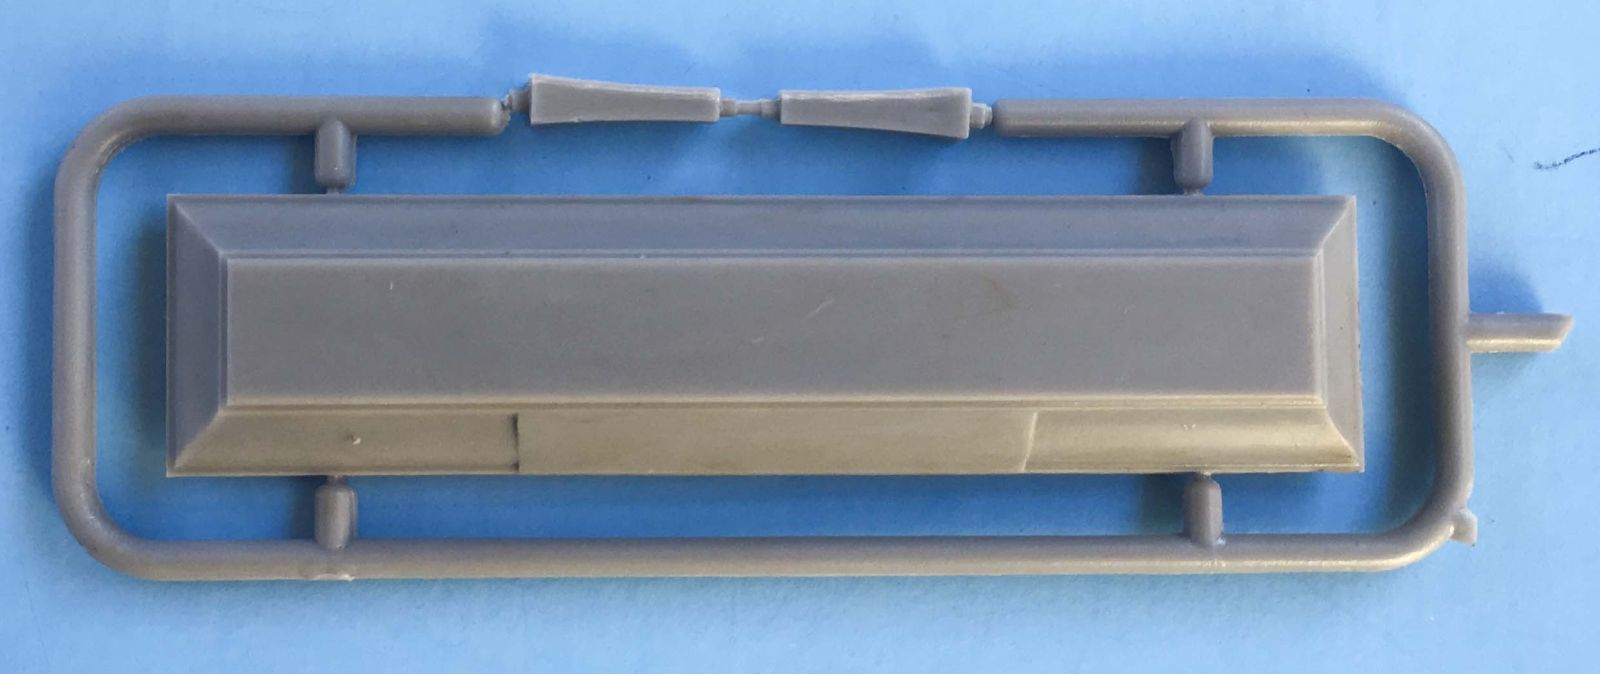
The new sprue contains the new sail that incorporates the missile hanger, the launch ramp, and the cruise missile. That totals up to three injected plastic sprues, one photoetch fret, and a small decal sheet still labeled as in the first release with markings for K-3 and K-21. Since K-3 was sunk on March 21, 1943, its an easy choice to go with K-21. I would point out though that many of the pictures that are described as the K-21 do not display any markings. Whether they were censored or not is another possibility. The instructions include a short history in Russian and English. The second page provides a parts diagram with part number call-outs. This is rather essential as the plastic parts are not numbered on the sprue. The instructions are in picture format with brass photo-etch parts indicated in red. The last page provides color call call-outs, again in Russian and English. You can find a color .pdf file of the instructions here: Instructions PDF.
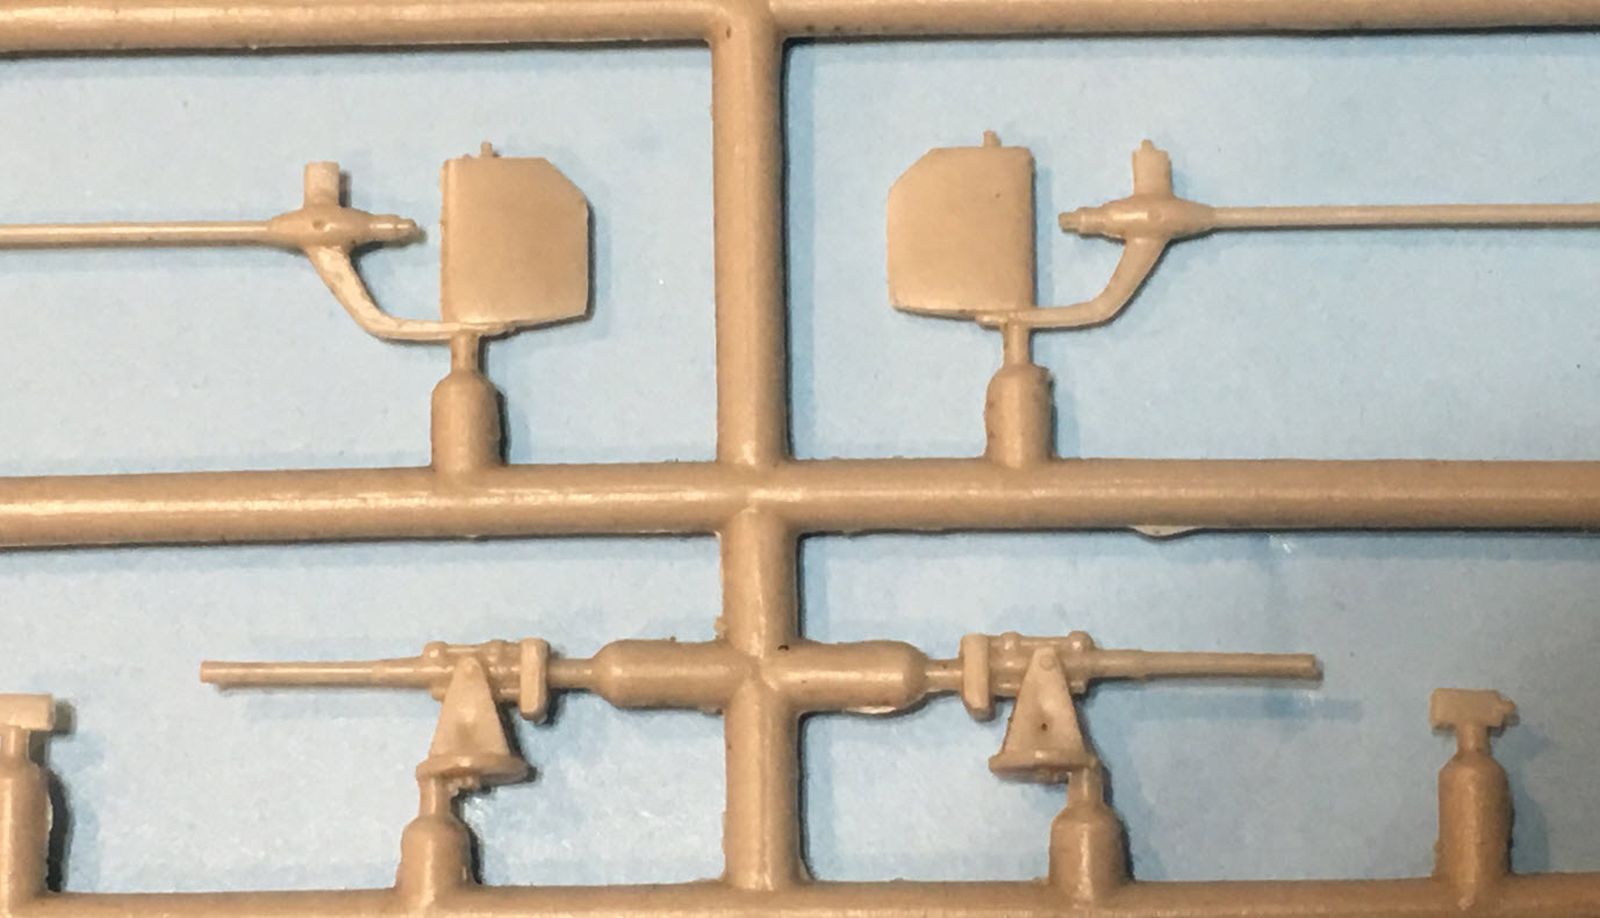
I started off with the sail and hanger assembly. You have to trap the floor of the sail along with the periscopes inside the sail. Test fitting is critical as there are no attachment pins (which of course can also be a good thing). The periscopes are visible within the sail which is a nice touch, but the periscope that is visible above the sail is quite thin, fragile, and not quite straight. I noticed that on most photographs of K-21 in action that the periscopes were retracted when surfaced – like when you had he cruise missile ready to launch – and so off they came. The cruise missile hanger was assembled next with the primary concern being the door which has what appears to be two sink marks on it. Not having any pictures to verify that they are supposed to be there, you will need to fill them. The final step was to add the photoetch window framing that appears on the front of the sail. Photoetch ladders are also provided to attach to the sail, but they didn’t resemble those that I saw in photographs and I chose to leave them off.
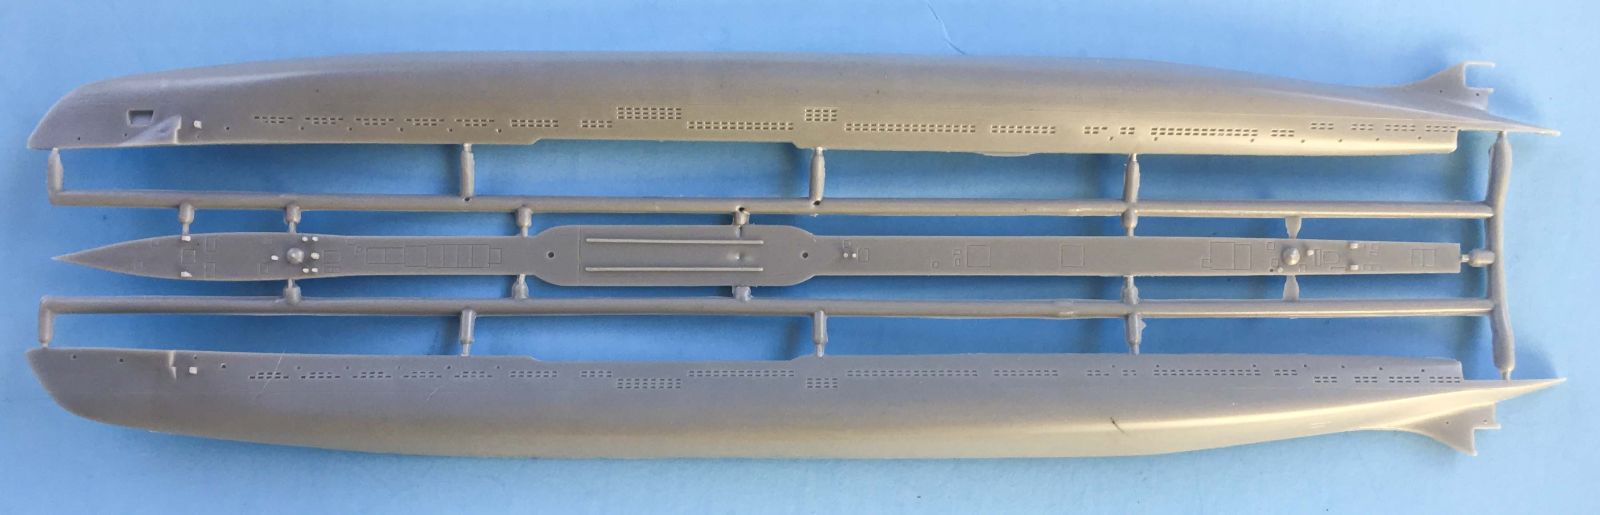
The lower hull is split vertically with a third part used for the decking. Once again, test fitting is critical as there are no pins or guides. I glued the bow first and started fitting in the deck, progressing aft with Tamiya Thin Set. The upper aft end is a separate part that took some more time test fitting to minimize filling and the main hull was complete. I used Tamiya primer to check for seams and began sanding. Once I was satisfied, I added the bow planes in the stowed position, added the rudder, the photoetched anchor (2 parts), and the propeller shafts. I left the photoetch propellers off till after all painting was completed. There are propeller tips that can be added, but they were extremely small and kind of lumpy and I decided to leave them off. Take your time to make sure that the propeller shafts and horizontal surfaces line up properly. I will also note that there are two very small propeller shaft vertical braces (Part 20). I missed them when I added the propeller shafts and had to add them later.
The next assembly involved the cruise missile and its launch rail. After mold seam clean up the launch rail halves were glued and set aside. The rails had a tendency to fold inwards so I utilized a spacer to keep both sides vertical. The launch rail base (part 49) was secured to the deck, just aft of the cruise missile hanger. Next time, I would add this base prior to priming the hull assembly. Once the launch rail had dried, I glued the launch rail elevation piston to the launch rail and then carefully raised the launch rail to the point where the elevation piston base was flat to the deck. You want to be careful here as its easy to get the launch rail off center to the starboard or port sides. Assembly of the cruise missile was next, basically aligning the pulse jet to the body of the missile. Due to the size of the pulse jet supports and the missile, this will take some patience, but it can be done. After fiddling with for a bit, I ended up tacking the pulse jet supports to the missile body with super glue, then followed up with Tamiya Thin Set. The base was sanded to remove some odd bumps with the vertical supports puttied to fill in some gaps. I tested the assembled base against the model to make sure I had the submarine’s center of gravity properly located and then drilled in a first mounting hole. I carefully marked the second hole using the base vertical supports as a guide and drilled the second mounting hole. I used a toothpick to apply some superglue around the inside of both holes to try to prevent any future spreading along the bottom hull join line. I have not yet glued the base to the hull, but so far it seems to be a fairly tight fit and I may not need to do so.
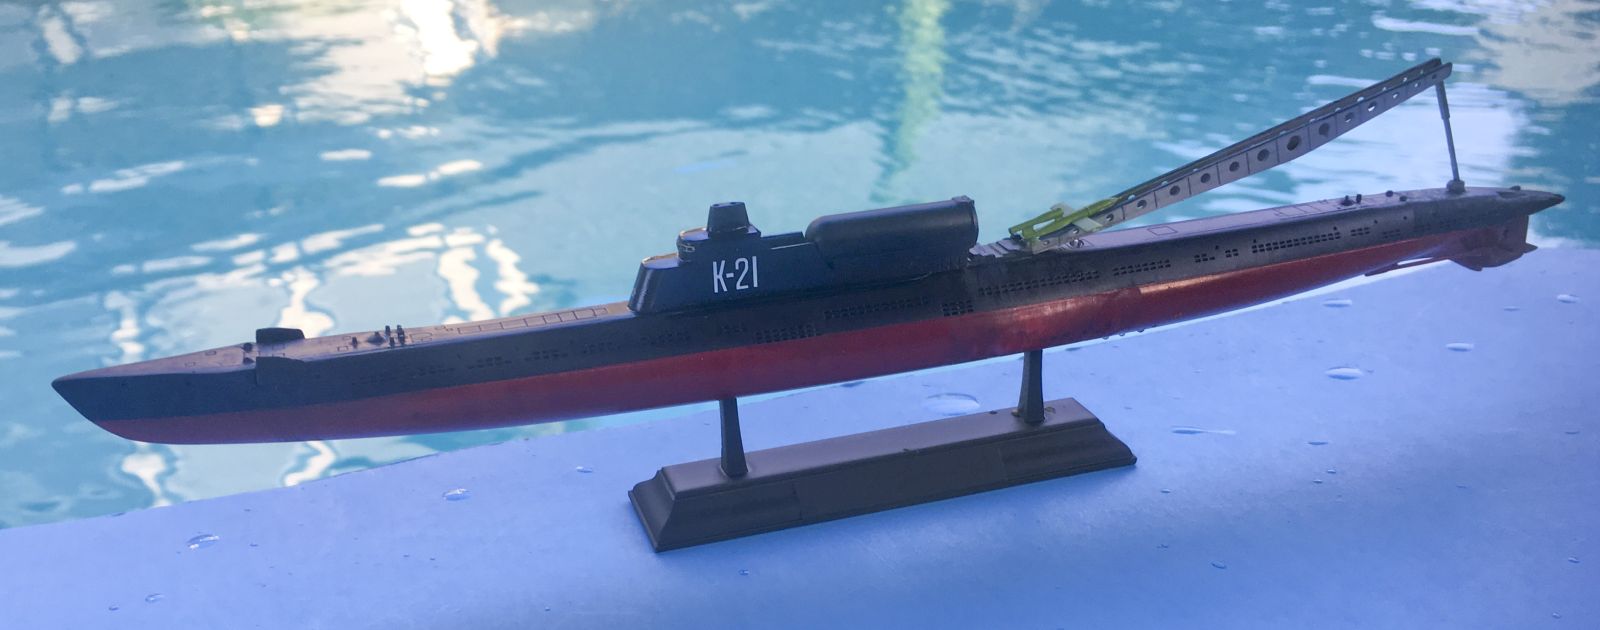
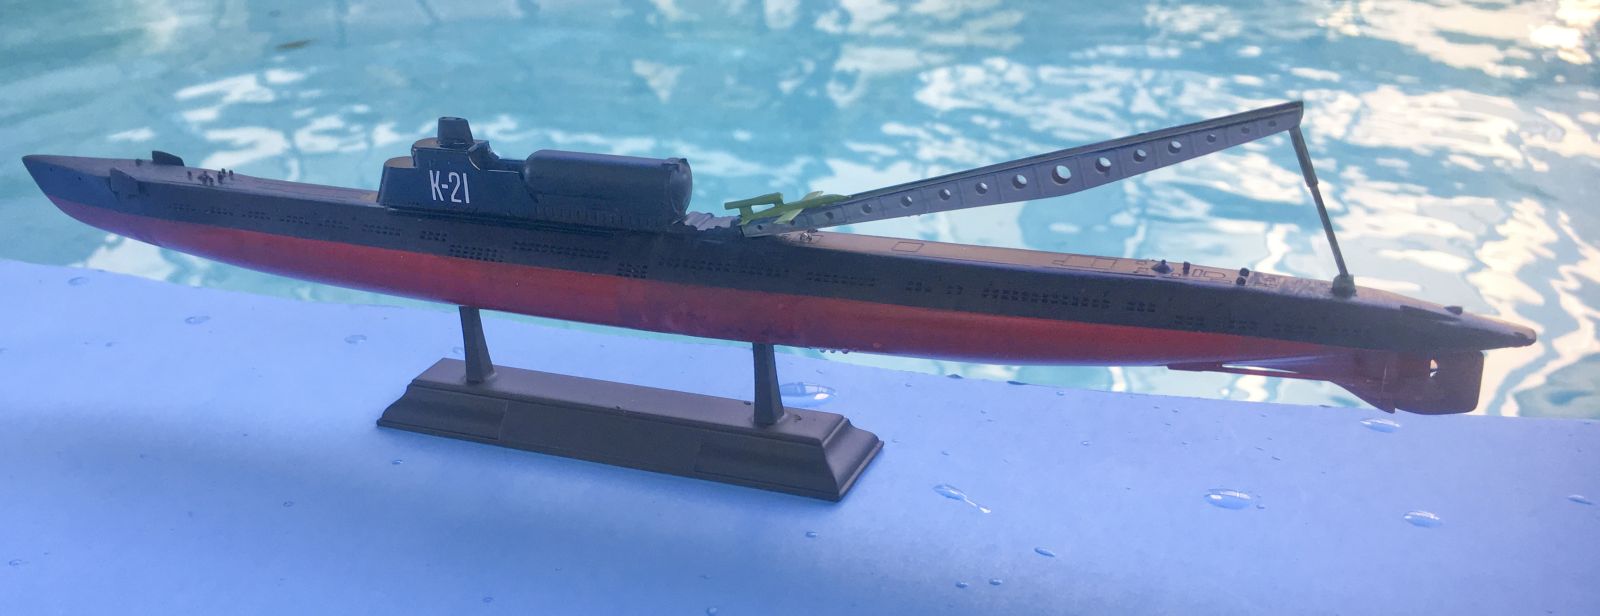
I sprayed the entire submarine with a Tamiya Flat Black rattle can. Once dry, I used the kit scribed line as a guide and applied Tamiya masking tape to the upper half. Once pressed down securely, I painted the bottom of the submarine with a Model Master Ferrari Red rattle can. Was it bright red? Of course, at least until I took a 6,000 grit sanding pad that brought the color down to where I wanted it. I masked off the launch rail and its elevation piston and sprayed it with Vallejo Light Blue Grey. I primed and then painted the photo-etched brass propellers at this point using Vallejo Bronze (metallic). Once dry, I secured them with super glue. You will want to make sure they stay vertical and not twist, but I had no major issues. I mentioned earlier that I left off the propeller tips (Part 16) that are provided, but I think that the extended shaft that the propeller blades sit on gives a nice extended tip.
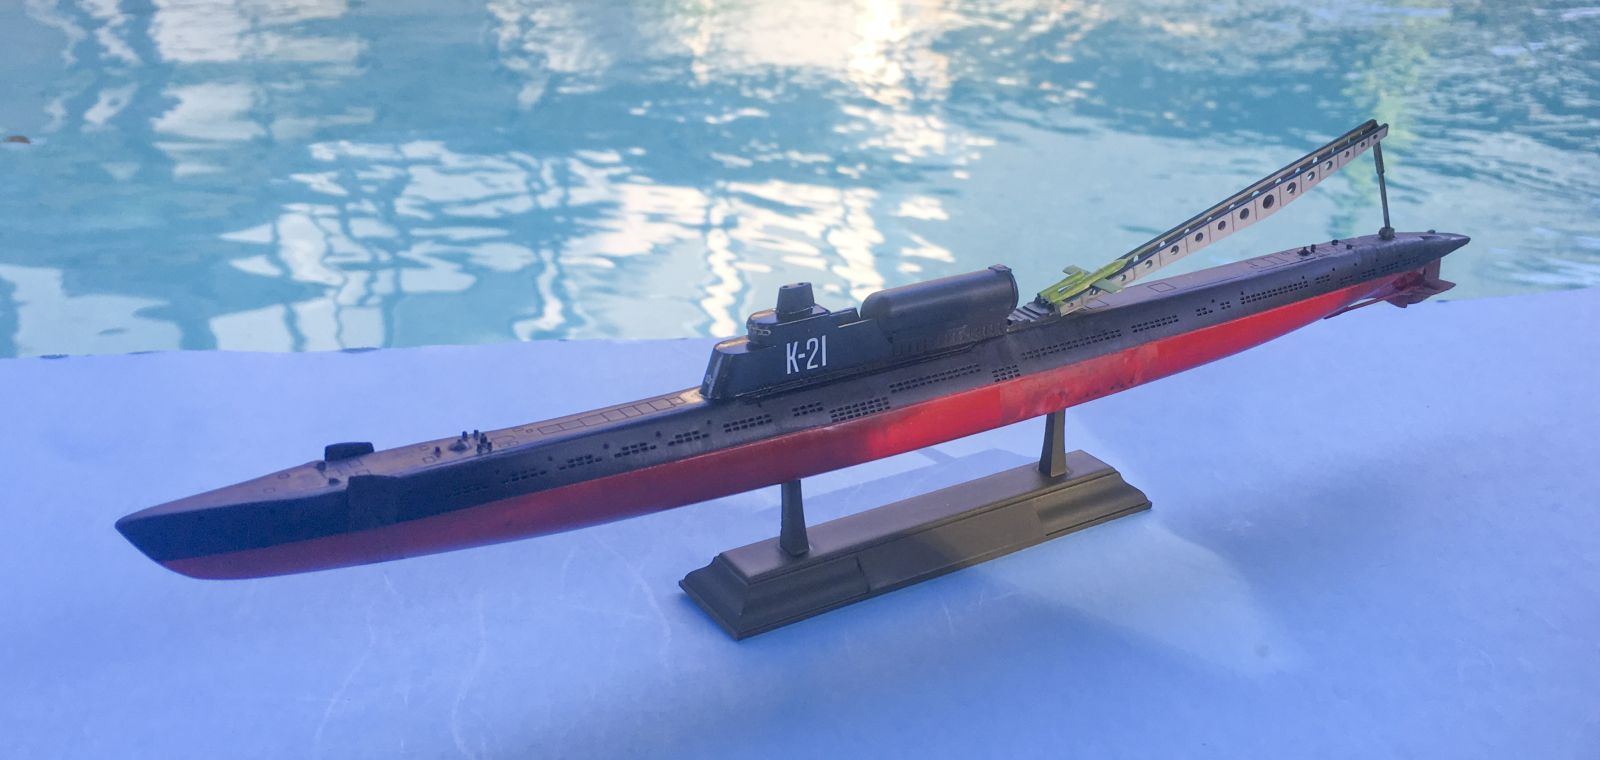
I sprayed the sail with Future and let dry and then added the K-21 sail decals next. I finished the decaling with a badge that is placed on the front of the sail. Once dry, I sealed with Future again and later sprayed Vallejo Clear Flat to tone the shine down. I used various Vallejo transparent colors (Black, Grey, Blue, Red, Green) to wash the various parts of the model to provide some wear and tonal variation. I followed up using Tamiya’s Panel Line Accents in Black, Brown, and Grey to give some additional highlighting. The cruise missile was sprayed Tamiya Flat White from a rattle can. I decided that the red and white checkerboard was a bit beyond my skill level and decided to paint it as an operational missile with a Vallejo Light Green top coat. There are additional photoetch parts that I have not installed yet. Primarily this includes the removable railing supports that you will need to supply your own horizontals for. There is also a circular antenna (Part 38 and 39) and a rectangular piece (Part 40) that I am guessing is also some kind of antenna. I may still add these at a later date.
This is a really nice use of the original K-Class submarine kit released earlier. I think it provides a nice comparison of what might have happened had this project come to fruition with the pulse jet cruise missile and is a nice comparator to the USN effort with the USS Cusk. The completed submarine is 350mm (13.78”). My suggestion for improvements for future kits would be the inclusion of a jig to get the correct angles for the photoetched propeller blades. I would also note that North Star Models (https://northstarmodels.com/) makes a photoetch fret (350112) that provides railings and a replacement deck specific to the Soviet K Class that could really dress up this kit if so desired. As it is, I’m quite pleased with how it came out. While this is not a ‘shake and bake’ kit, I don’t think it is so difficult that the average modeler could not produce a great looking model out of, and if you are a great modeler, you can have a field day opening up the torpedo doors and limber holes.
Highly Recommended
My thanks to Mikro-Mir and IPMS/USA for the chance to review this great kit.


Reviewer Bio
Frank Landrus

Frank retired from the Ophthalmic industry with over thirty-six years of Research and Development experience. Frank's first model kit was a 1959 Hawk 1/72 US Marines Vought AU-1 Corsair and has been building models for over sixty years. Frank's first encounter with IPMS was attending a North Central Texas ScaleFest show in 1984. Frank soon became more involved in Make-N-Take activities and became the IPMS Western Coordinator for Make-N-Takes [West of the Mississippi River]. Make-N-Takes quickly became a local model contest and airshow staple reaching a high of reaching over 1,300 children before the COVID shutdown. Frank has volunteered to assist in contest judging since 1985 and is currently the Nationals Head Figure Judge until he is dead or they find someone better.
Comments
Add new comment
This site is protected by reCAPTCHA and the Google Privacy Policy and Terms of Service apply.
Similar Reviews