
Siemens-Schuckert D III - Standard & Early "No Cut" Conversion
Loon Models bills this set as a “No Cut” conversion. It comprises a small number of tan resin pieces of moderate quality to directly replace styrene counterparts in Roden’s 1/32 scale Siemens-Schuckert D-III kit.
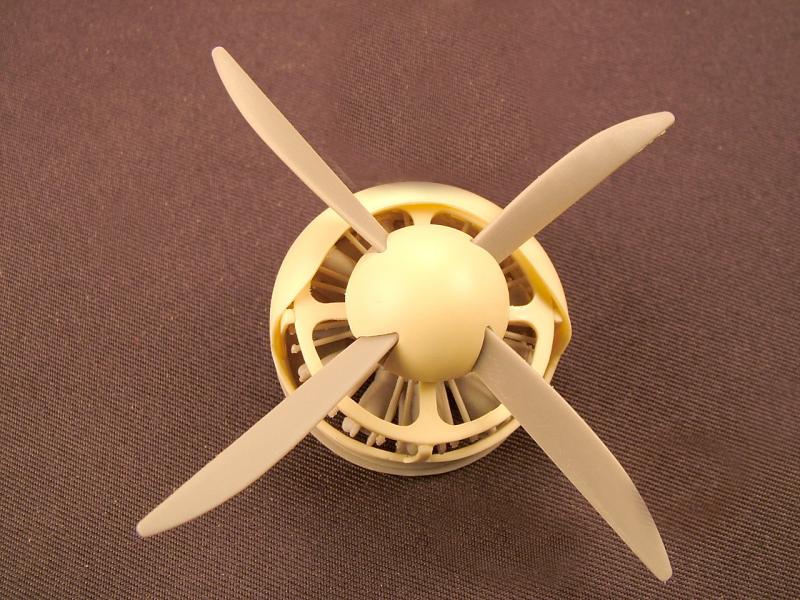
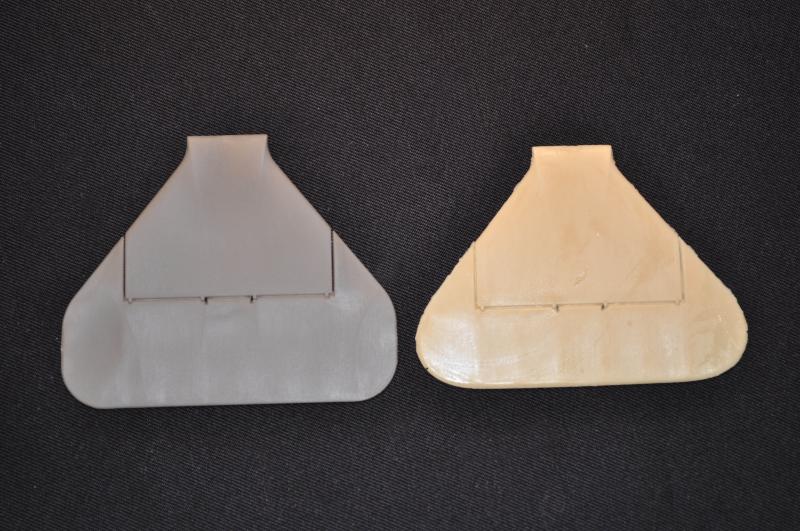
Included are two cowls, one a replacement for the “standard” number supplied in the kit and the second a later “cut back” version. Along with these are a “non vented” propeller hub, a separate engine frame assembly and a horizontal stabilizer/elevator assembly with the shorter span, narrow chord control surface of the earlier production D-III’s.
The parts come packaged in a zip lock bag inside a thermoform plastic box. There is a single sheet of written instructions with no pictures or diagrams, construction sequences, in-progress illustrations or references.
While there are no sprues or casting blocks, my example showed a good deal of light flash on every part, all easily cleaned off with the exception of the six brace arms for the engine frames where divining flash from part was problematic, even with a magnifier. There were a number of pin holes, particularly along the trailing edge of the elevator, but nothing that cannot be managed with a bit of super glue and some accelerator. The cowlings are extremely thin, and will look very much in scale when installed and finished, but the payback comes in their considerable lack of rigidity and almost intimidating fragility; be very, very careful with these parts. The “cut back” cowling in my example showed a serious casing flaw as well, a massive bubble that left the outside surface wafer thin. This will prove a little more awkward to correct, and is the one thing I would say should not have gotten past the quality control folks at Loon Models.
So, how does it go together? Well…
Both cowls are significantly undersize. When mated up to the kit’s firewall they leave about a .025” flange all the way around. I was able to correct this by cutting the lower cowl ring and grafting in a slice of .030” plastic 3.5mm wide blended in with super glue. Given the fragility of the repaired cowl and the delicate nature of the engine frame assembly, I would pass on having the propeller/engine rotate on this one. Plan on gluing everything down securely.
Speaking of the engine frame, this is where the real fun begins. First, I must admit that I did not have access to the SS D-III Data File nor was I able to scrounge any clear pictures from the internet so I’m unable to comment on the accuracy of the parts or their application. Loon’s instructions direct the builder to attach the braces oriented 180 degrees from their counterparts on the kit cowl. Whether or not this is correct I will leave to the WWI Illuminati, what I can say is they do not fit any other way in any case, at least not so as to allow the completed assembly to fit over the built up engine.
Once installed, the braces do not attach to anything. They are too short to reach the firewall by a good .035”-.040” with the engine in situ. I also could not ascertain whether the bottom brace (the one that sits at 6’oclock viewed from head on) should extend to the firewall underneath the cowl ring, or attach to the ring itself as per the original kit part. In the end, I wound up carefully aligning the brace assembly inside the cowl and gluing it solidly in place, then fitting and blending the bottom (6 o’clock) brace into the lower cowl ring. It all came together more or less serviceably, but to my eye, scale fidelity and fit is standoff at best. We’ll have to see how it fares on the finished model.
The horizontal stabilizers were more of the same. I suspect the master for these molds are simply the kit parts suitably modified. The problem is, Roden has given us styrene that at fit perfectly, but shrinkage of the less than space age resin has left their aftermarket counterparts almost universally undersize. This could be fixed on the resin stabilizer, but it would be a far longer job than necessary. My suggestion would be to use the Roden stabilizer and attach the Loon elevator if you want the early version; or failing that use the Loon part as a pattern and cut down the kit part accordingly. The commercials wouldn’t be over by the time you were done.
The unvented spinner is well done and fits perfectly. Here again, Loon has saved you another fifteen minutes fooling about with sprue, superglue and sandpaper.
Where the kit does bring something to the bench is in the case of the late “cut back” cowl. Roden’s integral cowl/frame molding would prove problematic indeed to convert, and Loon’s separate pieces make the job a snap. Well, as much of a snap as gluing five thin fiddly resin parts together to form a perfect circle, figuring out how to attach them to thin air and getting it by judges armed with dental mirrors and fiber optic vascular scopes could be-but, hey, it’s a hobby, right?
Aftermarket resin, to my mind, must bring some definite advantages to justify their not inconsequential extra cost. They either provide a level of detail unattainable by us mere mortals unequipped with CNC operated miniature mills and lathes and patternmaking backgrounds or they represent a significant savings in time, allowing us to produce our latest miniature wonder before the dawn of the next millennium.
In all honesty, this set from Loon does neither very well. The work level required to incorporate the undersized, inconsistently molded parts does not, in my opinion, reward the builder with a commensurate level of improved detail. There is some value, however in the separately molded engine brace. Were I to use this kit on a full build, I would utilize only the front brace and the elevator parts, suitably altered, and consign the rest to resin oblivion. Whether or not the use of those two parts justifies the price of the set can only be left to the individual modeler.
I would like to express my thanks to Loon Models and Roll Models for this review sample.


Comments
Add new comment
This site is protected by reCAPTCHA and the Google Privacy Policy and Terms of Service apply.
Similar Reviews