
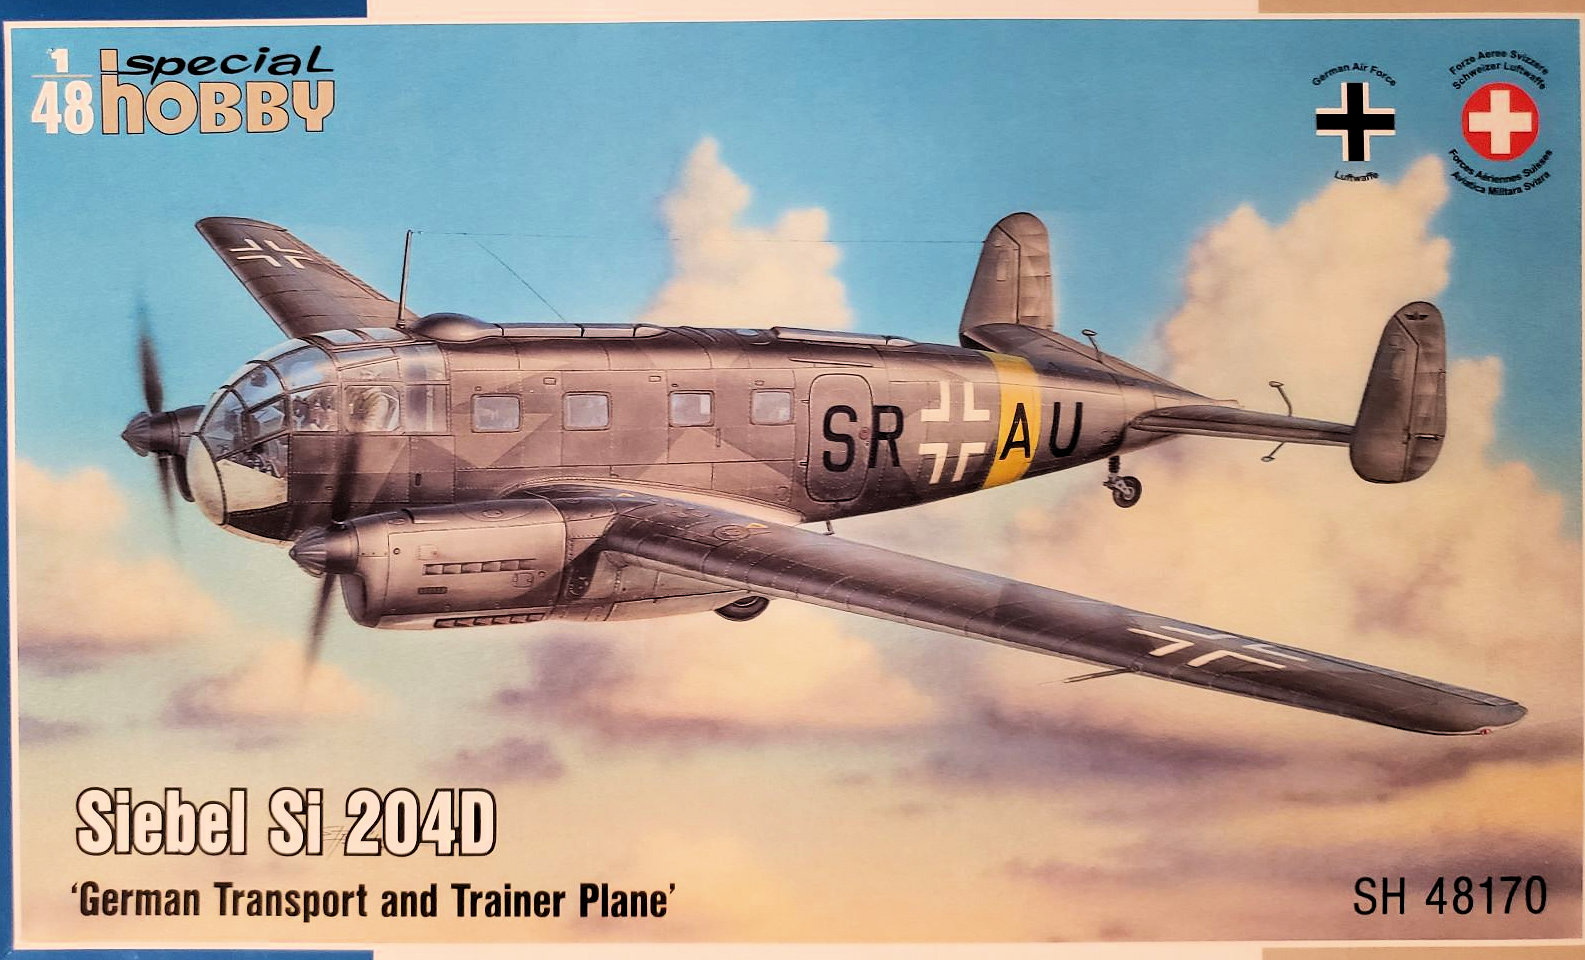
Siebel Si204
The Siebel Si204D was a Luftwaffe training and liaison aircraft which first flew in May 1941. It possessed excellent flying characteristics and was very reliable, albeit not particularly attractive. I believe this is the first injection molded 1/48 kit of the type. MPM did a vacuform kit many years ago, and I have tried several times to obtain one, but with no luck. When I saw this offering listed amongst the available review kits, I jumped at the chance to review it.
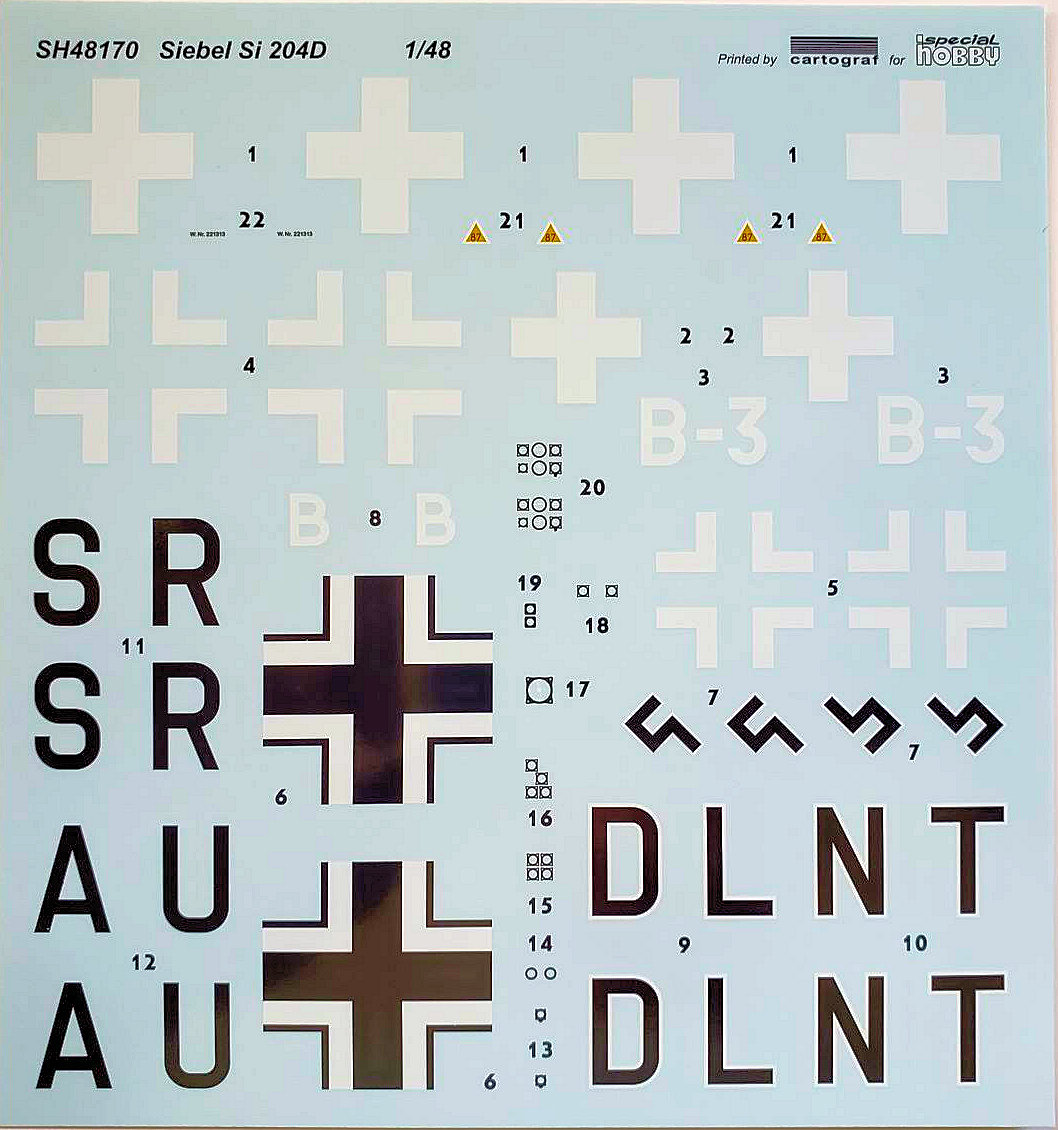
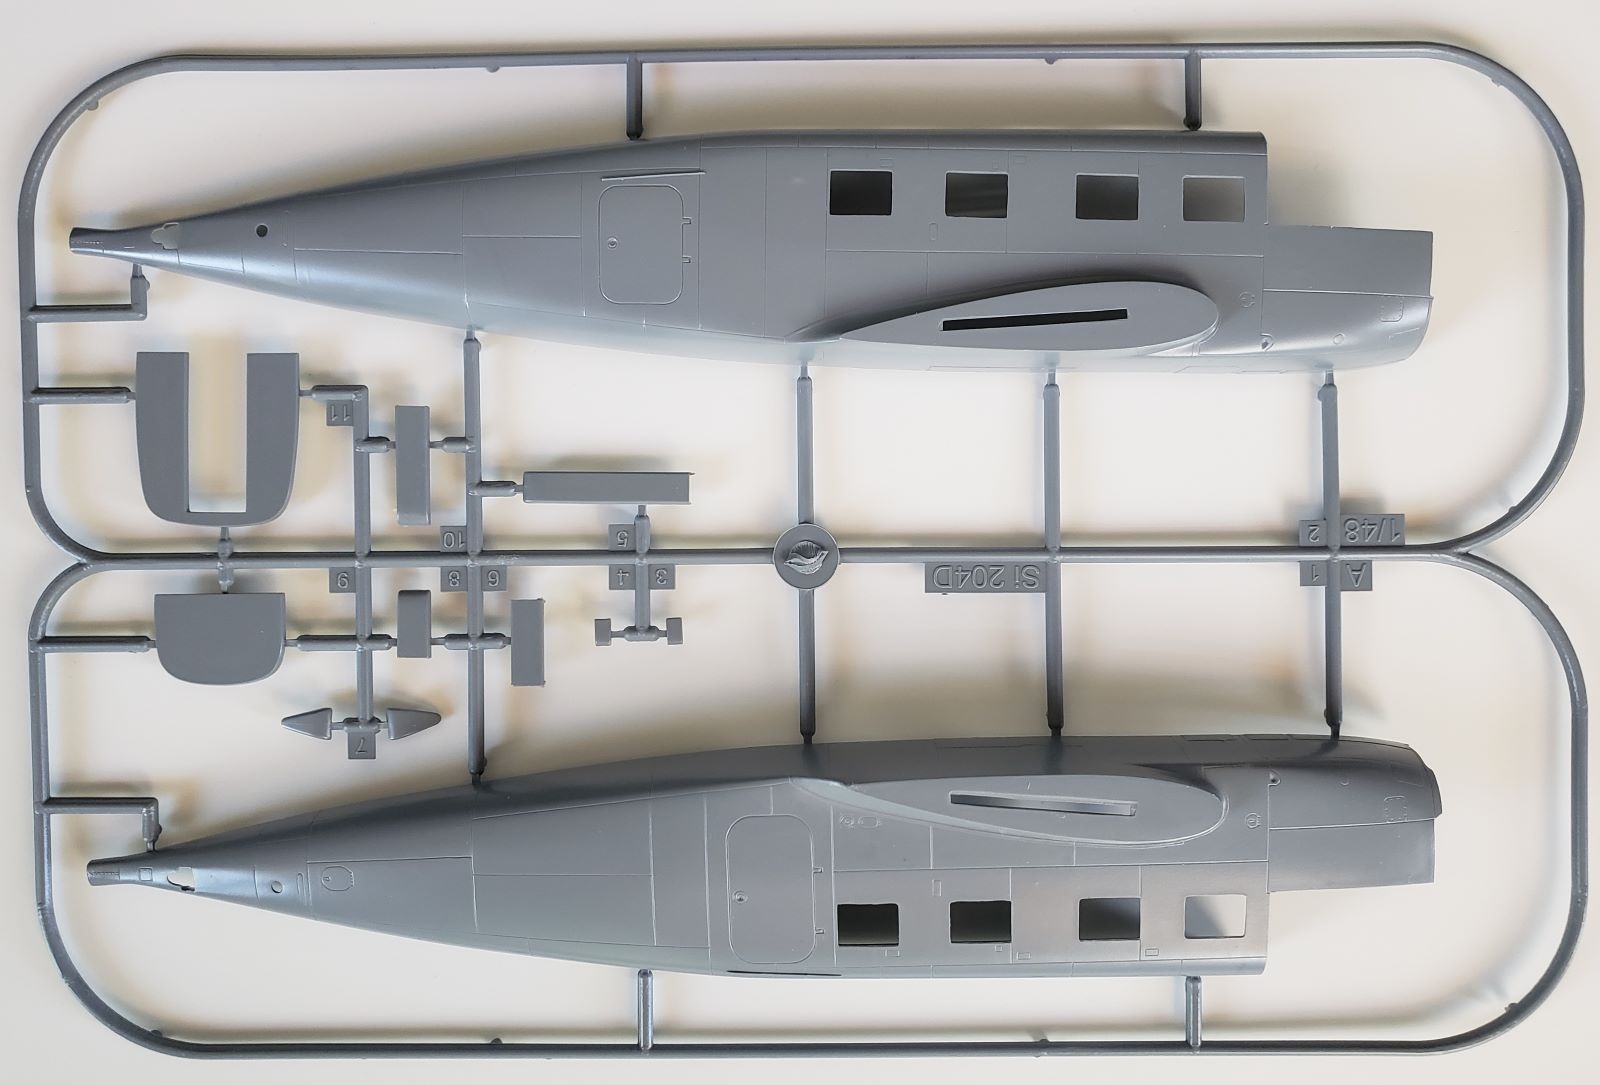
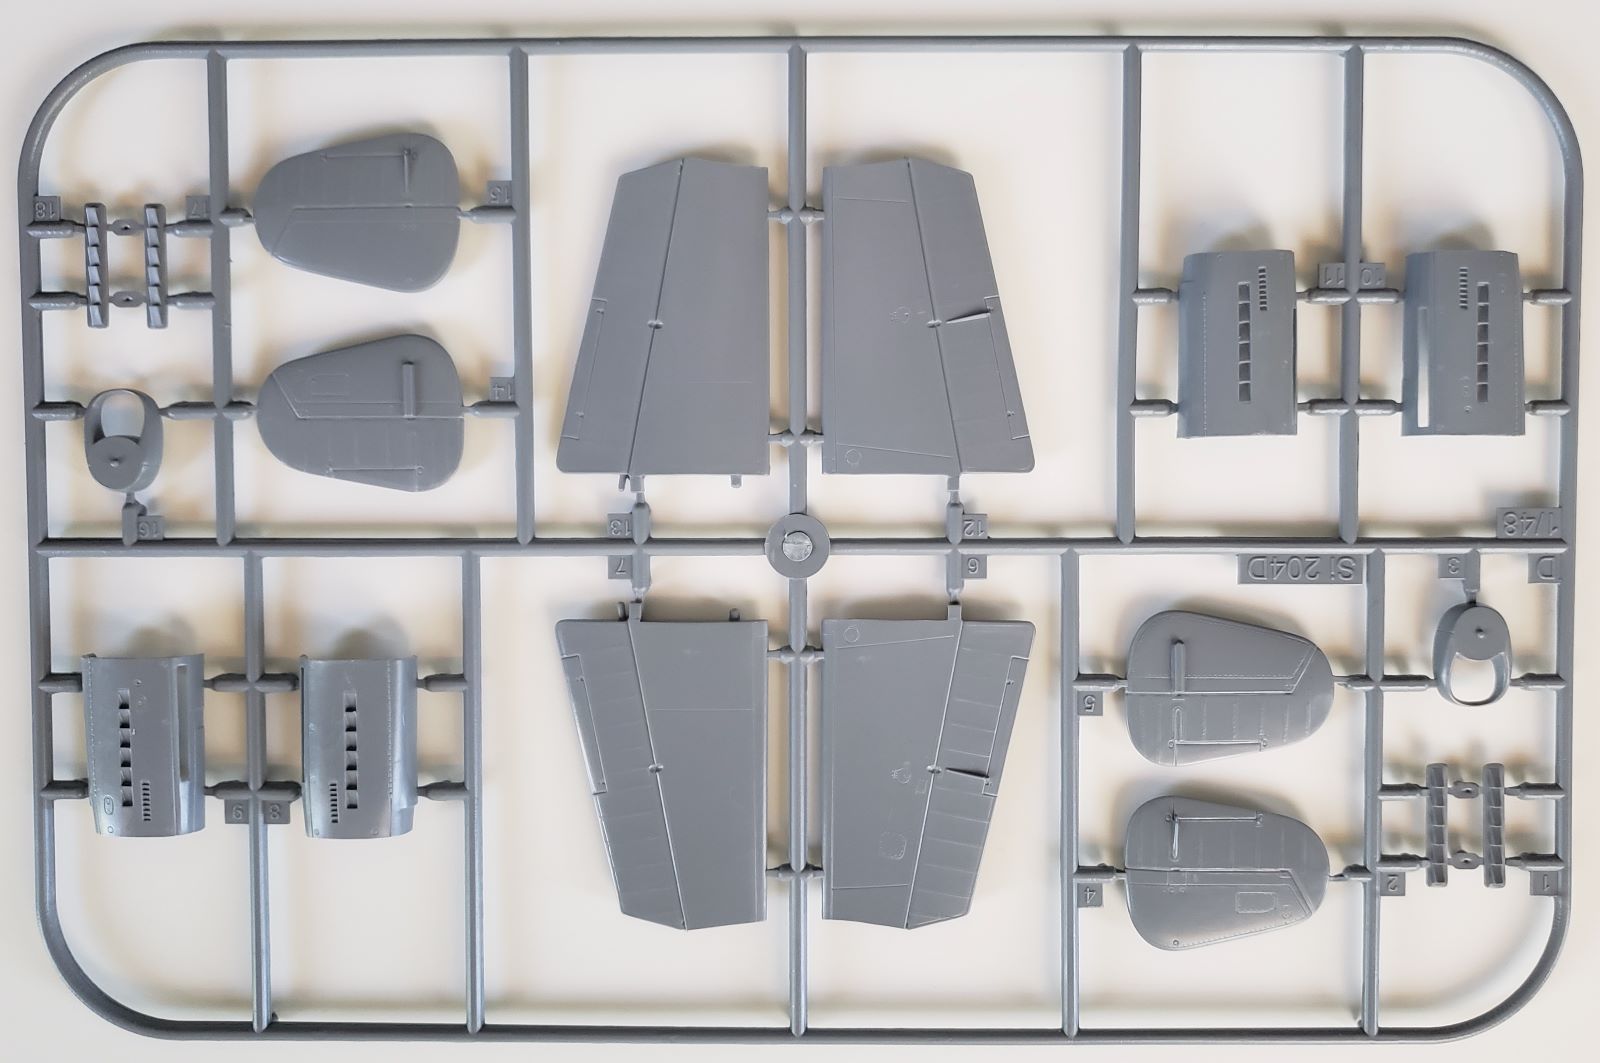
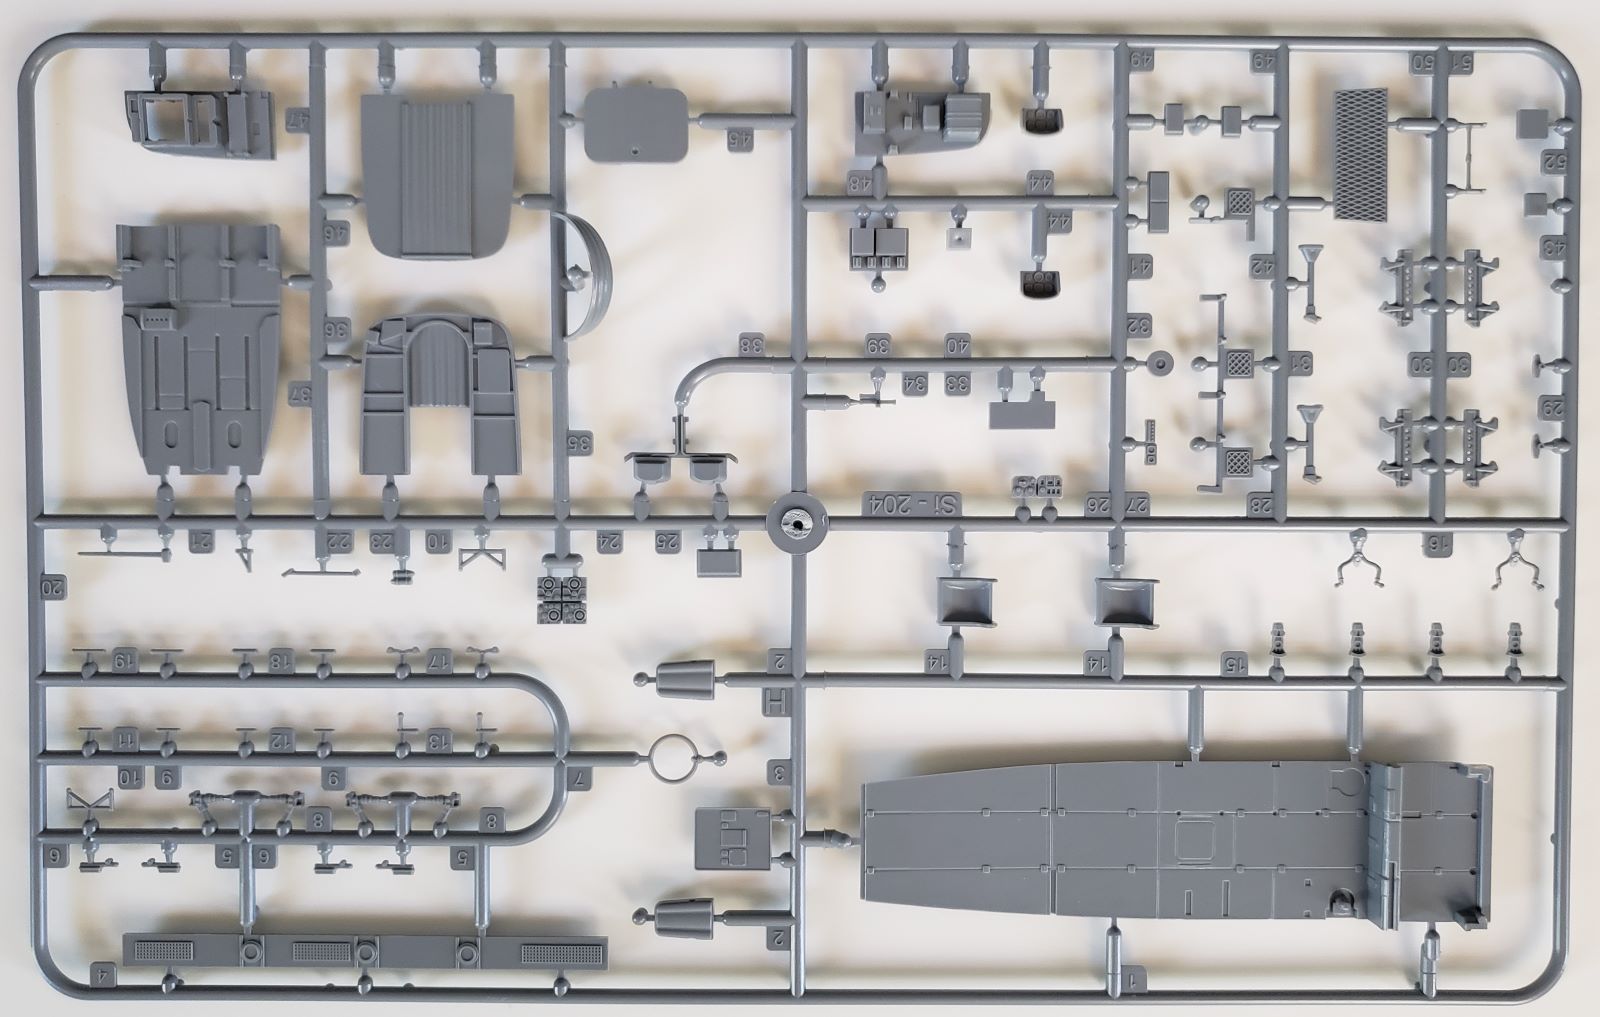
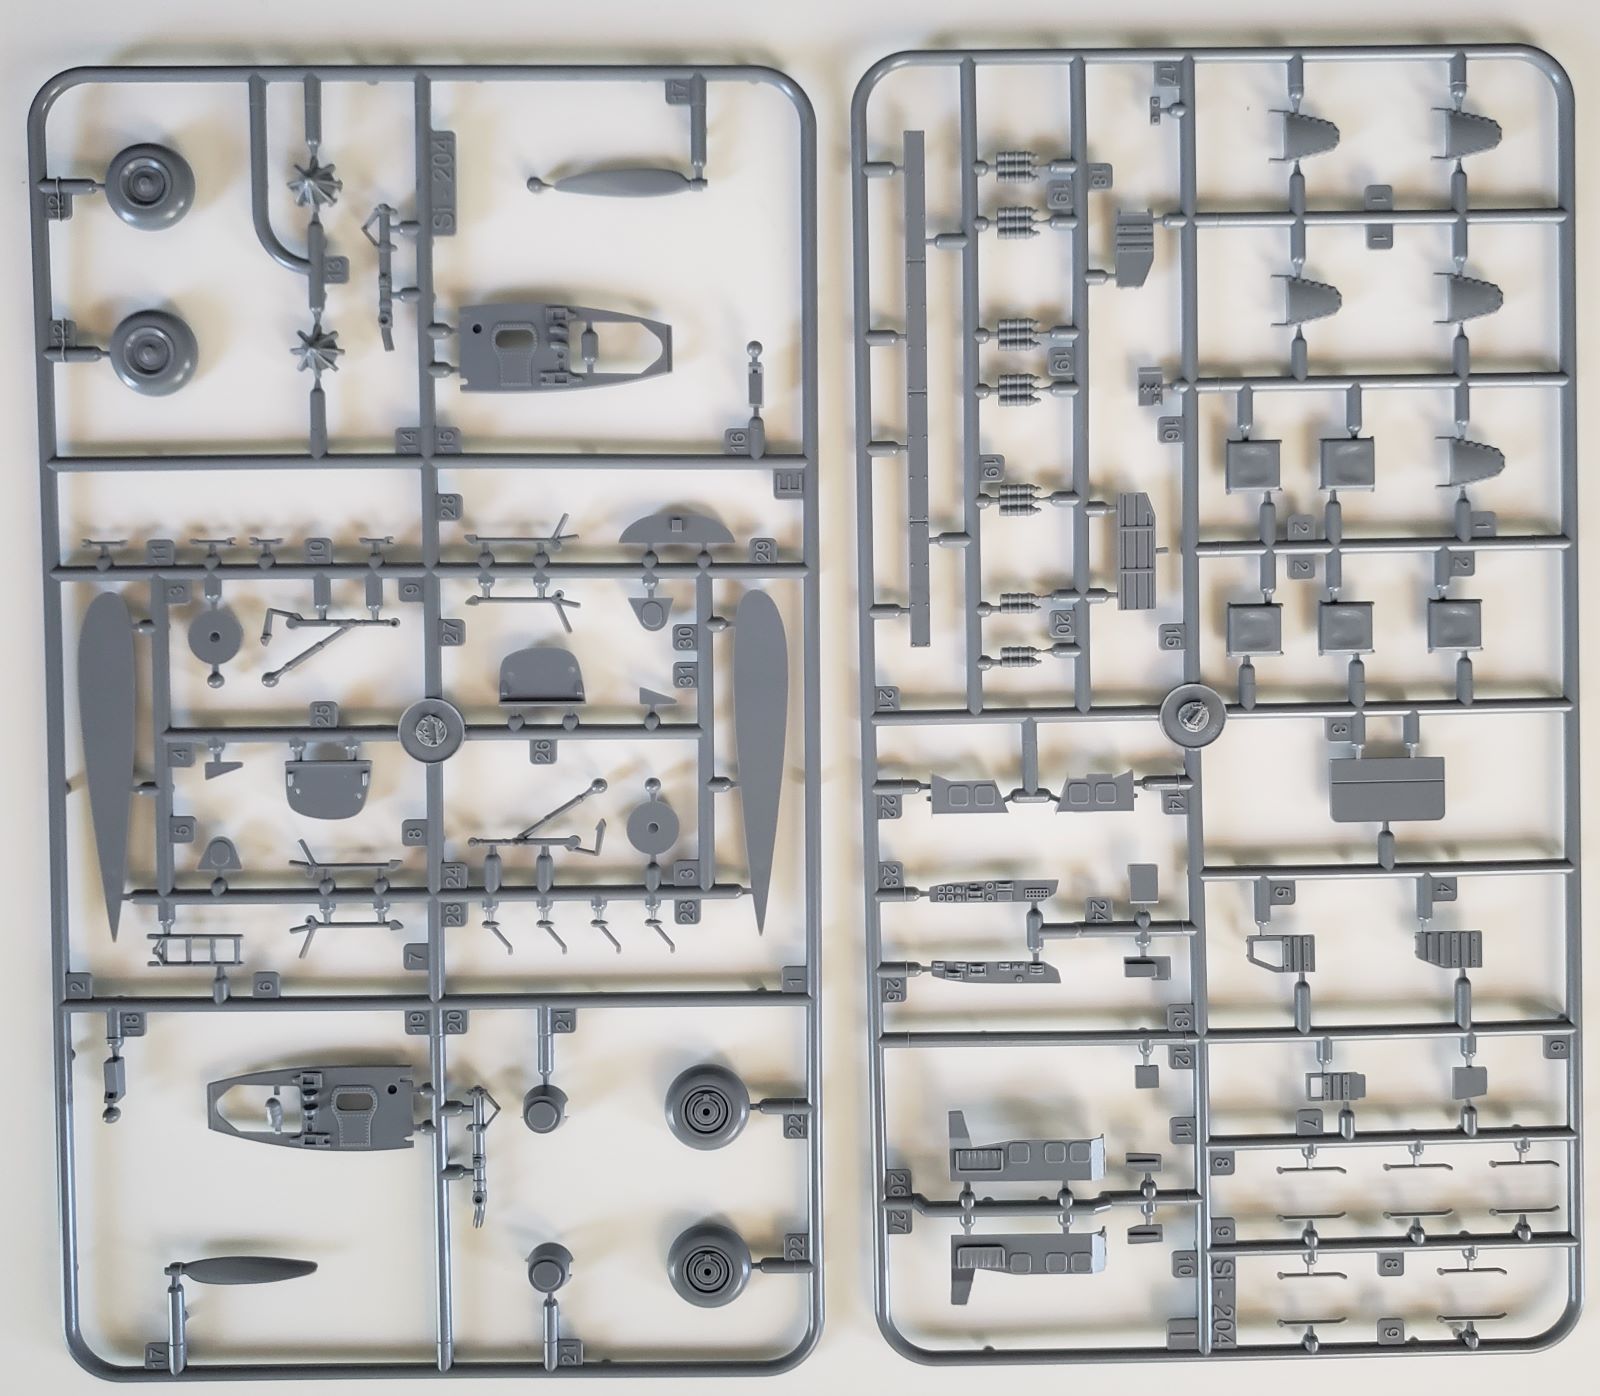
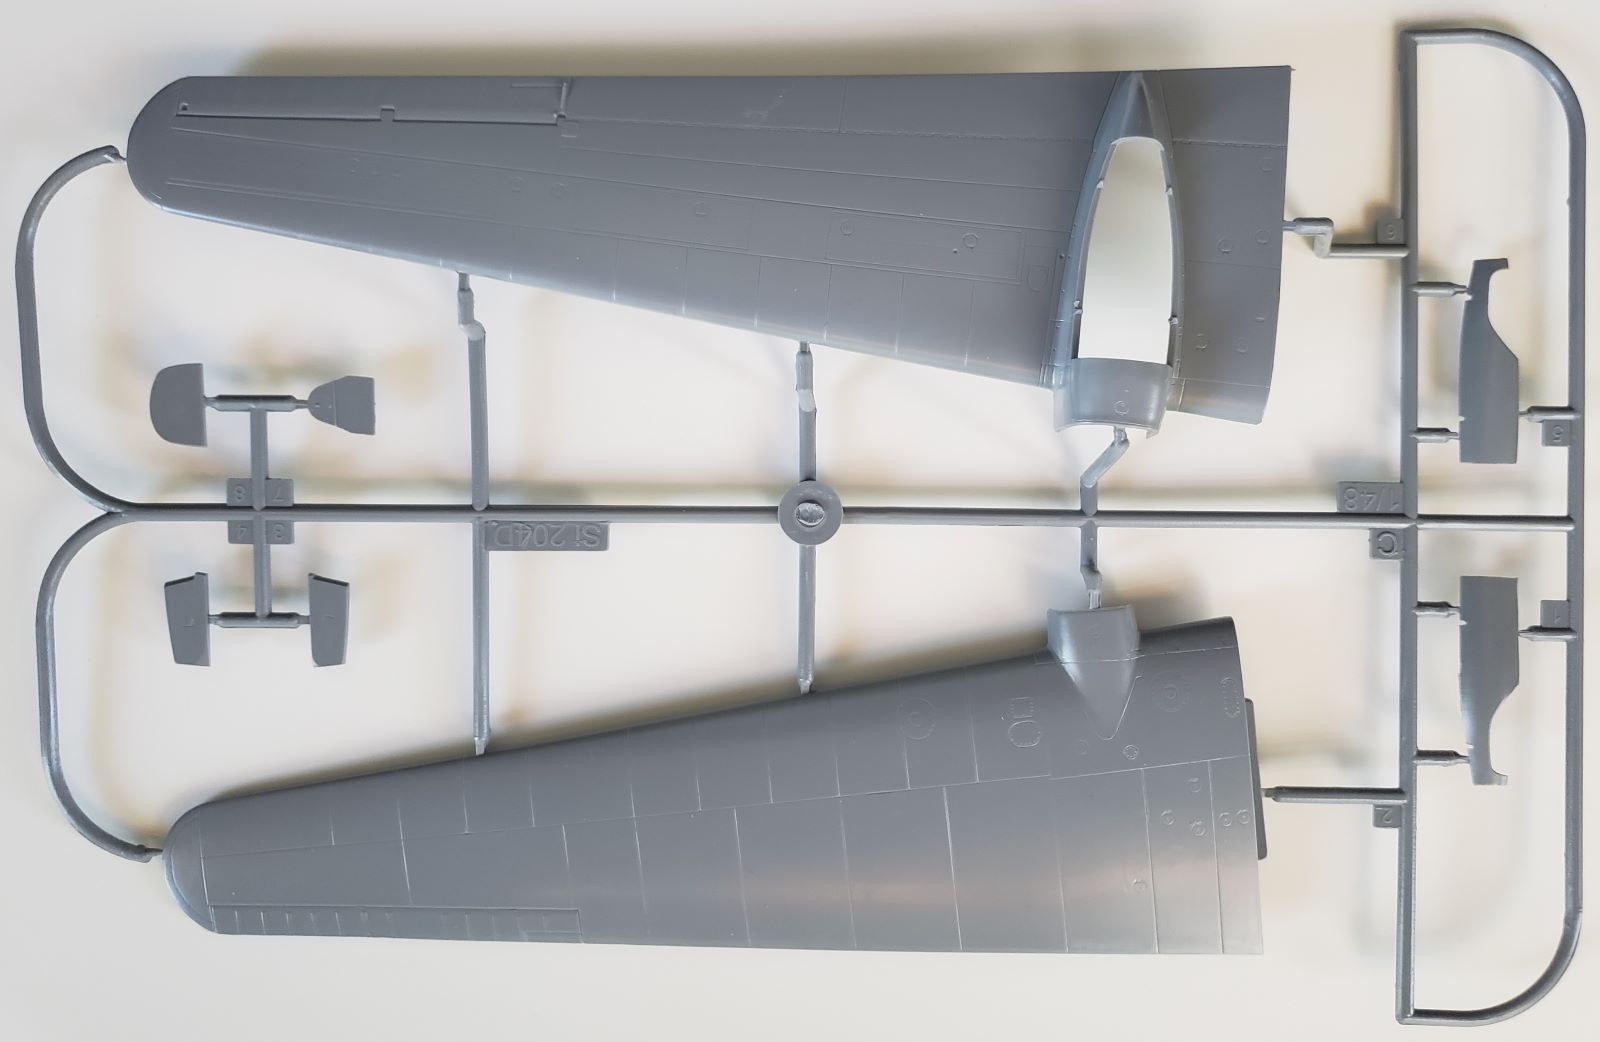
The kit comes in a sturdy, medium sized box with nicely done artwork on the box. Inside are eight sprues of medium gray plastic, one sprue of clear plastic and a resin radome for one of the three decal schemes – two Luftwaffe aircraft and one Swiss. Parts count is just under 200, but about 25 of those are not used. There are no photo etch parts. The parts have nice detail and for the most part the panel lines are recessed and crisp. As I looked closer I could see that parts cleanup was going to be time consuming. Just about every part had a mold seam that needed to be dealt with.
The instructions have large, clear CAD drawings with paint callouts for Gunze colors. The parts that are to be attached are shown with dark shading on the instructions. Because of that dark shading there are a few instances where it was impossible to make out the detail in the drawings, which made it hard to figure out which way around the part went.
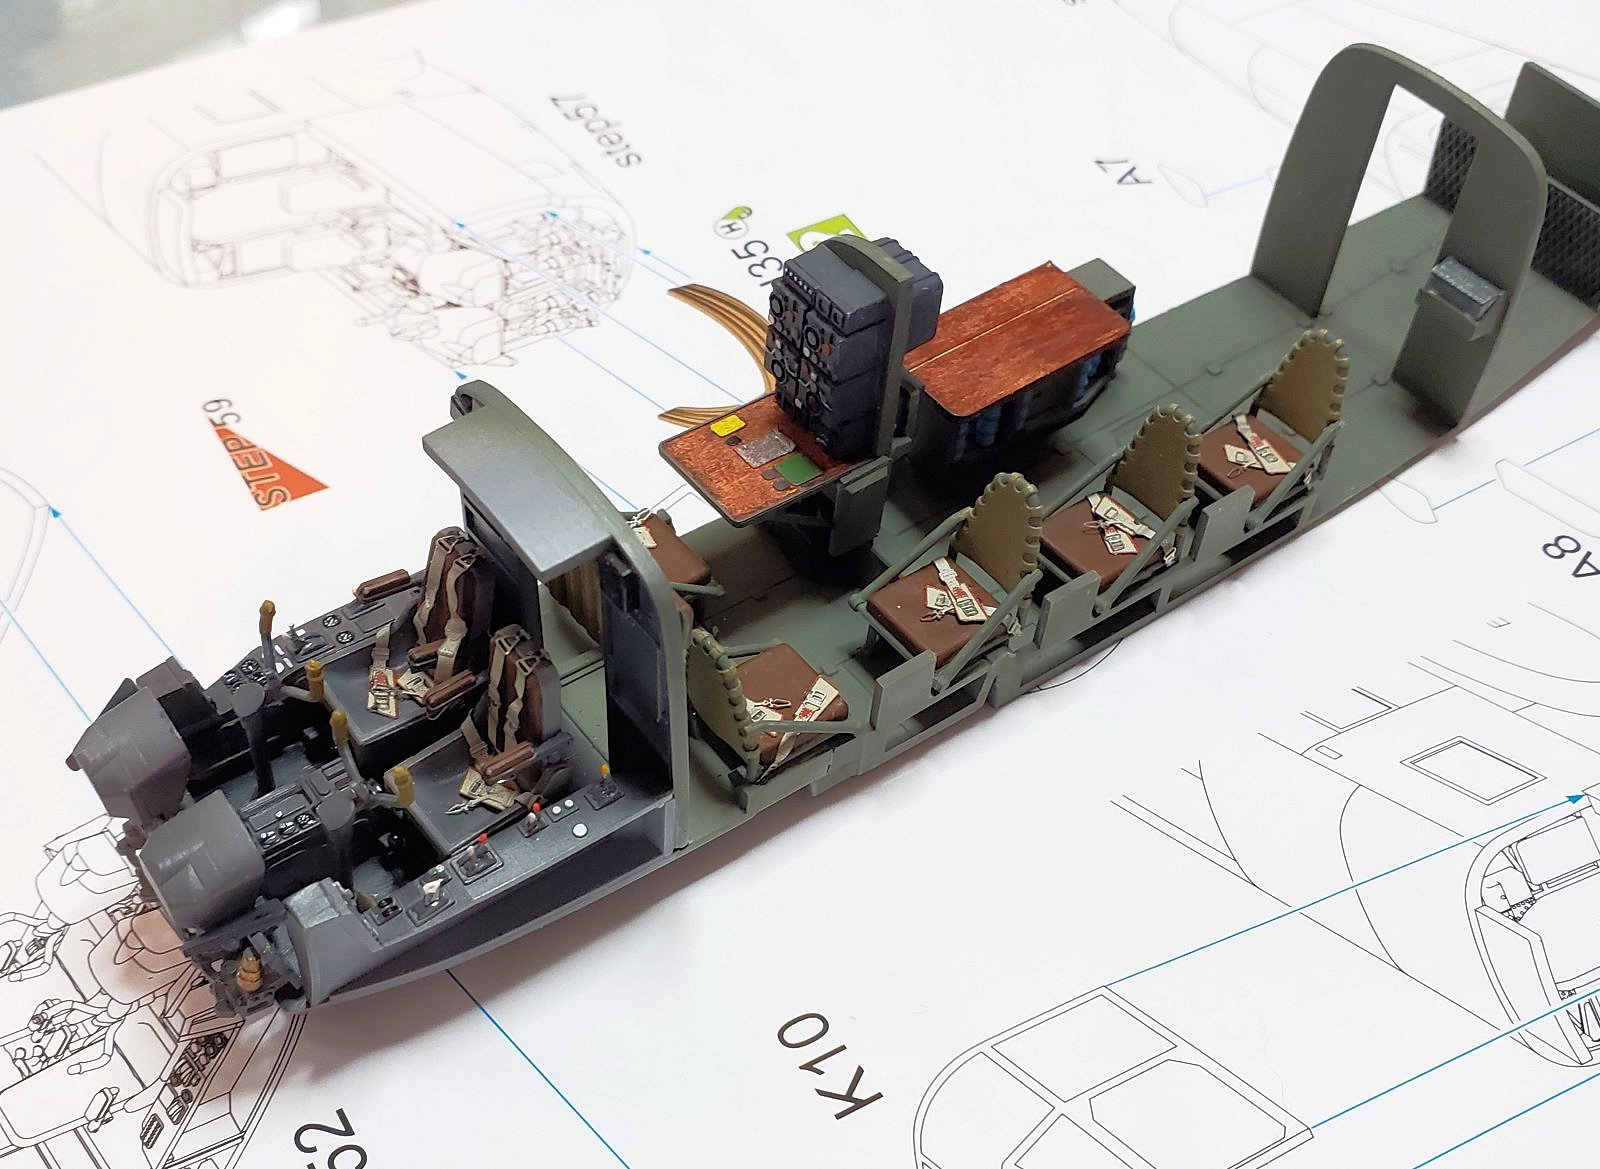
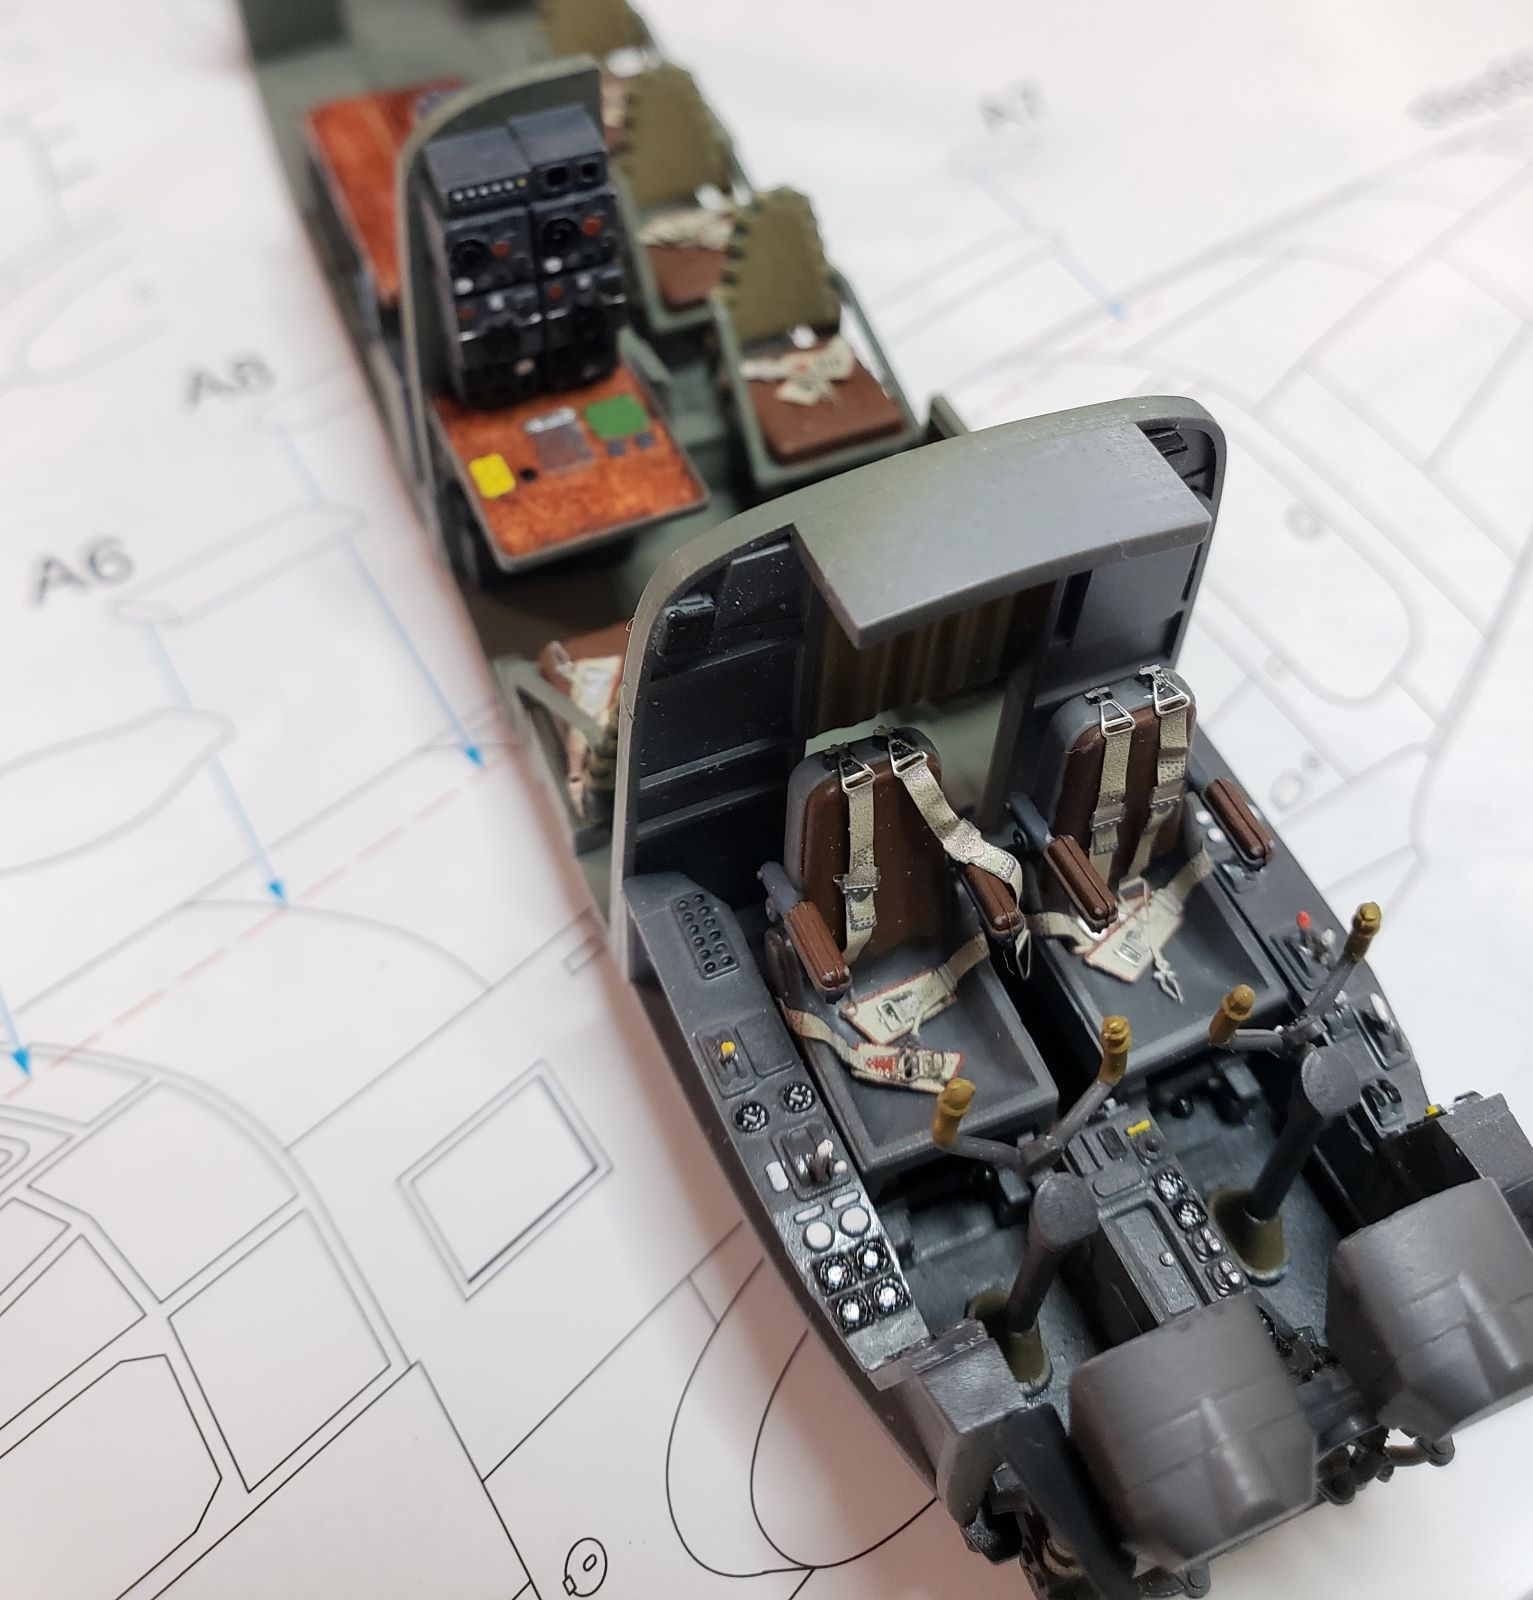
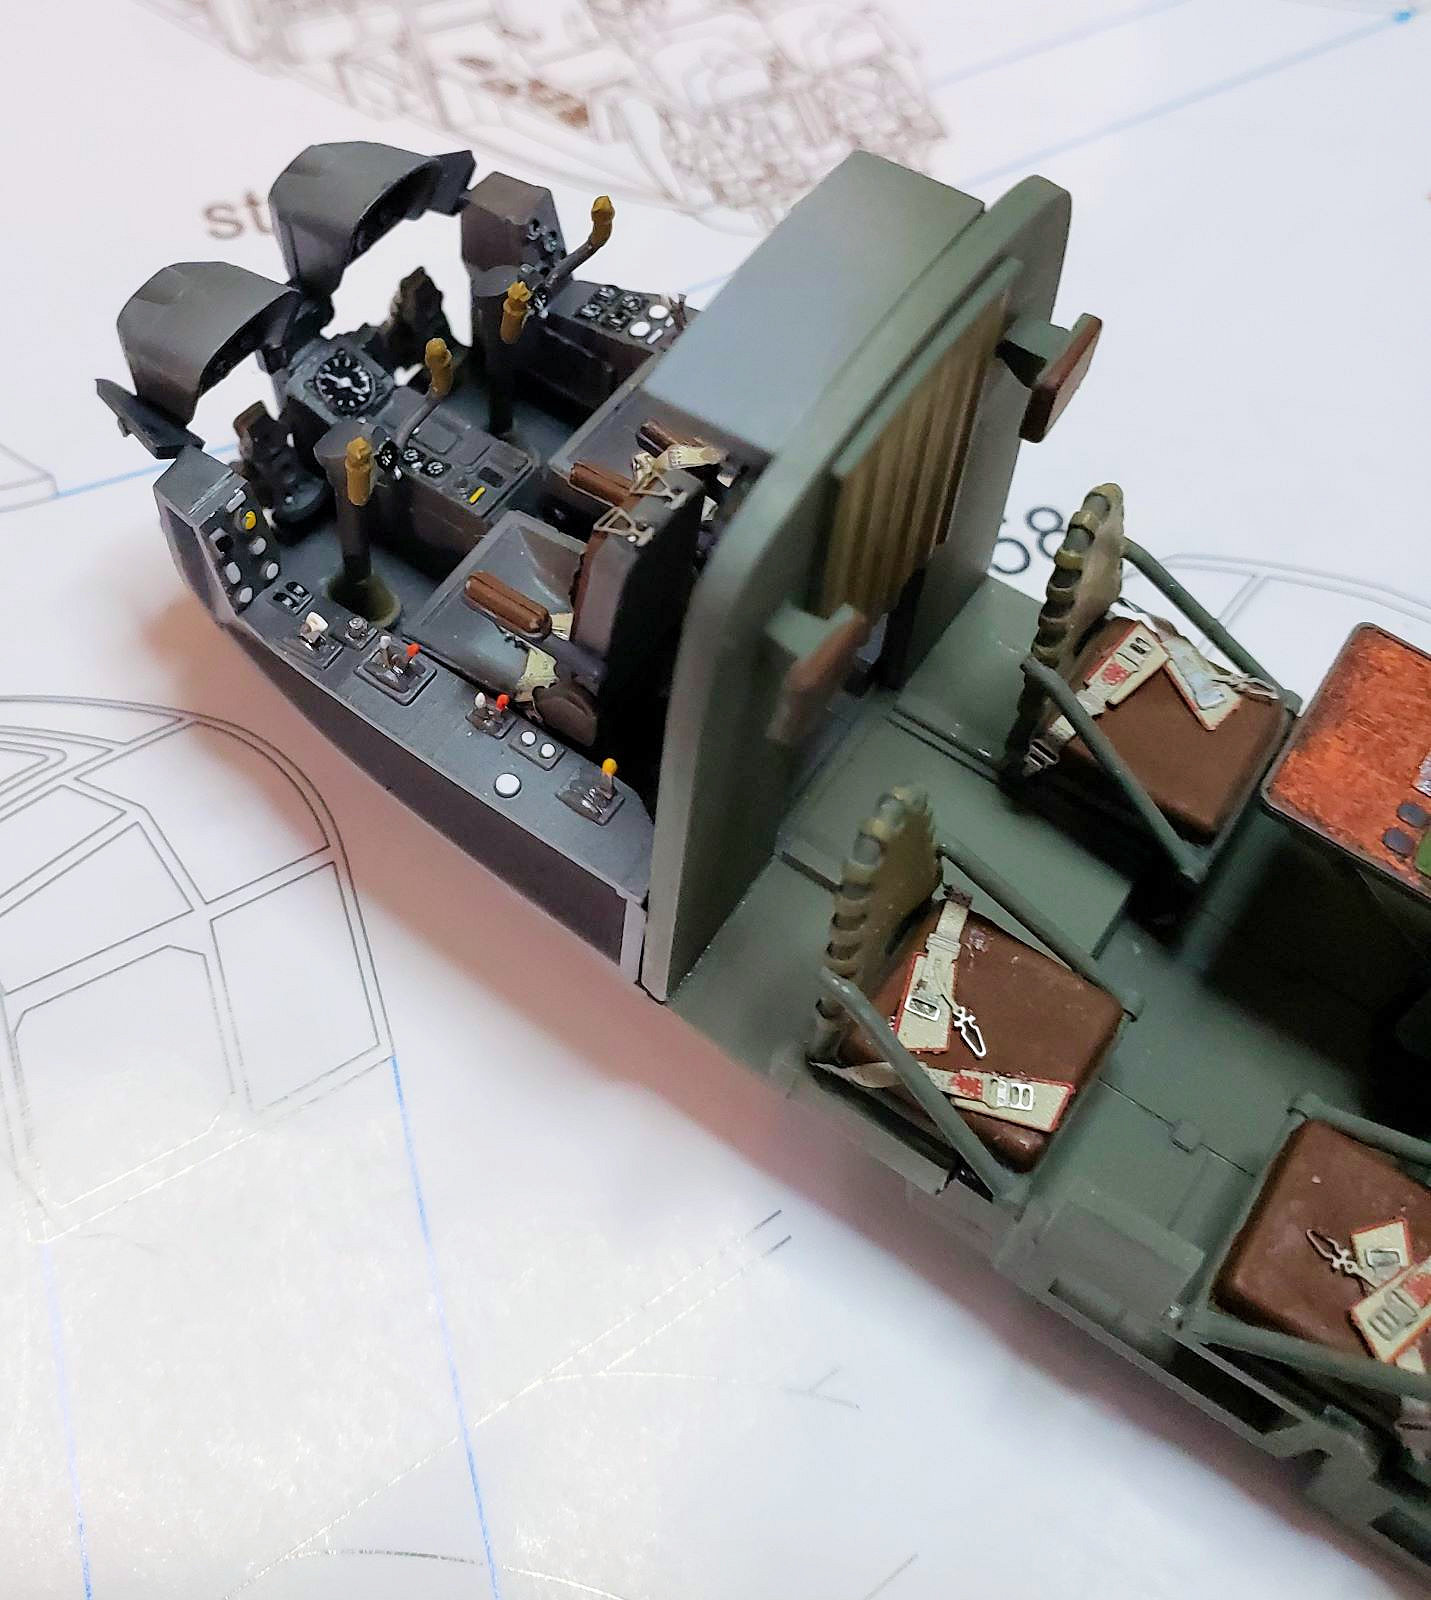
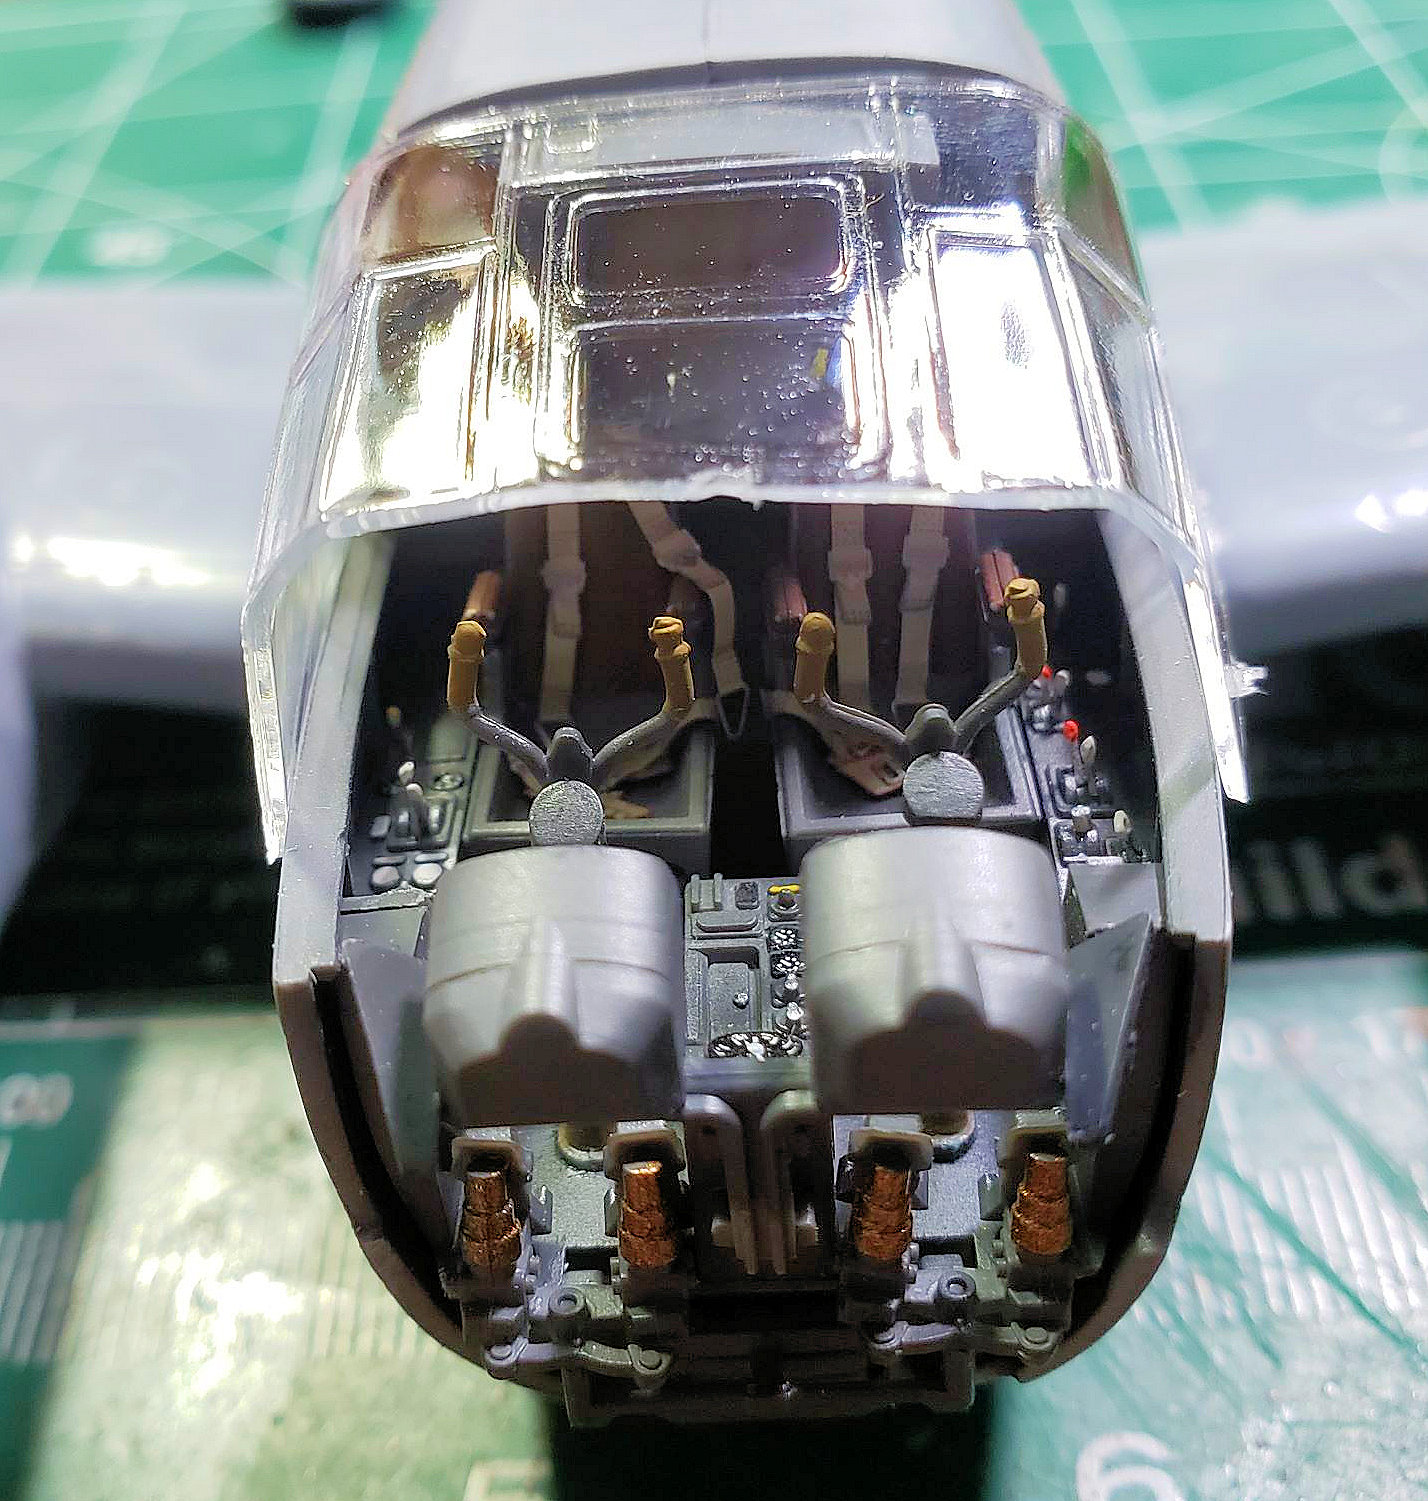
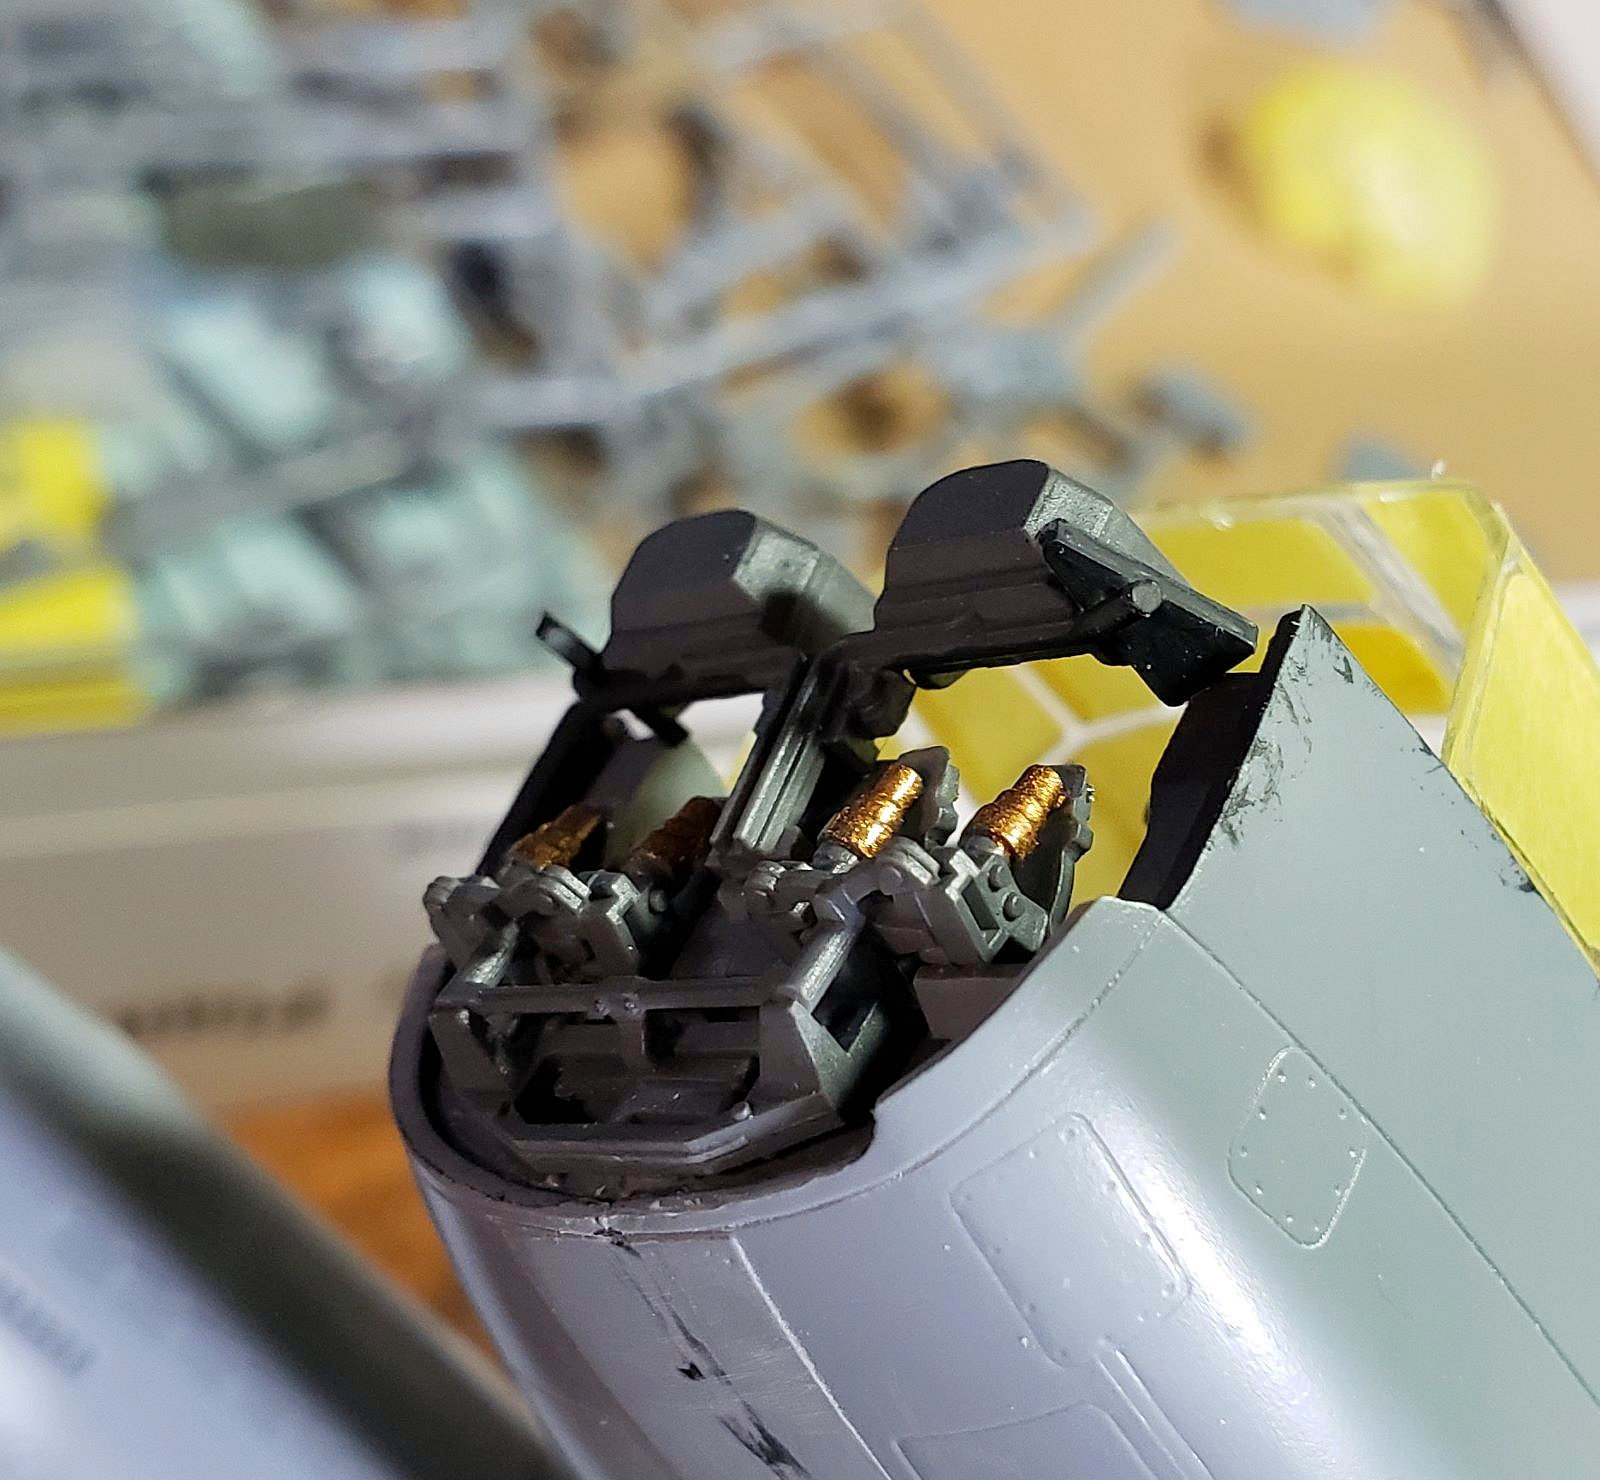
Construction begins in the cockpit, as expected. Due to the large glasshouse canopy, careful painting and assembly will be essential. The detail is very nice and decals are provided for the various instrument panels and they fit perfectly and snuggle down well with a little Micro Sol. I added a few levers to the side consoles as depicted in the Schiffer book on the subject.
The rudder pedal assembly is very nicely detailed, but a bit fiddly to put together. There are no positive locating holes or tabs for some of the parts, so careful placement and alignment is needed. The mold seams combined with the small size of the parts made cleanup tedious. Continuing along in the cockpit, the supporting frames for the seats were another fiddly assembly which would have been much easier with a third hand. Once again, the detail was great, but the assembly and parts cleanup was time consuming. In addition to the pilot and co-pilot seats, there are five well done seats for the cabin that also need to be assembled. Just as I started putting together the seats, an email came from the IPMS review team regarding Eduard review items that were available. Lo and behold, there was a set of steel seatbelts and a set of canopy masks that needed to be reviewed. The seatbelts were up to Eduard’s usual high standards and really helped dress up the interior.
There are two identical parts H43 that go on either side of the cockpit bulkhead door, but one of them was missing from my kit. It didn’t appear that it was broken off the sprue, but that maybe it didn’t get molded. Luckily it was a simple looking part, so I made a replacement from scrap plastic.
The next several steps deal with the cabin interior, which has some excellent detail. In addition to the aforementioned five seats, there is a radio operator’s station, a couple more bulkheads and a rack which holds a bunch of what I assumed are oxygen bottles. Fit of the parts, once cleaned up, was very good. The cabin floor is then mated to the cockpit assembly. Once they are together, it makes for a very impressive interior.
Before the fuselage can be joined together, there are several windows that must be installed. Since I had the Eduard masks to review also, I attached the masks to the cabin windows before gluing the windows in place with Gator glue. There are also inserts to cover the wing attachment points and a few boxes that need to be attached to the cabin side walls. There are also a couple of long sections which go on the ceiling of the cabin. The position is somewhat vague and I found the strip running down the center to be very difficult to position correctly. Mine ended up being slightly crooked, but after the fuselage is closed up it’s not visible.
The fuselage halves went together better than I expected considering all that stuff being on the inside. There were a couple of areas where I had to do some fairly aggressive clamping, but it all turned out good and the seams only required a few smears of putty and some sanding. The upper fuselage has several panels that are added along the spine, so that helps to hide some of the seams there. The instructions would also have you add the two-part canopy at this time, but I decided to leave that until the rest of the airframe was together. I chose to open up the cabin door on the port side of the fuselage. I found a very interesting picture of a group of what appear to be Russian airmen posing along the side of an Si204 with the cabin door open. I hope to do a diorama someday based on that picture.
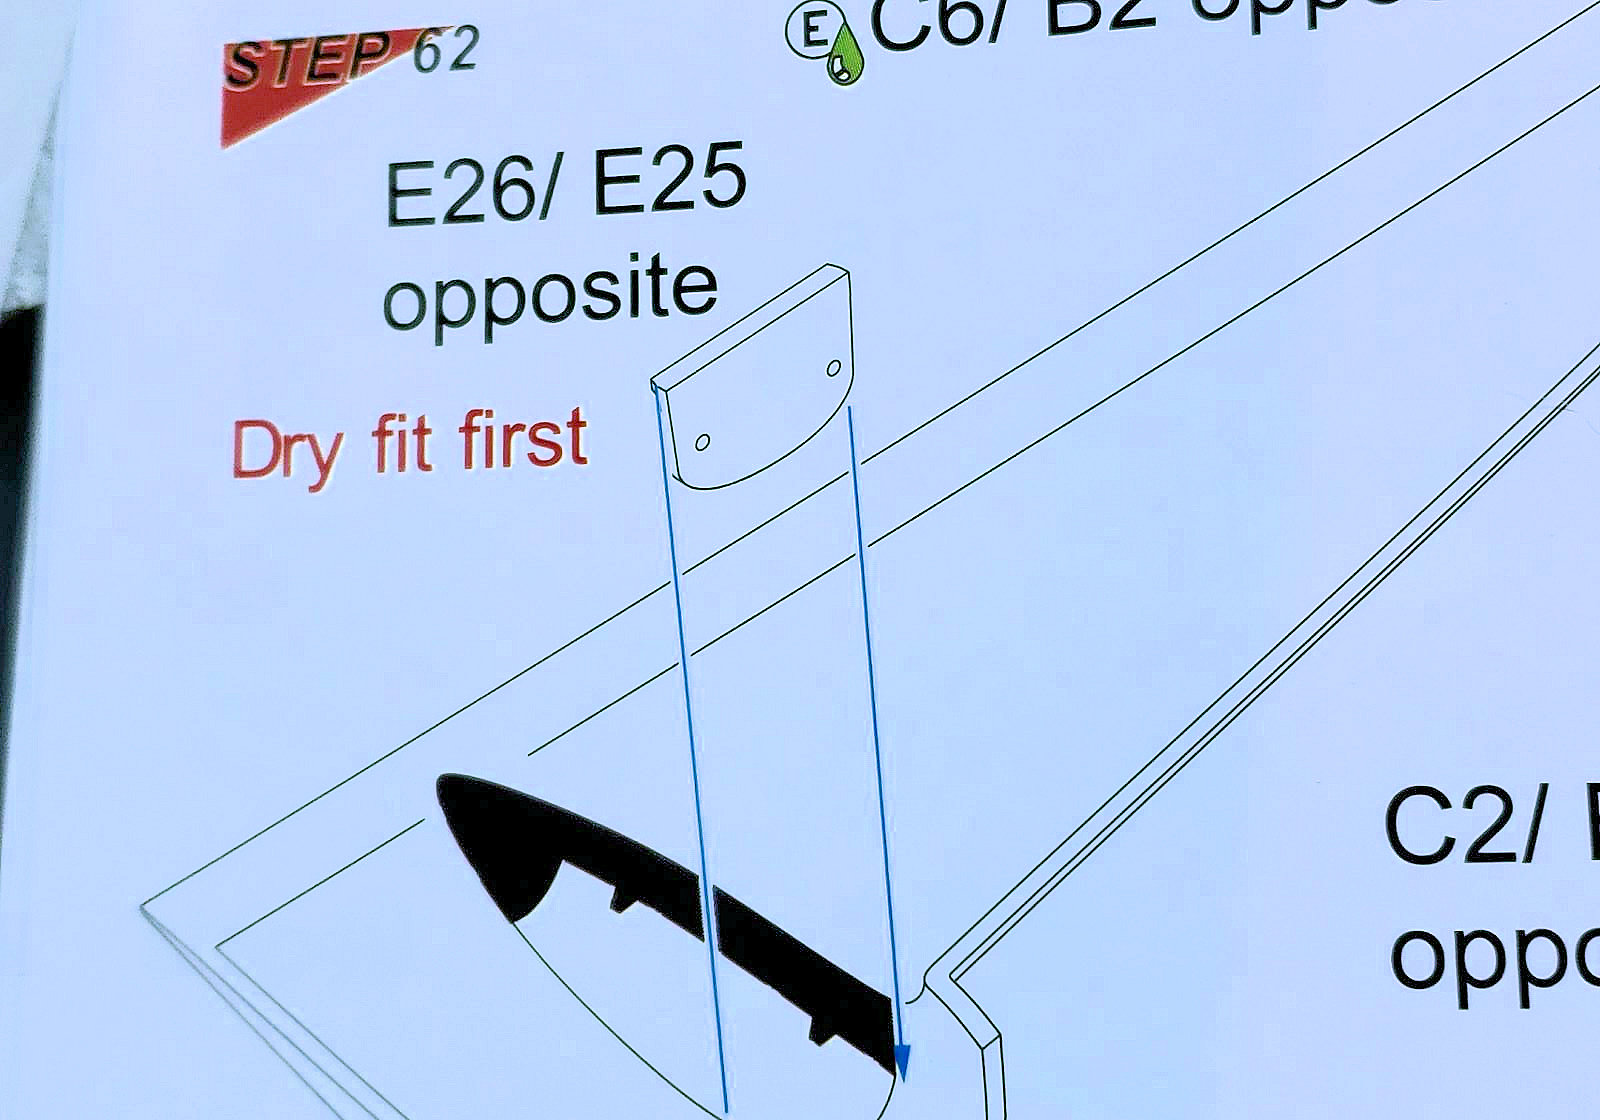
Next we turn our attention to the wings. The first step here is to glue in the forward wheel well bulkhead. There is a note in red on this step that says, “Dry fit first.” Hmmmm. That doesn’t sound promising. Well, the note was good advice because it took 15-20 minutes of sanding, test fitting, sanding, etc. Finally I achieved what I felt was a decent fit and glued it into place. The next few parts also require some guesswork and the whole wheel well assembly left me worried that my landing gear were not going to be straight.
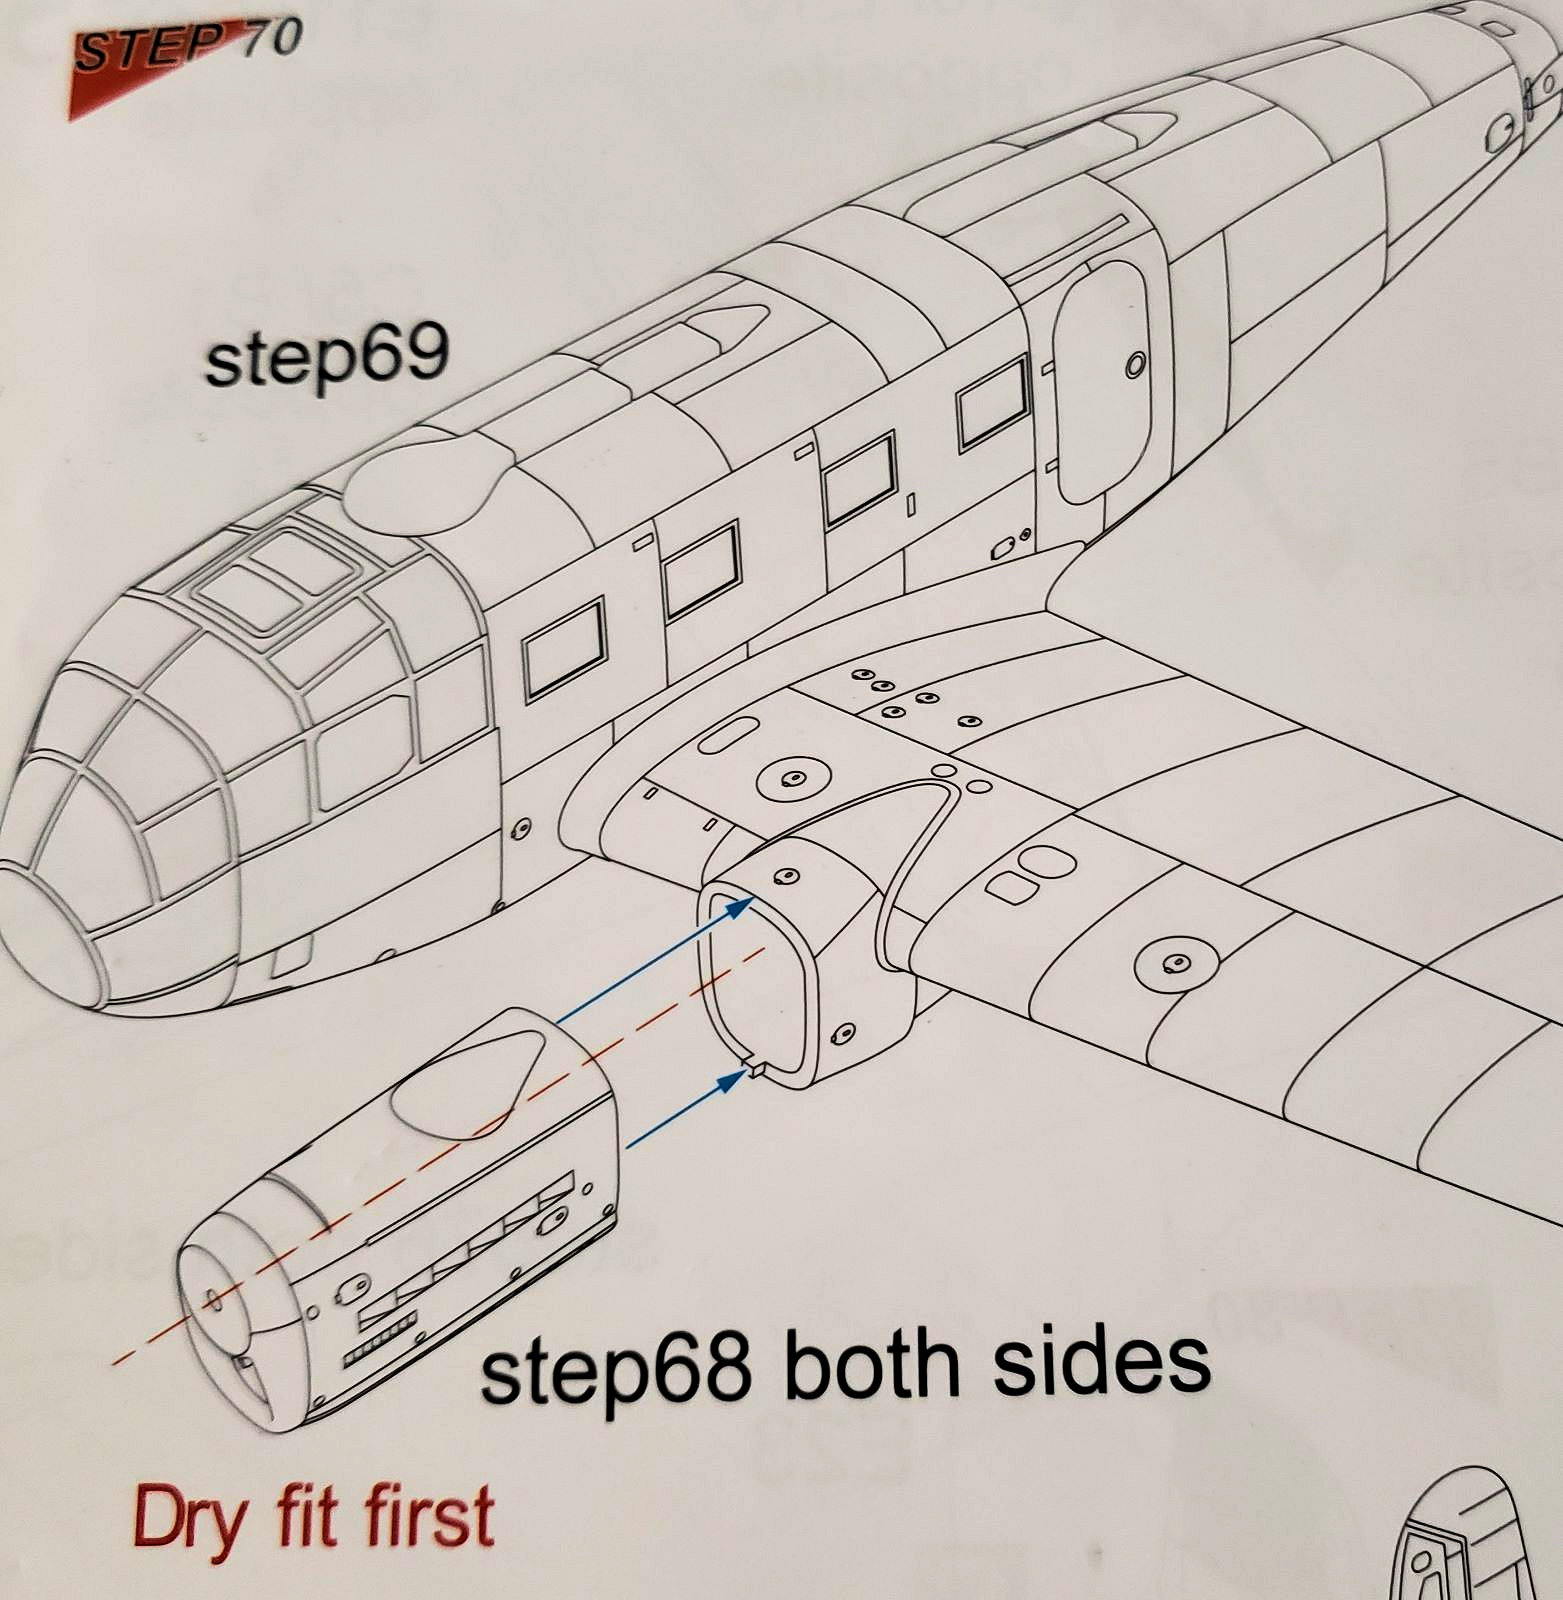
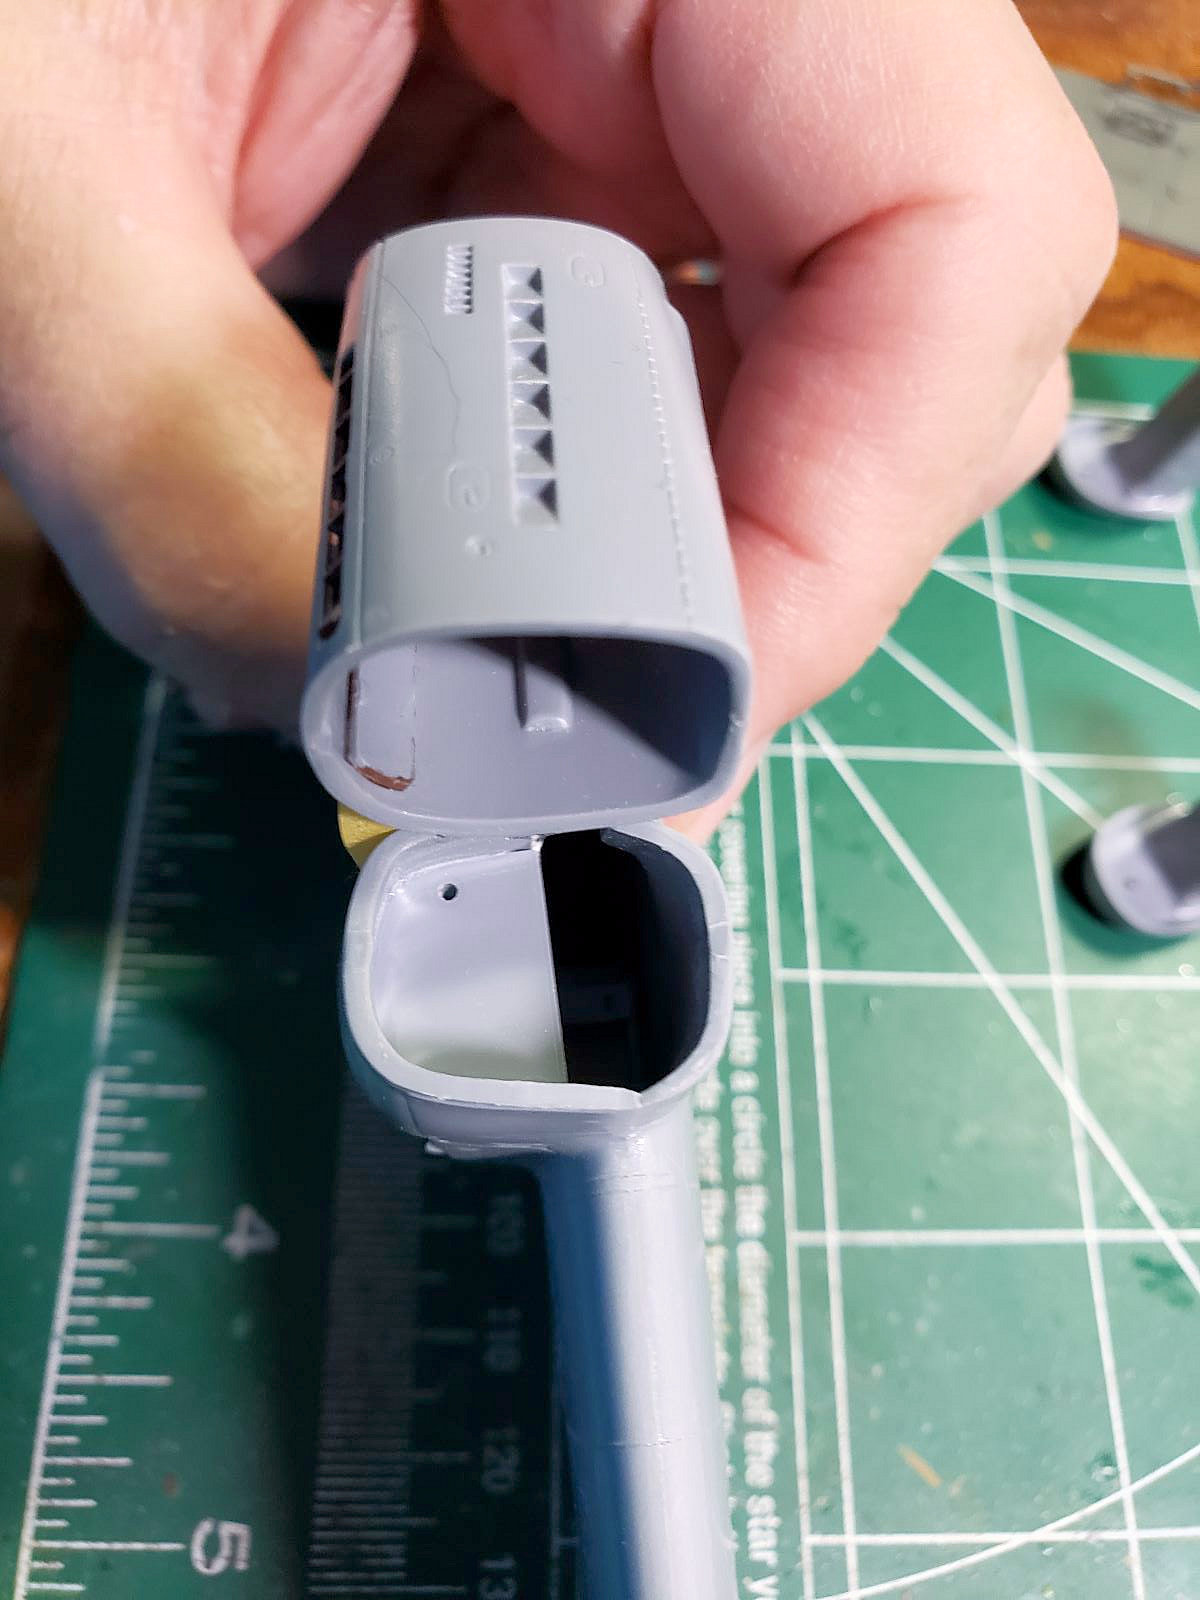
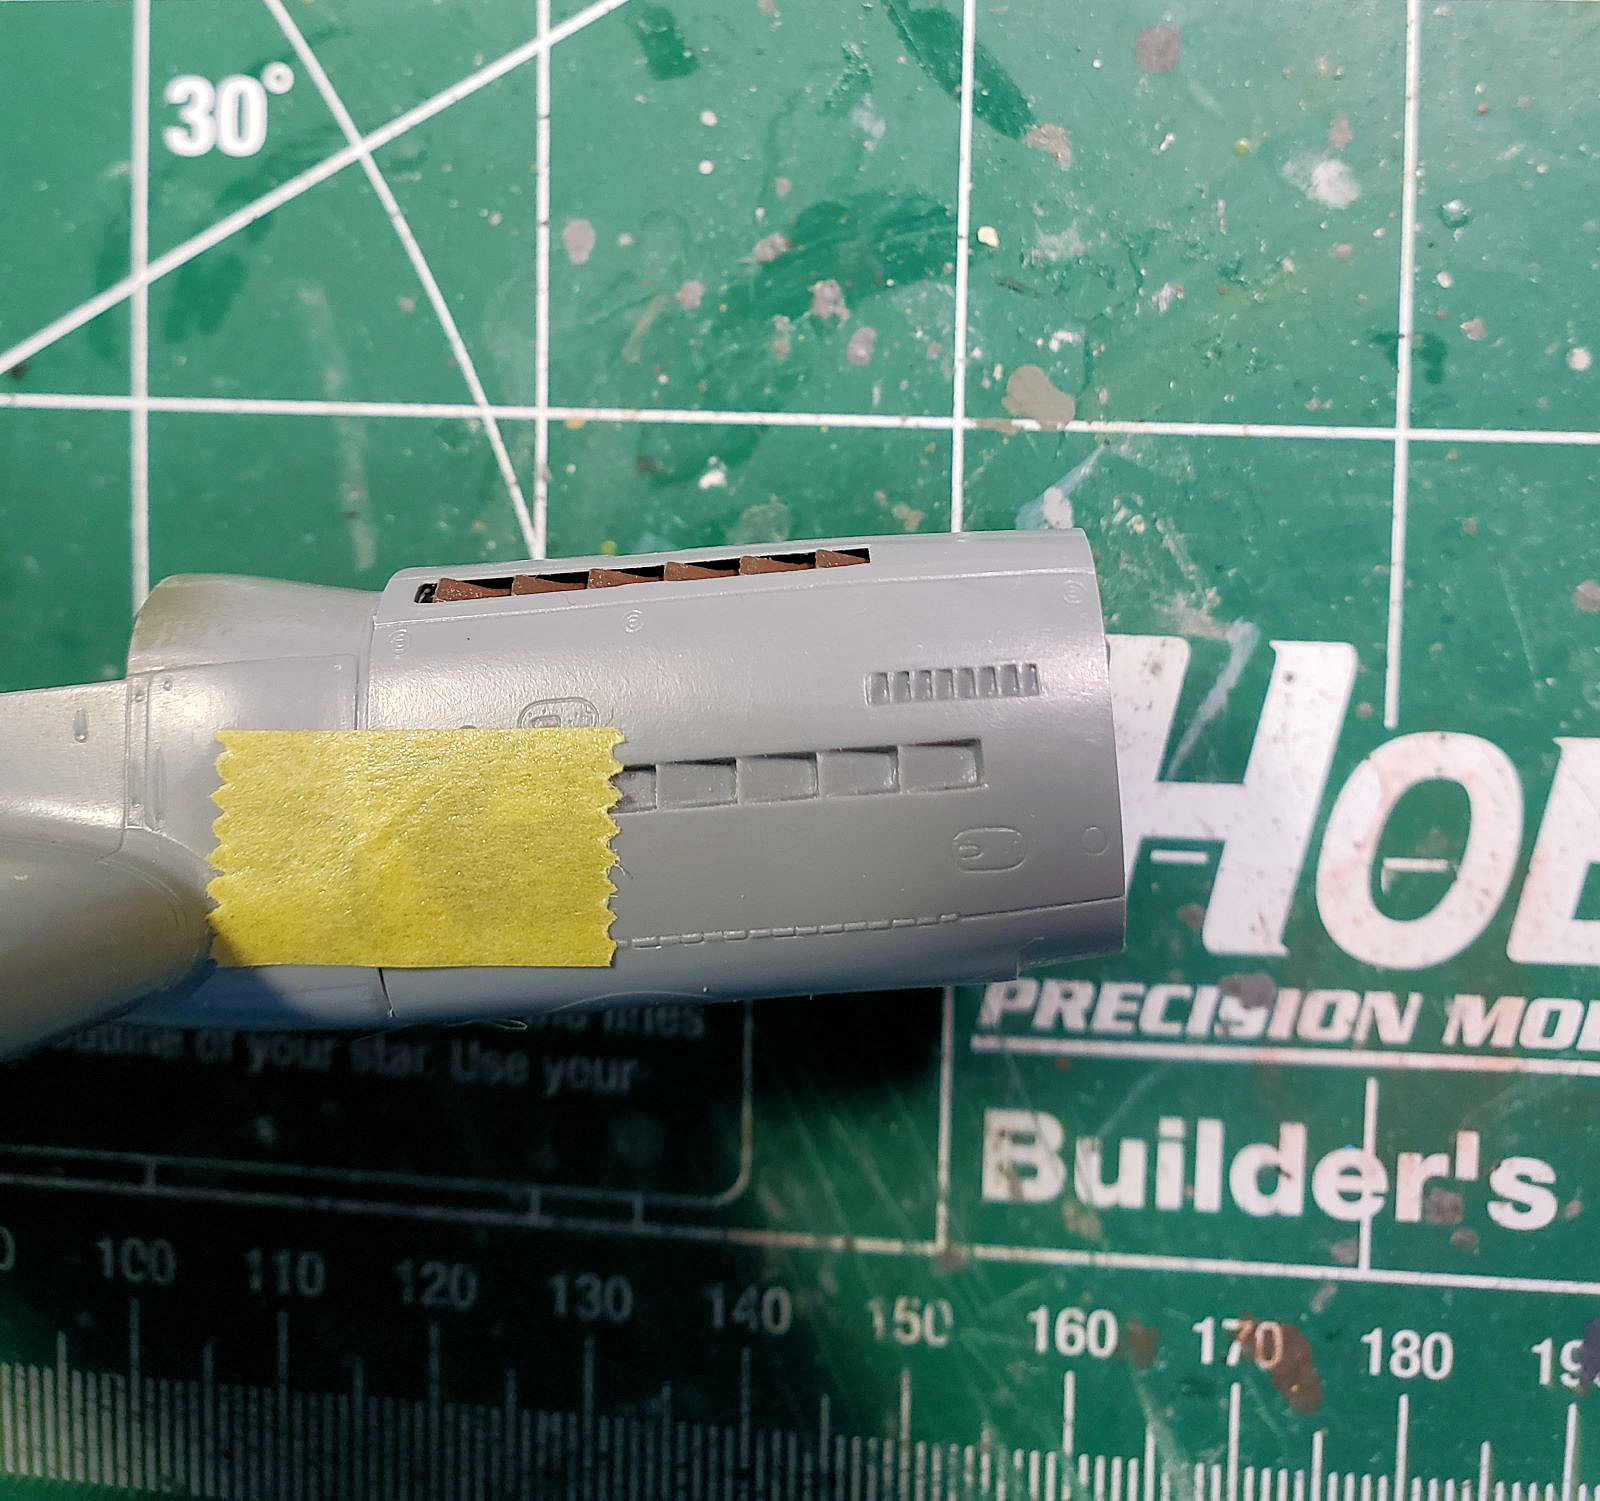
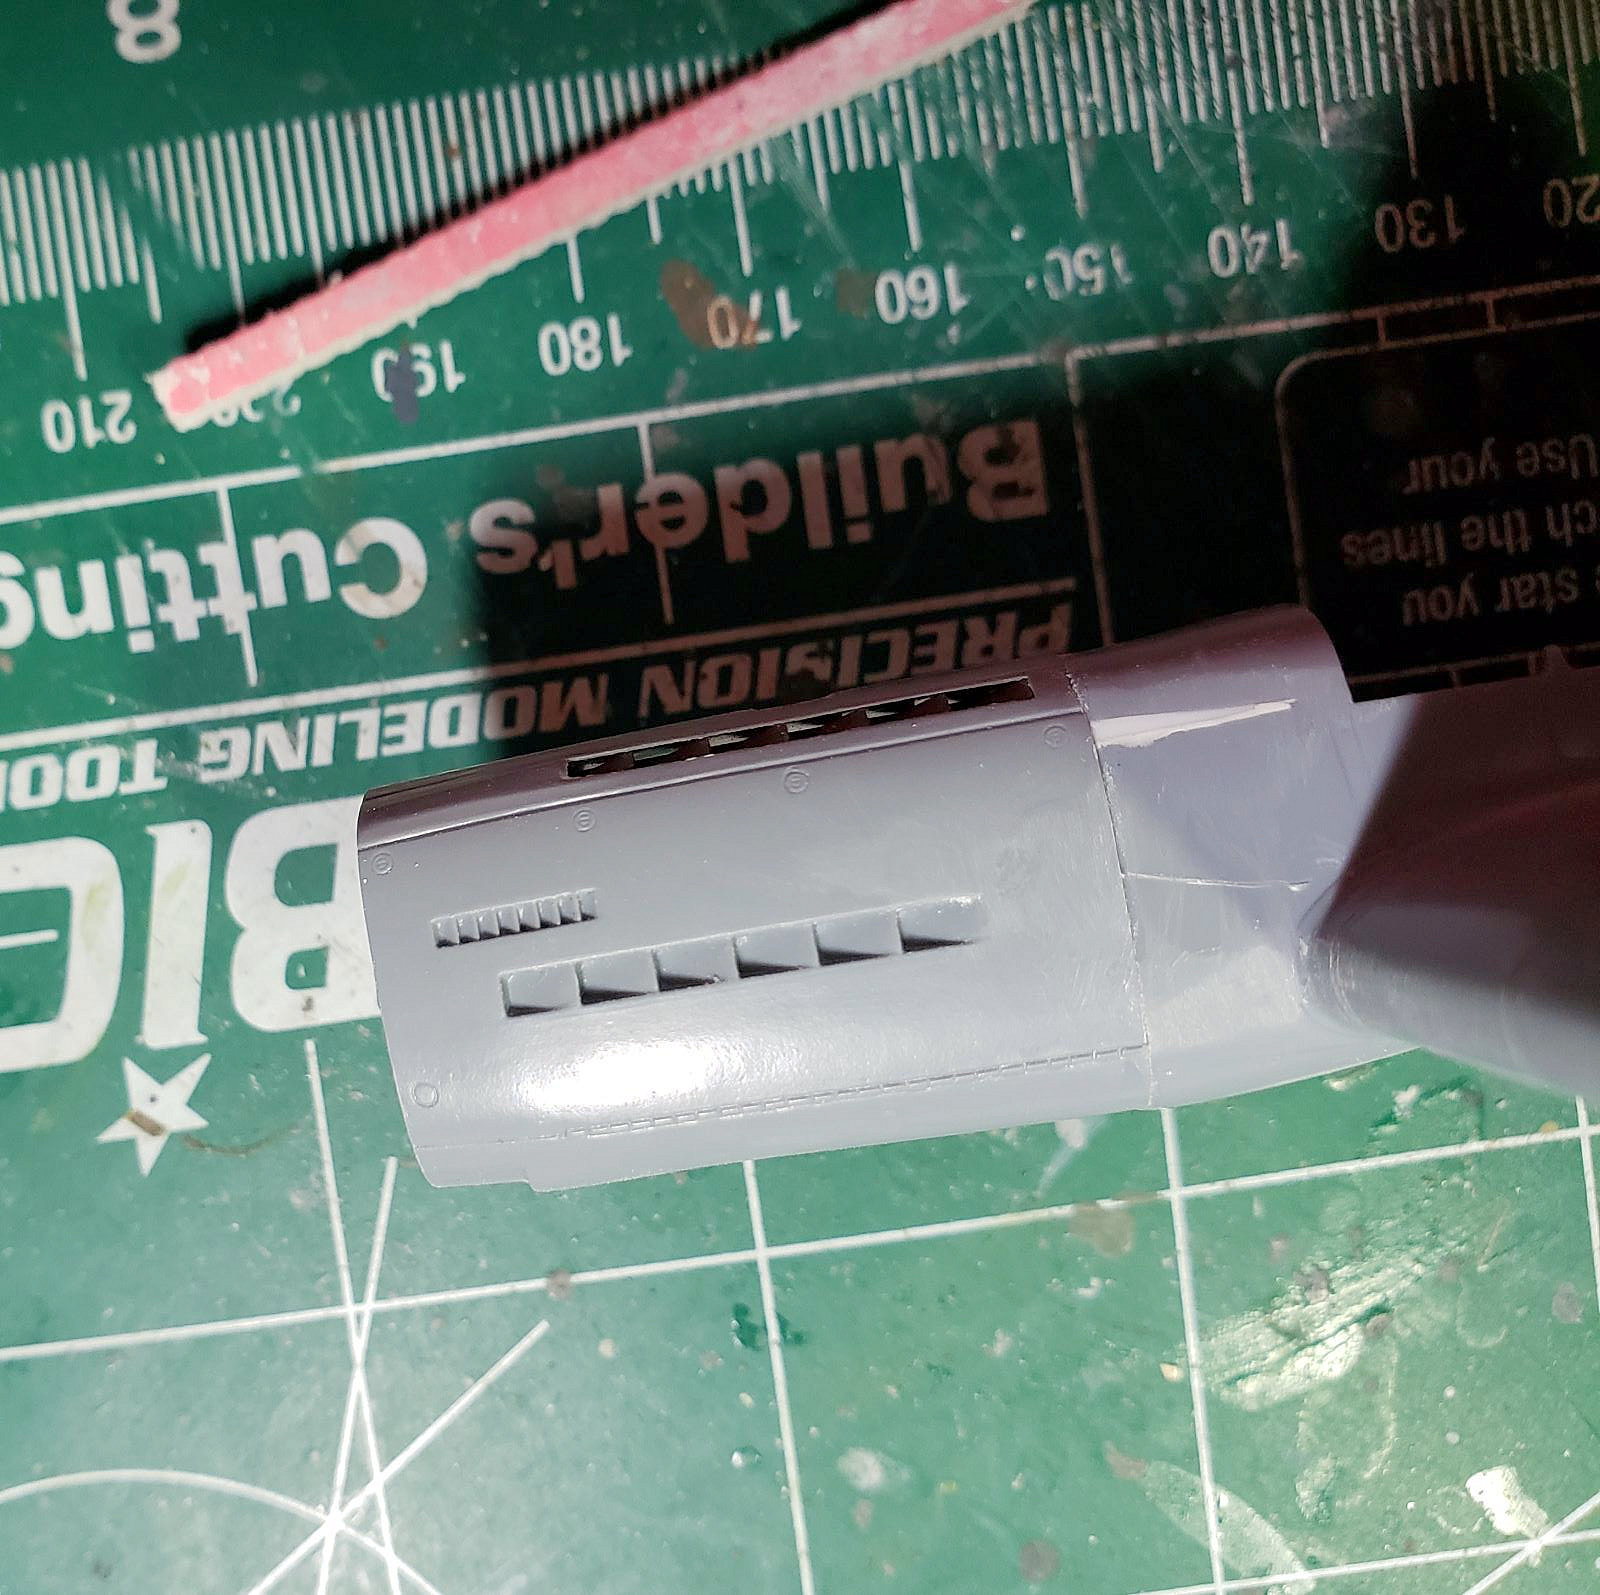
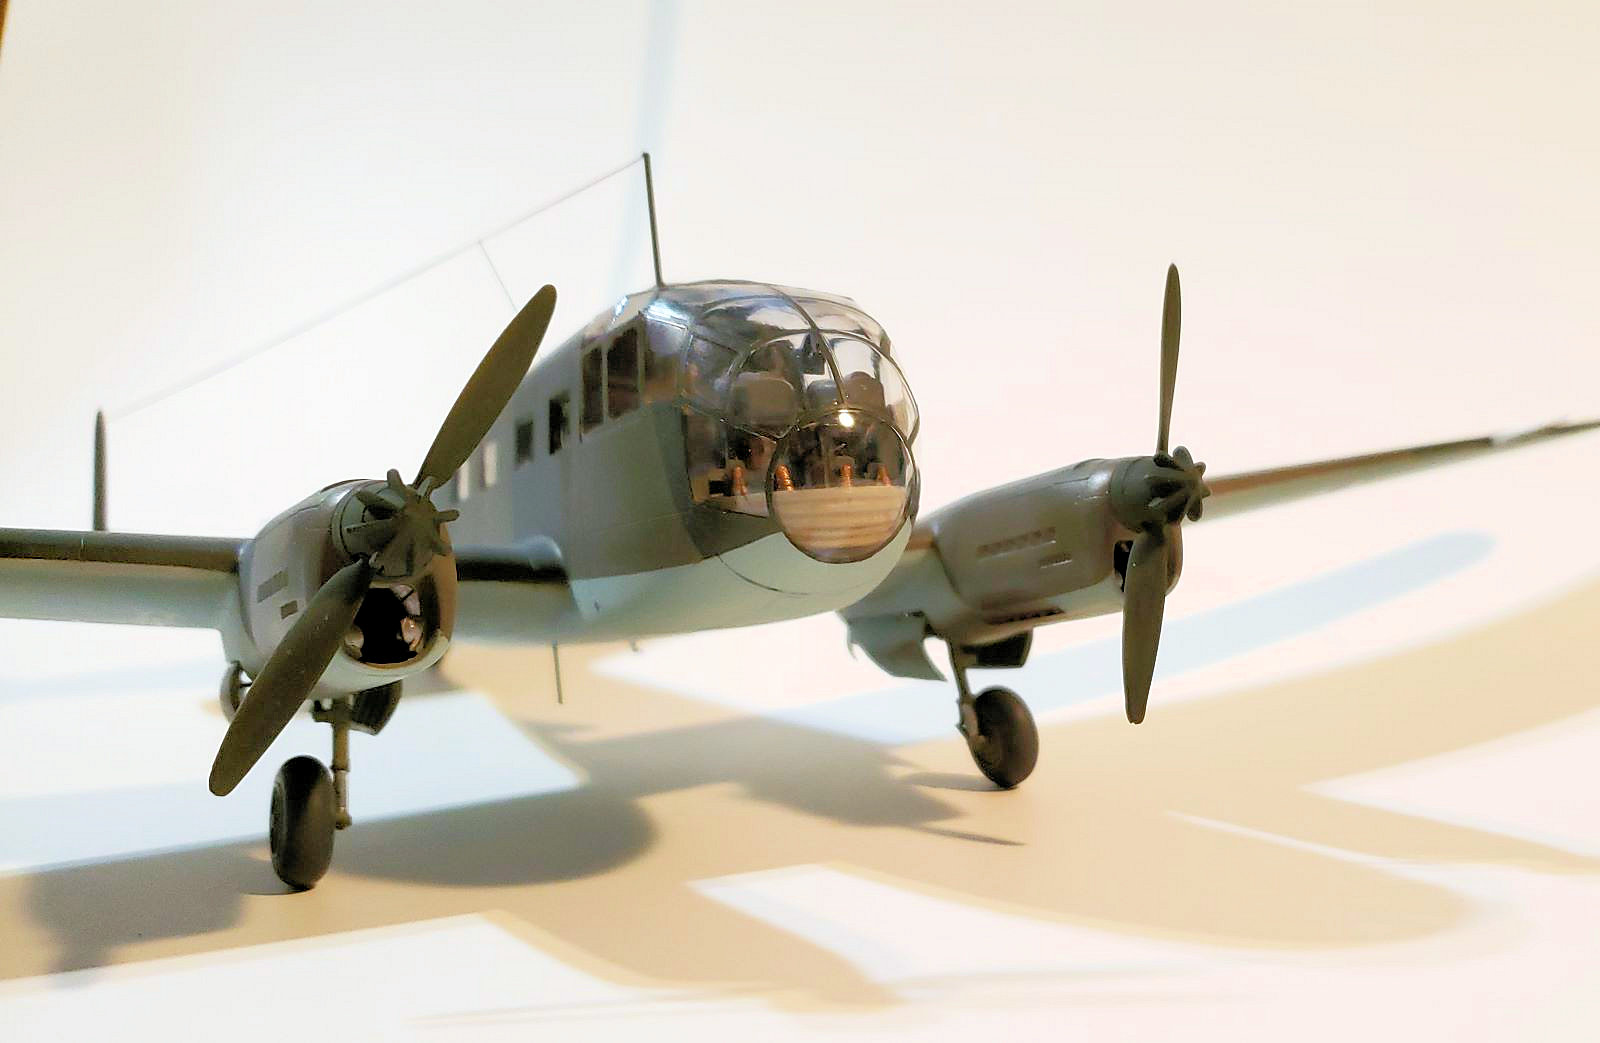
The engine nacelles have decent detail on them and in them and went together without much fuss. However, when they were offered up to the wings they didn’t match the shape of the mounting point on the wing. Looking at pictures in the Schiffer book, the sides of the nacelle have a bit of a step in them but the top and bottom should be flush. The forward portion of the nacelle was larger along the Y axis. I mulled this over for a day or two then came up with a solution. There is a panel line on the wing portion of the nacelle just forward of the wheel well. I cut along that panel line with a razor saw and then wedged a triangle of sheet styrene in the cut to force the lower portion to widen until it matched more closely with the engine nacelle (see accompanying pictures). I then aligned the engine nacelle and wing portion of the nacelle on the underside, glued them together and then used some Apoxie Sculpt on the top to fair them into each other. I was happy with the results, but lost some of the recessed detail in the process.
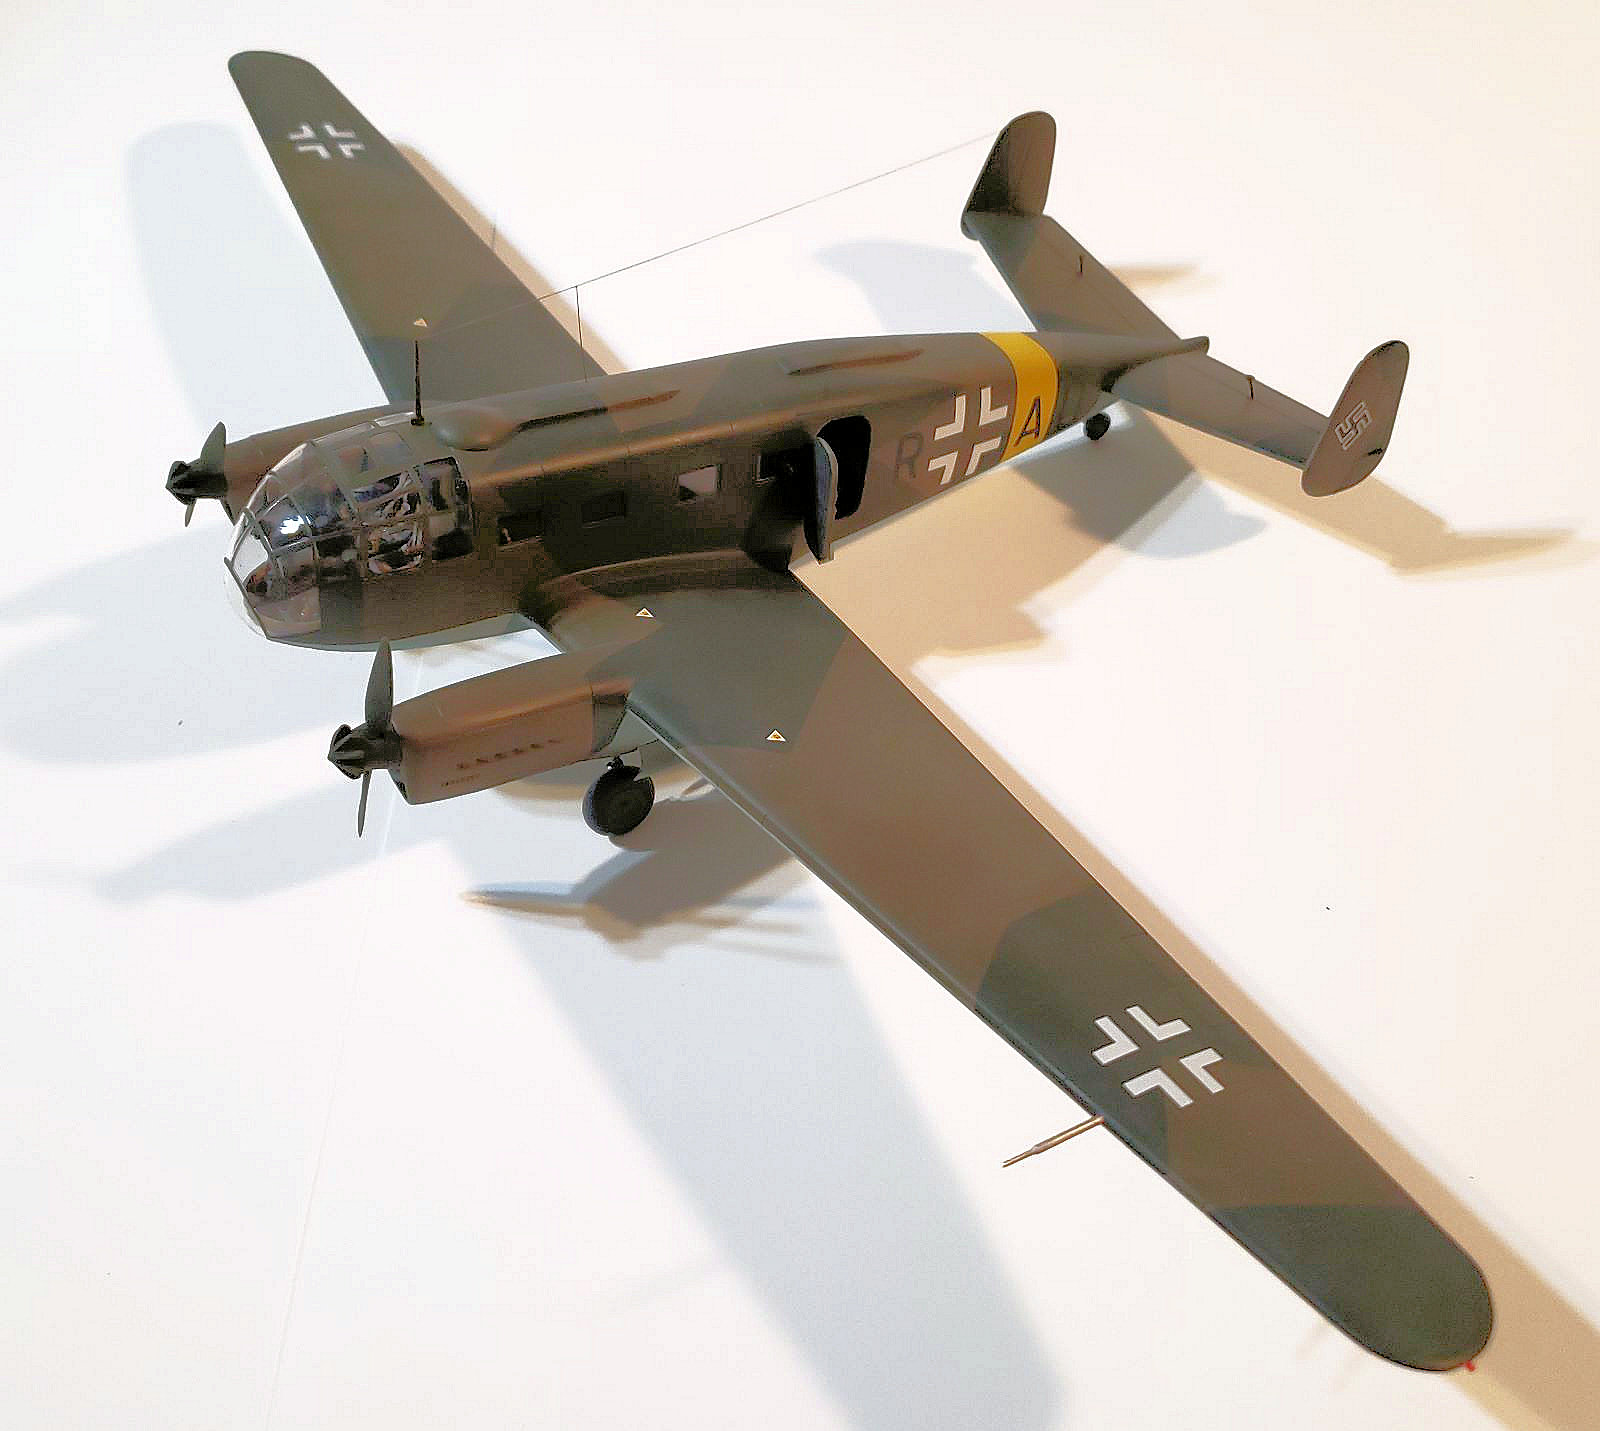
Once all that was sorted out, it was just a matter of attaching the wings to the fuselage, then the twin tail is assembled and attached. The instructions give a head-on drawing to help with getting the correct dihedral for the wings and tail. I left off the landing gear until after painting because I have a tendency to knock stuff like that off during painting and decaling.
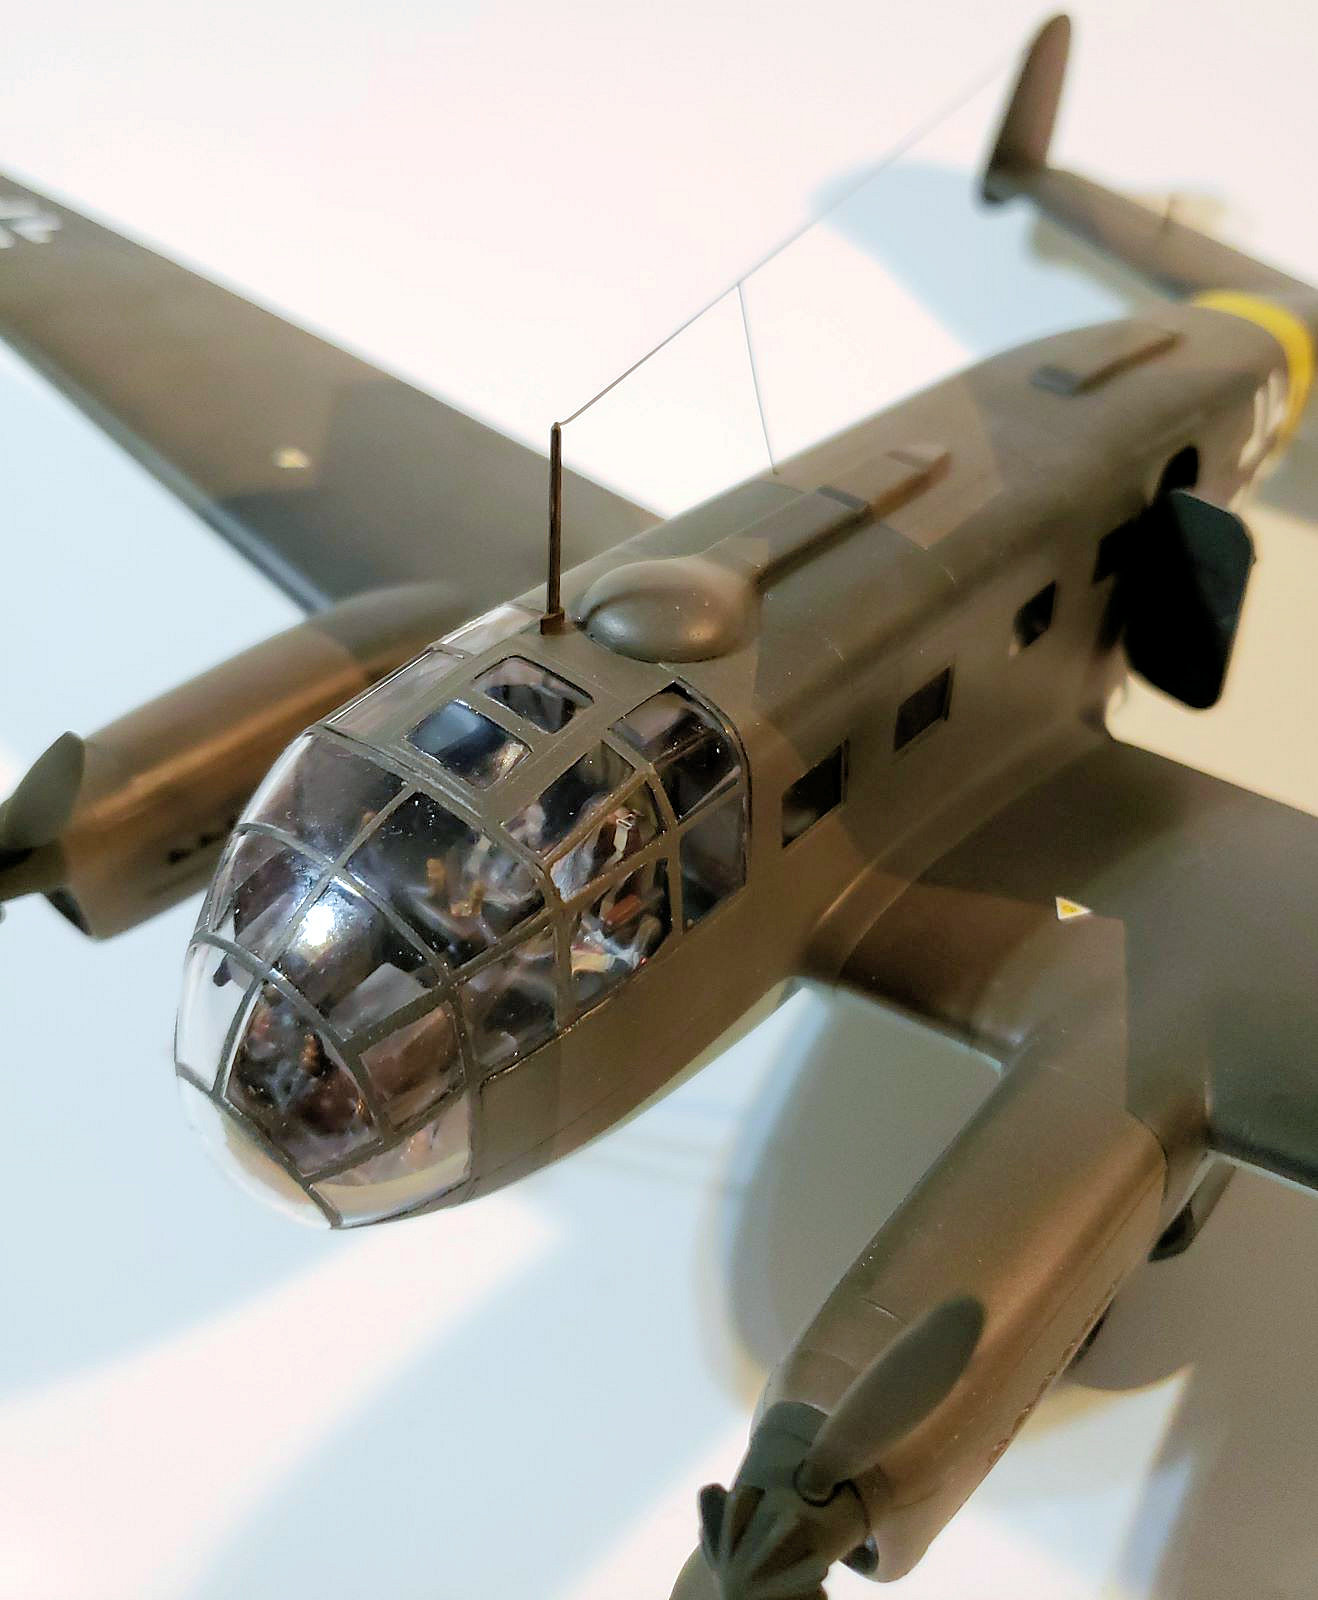
Now it was time to attach the canopy, which consists of the forward nose glazing and the rear part of the canopy. Here is where I ran into the biggest problem with the kit and I hope my sample was just a one-of-a-kind issue. The rear part of the canopy was misshapen. Not only was it too wide by about 2mm on each side, it did not have the correct curve to it to match the fuselage and the forward part of the canopy. It’s almost as though that part was exposed to some heat and got slightly warped. I thought about how to resolve the problem for a couple of days and finally decided to try dipping the part in slightly boiling water and trying to reshape it. I figured if I ruined the part I could buy another kit to see if that was a prevalent problem with the kit. Fortunately I was able to get the width problem solved with the boiling water trick, but never did get the curve to match up perfectly. Someday I hope to have access to another kit to see how the canopy looks. It should also be noted that there is an extra bit of plastic that needs to be removed at the front of the port side of the fuselage so that the forward portion of the canopy will sit flush with the forward part of the fuselage. It’s an easy fix, but an obvious flaw in the molding.
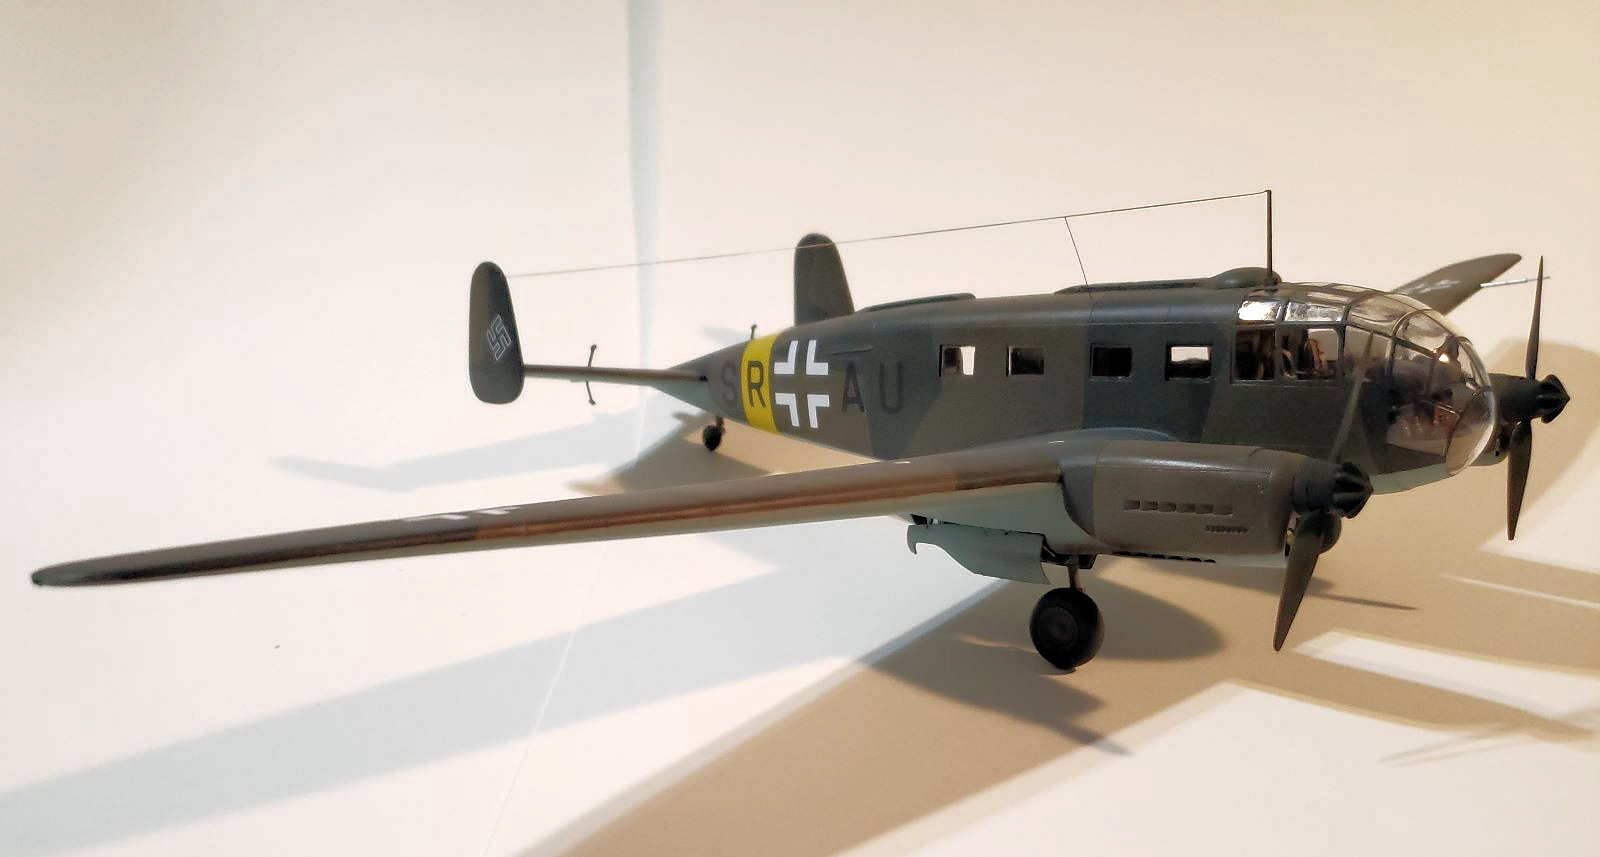
After masking the canopy with the Eduard masks, it was time for primer, paint and decals. I chose option A, which is a Luftwaffe machine based in France during the Summer of 1943 in the typical RLM 70/71 splinter scheme over RLM 65. The yellow RLM 04 fuselage band was painted first, then masked to apply the other three colors. The decals are by Cartograph and performed perfectly, as expected. There are no stencils provided other than four yellow fuel triangles for the upper wing. The swastika is provided in two parts.
Once all that was done, it was time to tackle the landing gear. It is well detailed and is made up of multiple parts, all of which need to have the seams cleaned up. Fit was pretty good, although I had to open up a few of the attachment points to get a better fit and allow for a little fine tuning. In the end my earlier fears about alignment were unfounded.
After that it was just a matter of all the fiddly bits being attached. I used a diagram in the Schiffer book for placement of the antenna wires rather than what was shown in the instructions, but I’m guessing there were different configurations depending upon how the aircraft was used.
Finally done! If you are a 1/48 Luftwaffe fan, then this kit is a must-have. It’s typical limited-run - lots of cleanup, test-fitting, sanding, filling and modeling experience required. But I think the results are well worth it. I am happy with the results and it’s something off the beaten path. I do hope that the canopy issue was just in my kit. I recommend this kit highly to experienced modelers who are interested in the subject. My sincere thanks to Special Hobby for the opportunity to review this great kit of an important subject. If you do obtain this kit there are lots of interesting pictures here - https://ww2aircraft.net/forum/threads/ebay-nc701-martinet-or-siebel-si204.42294/


Comments
Add new comment
This site is protected by reCAPTCHA and the Google Privacy Policy and Terms of Service apply.
Similar Reviews