
SH-2G Super Seasprite
History
In the early 1980’s the US Navy was looking to replace their old ship based helicopter fleet with something new as their current the helicopter at the time the SH-2F Seasprite was showing its age as it was approaching being close to 30 years old. They first looked into getting the new MH-60 but it was too large for some of the Navy’s ships. So with there being no newer options the Navy decided to just upgrade their existing fleet. The first prototype flew in 1985 which was a SH-2F fitted with two new engines. The Navy started receiving them in 1991 and finally retired them in 2001.
The Super Seasprite is also used by 5 other countries. Australia, New Zealand, Egypt, Peru, and Poland.
Initial View
Upon receiving the model you get a box with a very nice box art of the Super Seasprite in US Navy markings. Opening the box you find most of the sprues individually bagged. Everything in the box seems different than in previous issues by Kitty Hawk. From the color of the plastic to the bags the sprues are in. Maybe this means a change in manufacturing. Upon debagging the plastic feels differently, more brittle and not as soft as before. The moldings also look thinner. The clear parts look very nice with no fogging or scratches. But they are not in a nice box like I've found in other boxings. There is still the issue of having some very large injector pin marks but the surface detail is phenomenal. At the bottom of the box under everything's the instructions which are the standard booklet style and seem very easy to follow and what's nice is you can get through the whole build without having a random fold in the center with some of the marking options. Also under everything is a small bag with the Photo Etch and the decals. The PE has mostly vents and seat belts. The decals look very nice and what's most impressive is the Dragon decal for the Polish Navy marking option. This is probably the one I'm going to be doing.
Assembly
I started by doing some initial test fits. I first did the main fuselage halves since these aren't on a sprue. I found some slight misalignments but it should be too hard to fix.
I started with the interior. The floor is strange as it has diamond plate molded on but that isn't the side you glue everything on. So you'll never see it. The biggest issue I found was there were a lot of injection pins on the floor that all need to be filled. I also included the new Eduard Photo Etch interior set which replaces the floor in the cockpit, bulkhead behind the seats, the seat side walls, rudder pedals, instrument panels, and some other small bits that add some great details. When putting the PE floor on some of the holes are misaligned and others are missing. Next I put on the rudder pedals which replace one of the kit parts. Once all the PE was on I started assembly. All the fit was good, with little to no fuss. Just some flash in the holes. The only issue was getting the parts off the sprue, a lot of the skinny parts were bending or breaking since the sprue gates were so big and plastic so brittle. The seats seem to sit a bit high as the control sticks almost rest on the seats.
The rest of the interior was simple. The rear computer is a nice touch to the interior and it comes together with good detail is removes all need for resin upgrades unlike the previous earlier version of this helicopter which didn't include anything aft of the cockpit. Eduard also released a Photo Etch set for the aft station which includes cargo nets and shelves. This would be a great addition of detail to the interior. Once the interior was finished I paint the interior walls of the fuselage halves and installed some of the glass. The glass at the front will require some clean up on the edges but it's not too bad. Closing the fuselage halves went fine. No huge gaps at all and the interior didn't fight the halves going together at all. Once the fuselage halves are together you can add the front windscreen which is comprised of 4 different clear parts which fit together fine, the best fit I see out of the 4 is the two big pieces. Once the windscreen is on you can add the engine pod to the top. The bubble consists of 6 parts along with some PE parts included in the kit. Once the pod is made it goes on snug and it almost doesn't need any glue.
Putting the rest of the glass in all the doors was tricky. It seemed like the recess for the glass was too small for how big the glass piece. And this wasn’t just for one piece it was for all of them so you are going to need to do a lot of sanding on the edges to get these pieces to fit. Then when it came to having a door closed (I chose to have the left cockpit door closed ) there was more sanding on the edges that had to be done. This was a combination of the door being too big and the windshield overlapping. Eduard masks are a great extra to have. They help extremely with the side windows since they bubble out so much, some seem a little misshapen but they do the job and they do it good. The landing gear goes together great. It fits in super snug and even when just dry fitted the main gear sits solid. I don’t believe metal landing gear is necessary. The assembly of the underside detail is straightforward. The radomes go on nicely and everything has an alignment hole and i couldn’t find any fit issues. The main rotor went together well. I needed clamps for the blades being attached to the hub but I feel that’s something with every helicopter kit. The aft rotor was a different story, you build up a small gearbox that goes on top of the tail, but the instructions say it consists of 3 parts when really its 4, the 4th being F58 which is the rotor shaft housing which attaches the aft rotor to the gearbox. Next, there is a small hub piece that goes over the main hub that is supposed to have 5 shafts. Mine didn’t have a single one. I don’t know if this was broken during bagging or just from being tossed around or it just wasn’t molded on there. Either way, it wasn’t there and it looks weird without it. Finally, part F58 is supposed to be hollow allowing the aft rotors shaft to go into but, it’s not, so i had to drill that out. The aft rotor was definitely the most annoying part of the whole build.
The Photo Etch included with the kit is very nice. When you assemble the engine bubble (That’s what I call it) you’ll notice there is a bunch of square cut outs all along it. These are filled over with really nice PE mesh that fits in perfectly. Also when building up the rear of the bubble there is a large gap created but you won’t need to worry about filing it because 2 PE panels go right over it completely hiding the gap. The last few pieces added were the external fuel tanks which go together really nicely actually but are a little flimsy when comes to mounting to the fuselage, and then the pylons for the Maverick anti-ship missile (or missiles if you use both) and the mine detector.
Painting
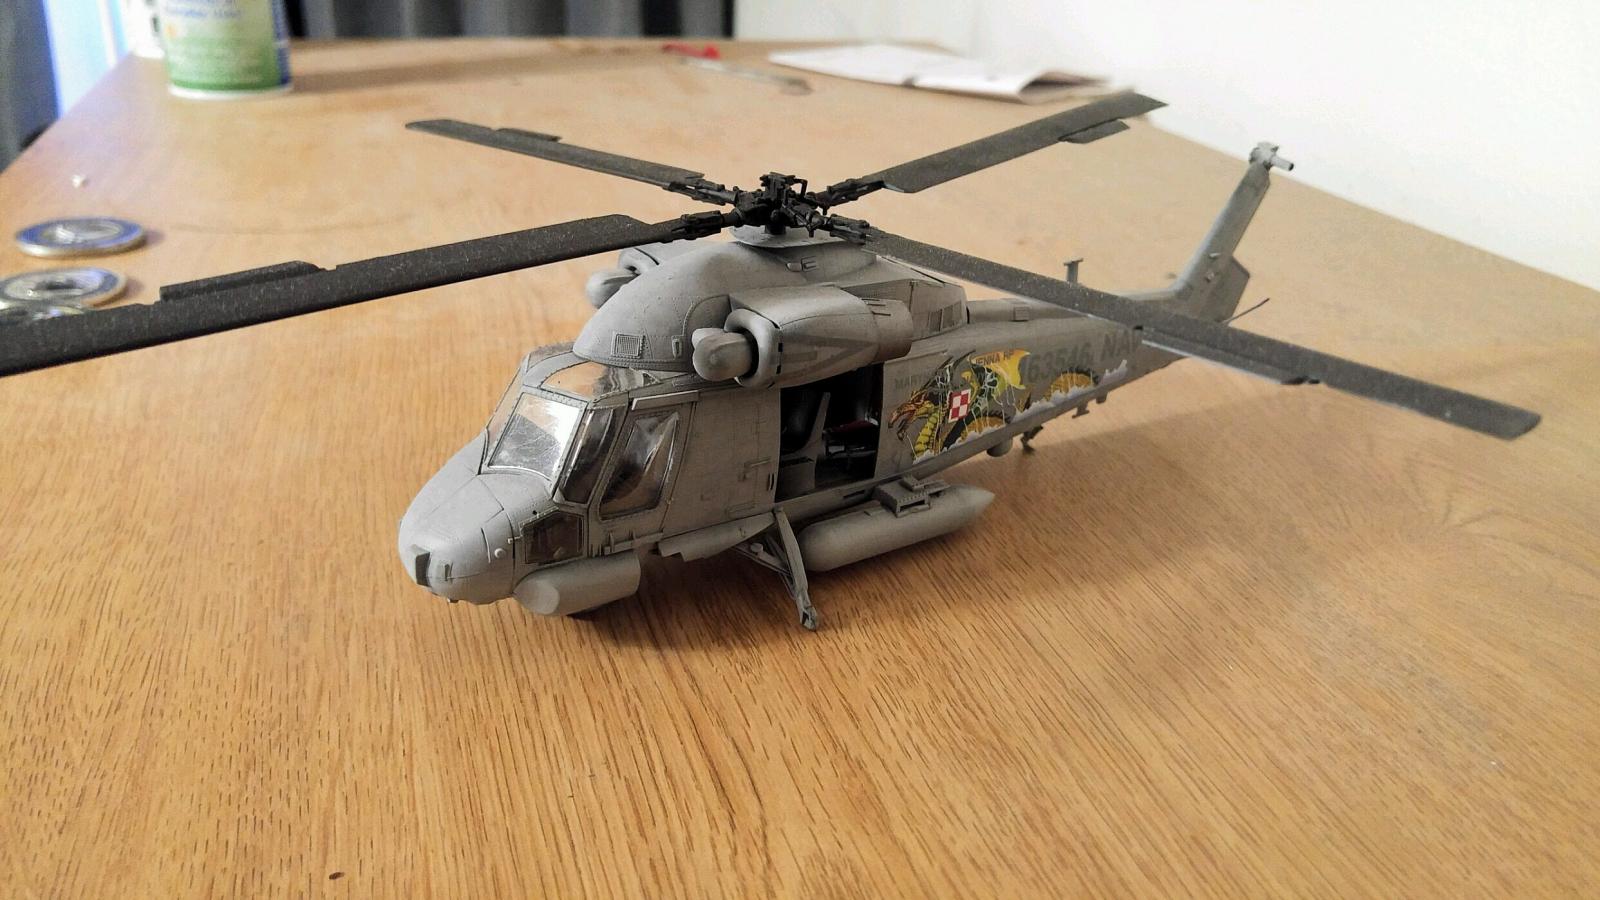
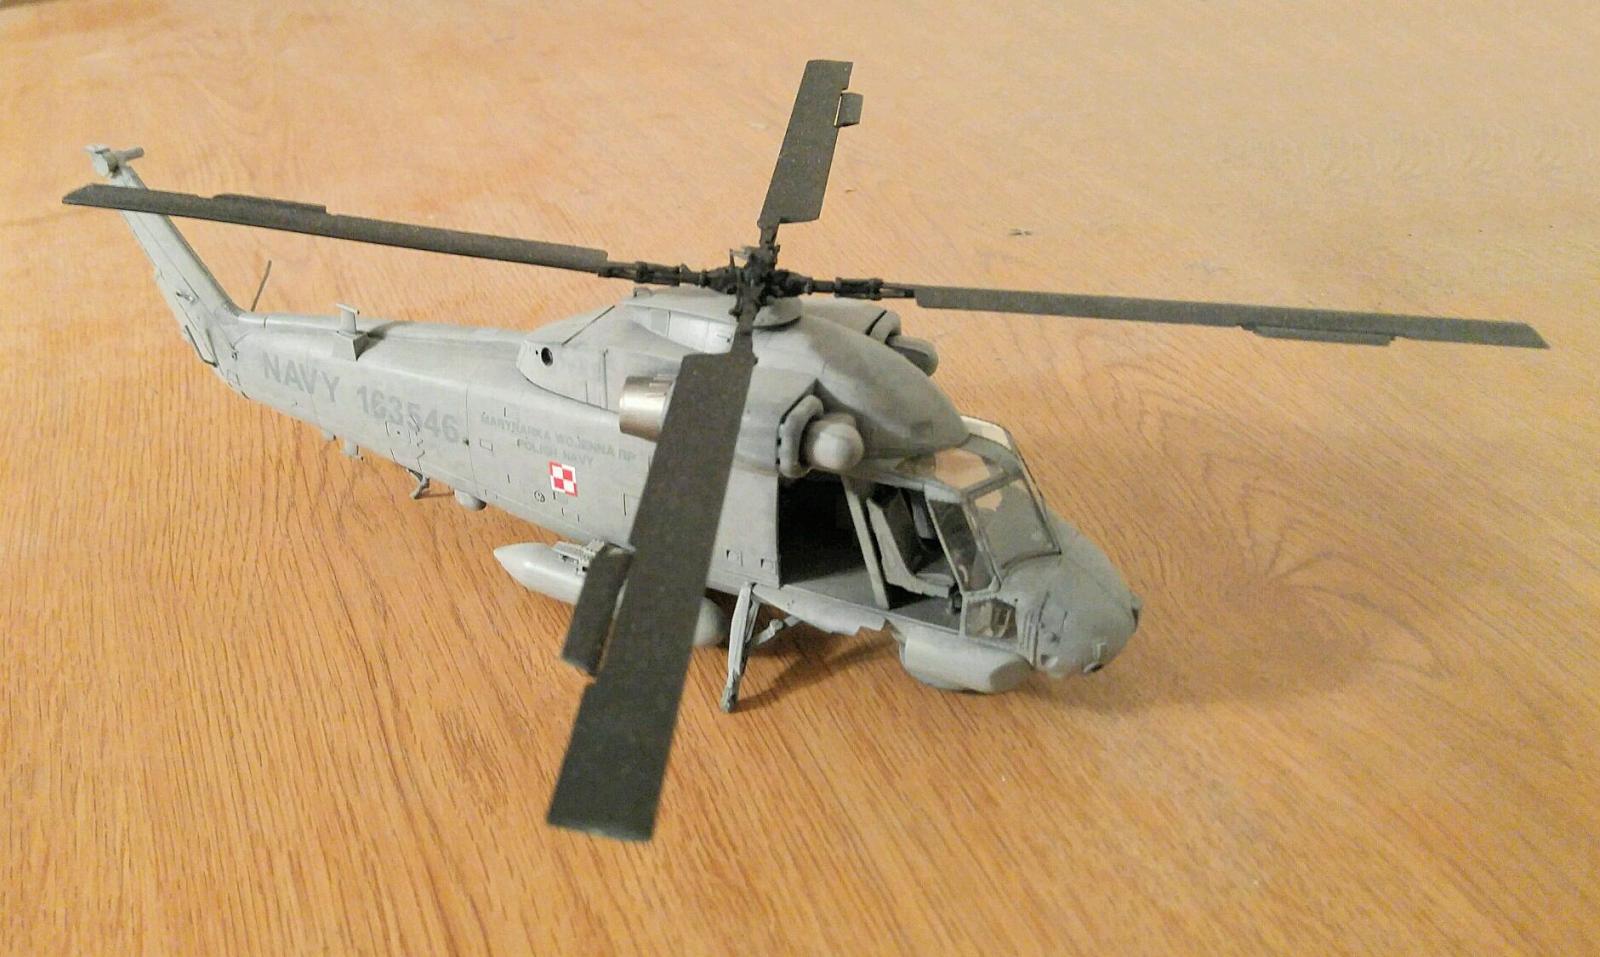
I started this by priming the model in my favorite primer Mr. Surfacer 1500. Next i started with the top color which was Tamiya XF-19. I wanted to do a pretty weathered aircraft as i was doing the Polish version and by the time the Polish Navy received their 4 they had already seen a lot of use. I started with doing a marble coat over the black primer. This allows me to achieve a very random weathered effect. To give a brief explanation to how this process works, you randomly put scribbles all over the aircraft of the color that it’s going to be, once that’s done you apply light coats of the paint over it. The end result came out nicely and next came the decals. I’ve never had any issues with Kitty Hawk decals as far as being too brittle and falling apart and it reacts to Solvaset nicely which is my go-to decals setting solution. They may take a couple applications but they set super nicely in the end.
Closing Thoughts
This is not a brand new kit. This is the SH-2F kit with an added sprue for updated engines, and aft avionics. Which I think is the biggest disappointment. I was hoping that Kitty Hawk would have revised the tooling of the old SH-2F kit and made some fixes to things such as sprue gate size. Now, my end pictures don’t look good, at all. I had an accident while moving and the model suffered which caused it to lose the tail rotor, and stabs and also a side door. But I have to say in the end, I would definitely build one of these again.
My thanks to Kitty Hawk for the review kit. Recommended


Comments
HSL94 Version
HI,
I chose the HSL-94 Version, because it is actually one of the aircraft I flew on when I was with HSL-94.. good work..
Finished build?
Nice work with the added interior details. A simple question: why are the wheels missing or are they intentionally omitted? Thanks.
Model was damaged and snapped the tires off
Since his deadline was coming up, he submitted as is
IPMS/USA
Add new comment
This site is protected by reCAPTCHA and the Google Privacy Policy and Terms of Service apply.
Similar Reviews