
Sea Vampire F.20 with Scale Aircraft Conversions Metal Gear
Included with this review
- Scale Aircraft Conversions - Vampire/Sea Vampire Landing Gear (2 sets) ; Stock #: 72069, MSRP: $13.95
Cyber-Hobby’s Sea Vampire kit is a variant based on their Vampire FB.5 kit, with the inclusion of additional parts unique to the carrier-capable version. All parts are beautifully molded and the engraved panel lines are sharp and precise. (See Parts photo) The use of slide molding allows a huge amount of depth in the parts, which shows up in the hollow tail booms and underwing fuel tanks. The kit gives the builder the option of retracted or extended gear, open or closed canopy, and raised or lowered flaps. The heart of the aircraft consists of an upper and lower half, which makes up the fuselage and wings. Sprue gates for several parts are on the inner mating surfaces so when they’re trimmed off there’s no danger of marring the surface detail.
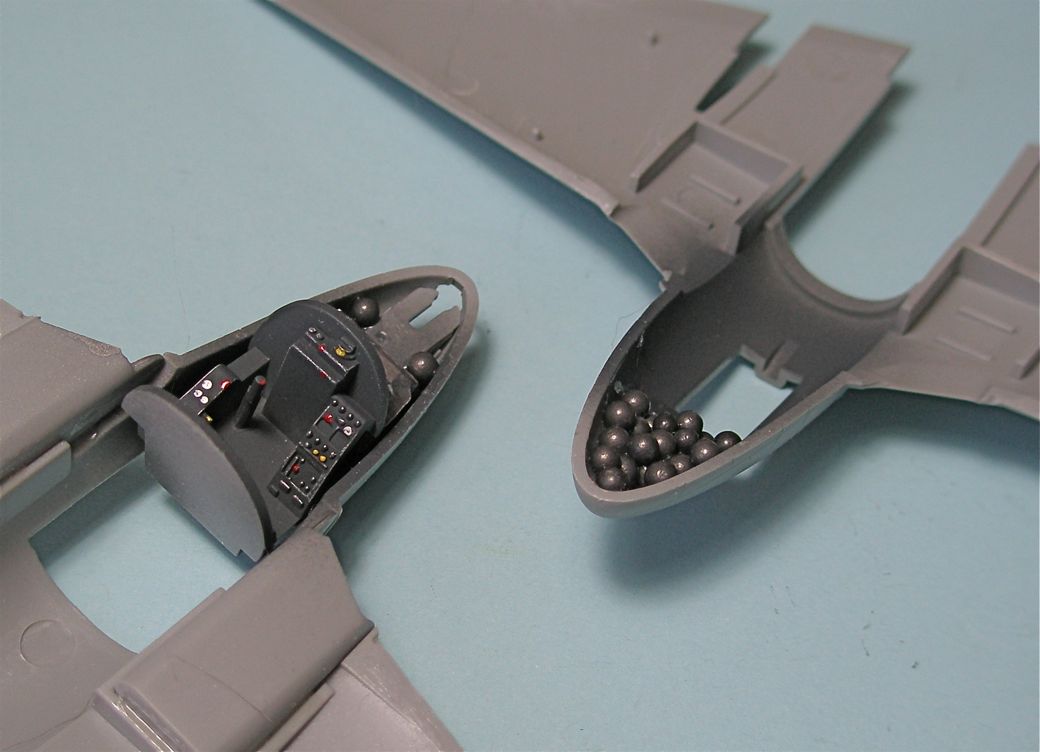
The cockpit is an odd assembly, with a nice right-hand console, but nothing on the left side of the cockpit, nor any sort of forward instrument panel. The seat seemed a little short when installed in the cockpit tub, so I added a spacer beneath it just to raise it up a little bit. There’s sufficient space in the nose for inclusion of weight to prevent the model’s becoming a tail-sitter. The kit instructions are a little short on color information for various parts, the interior being one of them. British aircraft of this era---the 1950’s---used black, but I used Extra Dark Sea Gray for mine just to avoid the “coal hole” look; (See Cockpit photo) the photo shows my nose weight (bird shot mixed with white glue) and the cockpit tub. I added a couple dabs of paint to the left and forward console to make up for the kit’s not having any detail there.
I’ve read several reviews of kits where their builders stated that they didn’t have to use filler, but this is the first one I’ve built where that was the case in many instances. The parts unique to the Sea Vampire---making up a large expanse of both the upper and lower fuselage---click into place and leave no gaps. In fact, I was to discover (happily) that if the sprue nubs weren’t completely removed, lots of the kit’s parts didn’t mesh correctly---they were molded that precisely.
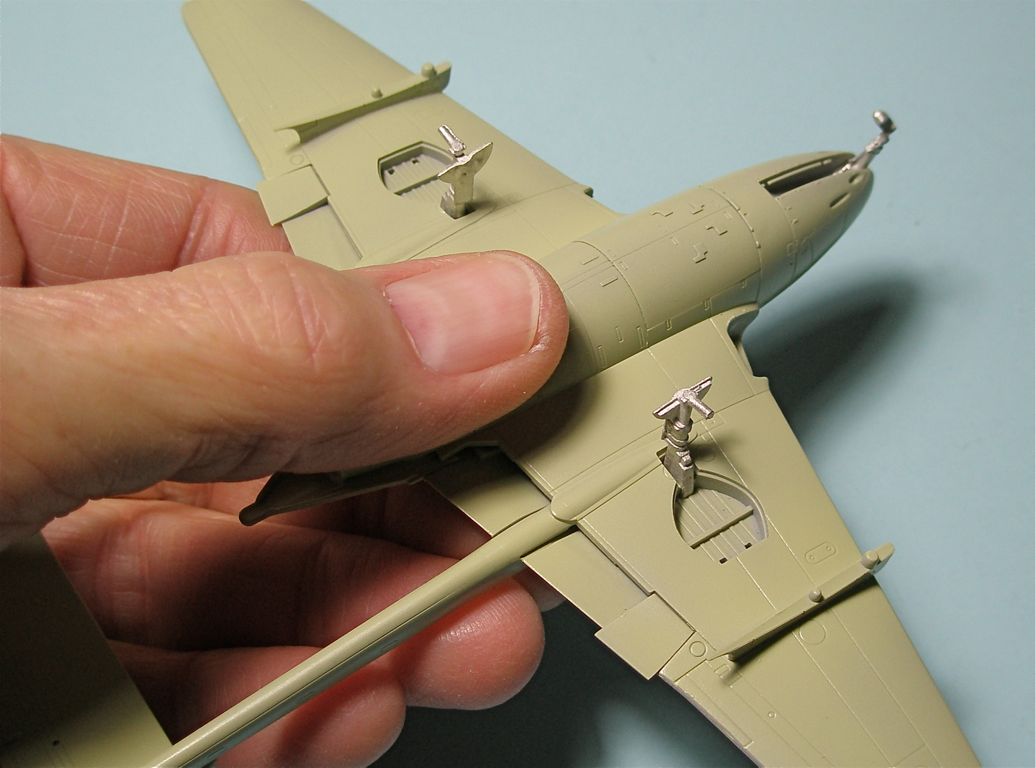
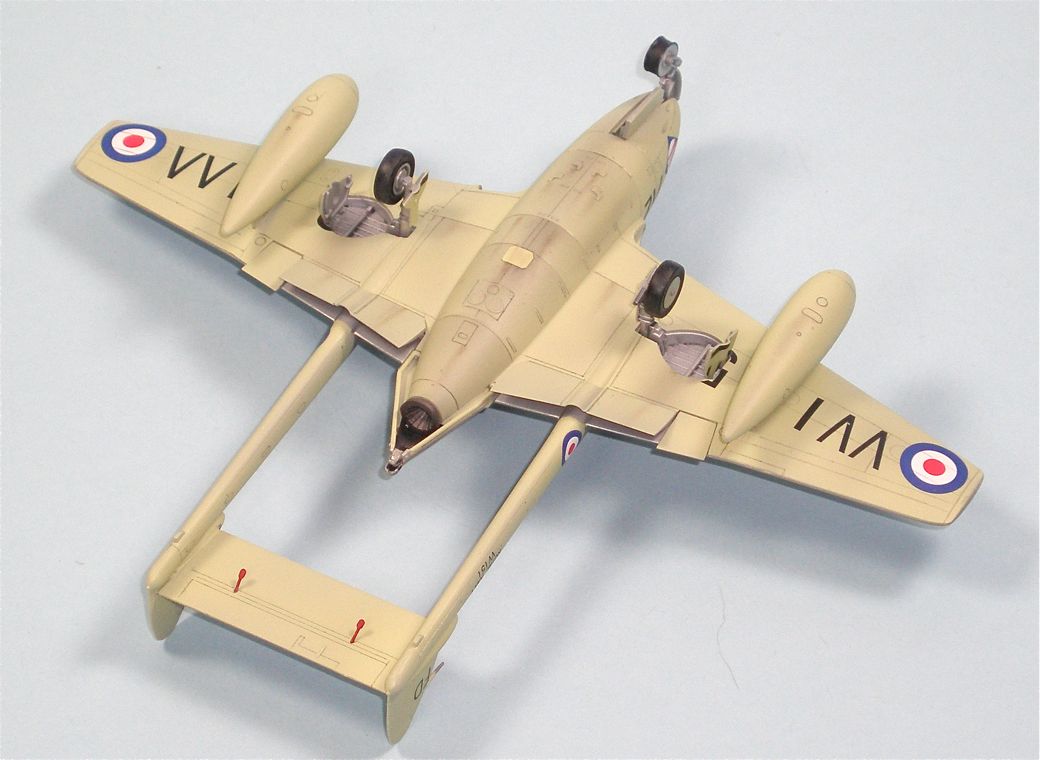
I reviewed the Scale Aircraft Conversions replacement metal landing gear for this kit, so incorporated it during the build. The white metal parts dropped into place just perfectly and I appreciated their appearance---no pits, no pockmarks. (See Gear photo) The axle for the starboard main gear was slanted downward a bit, so I bent it back level (carefully) and the cleanup of flash on the parts was minimal. The SAC offering comprises two complete sets of the struts themselves, but no wheels; the kit’s are used here. After ensuring the parts would fit, I removed them for installation after the build was complete. The nose gear is comprised of two pieces because the fork has to sandwich the nose wheel in place. The SAC gear is petite and well-done, but it won’t be of much help in weighting the nose of the model---it’s pretty light.
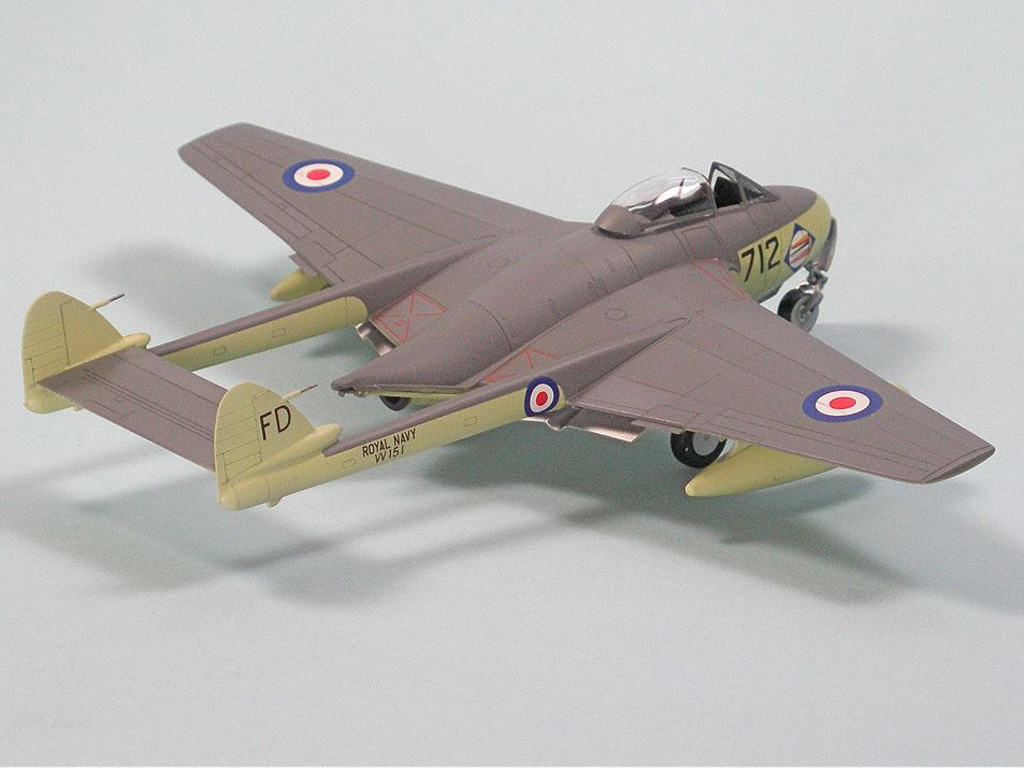
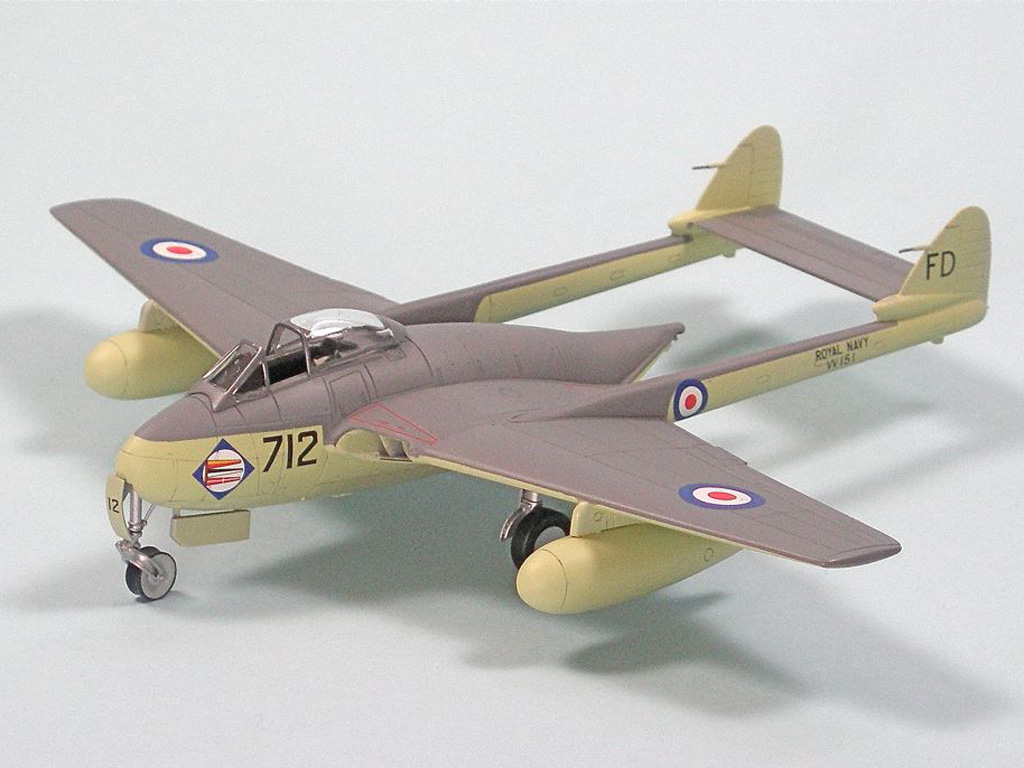
The build was straightforward and everything fit beautifully. When it came time for painting, I used Gunze Sangyo H74 acrylic for the lower surfaces, and Tamiya XF-54 Dark Sea Gray for the uppers. I had a little problem masking off the tail booms around the vertical tail “bullet” fairings because of the model’s diminutive size. It gets pretty tight back there.
The clear parts---the windshield and separate canopy---are both nice and clear but a little on the thick side. Again, the small size of the model came into play here because the frames on the clear parts are very small and masking them was an exercise in patience and good eyesight---a couple of things in short supply at my bench most of the time.
The odd-looking nose wheel with its large hub and low-profile tire is a design similar to the bifurcated one on the Mosquito’s tail wheel, and was installed to prevent its hydroplaning on a wet deck. The kit gives this wheel as a right and a left half; I found it difficult to clean the sprue nubs off without damaging the circumference of the tire, mainly because of its size.
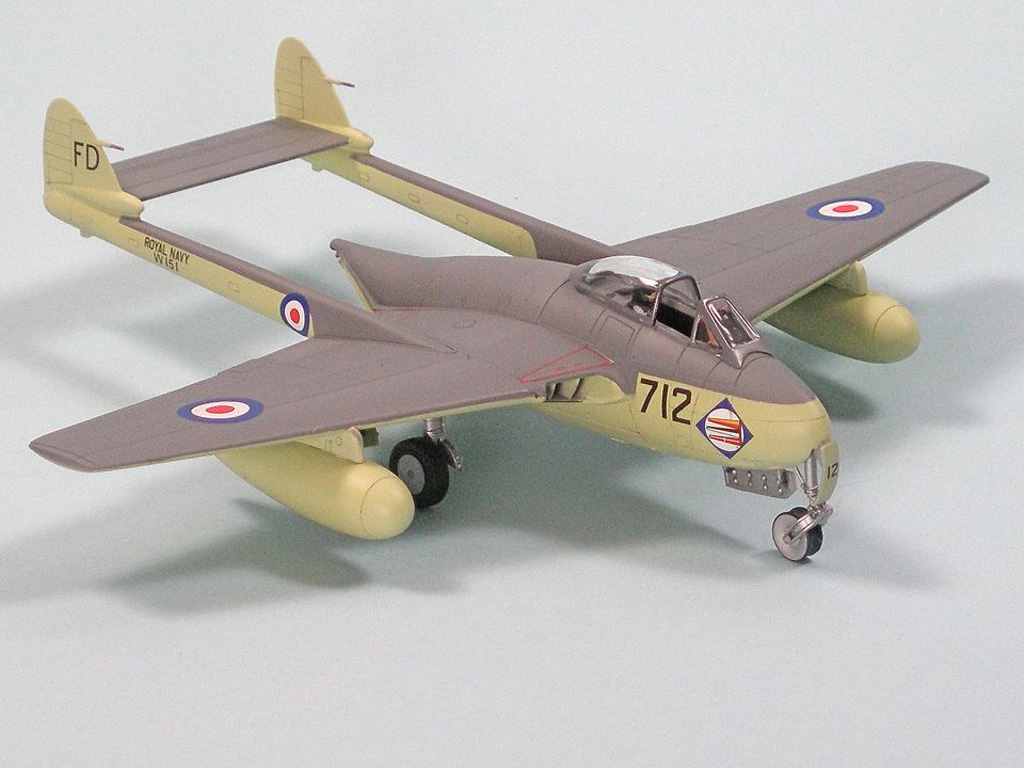
The matte-finished decal sheet provides markings for three aircraft. Since deHavilland only produced 18 Sea Vampire F.20’s, this probably is as wide a spectrum of squadrons which flew the aircraft as could be expected. I opted for a 764 Squadron machine from RNAS Ford because it was the most colorful of the three. The instruction sheet is in error here, saying this aircraft was from 712 Squadron---the side number is 712 (do the British call these Modexes like the U.S. Navy?), but the logo with the numeral 7, 6, and 4 pennants is 764 Squadron’s. All the decals behaved great, fit the model precisely, and most importantly, snuggled right down with a minimum of fuss.
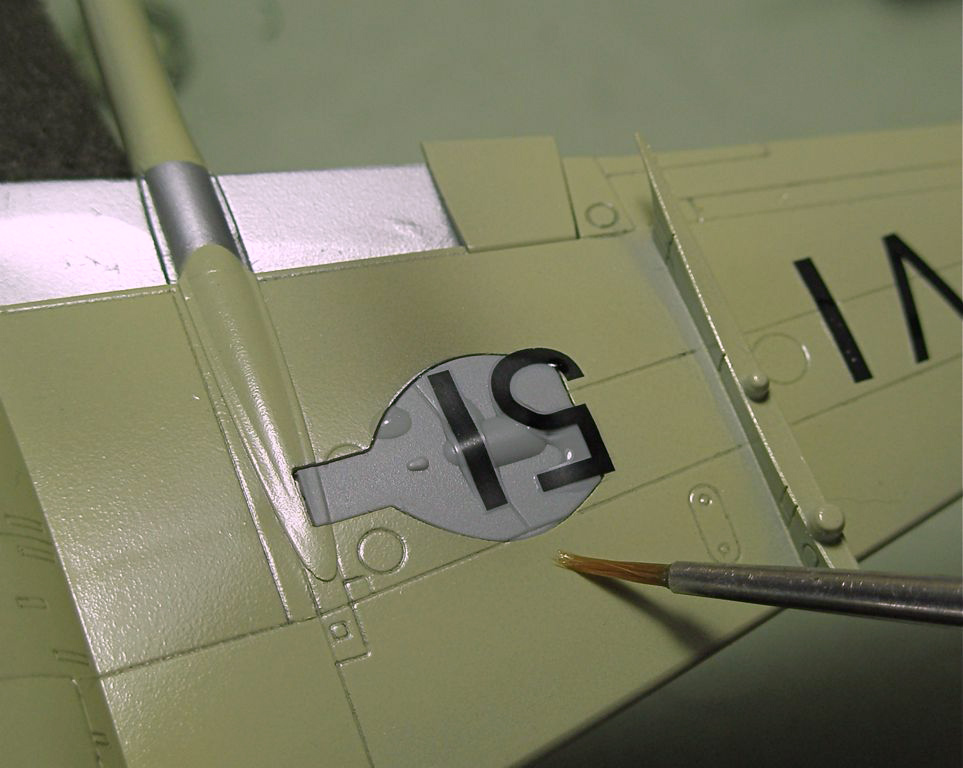
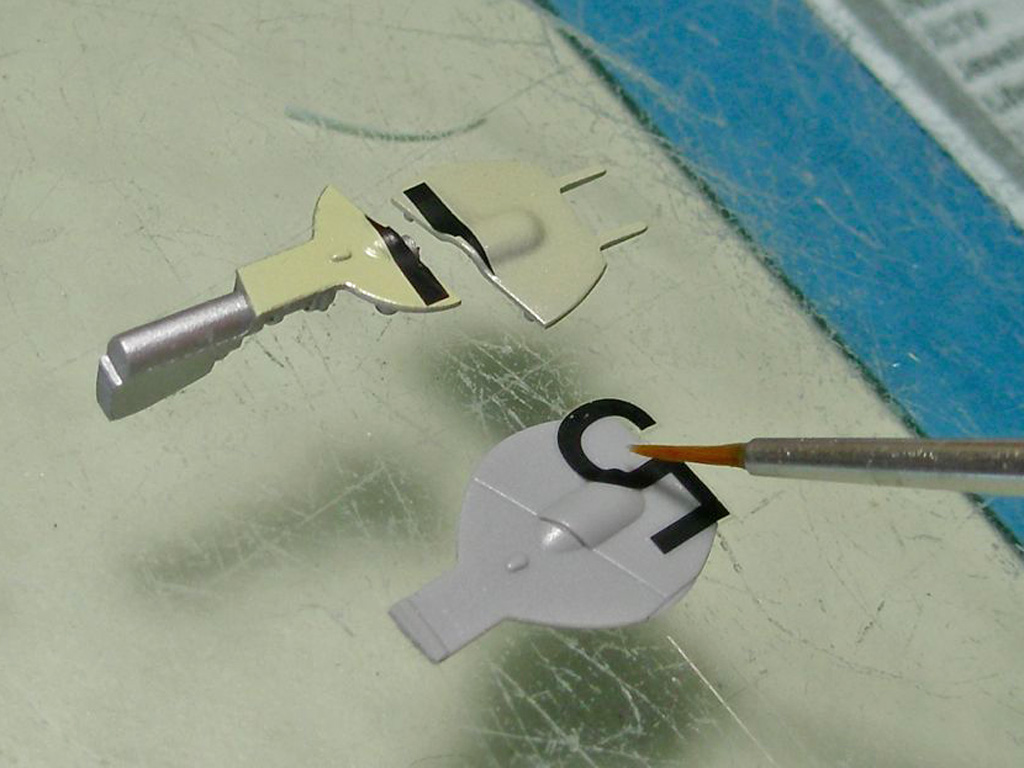
I was able to utilize the optional closed main gear doors from the kit to position the large ID numbers on the lower wing. It fit so precisely, I was able to lay it in the wheel well and apply the numbers directly on the wing. (see Decal 1 photo) When they’d dried sufficiently, I removed the doors, sliced through them with a sharp knife blade, then transferred the decals over to the main gear doors I’d painted. The bare plastic released them with just some water and prodding with a small brush. (see Decal 2 photo) The SAC landing gear was installed after painting and decaling, secured in place with CA glue.
The elevator mass balances are really tiny parts, so I left those off the model until the very last, knowing that like the molded-on pitot tubes, my ham hands would surely snag one (if not both) and cause it to depart the model, never to be seen again. I was fortunate to only bend the right-hand pitot tube (many times) without breaking it, but that’s a wonder. For effect, I painted the mass balances red….I’ve seen a couple of these head-knockers on real aircraft painted red for purposes of visibility so I followed suit.
Conclusion: this is one fine kit! The fit was almost perfect and other than the miniscule size of the model and some of its parts, it was a pleasure to build. Thanks to Cyber-Hobby, DML/Dragon, Scale Aircraft Conversions, and IPMS/USA for the opportunity to review the kit and the replacement metal landing gear for it. Both highly recommended.


Comments
Add new comment
This site is protected by reCAPTCHA and the Google Privacy Policy and Terms of Service apply.
Similar Reviews