
SE.5a Wolsely Viper
SE.5a Wolsely Viper
This is an excellent newly tooled kit from Edward, who continue to set the standard for the finest in model kits. This kit will appeal to less experienced modelers, who may not want to use the photoetch or install the plane’s rigging. More advanced modelers will be able to enjoy the detail provided by the photoetch and rigging. Either way, this builds into a beautiful model.
Background
The Royal Aircraft Factory S.E.5 was a World War I British biplane fighter aircraft first introduced in March 1917. The SE.5 was initially powered by a geared 150 HP Hispano-Suiza engine with two-bladed counter-clockwise rotating propeller and had many technical problems. An improved version, the SE.5a, was issued with a 200 HP Hispano-Suiza 8B engine (‘Hisso’), a gear-driven engine with counter-clockwise rotating four-bladed propeller, which also proved unreliable. In later production, the Wolseley Viper engine increased the reliability of the SE.5a. The 200 HP Viper engine was a direct drive with clockwise rotating two-bladed propeller. Other changes to the SE.5a version included a head fairing behind the cockpit, shortened wingspan, added radiator shutters, and longer exhaust pipes.
Eduard supplies both the Wolseley Viper and Hispano-Suizo 8B engines in this kit, along with clockwise and counter-clockwise propellers, including a four-bladed propeller for the 200 HP Hispano-Suiza engine. The alternate propellers and Hispano-Suiza engine are marked ‘Not for Use’ with the Wolseley Viper version of the SE.5a. It is possible to build a Hispano-Suiza SE.5a with this kit too.
The SE.5 was armed with a single synchronized .303-inch Vickers machine gun mounted on the fuselage in front of the cockpit. Many versions also had a wing-mounted Lewis gun fitted on a Foster Mounting to allow the pilot to fire at overhead aircraft.
References
- The Vintage Aviator
- The Vintage Aviator has built an SE.5a powered by a Hispano-Suiza Direct drive 180 HP engine. Their website provides tons of information on building the SE.5a that is very helpful for modelers.
- Full-size scale plans of an SE.5a are available from Replicraft - https://replicraftplans.com
- Wikipedia https://en.wikipedia.org/wiki/Royal_Aircraft_Factory_S.E.5
This kit is Eduard's ProfiPack edition of the SE.5a with a Wolseley Viper engine. A ProfiPack kit includes a complete plastic model, decals, photoetch, and masks for multiple variants of the aircraft. A ProfiPack kit is aimed at moderately experienced modelers. Eduard also produces these other kit editions:
- Limited Edition - Plastic parts from Eduard or other manufacturers, PE, decals, masks, and may include resin accessories, figures, or reference publications. Many are issued with two complete kits.
- Weekend Edition - Simpler and less expensive than a ProfiPack. Still a complete kit but only one or two variants.
- Overtrees - Includes just the plastic parts, no instructions, decals, photoetch, etc. Can be used in conjunction with another more complete kit to build another variant.
- Royal Class - Includes multiple kits, additional resin details, more marking options, and modeling memorabilia.
Eduard has also issued 1/48 Royal Class and Overtrees versions of the SE.5a
Eduard & Brassin have also issued many upgrades to the ProfiPack SE.5a kit:
- 648298 Radiator - Wolseley Viper
- 82131-LEPT Wolseley Viper - PE set (same as included in the ProfiPack kit)
- 648299 SE.5a Guns
- 648318 SE.5a propeller four-blade 1/48 Eduard
- 648296 SE.5a Propeller two-blade (left rotating)
- 648297 SE.5a Propeller two-blade (right rotating)
- 648319 SE.5a radiator - Hispano Suiza for 4 blade prop
- 648320 SE.5a radiator - Hispano Suiza for 2 blade prop
The Eduard ProfiPack SE.5a kit includes parts on two gray plastic sprues, one clear plastic sprue, decal sheet, masks, and photoetch fret. The gray plastic sprues are combined in one plastic bag. The clear plastic sprue, decal sheet, masks, and the photoetch fret are all individually bagged. Instructions are in a 5 3/4 x 8 1/4 stapled 20-page booklet that includes diagrams of the sprues and show that 18 of the plastic parts are not used with this version of the SE.5a. My early version of the instructions has mistakes on the engine block part numbers and the location of the wing strut with the pitot tube. Eduard has corrected versions of the instruction on their website. Colors are called out in Gunze Aqueous and Mr. Color paint numbers and detail painting instructions are included with the assembly steps.
The plastic parts are newly tooled by Eduard and are molded in gray plastic. Detail on the parts is excellent and there is no flash. I did not notice any visible ejection pins or sink marks.
The photoetch fret is steel, 2-¼ x 2-3/4 inches, and contains details for the seatbelts, instrument panel & gauges, cockpit levers, frames for the inspection windows, and cables for the control surfaces. Many of the PE parts are extremely small and delicate so PE experience is necessary.
Edward does provide extras for a few of the smaller photoetch pieces for those that take flight or disappear from the workbench. It is possible and much easier, to build the kit without using the photoetch and still have a very nice model.
The instructions include color painting and marking guides for five different versions of the SE.5a.
Assembly begins with the cockpit, seat, and cabin fuselage framing, and the parts fit very nicely. Either photoetch or decals can be used for the side console gauges. Detail colors are called out for the parts, which should be painted as assembly progresses. Subassembly B on page 3 shows the use of aluminum painted photoetch for the control levers on the yoke. Existing plastic levers are cut off, but could be left in place if the photoetch is not used. As the photoetch is steel I decided to use the levers without painting. The seatbelts are nicely detailed and pre-painted, although the red leather color may be a little too red and needs to be browner. The seatbelts attached to the sides of the seat need to be tight to the seat otherwise they will interfere with the installation of the seat into the fuselage framing.
Eduard provides two options for the aircraft’s instrument panel: the base kit plastic panel using decals, or a photoetch panel with photoetch gauges. I assembled both options for comparison, and they both work well. The photoetch instrument panel is pre-colored in a light tan. The color doesn’t seem right for the wood in the actual aircraft. Both options provided really nice detail for the instrument panel. The photoetch option includes piping for the fuel switch on the lower left corner of the control panel, making it much easier to paint.
There are two each of the levers PE29 and PE35 on the left side of the cockpit in case they break during folding or get lost. I left these levers as unfinished steel photoetch also.
Assembly of the cockpit framing at the bottom of page 3 requires lots of patience to get the struts aligned. I glued them to one side of the cockpit first, and then aligned them one by one and glued to the other side of the cockpit. The part fit is very good, just requires patience aligning all the individual struts.
The wire diagonal braces for the cockpit assembly are installed in subassembly D on page 4. The wire is not provided with the kit, so I used stretchable EZ Line. Eduard provides slots in the struts for the alignment of the cables.
In step two on page 4, Eduard provides optional photoetch for the Vickers gun magazine edge and holder. The photoetch magazine edge is difficult to install and provides only marginally better detail. Eduard provides a much better solution for the magazine and holder in their SE.5a Guns upgrade set 648299.
Page 5 of the instructions starts assembly of the fuselage and installs it over the cockpit on the lower wing. The interior parts of the fuselage were painted before assembly. The fuselage halves fit together fantastically with only minor touch up of the seams and slips over the cockpit framing with nice tight joints.
The Wolsey Viper Engine is assembled on page 6 of the instructions. My version of the instructions, NAV1, has the cylinder banks reversed. Parts B1 and B6 should be the left cylinder bank, not the right as shown. The instructions on Eduard’s website show this correctly. The engine has nice detail but unfortunately, most of it will be hidden by the fuselage.
Page 7 of the instructions shows the installation of the tail and ailerons, but I waited and did some more work on the fuselage first. The engine is also shown to be installed here, but I waited until after the fuselage was painted. Fuselage top panel B65 is installed here and fits nicely with a very slight joint. The joint line, although barely visible, is not on one of the aircraft panel joints. I wonder if the joint couldn't be lower in at the aircraft joint line, but it fits so nicely it shouldn't be an issue.
The elevators are shown to be installed on page 8, but I held off on these also until after the fuselage is painted. The Vickers machine gun is installed here under the cockpit cover panel. The cockpit panel joint is also not at a normal aircraft seam, but is also very tight and barely visible. Installing the gun first will mean that the panel joints will need to be repaired after the gun is in place. This complicates painting as the gun will need to be masked off when the fuselage is painted. Another option would be to cut off the front barrel of the machine gun, install the rest of the gun in the cockpit, paint the fuselage, then glue the gun barrel back in place. The gun itself is nicely detailed with some photoetch for the gunsight and the grip. When installing the gun make sure the rear gunsight fits through the hole in the cockpit panel.
The head fairing is shown to be installed on page 15 should be installed sooner, before the fuselage is painted. The head fairing is only used on a few of the marketing options, which would have been for the later production SE.5a aircraft.
Eduard uses clear plastic, photoetch frames, and masks for the inspection windows in the wings and tail. These end up being a little thick as the wing top fabric laid over the window. Here again I think the photoetch is optional and the kit will be fine without it. The clear plastic window does show the detail nicely after painting.
I assembled and painted the aircraft using Marking Scheme E - C1149, Capt. D. W. Grinnell-Milne, No. 56 Squadron, Bethencourt, France, January 1919. I used the Mr. Color paint colors as called out in the instructions. All the painting and decaling was done before assembling the upper wing so it was easier to handle.
The excellent decals are printed by Cartograf. The decal film is very tight to the image, and the decals release quickly from the backing sheet. They are quite sticky so place them close to the final location. The decals are thick enough to allow some positioning, but Micro Set and a few coats of Micro Sol settled the decals down nicely on the surface detail. The decals are very opaque.
Brackets for the exhaust pipes, photoetch parts PE34, are shown being installed on page 11. Wait until after the exhaust pipes are installed on page 13 to allow correct positioning of the brackets to align with the straps on the exhaust pipes.
Assembly of the struts for the upper wing is shown on page 11. Drilling out the holes for the cable anchors on the struts will be easier before they’re assembled. Note that strut A15 with the pitot tube is shown on the left wing. This should be on the right wing as Eduard has corrected in the instructions on their website. Before attaching the upper wing, I attached the cables to make them easier to reach. I used EZ Line elastic thread on the kit. Here again the parts fit nicely and the wings aligned perfectly.
Masks for the wheels and clear plastic parts are included with the kit and their locations shown on page 12. The masks are very effective. The masks for the inspection windows on the wings are correctly sized smaller than the photoetch frames as paint on the actual aircraft flowed over onto the glass.
Photoetch cables for the aileron controls are shown to be installed on page 12, and for the elevators on page 14. These are small and delicate photoetch pieces that will require great care removing from the sprue and getting them glued into place. Some of my parts were bent on the sprue and it's best to straighten them before removing from the sprue. A good pair of photoetch scissors works best for removing the cables from the sprue. The lower cables for the rudder were way too short to hit the front mounting hole. The upper cables weren't much longer so I don't think the part numbers were reversed. The upper cables seem to be the right length. Placing the cables should not be done until assembly is complete to avoid breaking them off. The photoetch cables do look very nice when installed. It may be easier for the less experienced modular to use the molded-on posts rather than the photoetch and stretch the cable with EZ Line.
Rigging for the wings and tail is installed on page 15. The rigging is not included with the kit so I used EZ Line elastic thread for this review sample. Eduard provides holes for the anchoring points of the rigging. The rigging is clearly shown in blue on the assembly diagram.
Final assembly steps are the upper wing-mounted Lewis gun and the propeller. Eduard provides photoetch for the gun, which is also optional. Part B75 for the rear grip is actually B73. The two-bladed clockwise propeller, part B10, is used for the Wolsey Viper engine.
Summary
Eduard has produced an excellent kit that can be enjoyed by all skill level modelers. Less experienced modelers can avoid the photoetch and rigging and still have a very nice, but simple to assemble kit. More experienced modelers will enjoy the added detail and challenge of the photoetch and plane rigging. The optional parts and different marketing options allow the modular to build several different variants of the aircraft. The fit of the parts is just about perfect, the accuracy and the fine level of detail is state of the art.
Many thanks to Eduard for providing review samples and producing these wonderful kits that make modeling so much fun!
Many continued thanks to the IPMS review program for allowing me to review this kit and sharing it with the IPMS members.

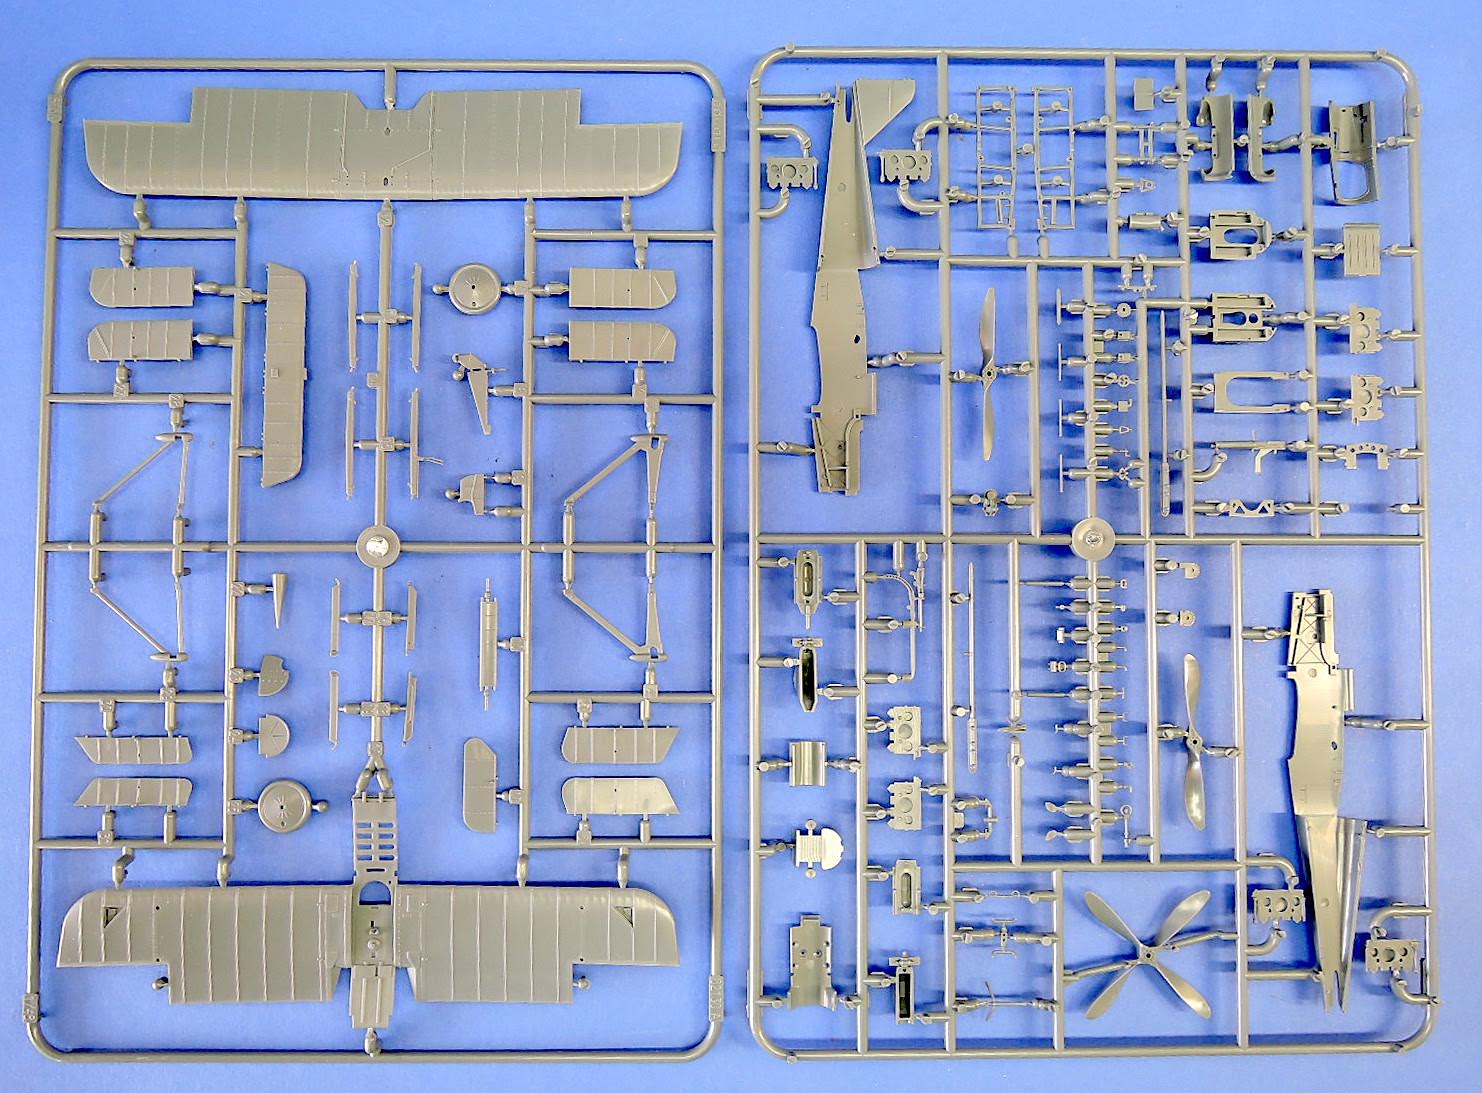
Sprues for Eduard kit
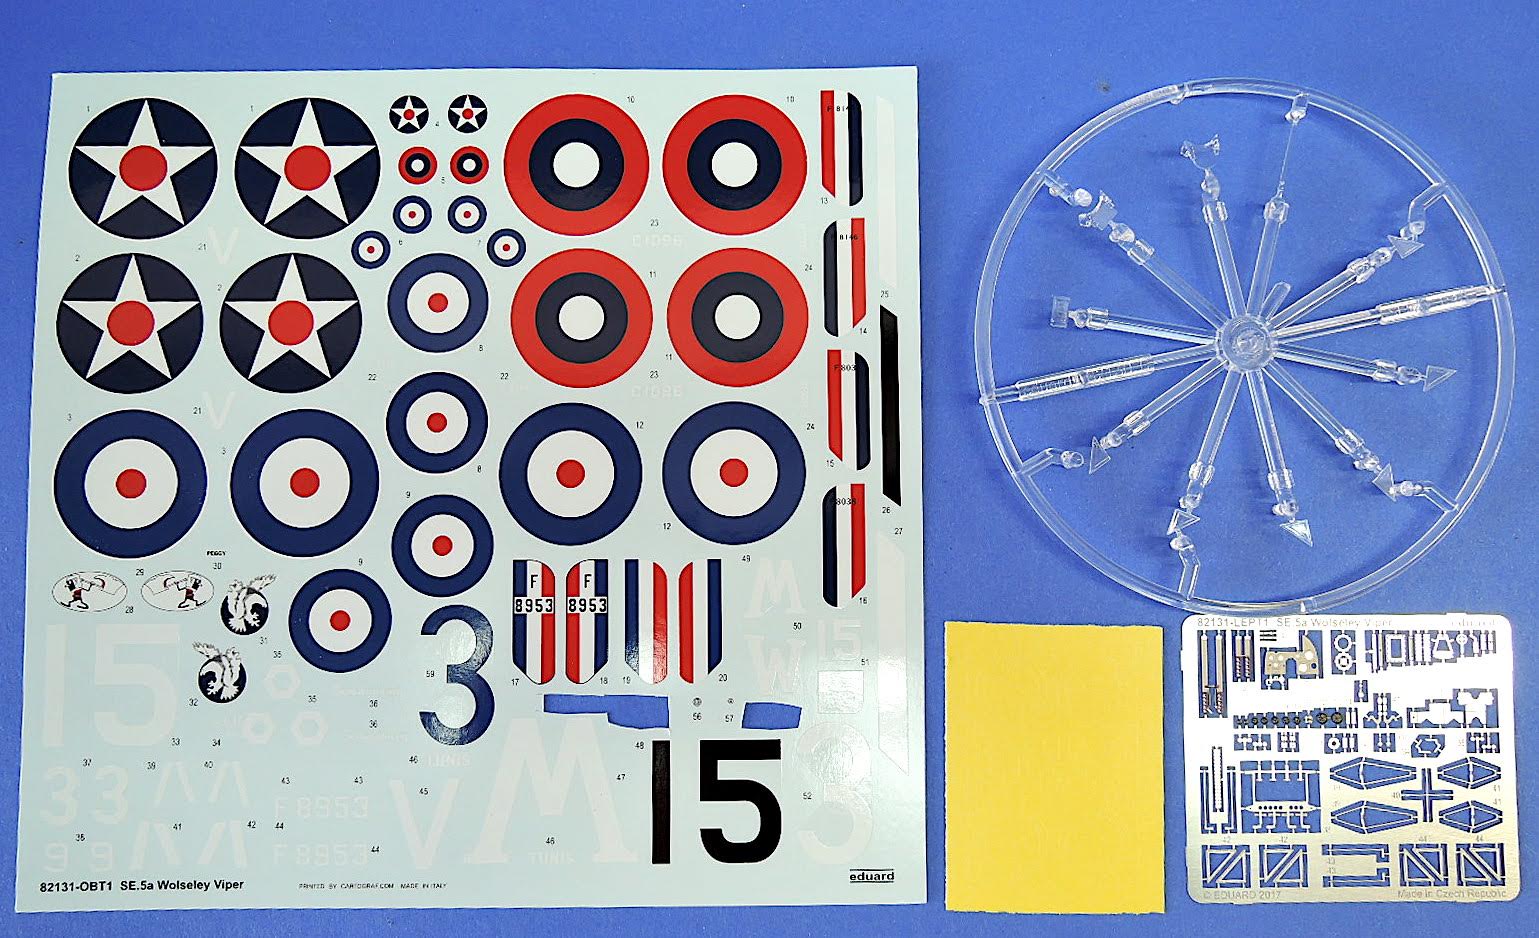
Clear parts with decals, mask and photoetch

Excellent Eduard instruction sheets
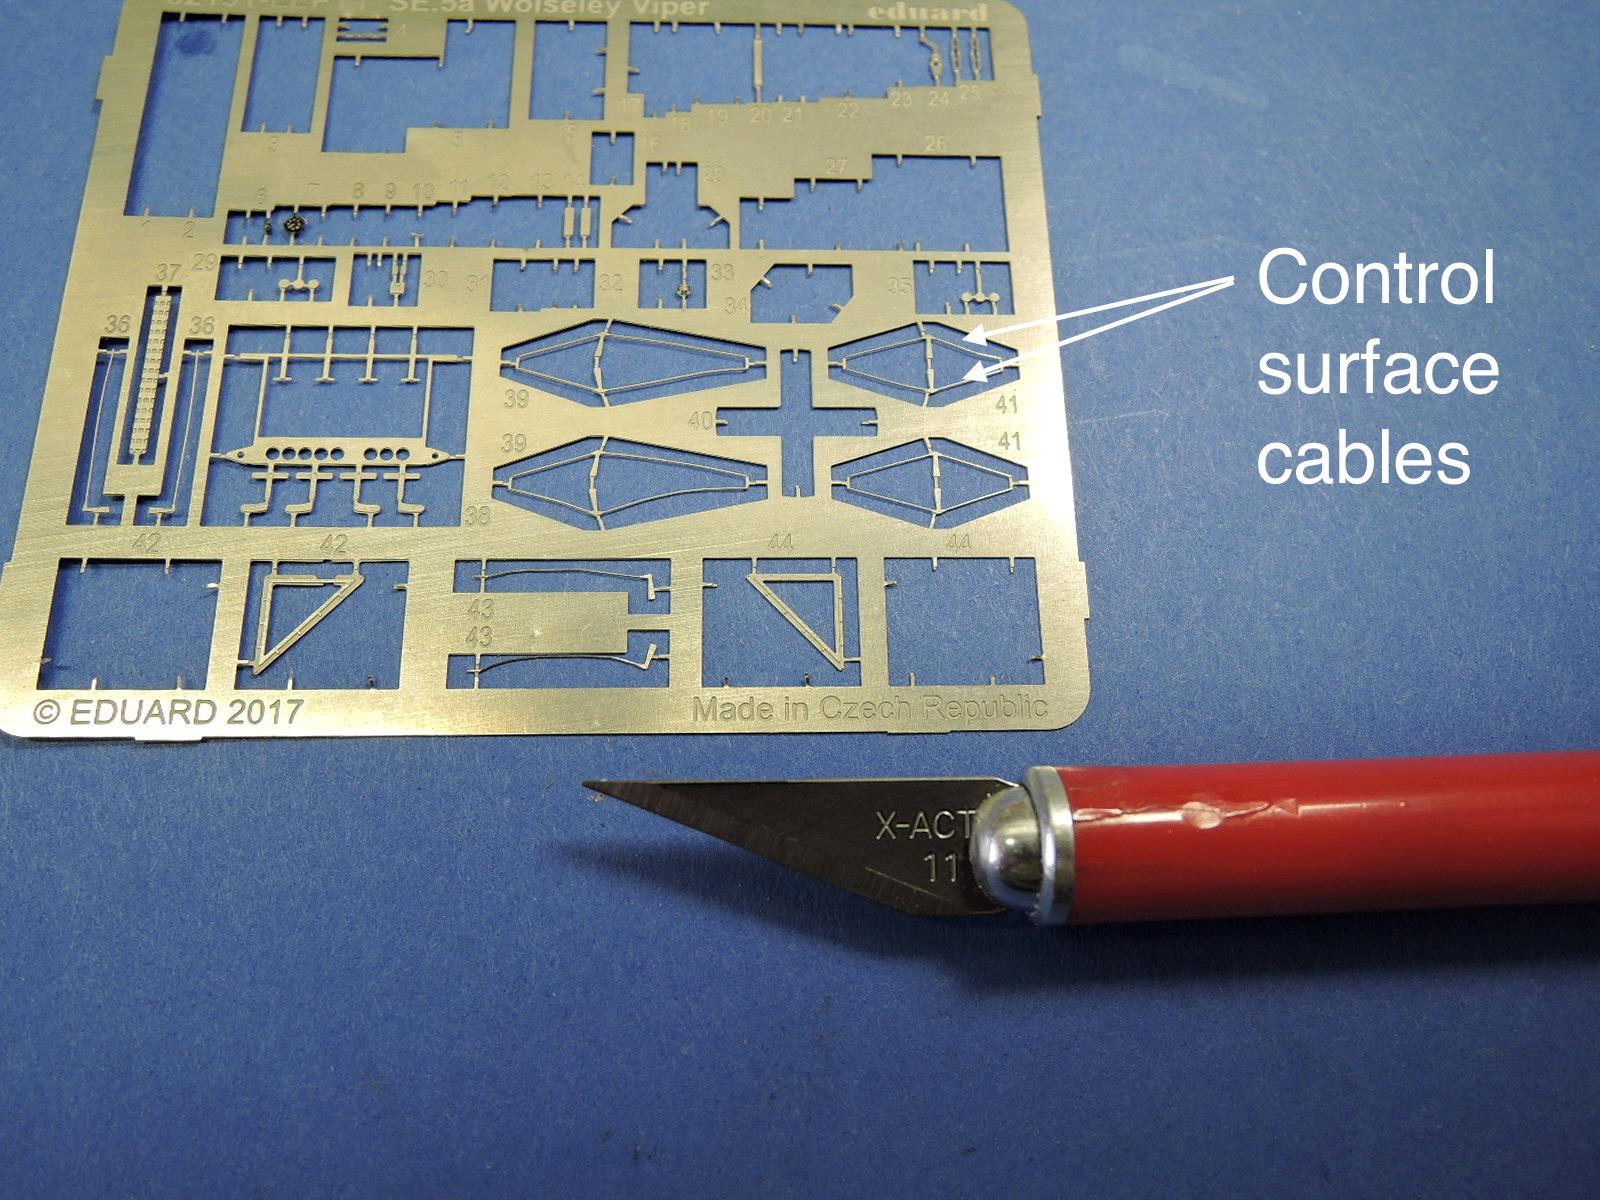
Control surface cables

Cockpit closeup
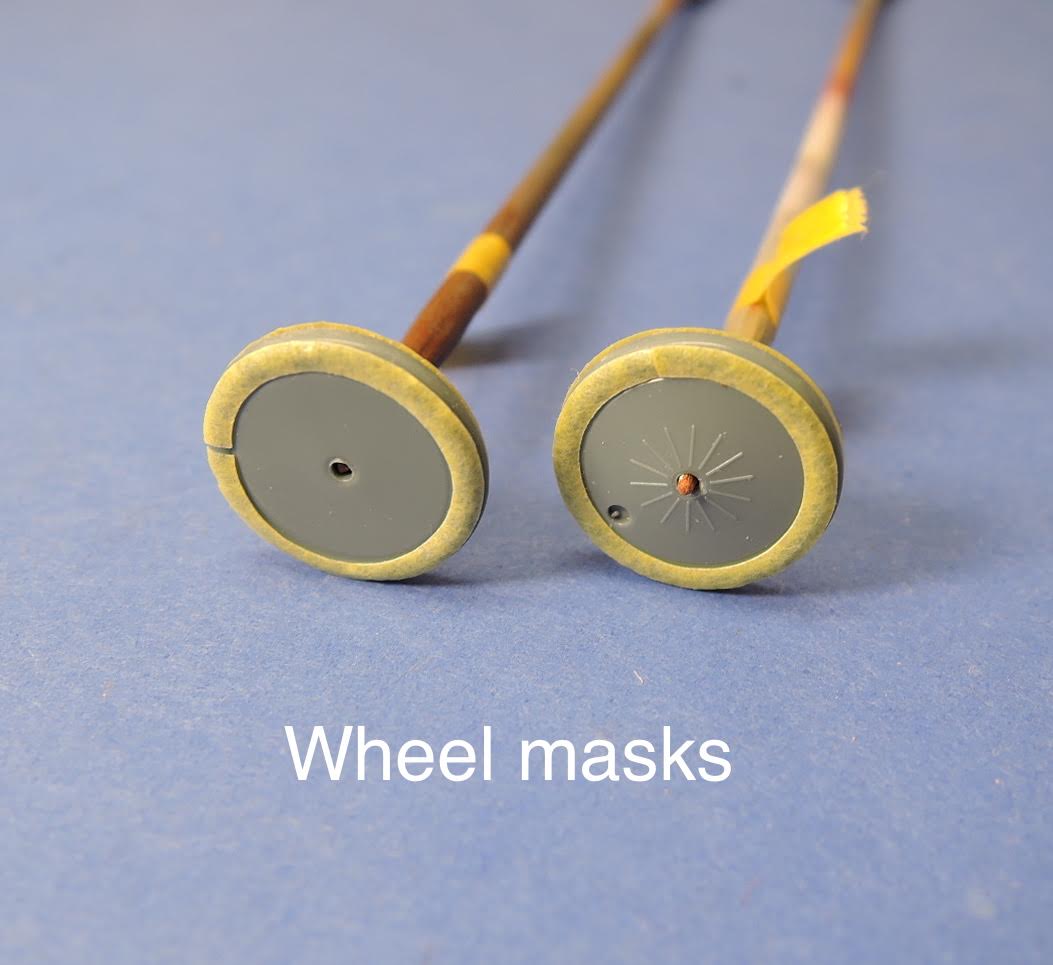
Wheels with masking applied
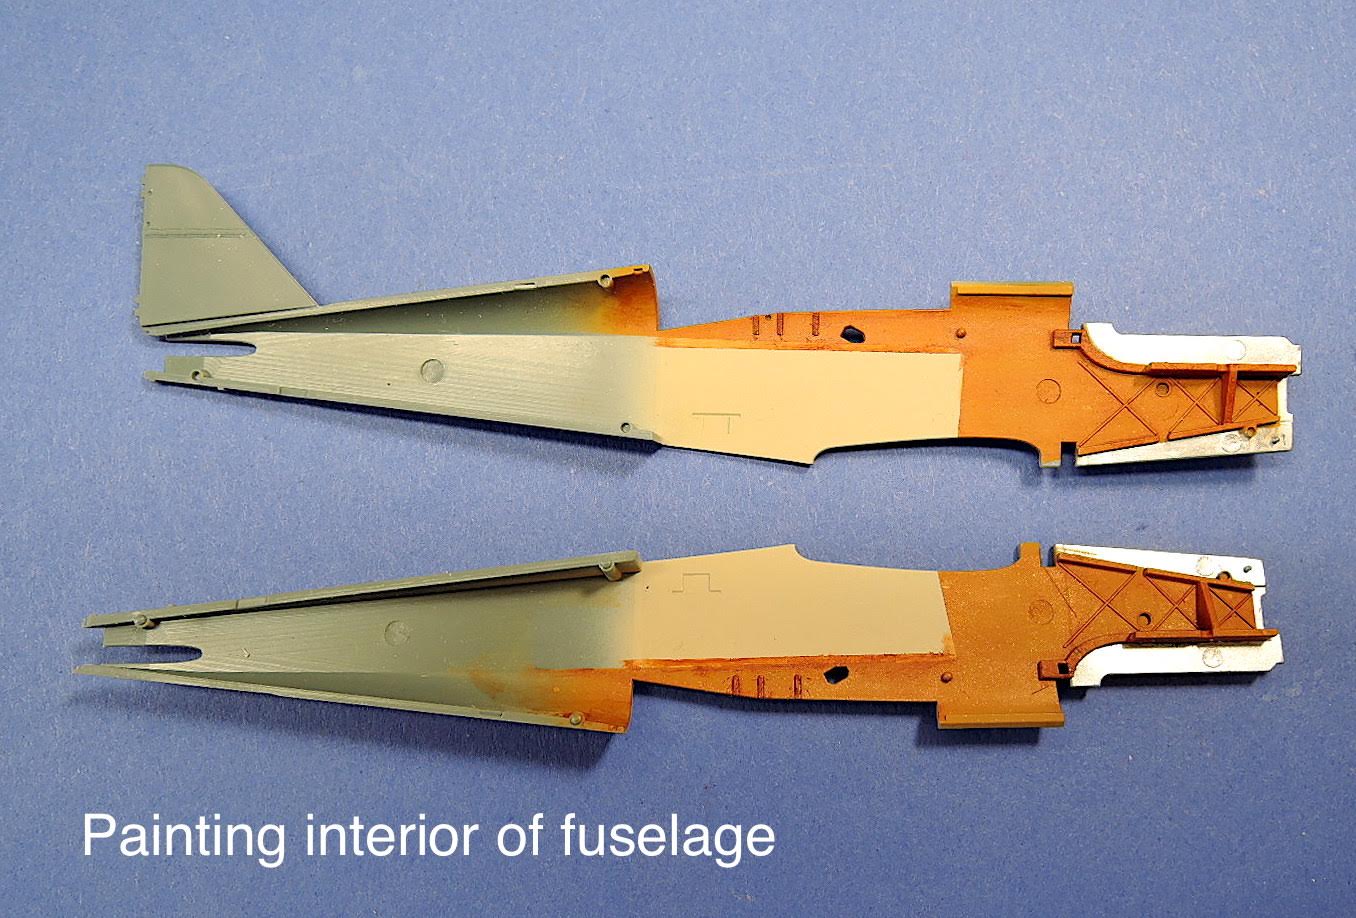
Interior fuselage paintede
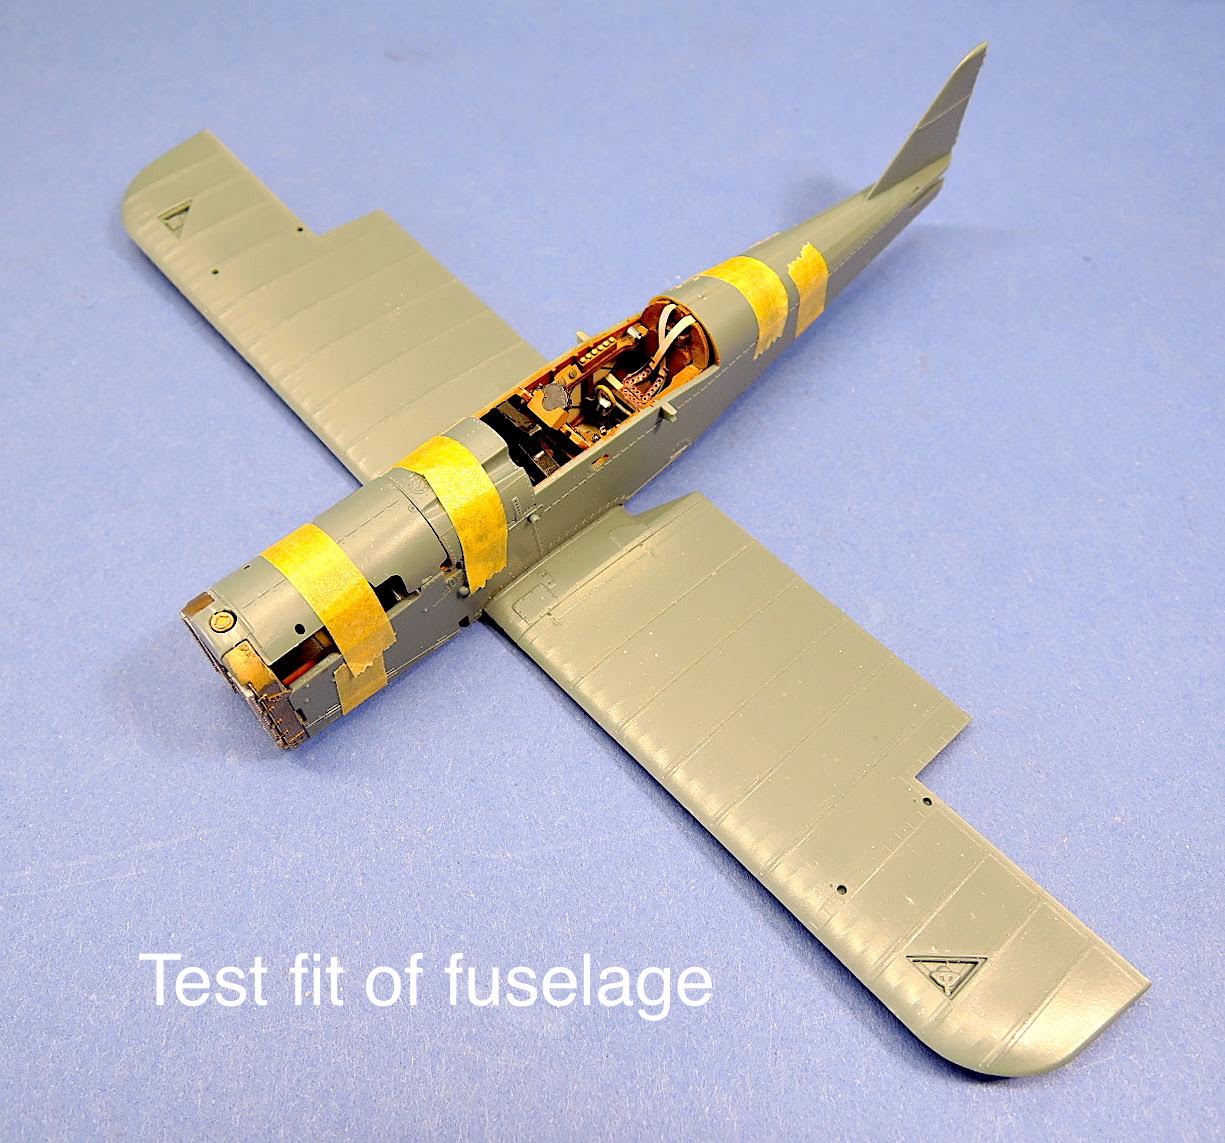
Fuselage offered up to lower wing

Fuselage joint with Vickers gun
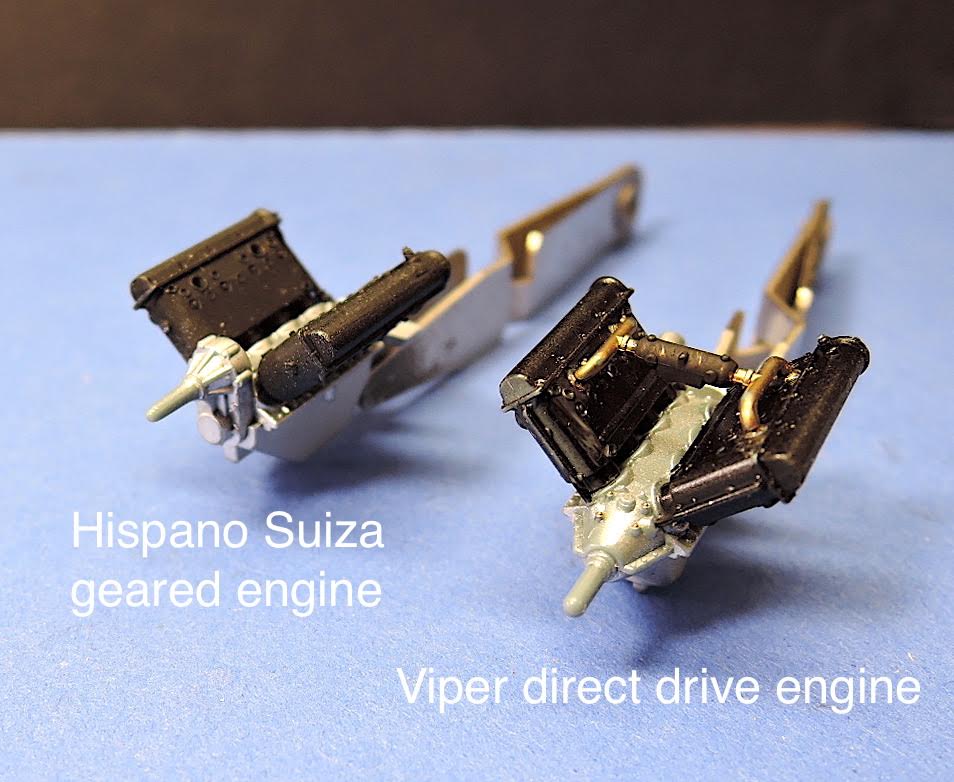
Kit engine comparison
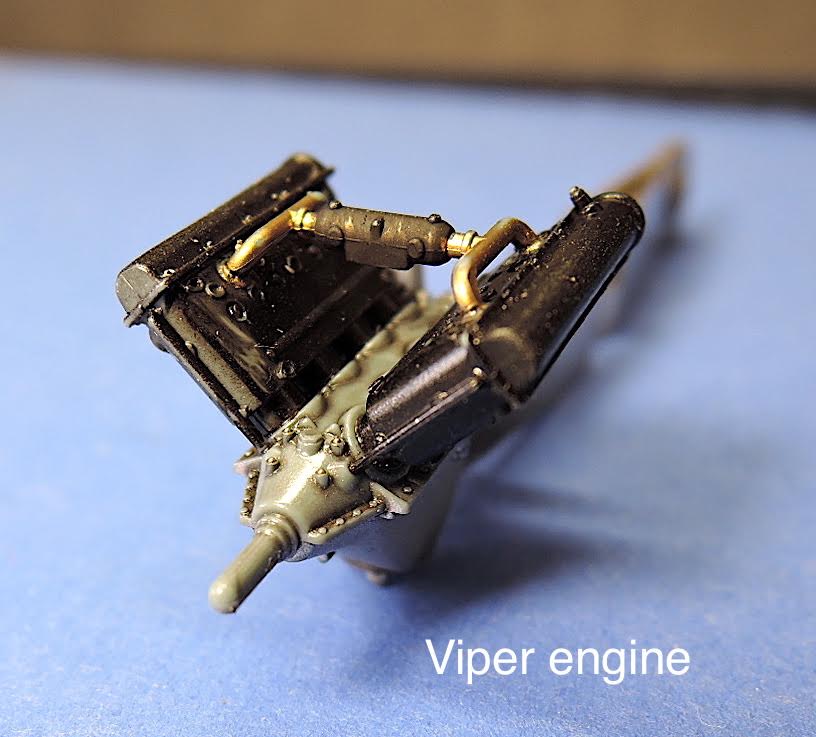
Viper engine

Preparing to install upper wing and struts

Assembly ready to receive struts and upper wing
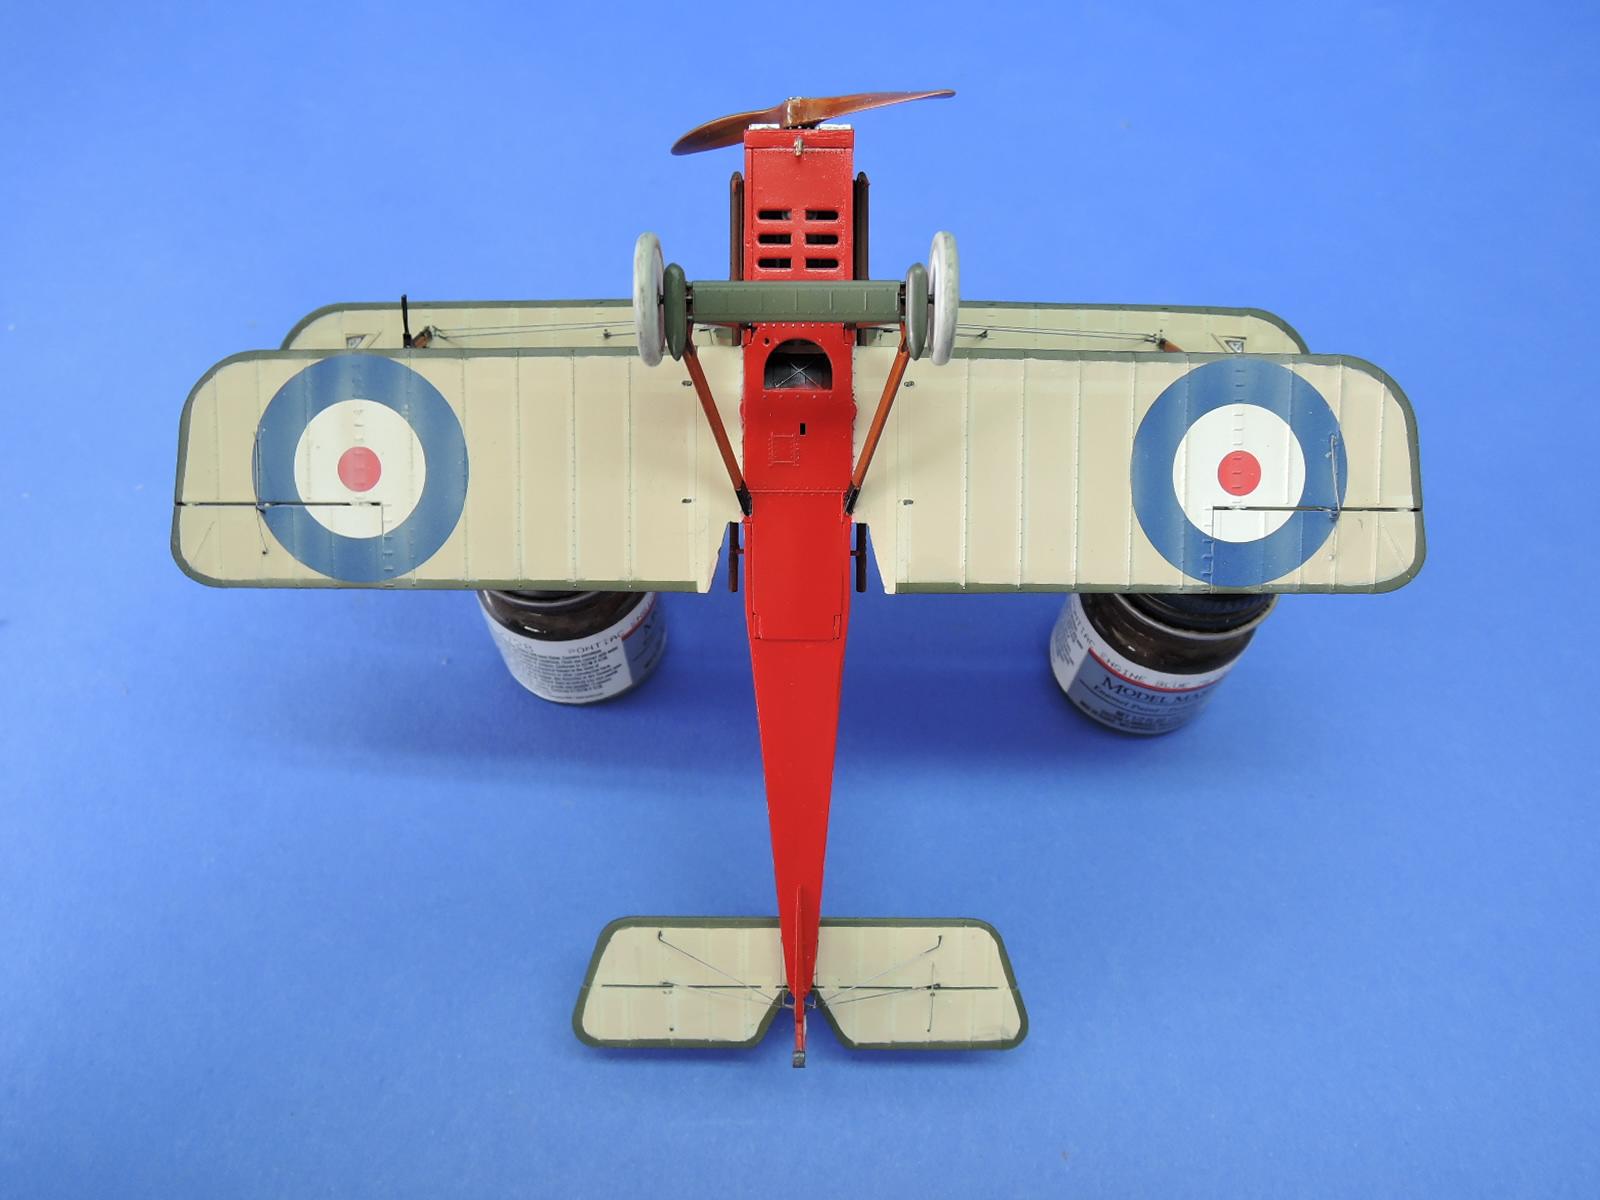
Underside of finished model

Closeup of top wing mounted Lewis gun

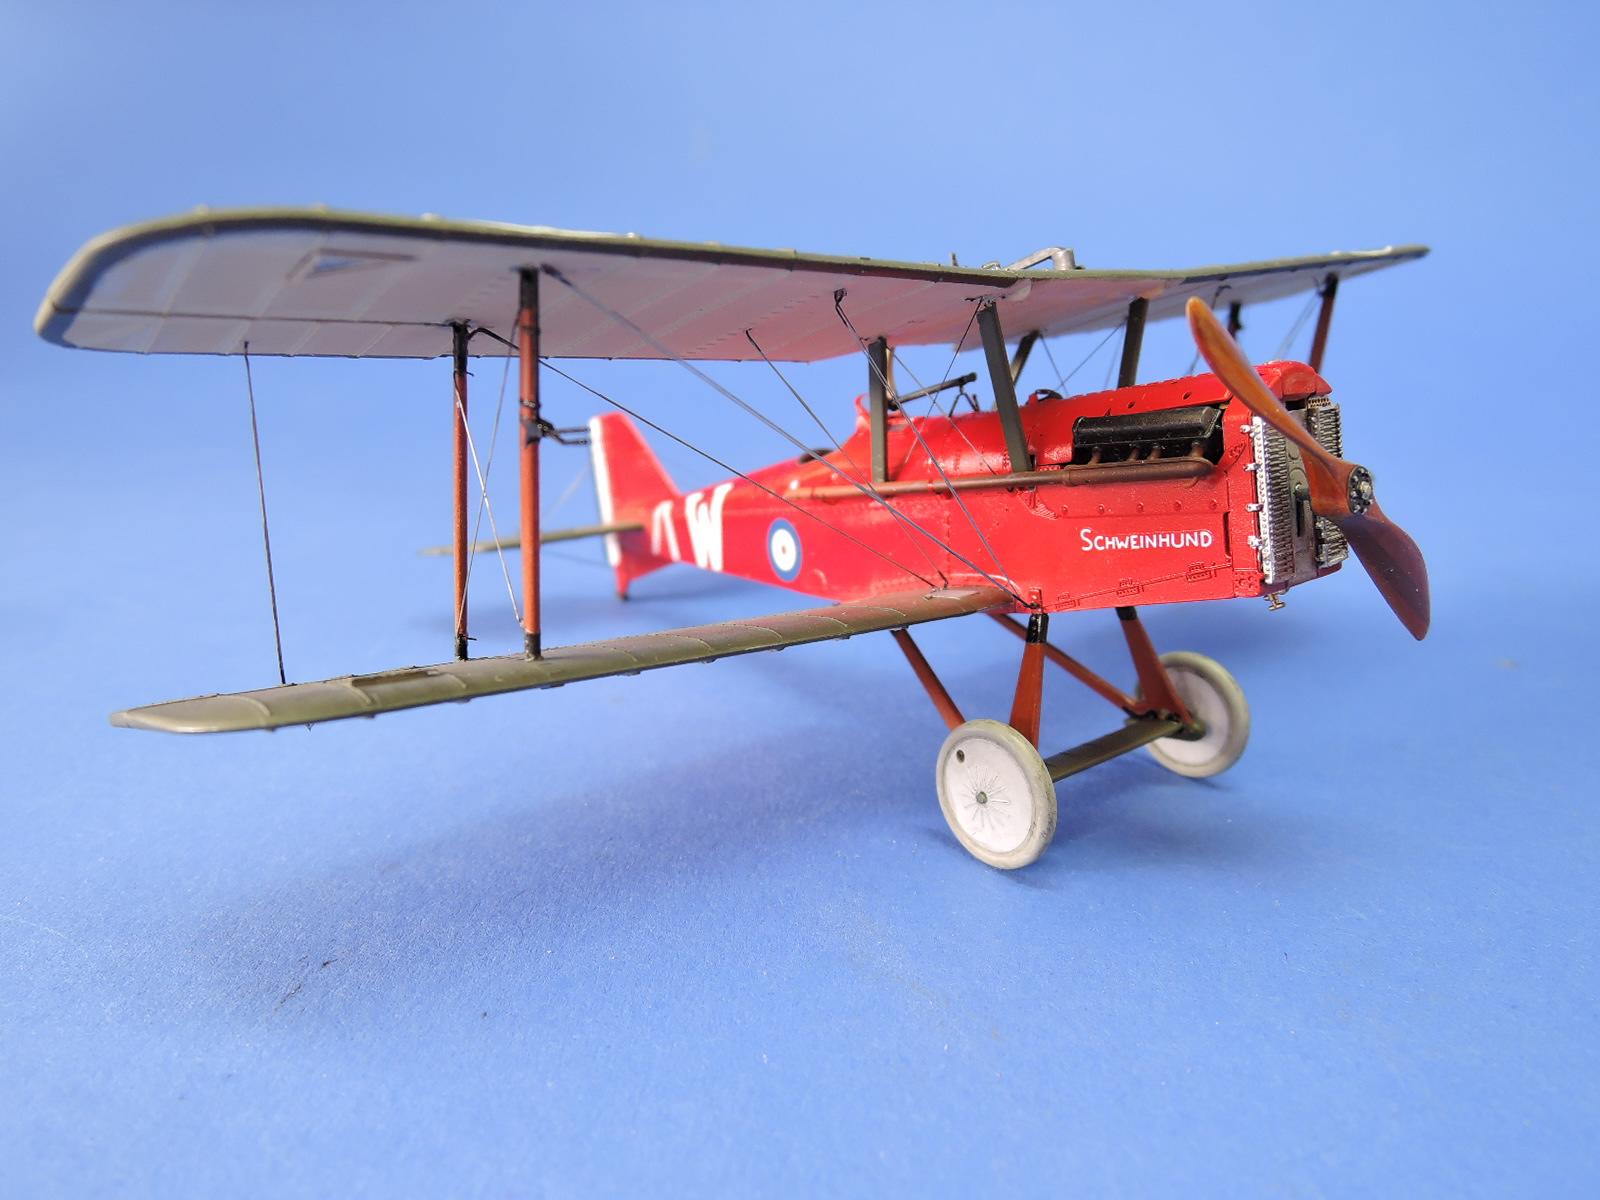
Finished model
Comments
Add new comment
This site is protected by reCAPTCHA and the Google Privacy Policy and Terms of Service apply.
Similar Reviews