
Se.5a Scout Royal Class: Dual Combo
If you are not familiar with Eduard kits then you might be confused by the differences between the five different types of kits that Eduard produces. (Content paraphrases content on the Eduard Website)
Overtree kits are very basic in content, with no reduction in the quality of molding or fit. There are no instructions, no decals, and no photoetch or resin. For a rather low price one gets the parts trees and that’s it. We are talking a price in the range of $15.00 for some excellent parts sufficient to produce one model of high quality, but you will need to supply the instructions and decals from other sources. Overtree kits are not necessarily “easy” or “easier” to build than other Eduard editions of a particular subject, they simply contain the parts for one model and nothing else.
ProfiPACK kits, as described by Eduard on their website, are the, “basic, high standard plastic kit edition.” A ProfiPACK kit will include parts sufficient to build one model, with some additional parts vor subvarients. ProfiPACK kits also include Eduard paint masks, a decal sheet with four to six markings options and are produced in 1/48th, 1/72nd, 1/144th, and one 1/32nd scales. The ProfiPACK packaging is unique in that the box is accented in orange and features the ProfiPACK logo. ProfiPACK kits are designed for modelers with some experience.
Weekend edition kits offers a simpler and less expensive alternative to the standard ProfiPACK kits. Weekend kits contain sufficient parts for one variant of the aircraft and all parts oar injection molded. They contain no additional accessories and have two marking options. These kits still can be upgraded with separately available accessory sets as, and if, desired. These kits are designed for those modelers that don't require or want all of the "bells and whistles" of the ProfiPack kits.
Again, as with the Overtree and ProfiPACK kits, the same part trees are included, and thus, the parts are of the same high quality regardless of which “edition” the kit is.
The Weekend series is a great option for those with less experience and those who want a model that will come together in less time that the ProFiPACK or Royal Class kits.
The Limited Edition kits offer plastic from Eduard runs, as well as of those of other manufacturers. The kit is brought up to the ProfiPack standards with the inclusion of photoetch sets, masks and large decal sheets, and are further complemented with other accessories such as resin details (exhausts, engines, wheels etc.), figures and/or supplementary publications. Many of Limited Edition kits are offered in Dual Combo packing, containing two complete kits. Limited Edition kits do not last long and most of these have historically sold out in a matter of weeks.
They are produced with the serious modeler and collector in mind.
Royal Class kits are, in my view, the top of the line. Models in this series provide the same high quality injection parts as the other series of kits, but in the case of the Royal Class kit, which is referred to as a “Dual Combo” kit, there are sufficient parts for two complete airframes. The decal sets offer a large number of variations, in fact, 13 variations are provided in this kit. The kit also includes photoetch and resin parts, masks, and a very well laid out instruction sheet.
Upon opening the box you will find:
Parts for two complete Se.5a aircraft, including the option to build a Viper variant and a Hispano variant.
- There are four Part Sprues, consisting of a pair of Sprue As and a pair of Sprue Bs are in a sealed clear plastic baggie. These sprues consist of the majority of parts in the kit, such as the fuselage, wings, struts, cockpit components, etc.
- Also in that same baggie are a pair of Part Sprue Cs, which are the clear parts for the aircraft.
- In smaller, separate zip-lock baggie is a sheet of masks.
- Another small baggie contains the Brassin resin parts.
- Two PE sheets numbered R0015-LEPT1 are bagged.
- Two PE sheets numbered 648 299 LEPT 1 are bagged.
- One PE sheet numbered R0015-LEPT2 are bagged.
- Resin parts R29 and R30 are bagged.
- Decal sheet, by Cartograf, is bagged. Please note that there are markings for 13 different aircraft.
- The kit instructions consist of 24 pages of illustrations which use color to help guide the modeler through the project. The assembly illustrations are very clear and well presented.
- A metal flask for adult beverages. The flask is engraved on the reverse side with the “eduard” logo, which is the word, “eduard”. On the front side appear the Victoria Cross and the “Wings” worn by those in the RFC. This is a high-quality metal flask and is Eduard’s way of saying “Thanks” for buying a Royal Class kit.
Kit Instructions
There are decals and part options for 13 different aircraft, each aircraft option having a full page dedicated to it, showing which decals to use and the placement of those decals. This is achieved through the presentation of full color 4-view illustrations (Top, Bottom, Right Side, Left Side).
A guide for rigging the aircraft is provided on page 11 with the rigging lines presented in blue. Many of the illustrations throughout the instruction booklet contain guides that inform the modeler of optional parts, depending on the aircraft being modeled
Fit
As with Eduard kits of all types, be they in the simple Overtree series, or in the magnificent Royal Class series, the engineering and attention detail is of the highest quality. Because the “fit” is precise, it is important to make sure that alignment of the parts prior to gluing is in accordance with the instructions. A mistake on the part of the builder in basic “fit” and “alignment” can ripple outward, through the remainder of the build. Don’t ask me how I know this. It’s a sad tale.
Even though I am a rather mediocre modeler I found that the “fit” of the parts was so good that no putty was used to close up seams. What little seam there was, particularly on the upper spine of the fuselage behind the cockpit was handled with nothing more than a file and some sandpaper.
Decals
The kit decals are printed by Cartograf, and I have yet to meet a Cartograf decal sheet that disappointed me in any way. The decals are thin and settle easily on the model surface. The decals are strong enough to allow some re-location and movement to take place during application. In many cases, the decal is applied over some of the molded detail on the fuselage and wings, and I used a sharp blade to put holes in the decals to allow trapped air and liquid to be squeezed out. Even this rather rugged handling of the decals caused no ill effect.
Issues
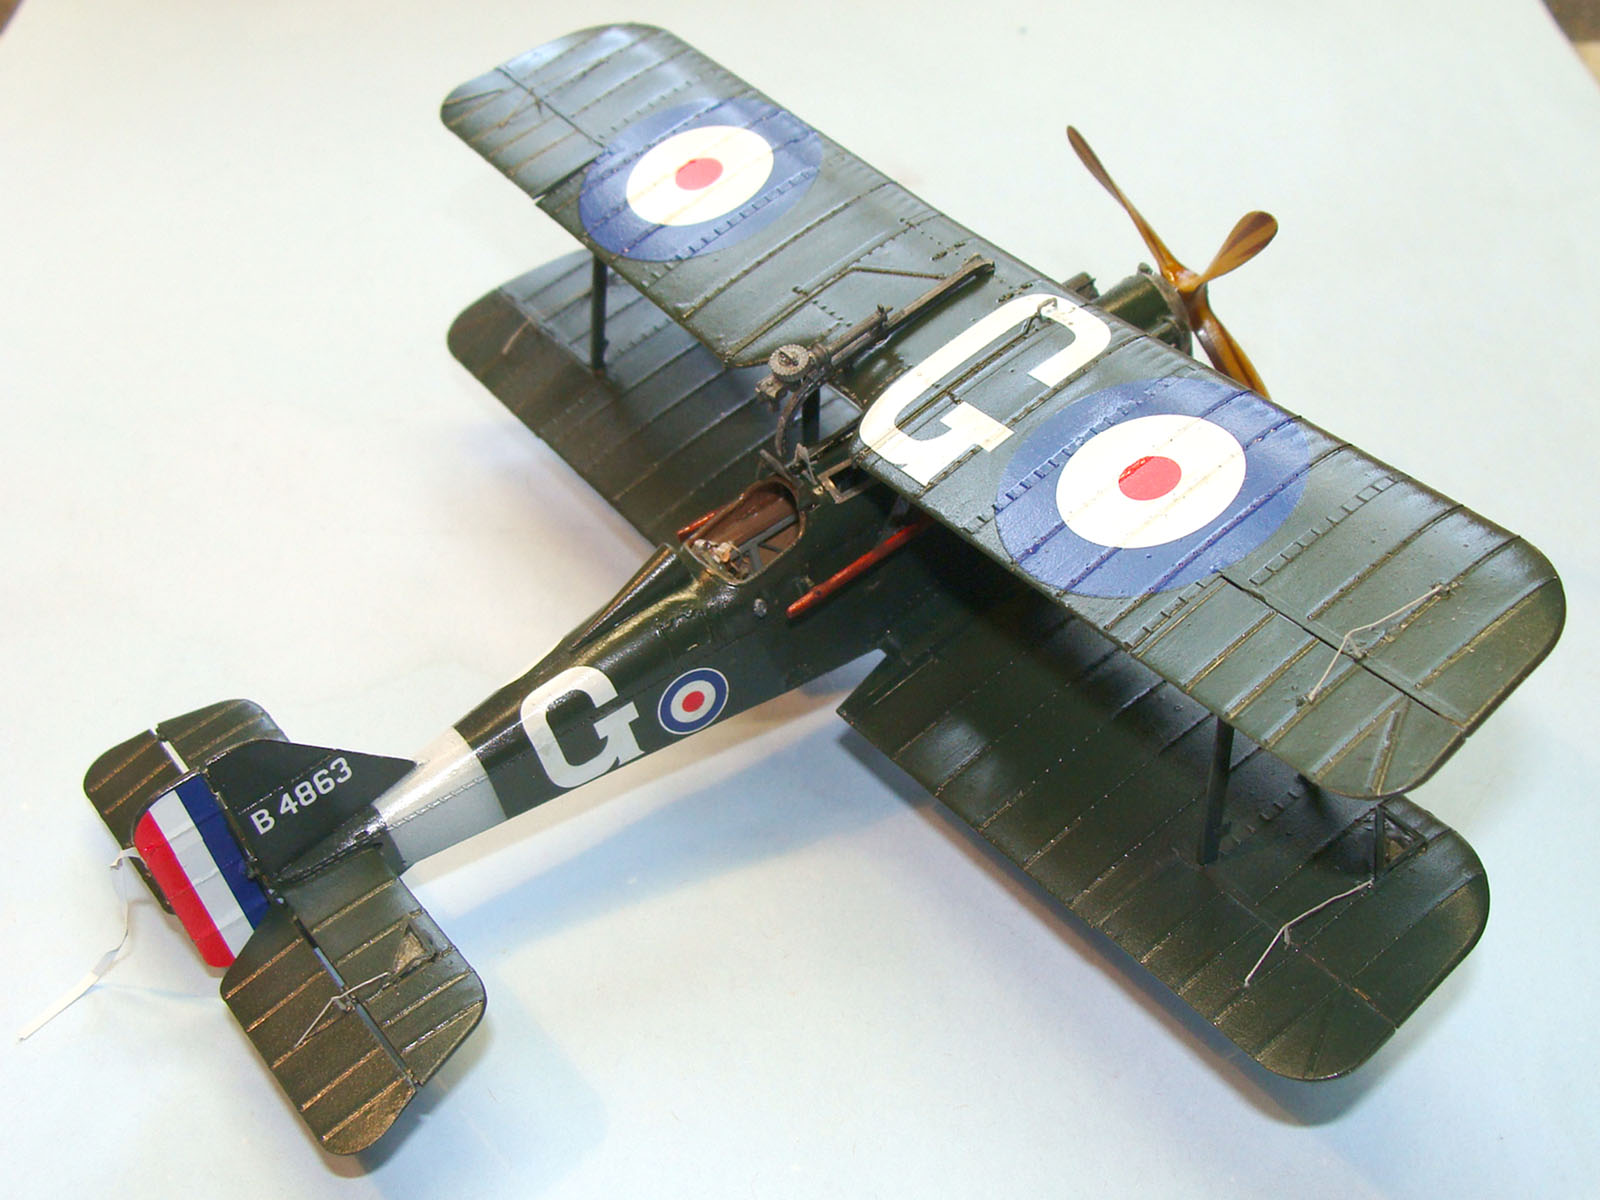
- I chose to build the Hispano variant of the Se.5a flown by Capt. J. T. B. McCudden. As the “build” progressed I reached the point at which it was time to mount the exhaust pipes to the engine and along the forward sides of the fuselage. During this step in the “build” I noticed that illustrations for this aircraft on page 24 contained what appears to be an error. The side profiles show the exhaust pipes running to a point just aft of the wing struts that are nearest the engine. The overhead and underside illustrations show the exhaust pipes running aft to a point just below the cockpit. (View the images that accompany this review and find the two images labeled “Exhaust Pipe 1 and Exhaust Pipe 2”.
Clearly, something is amiss. However, this issue is resolved when one studies the illustration on page 9, which clearly shows that for the McCudden aircraft, the exhaust pipe is to be cut to proper length. - The above issue brings to light the absolute significance of heeding the notices, printed in blue on various pages in the instructions, that certain actions and/or parts are pertinent to the markings and airframe one has chosen to build. (Refer to the image labeled “Markings Alert”)
- This kit contains resin parts, photo-etched parts, and the standard injection-molded parts. Many of these parts are rather small and you, like I discovered, will most likely find the carpet-monster is not your friend. Further, because this kit is very much a multi-media kit, if the builder has not yet experienced the joy of full-up work on previous projects with resin, masking, and photoetch, then this kit may be one that should follow a “build” of a Weekend edition kit.
- Because I am a bit of a heavy-handed modeler, I managed to snap off one of the wheels. I should have opened up the locating hole in the rim a bit before attempting to push the wheel onto the locating pin/axle, but I didn’t. I learned my lesson, however, and used an appropriately sized drill bit to gently enlarge the locating holes for the other wheels on both of the airframes. I also expanded the locating holes where the wing struts meet the wing surfaces. We are not talking about a noticeable difference in diameter, but just a turn or two with a drill bit and the locating pins on the struts slipped inside nicely, and, for the most part, the struts remained in place while I prepared the glue for attacting the struts.
Conclusion
As with most bi-winged aircraft, there are special challenges involved in construction. Attaching and aligning the wing struts and braces can be difficult, alignment of the upper and lower wing leading and trailing edges is important, and can be difficult. Strength of the undercarriage can be an issue, as well as alignment.
In the case of this Eduard item, it is loaded with resin and PE parts (remember, it’s a Royal Class kit) and that can make handling the model, even gently and with great care, very problematic.
Eduard addresses these issues with a spectacular job of engineering and molding the parts. The fit is excellent and that makes alignment much easier. In fact, most of the wing struts fit into the lower wing so well that they could be put in place and would stay in place for a time before shaking loose as the airframe was handled.
Simply put, there are no major, or even minor issues that I found during the construction process. The instructions are very well written and, may I emphasize, studied and adhered to. There was no flash to remove, and the fit between the parts was very precise. The decals are typical of Cartograf, very high quality, strong, and crisp.
This kit is recommended for the more experienced modeler due to the fact that it is a bi-winged aircraft and is a multi-media (photo-etch, resin, and injection) kit. The kit, being a combo kit, is well worth the price. You will, very simply, not be disappointed! Thanks to Eduard for making this kit available to IPMS for review.

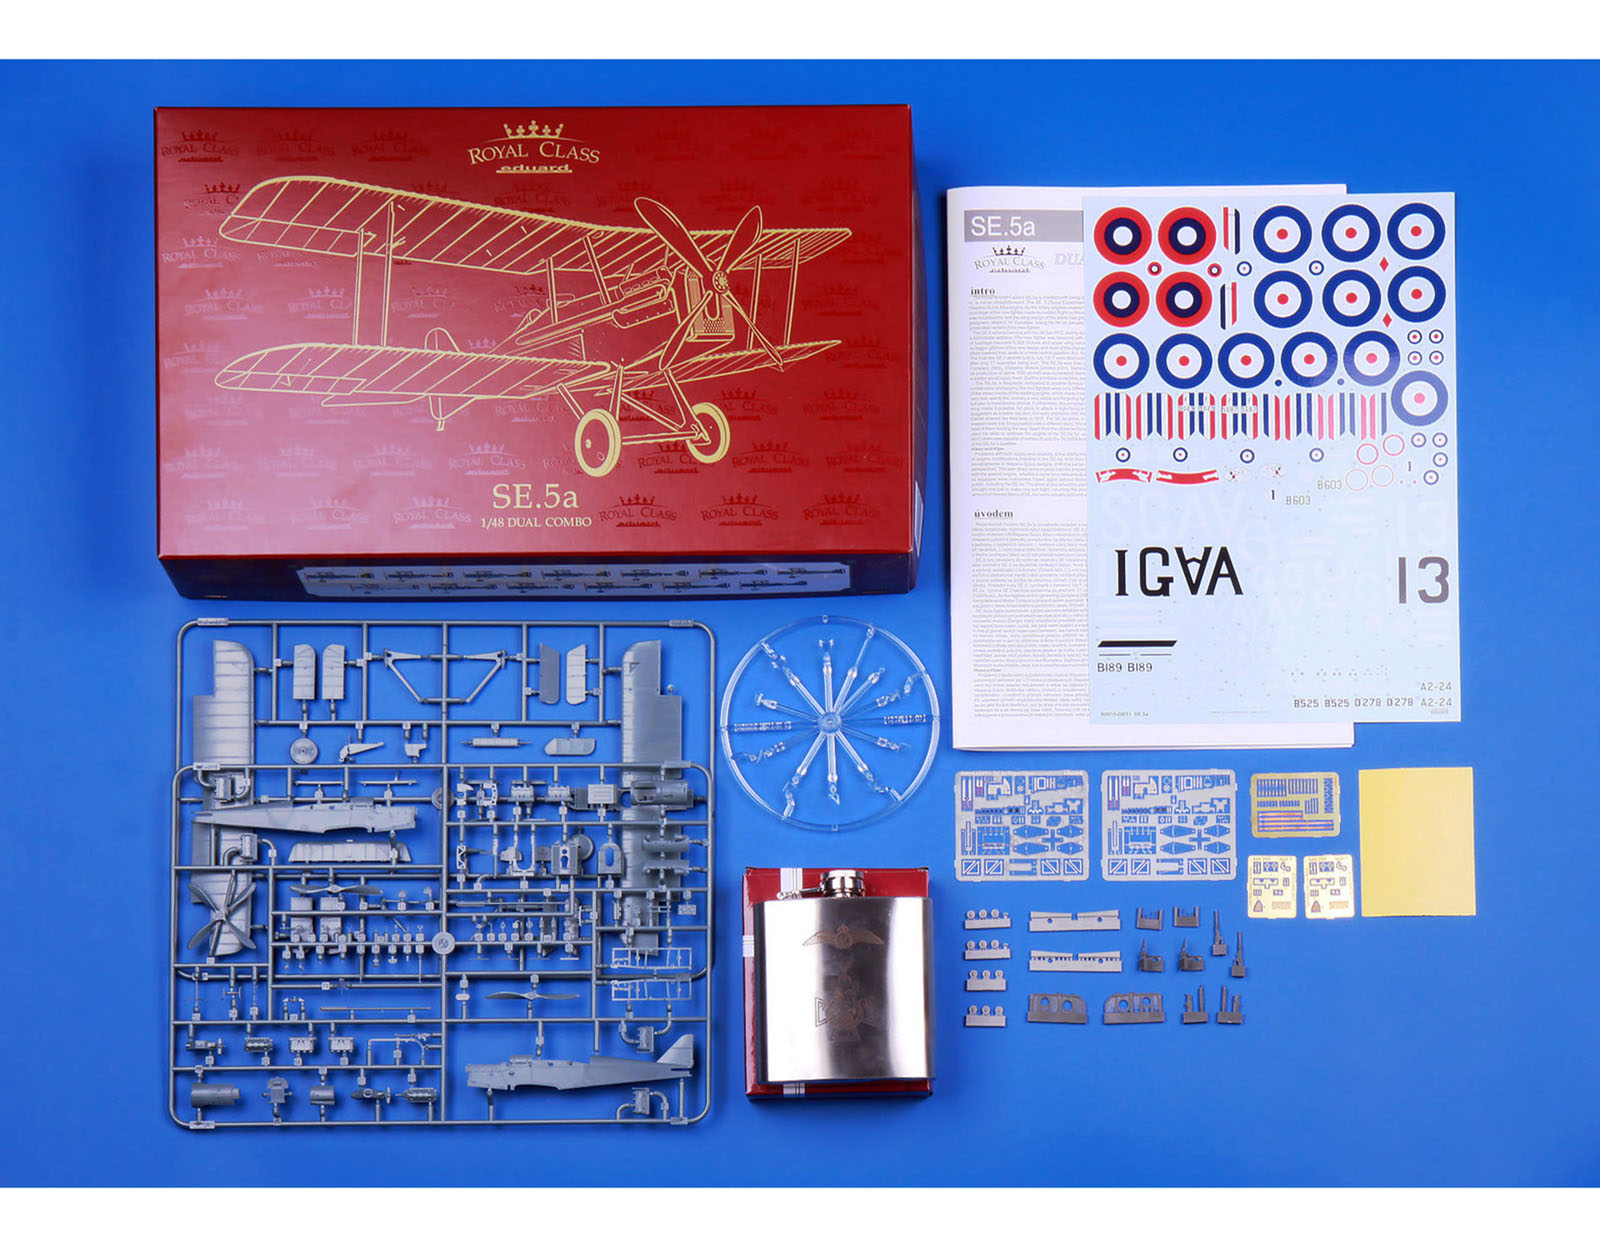
Kit contents

Flask included in kit with engraved WWI insignia

Exhaust Pipe 1: Issue 1

Exhaust Pipe 2: Issue 1
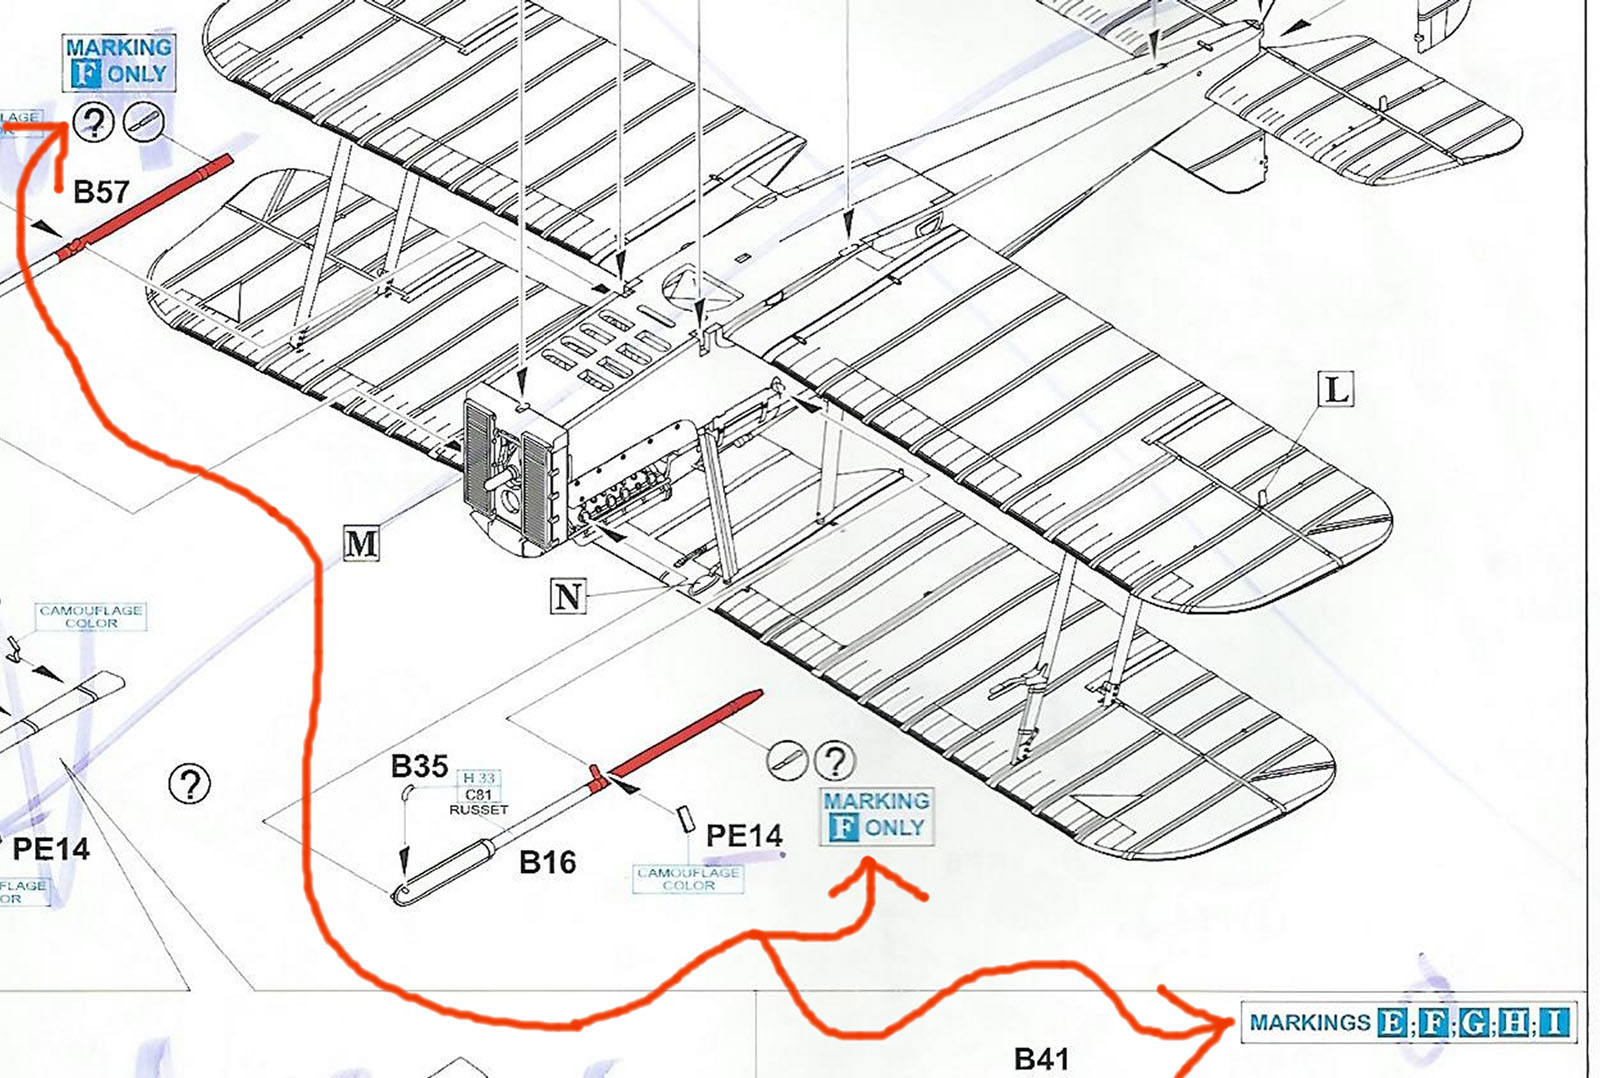
Markings Alert: Be sure to heed the notices, printed in blue on various pages that pertain to the airframe version chosen
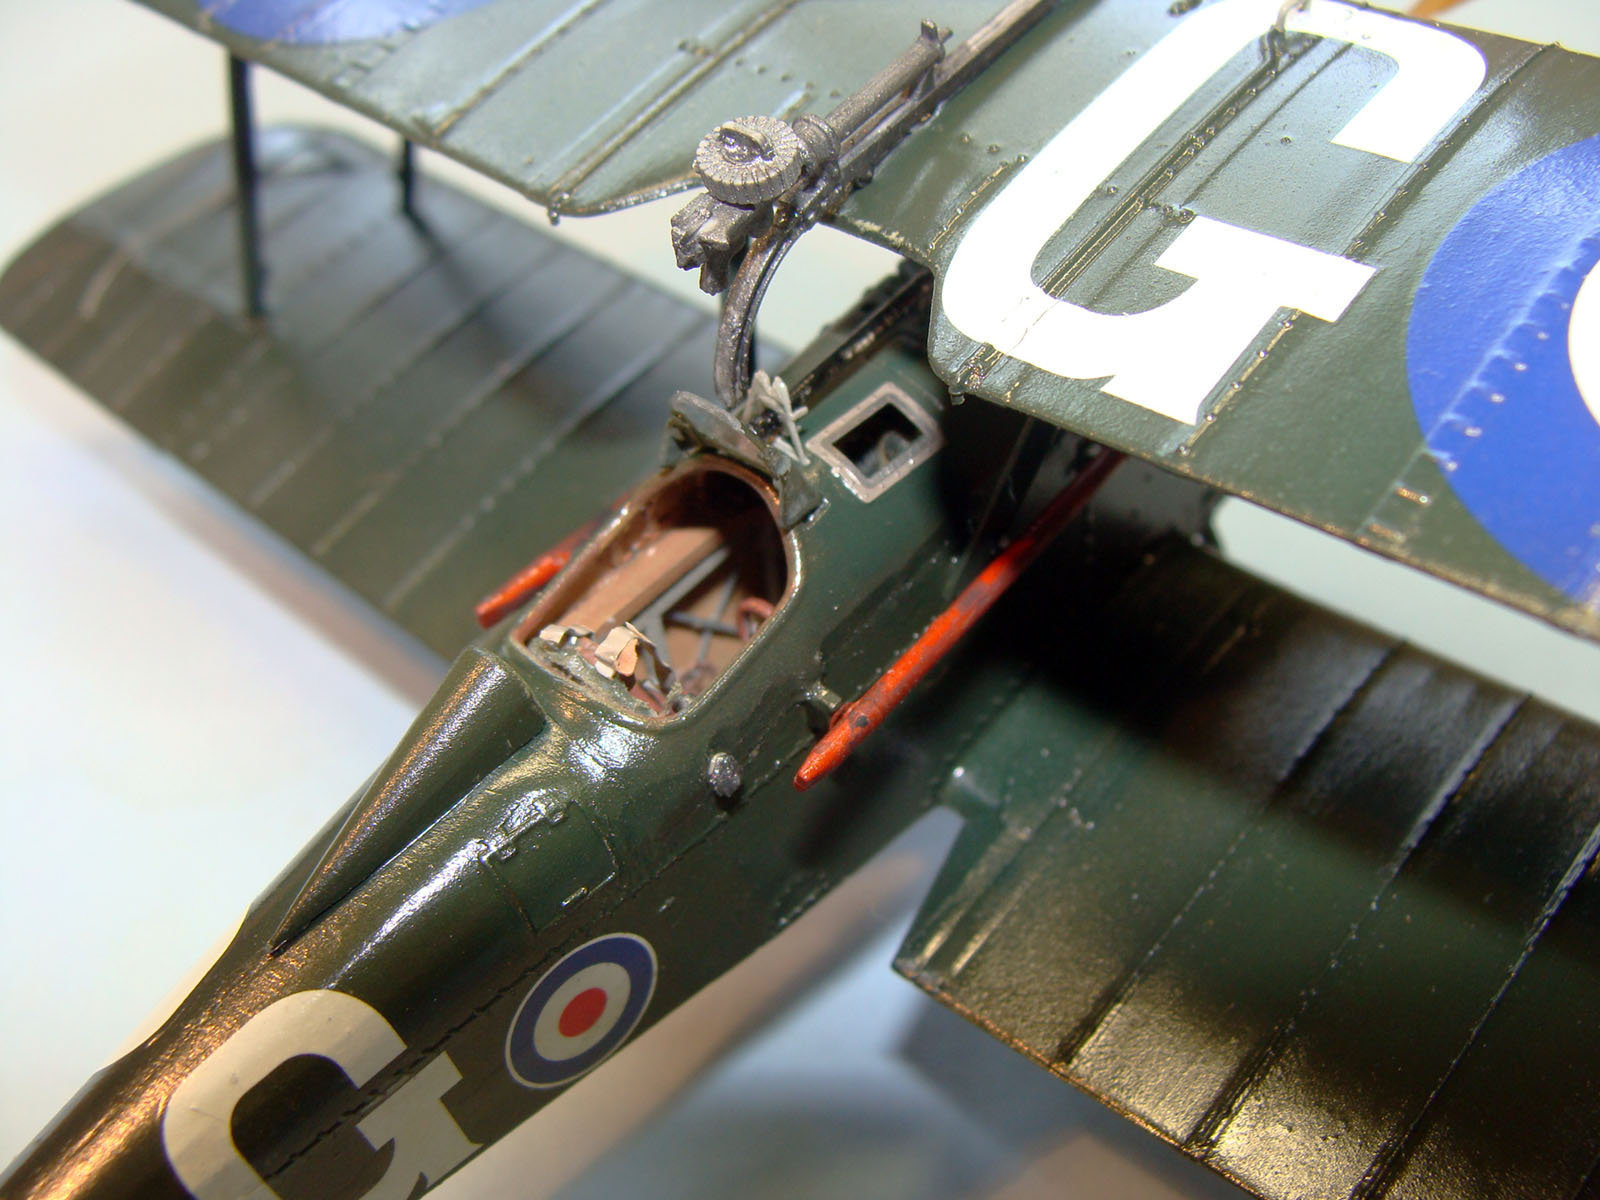
Hispano cockpit
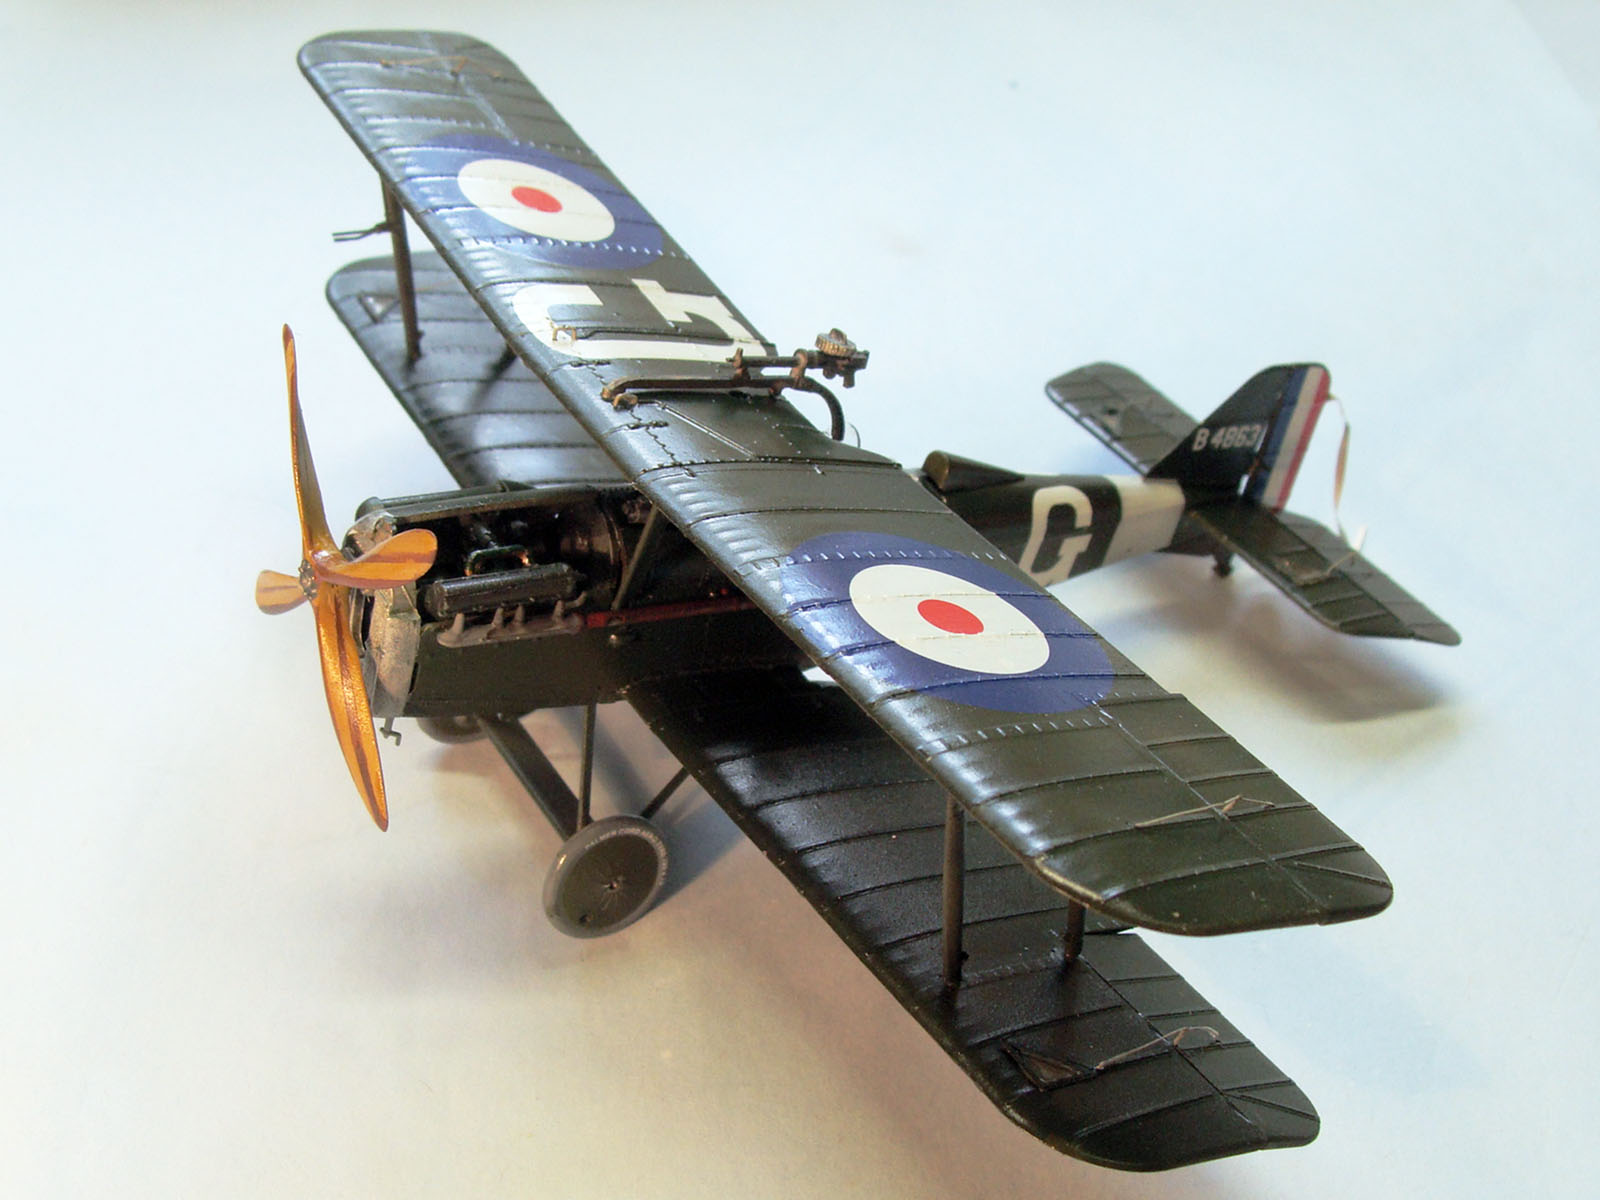
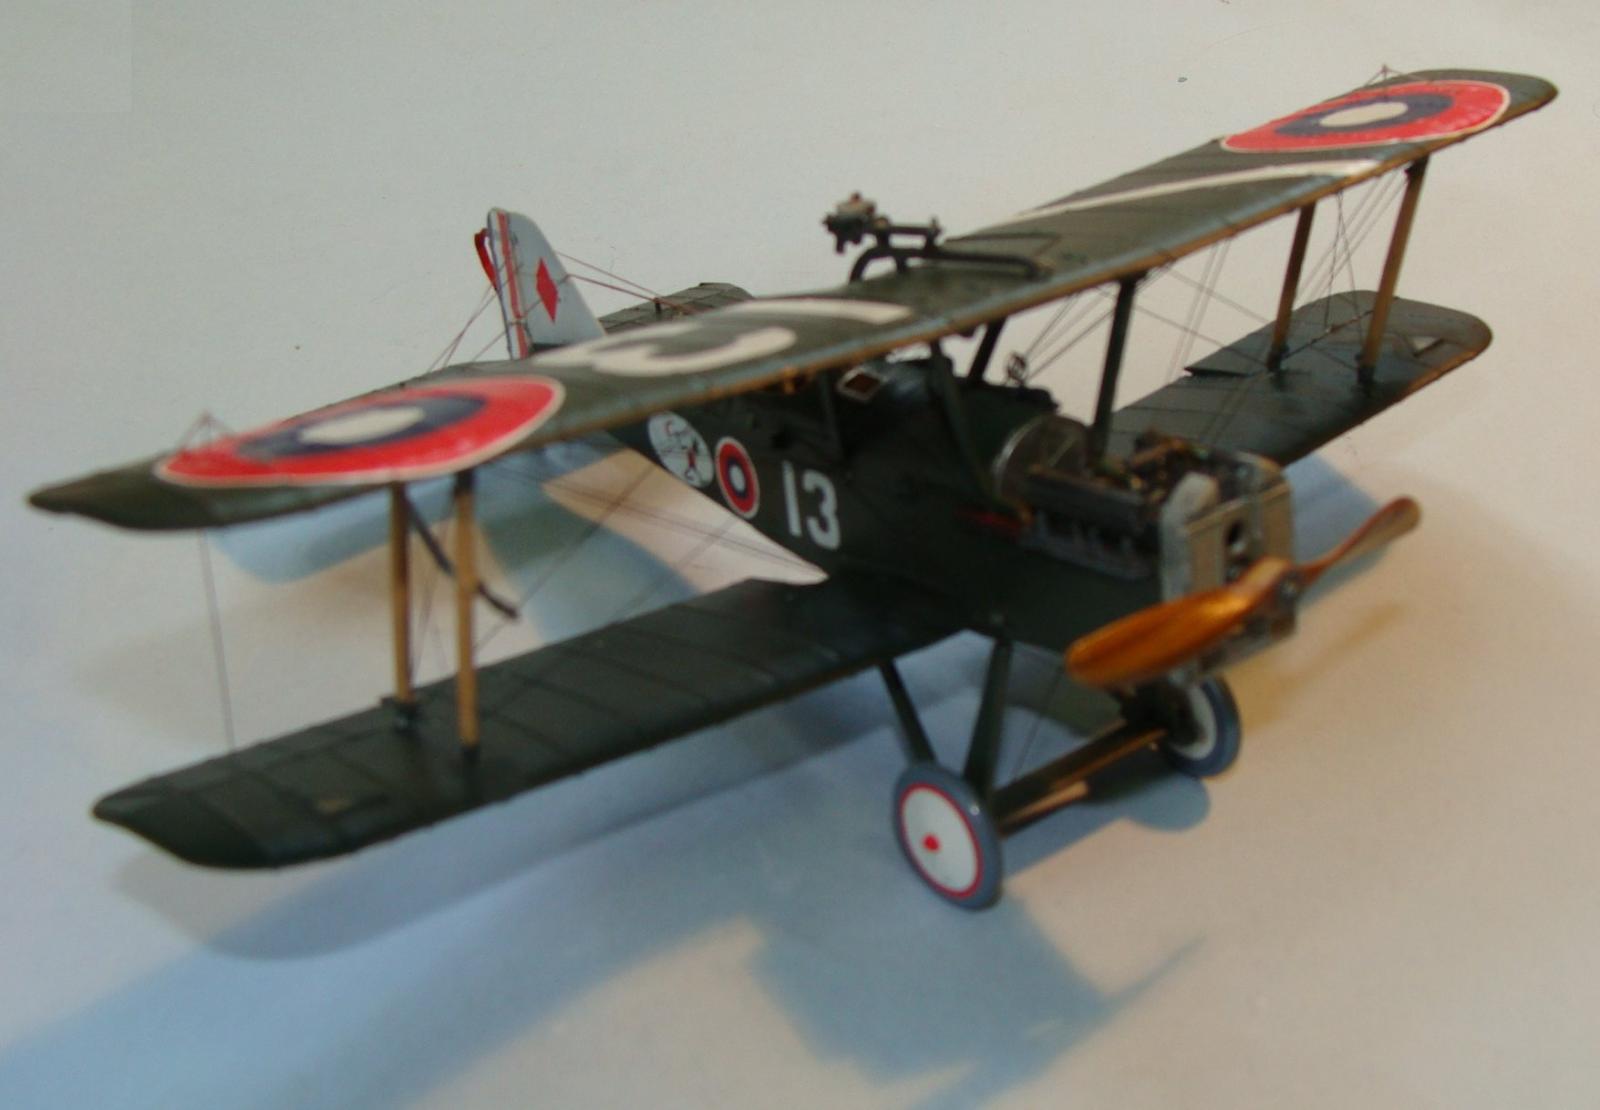
Front-left view of Hispano

Hispano left-side view
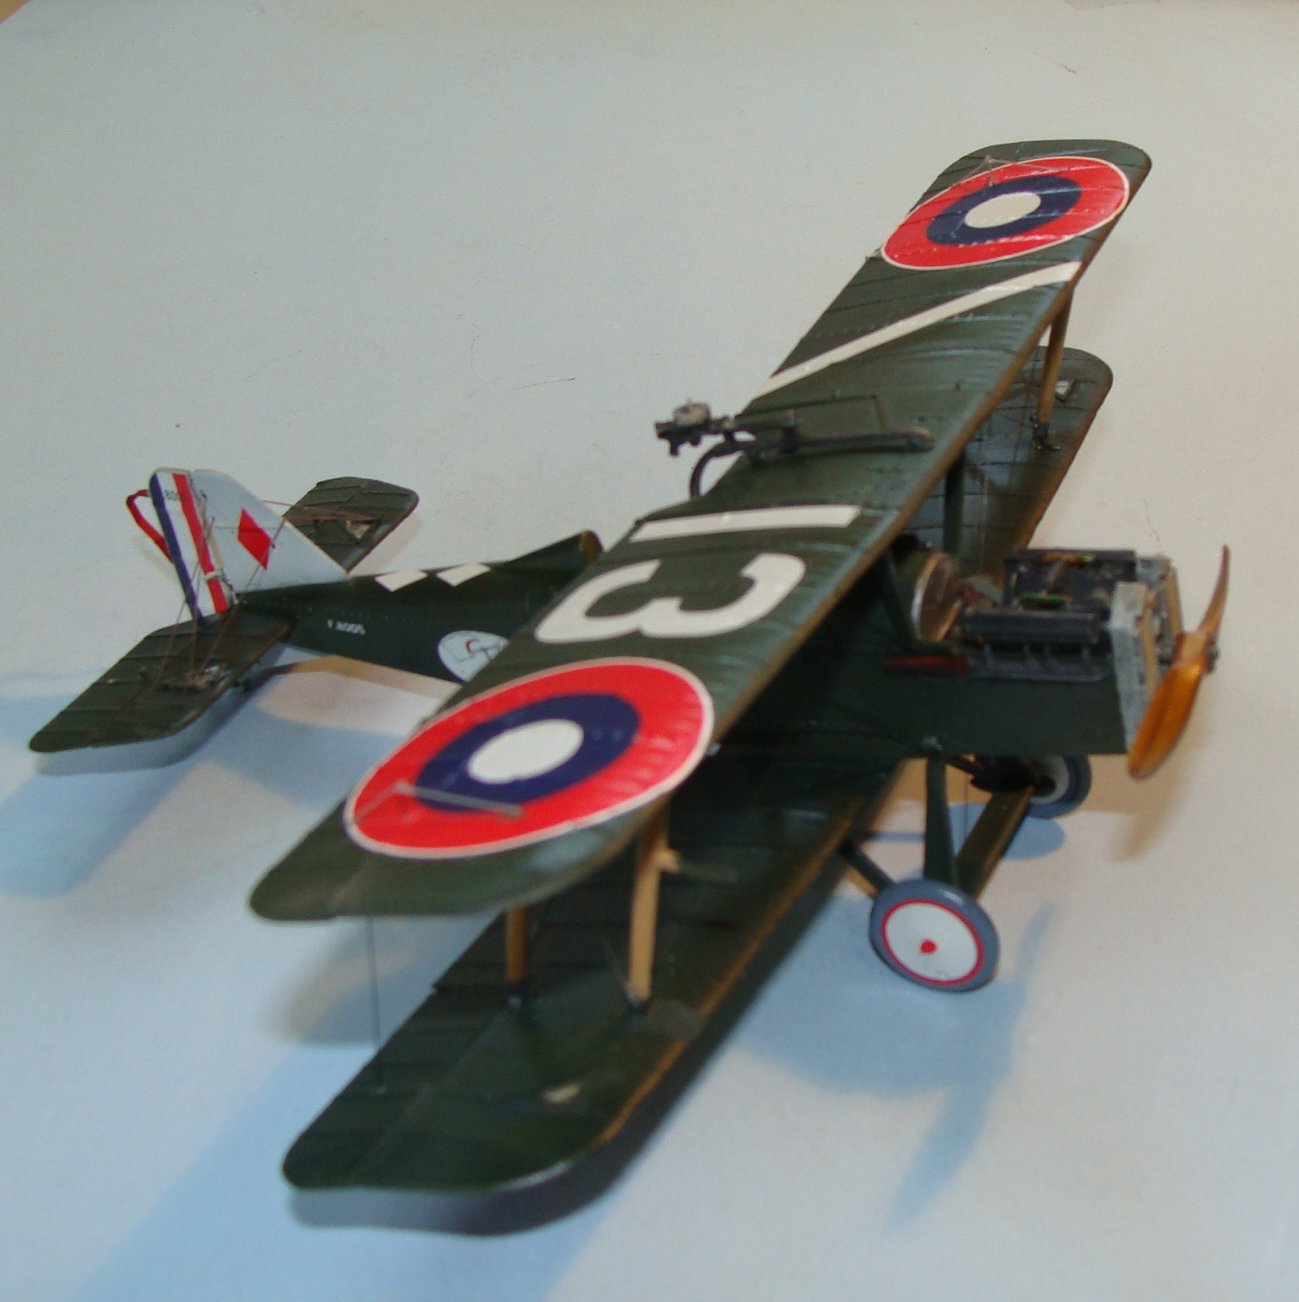
Hispano right-rear

Hispano engine compartment

Viper left-front view

Viper left-rear
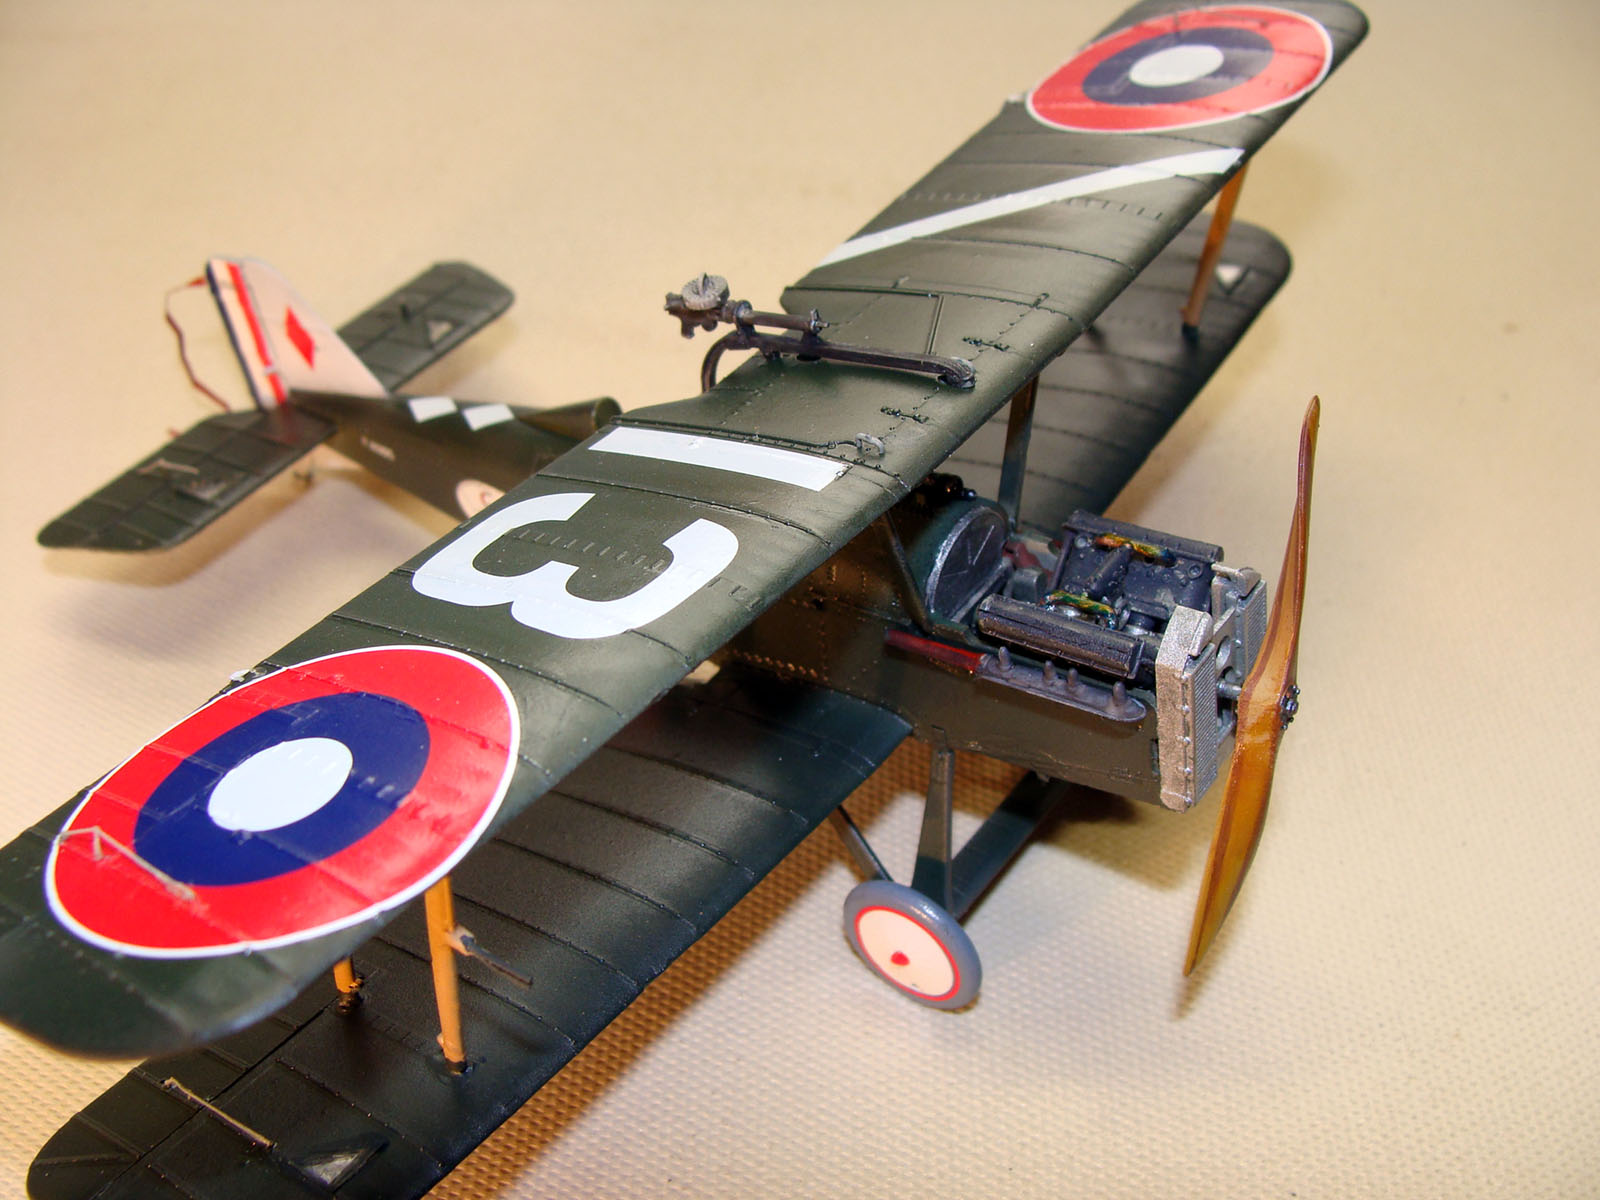
Viper engine compartment

Viper right-rear
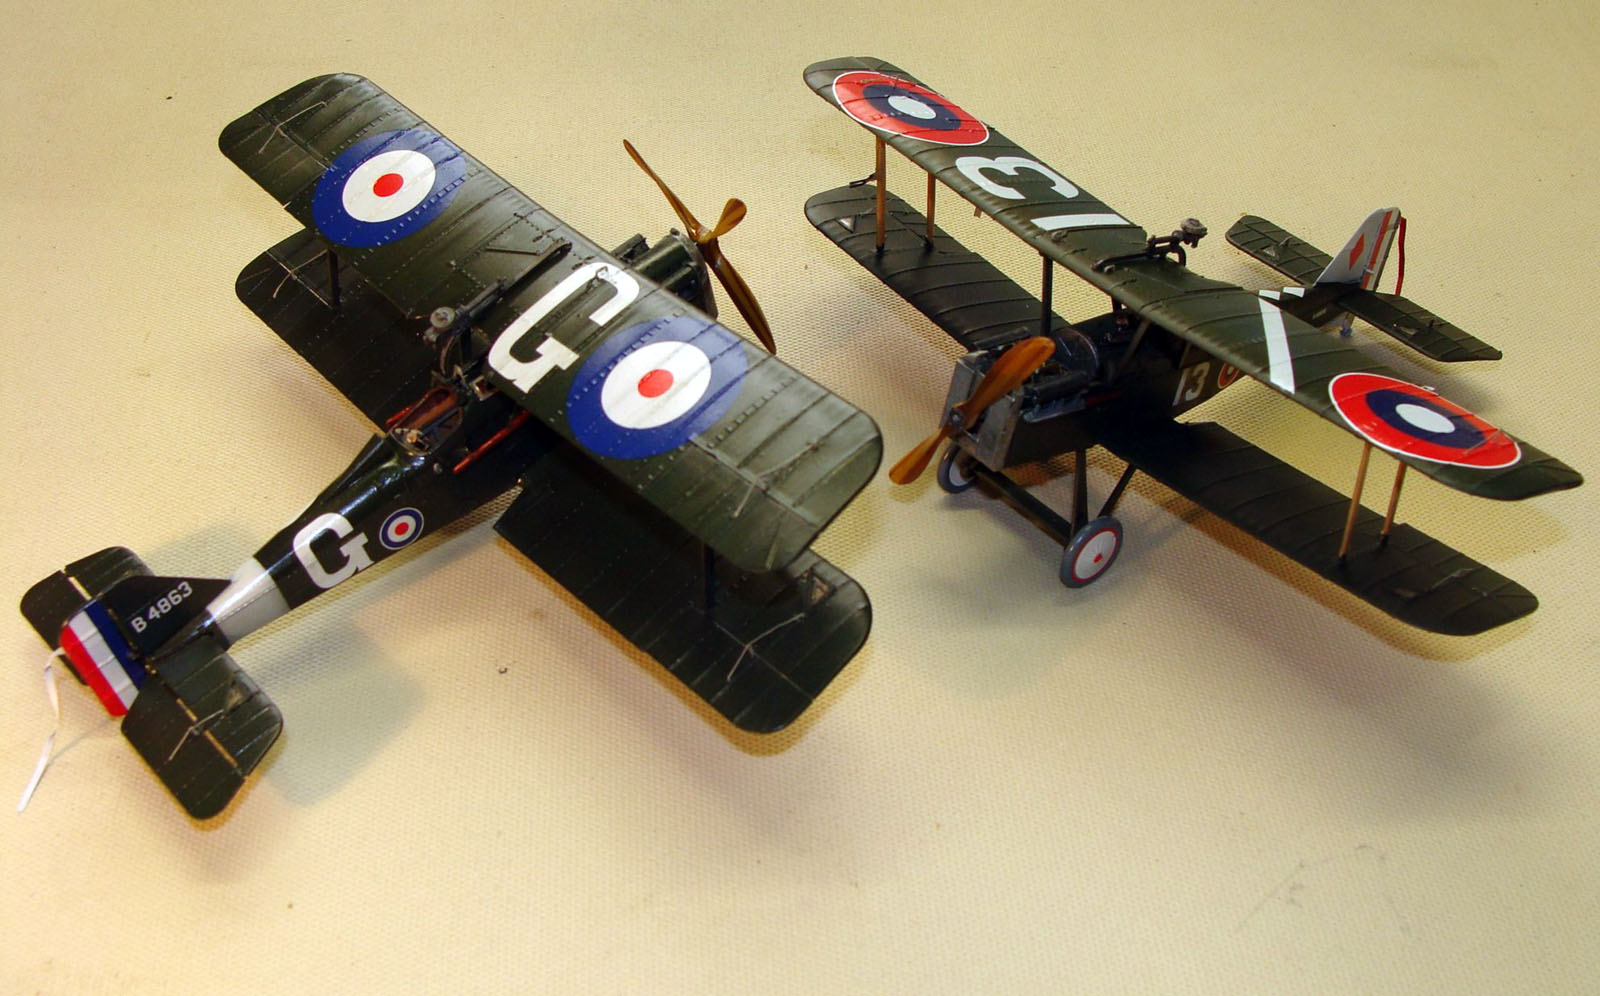
Both airfraft, side-by-side - Se.5 on left, Viper right
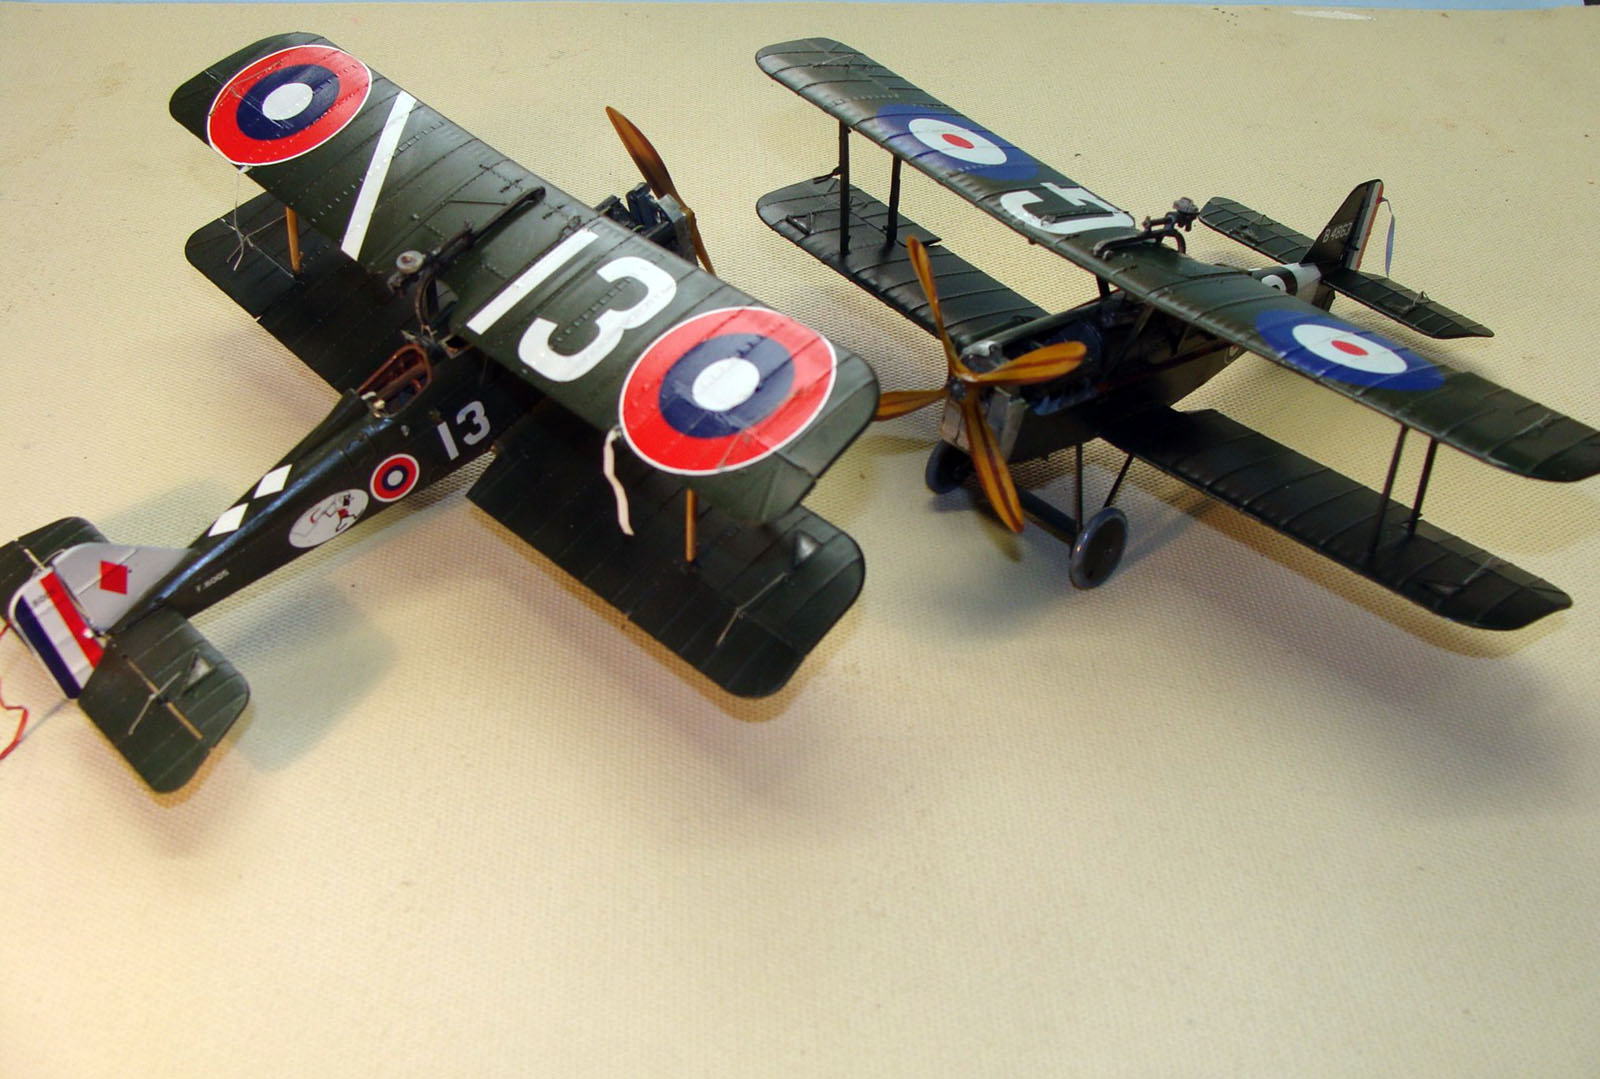
Both airfraft, side-by-side - Viper on left, Se.5 right

Rigged
Rigged
Comments
Add new comment
This site is protected by reCAPTCHA and the Google Privacy Policy and Terms of Service apply.
Similar Reviews