
Sd.Kfz.182 Kingtiger Porsche Turret w/Zimmerit (2 in 1)
In recent months, we have seen a plethora of King Tiger kits hit the market. Most notable have been the Takom releases of the Sd.Kfz. 182 with full interiors…and it seems these have so far been a hit with armor modelers around the world. ICM and Meng have also released similar models of this iconic tank so it should not be a surprise that Dragon has also entered the fray with yet another release of this “king” of the WWII battlefield. One can point out numerous Dragon releases of this tank in past years but this time around they have upped their game to stay competitive. The question is, will these extras be enough to keep this newest Konigstiger on the Forward Edge of the Battlefield?
Parts
- Molded in gray: 436 (not used: 131)
- Molded in clear styrene: 21 (not used: 10)
- Magic Track Individual Track Links: 240
- Phot-etch: 116 on one fret
- Braided metal cable: 3
- Decal sheet 1
This boxing of the Dragon King Tiger is of the Porsche variety – noted by its very visible curved and sloped turret - and it also comes with molded zimmerit. In addition to these basics Dragon has included expanded photoetch and most interesting is the inclusion of a turret mounted Berge Panzer crane that was most probably utilized to lift the maintenance-prone Maybach engine for in-the-field repairs. The most competitive aspect of this release, however, is the inclusion of Magic Tracks…a very welcome sight and an indication that this kit is targeting the discerning armor modeler.
This is pretty much a straight-forward Dragon kit and if you are an experienced builder of such kits then this one will pose no problems at all. If you are new to armor modelling, or new to Dragon kits in general, this one is a good one to start with as it poses no major hurdles (except for the Magic Track individual track links). Dragon seems to have heard all the feedback over the years regarding its instructions. While I have not built EVERY Dragon kit out there I have built enough to see that these instructions are different than any I have seen in the past. Dragon is utilizing computer generated pictures in each step of the instructions with computerized drawings of the individual pieces and arrows to their respective locations. A definite improvement over past instructions. (see photo)
There is no interior to speak of except for a rudimentary gun that is really just there to give something for the barrel to attach to. If I were to pose the hatches open I would do some improving, or even replace the gun altogether along with adding turret interior details such as seats, ammo racks, and radios/boxes. One hurdle I encountered was the placement of the turret collar armor. The instructions tell you to place then four pieces on the hull before placing the turret. I did just that and even with guide pins and holes the turret would not settle into place…the armor was just a tad off. I pried off the armor, put the turret in place, and built the armor around the turret. This technique ensures a perfect fit. (see photo)
The expanded PE offering is a welcome sight although it falls short in some areas. I really like it when I can place my pioneer tools on the AFV with brass PE latches as this adds an increased level of detail. Dragon includes latches for some but not all of the tools (see photo). Why it cannot include a few more latches I do not know... maybe they ran out of room on the PE fret. I have seen this shortcoming on last year's Panzer IIC release as well. The PE that is included is nicely executed and goes on without a hitch. I do all my PE-to-styrene bonds with CA glue and PE-to-PE with solder.
The turret mounted crane looks good on the sprue but when you put it together you realize there are some missing parts…specifically the parts that mount the crane to the turret roof. I looked very carefully on both the instructions (see photo) and in the box for any parts or guidance but came up empty-handed. While I wanted to build this kit with the crane attached I had to forego this feature. The sprue is labeled for Dragon’s Berge Panzer release but overlooked are the attachment points for the crane on the Porsche turret of the King Tiger.
The molded-on zimmerit is a nice touch and is executed well. It represents nicely the hand-application method as was common of zimmerit during that time. The finished model accurately reflects the size and scale of the zimmerit of the Tiger IIs of 1944. The only negative I can think of is that when it comes to decaling, zimmerit poses a unique challenge in getting the decals to snuggle down and minimize air bubbles and silvering. I have moved to spray stencils for German armor with zim in my personal builds/collection but since this is a review build I wanted to test out the kit decals over the zim and report my results. With this in mind, I decided to give the decals a try with some new Tamiya Mark Fit decal setting solution. I am happy to report that the decals settled quite nicely into the zimmerit and in-fact look like painted numbers. Either the decal film is of superior quality, the new Tamiya Mark Fit setting solution is up to the job, or a combination of both. (see photo)
Overall, I spent 30 hours on this build: 17 hours in the construction, 5 hours on the Magic Track, and 8 hours in painting and weathering. If you are looking for a solid kit of a “zimmed” Porsche King Tiger without the added hours of executing an interior than this is the kit for you. It looks fantastic on my shelf next to all my other German WWII armor.
Huge thanks go out to Dragon USA for allowing IPMS to review this fantastic King Tiger.

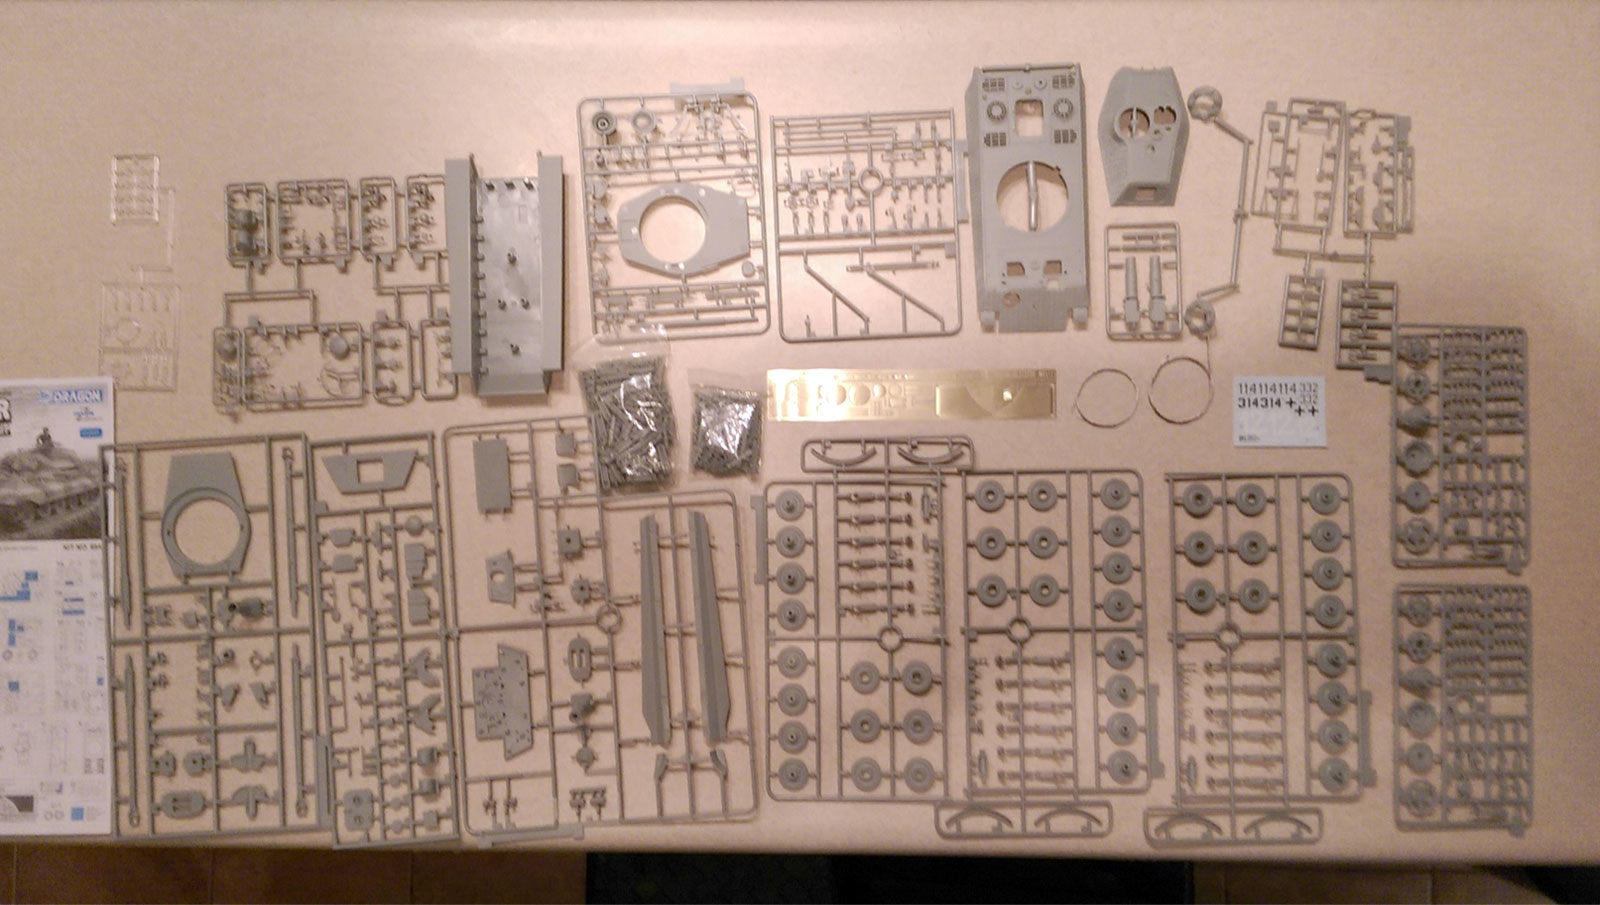
Box contents
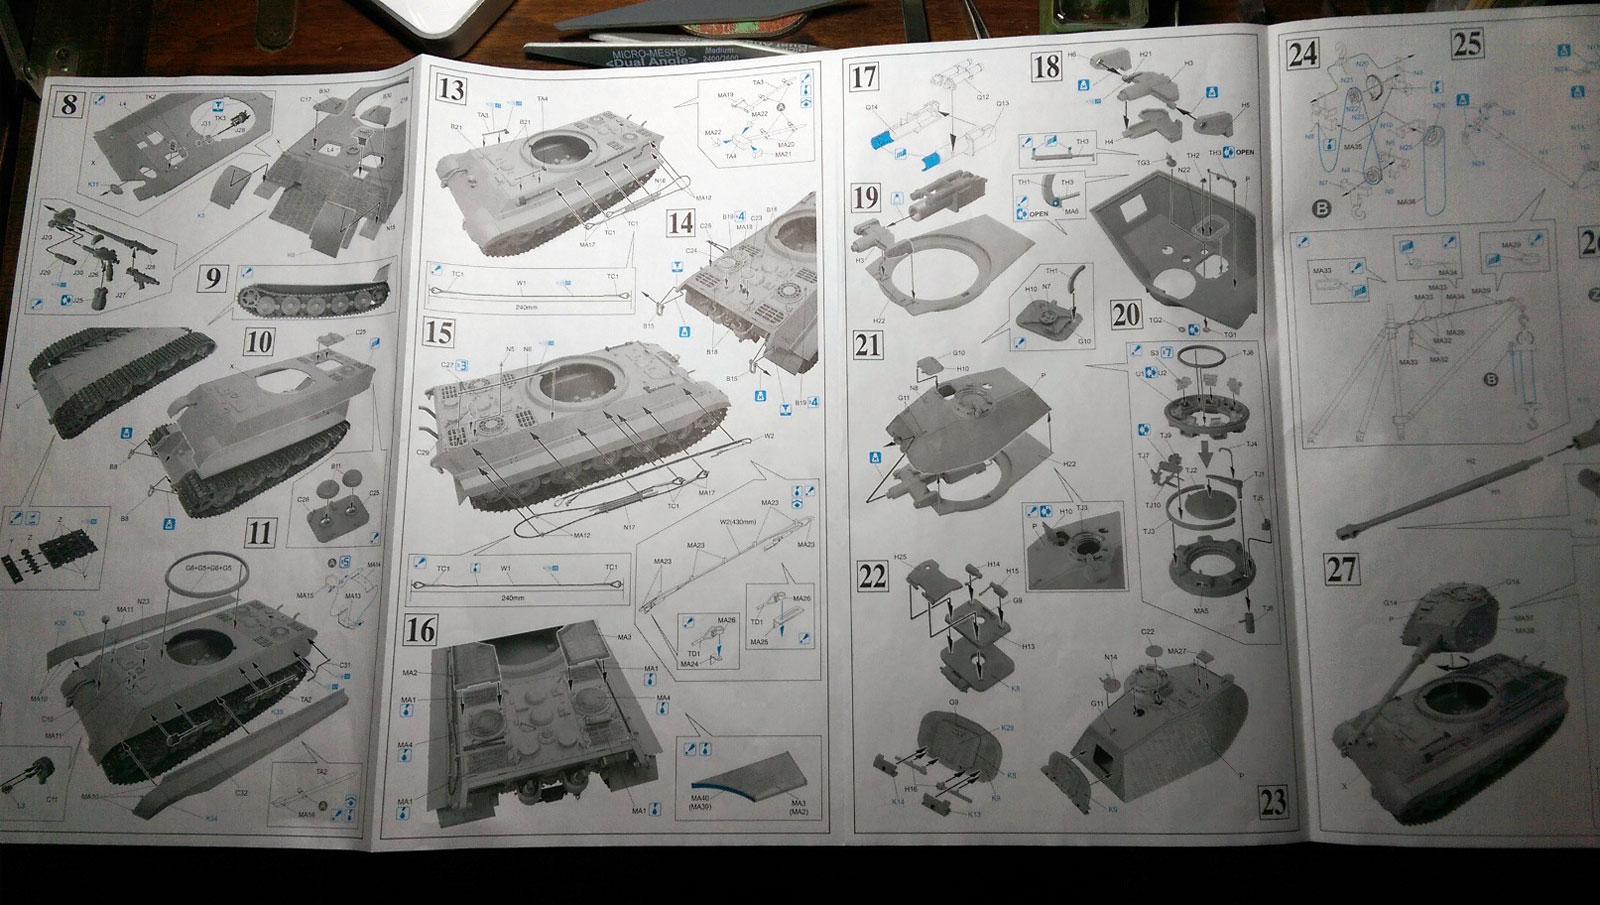
Instructions
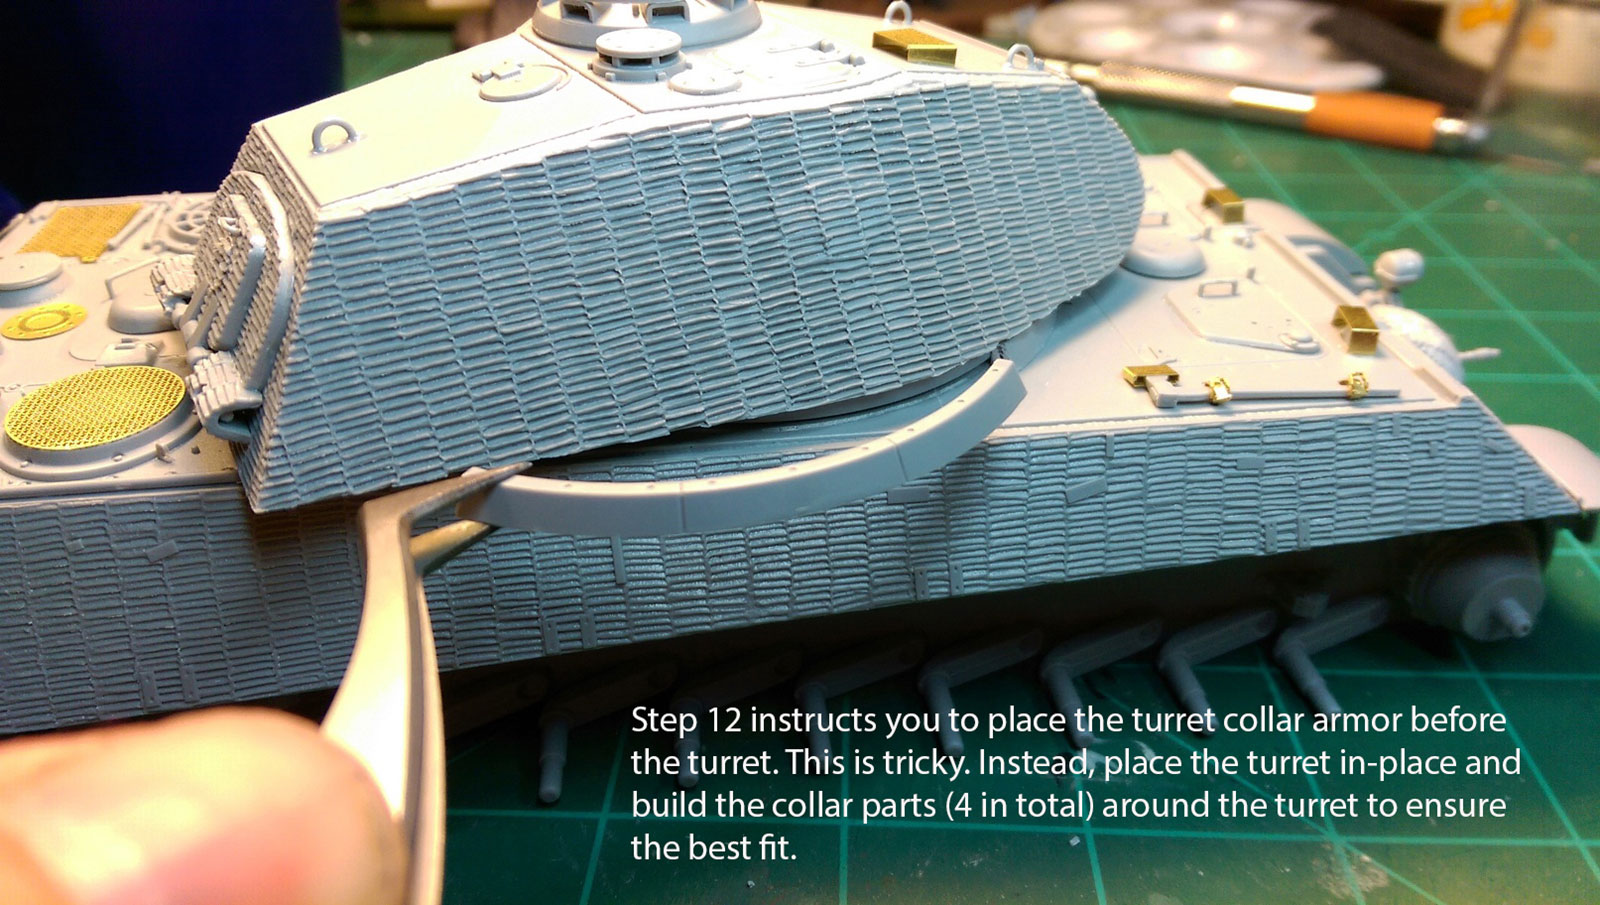
Advice regarding how to install the turret collar armorin step 12
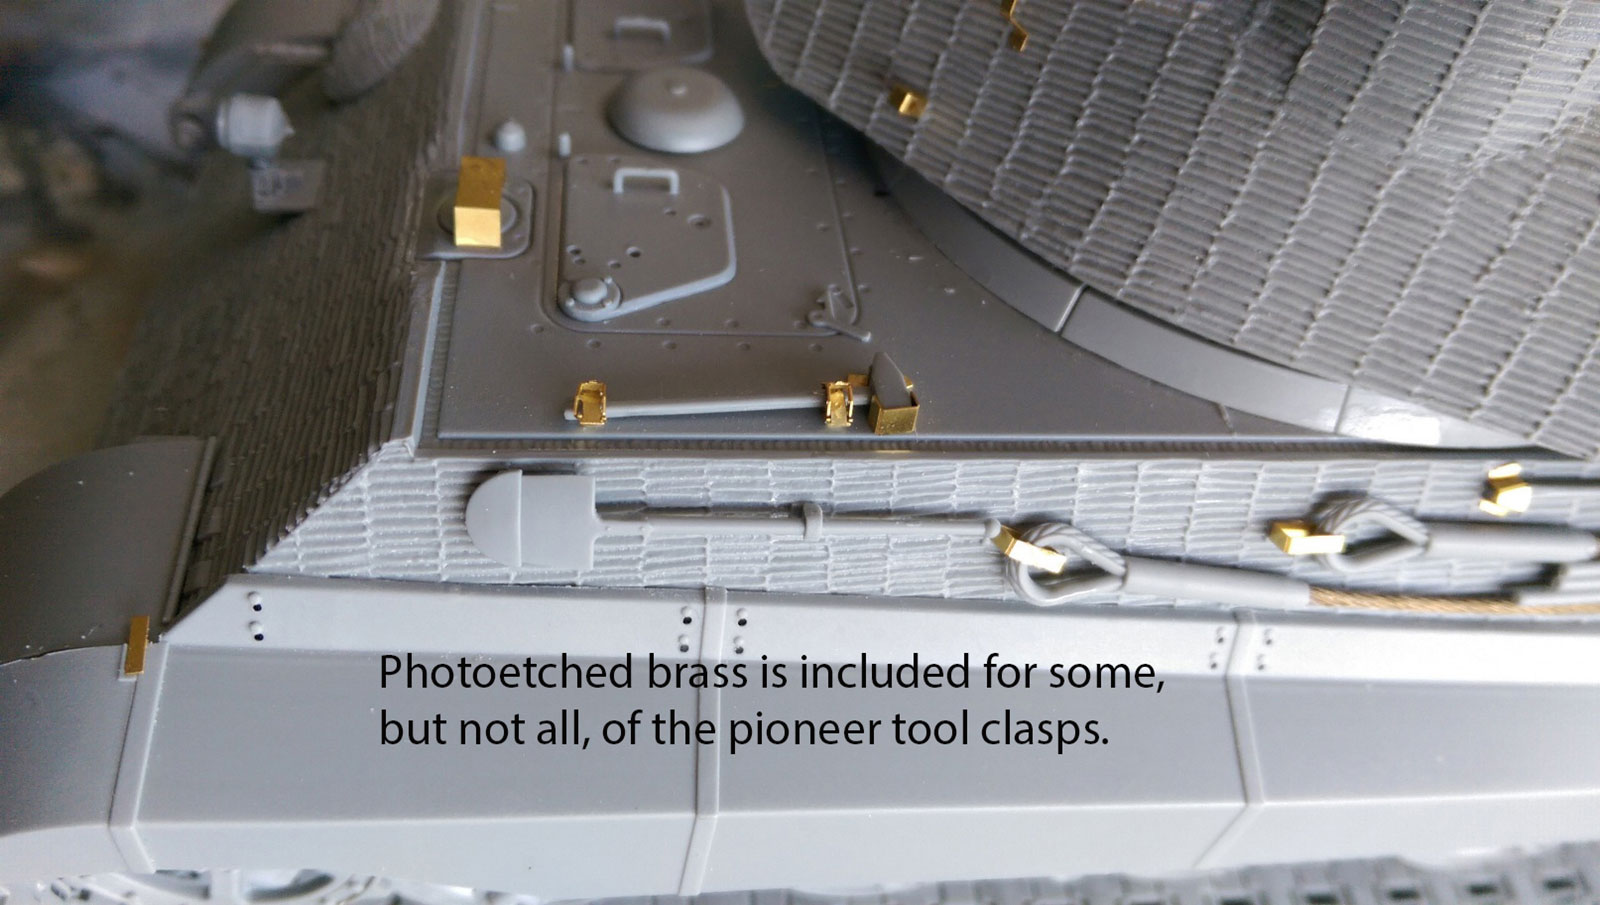
Pioneer tools with accompanying photo etch brackets
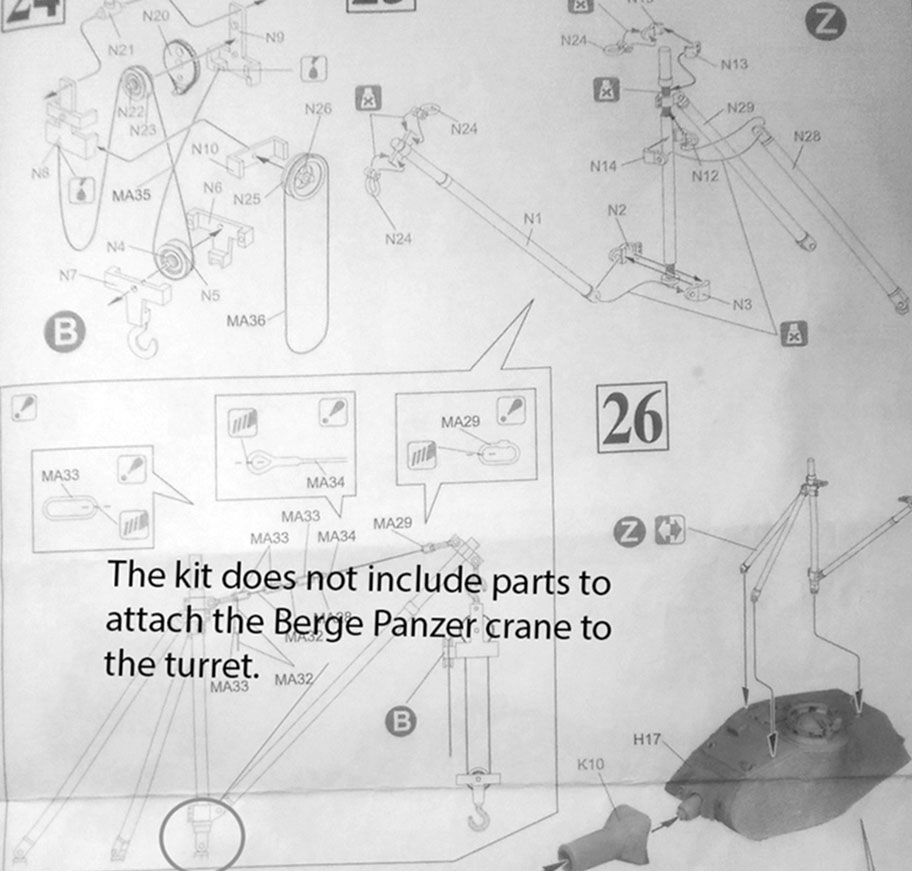
Attachment points for the Berge Panzer crane are overlooked on the Porsche turret
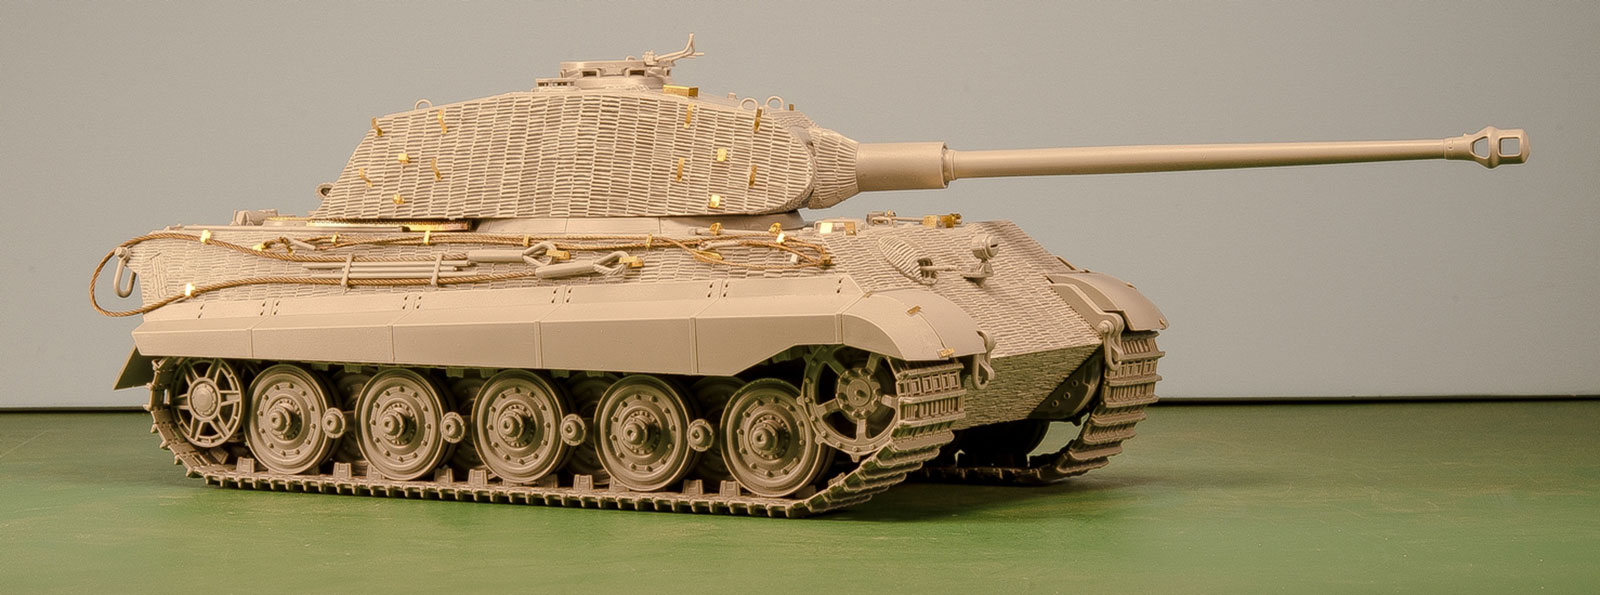
In-progress shot of right side of tank
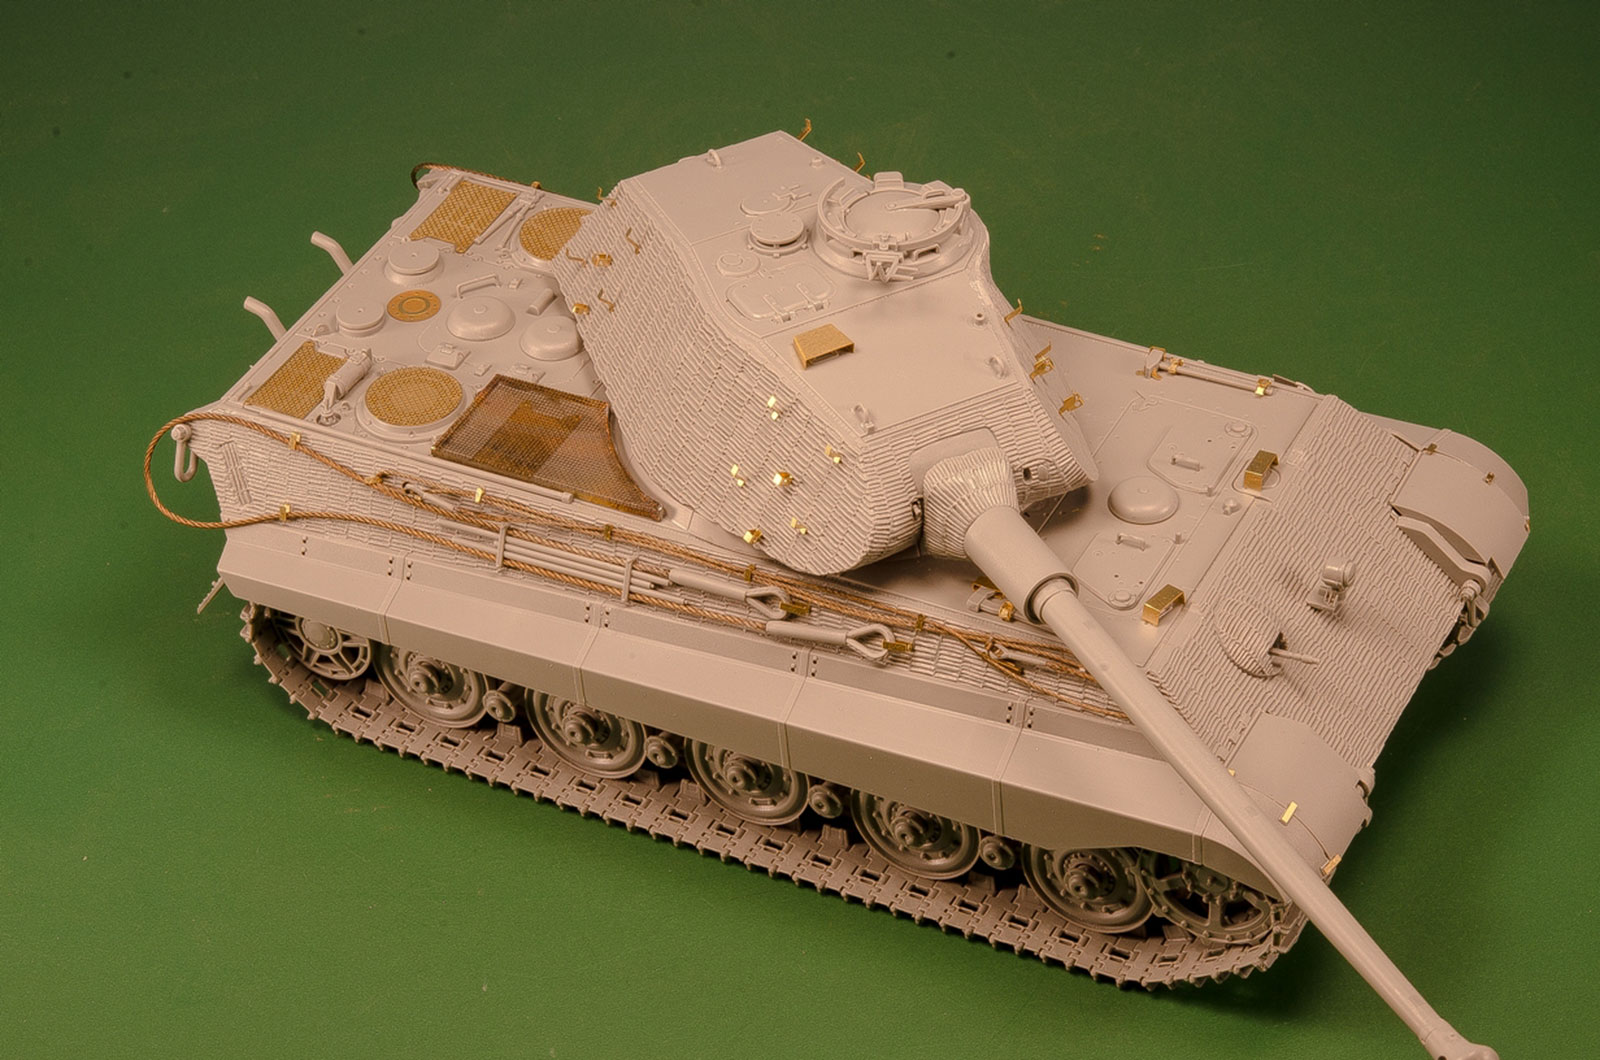
In-progress shot of rear of tank, profiling the exclusive Porsche turret
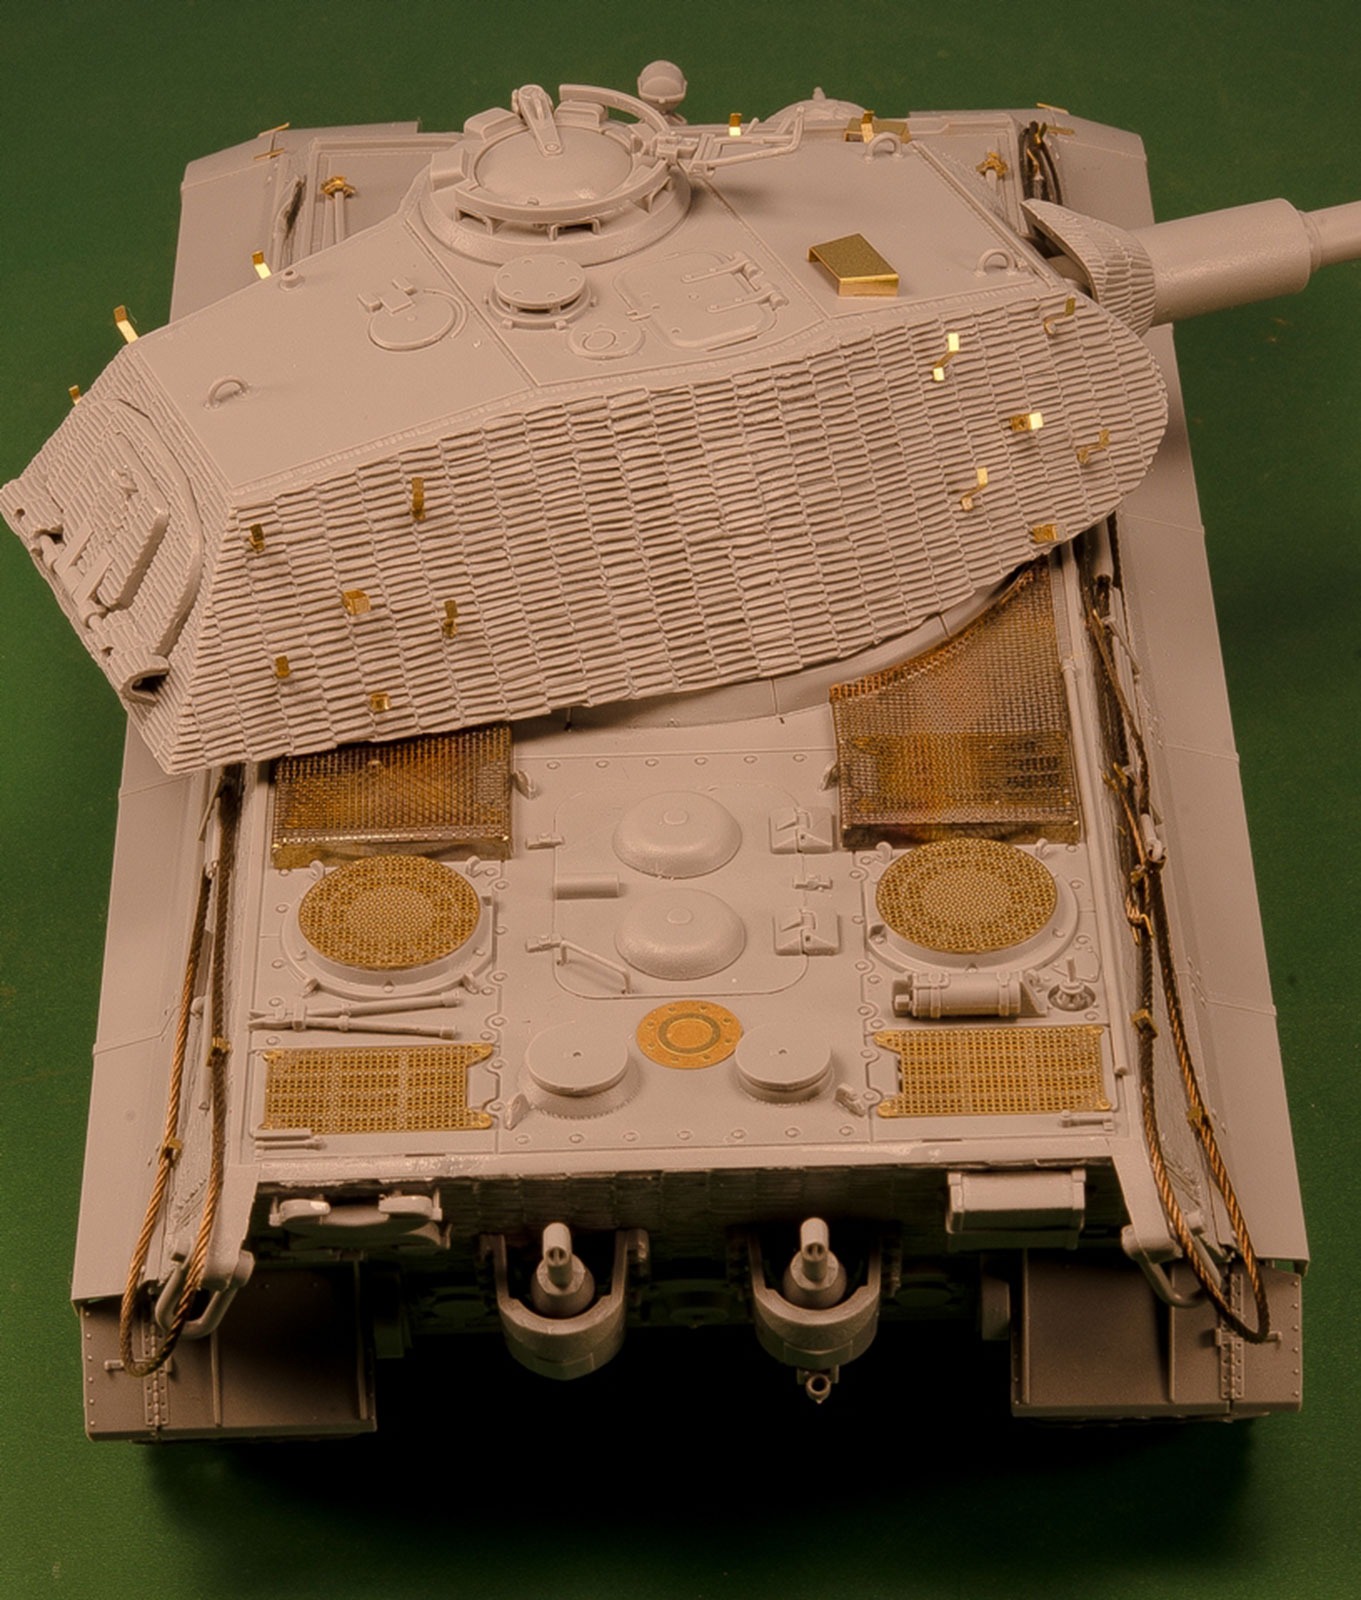
Right-above image of the kit during construction

Decals being applied over Zimmerit, which settled down nicely due to use of Tamiya Mark Fit decal setting solution
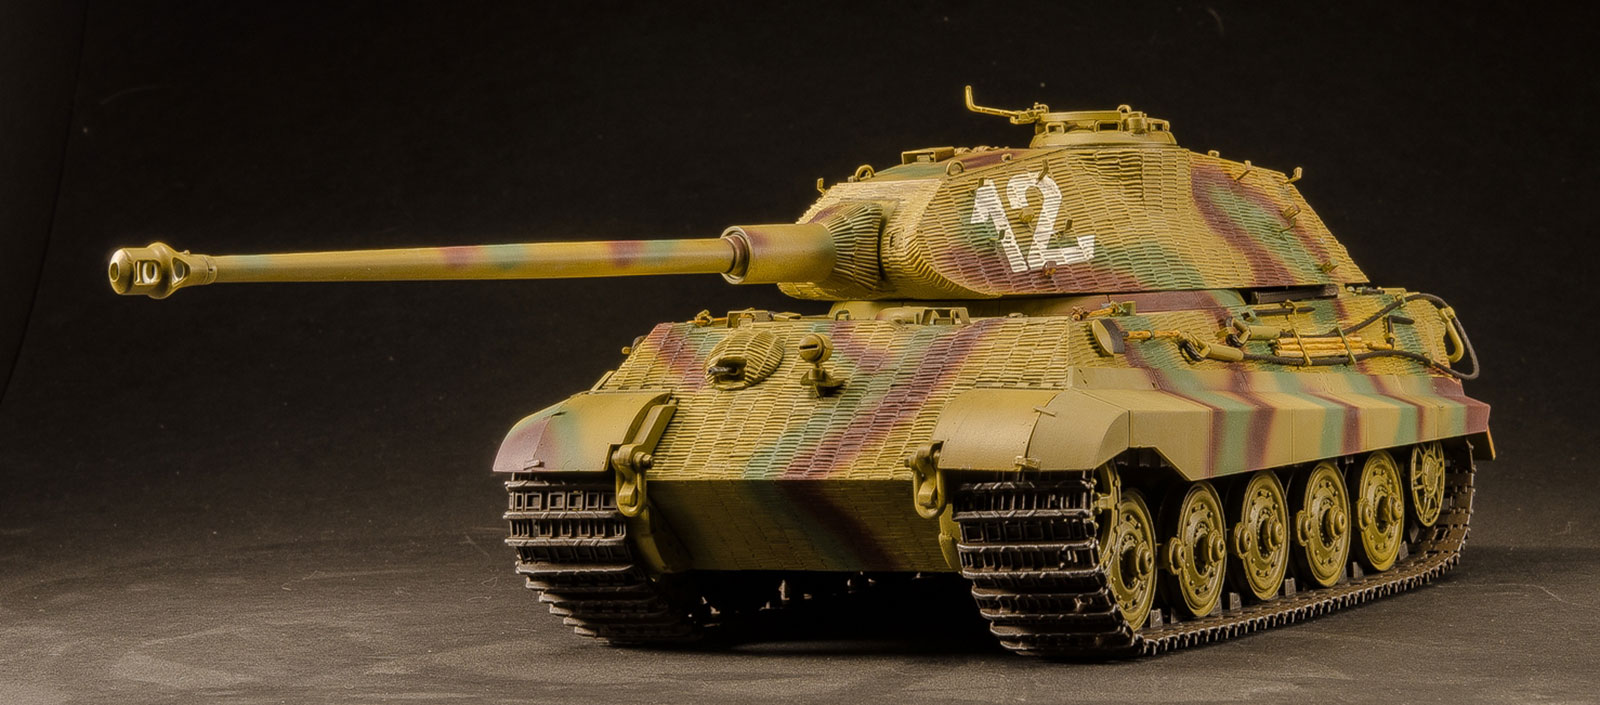
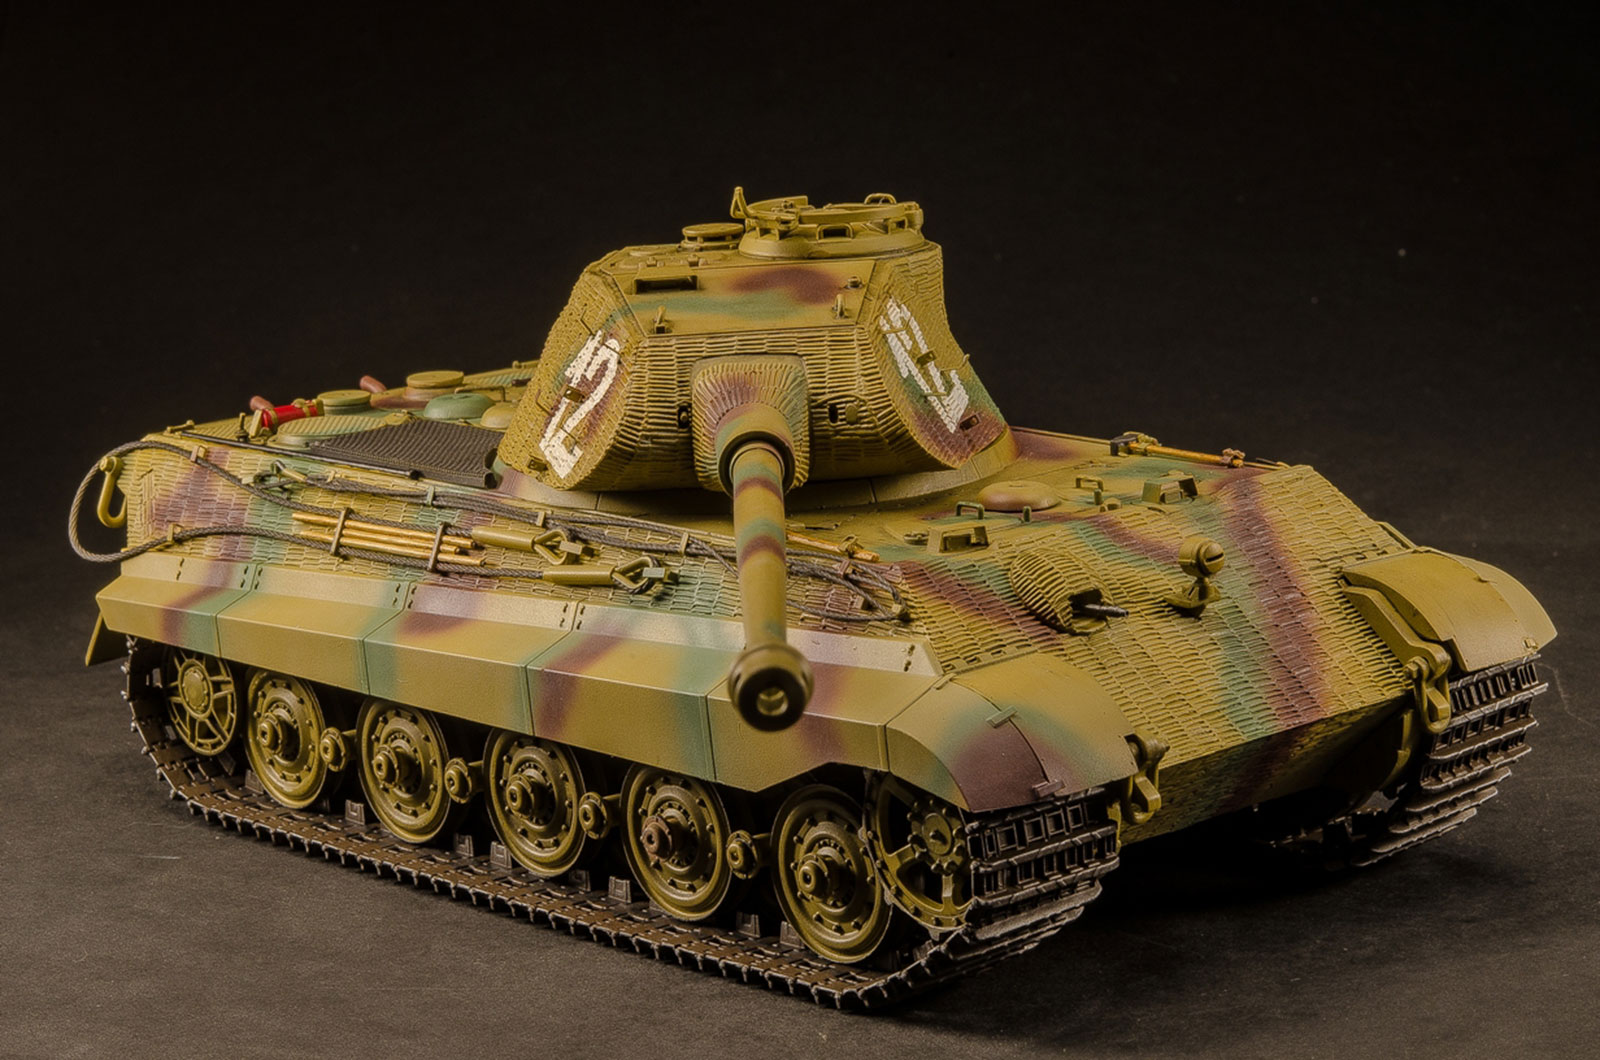
Complete kit, front-left

Complete kit, front-left above
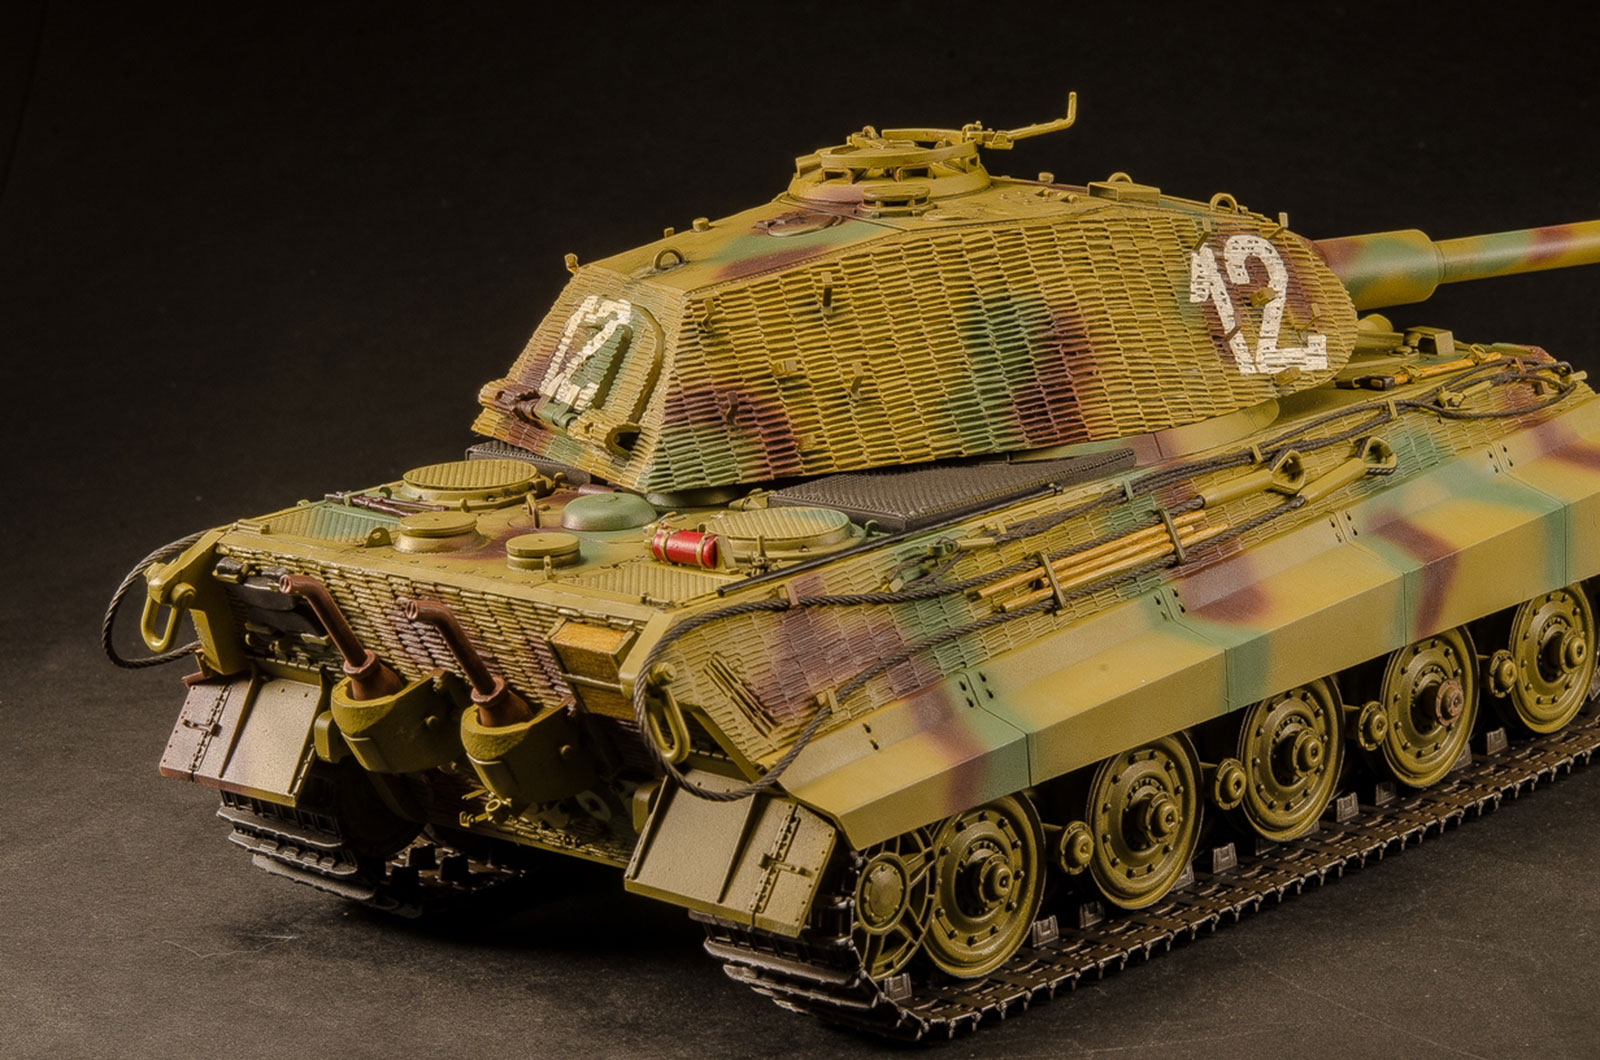
Complete kit, right-rear
Comments
Add new comment
This site is protected by reCAPTCHA and the Google Privacy Policy and Terms of Service apply.
Similar Reviews