
Sd.Kfz 251D
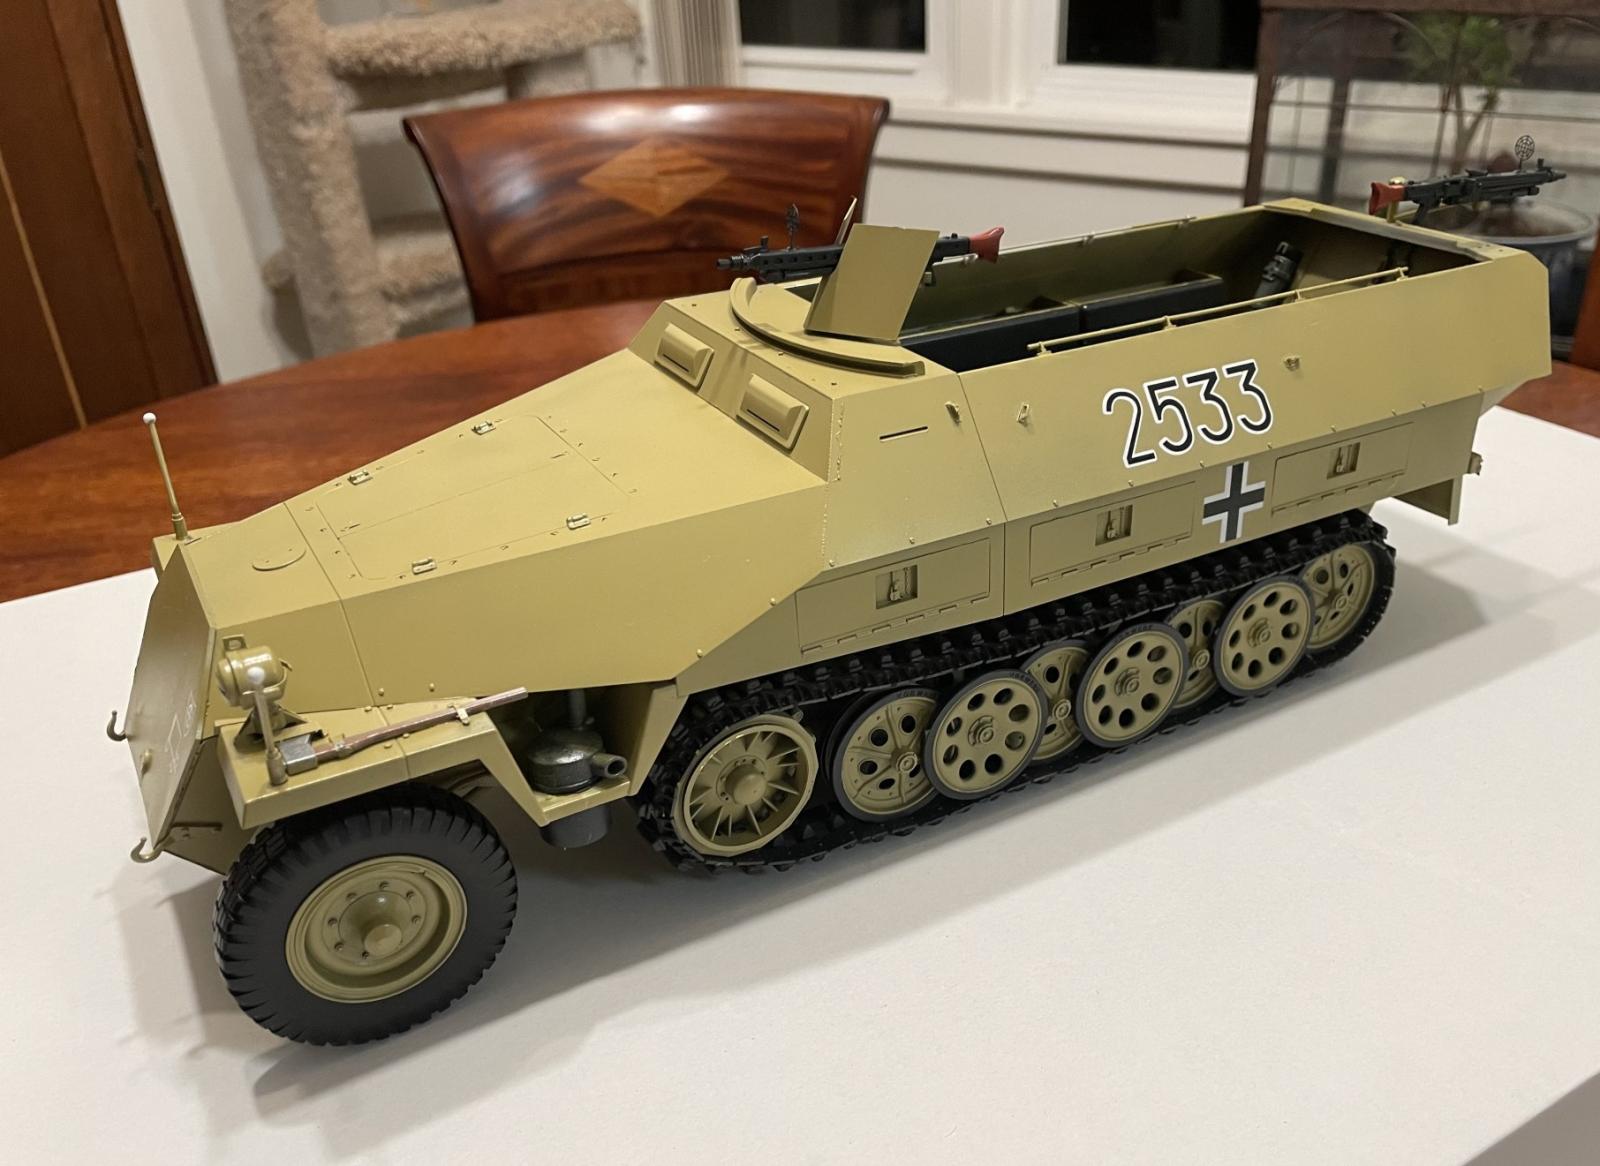
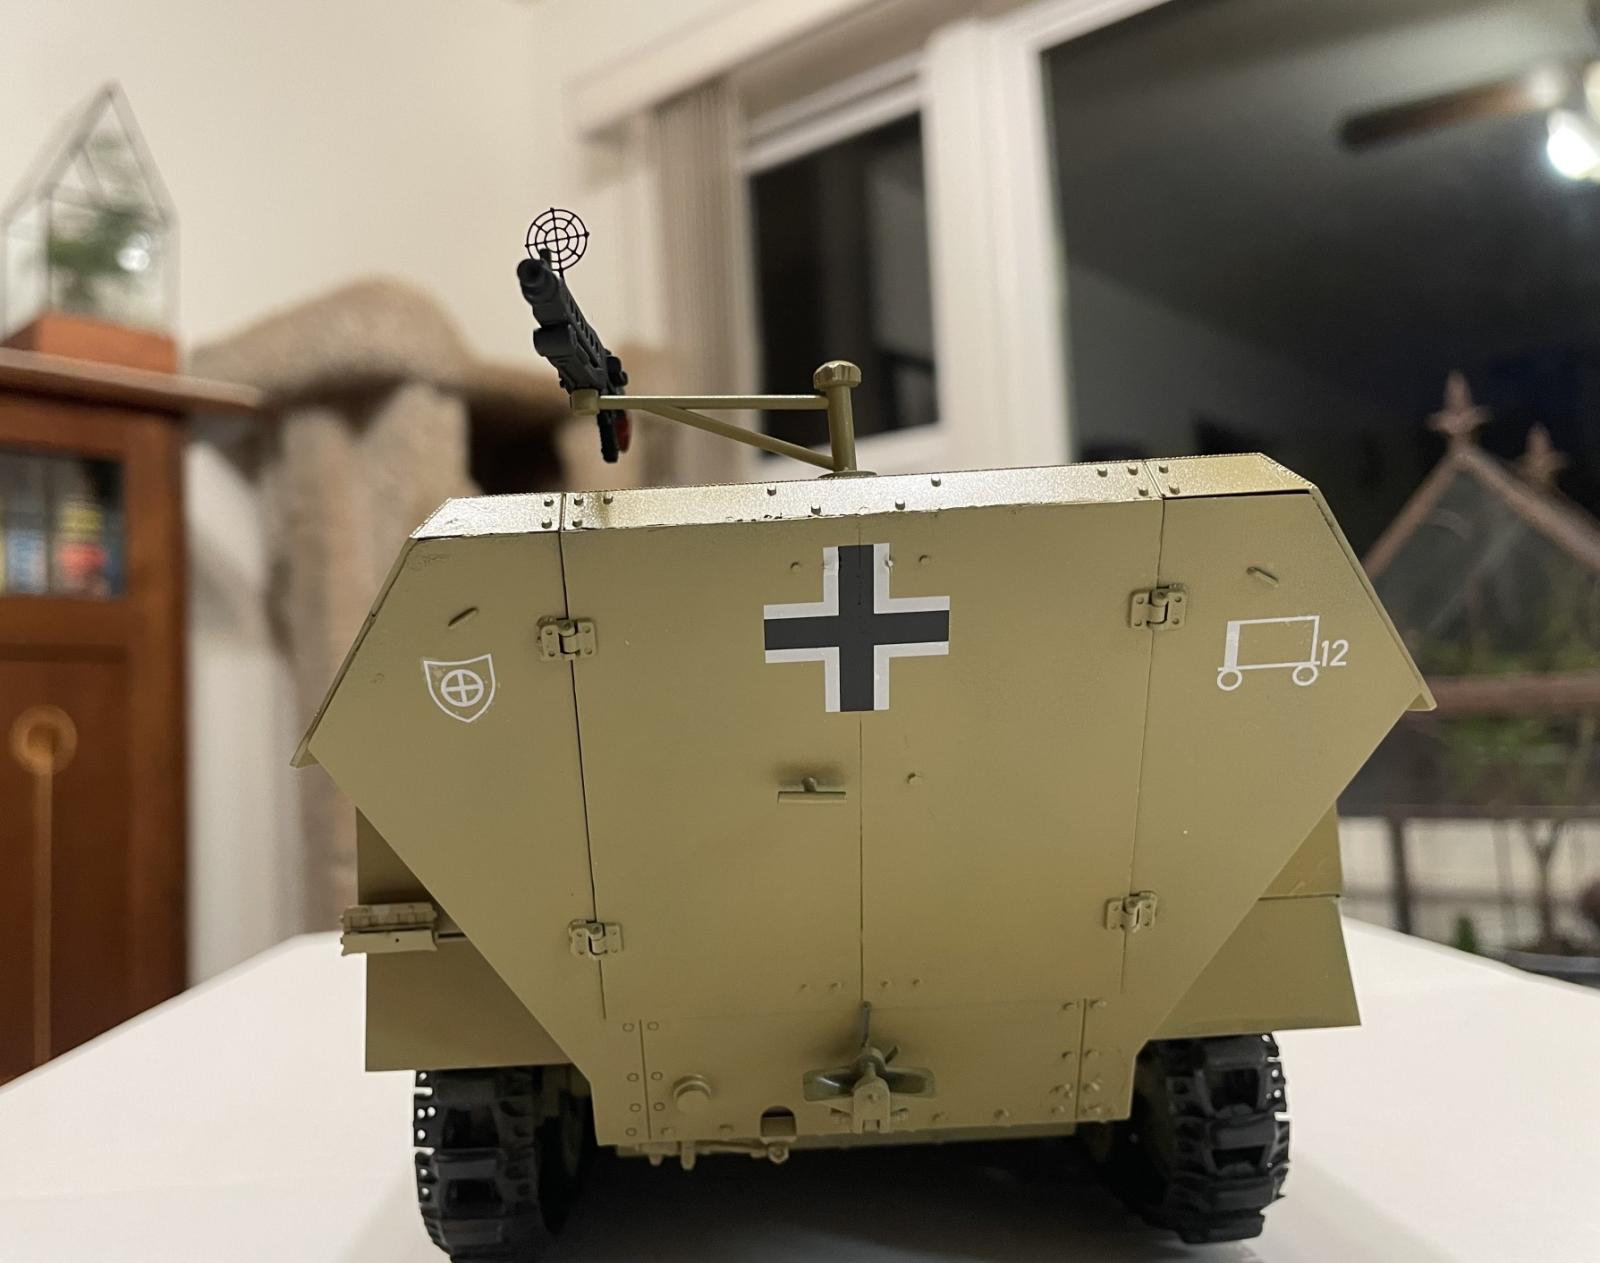
The Sd.Kfz 251D halftrack was primary vehicle in German mechanized formations in the Second World War. The vehicle was developed in 1937-38 and entered production in 1939. The variant that Trumpeter has produced is the last variant, ‘D’. The primary difference between the earlier models is that the back of the vehicle is a single sloping piece of steel. Over 15,000 were produced and continued to serve in various post-war armies.
The Sd.Kfz 251 has been produced before in 1/35 scale. In 2023 both Trumpeter and Das Werk have produced Sd.kfz 251D in 1/16 scale. The Trumpeter kit has 816 parts on 19 sprues, 64 PE parts on two frets, a clear sprue, and two tires. As with most Trumpeter kits, there is a great deal of thought put into how the frames are packed. Nothing was broken and fragile parts had packing material wrapped around them. The upper and lower bodies are packed separately. Given that this is an open vehicle, there is a full interior. Unlike the Das Werk kit, there is not an engine, which for me is fine. The panels on the floor cannot be opened without some surgery. As with other Trumpeter kits I have built, on some pieces the sprue joints overlap a joint between parts and will need some cleaning. Instructions provide color profiles of six vehicles with accompanying decals. Instructions are typical Trumpeter. For me, they are relatively easy to follow. Unfortunately, with many Trumpeter kits, there are no color call outs for interior details. Use your sources for interior colors. Since this is a new kit and mold, the parts are relatively crisp. I noticed flash on some of the smaller pieces as well as some minor sink marks.
Assembly
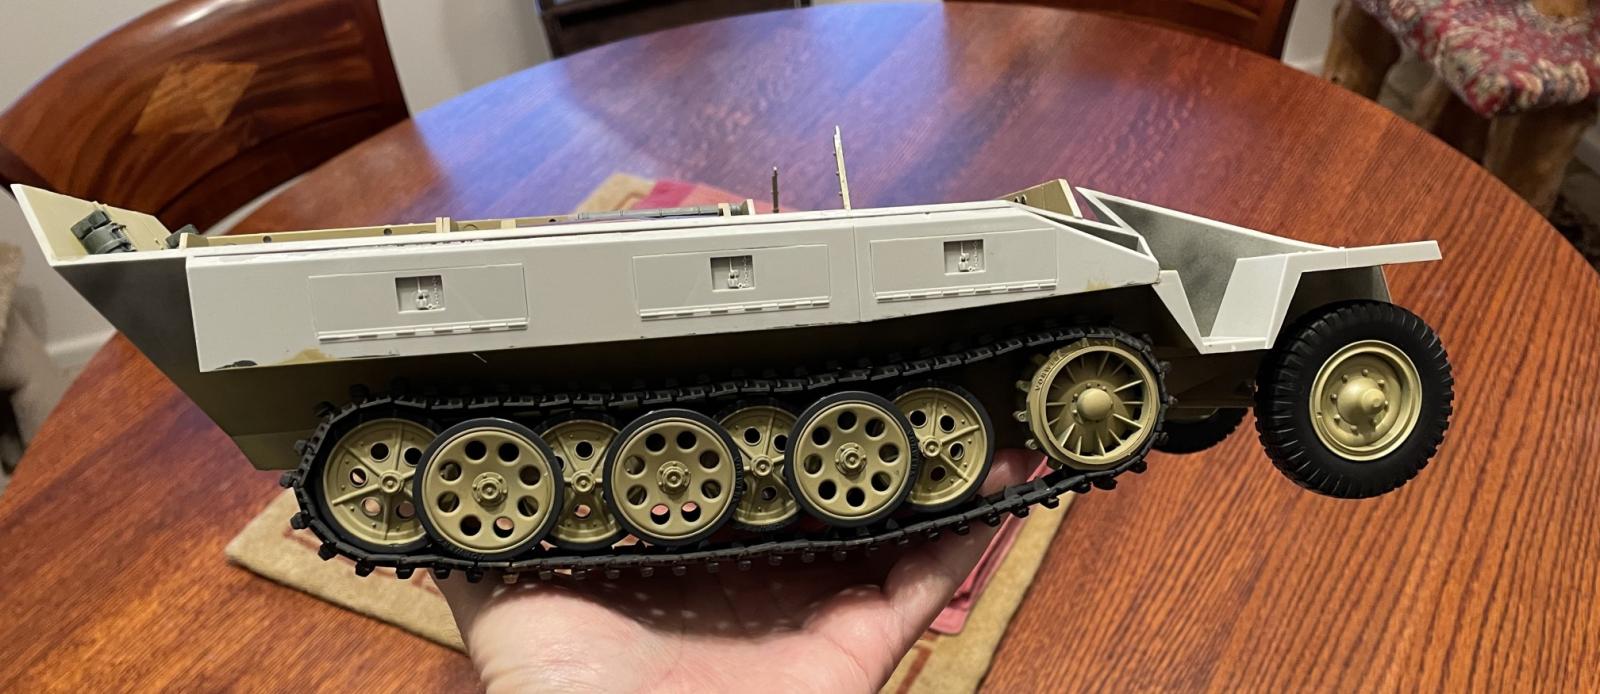
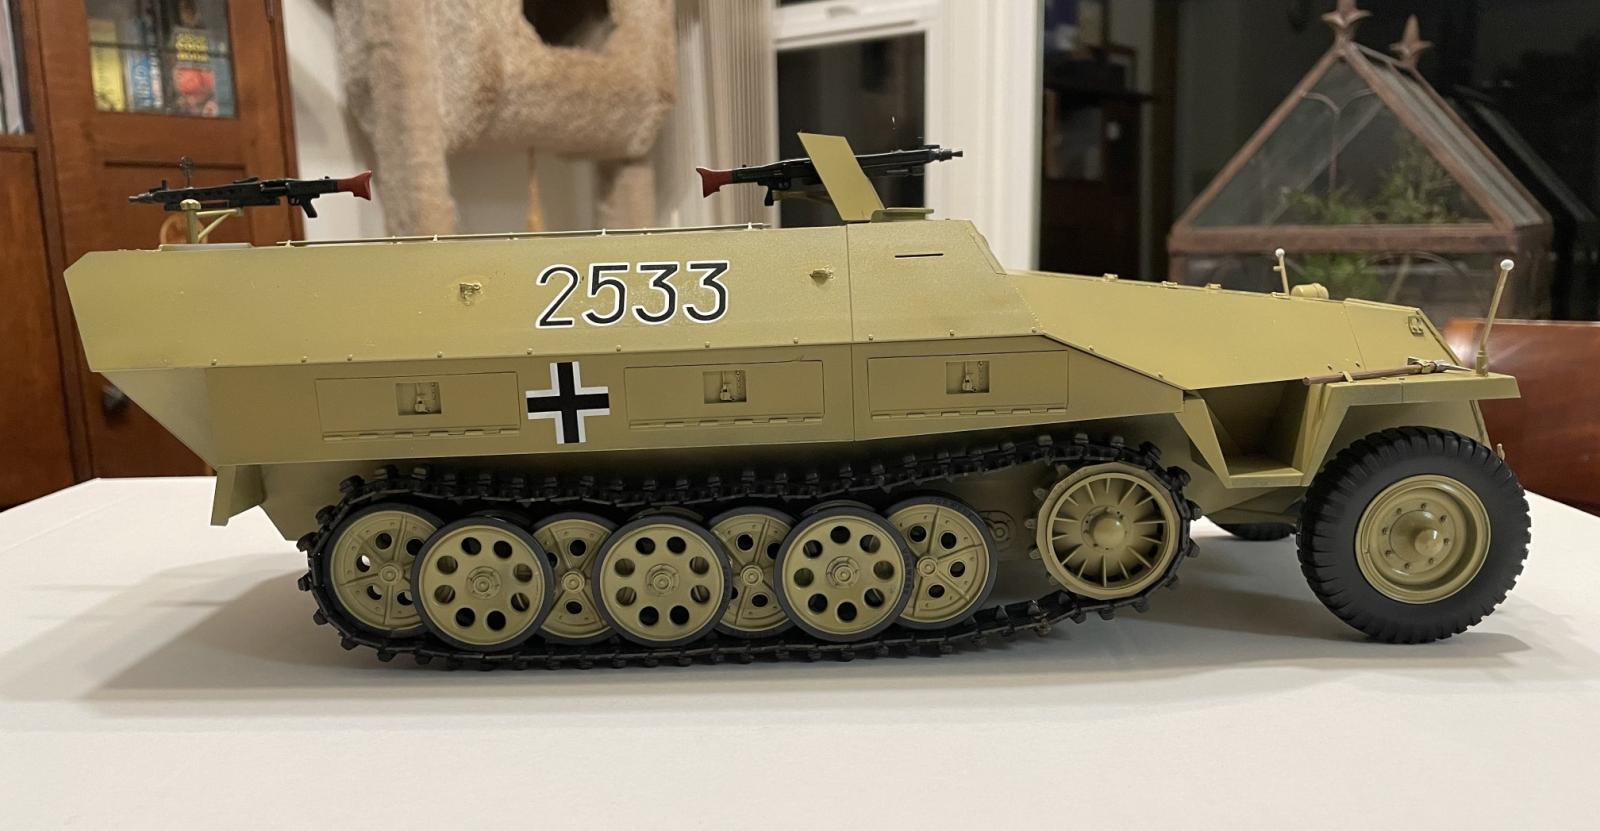
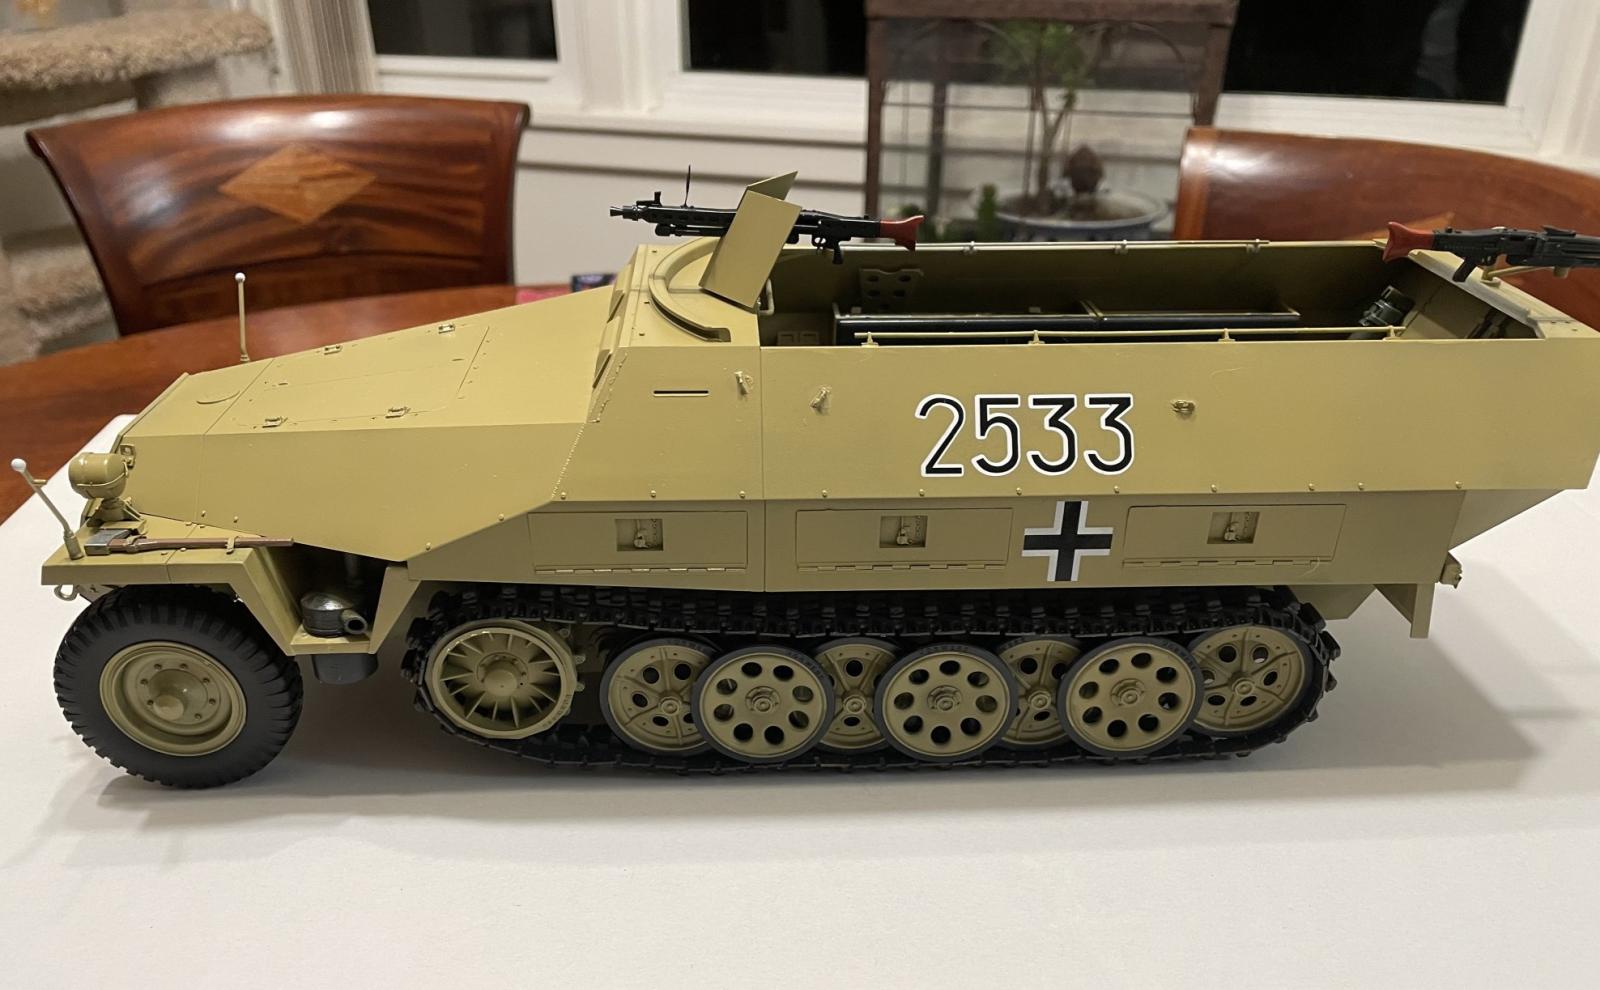
Assembly begins with lower hull and the suspension. As with many German armored vehicles, the suspension is complicated. The road wheels are inter-levered, so the care and attention must be paid in this stage for everything to fit. The suspension arms are all one piece and the ends are keyed to the holes in the hull. Some of these points are looser than others so take care when installing them. Since it would be difficult to paint the hull with the road wheels in place, once the suspension arms were secure, I painted the area before installing the road wheels. I used Tamiya NATO black for some pre-shading and Tamiya Dark Yellow as the primary body color.
There are two sets of road wheels, one that is skinny and the other wide. Each set are in multiple pieces. The rubber rim goes over the wheels in separate inserts and makes it easier to paint. All of the road wheel components were painted on the sprue. Pay attention to the instructions. The road wheels need to be installed in a certain order. For the inner road wheels (the skinny ones), there are photo etch pieces that go around the assembled rim. In my haste to get the road wheels on the frame, I forgot to install them. At the front of the hull, the axle is assembled and attached to the front. Be careful removing C 40 from the sprue, one of mine snapped and it could not be salvaged. When it comes to attaching the front suspension to the hull, I needed to sand the pins which attached to the hull to make the unit fit flush with the hull.
Once the road wheels are installed, it is time to move to the tracks. As most of you can appreciate, it takes time to remove all of the bits and pieces from the sprue. Assembly of the tracks take the most time of any of the sub-components. It is time consuming. The track pads are individual pieces that are attached to an individual link. Each individual link has splines that are not very robust, so take care when removing the pieces from the frame. Several were broken on my sample. The track frames have a fair number of nibs that need to be clipped before use and then sanded. The frames attach to each other with pins. The track links assembled previously go over the pins, linking each track. With a judicious use of glue, each link can move.
Cutting off the individual pieces was by far the most tedious part of this process. Once the pieces were off the frame, assembly is pretty straight forward, but each piece requires some prep, primarily using a sanding stick, to get rid of seam lines and insure a tight and even fit. It takes patience and diligence. According to the instructions, each side requires 58 links. I built them in runs of ten, making it easier to assemble the entire run. The entire track run was assembled but left off the vehicle for painting. When the tracks were put on the vehicle, the fit snuggly, but they needed a bit of glue along the top of the tracks to make them snug with road wheels.
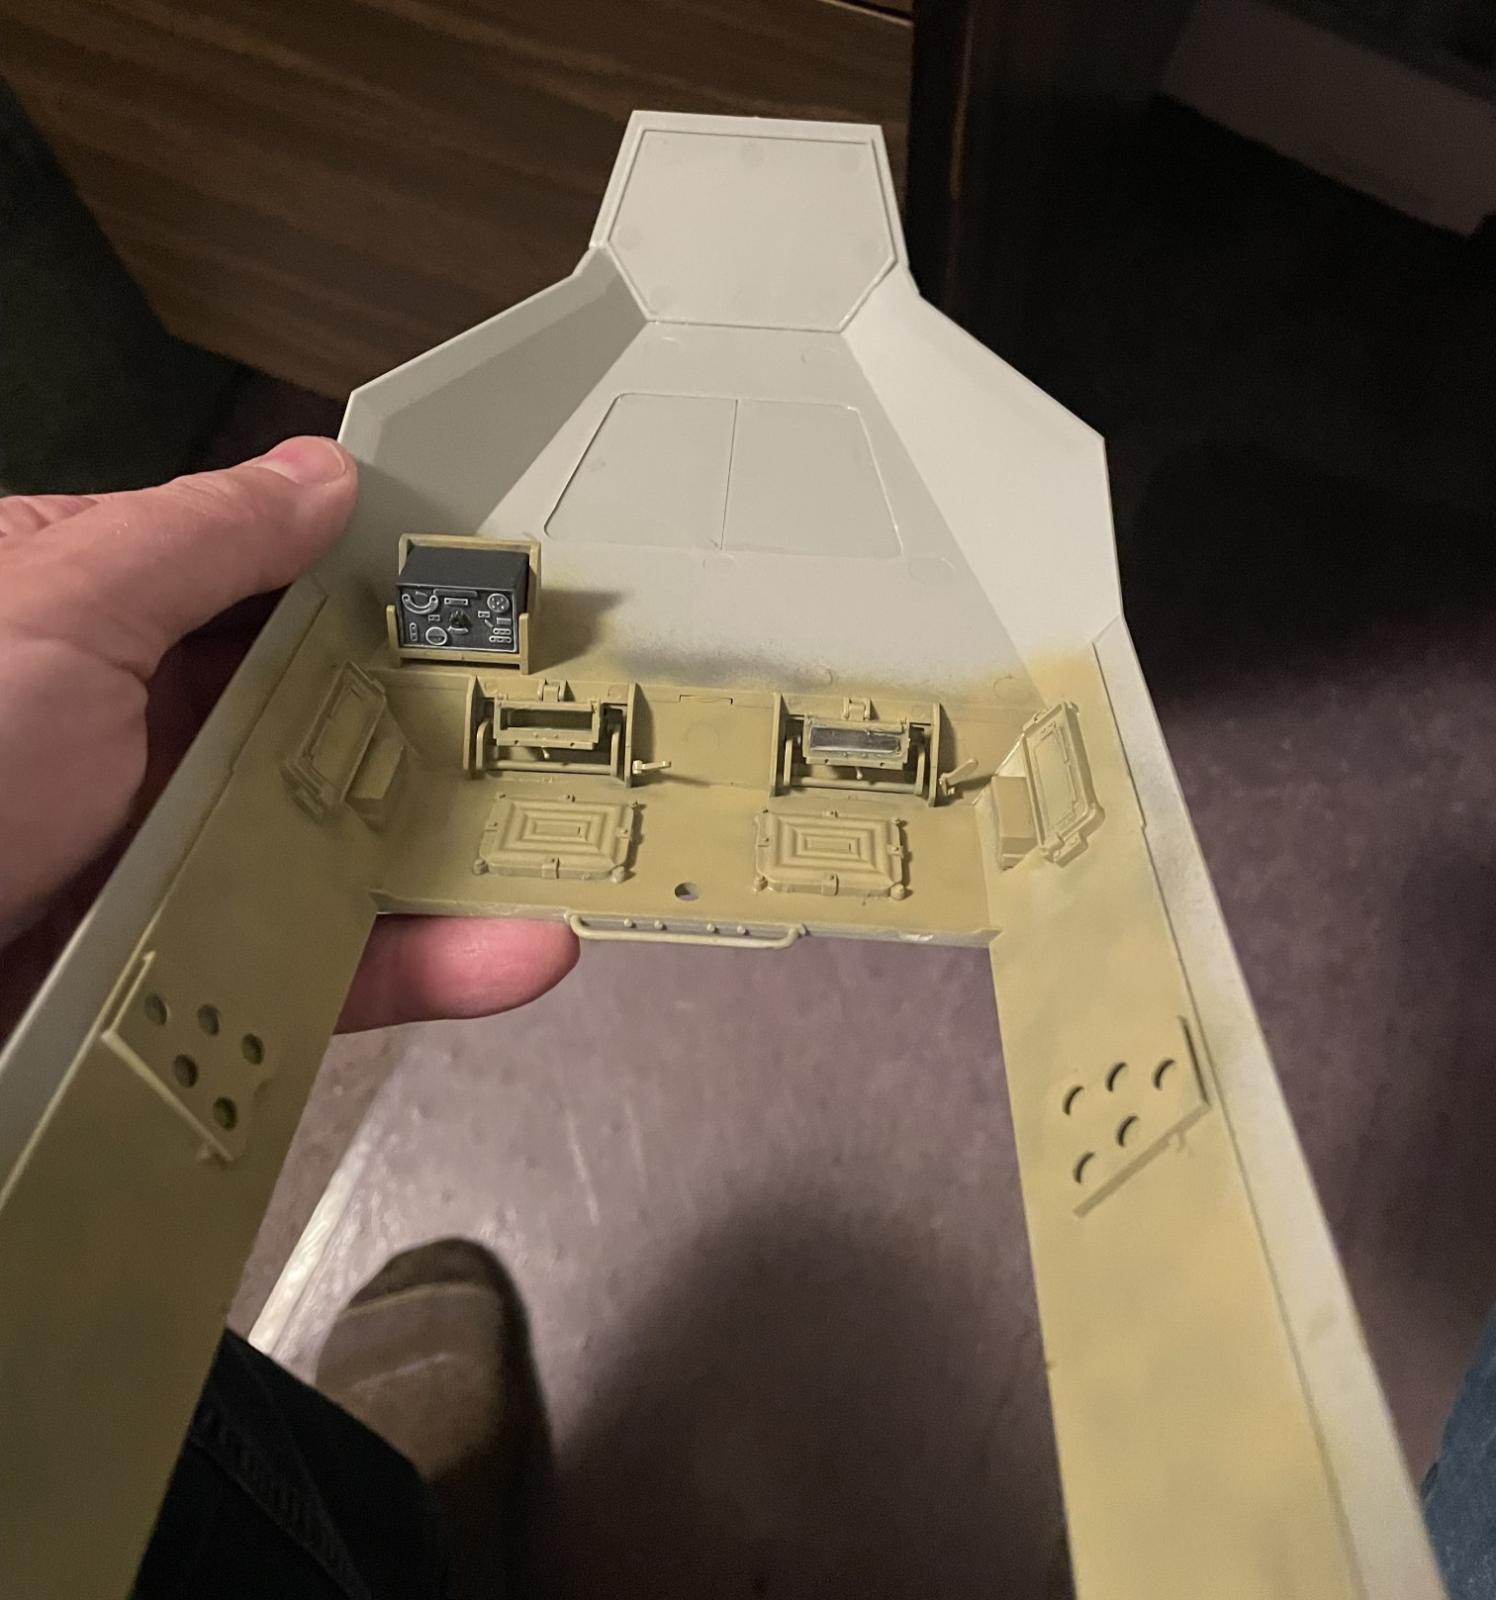
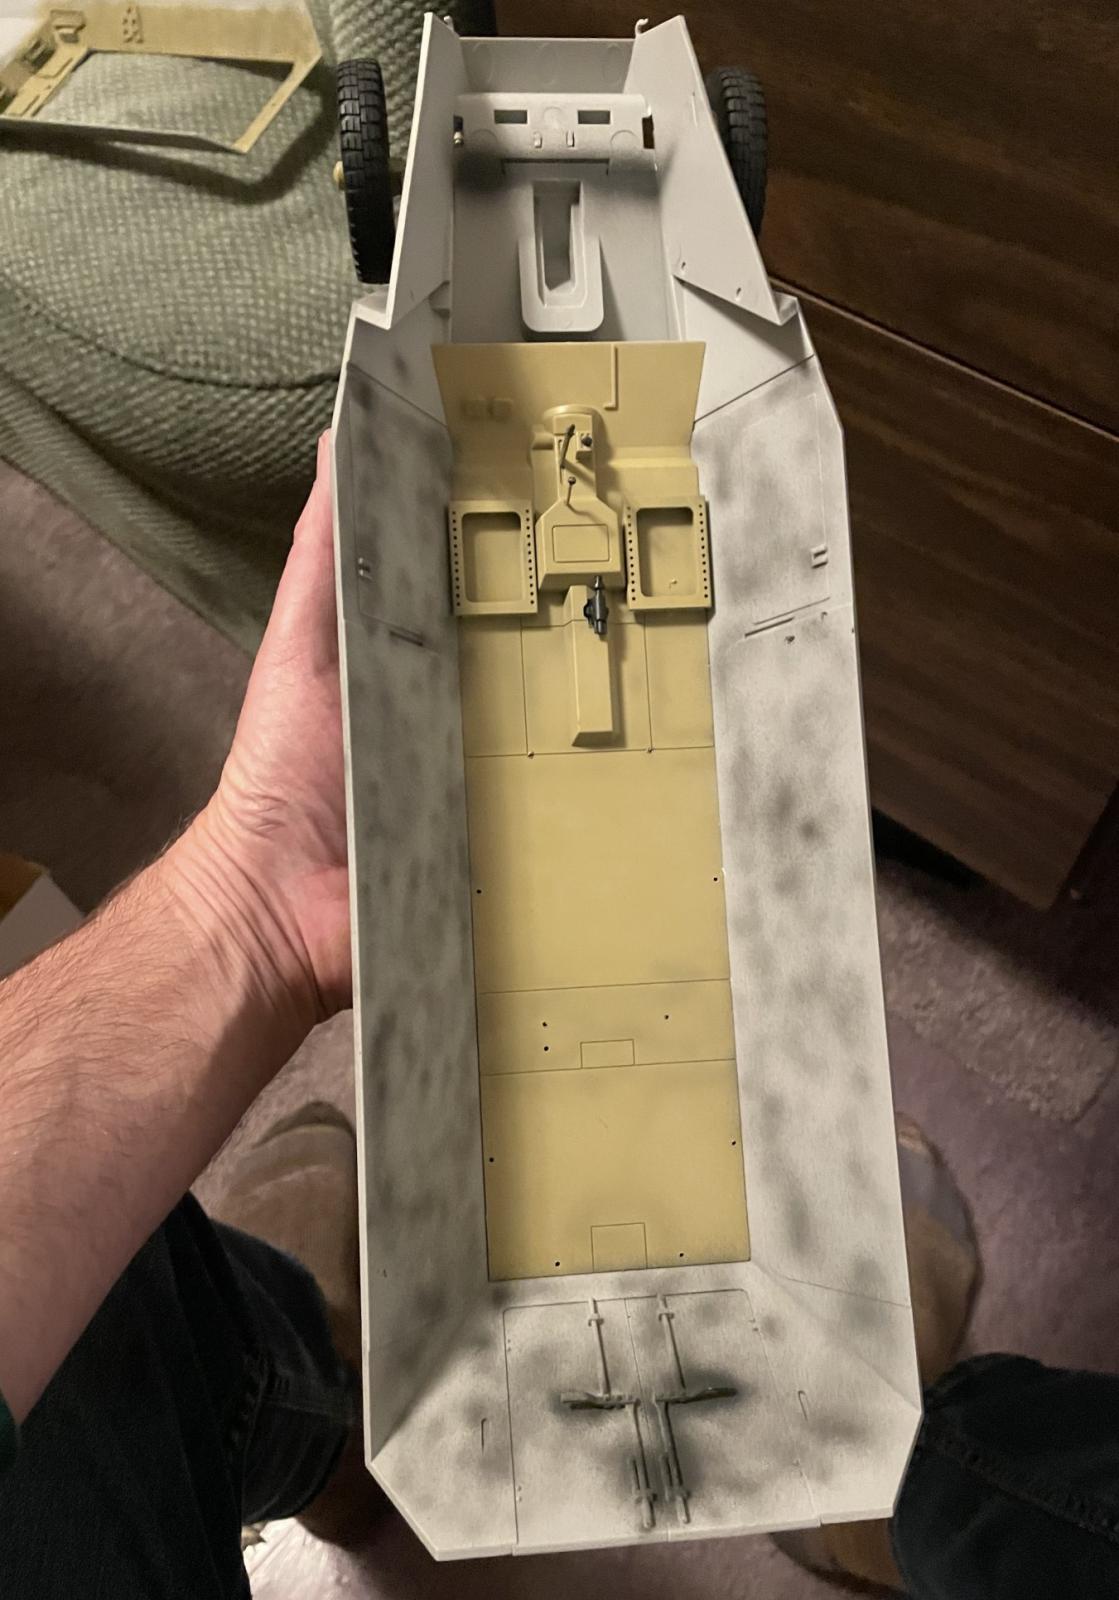
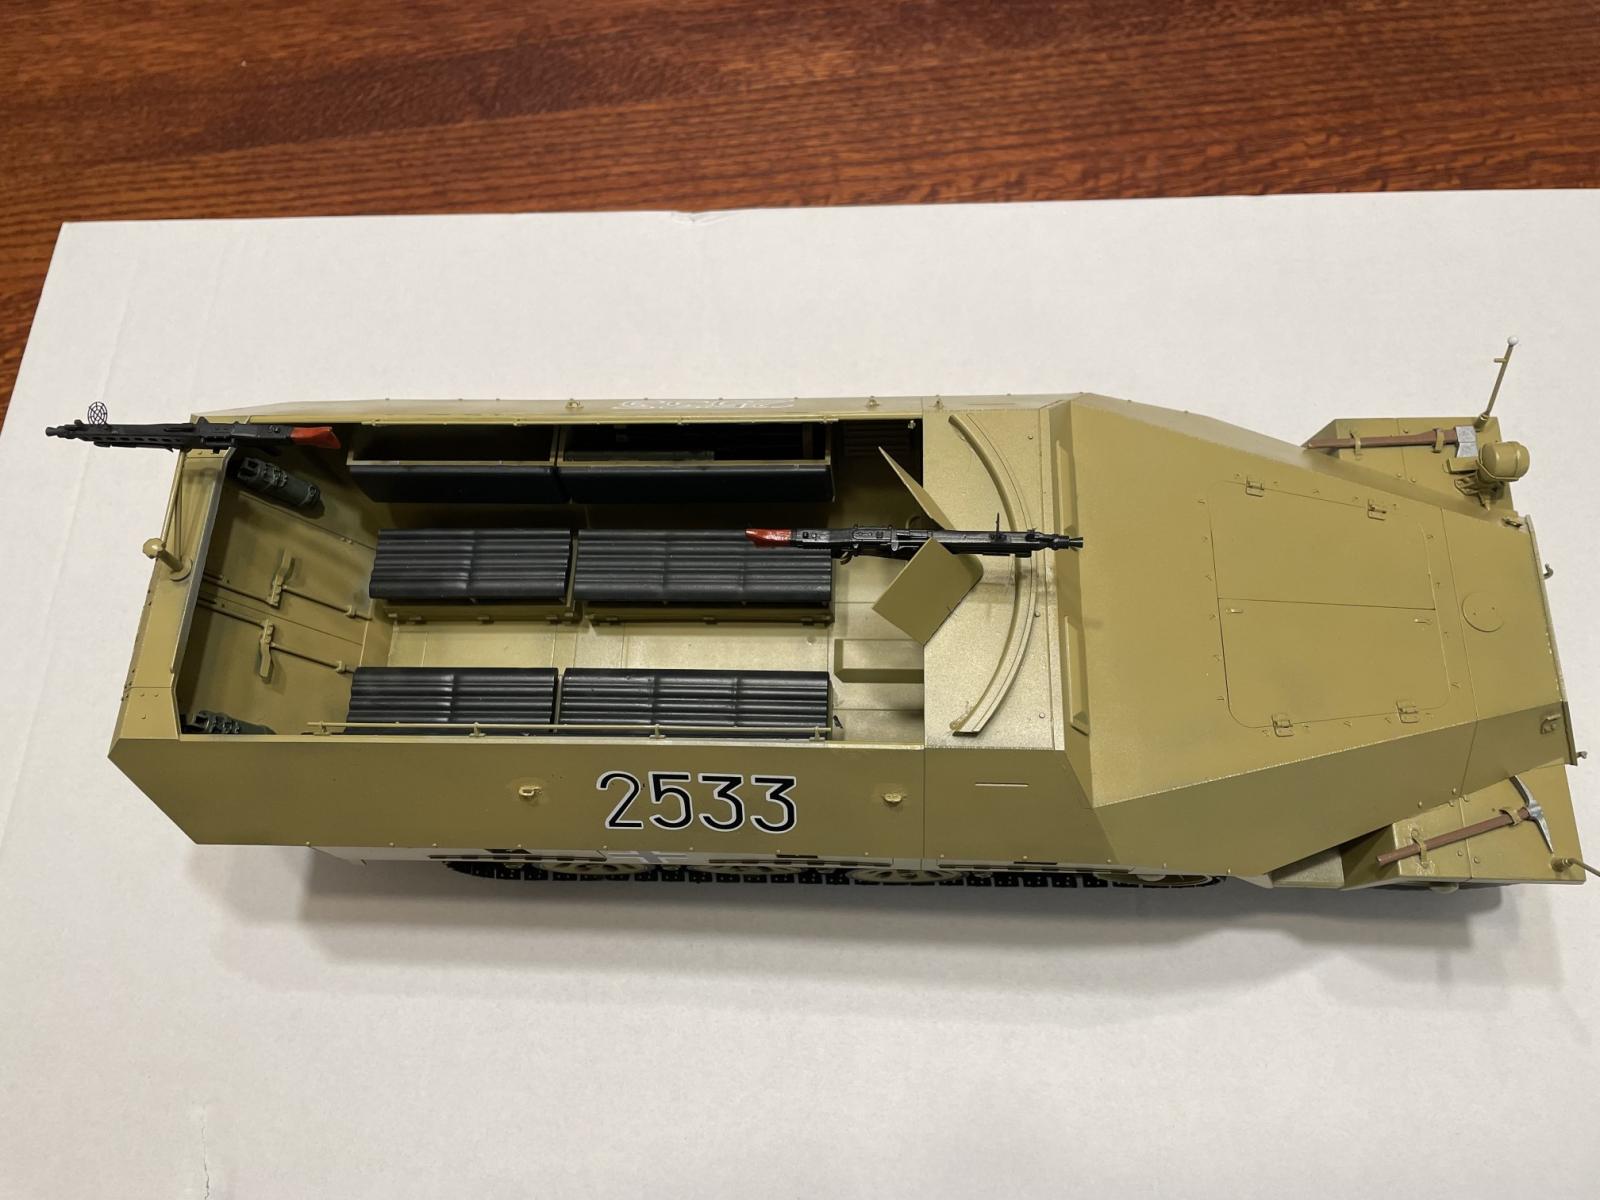
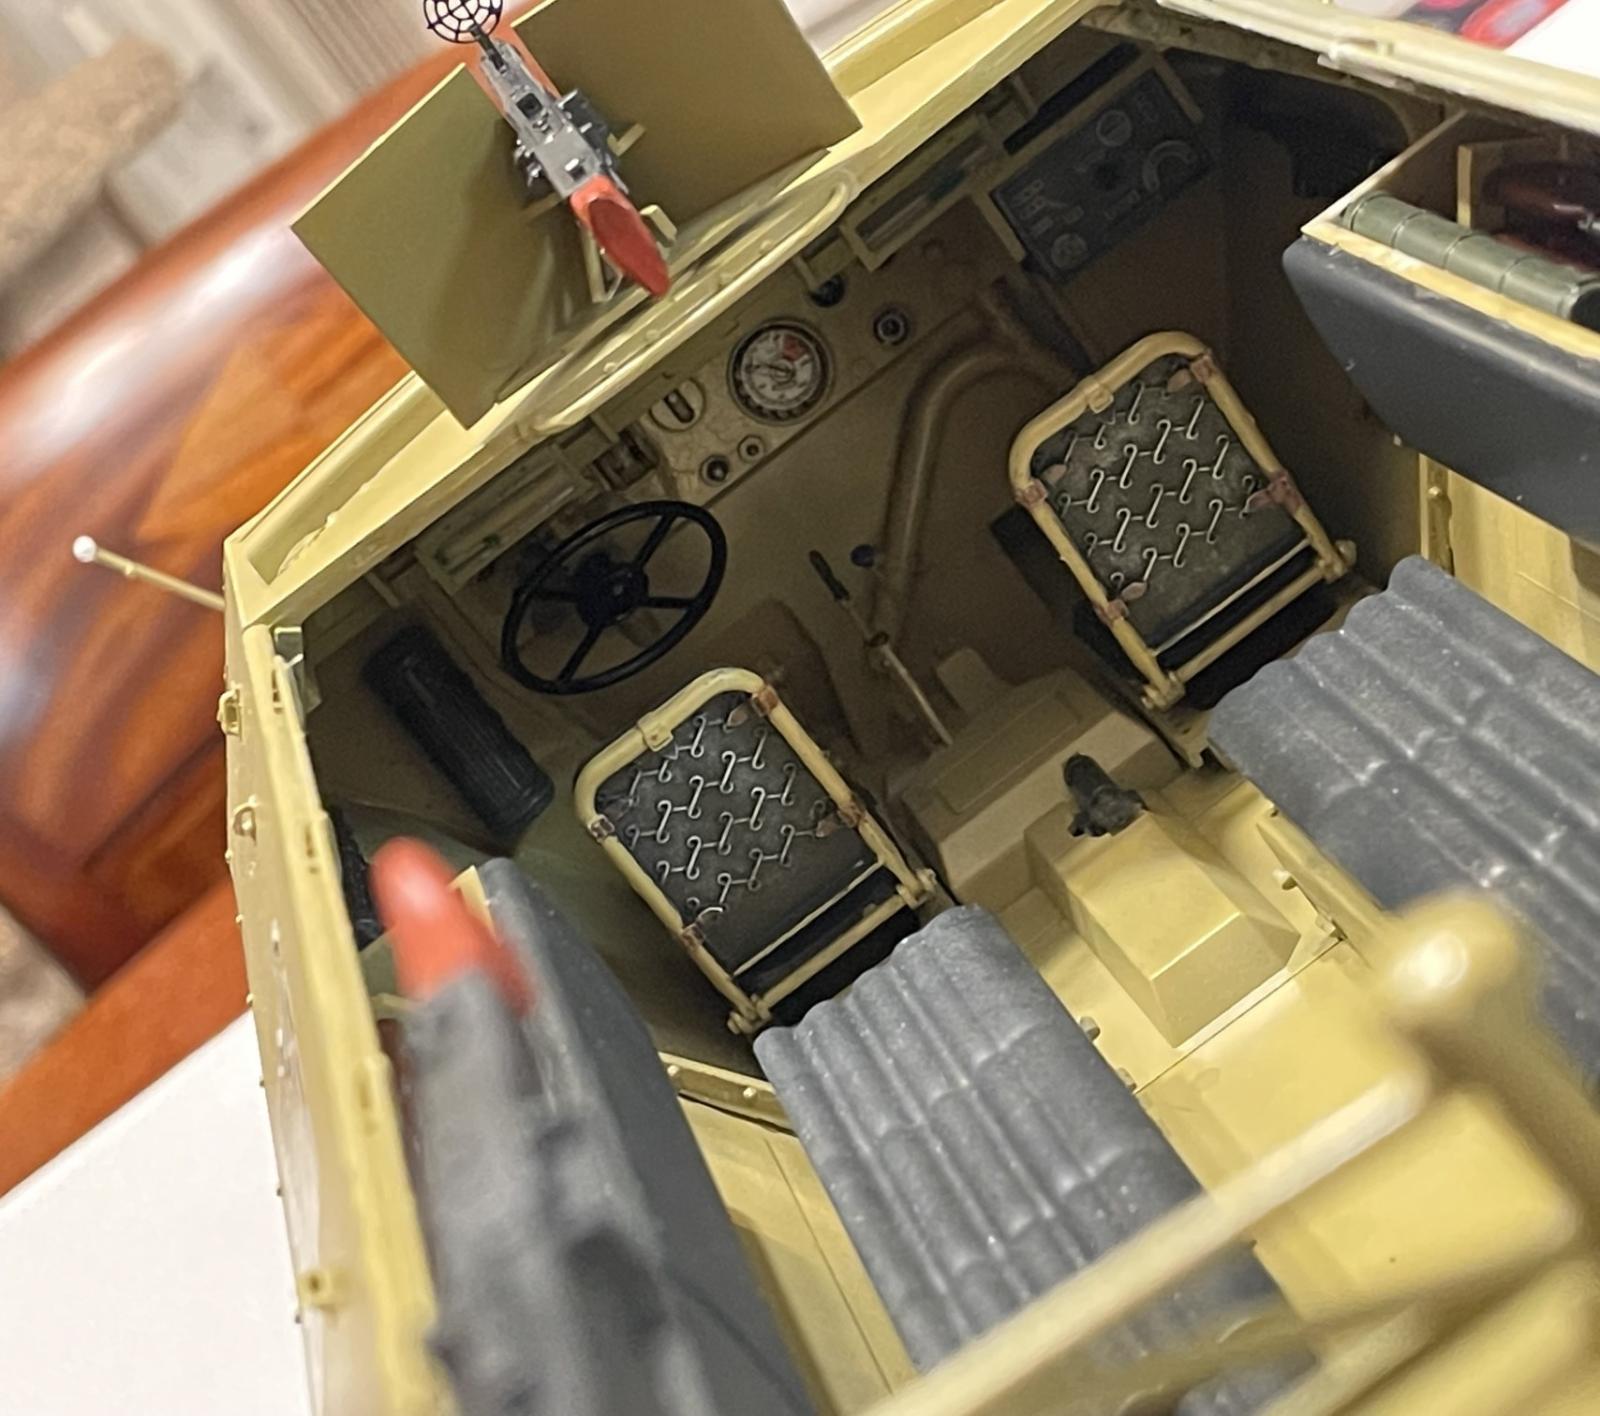
With the tracks out of the way, it was time to tackle the interior. The rear doors and latches go on rather easily but need a bit of prep before being glued. There are various assemblies that go into the hull. There are no painting instructions, but since there are no hatches that can me moved in the floor, I opted to just keep them clean plastic and glue the floor in place. If you wanted the hatches to open, you will have to cut them yourself. The instrument panel is nicely molded. I am not sure, but there may be some data plates missing, but the decal sheet provides all of the dials. Again, there are no color call outs for the various knobs and switches, so I guessed.
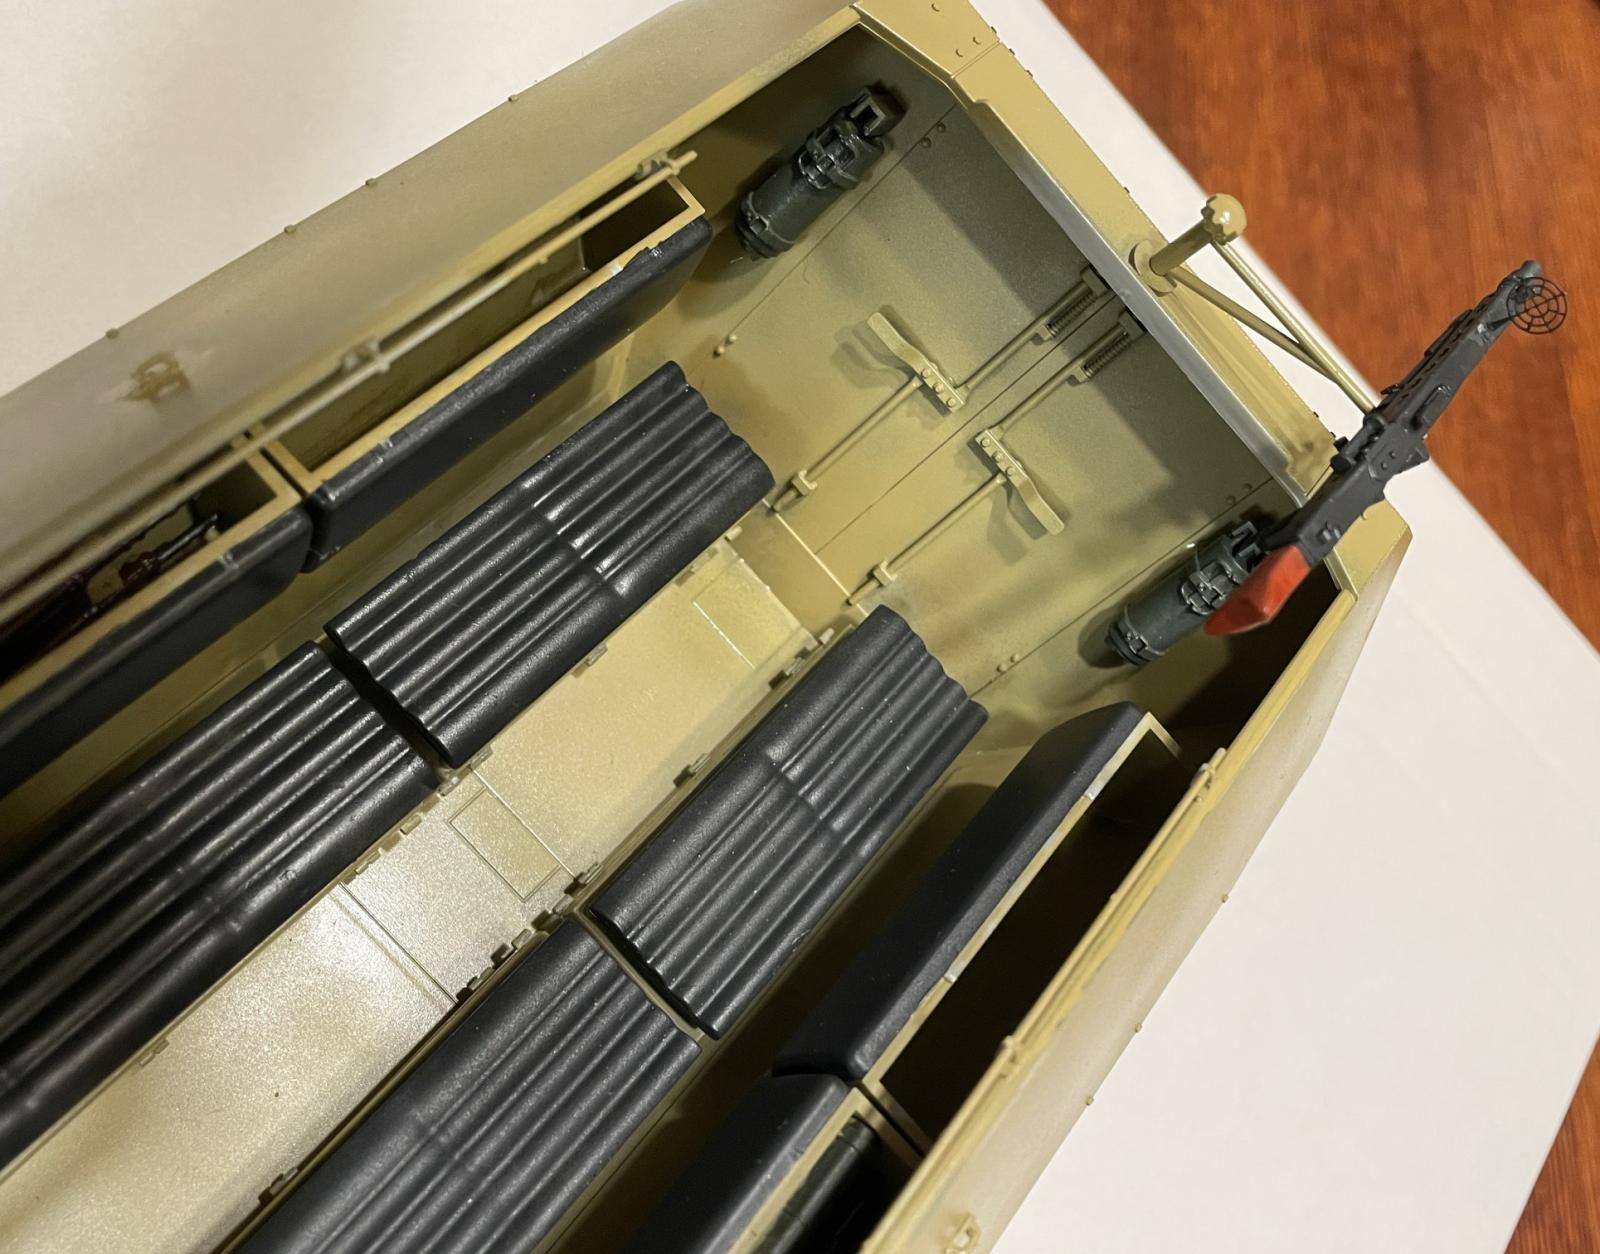
The main interior is taken up by benches on the floor and various accoutrements on the sides of the vehicle, including a location for the MP-40 and rifles for the drivers. Given the size of a 1/16 kit, at least by my eye, the moldings of the weapons were great. Once the rifle rack was installed, the rifles snapped right in and was held in place by friction alone. The overall color of the interior is Germany Dark Yellow. Because of the lack of color call outs, I chose to paint the seat cushions black. I am not sure if it is right, but it serves my needs just fine. The boxes that attach to the sides of the vehicles have no lugs for attaching it. Instead, there are fine ridges that the boxes rest against. It takes patience to attach them. I would have preferred something more substantial to insure that the boxes are aligned with the seats and each other.
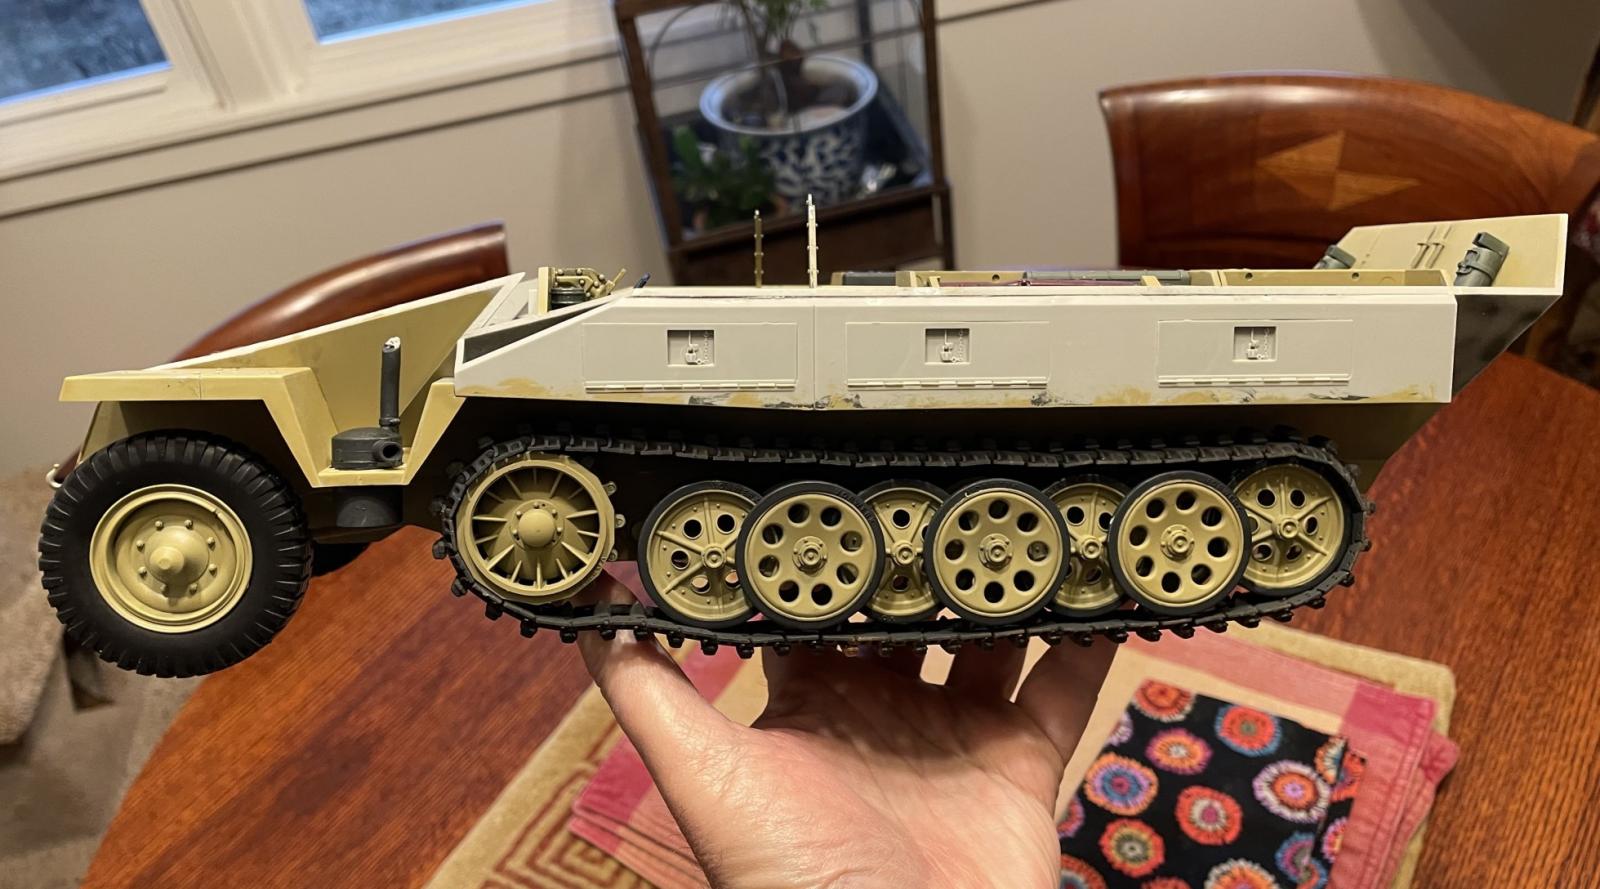
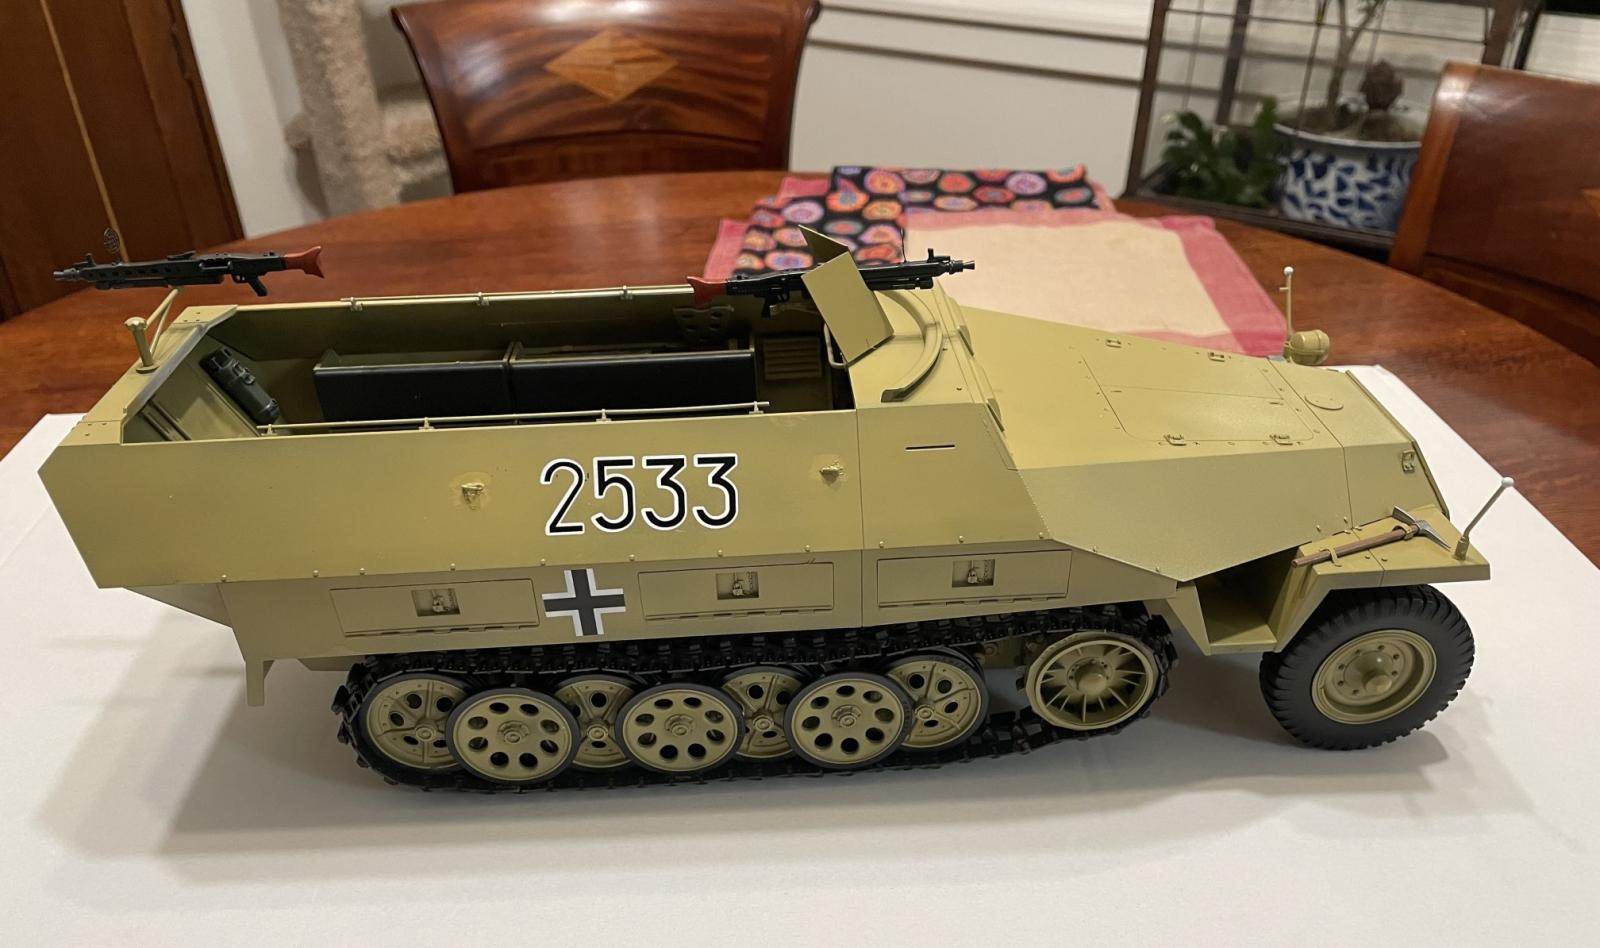
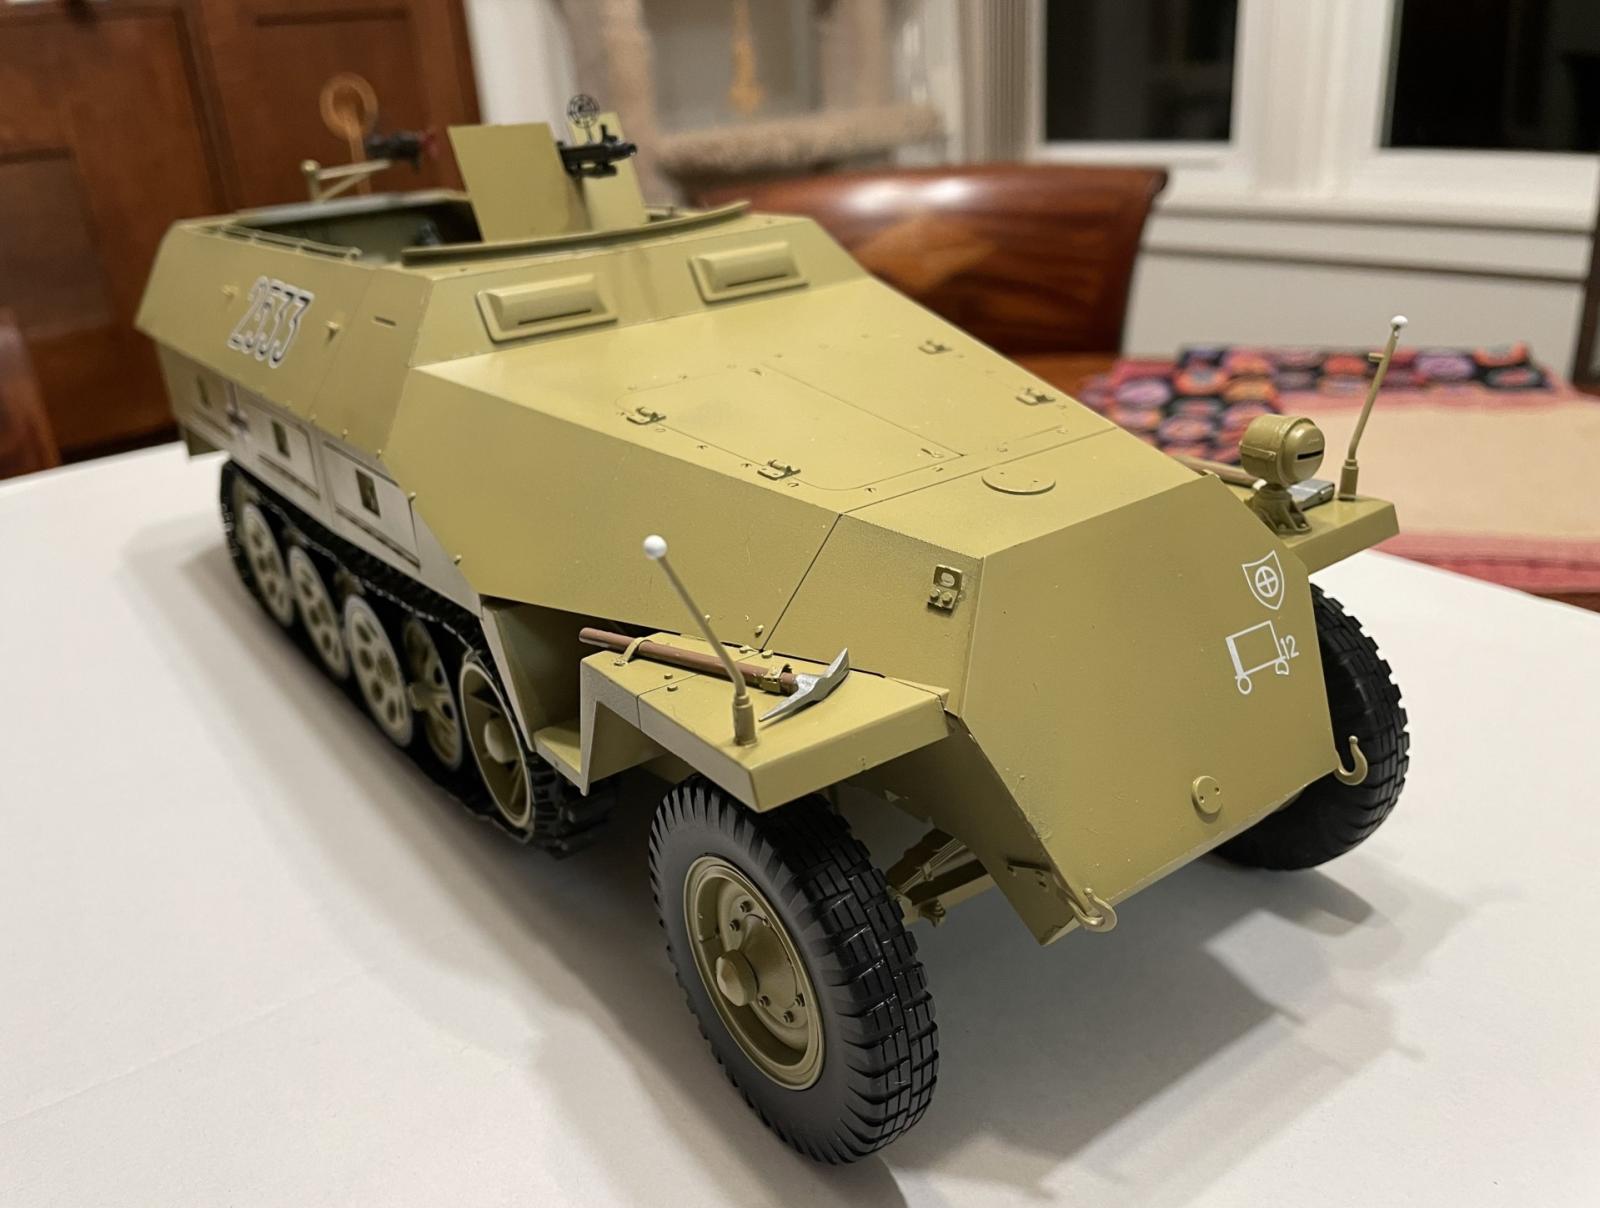
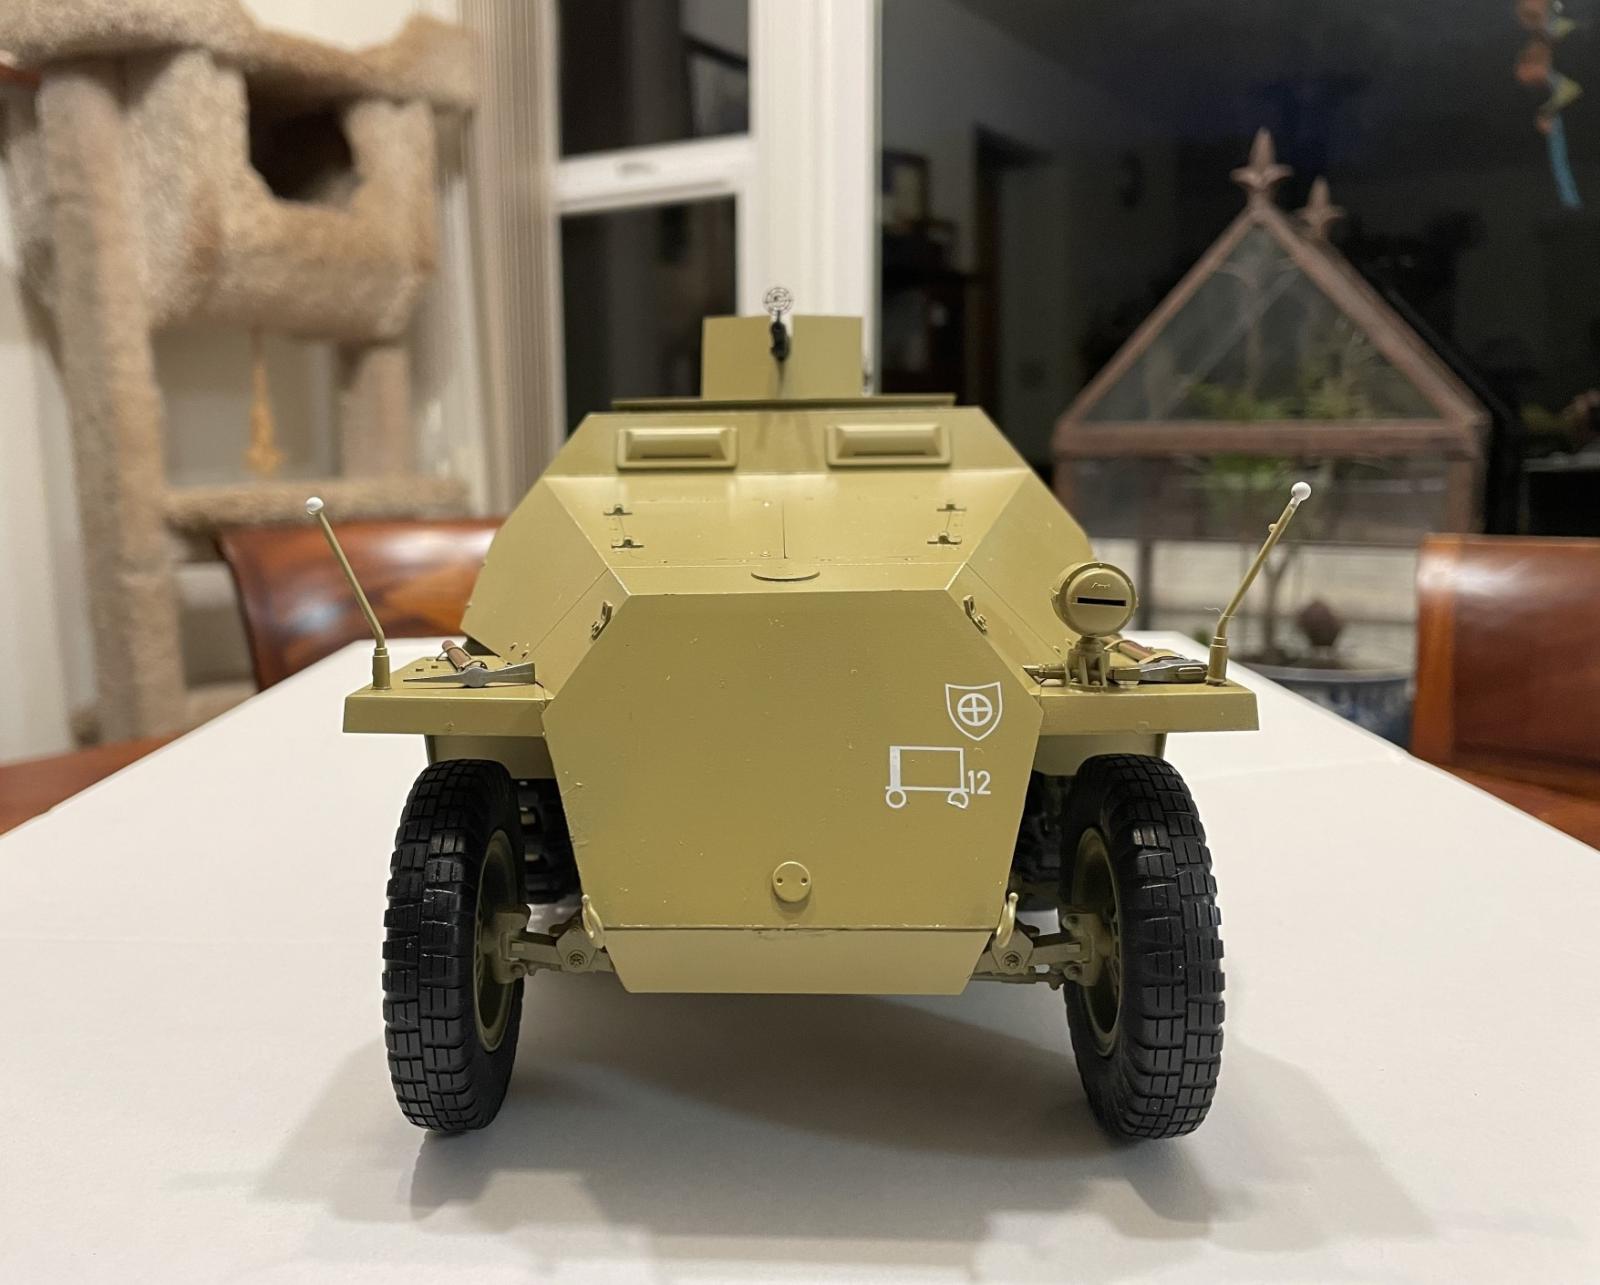
Once the interior is complete, it is time to mate the top half of the vehicle with the bottom half. It fit fairly well, but there is a gap on the right side of the vehicle. I am not sure if this was operator error, of warped parts. I am going to put it down as operator error. Once the top is assembled, the vehicle is nearly done! On the bottom of the vehicle, the hitch and the mud guards. On the top of the vehicle the lights and tools were attached to the fenders. The tools have photoetch clamps. As the model assembly is complete, a couple of issues stand out. The instructions call out nineteen bolt heads that need to be glued into the rear of the vehicle. Even in this scale, they are hopefully small and over half of them were sacrificed to the carpet monster. I am not sure why Trumpeter couldn’t mold those into the chassis. The final task was installing the MG-42s at the front and back of the vehicle. They are well molded and stand out. For the ease of the review I chose the color profile that is in overall dark yellow. I used Tamiya XF-60. The hull was sprayed with Tamiya clear in preparation for the decals. The decals are large and very fragile. A couple of them folded upon each other, but I got them on the model without too much damage. They went down well. Given that this is a review, I opted to do a clean vehicle, without much in the way of weathering.
This was the first 1/16 kit I have ever assembled. I must say, that the larger pieces are a joy to handle and prepare. I have heard some say that the kits that are this size sacrifice detail for size, making them rather toy like. While not exactly toy-like in appearance, there are some sacrifices. The sides and bottom of the vehicle lack any texture. Nevertheless, for someone like me who needs a bright light and stronger magnification, I appreciate the larger size of these pieces. In terms of assembly, the steps are logical and the individual pieces are well molded. Sometimes, they just seemed to snap in place. If you want a detailed engine, and posable hatches, the Das Werk Sdkfz 251 kit will be a better choice. While there are compromises due to the size of the kit, namely many features of the vehicle come off as toy like, it is nevertheless a nice addition to anyone’s collection of 1/16 kits. I highly recommend this kit for the more experienced modeler.

Comments
Add new comment
This site is protected by reCAPTCHA and the Google Privacy Policy and Terms of Service apply.
Similar Reviews