
Scot Racing Team Honda RS250RW "2009 WGP250 Champion"
History
Established in 1949 by the FIM (Fédération Internationale de Motocyclisme) the Road Racing World Championship Grand Prix is the premier championship of motorcycle road racing. Currently it consists of an eighteen-race series visiting fourteen countries, and four continents. Eight nationalities of the world's most skilled riders are mounted on purebred racing bikes. These purpose-built, high tech prototypes are fielded by four manufacturers; Ducati, Yamaha, Honda and Suzuki. They are not available for purchase by the general public and cannot be legally ridden on public roads.
In 2009 Hiroshi Aoyama won the 250cc World Championship riding a Honda RS250RW for Team Scot. Team Scot was a motorcycle racing team from Italy and named after Scot Costruzioni, an Italian construction company. Aoyama was the last winner of this class before the Moto2 class replaced it in 2010. It is his Honda RS250RW that Hasegawa has recently released as a new kit and is the subject of this review.
The Kit
The kit comes in a cellophane-wrapped box measuring 13-3/4” X 7-7/8” X 3”. The art on the box top is almost photo-like and comes is useful when painting and decaling the model.
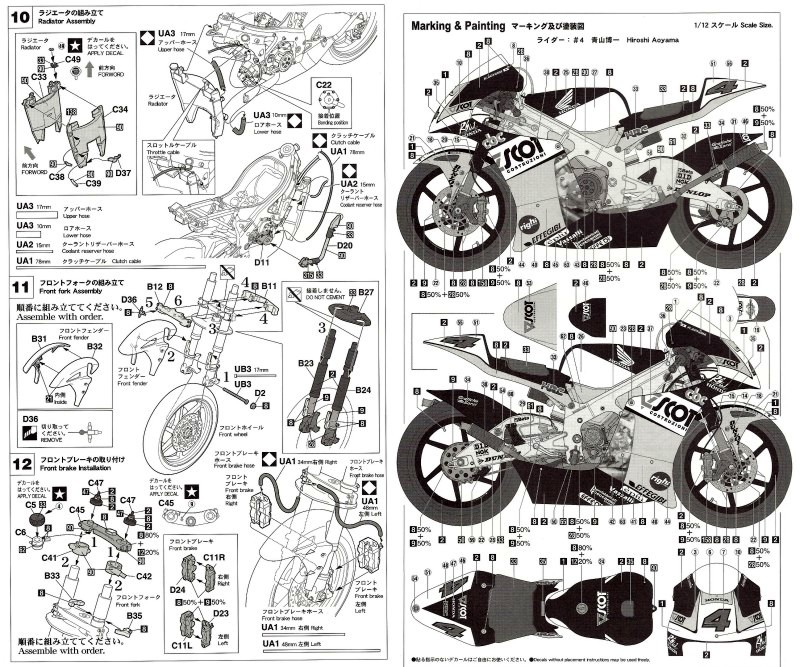
The instructions are broken down into eighteen steps with numerous sub-steps. The last page contains the painting and decaling diagrams. These are clear and easy to read but contain a lot of information. The painting instructions address the major components after assembly is complete. Paint instructions for nearly all of the small parts are shown at the step level during construction. Color callouts are GSI Creos Aqueous Hobby Color, Mr. Color and generic.
The parts come on two gray sprues and one white sprue. There are also two clear sprue containing the windscreens and optional clear cowling. The parts are molded extremely well with no flash and imperceptible mold lines. There are not ejector pin marks to speak. The windscreens are thin and will have to he handled with care. The kit also includes a nice set of soft rubber racing tires. There is a small bag containing a spring, long fine threaded bolts and sufficient tubing for the radiator connections and all the wiring and cables. Altogether there are approximately 145 parts in the kit.
The Build
It took me longer than anticipated to build this model. I build mostly aircraft and a few cars and armor. Building a motorcycle is totally new so I had to rely almost totally on the instructions to show me how this model goes together.
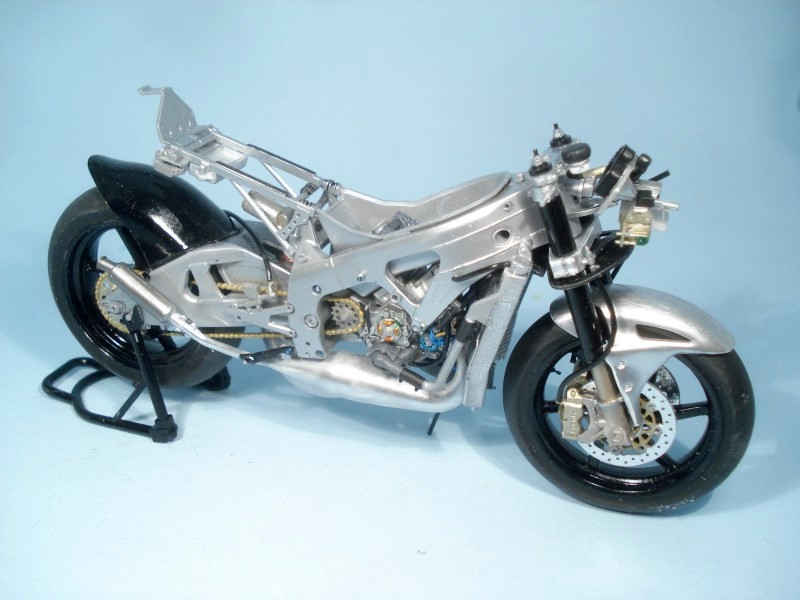
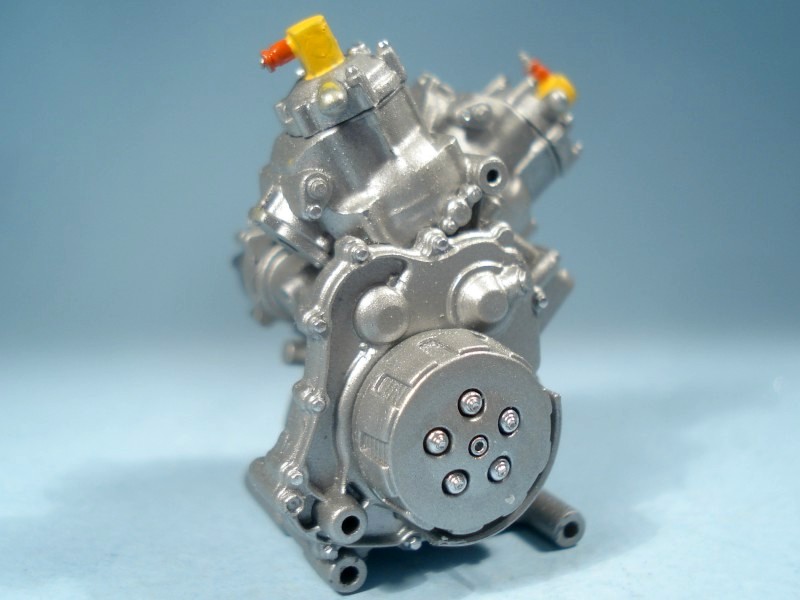
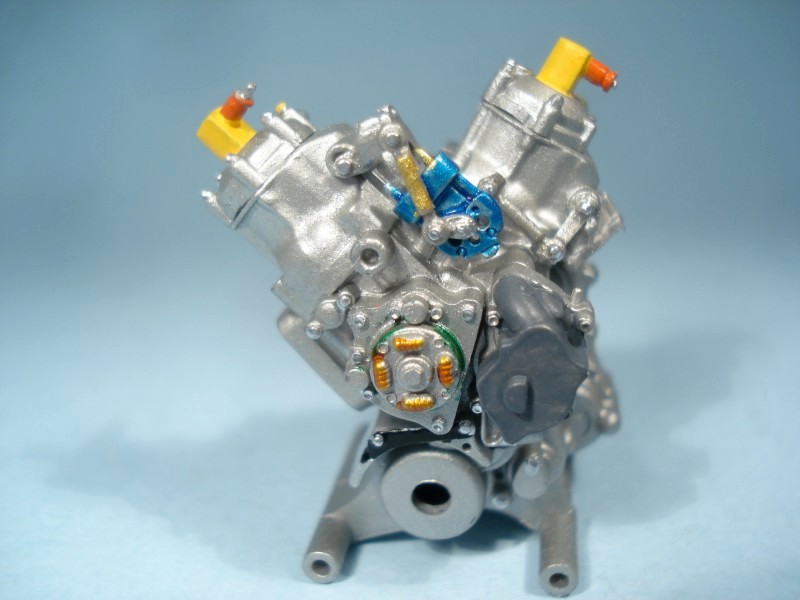
Construction begins with the engine. The engine block is a two-piece affair with fifteen smaller parts added on. Every part gets painted before it’s added to the block and they fit wonderfully. The end result is a model in itself. Too bad it gets buried within the frame and cowl.
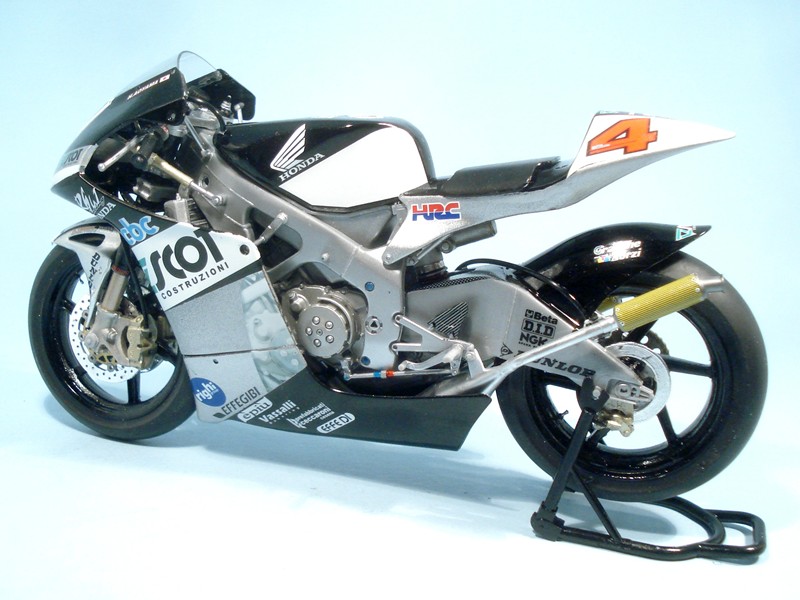
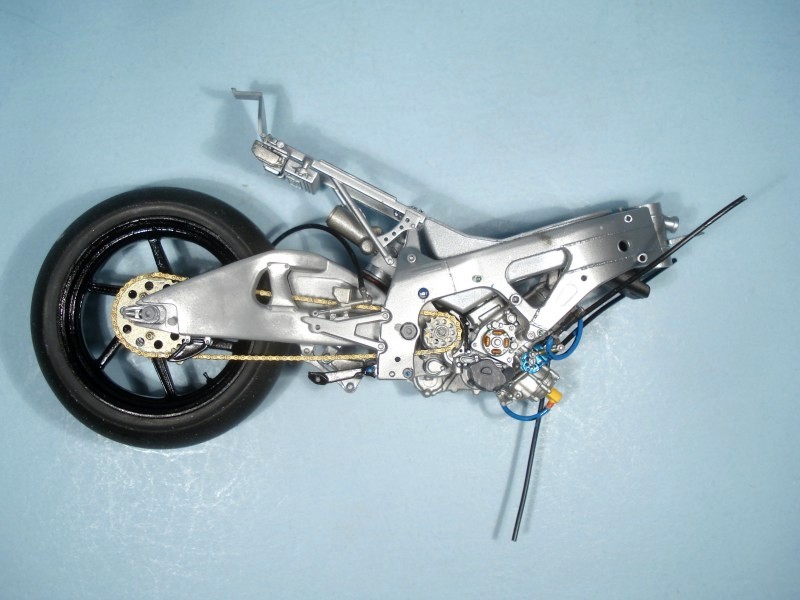
The frame is built next. There is nothing difficult here. Look closely and you will notice the nice weld lines molded on the frame. A few parts are added to the frame and the engine is installed. Two pieces of tubing representing RC valve cables are added to the engine. Following the engine installation are the carburetors, the air intake and the air box placement. As with the engine, all parts are painted before installation. The parts fit is very nice.
The wheel parts are painted and assembled. The brake rotors have very nice detail. The tires mount on the wheels with no trouble. The swing arm is assembled next. The detail on the fragile drive chain is excellent. Take care in placing it in the swing arm. The rear wheel is now added using one of the several long metal bolts that come in the kit. This assembly is installed on the frame and the rear break line is placed.
At this point the instructions call for the build up of the exhaust system, rear suspension and cooling system. The suspension system uses an actual steel spring but it is practically hidden from view. There is some very fine detail molded into the radiator. The clutch cable is cut and one end attached to the engine. These steps presented no problems.
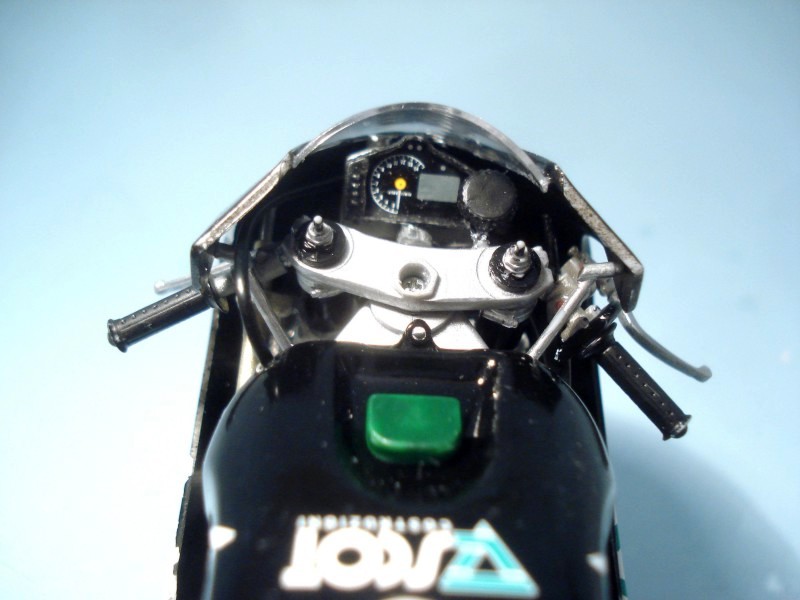
The front fork assembly and installation comes next. This step is not really difficult but requires a little manual dexterity to align all the parts. As with the rear wheel a steel bolt is used as the axle. The brake calipers are added and the break lines attached. Now it’s beginning to look like a motorcycle. The loose cable ends get attached later in construction. Routing the cables is the only real problem I had. The routing instructions are not as clear as I would have liked them. It took me awhile studying several construction diagrams and taking notes to understand how to run the cables. In the end, the cables appear to be run correctly.
The gas tank consists of four pieces and the rear cowl/seat consists of four pieces. After assembling these two components the seams needed to be filled. The seams weren’t bad, but they would show up under the paint if not filled.
The final step in construction is mounting the four brackets that hold the cowls. Their alignment is critical in order for the holes in the cowl to pick up the ends of the brackets. The square holes and square ends on the bracket facilitate the correct placement.
Finishing
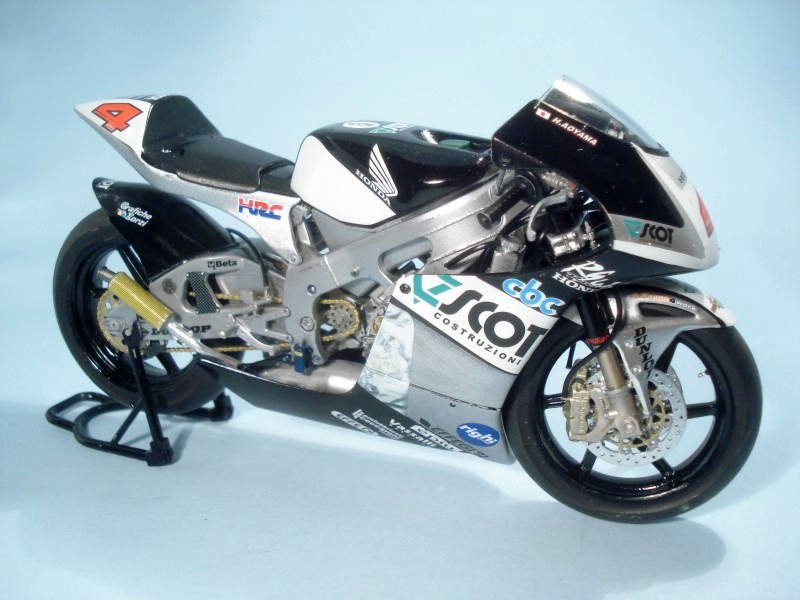
This was a time consuming phase for me. Practically every part gets painted individually unlike most airplane models that are assembled and painted as a whole. A number of parts receive two or three different colors. There are no guidelines on the front or rear cowl to help with the painting. It’s simply a matter of “eyeballing” the proper lines. The painting/decaling process is a multi-step process because of the over-lapping paint and decals. You’ll have to develop a sequence that works best for you. A sequence is not provided in the instructions. Do not forget to use Future to protect the first decals placed when masking.
These decals are very, very good. They release from the backing paper quickly and conform to the compound curves easily. The colors are excellent and their opaqueness blocks out the under laying paint. This is evident when I placed the white decals on the black surfaces and none of the black showed through.
Once the model is complete it is easily displayed using the jack stand provided in the kit. You’ll also have to decide whether to use the clear cowling to show off the detail or use the standard cowling.
Assessment
Hasegawa has produced a little gem with this kit. The parts are exquisitely molded with a high degree of detail. The entire kit is very well engineered. I particularly like the option of using the clear cowl so the beautiful detail will not be hidden.
This Hiroshi Aoyama 2009 GP250 championship motorcycle represents an important moment in motorcycle road racing. Hasegawa has produced a kit that is worthy of its place in history. For the motorcycle enthusiasts this should be reason enough to build this kit.
While it may not be a kit suited to the novice builder, it will be an enjoyable build for most modelers. I certainly enjoyed it and give it two thumbs up.
My sincere thanks go to Hobbico for providing this review sample and to IPMS/USA for allowing me to review it.


Comments
Add new comment
This site is protected by reCAPTCHA and the Google Privacy Policy and Terms of Service apply.
Similar Reviews