
Scania R730 Streamline
Having previously built Italeri’s Iveco Hi-Way 40th Anniversary and the Mercedes-Benz Actros MP4 Giga Space, I had a pretty good idea of what was in front of me building this truck.
All the parts sprues were presented in the same organized fashion, and like the Iveco Hi-Way, the Scania R730 included a fantastic chrome adhesive sticker sheet on top of the gorgeous decal sheet. Italeri mentioned that the chrome plastic sprues were newly tooled, but they were identical to those found in the Iveco kit mentioned above, except for the addition of the sun visor and exhaust pipe panel.
Construction could be broken down into four distinct modules – the chassis (including the wheels), the engine, the cab interior, and the cab exterior. Tamiya Extra Thin Cement was my glue of choice for most of the build along with super glue. The kit plastic reacted very well to the Tamiya cement, melting where needed to form a strong bond.
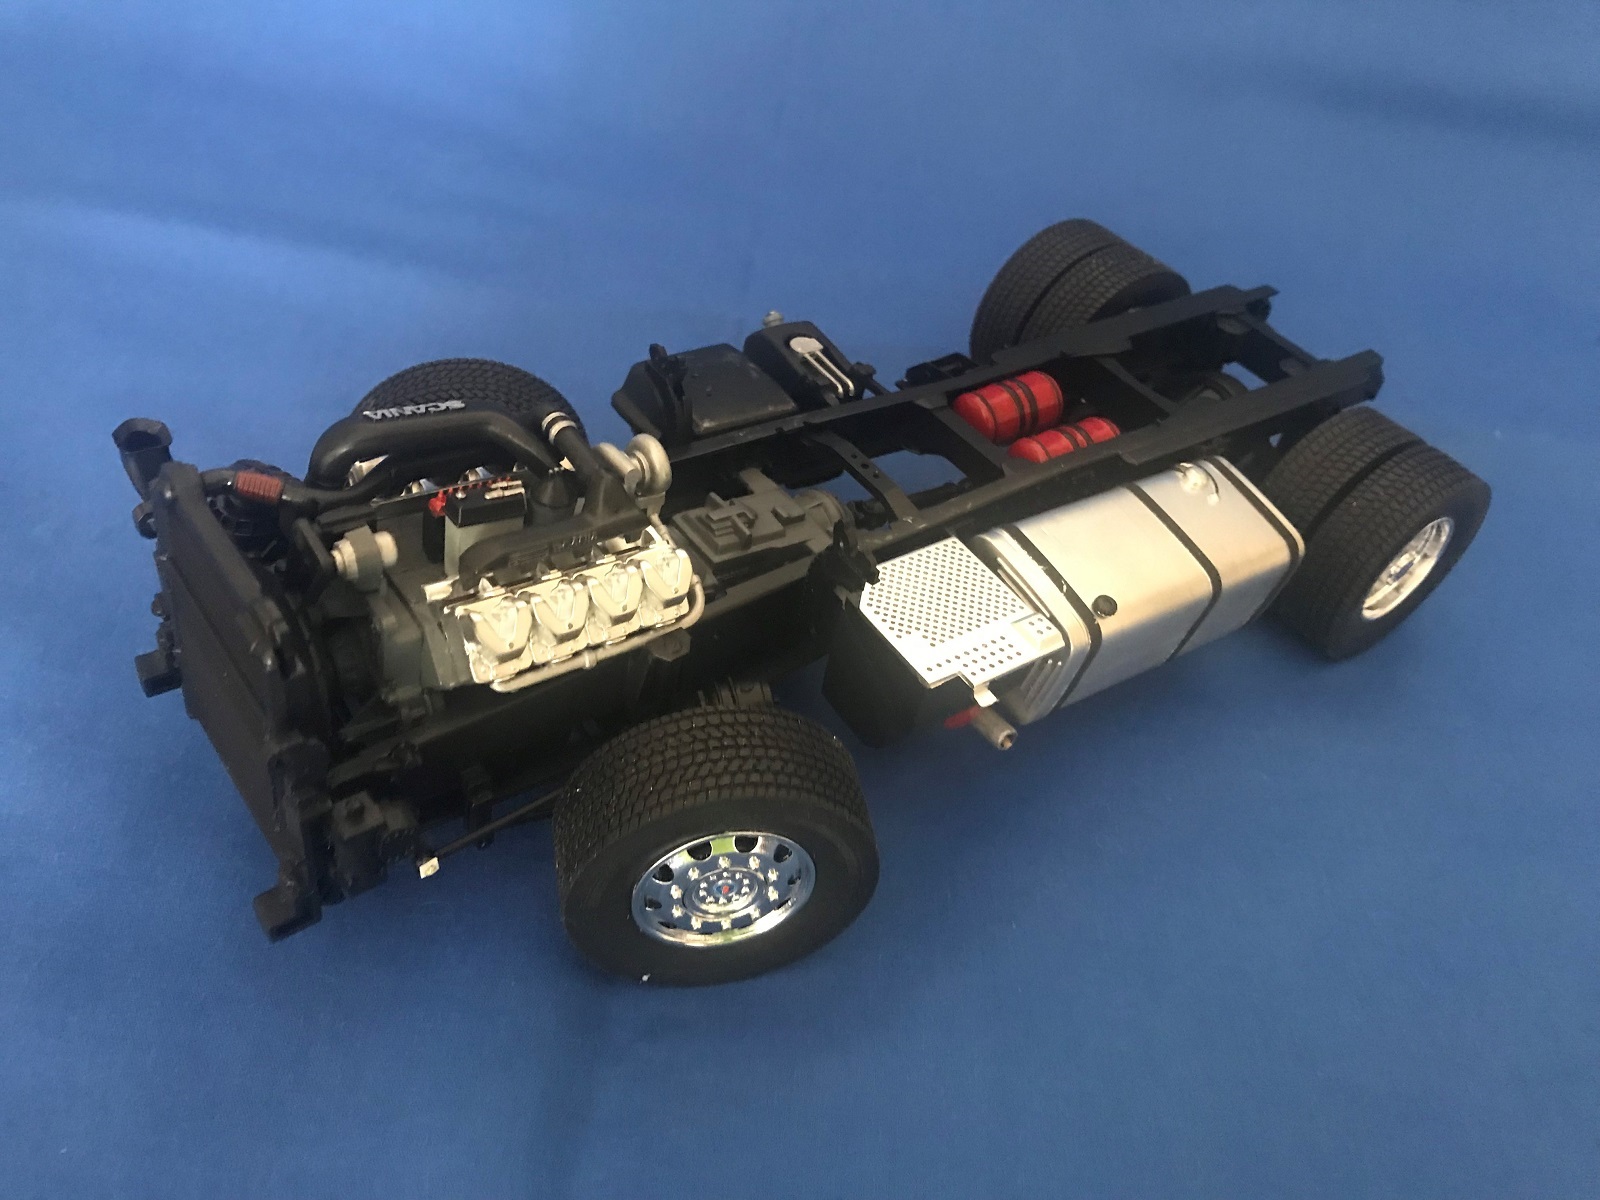
I started with the chassis, air tanks, rear suspension, brakes, and drive train. Assembly moved quite quickly with reasonable parts fit. However, a good deal of time was spent eliminating seams from glue joints, and the usual, sometimes large kit mold seams. All of which were necessary for a better fit and look. The chassis framework was built making sure the cross members lined up and everything was square. There were a few slots that needed opening on each chassis rail. The rear axle and suspension were added, as well as engine mounts and other components that would be the same color.
The front brakes, suspension and steering assemblies were built and installed. As I had cleaned up joint and mold seams on all these items earlier, assembly went quickly. The front wheels were designed to steer and the tops of all the steering linkage pins were melted using the end of a hot knife to lock them into the next moving linkage bushing. This all worked very well.
I used the instruction paint color recommendations, except the flat black recommended to paint the chassis and other related parts. Instead, I used Tamiya semi-gloss black which gave a nice low sheen.
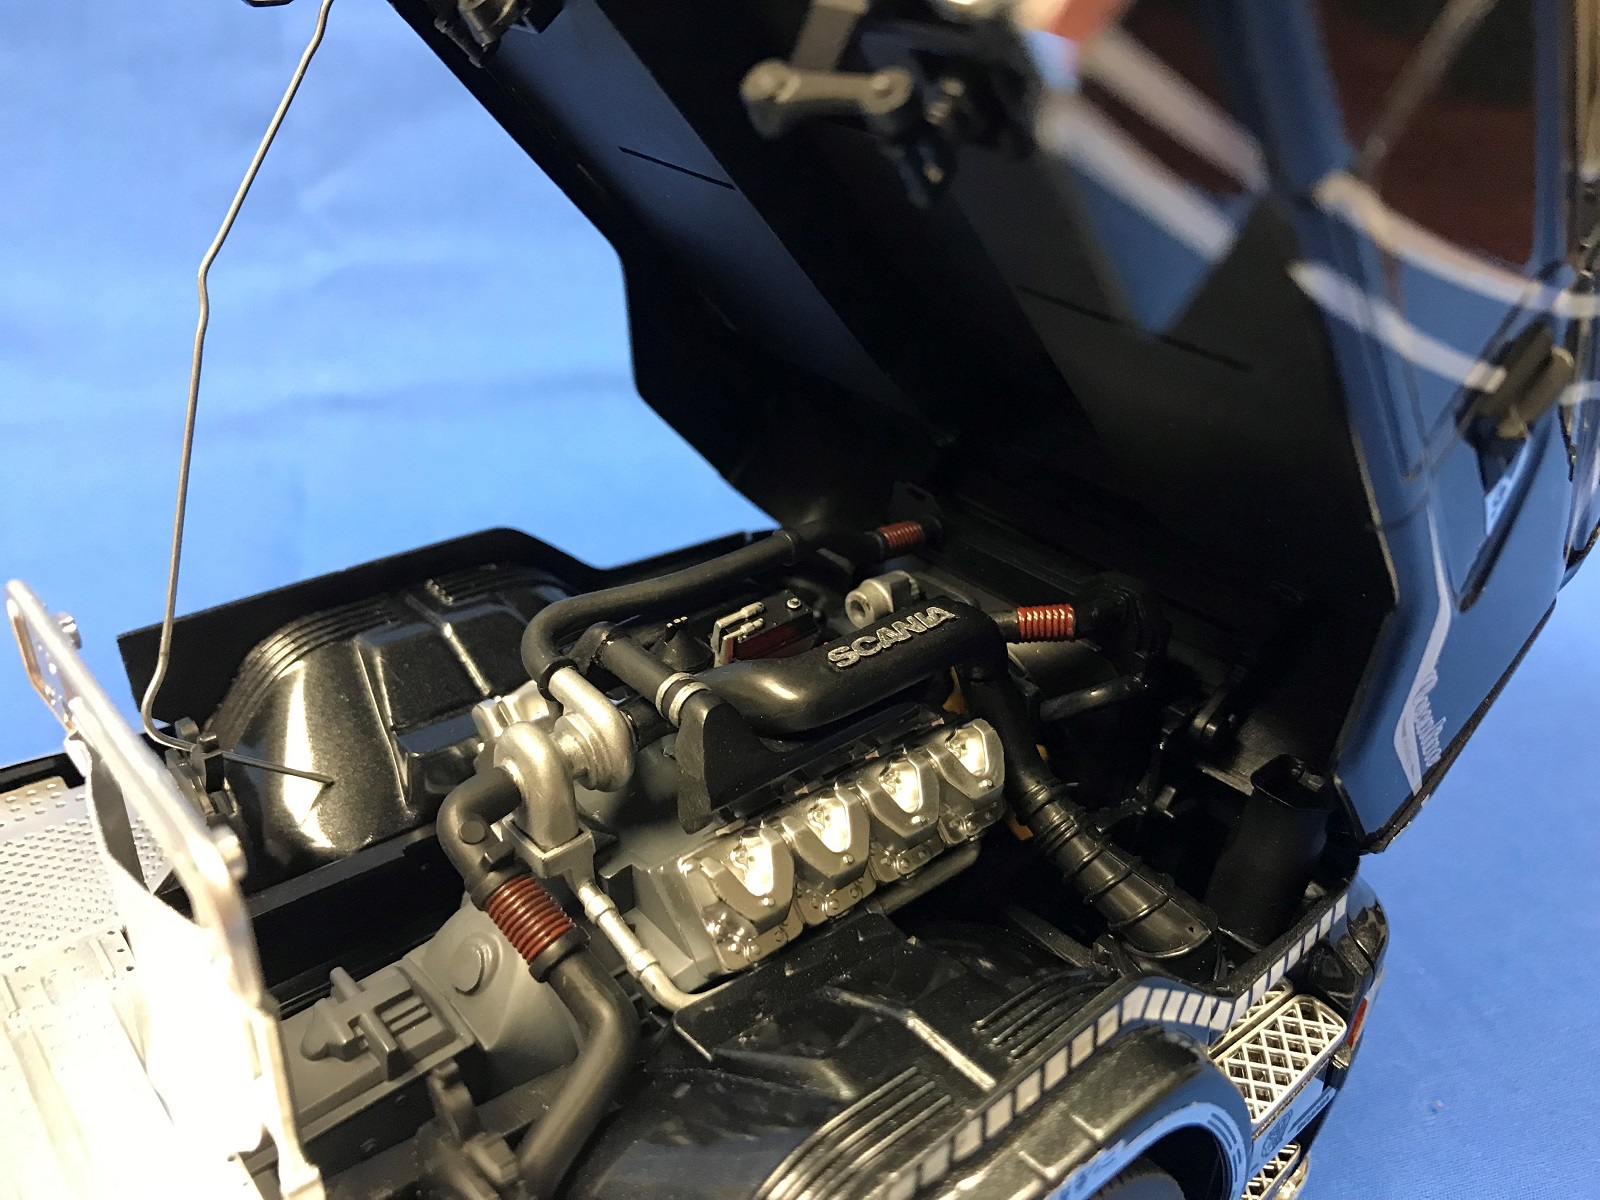
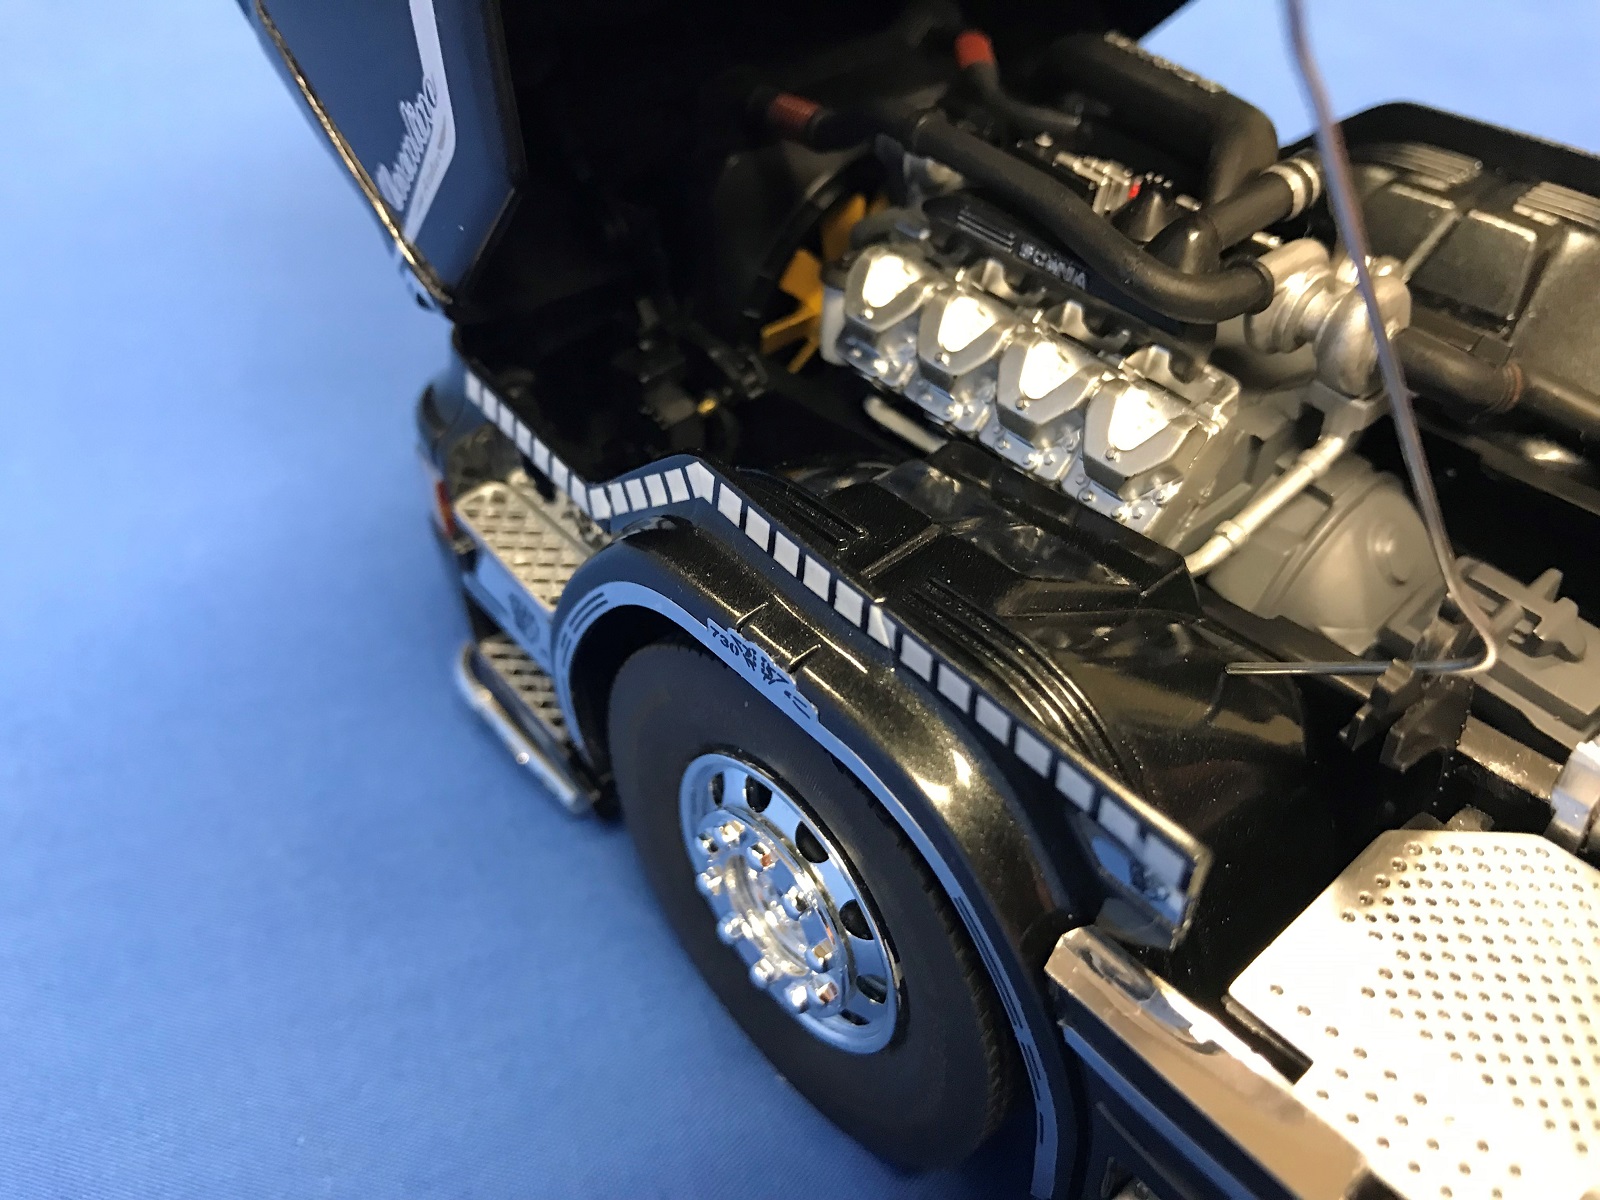
The big Scania V8 engine was very nicely detailed and built into a good-looking representation of the real thing. Most parts fit quite well, although the instructions were a little vague on where some items went. Ejector pin marks also needed removing for a better fit on some items. Again, I followed the painting recommendations which were quite limited, and I added blue and white colors to oil, fuel and other filters. Raised Scania name plates were carefully painted chrome using my Molotow Liquid Chrome pen. With the engine built and painted, it was glued to the chassis engine mounts. Don’t forget to add the drive shaft at the same time between the transmission and rear axle. The cooling fan was attached to the front to the engine followed by the massive radiator.
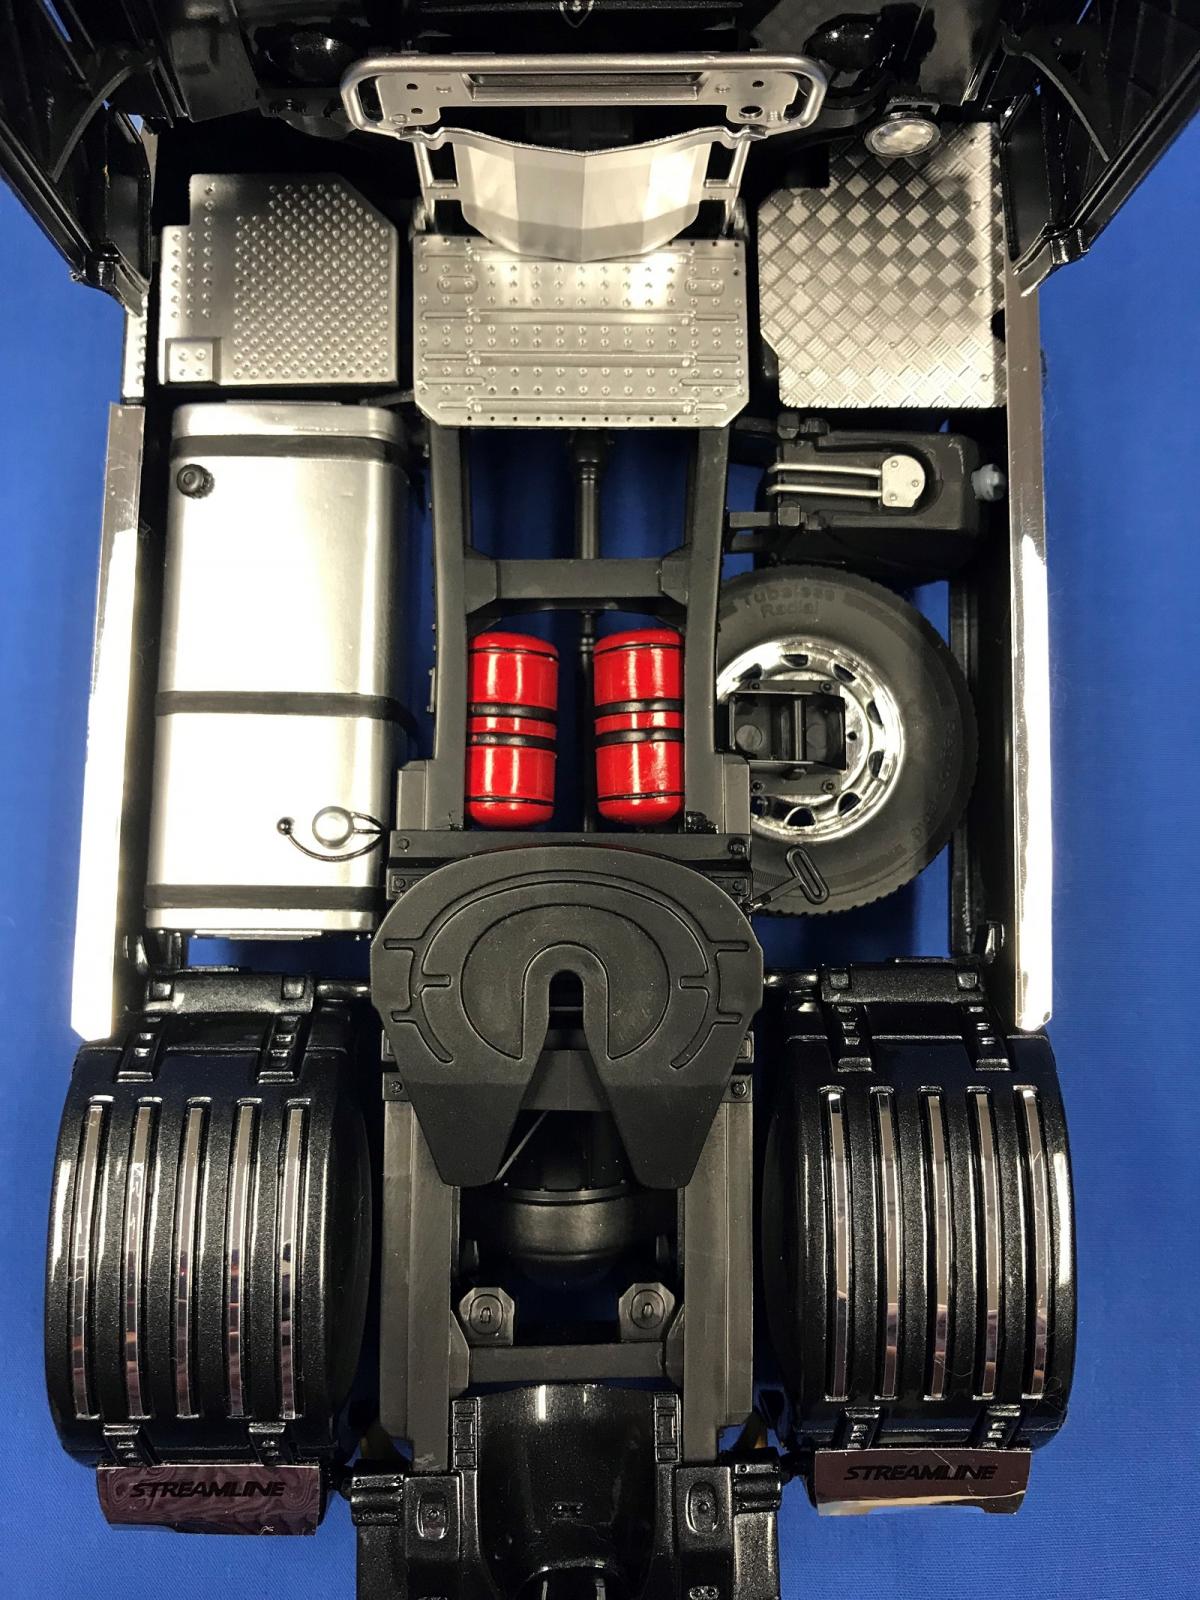
The four air tanks were assembled and painted gloss red with black stripes. The battery box and exhaust noise reducer/muffler box were built and painted semi-gloss black, while the fuel tank along with all the walking platforms were painted Model Master chrome. This gave a nice polished stainless-steel finish. All of these components mounted securely to the chassis. The exhaust and other pipes were added and fit fine.
With the chassis and engine completed, I started on the wheels and tires. Each chrome wheel half required careful removal from the sprue as the stub is located right behind the scale thin rim. This sprue stub also needed to be fully removed to allow the tire to sit flush against the inside of the rim. I covered any blemishes I made to the chrome plating using my Molotow pen.
The rear, inner wheel was attached to its axle using a plastic washer, part 99A. I needed to reduce the washer’s diameter so its cover, part 8C would fit over it. The outer wheel was then mated with inner wheel. The front wheels were installed but no washers were provided. I used parts 98A (an axle grease cap on the real thing) which I modified by sanding down the dome so the chrome cover would fit over it. The tires were rubber/vinyl. They were attached to a vinyl sprue which if clipped carefully separated with minimal damage to the tire. Each tire showed nice side wall and tread pattern detail and there were no center mold seams . A chassis mounted spare wheel and tire were also included. Michelin decals were included for the tire side walls, but they did not stick to the rubber. The tread pattern was directional.
This work completed the first two build modules, minus the addition of side skirts and wheel covers.
Italeri suggested painting the cab interior white, which may well be correct for this particular Cosentino Group truck, but I thought light ghost grey looked better. I then picked out details and accents with white and chrome. The steering wheel was painted black with grey accents. Decals finished the seats and steering wheel as well as the dash. Italeri’s instructions did not mention it but there was a small green “Cosentino Group” decal that went on the rear wall of the cabin. It was in the same grouping as the seat decals on the sheet and could also be seen on the decal placement page of the instruction manual.
The cab interior was assembled with each side panel joining quite well. Take care to properly align all the panels so it comes together square. I left the ceiling part off until later. The outer roof included a separate lower section where the sides and front angled inward. The fit was quite nice except the rear edges which needed a little filler. I was able to apply Tamiya Extra Thin cement and just squeeze the two parts together which melted the plastic and filled the gaps.
The roof and side spoilers showed nice structural cross hatch detail on the inside but were marred by multiple ejector pin marks. As these would be visible on the finished model, I took the time to remove them. Luckily, they were not too deep and elimination was easy enough. I sanded the outside edges as the cross hatch formed shallow sink marks. I found later that I didn’t sand quite enough as they are still faintly visible.
Each outer cab side and roof were separate parts and met the next at a natural seam. I painted each part separately using Tamiya spray can TS-40 metallic black, followed by Tamiya TS-13 spray can gloss.
To facilitate the extensive decal job ahead of me, I temporarily taped all four sides and the roof together around the completed cab interior. The side spoilers were also taped on. I used the roof spoiler to make sure the side spoilers were aligned at the correct angle. I taped all this together so I could apply the decals, then disassemble all the cab panels and gloss coat each part before adding the windows. While this method appeared tedious, it actually made the paint and gloss coat application easier.
The decals were glossy and strong. They responded quite well to Micro-Sol with some help from pin pricks and gentle manipulation to conform to the many compound curves they were applied over. When the decals were almost dry, I used a new blade to slice them where they ran between the cab parts and spoilers. A further application of Micro-Sol conformed the cut edges to where they met each panel. The only problem I had with the decals was that they did not want to separate from the backing paper. I tried hot and cold water and left them in the water for five to ten minutes to no avail! The only way I could remove each decal, after a period of soaking in water, was to gently maneuver a soft bristle paint brush under the decal without damaging the edge and carefully coerce it away from the backing paper. With how many decals there were, this took a good deal of time!
All the clear parts were crystal clear, but I treated them to a dip in Future/Pledge Floor Wax to protect them further. When dry, I installed the windscreen and side windows. Much care was needed removing each window from its sprue stub. The “glass” was extremely thin and the sprue attachments were large. The good news was that they couldn’t come loose from the sprue and get scratched. I used my trusty razor saw to do the job.
Installing the windscreen and side windows, I found the fit was good, but the mating surfaces, especially for the windscreen were quite narrow. I used Tamiya extra thin cement where capillary action ran the cement along the edges. Wooded clothes pegs held the “glass” in place until the glue was dry.
The four completed outer cab panels and the roof were brought together to finally complete the basic cab. However, the inside door trim panels impeded the fit of the side panels that sat against the dash. They needed extensive sanding to achieve a good fit. Luckily where I sanded couldn’t be seen. The side spoilers along with their mounting brackets were glued and aligned with the cab rear and sides. The roof spoiler joined the tops of the two side spoilers which completed this assembly.
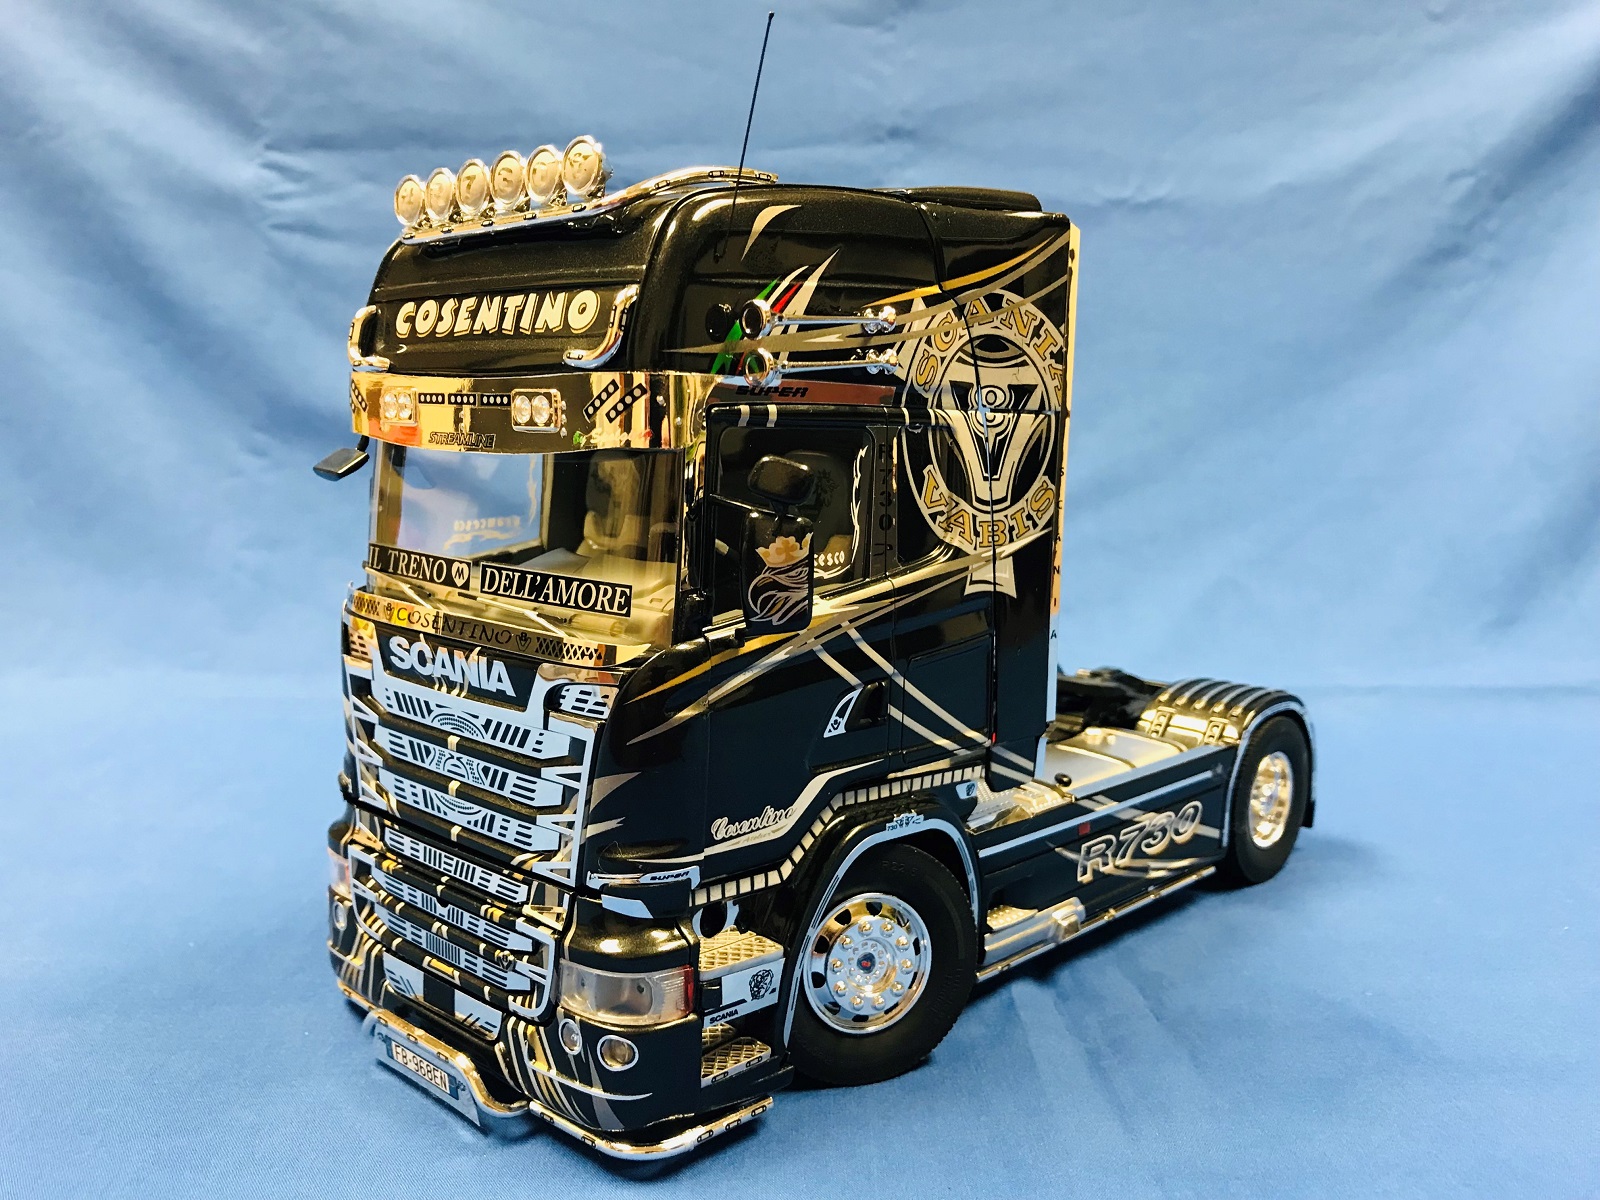
The chrome sprue containing the spotlights, holders and side light bars all needed careful attention dealing with chrome repair where the part was snipped from the sprue and cleaned up. I used chrome bare metal foil and my Molotow “Liquid Chrome” pen. Some parts had mold seams that ran through visible areas. I contemplated sanding them off but decided to leave them alone.
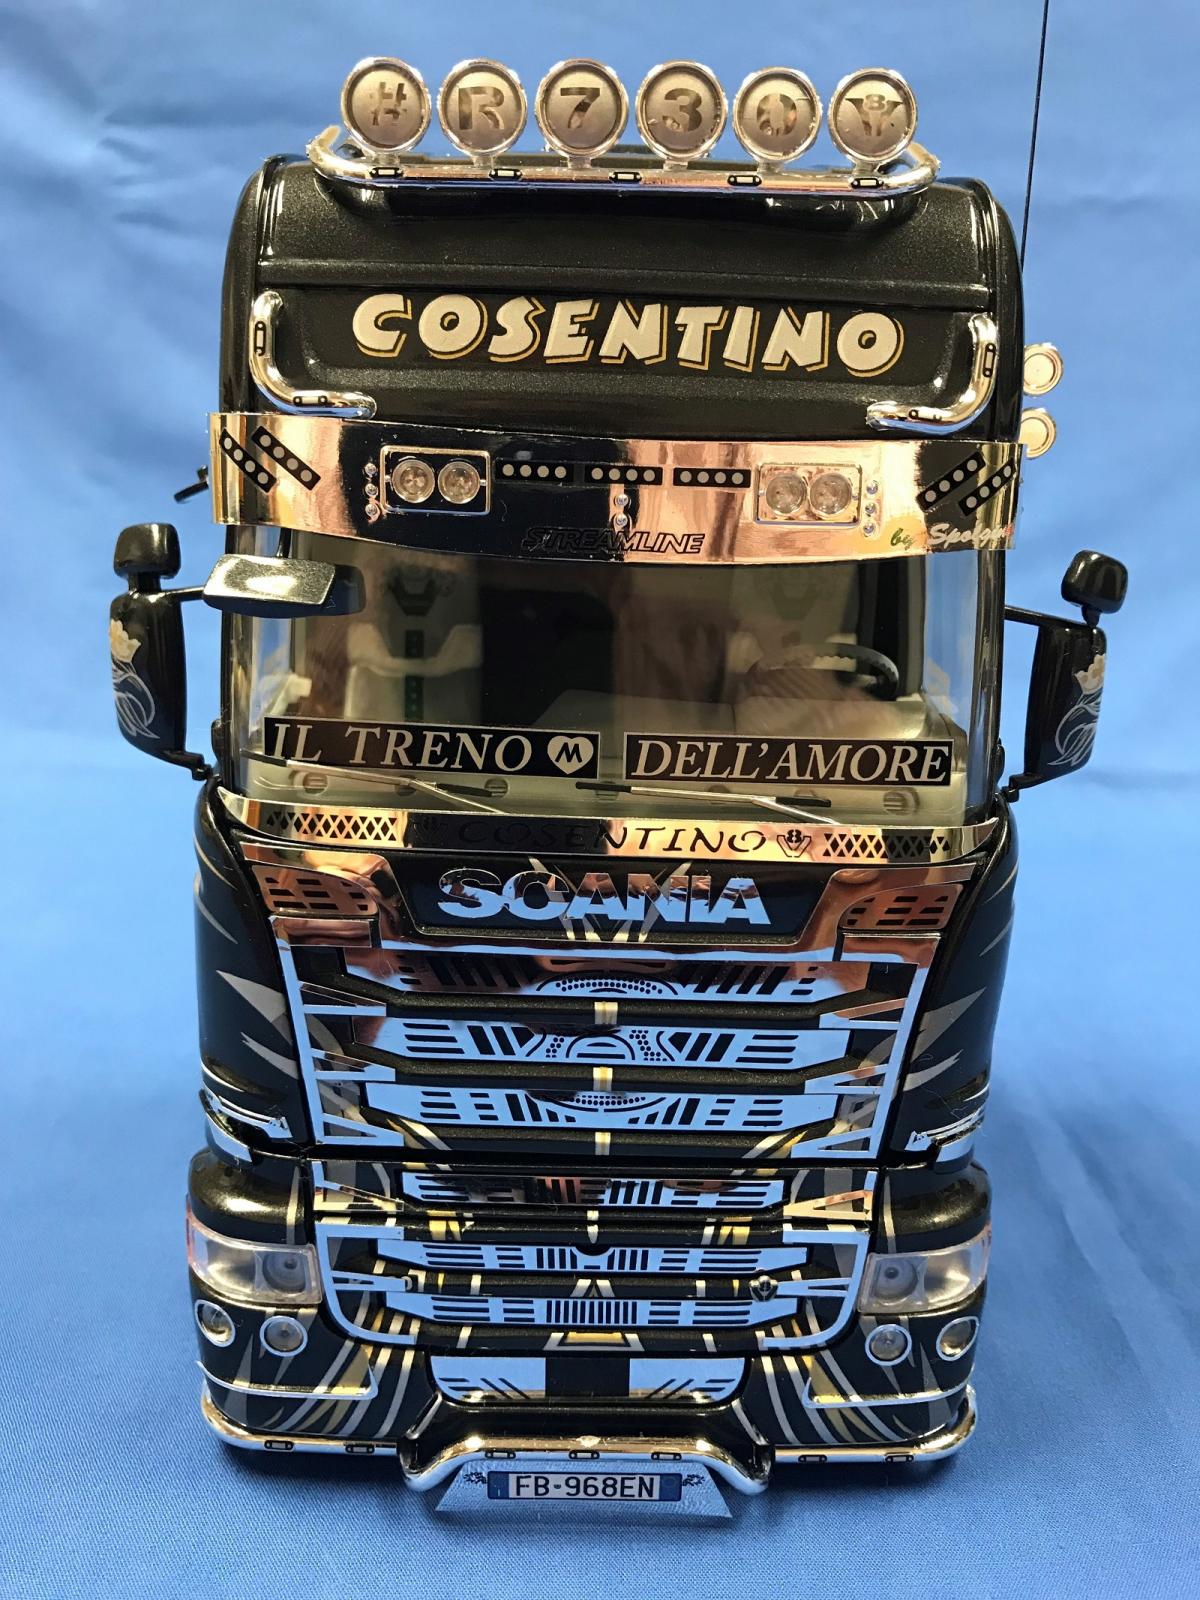
Six round spotlights mounted to a light bar that wrapped up and over the cab roof. The bar was identical to that in the Iveco kit and was not shaped to fit the Scania roof line properly. It was also too narrow and did not extend back far enough. The instructions suggest modifying the light bases to fit a forward angle of their mounting platforms, however, due to the poor fit they actually angle the other way! I carefully glued each light so it sat vertically and went on! Decals covered each spotlight lenses.
Before mating the cab to the chassis, more chrome work followed with the chrome adhesive sticker sheet. I removed each sticker using a sharp knife to lift an edge and peel it off the backing sheet. The adhesive was quite strong so care was needed to place the sticker accurately before burnishing it down on the surface. The stickers did not want to conform to sharp corners or compound curves. The chrome stickers really added “bling” to the truck!!
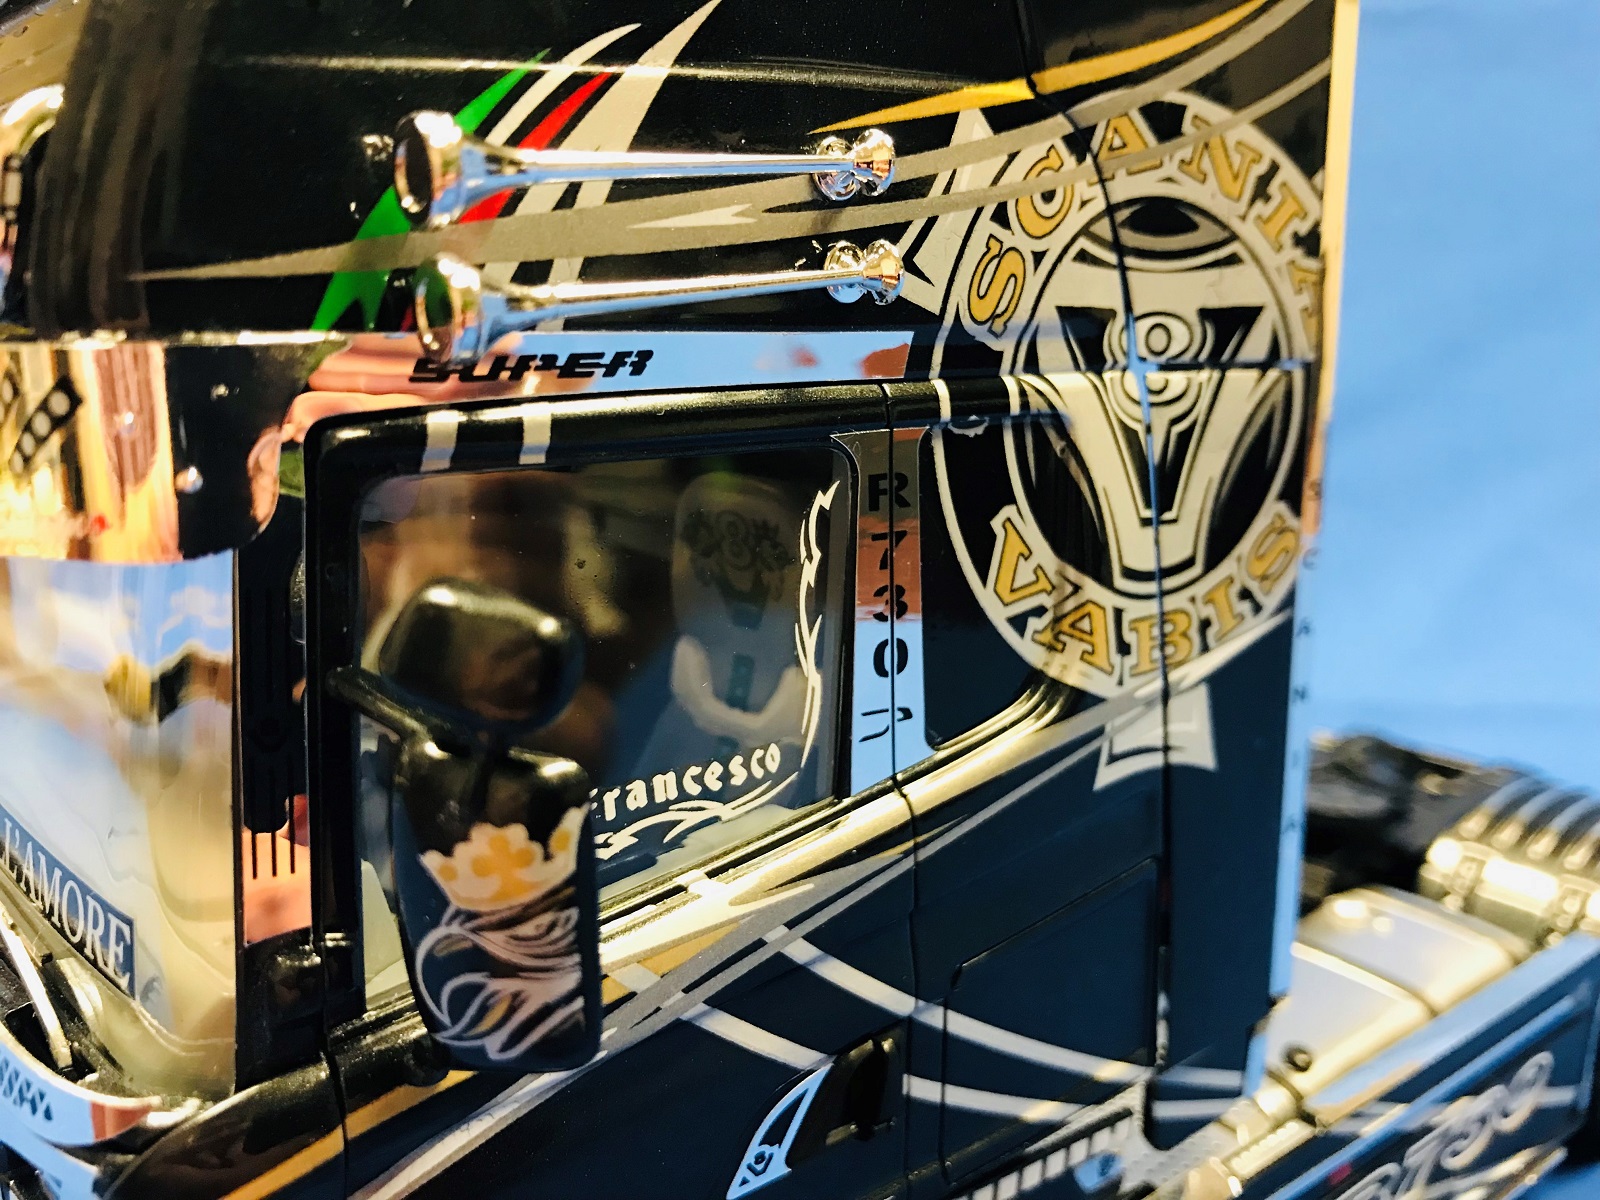
The model was nearing completion, but there were still a number of delicate parts that I left off until later. Chrome stickers were provided for the mirrors, but from previous experience with Italeri trucks, they do not conform to compound curves. I stuck the sticker flat inside the mirror housing and glued the curved “glass” over the top.
The chrome sun visor included a downward facing mirror that was glued to its rear side and spotlight lenses covered four integral lights. Spotlight decals were also applied. The visor was attached above the windscreen and fitted fine.
Left and right skirts finished the sides of the truck and were mounted between the front and rear wheel covers. Chrome light bars mounted to the bottom of each skirt.
Before attaching the front lower grill/air dam, I inserted two pins to permanently join the cab to the chassis. The instructions call for the pin end to be melted like the steering linkages. The air dam was then glued to mounts on the chassis front. The cab can be tilted forward but there was no jack to support it.
The headlight and lower spotlight covers were glued on and they fit very nicely. Two chrome horns attached to the upper left side of the cab. I carefully drilled a small hole above the horns and fashioned an arial out of wire.
I wiped over the chrome stickers with WD-40 to remove any remaining adhesive and then called this audacious and colorful looking truck done. I parked the Scania R730 next to my Mercedes and Iveco show trucks which now look like they have all met at a “cruise and coffee” get together!!
I thoroughly enjoyed building the Scania truck. Overall, it was not overly difficult, however some planning and experience with other truck models would be helpful with painting and especially decaling. The only major problem I encountered were the decals not wanting to separate from the backing sheet. I hope this was isolated to just my decal sheet.
My sincere thanks to Italeri, MRC and IPMS USA for the privilege of building and reviewing this fabulous Scania truck.

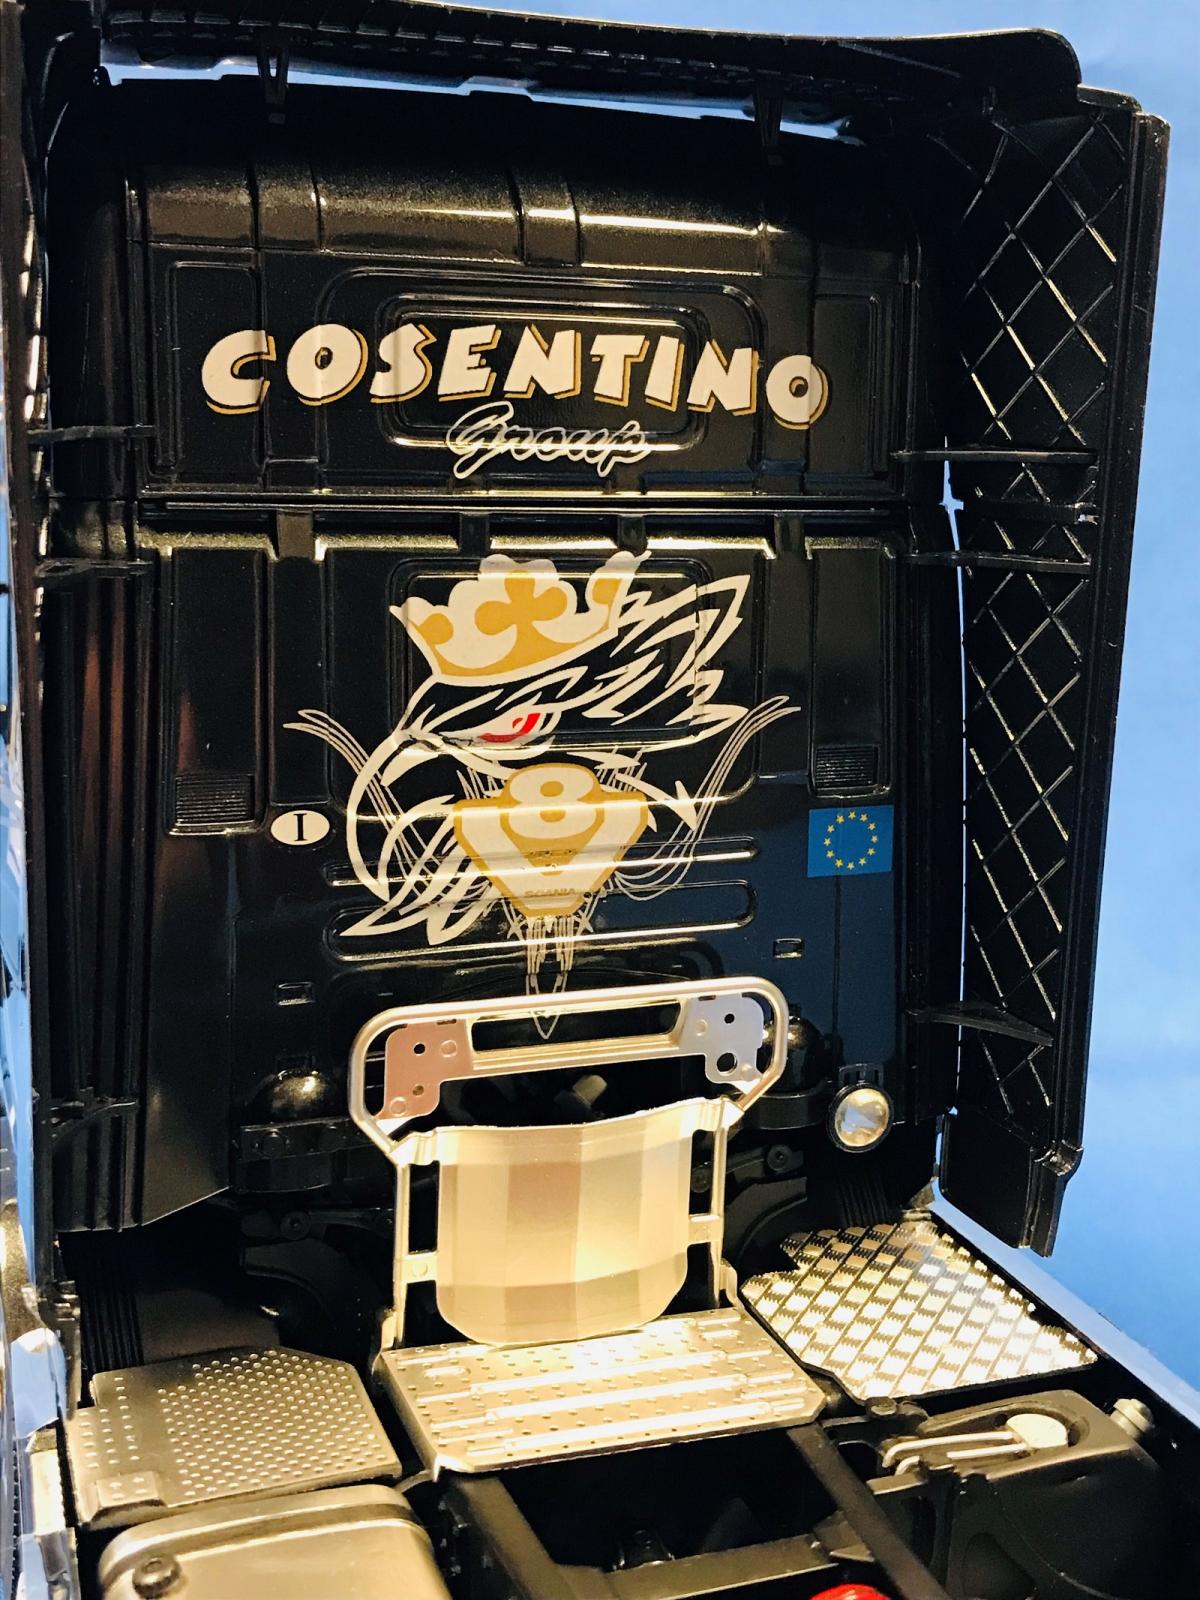
Cab - rear closeup

Cab ceiling

Cab dashboard
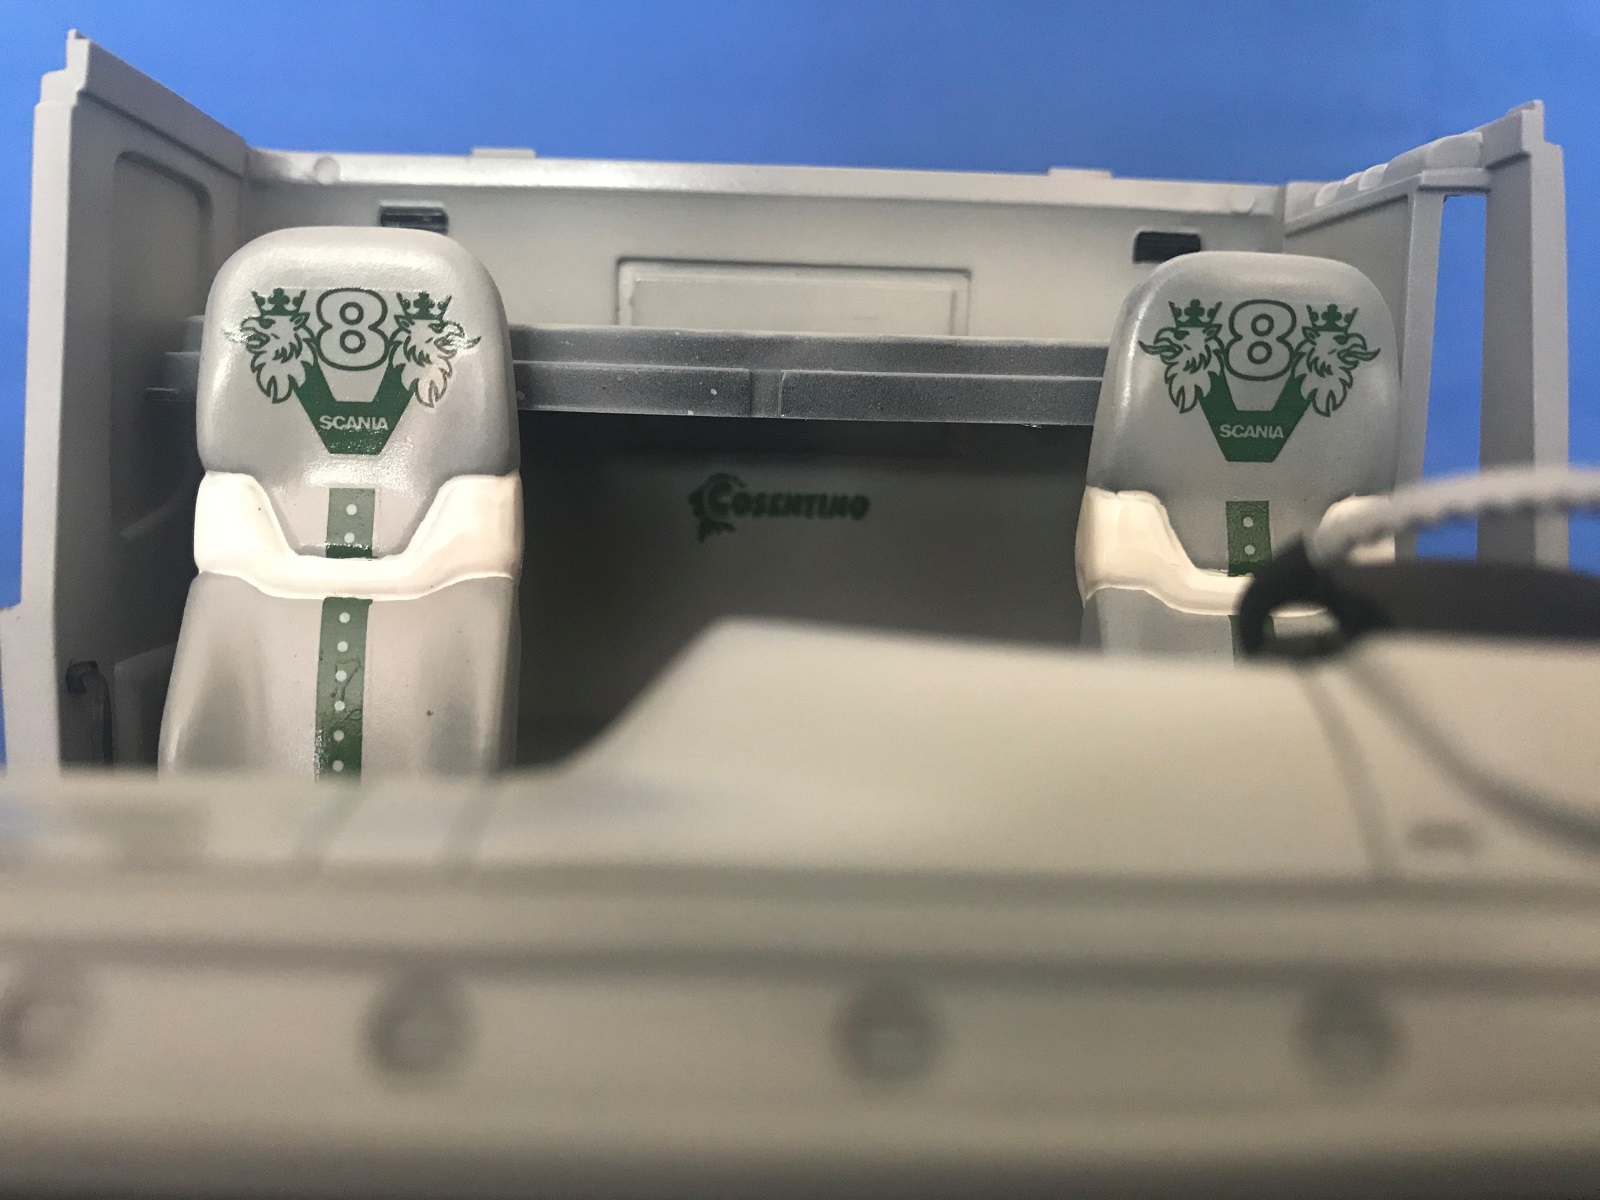
Cab seats

Cab Taped for Decal Application
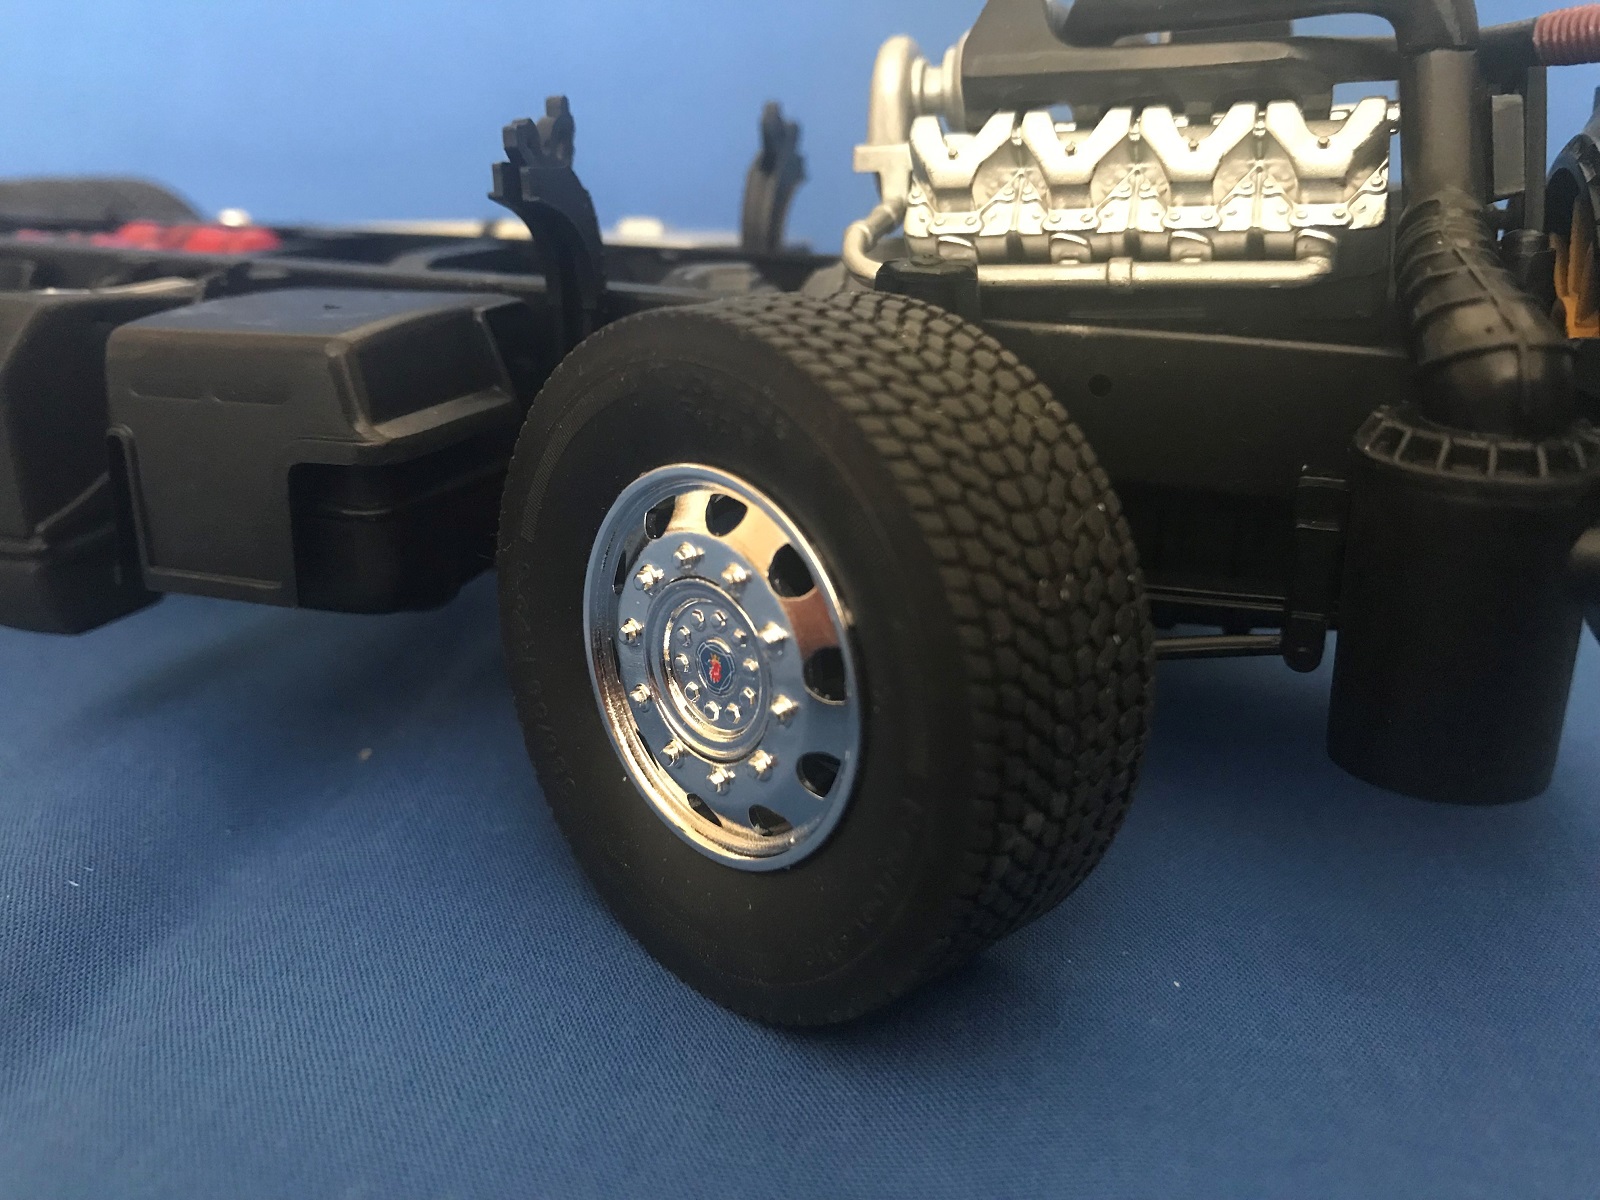
Chassis front wheel
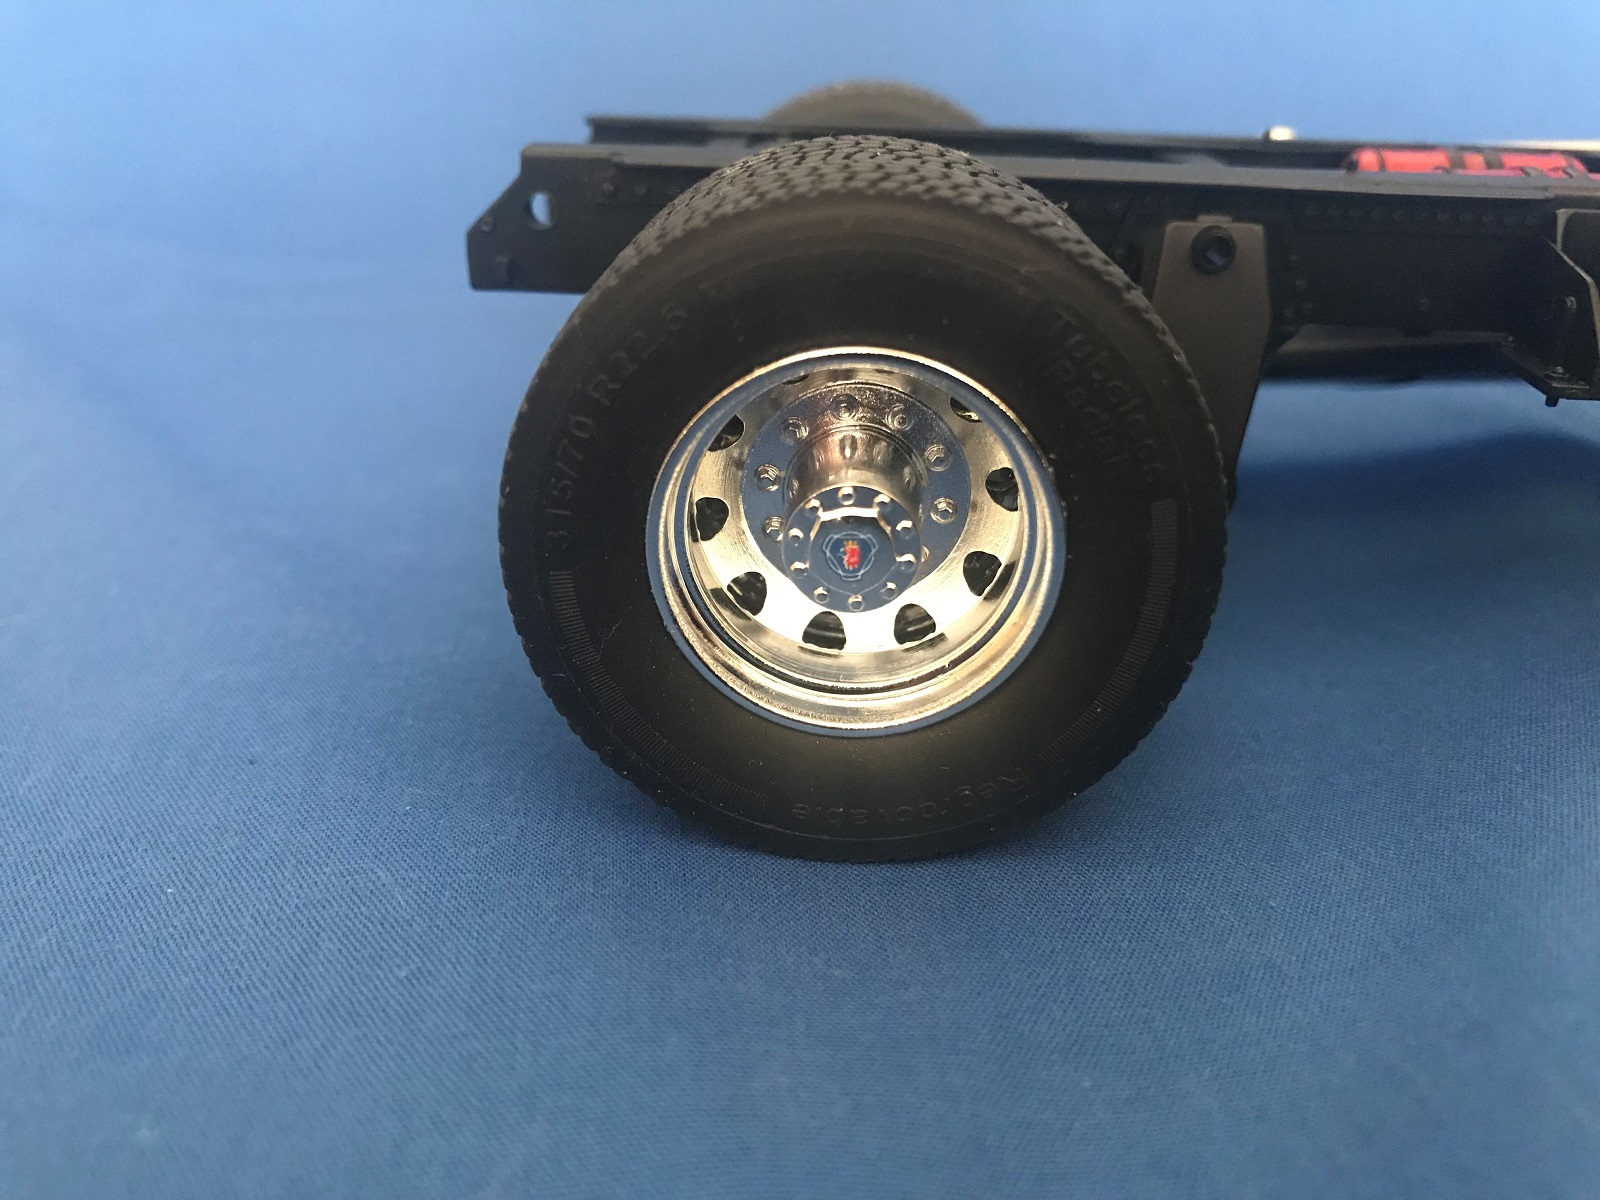
Chassis rear wheels
Chassis
Engine & piping
Engine left
Fifth wheel

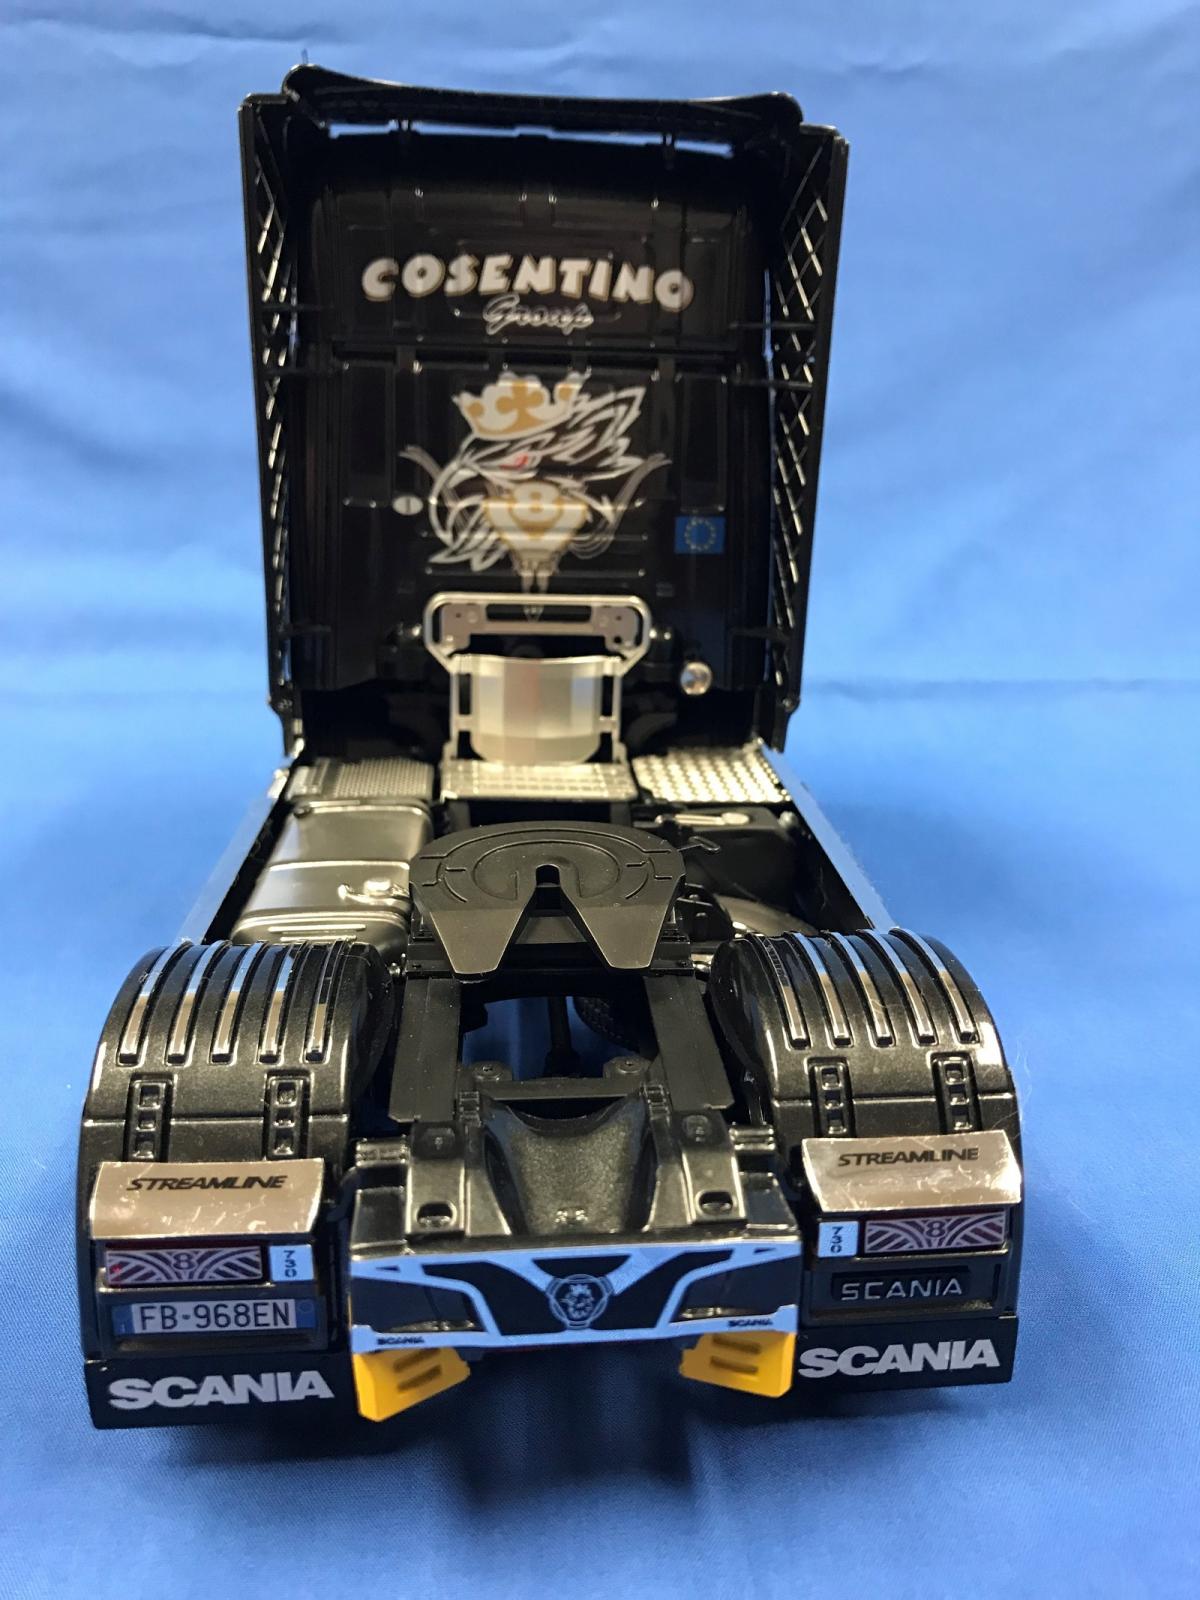
Front - cab tilted forward
Front windscreen & grill
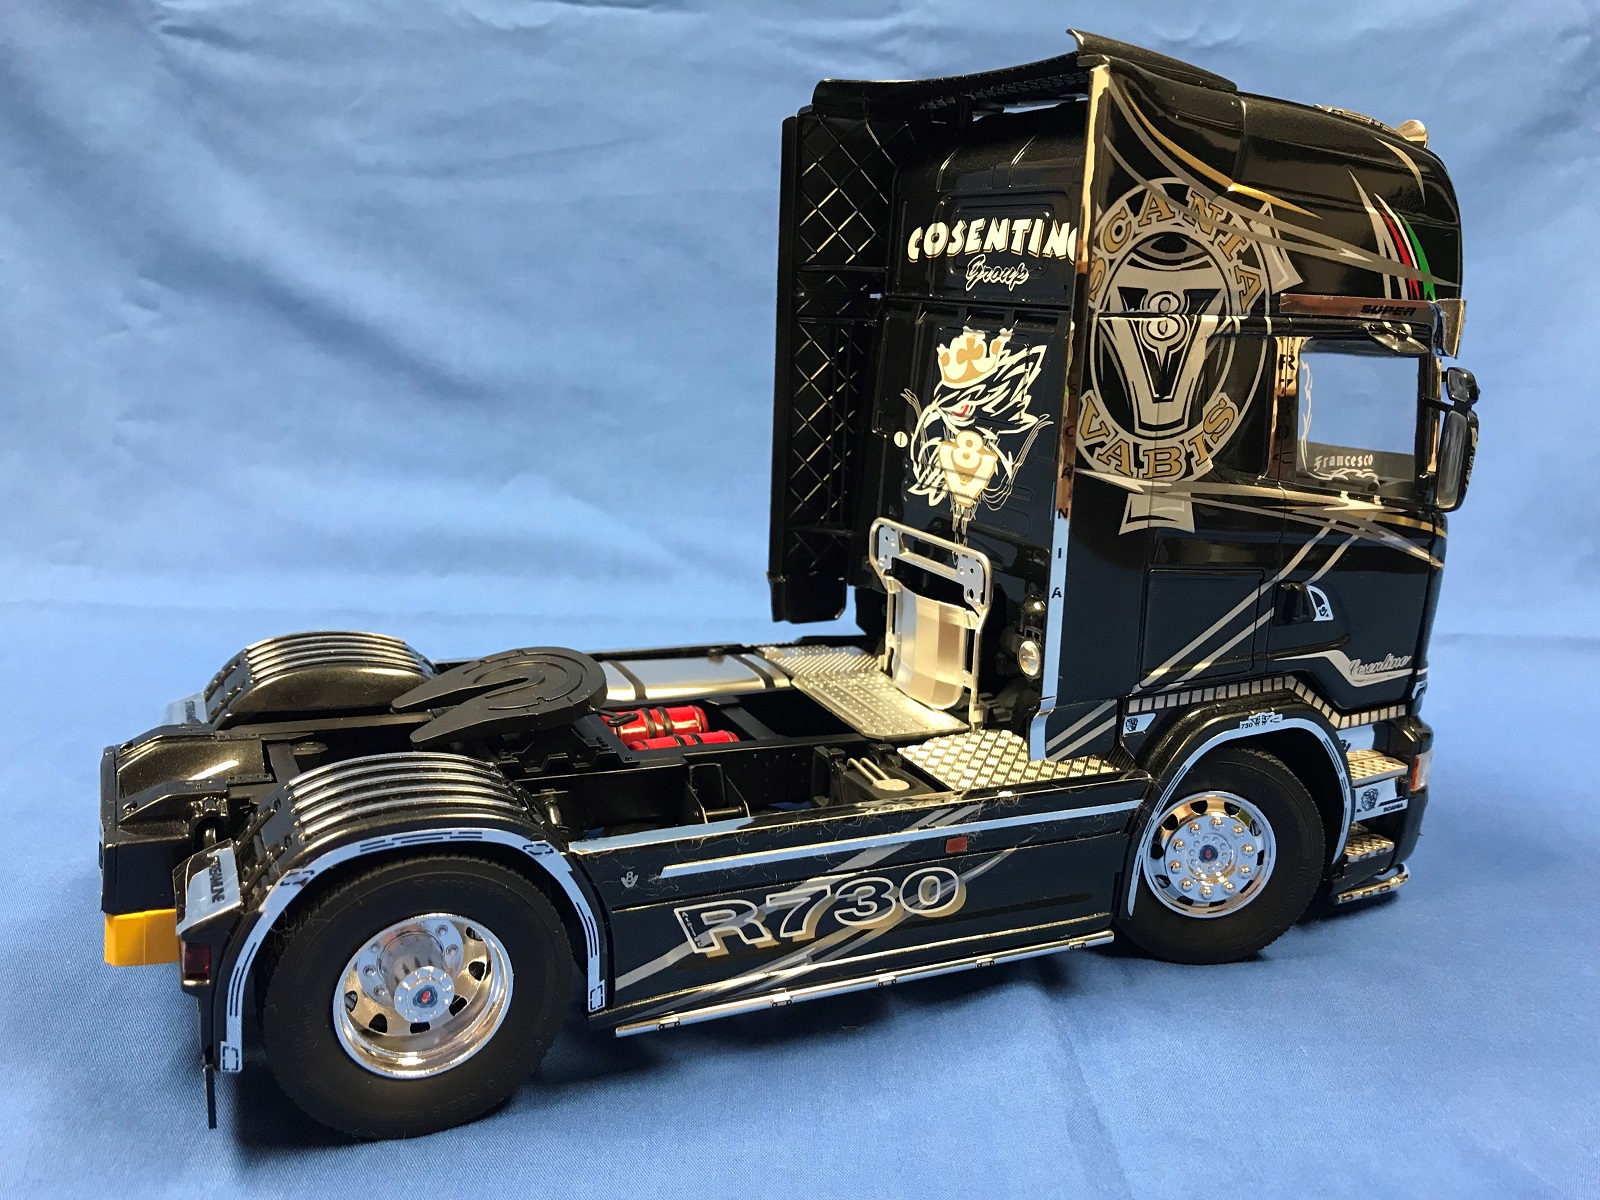
Front - Left side

Left side - cab tilted forward
Left side cab - closeup
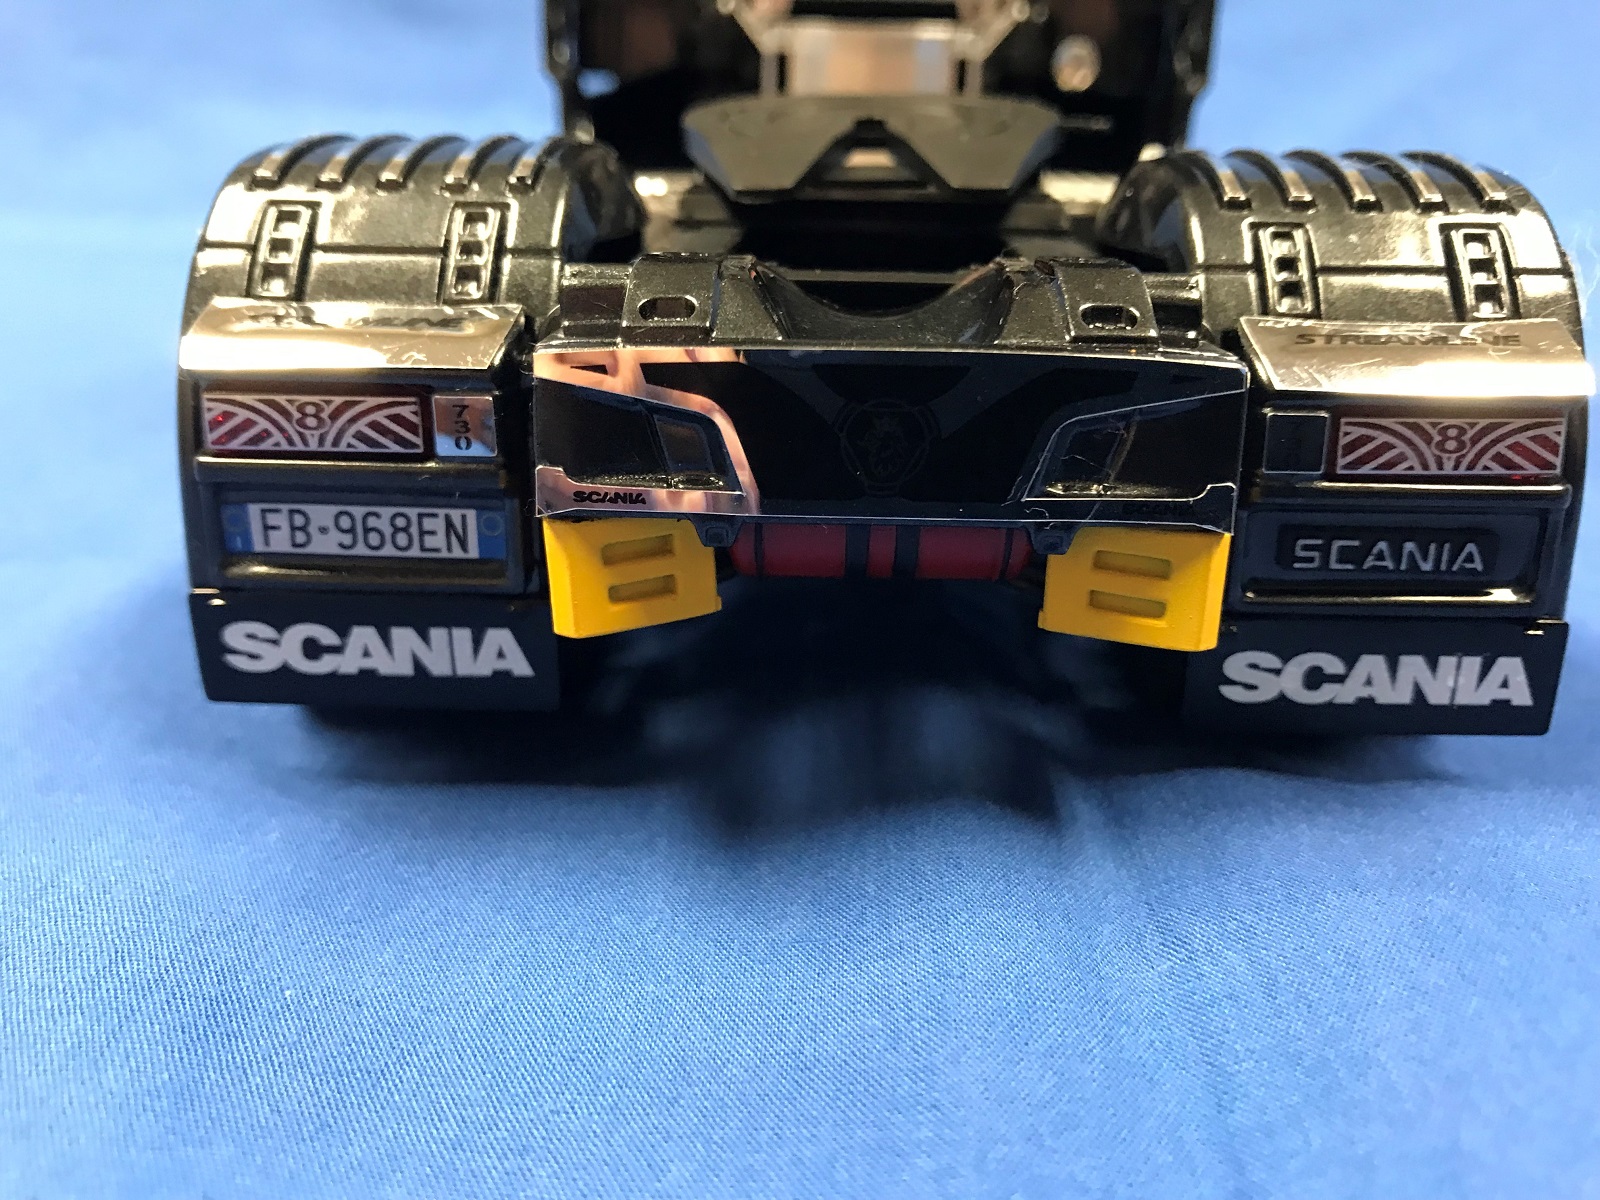
Rear - closeup
Rear
Right side skirt and cab
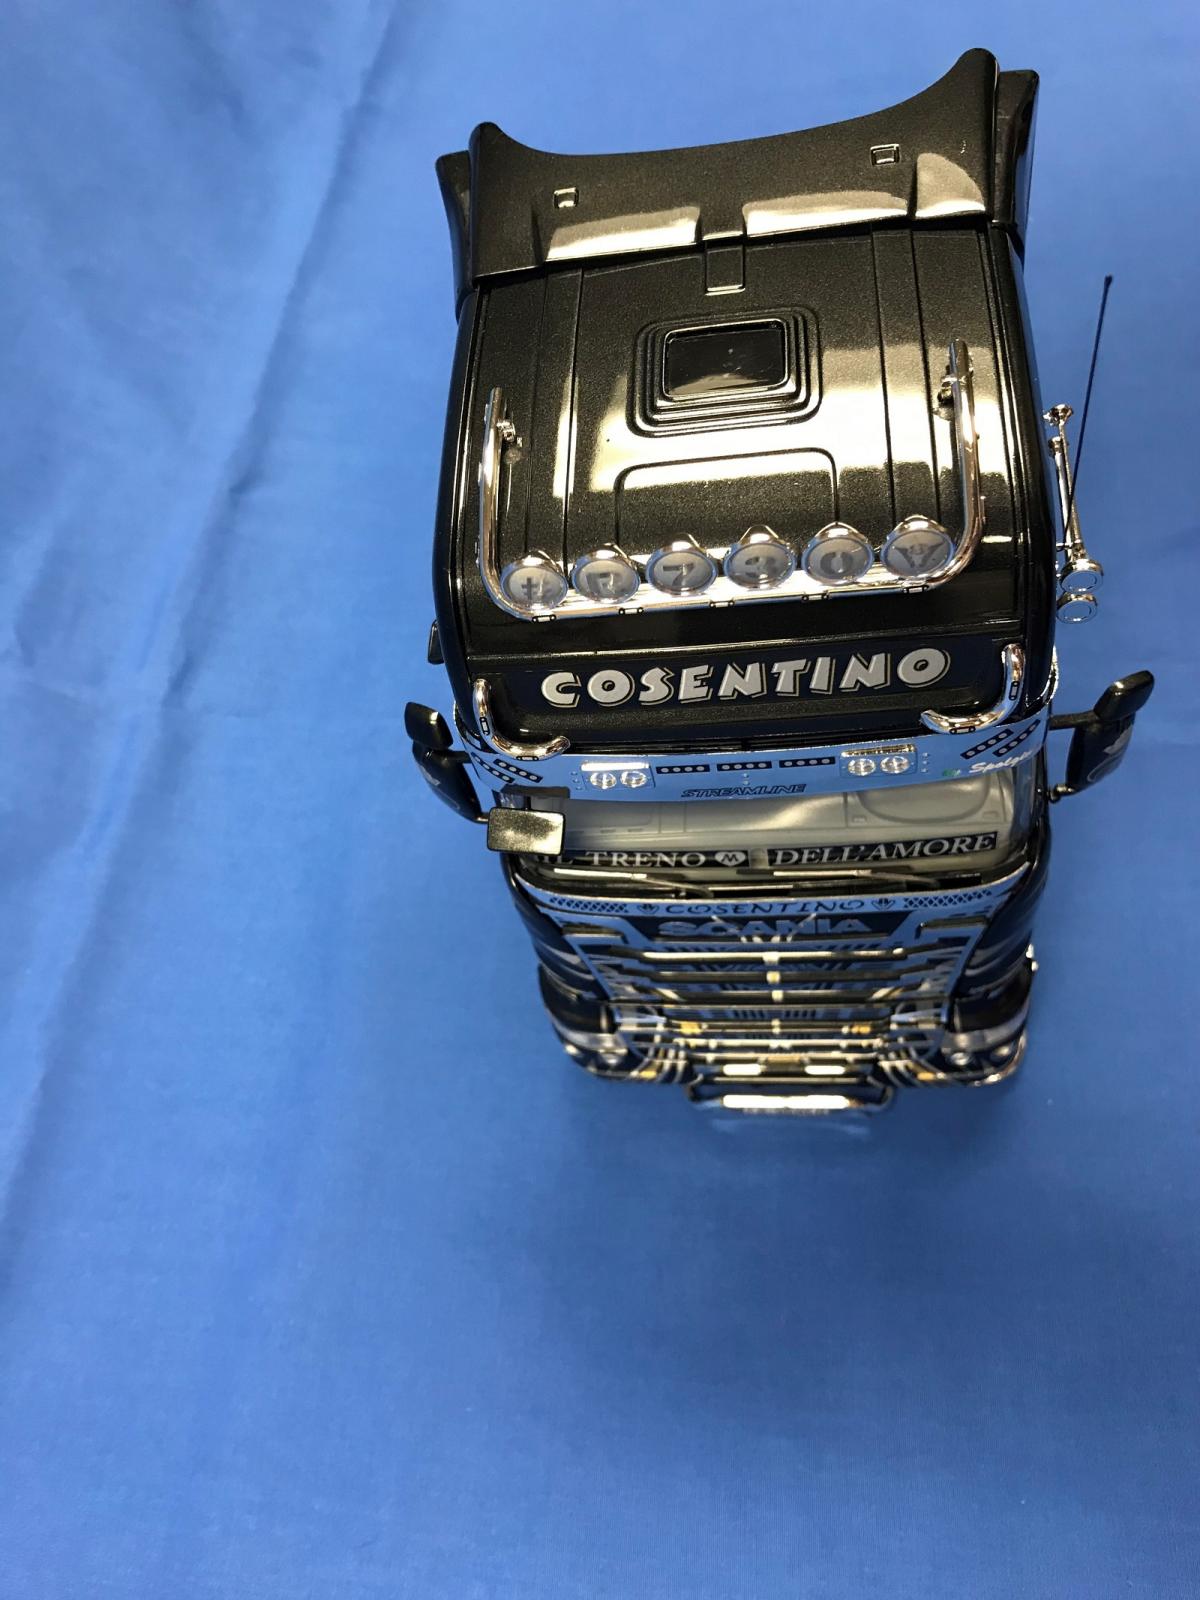
Top - front

Comments
Add new comment
This site is protected by reCAPTCHA and the Google Privacy Policy and Terms of Service apply.
Similar Reviews