
Russian Self-Propelled SU-152 [April 1943 Production]
Overview
The SU-152 was a large caliber self propelled assault gun base on the KV heavy tank chassis, designed to provide mobile artillery support for mechanized units to replace the antiquated and slow moving towed artillery that Soviet forces fielded at the start of the Second World War. The pilot vehicle was designed in just 25 days, and the SU-152 entered production at the Chelyabinsk tank factory in January 1943. The vehicle proved not only to be an excellent assault gun, but was also capable of destroying the German Tiger 1 and Panther tanks at long range, gaining the SU-152 the nickname among Soviet troops of “Zveroboy” or “Beast Killer”. Production of the SU-152 ended in December 1943 in favor of the ISU-152, which was based on the IS-2 tank chassis.
Kit Contents
- 3 Sprues of green injection plastic parts
- 1 piece main lower hull in injection plastic
- 1 small sprue of injection plastic clear parts
- 1 small decal sheet, covering two marking schemes
- 1 small photo etched brass sheet
- 1 length of braided copper wire
- NO crew figures
This is the first tracked vehicle in Bronco’s small range of 1/48th scale military vehicles, the previous three being based on the Staghound armored car series. I had the great pleasure of reviewing one of the Staghound kits for IPMS/USA a while back,.
The word “Wow” came to mind when I reviewed Bronco’s Staghound kit, and without hesitation the word can be repeated here for their SU-152 kit. The parts are intricately detailed, extremely well molded, and without any ejection pin marks or sink marks. The large upper hull part has a “rolled steel” texture to it, more about this later. The tracks are link and length, and are very well detailed and minus ejection pin marks that often mar similar such tracks in other manufacturers’ kits.
Construction as with most tracked military vehicles begins with the lower hull assembly together with the road wheels and drive sprockets etc. The lower hull is a one piece “tub”, and has excellent detail, far better than the leading kit manufacturer in this scale offers the modeler. The parts fit is generally good with the exception of parts B26/27, track return rollers, which wobble about on their mounting posts, B16. Care will need to be taken to get the return rollers centered on these posts. The drive sprockets consist of four individual parts per side, thus insuring excellent detail. The one photo etched brass part is installed in Section 2 of the instructions, and is for the large air intake screen at the very rear of the hull.
Next comes the installation of the tracks, and make sure you find the “Addendum” sheet that should be included in the kit box, as the main instructions have an error in the parts assembly sequence for the tracks. Failure to follow the Addendum will cause you no end of problems, as I found to my cost when I at first didn’t notice it!
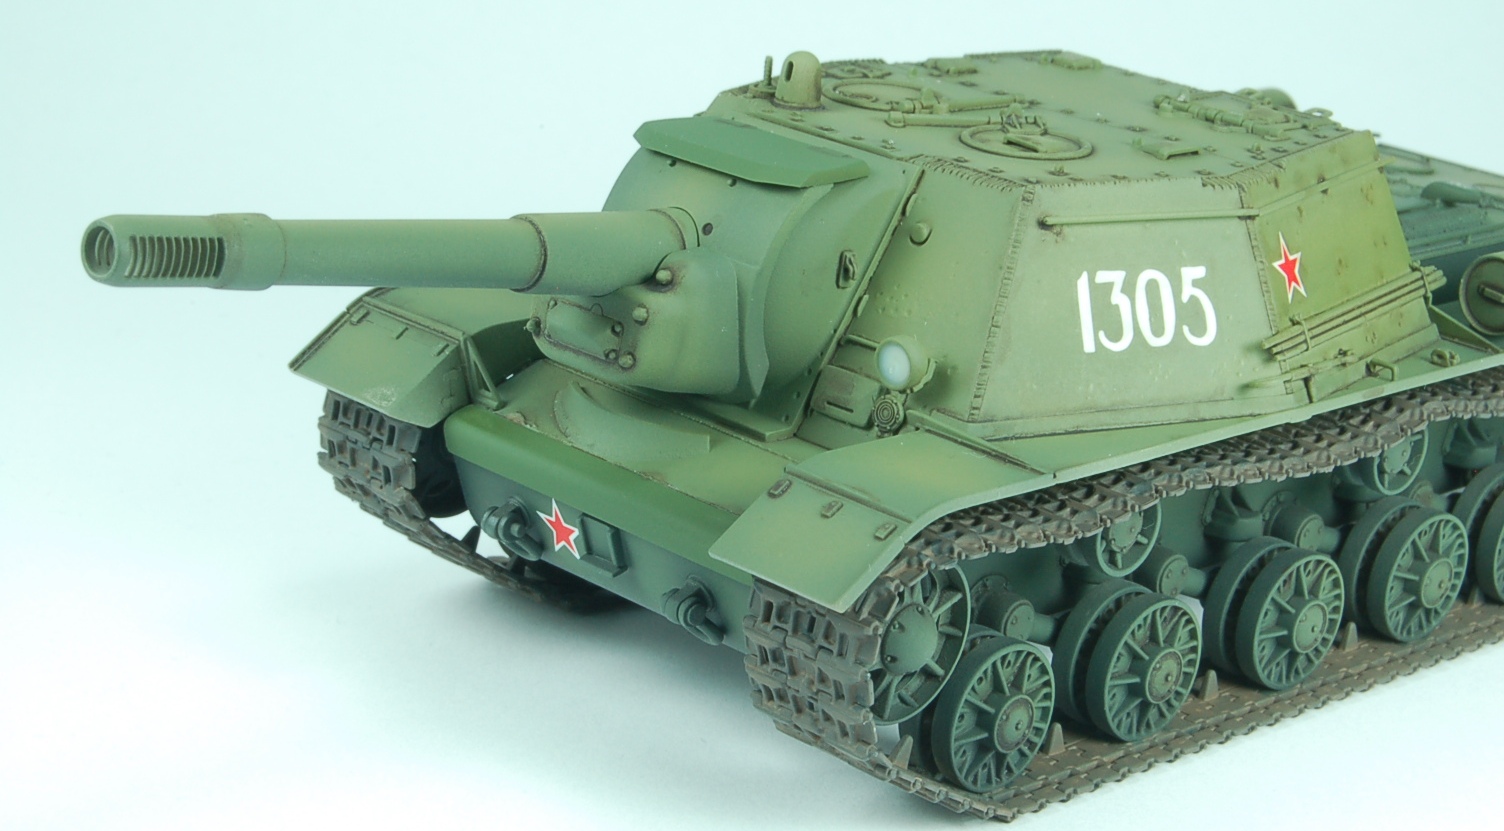
The main gun parts for the kit are very well detailed, and include the basic parts for the internal gun breech. Since the kit has the option of allowing for the upper hull entry hatches to be built in the open position, this is a useful feature. The gun can also be pivoted up and down to some effect as well. The gun mantlet has a big casting number incorporated into it, again pointing to the lovely detail on this kit’s parts. Weld and torch cutting mark detail is also nicely incorporated into the main upper hull part, C18. However, I feel that the “rolled steel” texture is a tad overdone, and could be improved by applying some Mr Surfacer 500 to the most prominent texture marks, to “tone” them down a bit.
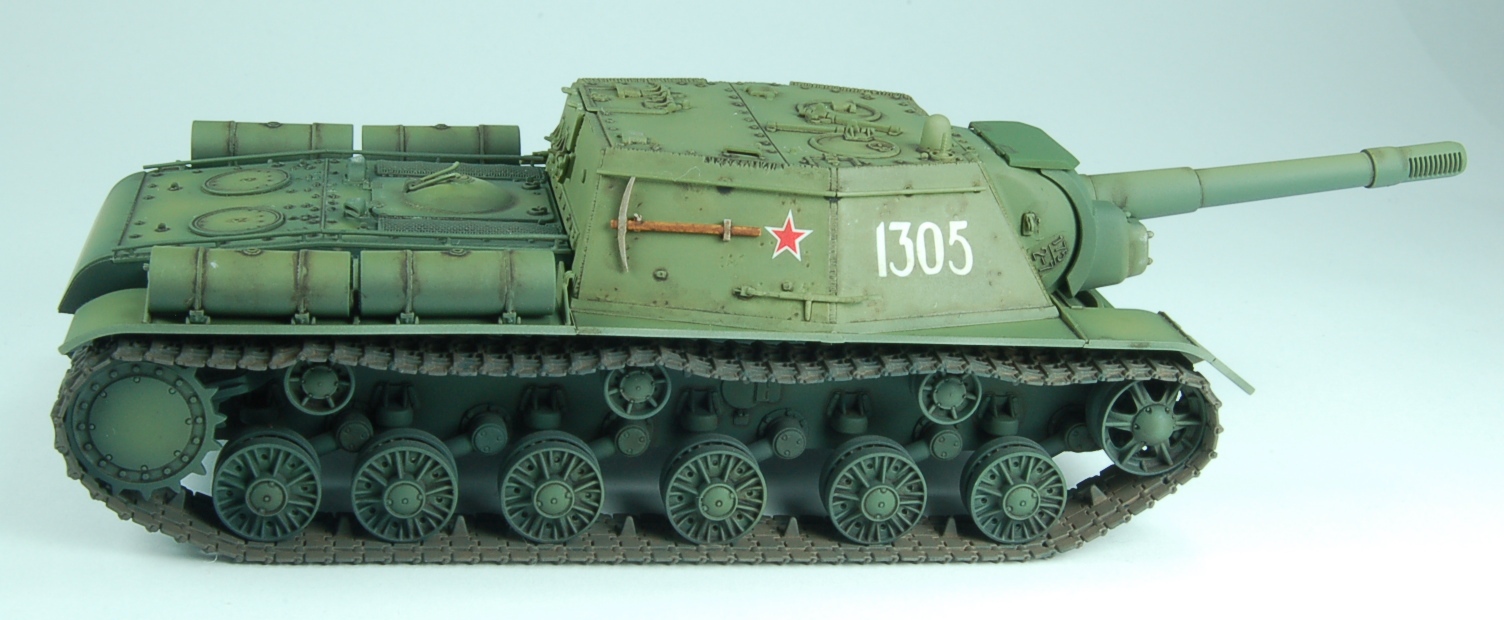
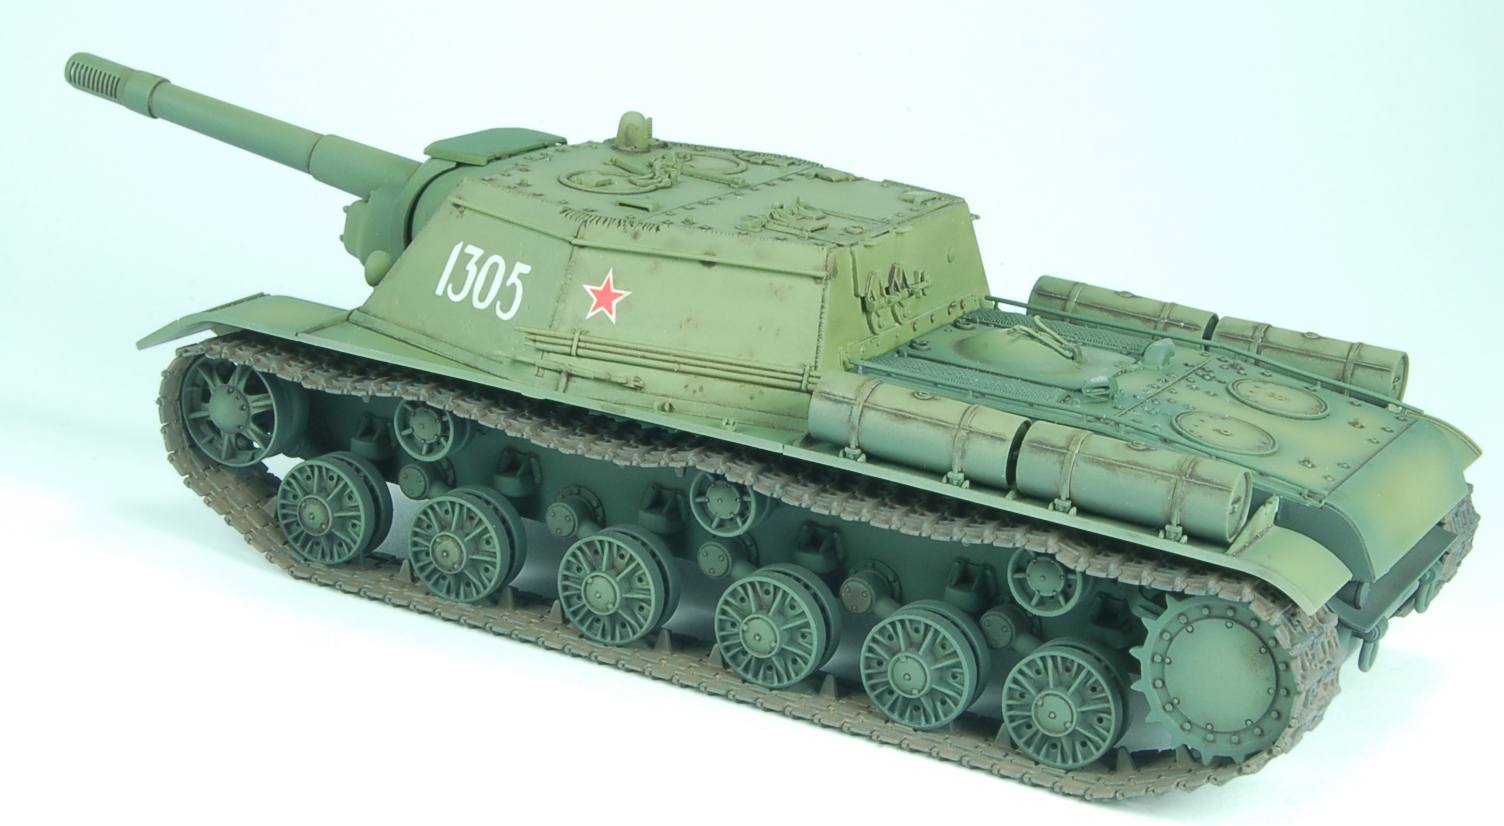
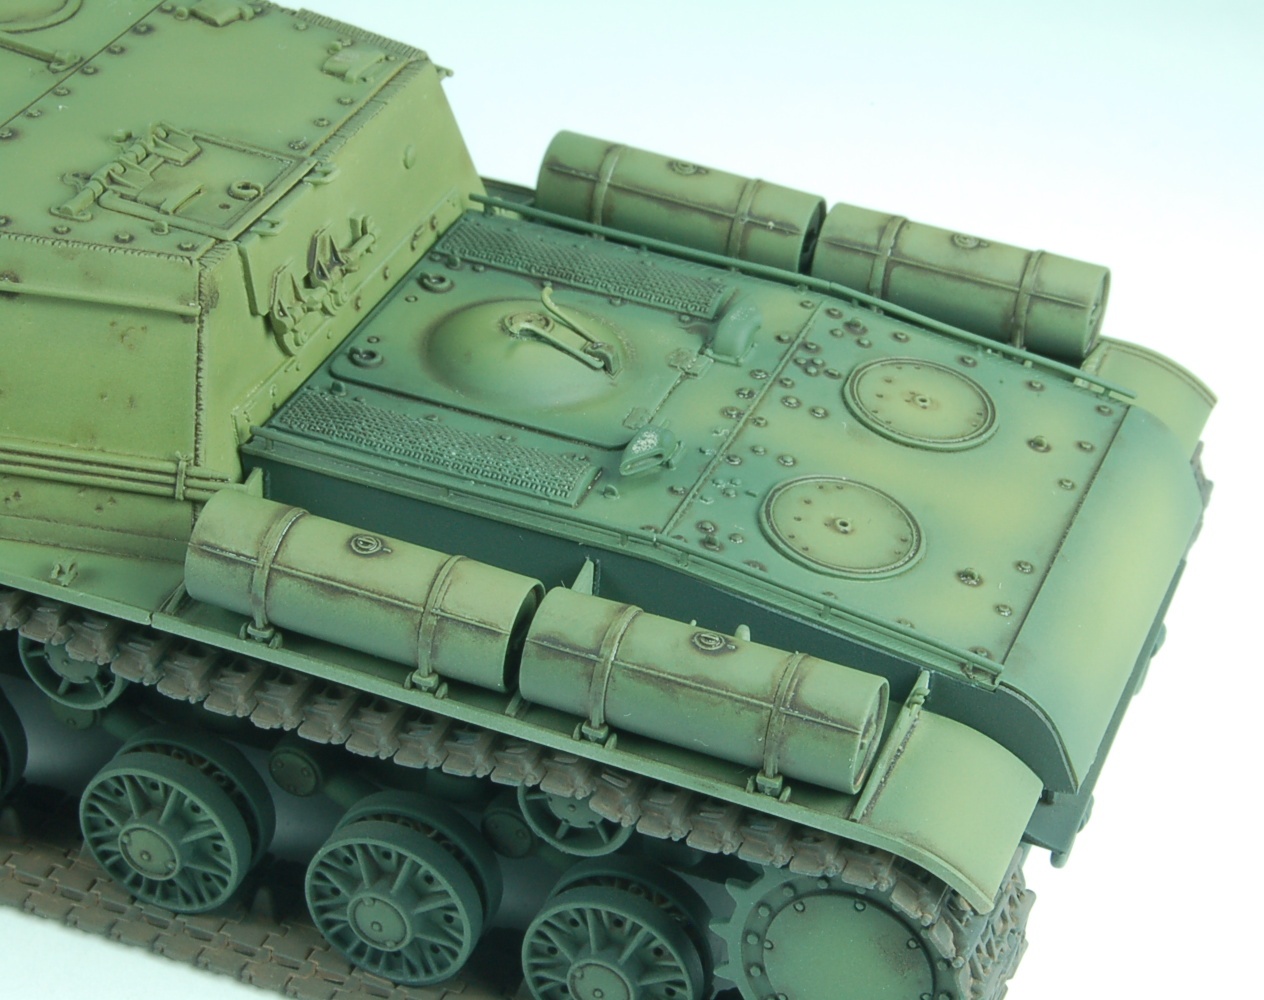
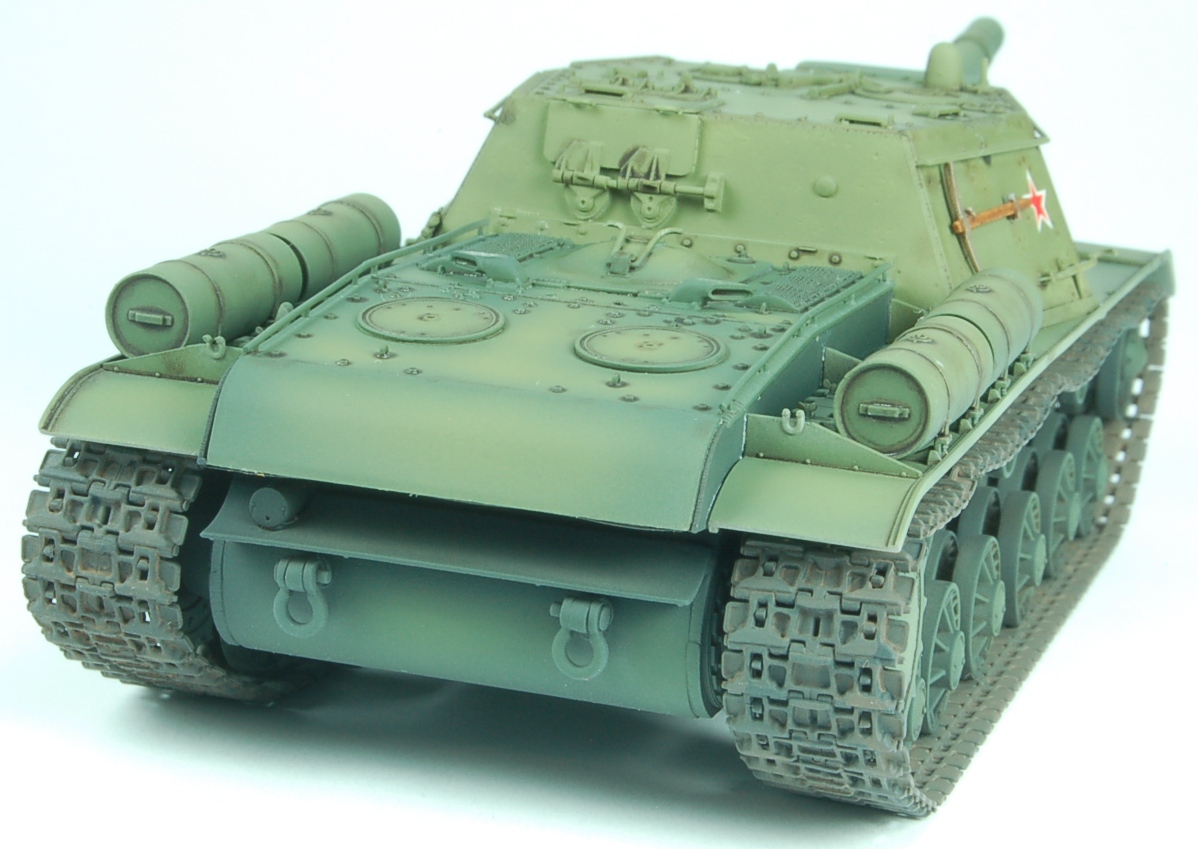
The rear engine deck, part A69 is extremely well detailed, and although the engine deck screens are molded into the plastic, rather than photo etched as some might like, the detail on the plastic is VERY nice, and takes a “wash” nicely to pick out the detail. Also on the rear engine deck are four external fuel tanks, each consisting of three parts. These have nicely rendered weld line detail which again takes a panel line wash nicely to accentuate the details. There is only one on board tool, a pick axe, but it is very nicely detailed, with the mounting latch having a tiny wing nut included. The two spare track links for the rear fenders also have tiny wing nut detail as well!!
One small area of concern to watch out for when building the kit: in Assembly Section 10 you will see part A59. This is used to help mount the vehicle tow cable seen in Assembly Section 21. The “hook” on part A59 is scale thickness and is rather fragile. My part broke, making it even weaker when I glued it back together. As such I am not going to mount the tow cable on my model, as I think the tension it would be under would just have it breaking again. My suggestion is to get a suitable length of brass wire, and bend it to the appropriate shape utilizing a drill bit to wrap the brass around to fashion the hook, drill a hole into the main body of part A59, and superglue in place. This will provide you with a much sturdier hold on the tow cable.
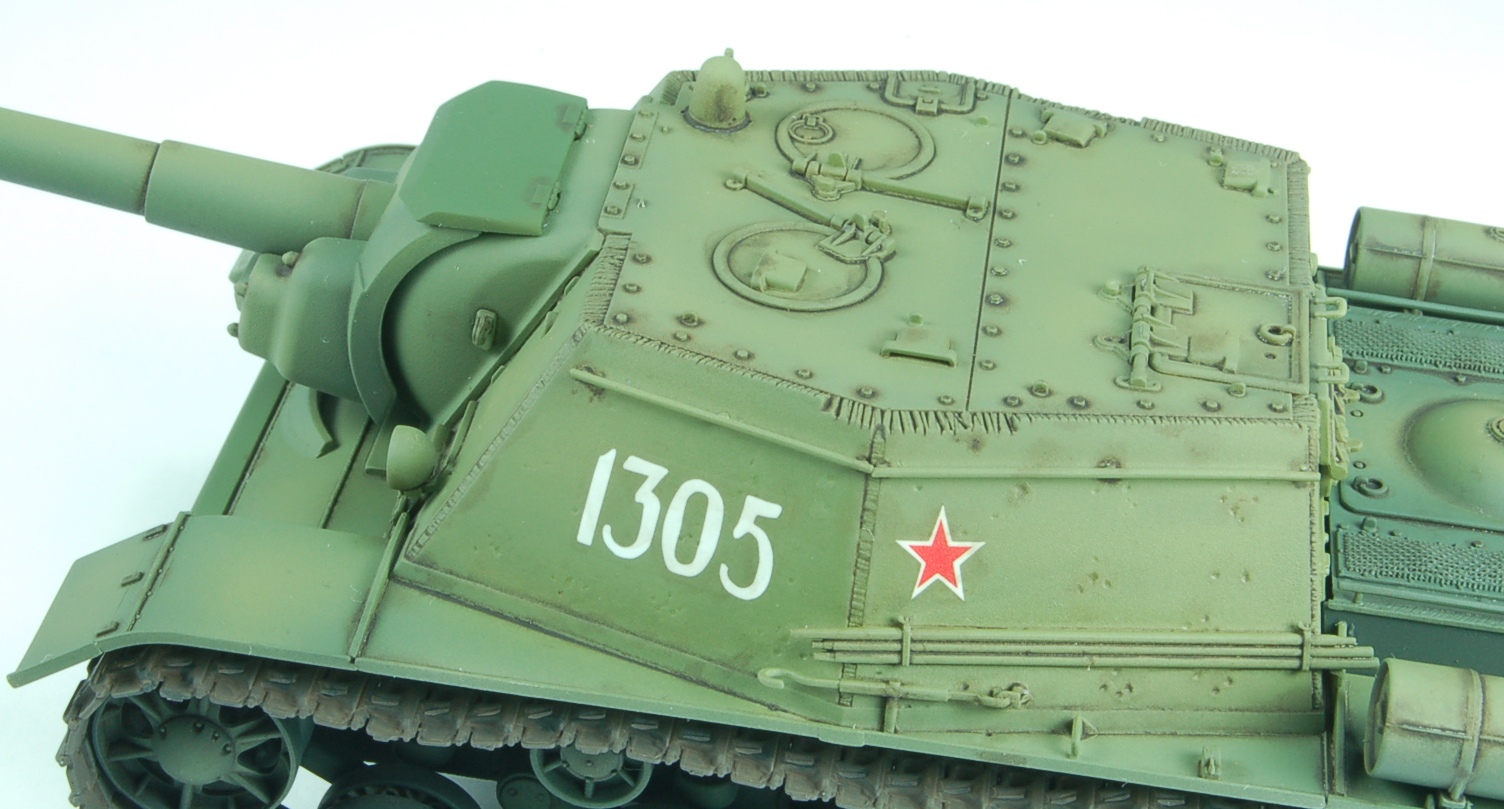
When it comes to color schemes for this vehicle, Bronco provides details for four different possibilities. Three of them are completely devoid of any markings whatsoever, though. Option 1 is an overall Russian 4BO Green scheme, “Unit Unknown, Russian Front, Summer 1943”. Option 2 is another “Unit Unknown”, this time Eastern Front, Winter 1943, and is a two tone Russian 4BO Green with a large patch of Flat White for the main gun as well as the front of the upper and lower hull. Option 3, “Unit Unknown” yet again, Eastern Front Winter 1943, in overall Flat White. Option 4 is for the 1539th SP Artillery Regiment, Karlia, June 1944, in overall Russian 4BO Green, markings for two different vehicles. I chose the latter for my model, and the decals performed well over a gloss clear coat, and utilizing Mr Mark Softer and Mr Mark Set as decal setting solutions.
Regarding painting my model, I utilized a set of acrylic paints I picked up at the 2014 IPMS USA National Convention from one of the vendors, “K4”, from Chile no less! The set, “WWII Russian Armor Colors”, consisted of six plastic squeeze bottles of paint, including both Green 4BO, and Flat White, allowing one to do all the schemes in Bronco’s kit! I first airbrushed on an overall black primer, trying out another purchase from the 2014 IPMS USA National Convention, Vallejo’s Black Polyurethane Surface Primer. This worked a treat, drying rock hard after I left it for a couple of days to fully cure. The K4 paint then airbrushed nicely over the top of this. A coat of Tamiya X-22 Clear Gloss was used to seal the paintwork, and provide a smooth surface for the application of the decals. Once thoroughly dry, another couple of thin coats of X-22 Clear were applied to seal the decals. I hand painted with a suitable brush the tracks, utilizing K4’s “Track Color”, and then the model was given a couple of appropriate pin washes with a Mig oil paint/thinner solution.
To conclude this is kit is nothing short of superb. Detail is some of the best you will see in the scale, and all the parts bar a couple fit extremely well together. Despite the detail, this kit should not pose any insurmountable challenges to even a beginner modeler. HIGHLY RECOMMENDED to anyone building in this scale with a penchant for massive Russian vehicles!
My sincere thanks to DragonUSA for providing this kit to IPMS USA for review. Run, don’t walk to your nearest hobby shop and pick one up!

Comments
Add new comment
This site is protected by reCAPTCHA and the Google Privacy Policy and Terms of Service apply.
Similar Reviews