
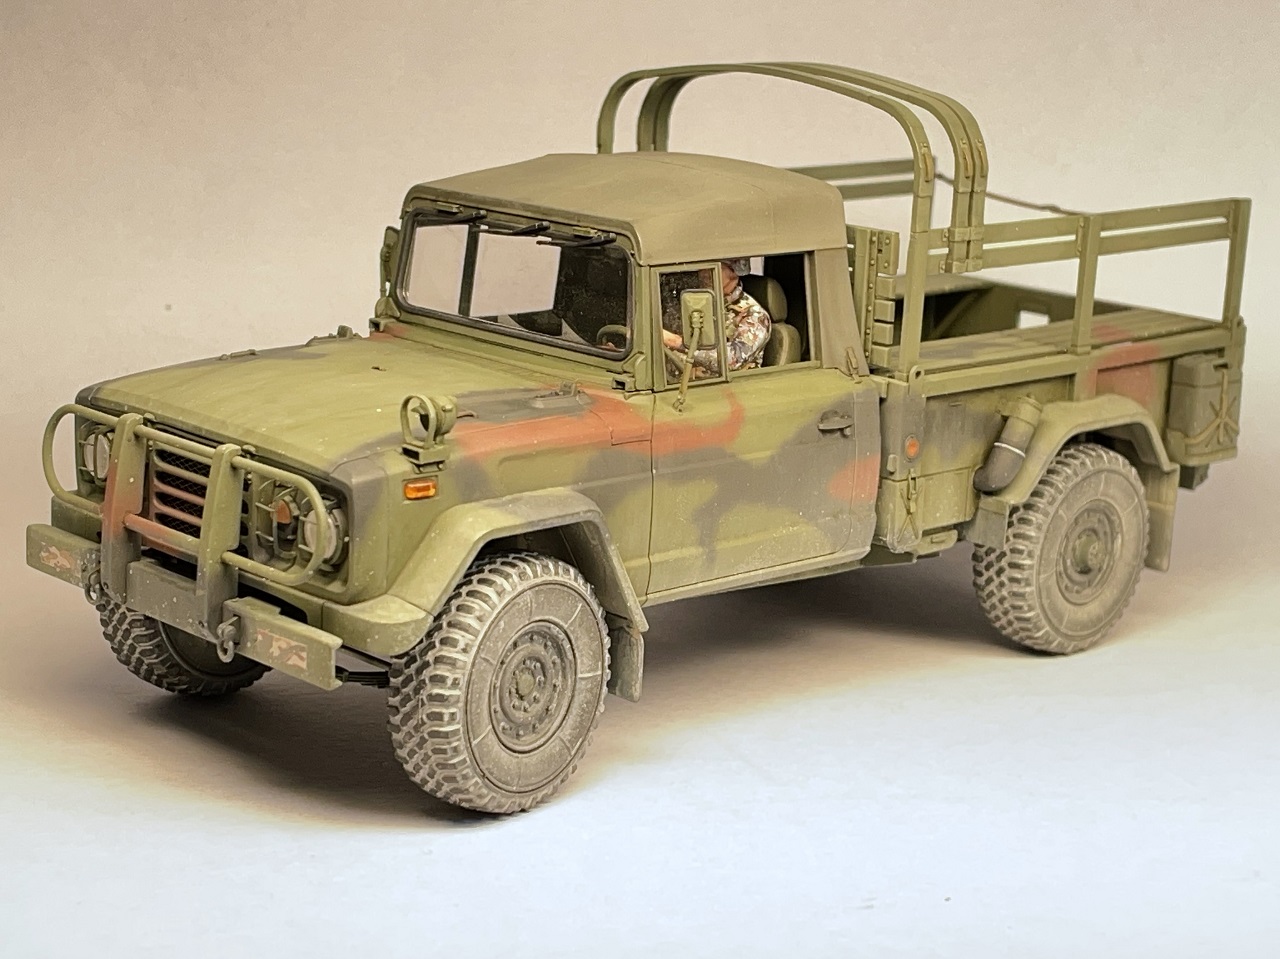
R.O.K. Army K311A1
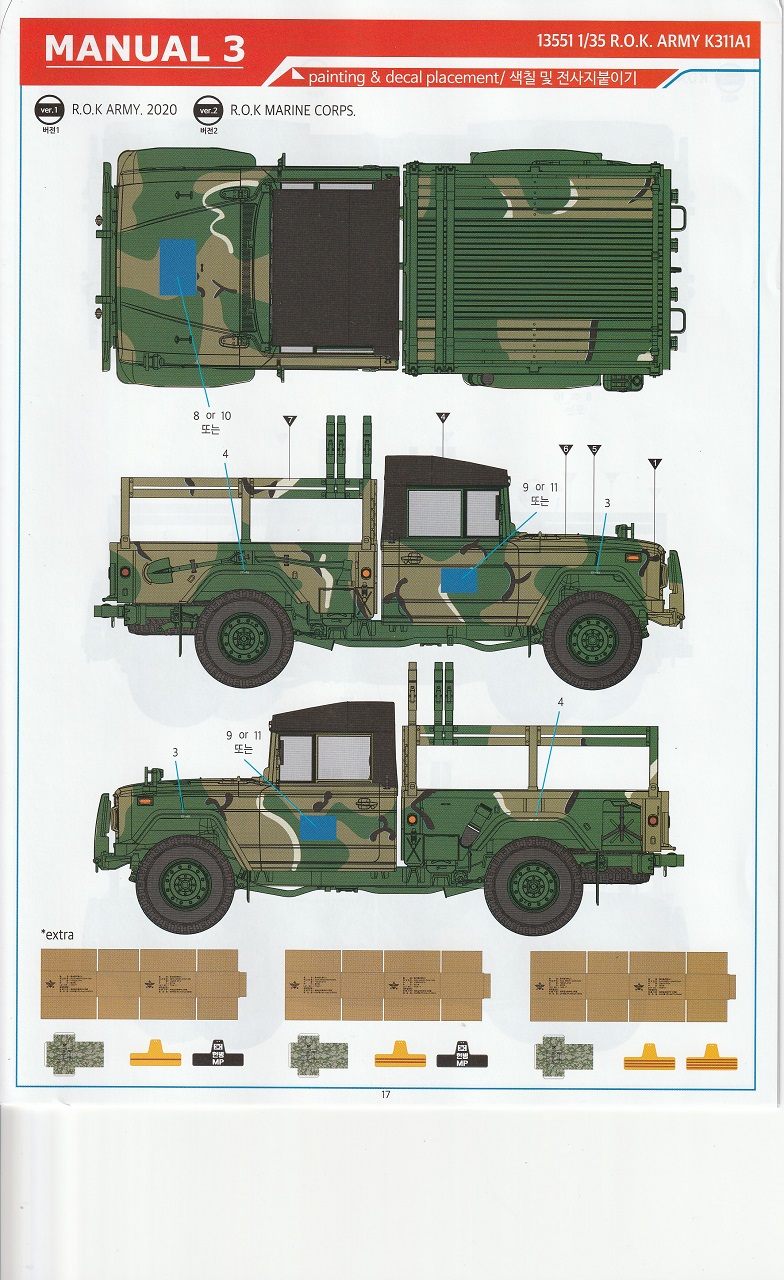
This new kit from Academy depicts the K311A1 1¼ -ton truck currently in service with the Armed forces of South Korea (R.O.K.) and exported to many other countries around the world. A detailed history of the vehicle is available on Wikipedia, so I won’t repeat it here. The kit provides marking options for two R.O.K. army trucks, one R.O.K. Marines, one R.O.K. Air Force, one Philippines, and two Chilean Marines trucks. The last Chilean option is a single color, providing an option for modelers who aren’t in the mood to paint complex camouflage.
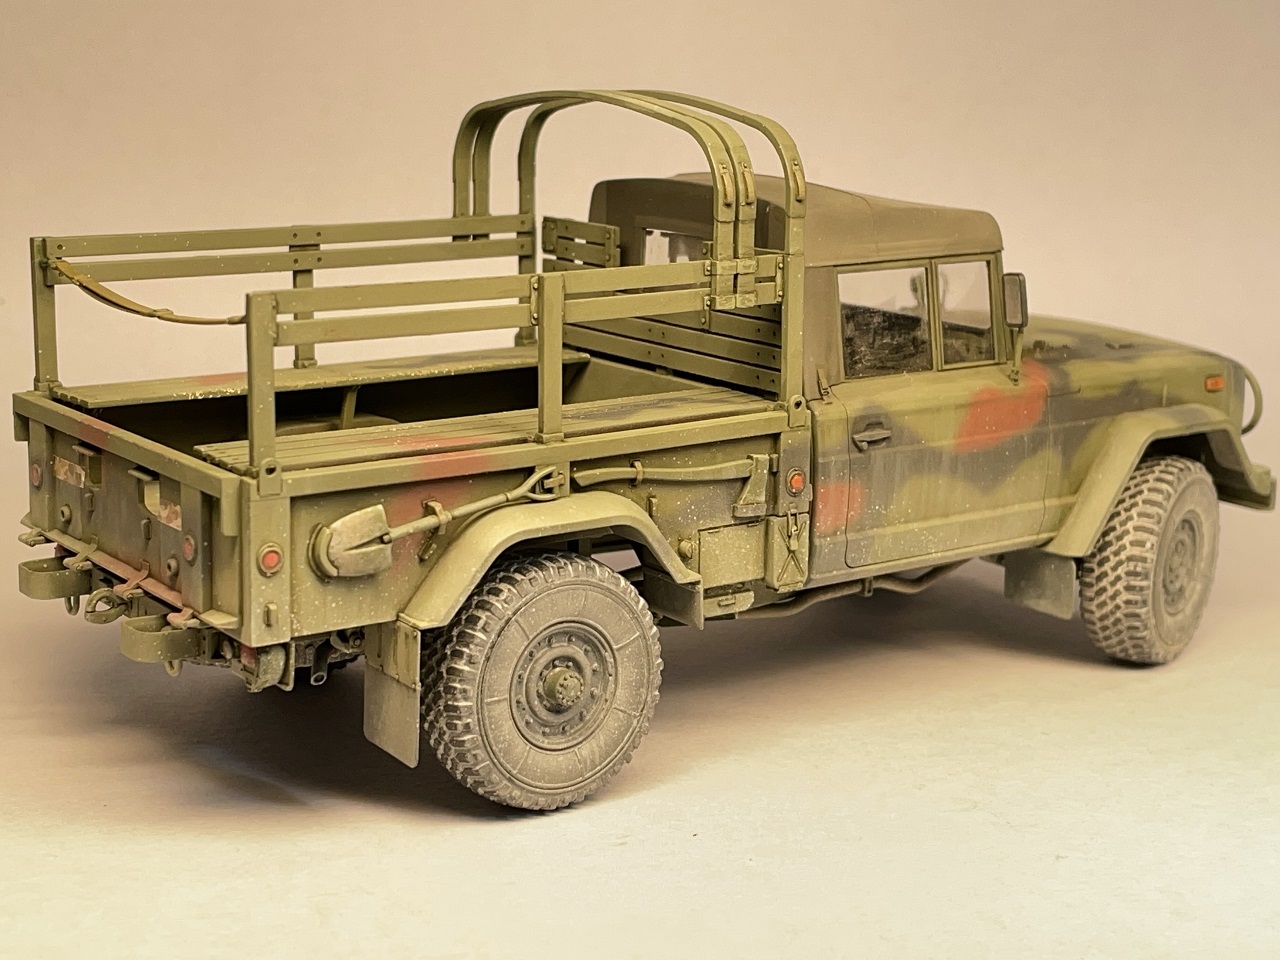
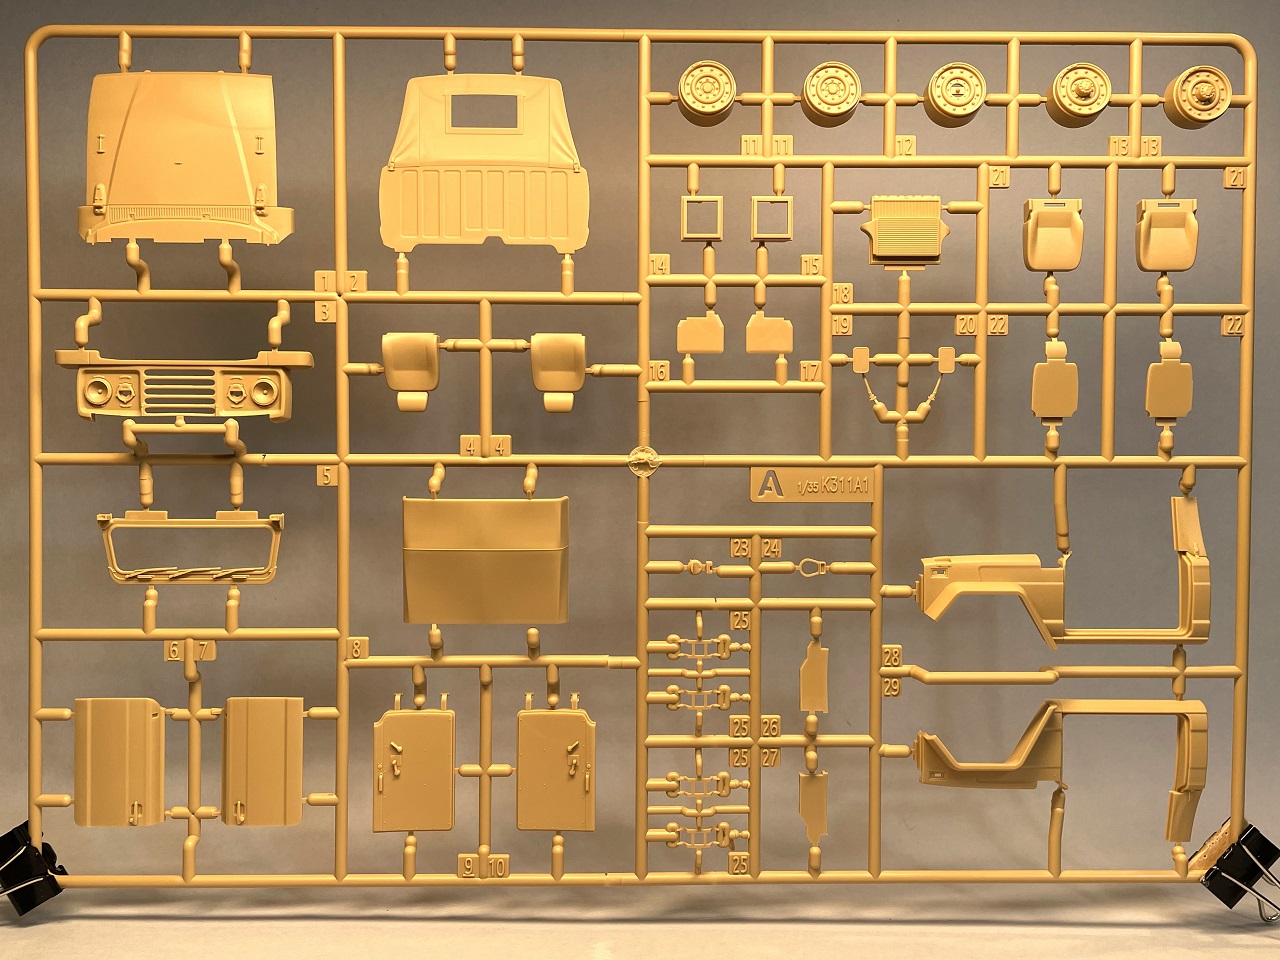
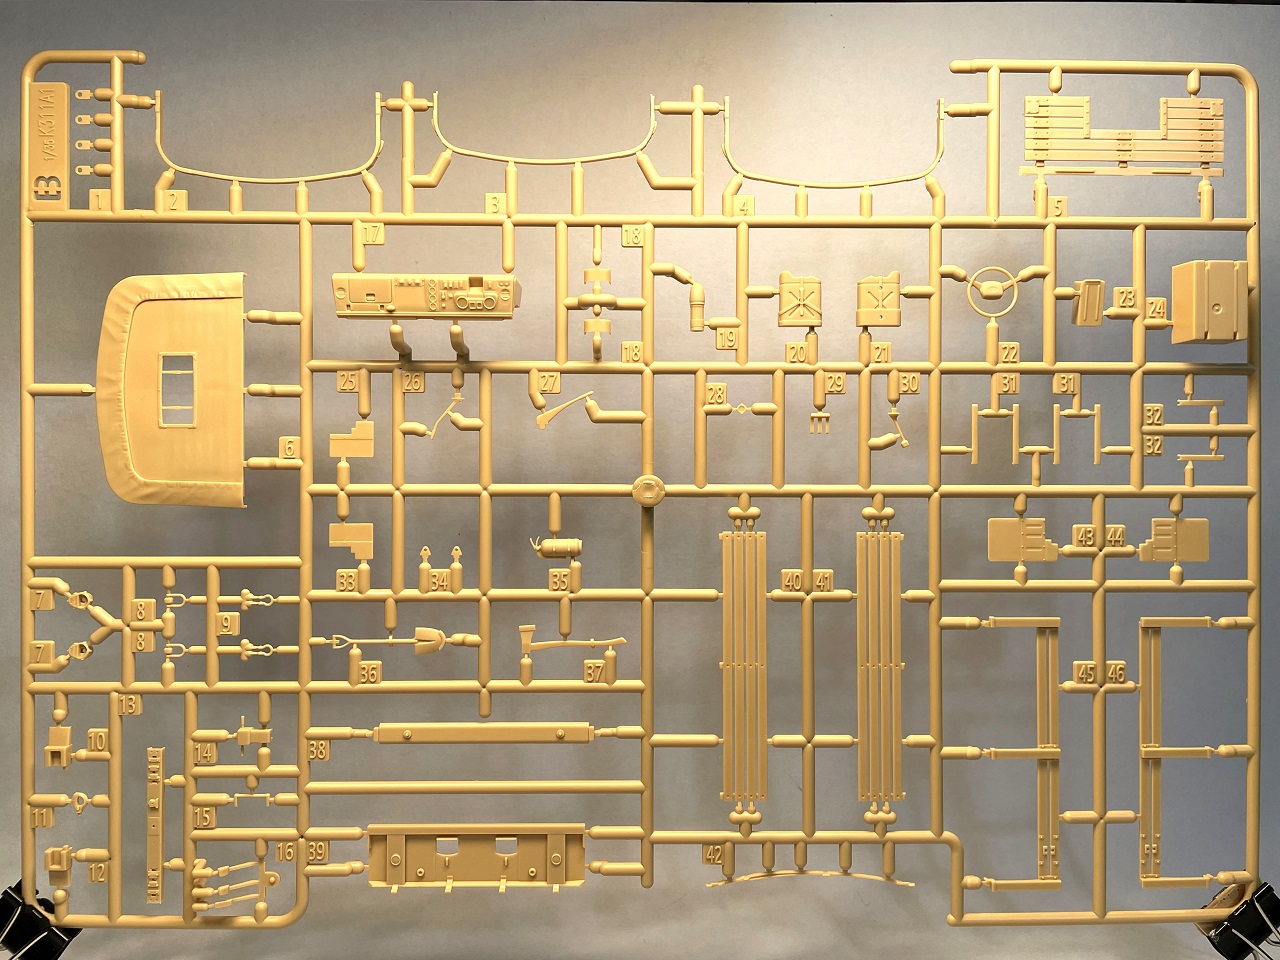
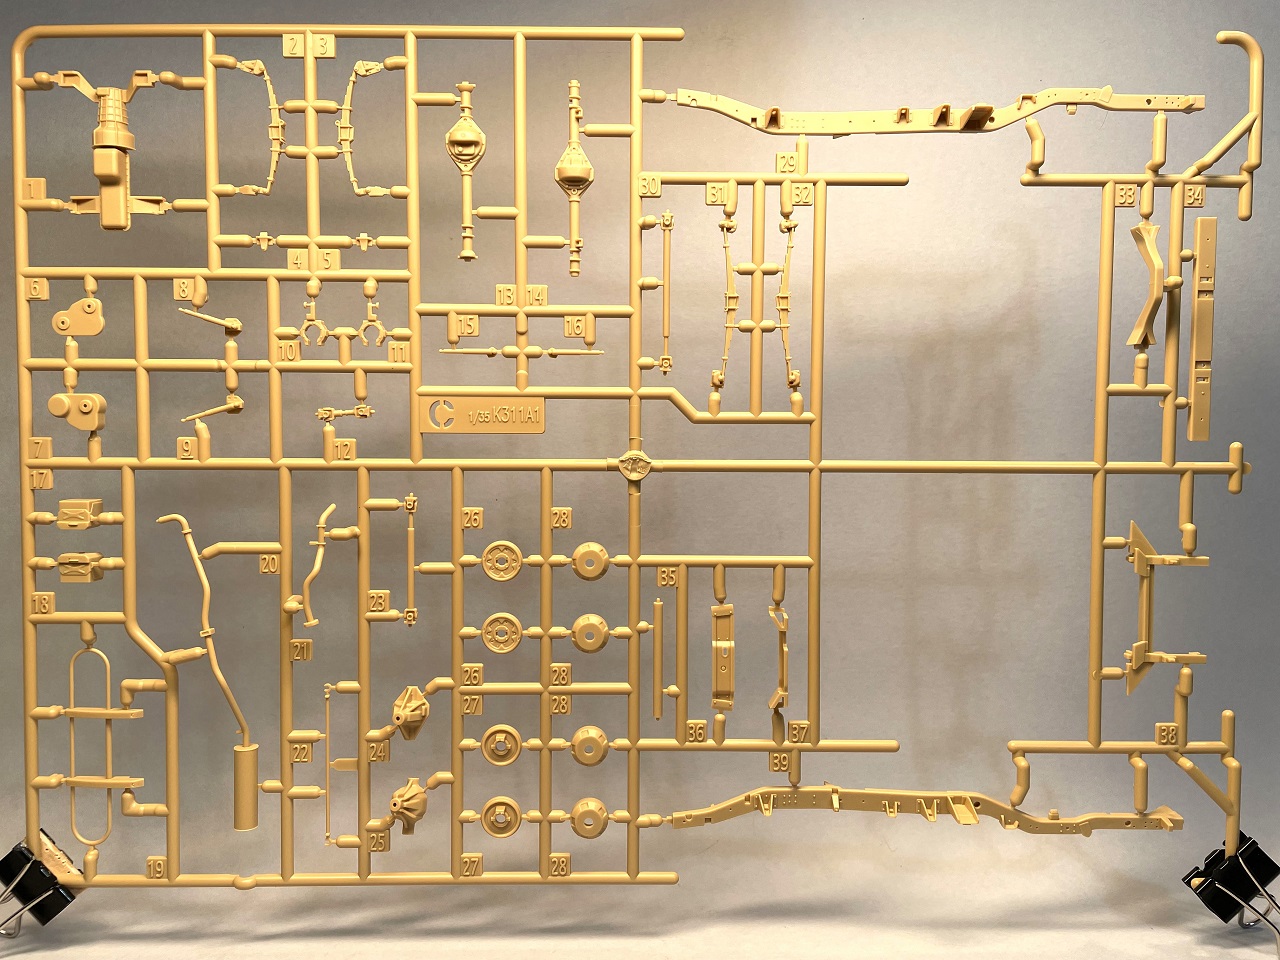
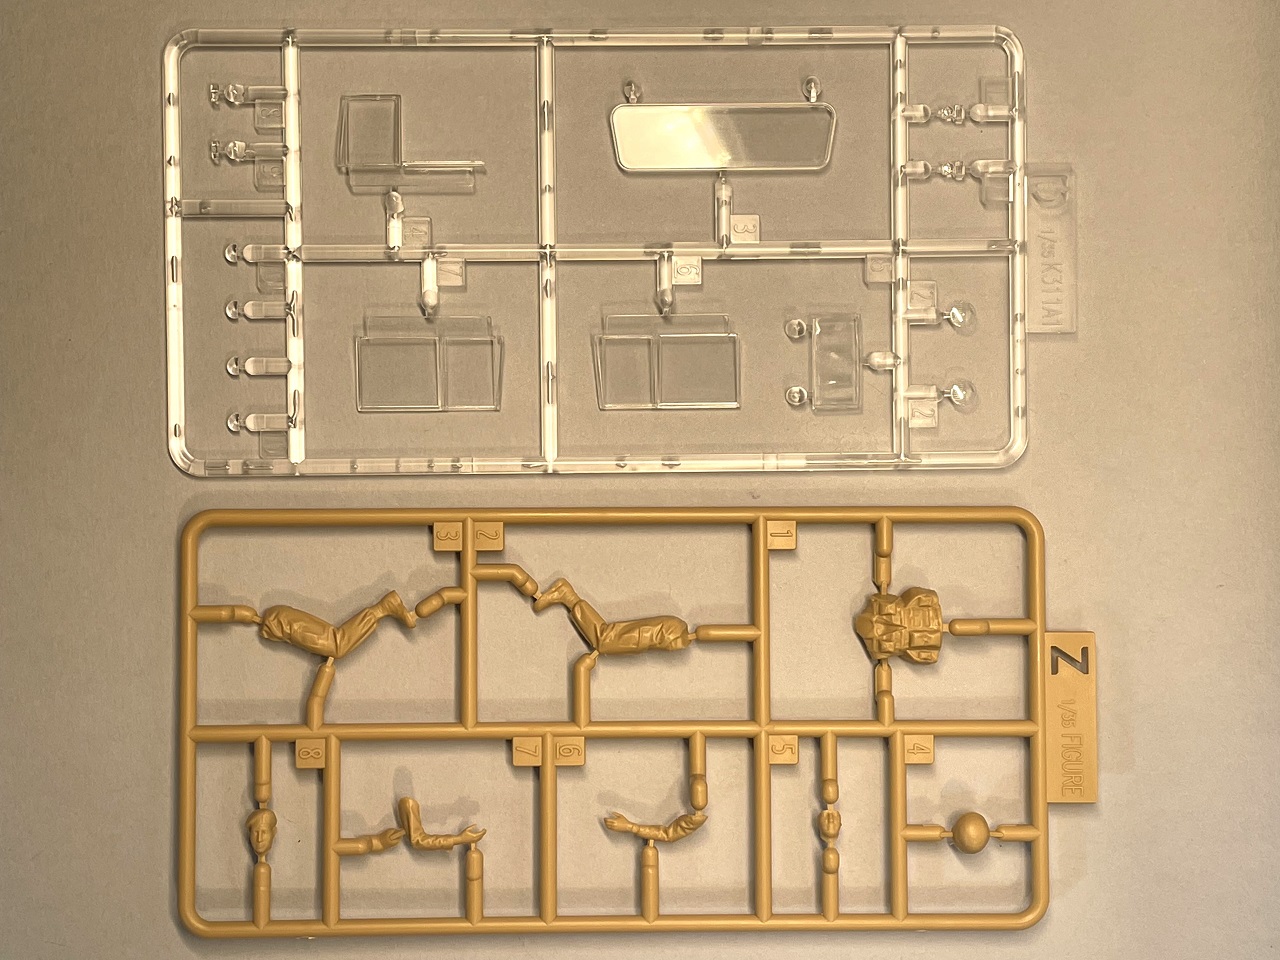
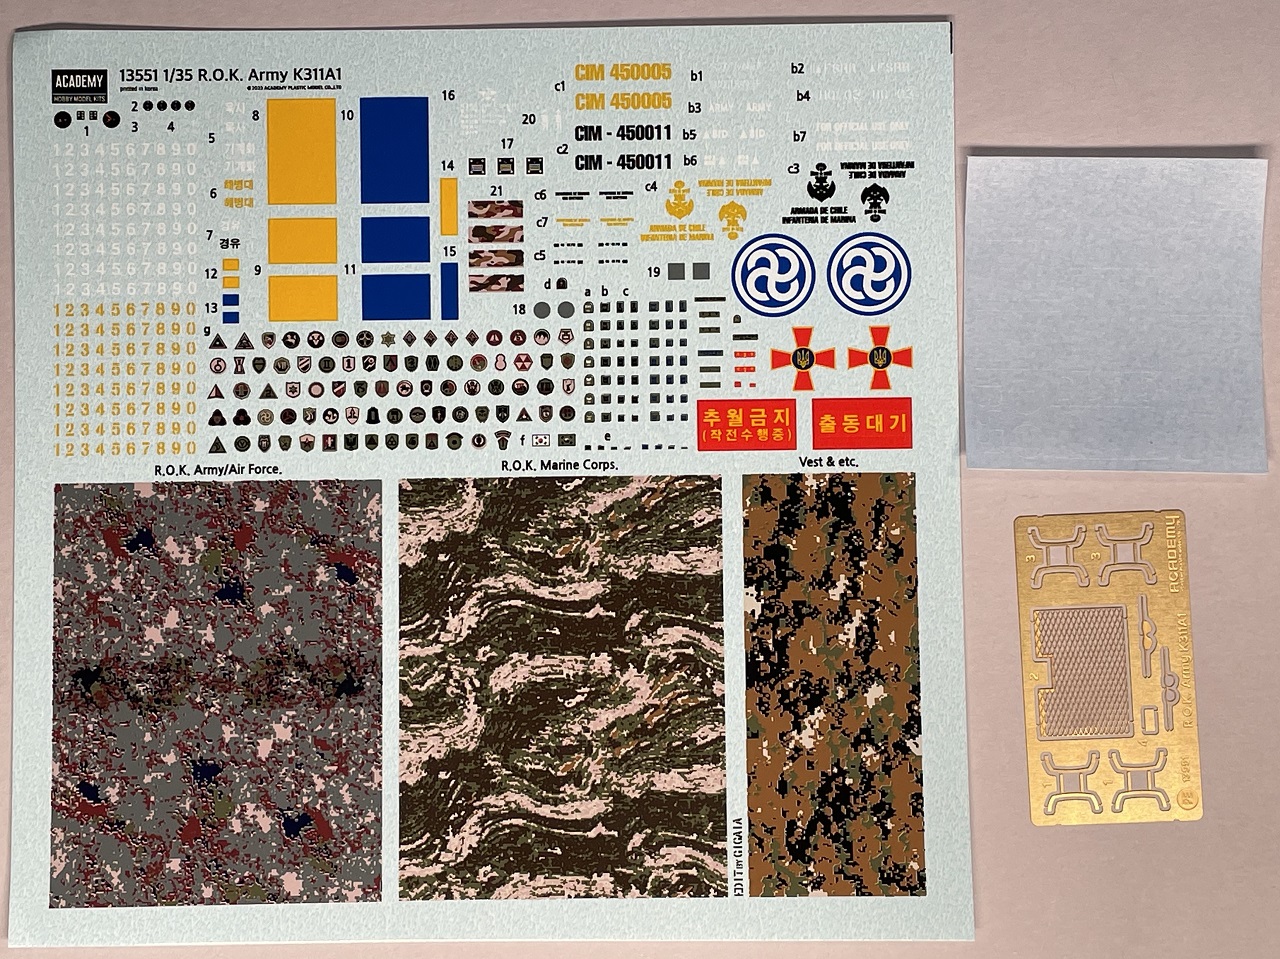
The kit comes in a sturdy and surprisingly large box with the entire top covered by artwork of the vehicle. The kit includes separately molded cargo bed, bed canopy, and cab floor, four trees of tan parts, one tree of clear parts, a tree of poly-caps, five tires in soft black plastic, a fret of photo-etch, a sheet of masks, decals, and instructions. Everything is well packaged to prevent damage or loss of parts.
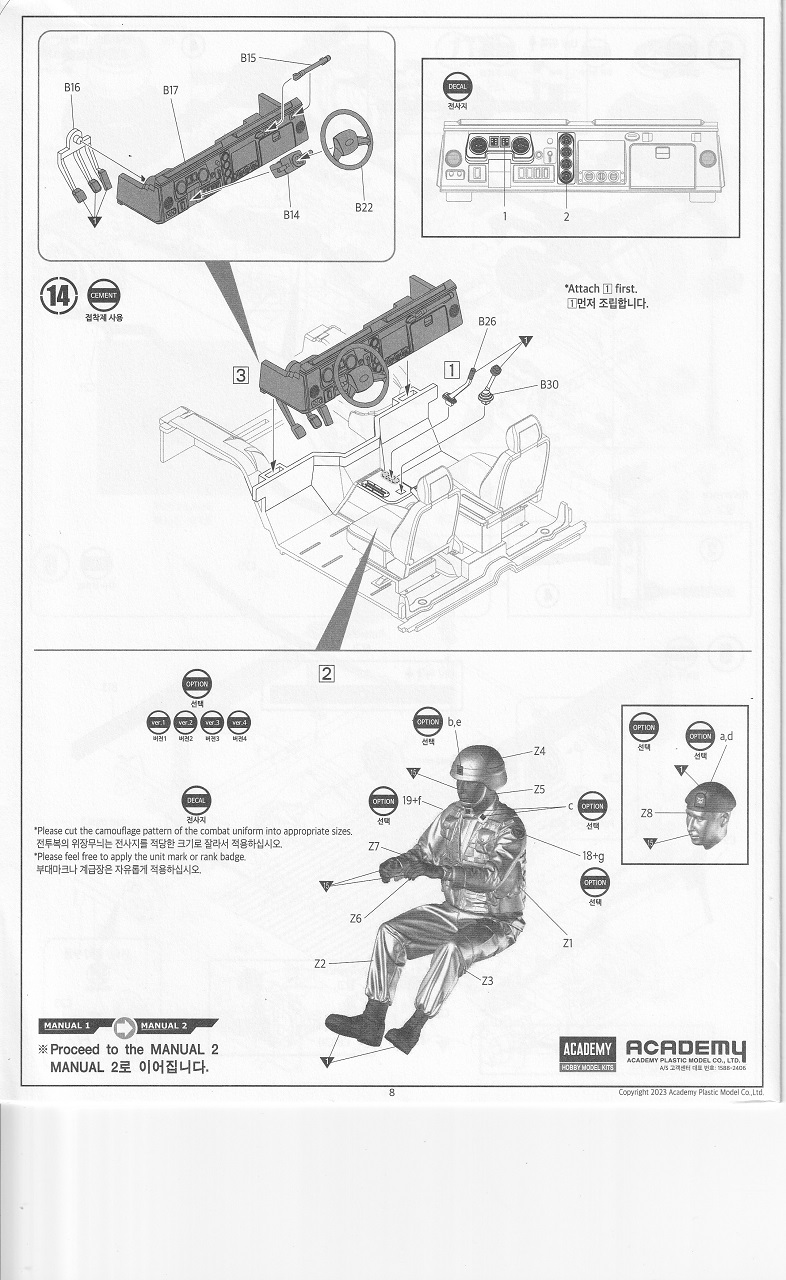
The instructions come in two black-and-white booklets for construction and a full-color booklet for exterior painting and decal placement. Illustrations are clear and easy to follow and construction is finished in 27 steps. Color call-outs are listed for Humbrol, GSI Creos, Lifecolor, Model Master, Revell, Vallejo, and AK Interactive brand paints. The full-color instruction booklet includes patterns for making boxes to put in the cargo bed. There are also patterns for what I assume are armbands for figures. They are not mentioned in the instructions so I’m not sure how to use them.
The truck parts are all sharply-molded and require very little clean up before assembly. There are ejector-pin marks on some parts but they are small and mostly in places where they won’t show on the finished model. If you choose to build your truck without the bed canopy, the ejector-pin marks on inner-faces of B45 and B46 will need to be filled. Since the cargo bed is molded as a single piece, construction is simplified but the inner faces where the part thickens to depict the external bracing have sink-marks. These sink marks will be beneath seats if you have them folded down.
The clear parts are excellent with no distortions. There are optional parts for having the driver’s window open or closed. The passenger door window is depicted closed, but could be cut apart easily if desired. Clear parts are provided for headlight, turn-indicator, and marker light lenses.
The tires are molded in a soft vinyl-like black plastic. There is a minor parting line visible on the tread of the tire that is difficult to clean up. I have had experiences in the past where soft plastic tires have prevented enamel paints from curing. I tested some enamel products on the tires to see if they would cure normally. They did cure normally but had very poor adhesion to the tires. I decided to paint my tires with primer to get better adhesion for enamel weathering effects. (For those who just can’t abide soft plastic tires, DEF Model has recently released a set of resin tires for this kit.)
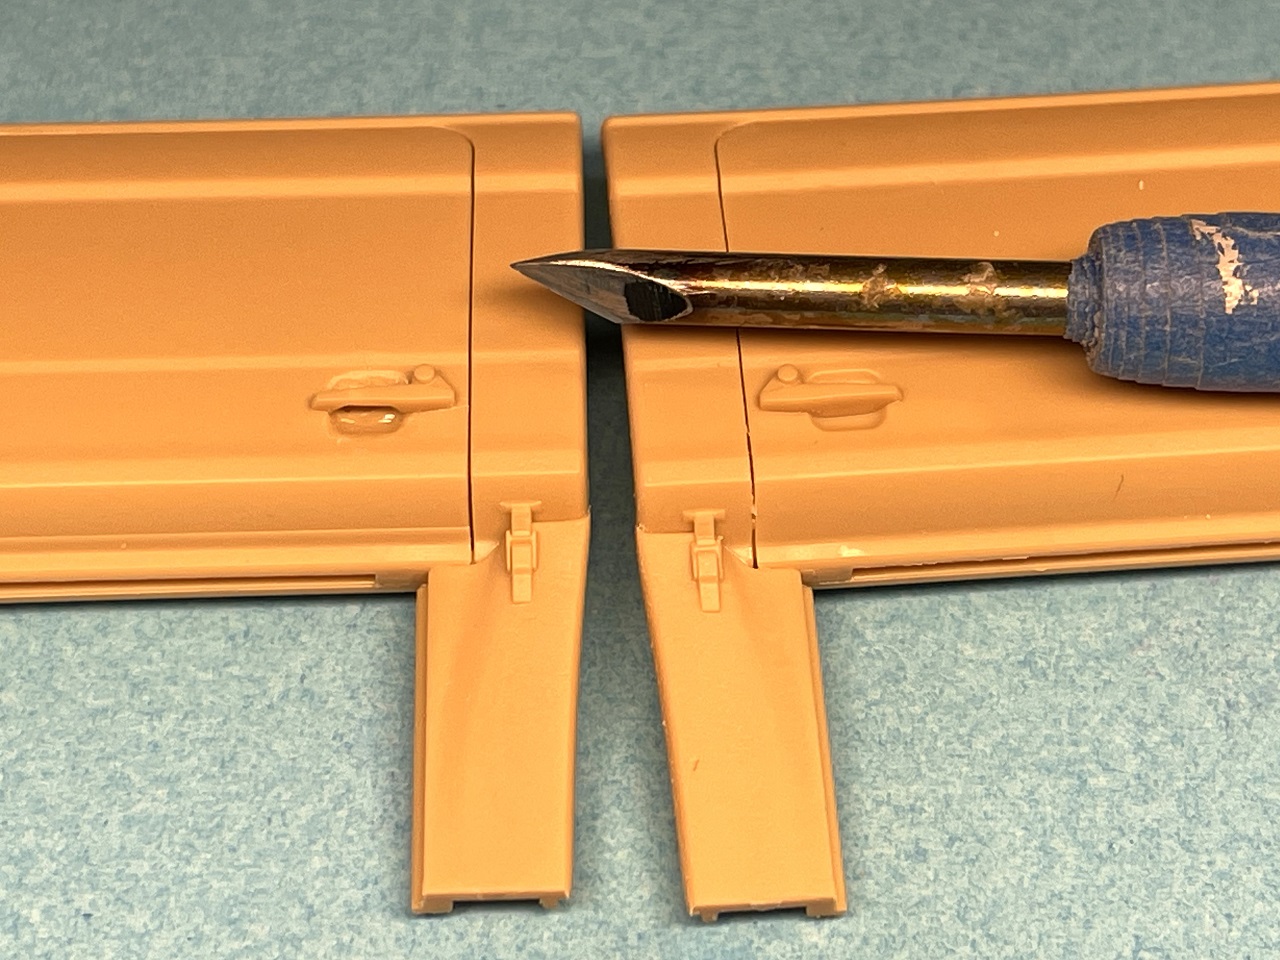
This kit goes together quickly and easily. Fits are generally excellent and parts are engineered so that they can only go together in the correct orientation. It seems that Academy’s engineers put an emphasis on ease of construction. Parts have obvious and solid locating features and small details are molded in place where possible. For some small details that were molded in place, such as tie-downs, straps, door handles, and latches, I used a sharpened nail to scrape shallow undercuts. This allows washes to flow under the parts rather than along the sides and creates the illusion of them being separate pieces.
The bed and cab covers have realistic folds and sags and capture the look of canvas parts. The canvas parts have the support frames molded on the inside. The model has options for a covered or un-covered bed. The modeler has to choose which option to build, the parts aren’t designed to be interchangeable. Although it’s not shown in the instructions, the fold-down seats (B40 and B41) can be installed in the raised position to complete the bed sides.
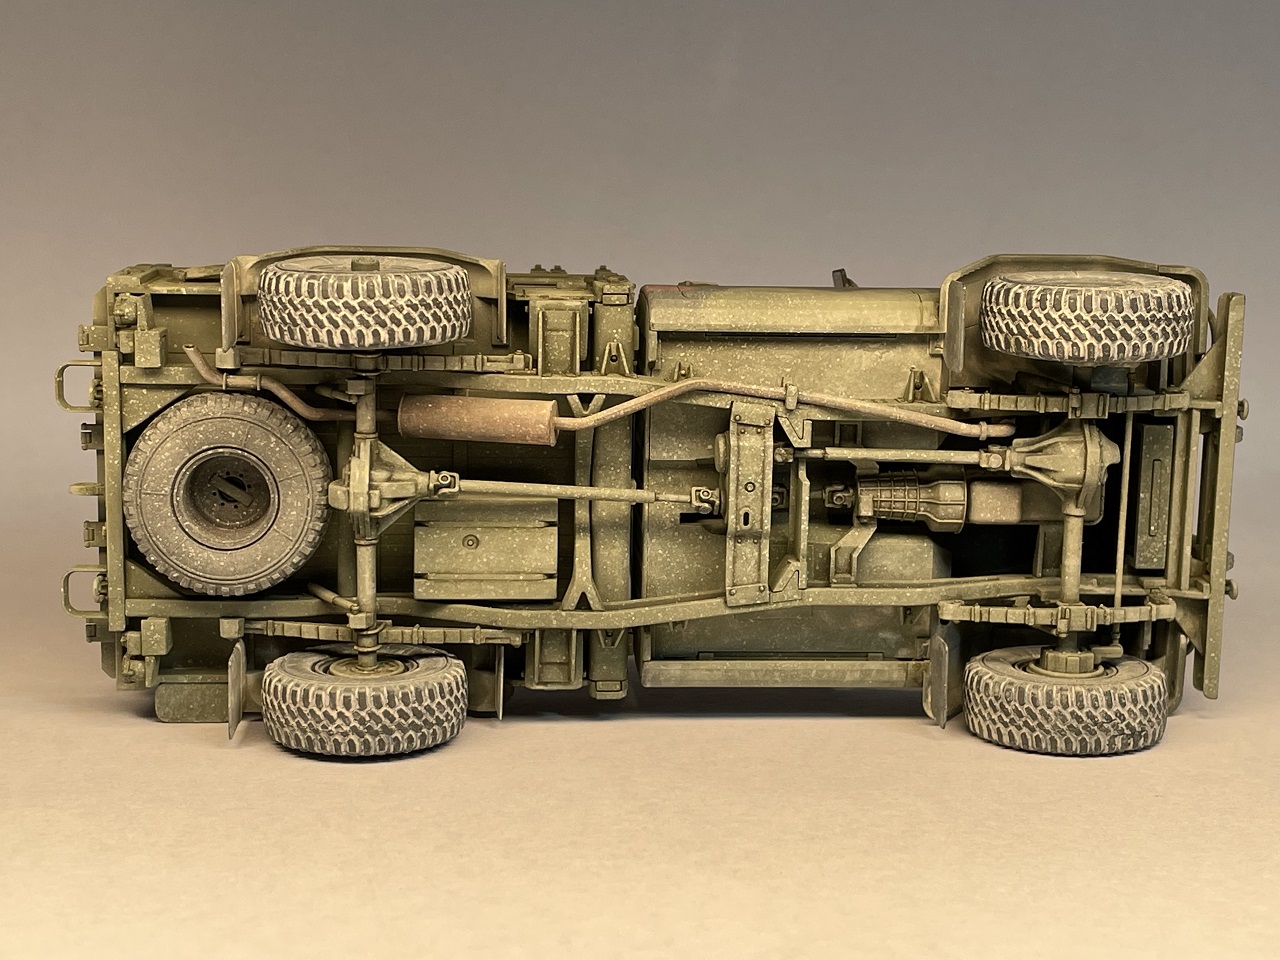
The wheels are held on with poly-caps so that they will turn after assembly. This is one area where fit is not as good as it should be. The wheels can wobble quite a bit after installation. If you set the model on a flat surface the wheels will self-align under the weight of the model but if you are setting the model on an uneven surface they may tilt at odd angles. The steering is posable. The tie-rod connecting the front hubs is very thin, you may want to leave it off until construction is complete so that an accidental bump doesn’t break it.
The first crossmember and front of the frame (part C38) can be tricky to align with the rest of the frame. I temporarily taped the cab floor in place to hold the parts in correct alignment while the glue set.
The seams of the model’s cab fall in the same places where seams are visible on the real truck. The seams on the canvas canopies for the cab and cargo bed do need some clean up. There were minor gaps between the differential covers and axles that required some filler.
Large locating pins and sockets for suspension pieces ensure solid construction and accurate alignment but leave large projections on the inner sides of the frame rails. These projections are not visible unless you turn the model over and most are concealed by the fuel tank, muffler, and spare tire.
The cab interior is well detailed and decals are provided for depicting the gauge faces. The decals group the gauges together, but I cut them apart to make them easier to apply. The carrier film conformed well and disappeared under a coat of flat varnish. A drop of gloss varnish on each gauge restored the look of glass. The doors are separate from the cab sides and can be displayed open, although there is no latch detail. The doors fit very well in the closed position and look like they were molded with the cab sides.
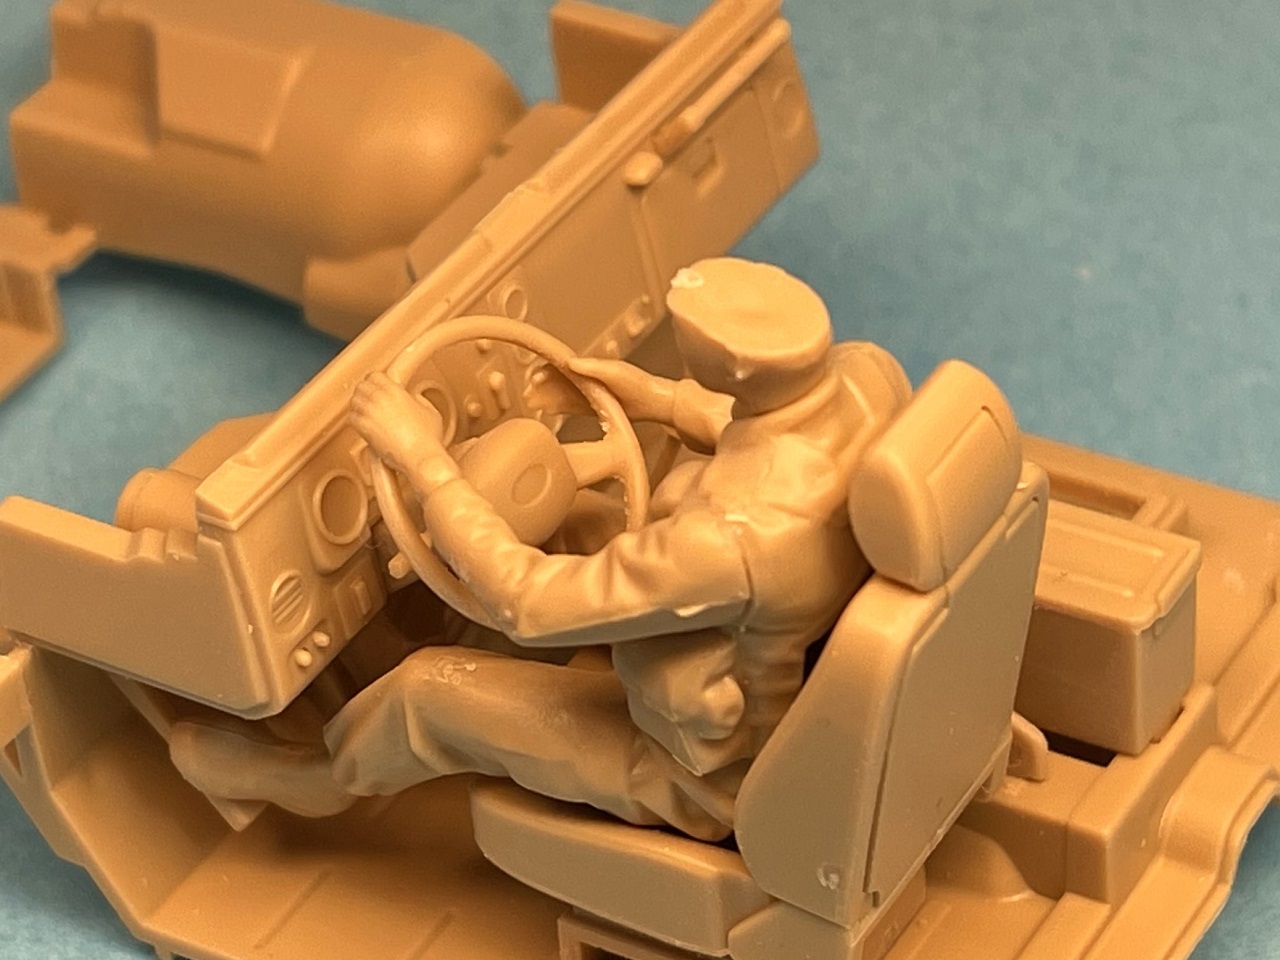
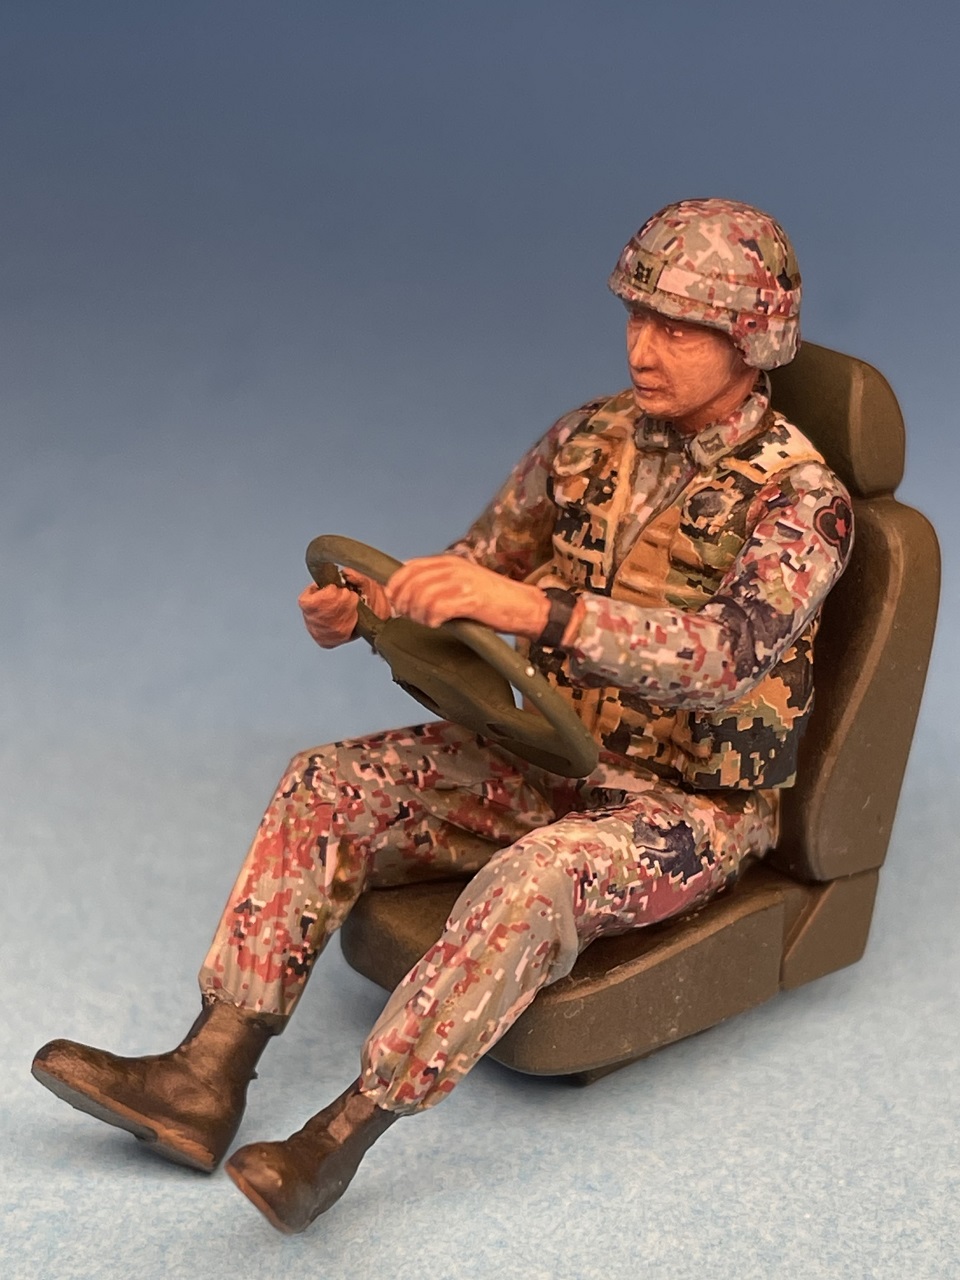
There is a driver figure provided with a choice of beret or helmet-wearing heads. The details of the figure are a bit soft and not quite up to the standard of the rest of the kit. Since most of the figure will be difficult to see in the finished model an after-market or spares-box head would be an adequate upgrade for most builders. The driver figure is designed to grip the steering wheel. To ensure that the driver’s arms were positioned correctly, I used white glue to tack the steering wheel and seat in place in the cab, then I assembled the driver gluing him to the seat and his hands to the steering wheel. Although not mentioned in the instructions there are eyeglasses and sunglasses frames included on the photo-etch fret. A nice cheat if you don’t want to paint eyes! For the driver’s uniform the decal sheet provides three different patterns of digital camouflage. I was surprised by how durable the carrier film was. Using Tamiya Mark Fit, I was able to get the camouflage decals to conform to the folds and creases of the figure without any tearing. The digital pattern hides the seams between decals so that the job is easier than it looks. The decal sheet also provides a lot of options for unit and rank insignia to add to the uniform.
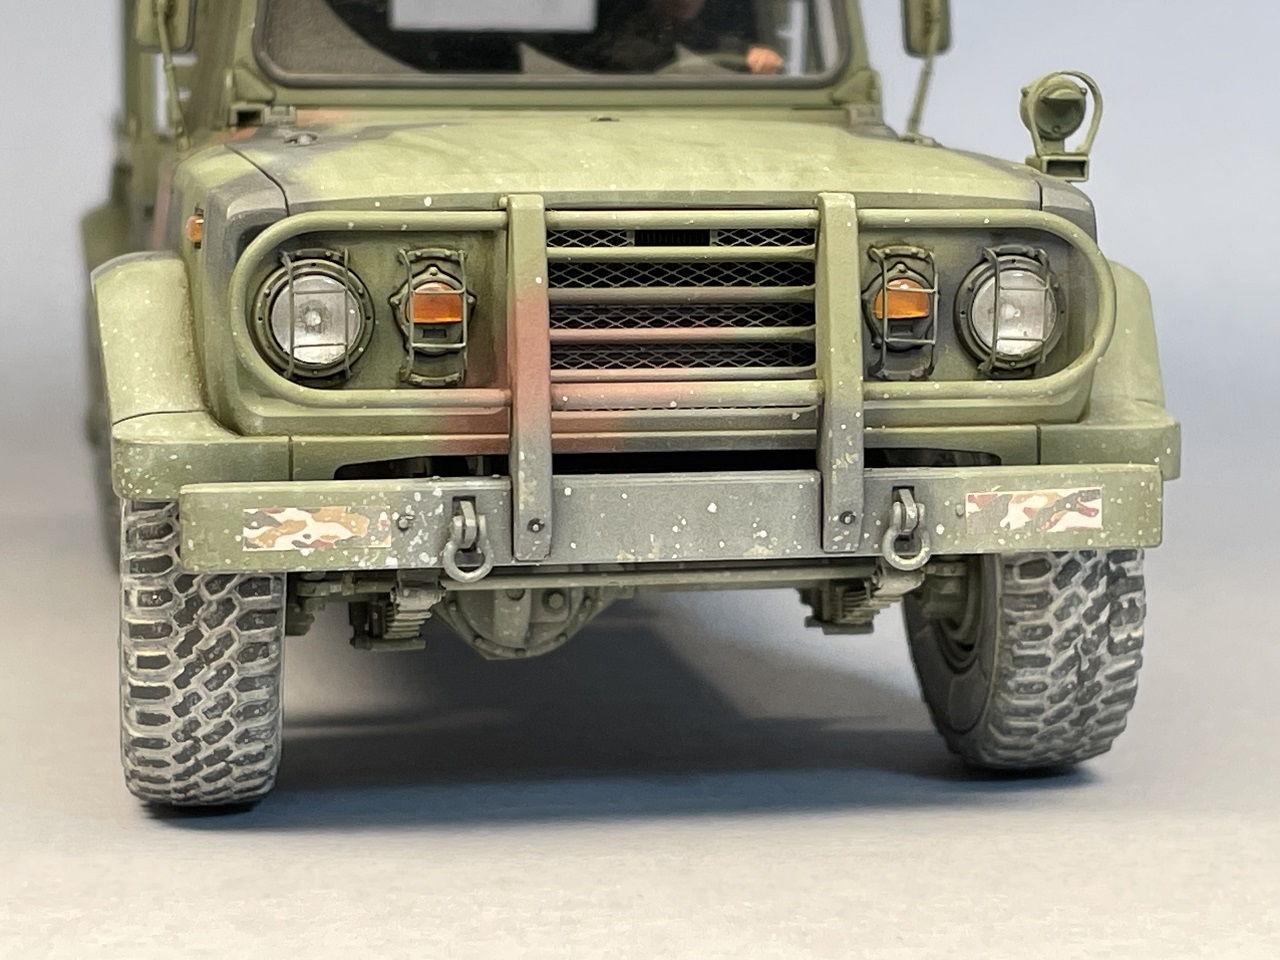
Photo-etch is provided for the front light guards and grill. There are also plastic parts for the light guards for modelers who don’t want to bend photo-etch, but they are pretty thick. Strangely, there is no photo-etch for the black-out light guard. Fortunately, the plastic part (A24) is not too difficult to thin with a sharp blade.
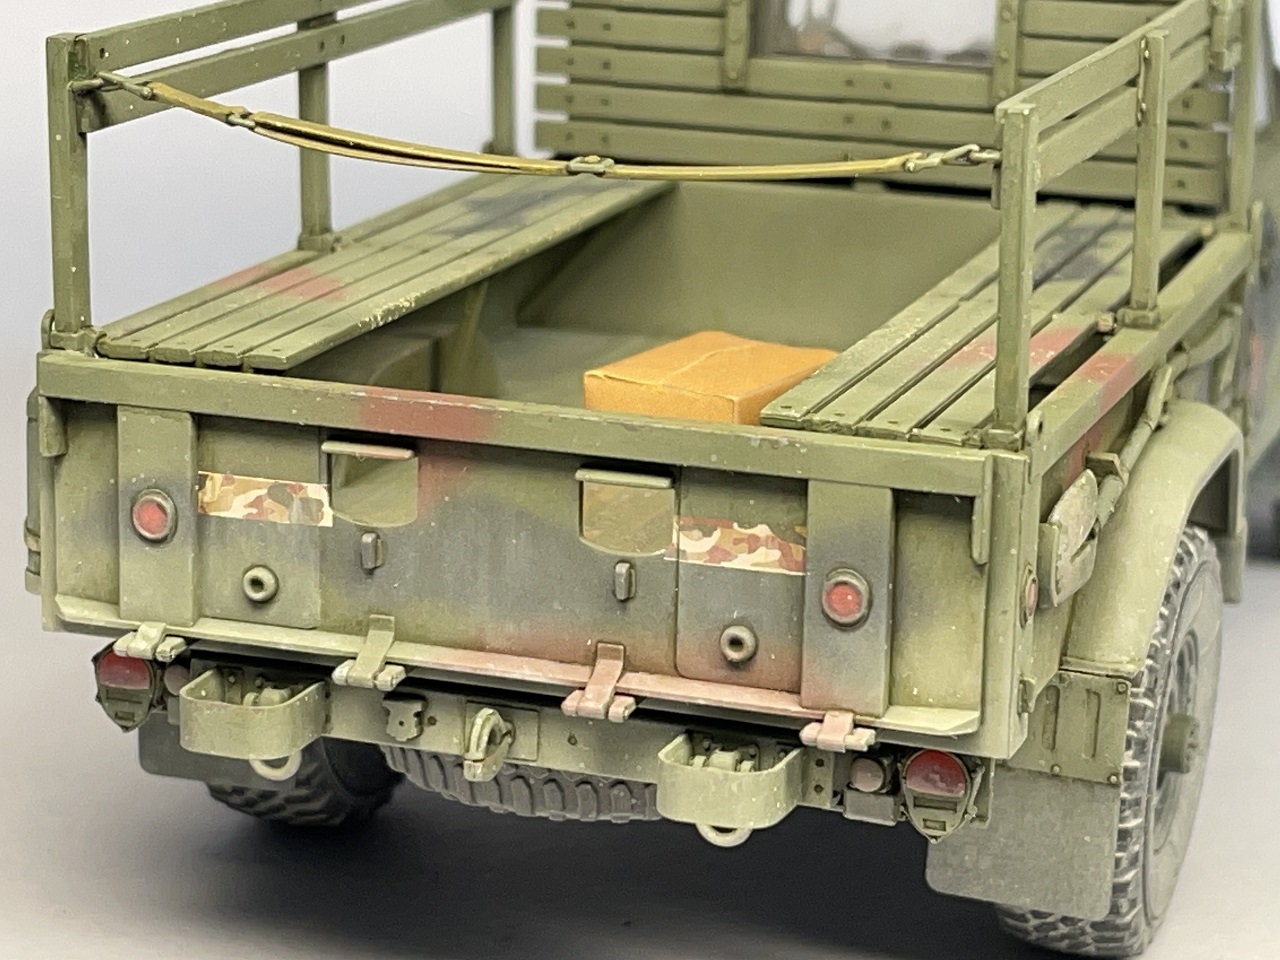
Self-adhesive pre-cut paper masks are provided for the cab windows, headlights, and indicator lights. The window masks fit very well and left no residue when removed. Be careful with the windshield mask as it can get trapped between the wiper blades and the windshield. I almost broke my wiper blades getting it off. Since the front lights have brush guards, I didn’t use the headlight or indicator light masks. I simply left those parts off until after painting, then did paint touch-ups after the brush guards were installed. The reverse and rear marker lights (parts D1) are provided as clear parts but have no masks. I painted the backs of these parts silver then used liquid masking on the lenses. These parts aren’t very visible on the finished model and it probably would have been easier to paint the lenses after applying the base color.
Judging by the number of unused decals on the decal sheet, different versions of this kit may be in the works. There are unused numbers, logos, and warning signs. There are decals with Ukrainian tridents on Maltese crosses. Perhaps there are ambulance, communication, or box-truck versions on the way?
This was a fun kit to build with good fits and enough detail out of the box to give a good-looking result without so much as to be overwhelming. Academy should be commended for producing a good kit of an interesting subject with some unusual marking options.
I would like to thank IPMS/USA and MRC for providing me the opportunity to review this kit.


Comments
Add new comment
This site is protected by reCAPTCHA and the Google Privacy Policy and Terms of Service apply.
Similar Reviews