
RAF Ventura Mk. II
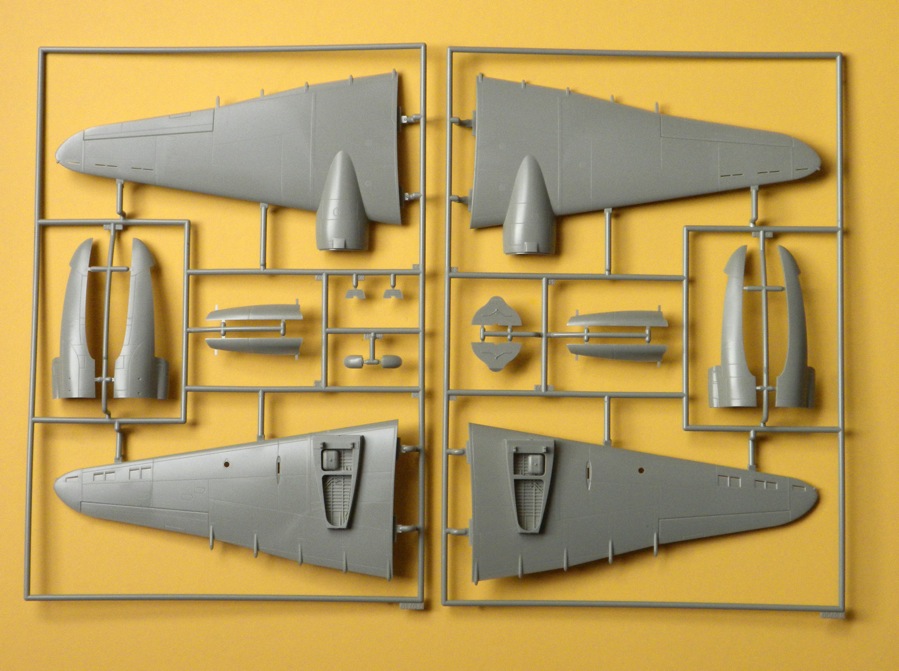
Less than two years after treating the modeling world to a state-of-the-art 1/48 scale Ventura PV-1, Revell has released a second version of the Ventura…the type ordered by the RAF in early 1940. According to Revell’s website there are 142 parts, but I counted 143. A number of them are common with the PV-1 kit, but a number of additional ones necessary to replicate the unique details of the RAF Mk.I and Mk.II are included. Twenty-one parts are molded in clear plastic. They are crystal clear and thin enough that interior details are easily viewed. All of the others are molded in a medium gray. As with the PV-1 kit, all parts are well molded with no flash or severe ejection pin marks to deal with. Recessed details are delicately engraved and a few raised details are nicely represented. Fortunately rivet detail is limited to a few conspicuous ones on the top of the fuselage and around fuel tank caps on the wing tops. As with the PV-1, the RAF Ventura Mk.II kit is packaged in a rather large two-piece folding carton that seems in fact to be too large for the contents. But, fortunately all sprues are well protected in poly bags inside the box so there is little chance that anything will be damaged as they slide around in the carton.
This release is priced a few dollars higher than the PV-1 because, in addition to the new parts necessary to build a Ventural Mk.I or Mk.II, Revell has included a comprehensive set of paint masks in this release and equally comprehensive instructions for placing them (It appears that they were sourced from Eduard as the backing card clearly states they were made in the Czech Republic). In addition to the masks, Revell has revised the propellers that were criticized in some reviewers of the original release. The Ventura Mk.II sprues include the wide blade propellers that are the correct type for the Ventura. In this reviewer’s opinion, including the paint masks and wide blade propellers more than justify the higher retail price. The photos below show the clear and gray part sprues, decals, instructions and paint masks.
As seems to be common with all new plastic kits from Revell, they have chosen to place their copyright declaration in raised lettering molded on the exterior of one of the parts that make up the stabilizer. Obviously something that will distract from the finished model, and obviously something that should be sanded off before any assembly begins.
Decals are included for two aircraft. The decals are crisply printed on thin film in what appear to be accurate opaque colors. Print registration is very good. The options are:
- Ventura Mk. II RAF, No. 454 Squadron, AE939
- Ventura MK. II AJ209, Pilot Sq. Leader L.H. Trent, No. 487 Squadron, Royal New Zealand Air Force, Methwold, Great Britain, 1943.
Before I began working on the review build however, Aviaeology released a pair of decal sets designed for the Ventura that provides a variety of markings which gave me an alternative to using the markings provided in the kit. After reviewing the options offered on Aviaeology’s Venturas in Canada Part 1 set, I decided to finish the review build in markings for one of the RCAF’s Venturas that served as a trainer. I did however use the kit decals for the instrument panel, the propeller blades, the fuel filler rings and the rudder deicing boots…and can confirm they fit well and behaved perfectly.
As mentioned above, parts unique to the Ventura Mk.I and Mk.II are provided on the sprues. However, there are some parts on the sprues common with the previous PV-1 release that should not be used. The external wing tanks that were fitted to many later Venturas models are included on the sprues and shown in the assembly instructions. However, there were no wing pylons on the Mk.I and Mk.II so they were not equipped to carry those tanks and they should not be installed if an accurate model is desired. Since I would not be installing the tanks, I filled the recesses molded into the underside of the wings where they fit, sanded the areas smooth and scribed the necessary panel lines (see the photo below).
Before beginning the build, I carefully removed the clear parts from the sprues with a new sharp #10 blade, cleaned up the sprue points, polished each part, dipped it in Future and set it aside for days under an inverted Tupperware bowl to give everything ample time to dry in a dust-free environment. Then, during the build, I often dry fitted the clear parts to determine if any adjustments would be required. In the case of this kit, very little adjusting was required…the clear parts fit very well.
The kit engines are molded in one piece. They appear to match photos found on the Internet and the details are nicely represented, so I felt painting them was all that would be needed to bring them to life. I painted the crankcase engine gray and the cylinders semi gloss black and highlighted everything by dry brushing some white W&N oil paints to the raised details and applying an oil wash to the recesses (as the photo below shows). After addressing the engines, I also took some time to open the faces of the air intakes on the top of the cowlings that Revell molded as superficial recesses. It’s a small improvement, but one I felt the cowlings deserved. I went ahead and assembled the cowlings and set them and the engines aside as they would not be installed until later in the build.
This kit is well engineered, but I believe faithfully adhering to the instructions sequence will likely create some problems down the road. I altered the recommended assembly sequence so certain parts could be prepainted and because some parts would likely be damaged in subsequent assembly steps…such as the instructions recommendation to install protruding machine guns early in the assembly of the fuselage. Instead, to avoid that, I cut the barrels off the upper nose guns before installing the body casings in their respective positions so the barrels could be added through the openings after the fuselage was painted. I also decided to delay steps 8 and 9 (installing the clear nose glazing, with its guns and the main landing gear) until later.
The interior cockpit parts were the next order of business. Small parts were painted on the sprues and I found everything fit perfectly when the parts were assembled. Since Venturas ordered by Commonwealth air forces were not equipped with dual controls, I did not install the right hand control column. I filled the hole in the floor, added tape seatbelts and painted the sidewalls and other interior parts interior green. I also decided to build the model with everything closed up so I omitted installing the bombs and the interior hinge mechanism for the bomb bay doors. Interior parts fit well and everything went together with no problems. I added the fuselage sidewall windows and tail wheel bay insert and the necessary internal parts that make up the bomb bay floor and end walls, but chose to leave the tail wheel assembly off and not install the astrodome until later. The main fuselage sides were closed up and the top and bottom seams were smoothed out with no drama. Since the two halves that make up the nose section are molded in clear plastic, I assembled them, masked the interior of the windows and painted the inside with interior green followed by a light spray of Dullcoat to avoid a glossy interior ruining the view inside. I also prepainted and added the internal details (seat &table) to the nose section but, as noted above, did remove the protruding gun barrels before adding the gun casings. I added the clear formation light inset after painting the backside of each lens in the appropriate clear color, followed by silver and a spray of the interior color. Then, after dry fitting the nose section to the fuselage one final time, I cemented them together with almost perfect alignment. A little sanding was needed to smooth out the unintended seam line that resulted (finding the clear plastic was a bit harder than the gray plastic to sand), but it didn’t take all that much work.
Wing halves and tail feathers were assembled next. No drama here either. The fit is superb and panel lines align perfectly. The wing assembly was straightforward, but it was important to install the clear landing light lens in each lower wing half before attaching it to the corresponding top wing half (and paint the back side of the lenses silver before installing them). I did add a few strips of evergreen styrene along lengthy edges of parts where they are cemented to other parts to avoid the possibility of seams showing up later (I seem to be doing that a lot these days). When assembled, the tail assembly literally clicked into place and the wings aligned in the proper dihedral thanks to the spar that they slide onto. However, dry fitting indicated some edges would benefit from a minor swipe with a sanding stick before gluing the wings to the fuselage. After that, assembly rolled along smoothly. All that was required was running a little liquid cement run around the join where the parts touched and some time for everything to set.
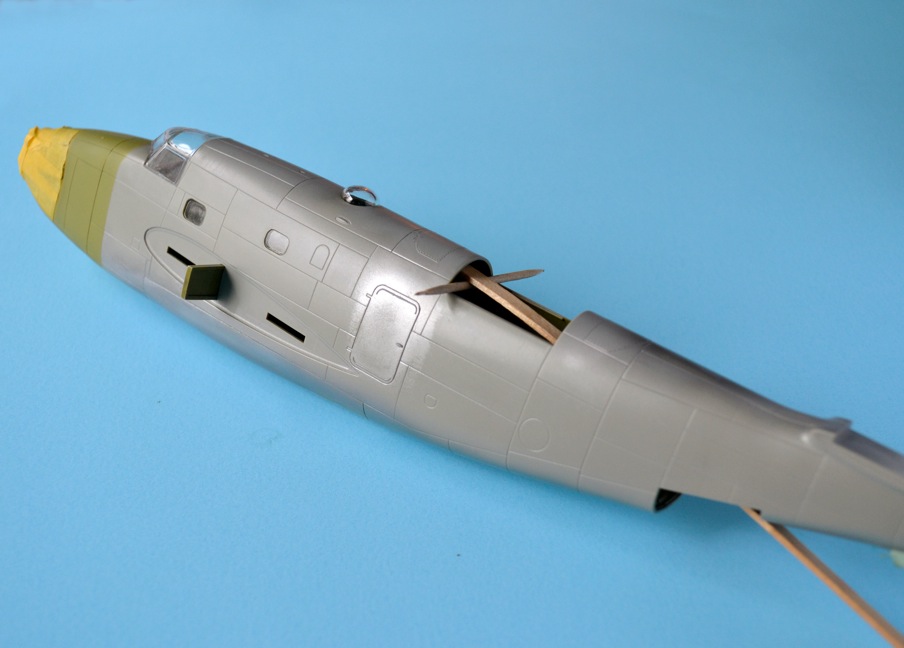
It was then that I experienced the only real fit problems with this kit. Since I had planned all along to finish the model with the bomb bay doors closed, I added the clamshell doors by first attaching the two opposing outermost clamshell doors to the edges of the opening, aligning them with the curvature of the fuselage underside. Then I discovered that there was a pronounced gap along the centerline when I added the remaining two doors. After bringing them together as much as possible by tightly wrap strong rubber bands around the fuselage as the liquid sement dried, I filled the remaining gap by cemented in a thin strip of evergreen styrene. Some putty filler was needed here and there and I smoothed everything out with some sanding stick work. This was the only area that needed such attention.
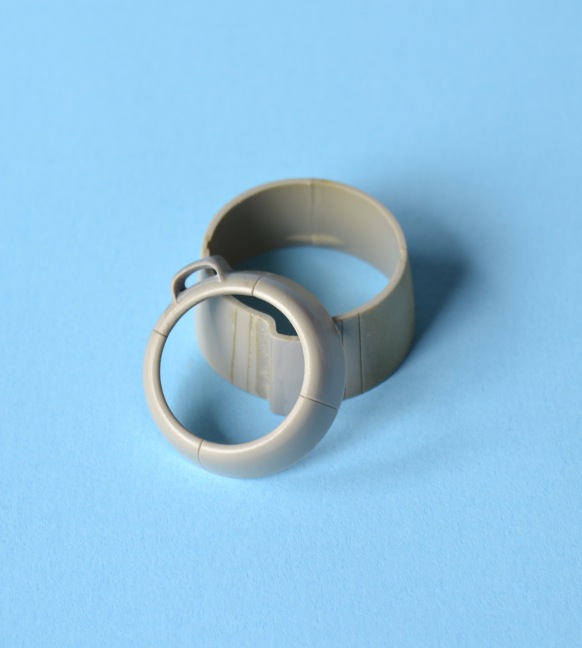
I had delayed installing the clear astrodome until after the fuselage seams were sanded smooth to avoid the inevitable damage that I was sure would result from sanding around it. After the seams were smoothed out it was time to install the astrodome. Two photos below show the way I installed it by holding it on the end of a coffee stirring stick with a piece of double sided tape, placing it in position through the ventral gun opening and, while holding it in place, flexed the stirring stick enough to slide a toothpick across the opening for the Boulton Paul turret under the stirring stick so it applied enough pressure needed to keep the astrodome in place. With a 000 brush, I applied a little diluted Future around the edges of the astrodome (letting capillary action carry it all the way around), repeated that application and followed with a small application of thin superglue around the edge to lock it in place.
Next, wheels were then assembled, painted (again using the masks) and set aside. The wheel bay parts were prepainted, dry-fitted and then installed along with the engine nacelles. Again everything fit together without the need for any filler. I decided to leave the landing gear, engines and engine cowlings, the turret and the ventral gun assembly off at this point to make painting the fuselage camouflage and the fuselage-facing sides of the nacelles without having to work around those protruding cowlings, the landing gear and the armament.
Applying the pre-cut paint masks was a treat. They fit perfectly and speeded the preparation time considerably. I taped off the wheel bays and tail wheel opening, sprayed on a light prime coat of Mr. Surfacer, checked everything and then painted the underside without masking anything else. I used Gunze’s Mr. Color paints because I have found they cover well, dry rapidly and provide a smooth resilient finish that is friendly to masking and decaling. After a day’s rest, I masked off the underside and began painting the topside camouflage and the separate engine nacelles following the kit instructions, the Aviaeology decal set instructions and photos I had downloaded from the Internet. It was obvious from the photos that field applied paint did not exactly match the patterns of the instruction sheet diagrams…especially where repairs had been made after training mishaps, so I strived for something of a compromise that looked realistic.
I prepainted the interior parts of the Boulton Paul turret, painted the guns with gunmetal, assembled everything, applied the precut masks and airbrushed the exterior with semi gloss black (in spite of the absence of a color callout in the instructions specifying the color to be used), gave everything a light spray of Dullcoat…and, set the completed turret aside for installation later.
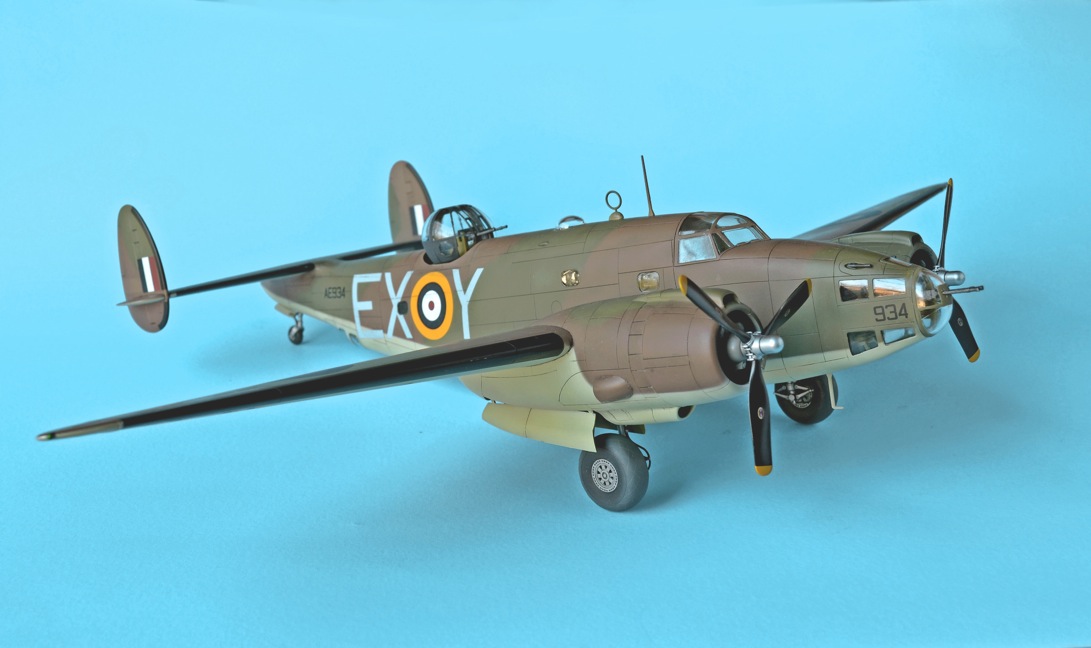
After a coat of Future, the decals were applied, followed by another coat of future and a light buffing. Then an oil wash was applied to bring out the recessed details and a topcoat of Dullcoat brought everything together nicely. I painted the wingtip navigation lights and removed the masks, touched up a few little flaws and gave everything time to thoroughly dry. I added the engines, the nacelles and finished things off by attaching the landing gear, gear doors, tail wheel (and doors), fitting the ventral gun assembly, inserting the Boulton Paul turret (with a twist much like the A/M Avenger), attached the antennas and adding the propellers. The photos below show how everything turned out.
The box top says the skill level is 3, but this kit would be a great choice for any model builder who has one or two kits under his belt. It is a very pleasant build that will reward a reasonable amount of patience and care (and a little bit of thinking ahead, as I’ve noted above). For what it’s worth, I plan to build another one sometime soon so I can use some of the other markings provided in the Venturas in Canada decal set. Revell has done a great job with this kit. It is highly recommended. My thanks to Revell for providing the review sample and IPMS/USA for the opportunity to build and review this kit.

Opening up the Cowling
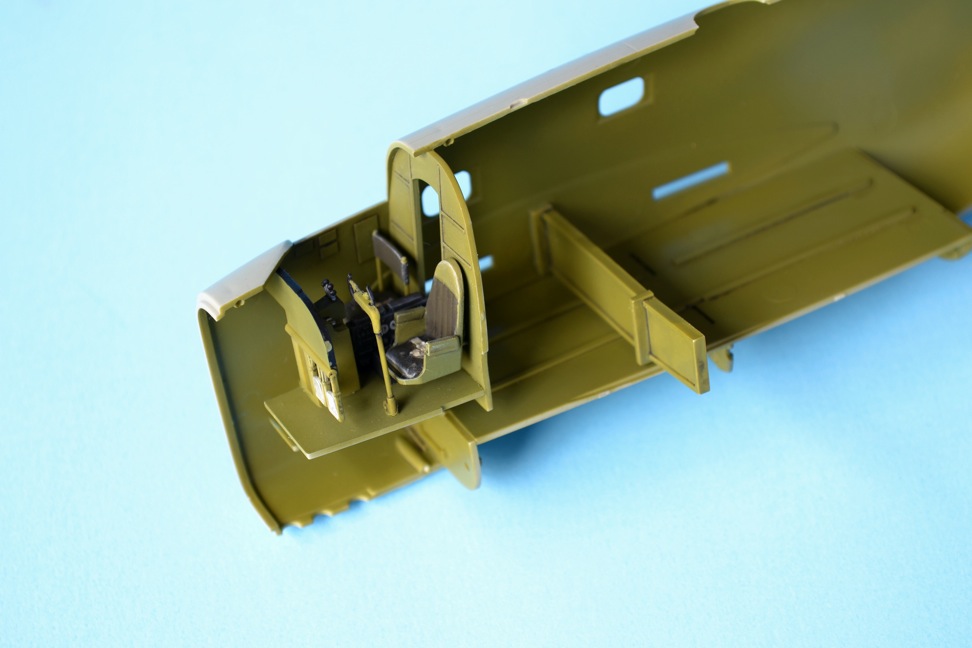
Cockpit & Interior

Revell Ventura Engines (unpainted and painted)
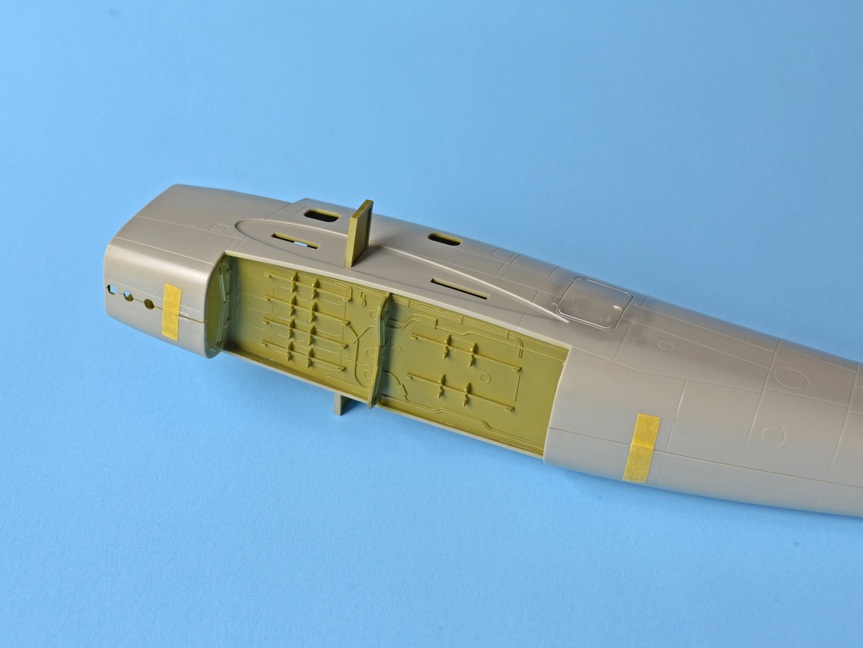
Fuselage closed up around bomb bay
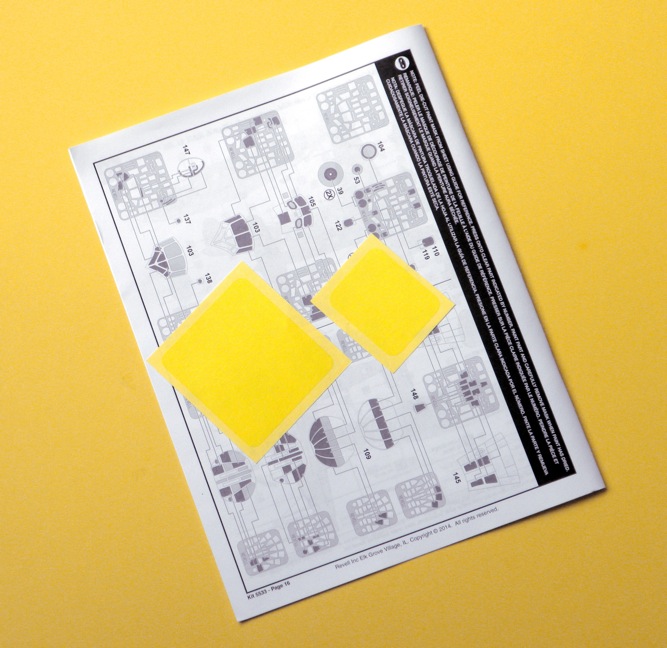
Paint Mask
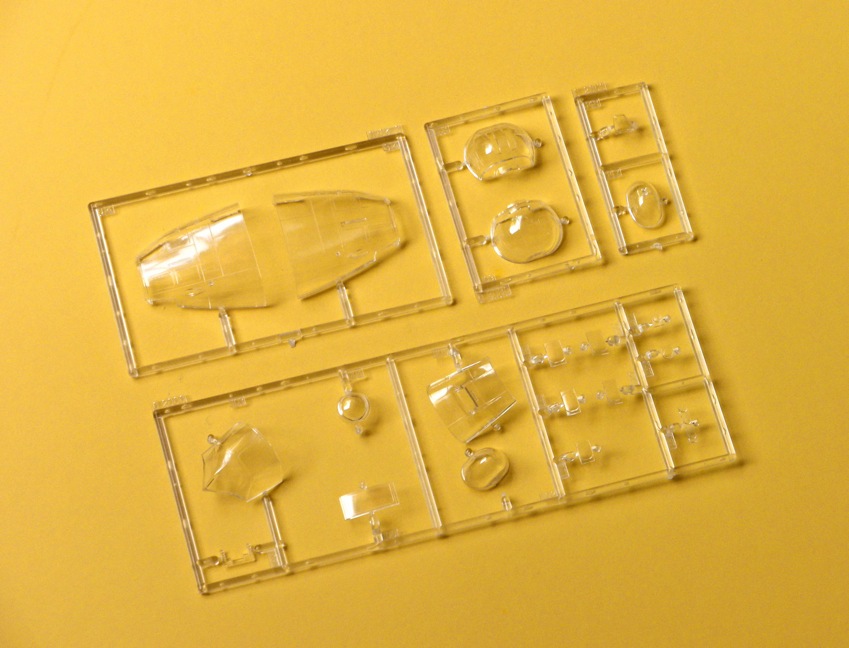
Clear Parts
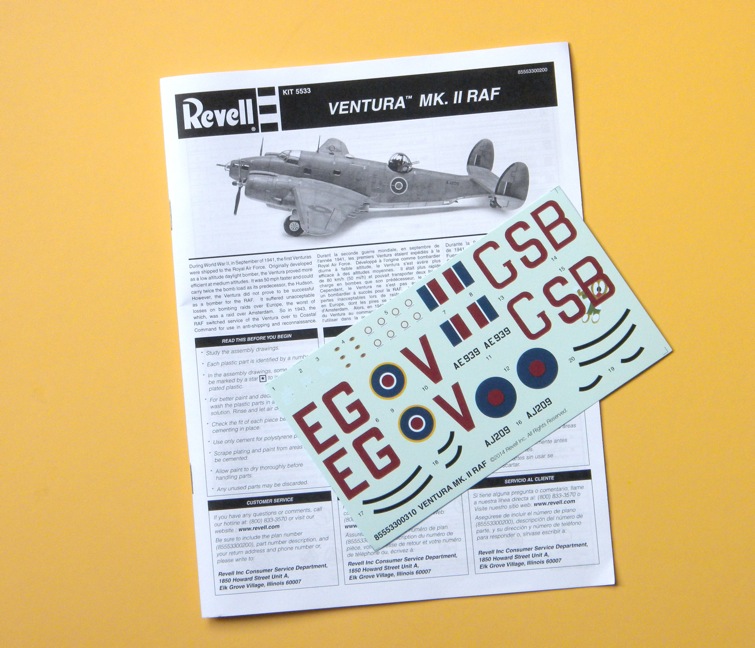
Decals

Sprue - 1
Sprue - 2
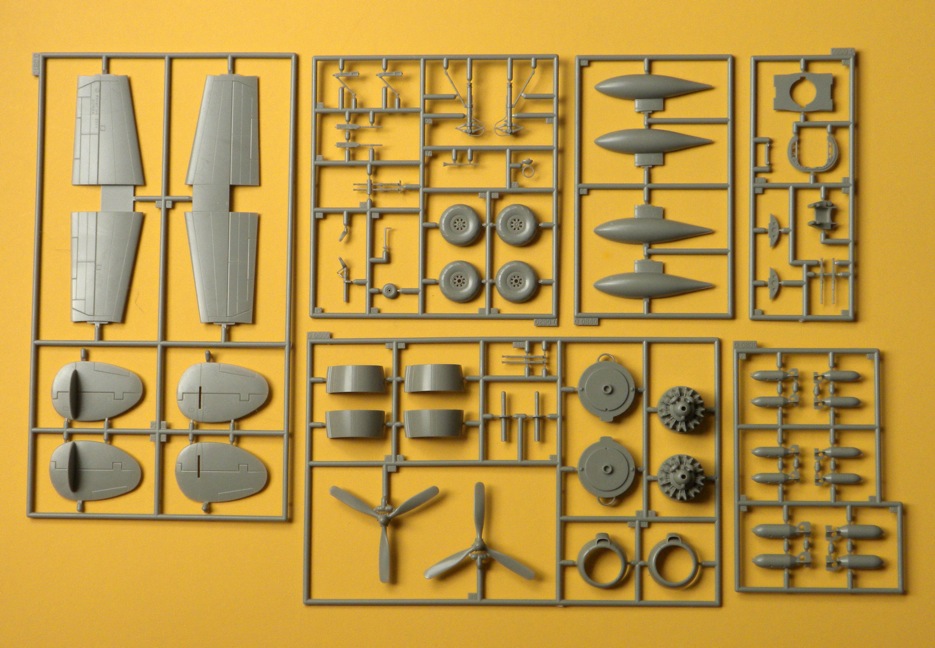
Sprue - 3
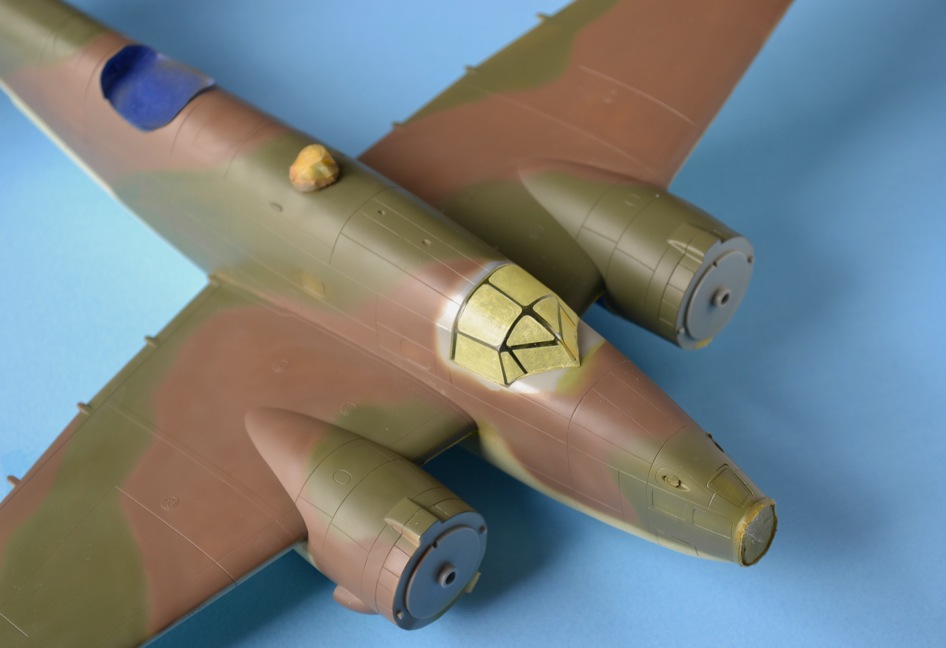
Using the Paint Masks
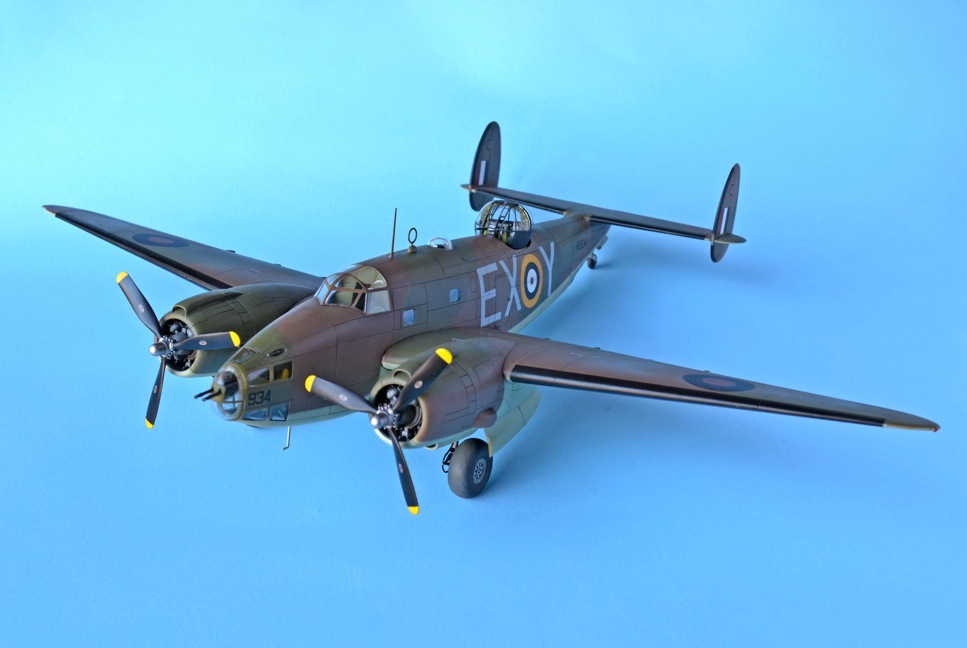
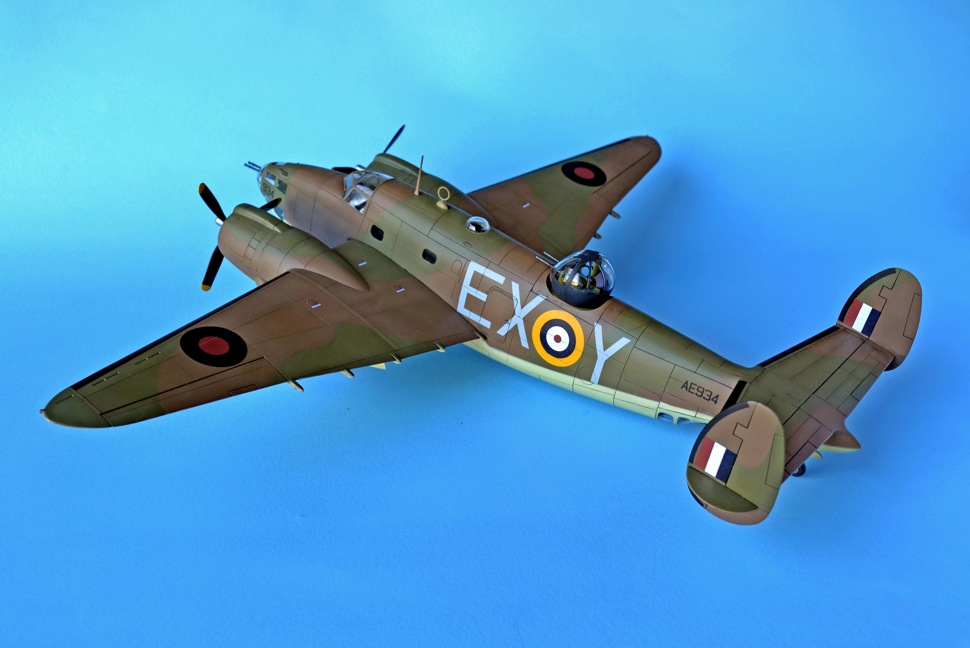
Front 3/4 View
Front Right 3/4 View

Left Side View
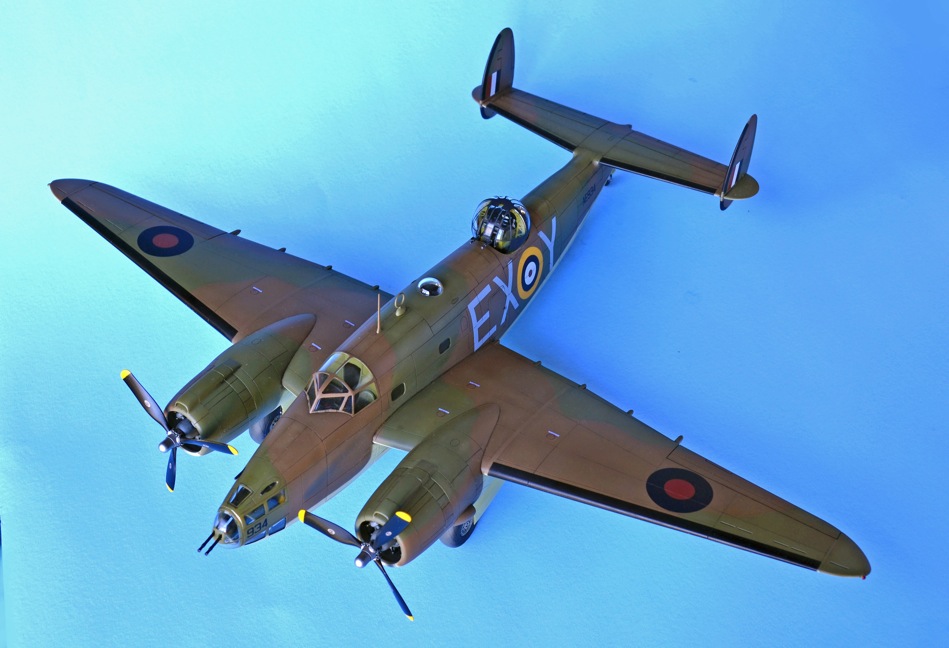
Overhead View
Rear 3/4 View
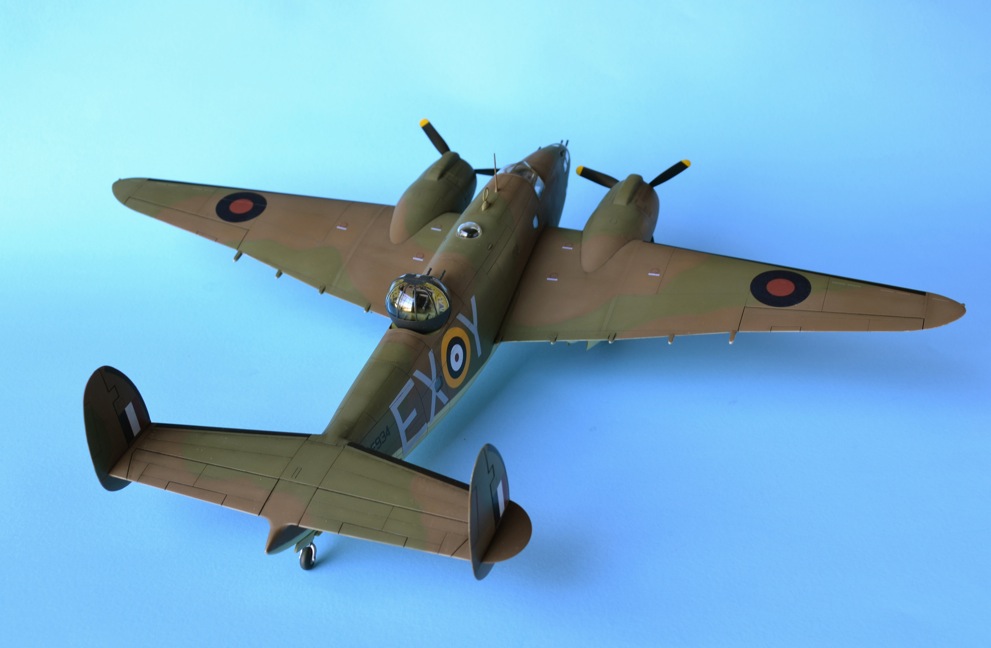
Rear Overhead View
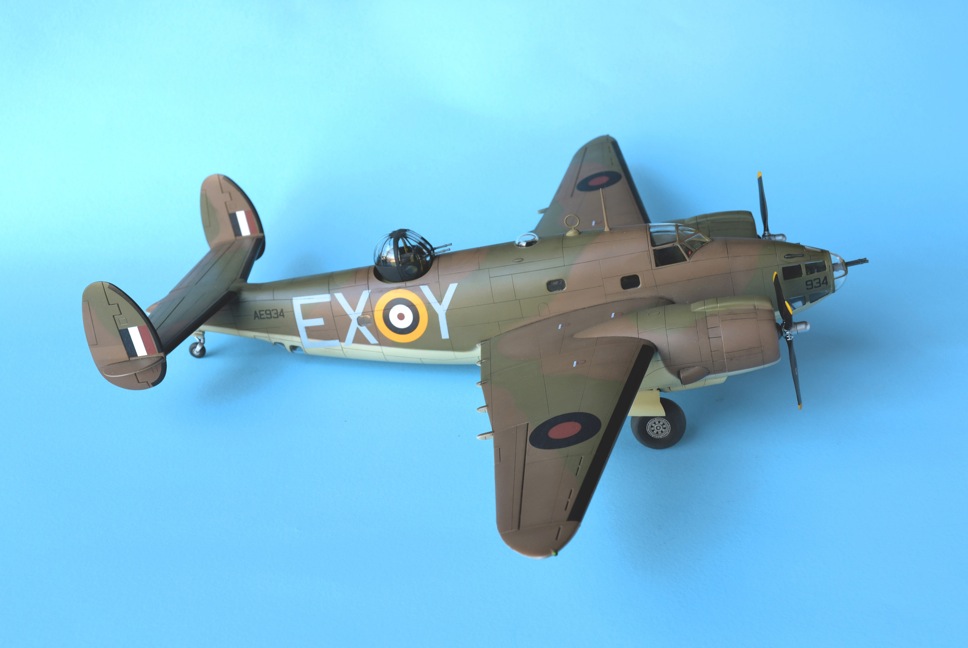
Right Profile View
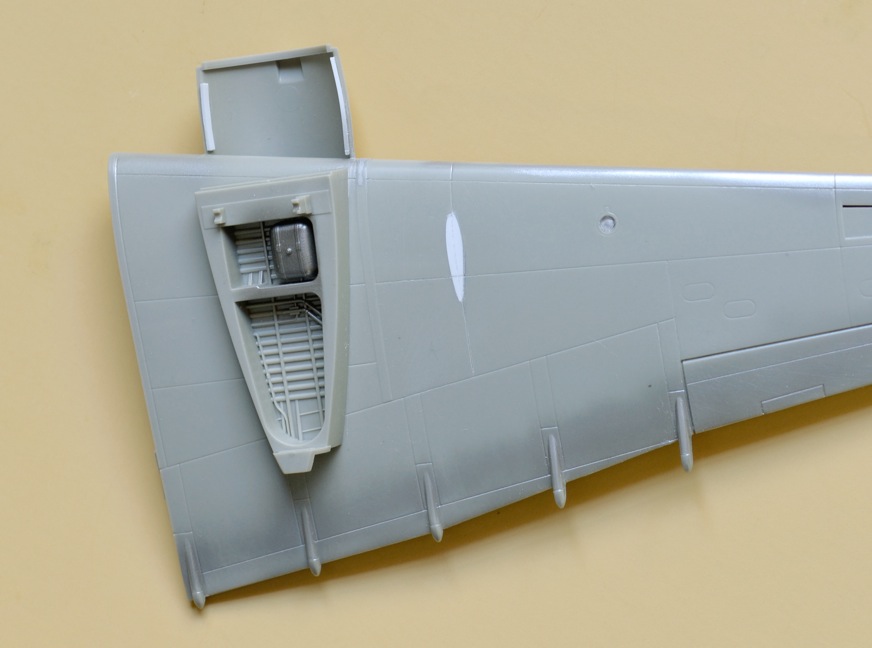
Filling the Wing Pylon Recess
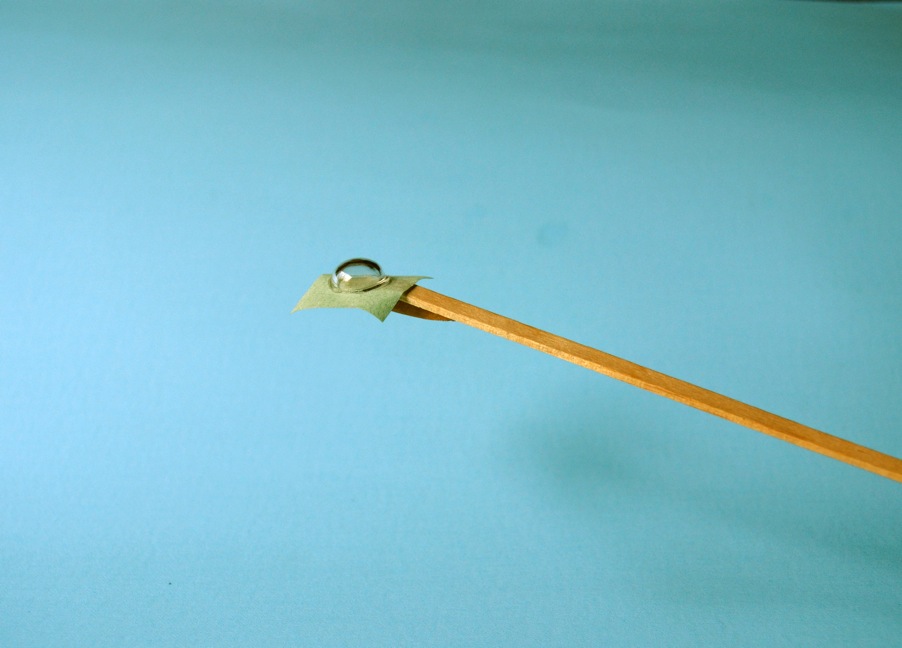
Installing the Astrodome 1
Comments
Add new comment
This site is protected by reCAPTCHA and the Google Privacy Policy and Terms of Service apply.
Similar Reviews