
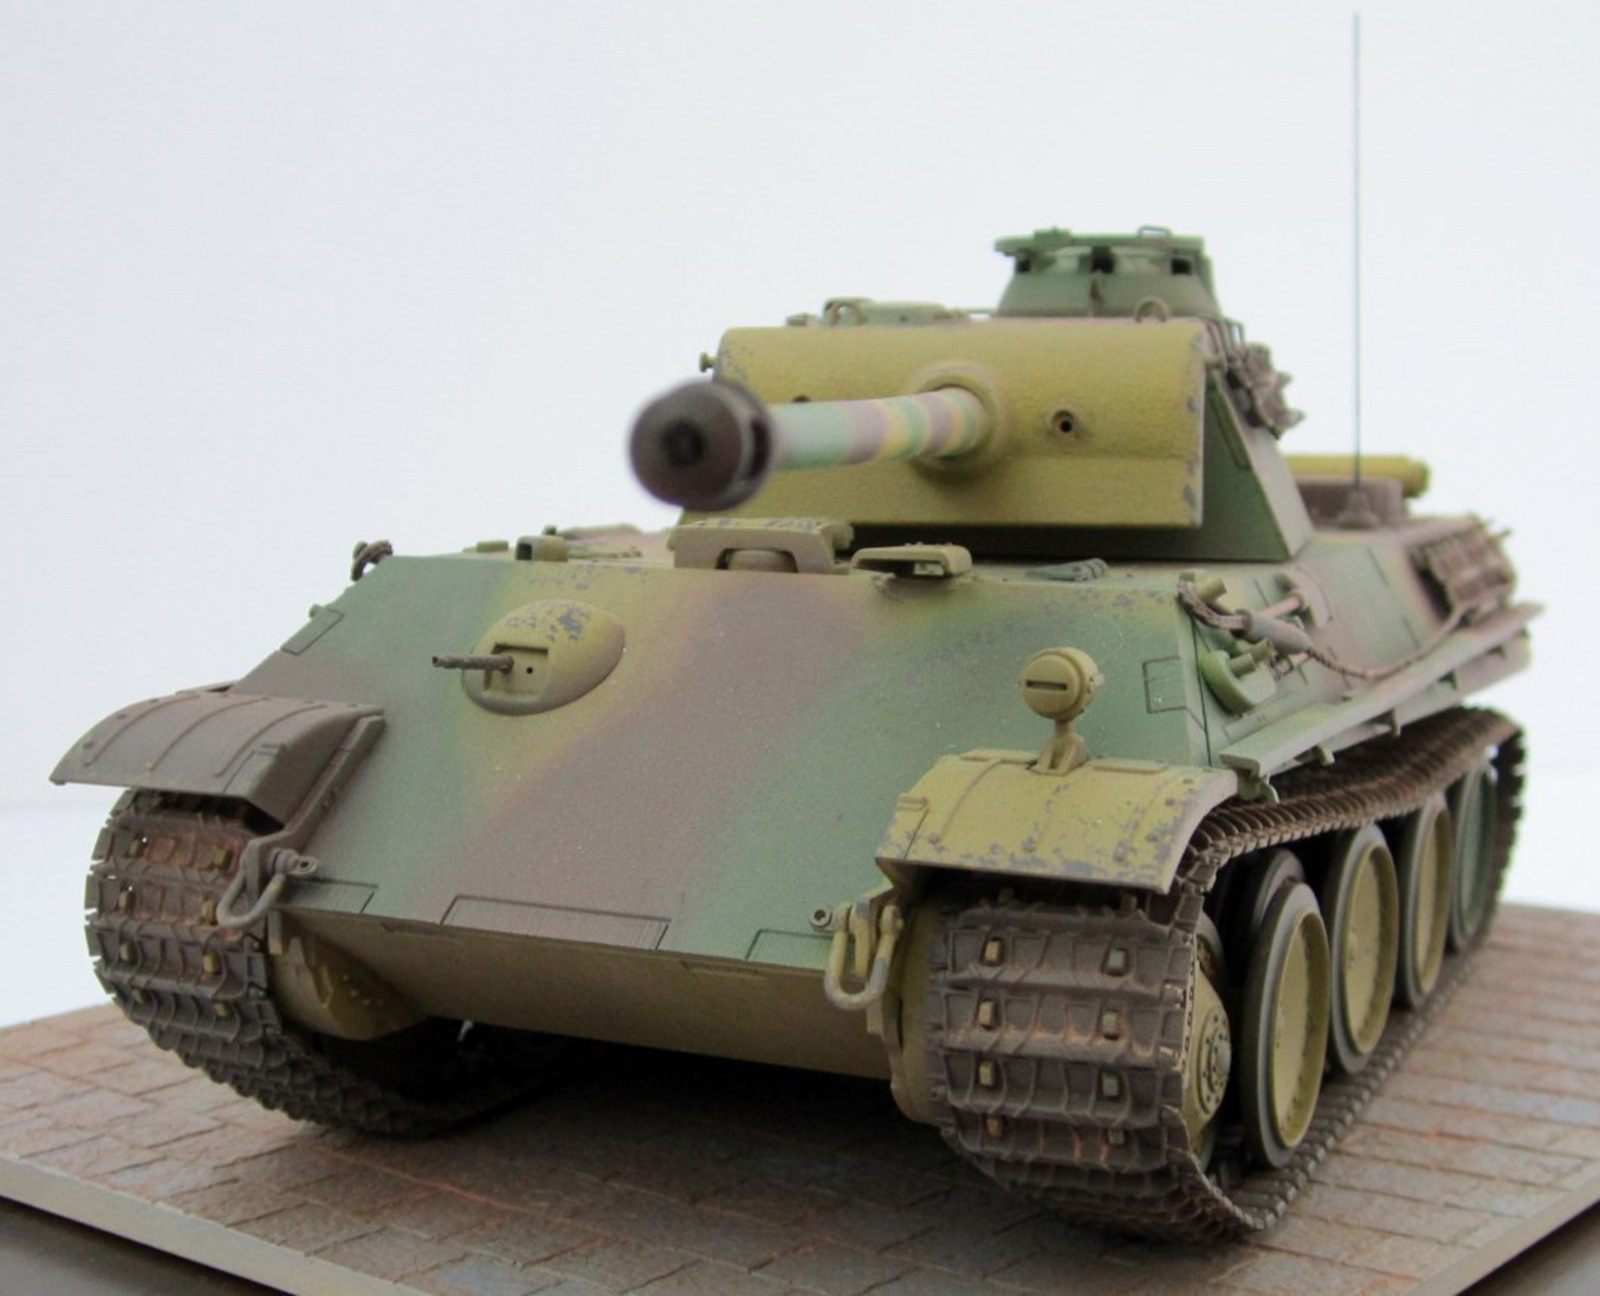
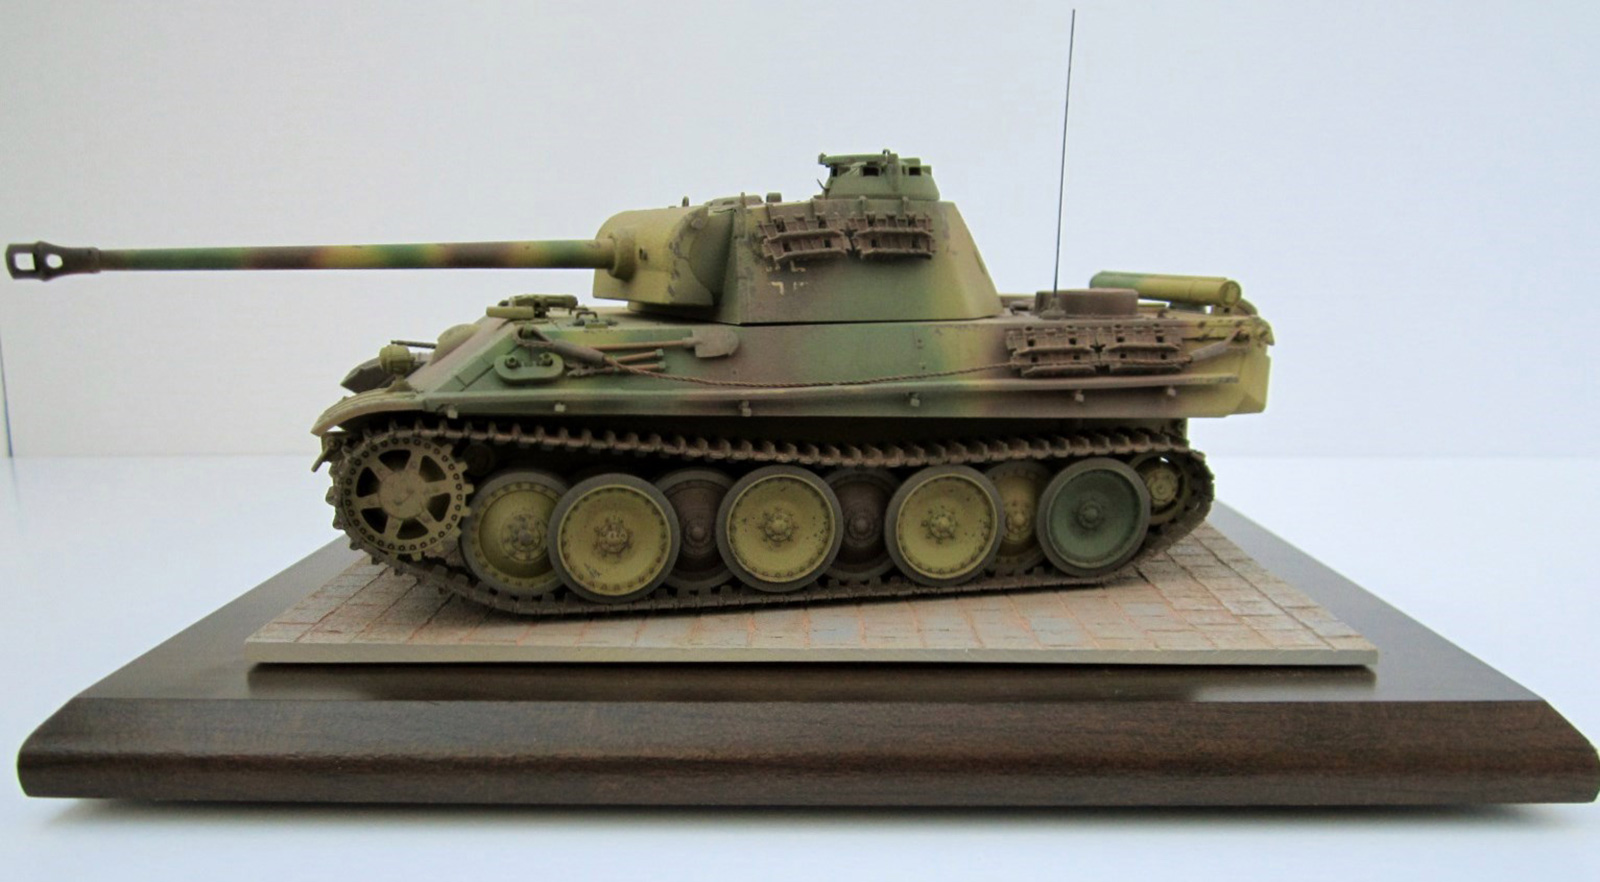
Pz.Kpfw.V Panther Ausf. G Late
This kit by Italeri is a rebox of their 2012 Pz. Kpfw. V Panther Ausf. G kit # 6493 with the addition of upgraded moulds, photo-etch fret and new gluable rubber tracks as stated on their website. Let me preface my review by stating that as modelers we do not always follow the instructions step by step. We tend to skip around completing steps in advance while letting previous steps dry or bond. For this build and review, I did indeed skip steps, but I will describe what I found in each step, pros or cons, so the builder will be enlightened as to what needs addressed during the build. I also will not review any historical data pertaining to the Panther tank as I assume the builder will review historical data prior to the build. The Panther tank I will be constructing represents Panther #122 under the command of Oberleutnant Rasim, which was destroyed and knocked out east of Berlin in late April 1945.
Box: The box is a normal size 14-1/2” long x 9-1/2” wide x 2-1/4” tall with great graphics of the Panther G in action with beautiful camo colors on the top. On the sides are images of the three versions that can be constructed. I noticed on the top of the box that Italeri has printed “Upgraded moulds”. Contained within the box are three sprues all contained in a plastic bag, a small plastic bag containing the photo etch with decals and another small bag containing the cotton twine which represents the cable. The kit contains 290 parts estimated per Hobbico’s website on three dark gray sprues lettered A, B and C and a large ten-page fold out instruction manual.
Sprues
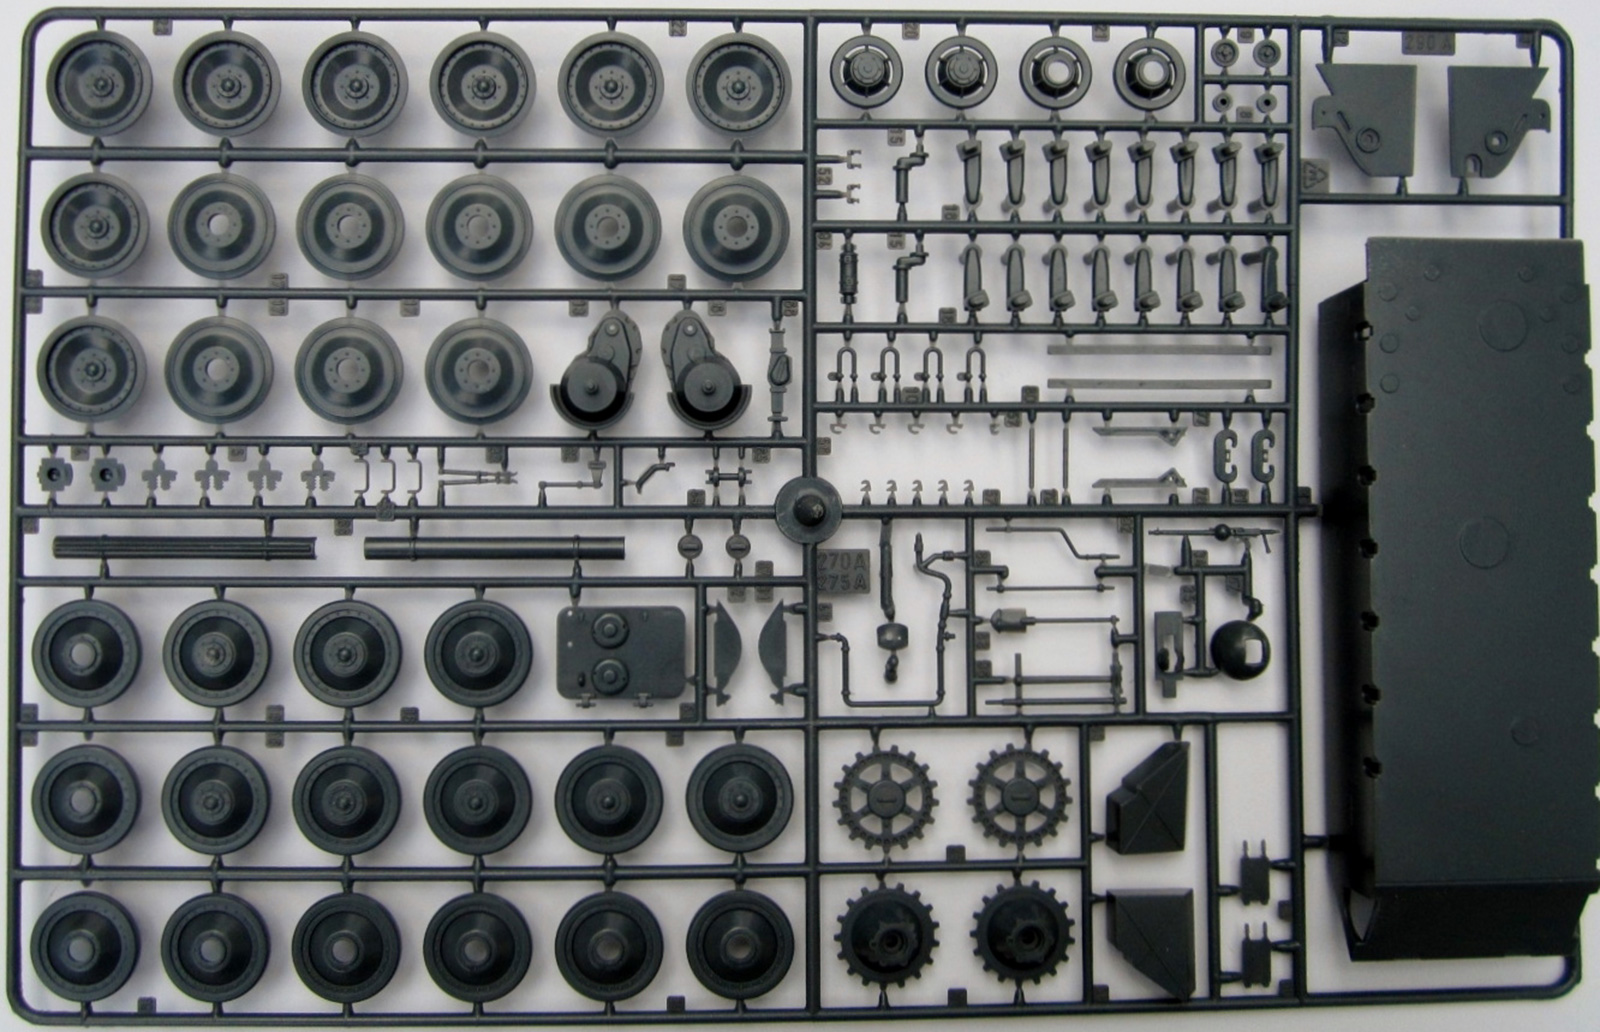
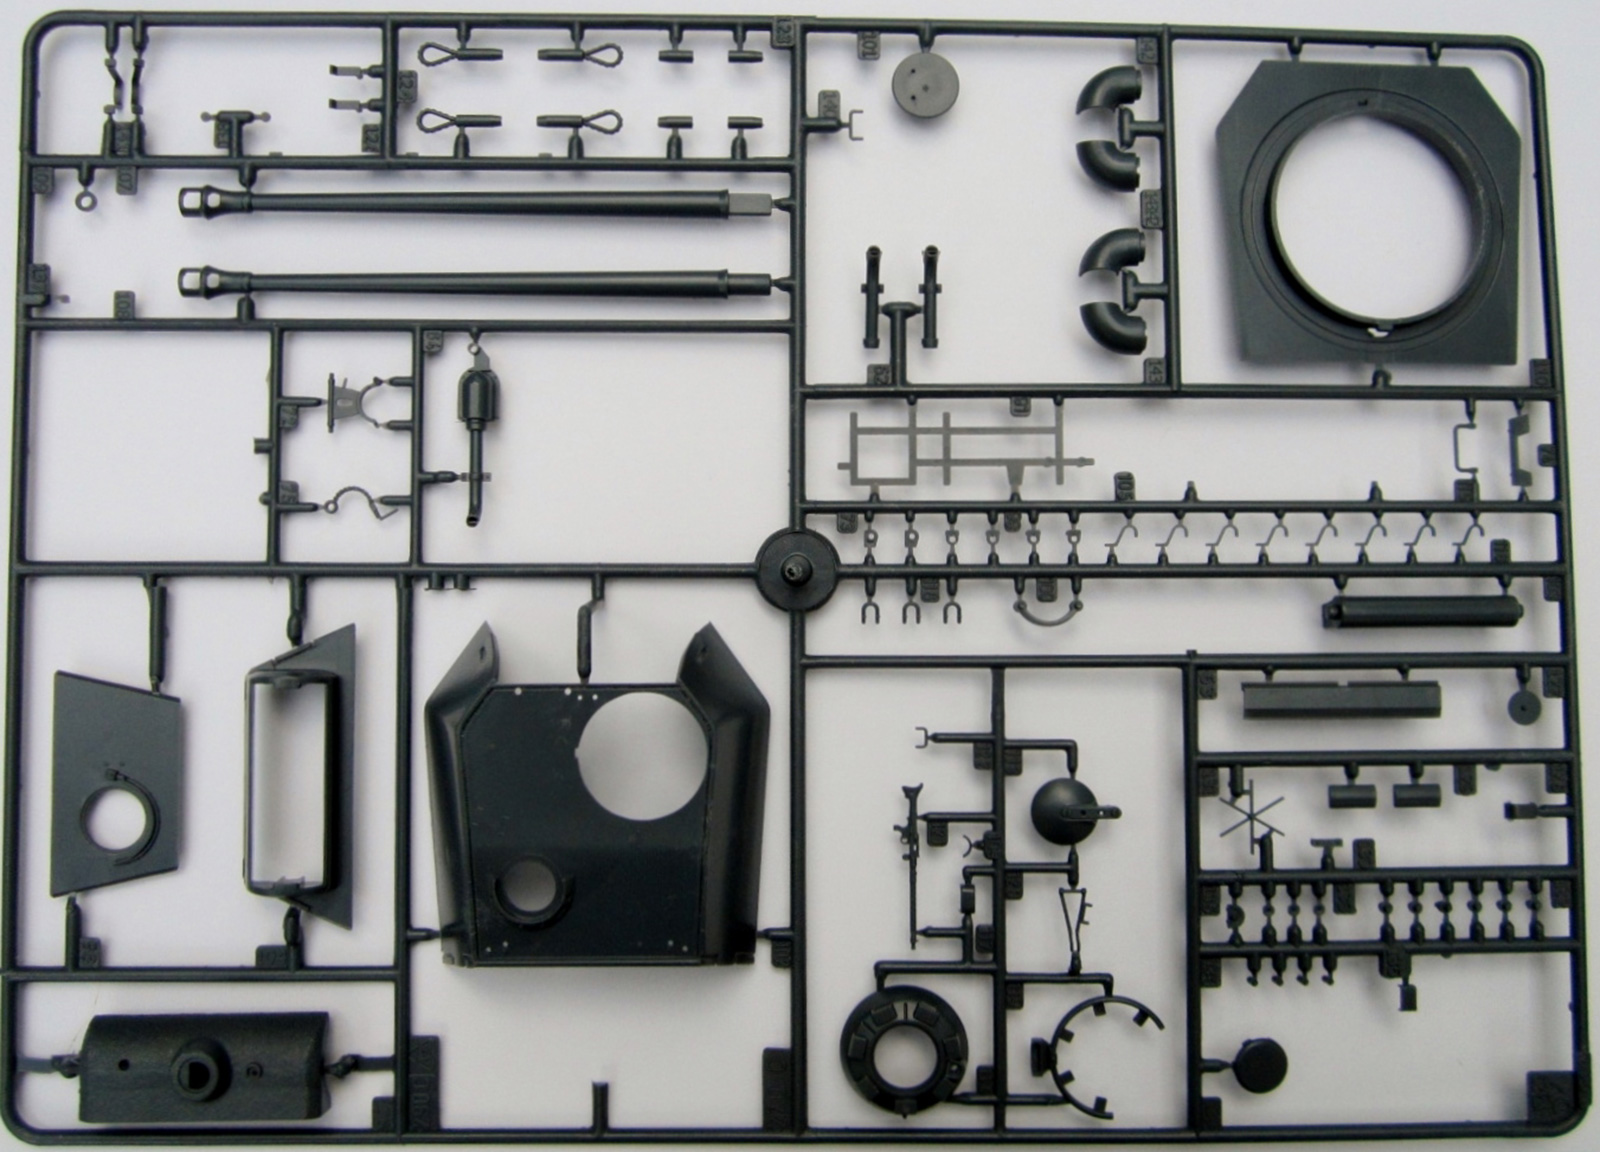
Upon opening any model kit, what I like to look for is the amount of work, such as flashing, location holes, ejector pin release points (sink or raised marks) and mold seams that need to be addressed during construction. The parts have crisp detail with extremely sharp well defined. I noticed that Italeri has provided in this kit 25 unused parts to add to your “stash” which are identified in the instruction manual. Upon inspection of the sprues: The foundry casting texture seemed to be too consistent. The hull has depressed weld beads. There is some slight flash but not much. If one wants to show the hatches open there are quite a few holes and ejector pin release points that will have to be filled. The 75mm gun barrel is moulded in two pieces with release points which can be cleaned up easily.
Tracks
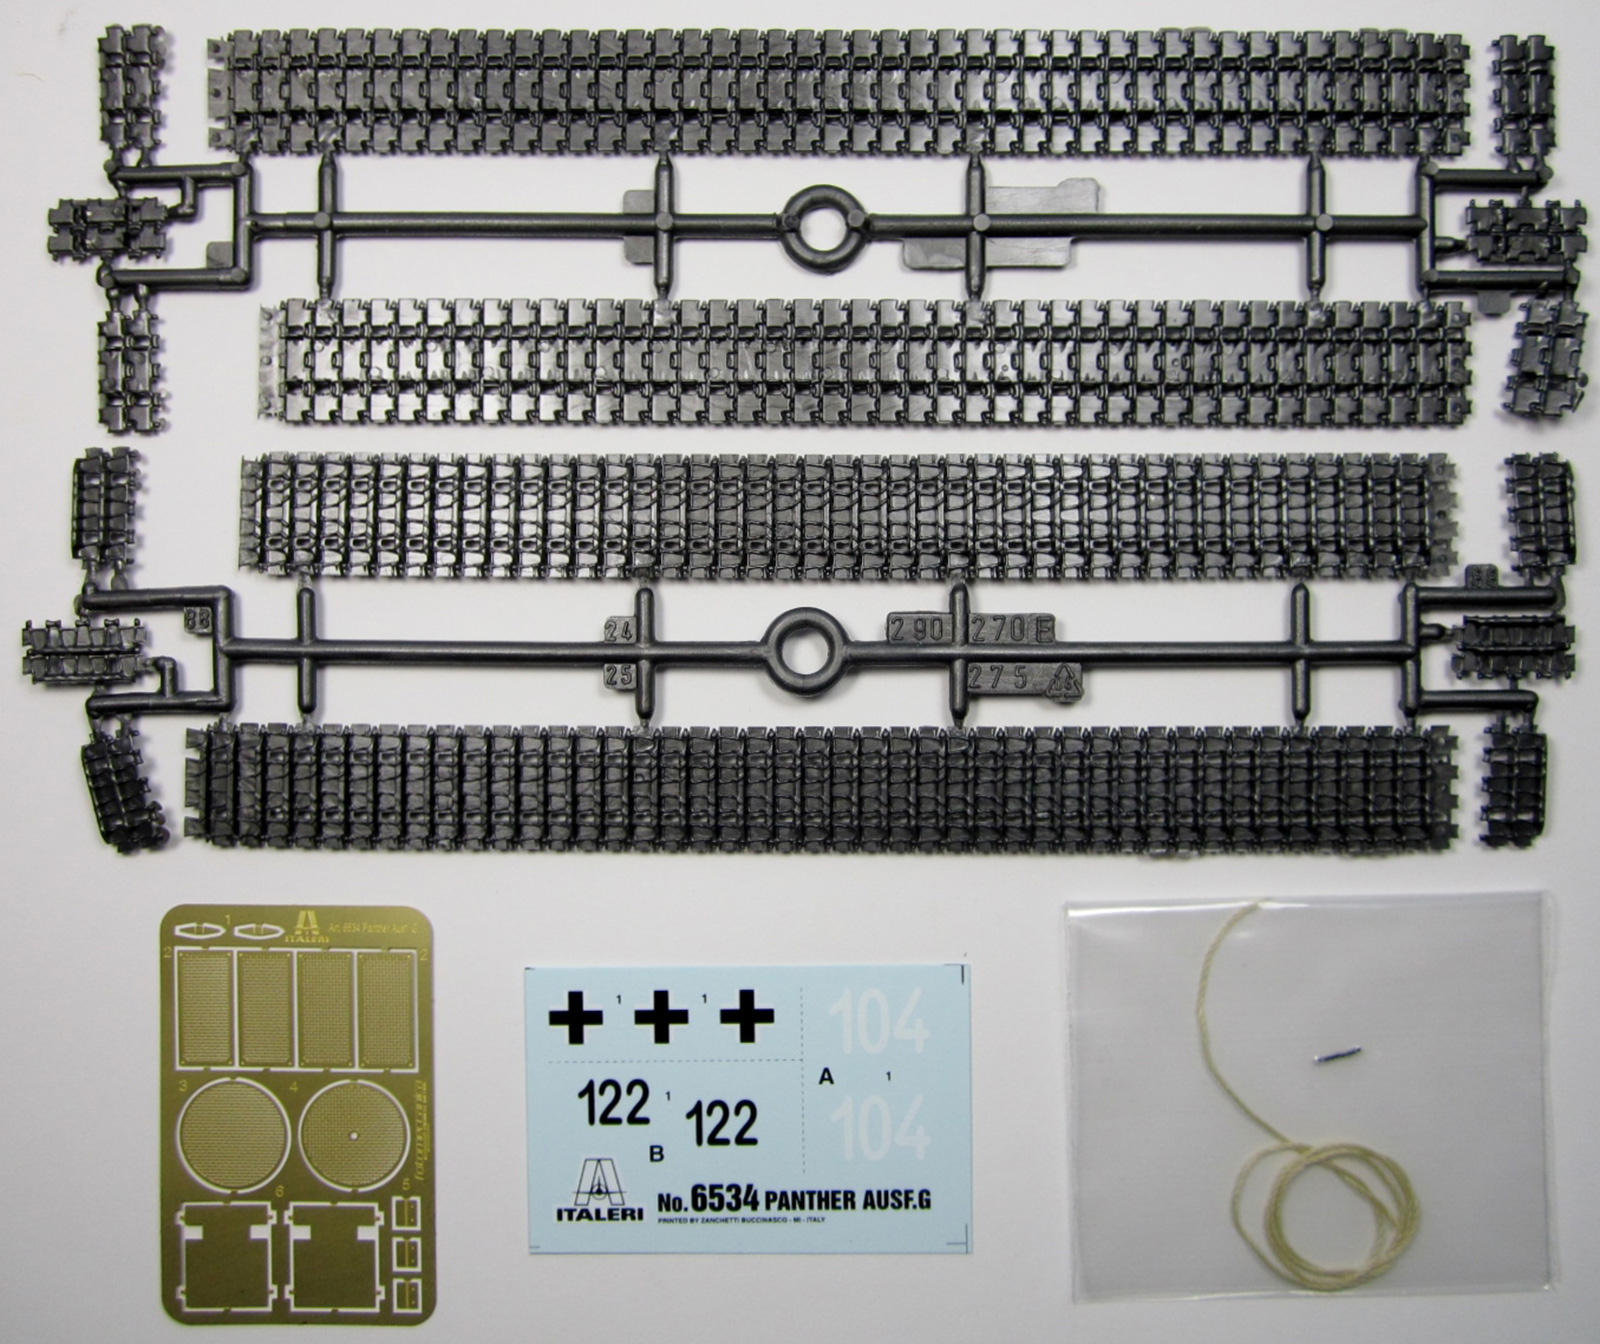
The tracks consist of four sections which need to be glued together using cyanoacrylate glue instead of liquid cement. The tracks are moulded with fine crisp detail with some clean up needed. Contained on the sprue with the tracks are track sections to be added to the turret and hull for protection. There were several ejector pin release points on the underside of the tracks located in the center run. These were filled with Perfect Plastic Putty. The tracks are the VK 3002 (DB) type and appear to be a good representation of historical Panther tank tracks from reference material. I noticed several mold seams on the end connections which were very small and one should be able to clean up. Tracks were painted with Ammo Mig 035 Dark Tracks and Vallejo Model Color 70.992 Neutral Grey, which represents the Flat Steel (FS37200) as directed by Italeri.
Instruction Manual, Paint/Markings Guide, Decal Sheet and Photo Etch
The instruction manual is printed in black and white measuring approximately 13“tall x 7-3/4“ wide in portrait orientation. It contains 15 steps on 10 pages of clear uncluttered diagrams printed in black and white. The images for the steps also contain the paint color reference to be used along with the PE part number. There is plenty of room for notations prior to or during the building stage. The paint colors to be used are provided by Italeri in their reference number but, Federal Standard numbers are also listed for referencing other paint manufacturers. Italeri also has an excellent PDF file for conversions for their brand of paints at: ItaleriAcrylicPaint-Conversion-Chart-2024.pdf Italeri provides in the instruction manual three different versions of the Panther G:
- Version A: Unknown unit, Germany, early 1945
- Version B: Unknown unit, Hungary, early 1945
- Version C: 10th elite pz. division “Frundsberg”, Siegfried Line, January 1945
The photo etch supplied with the kit includes eleven parts that seem to be well detailed and crisp in appearance. The rope supplied appears to be a cotton piece of twine. The kit instruction manual has a template for cutting the rope to size. This is a good addition, which makes for cutting the length of rope to exact dimensions.
The Build
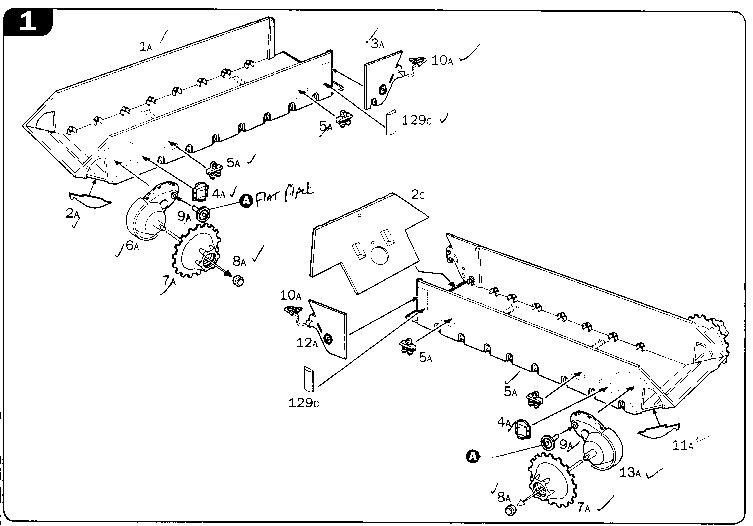
- Step 1 consists of attaching parts to the lower hull. There is one mistake printed in Step 1. Part 2C in incorrectly identified. It is located on Sprue B 37. When attaching this part 2C the ejector pin release points on parts 10A and 12A must be sanded down in order for part 2C to fit correctly as these will be seen.
- Step 2 consist of attaching road wheels there are 32 road wheels including inner and outer halves. See Parts 17a, 18a, 19a and 22a. In order not to get them mixed up, I placed them on a strip of cardboard with blue painters tape and identified each strip. After removing them from the sprues, I sanded then primed them with Vallejo Desert Tan Surface Primer 73.613. Depending on the camouflage pattern to be used, this is where the road wheels should be painted. I used Vallejo Model Color 70.978 Dark Yellow, 70.968 Flat Green and Tamiya XF-10 Flat Brown. As I noted, the camo pattern use decided how many of each road wheel needed to be painted. The rubber on the road wheels was painted using Ammo Mig 033 Rubber and Tires paint. The steel was painted with Vallejo Neutral Grey 70.992.
- Step 3 – 6: I saw no problems here in construction.
- Step 7: Here I noticed that there was a part number discrepancy. The instruction sheet states Part 77A is noted twice. Left and right side of front hull which holds the U shaped shackle is noted at Part 77A on both sides. It should state Part 77A left side and Part 76A right side as seen on diagram of parts spread out (Sprue A)
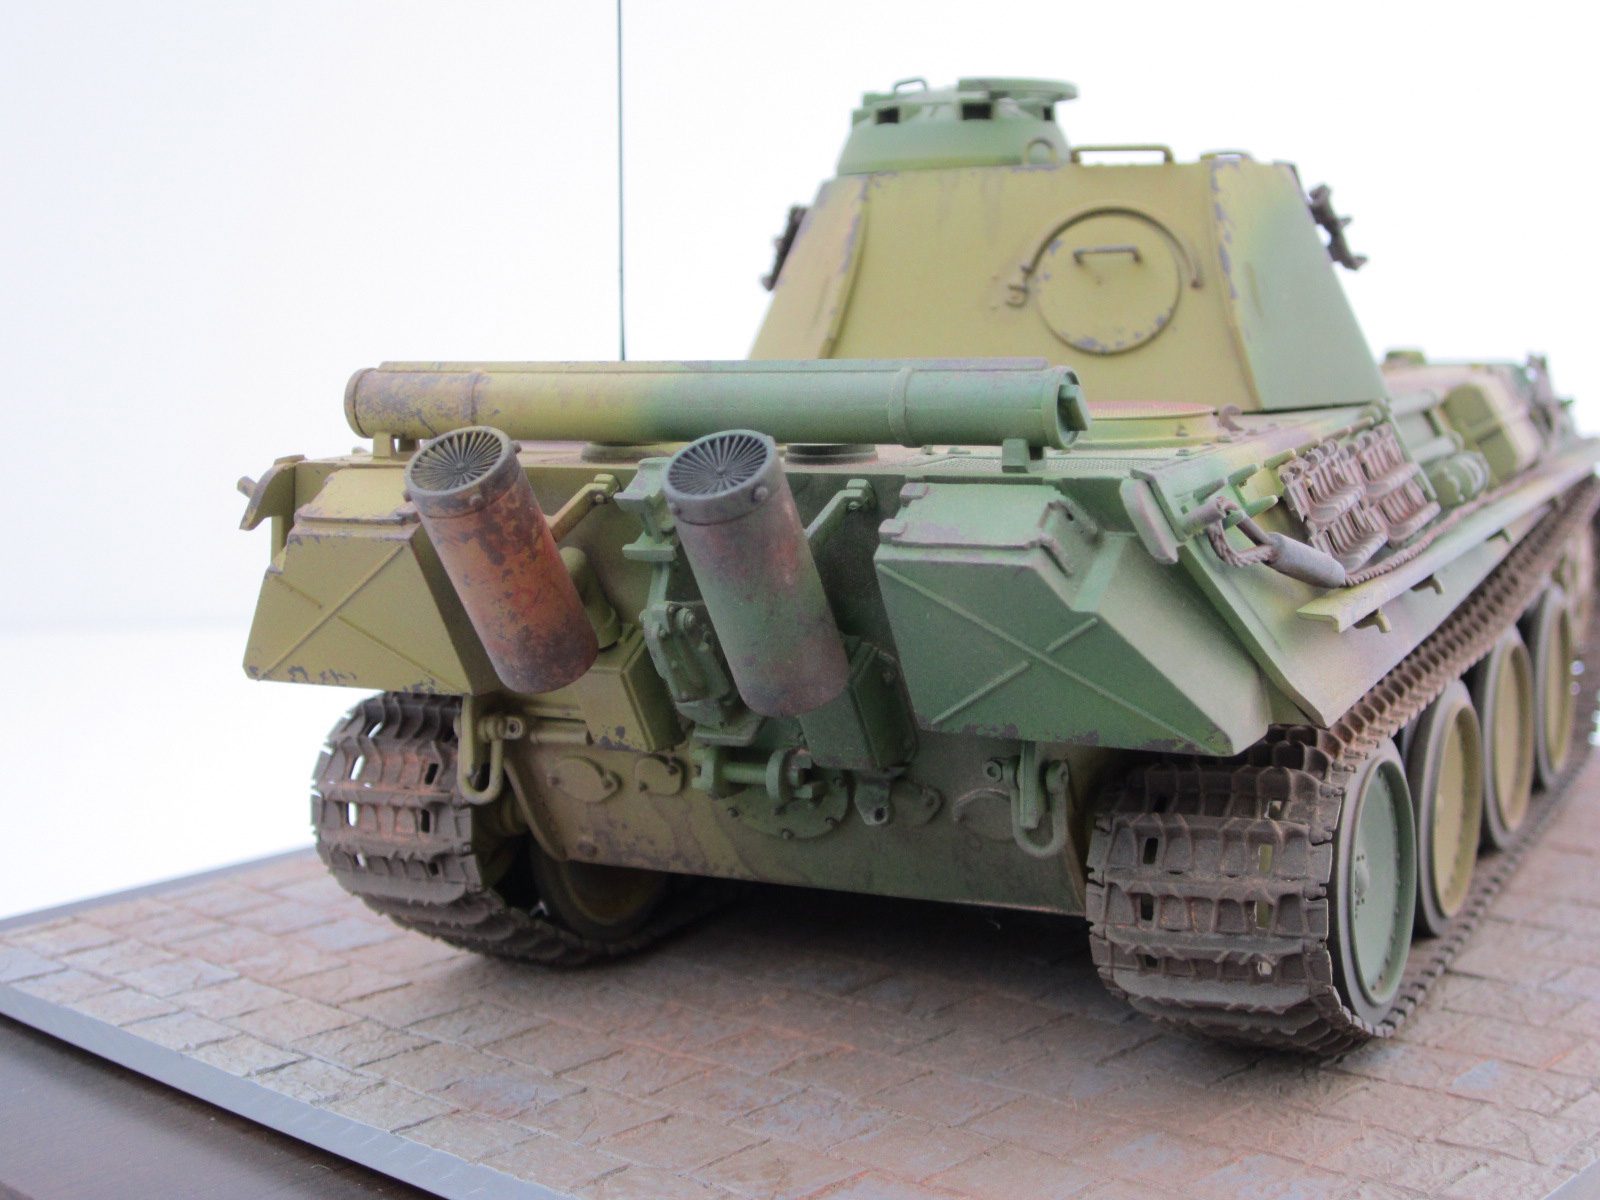
- Step 8: Part 20 B is incorrectly identified as Part 14 D. Both are at located at B20. I also attached the gun cleaning rod tube to the back of the engine deck as seen with later G models. The side mounted proved vulnerable to damage. See Culver, Bruce. Panther in Action. Warren, MI: Squadron/Signal Publications, 1975. Print. page 41.
- Step 9: No problems noted.
- Step 10 & 11 give you three alternatives to the exhaust ports.
- Step 12. There is an inconsistency in the instructions. The instruction sheet specifies two Parts 5D which in reality are Parts B3 and Parts B7. Also Part 13B is incorrectly identified on the B sprue which is really Part 28B. In addition Parts 56A are not designated on Sprue B. You have to refer to the parts layout on page 2 of the instructions. Also I thought the instructions for the aerial were ironic as they state “Stirred Plastic Aerial” instead of “Stretched Plastic Aerial”.
- Step 13 consists of constructing the turret assembly. As a note: I did not want to show the tank with the turret hatches open so parts 99C and 100C do not have to be installed. These are only used if the back hatch is to be left open. As noted earlier the mantle appears to be too consistent in foundry casting. Additionally a seam line runs across the mantle which needs to be removed. Mr. Surfacer 500 was added to replace the casting texture sanded off. Part 110C needs to be sanded down to fit properly. As to the barrel, I found somewhat of a seam line but it was easily corrected with a little sanding and putty. However, it was straight and was not warped.
- Step 14: No problems noted.
- Step 15 has you to construct the tow cables cutting the string provided at 12.5cm. If you cut to this length, the cable does not reach the attachment points (Parts 20B and Parts 126C). So measure before cutting.
- Decals: I had somewhat of a problem with the decals because of their thickness. Three applications of Solvaset did in fact allow them to lay down without silvering but a border could still be seen.
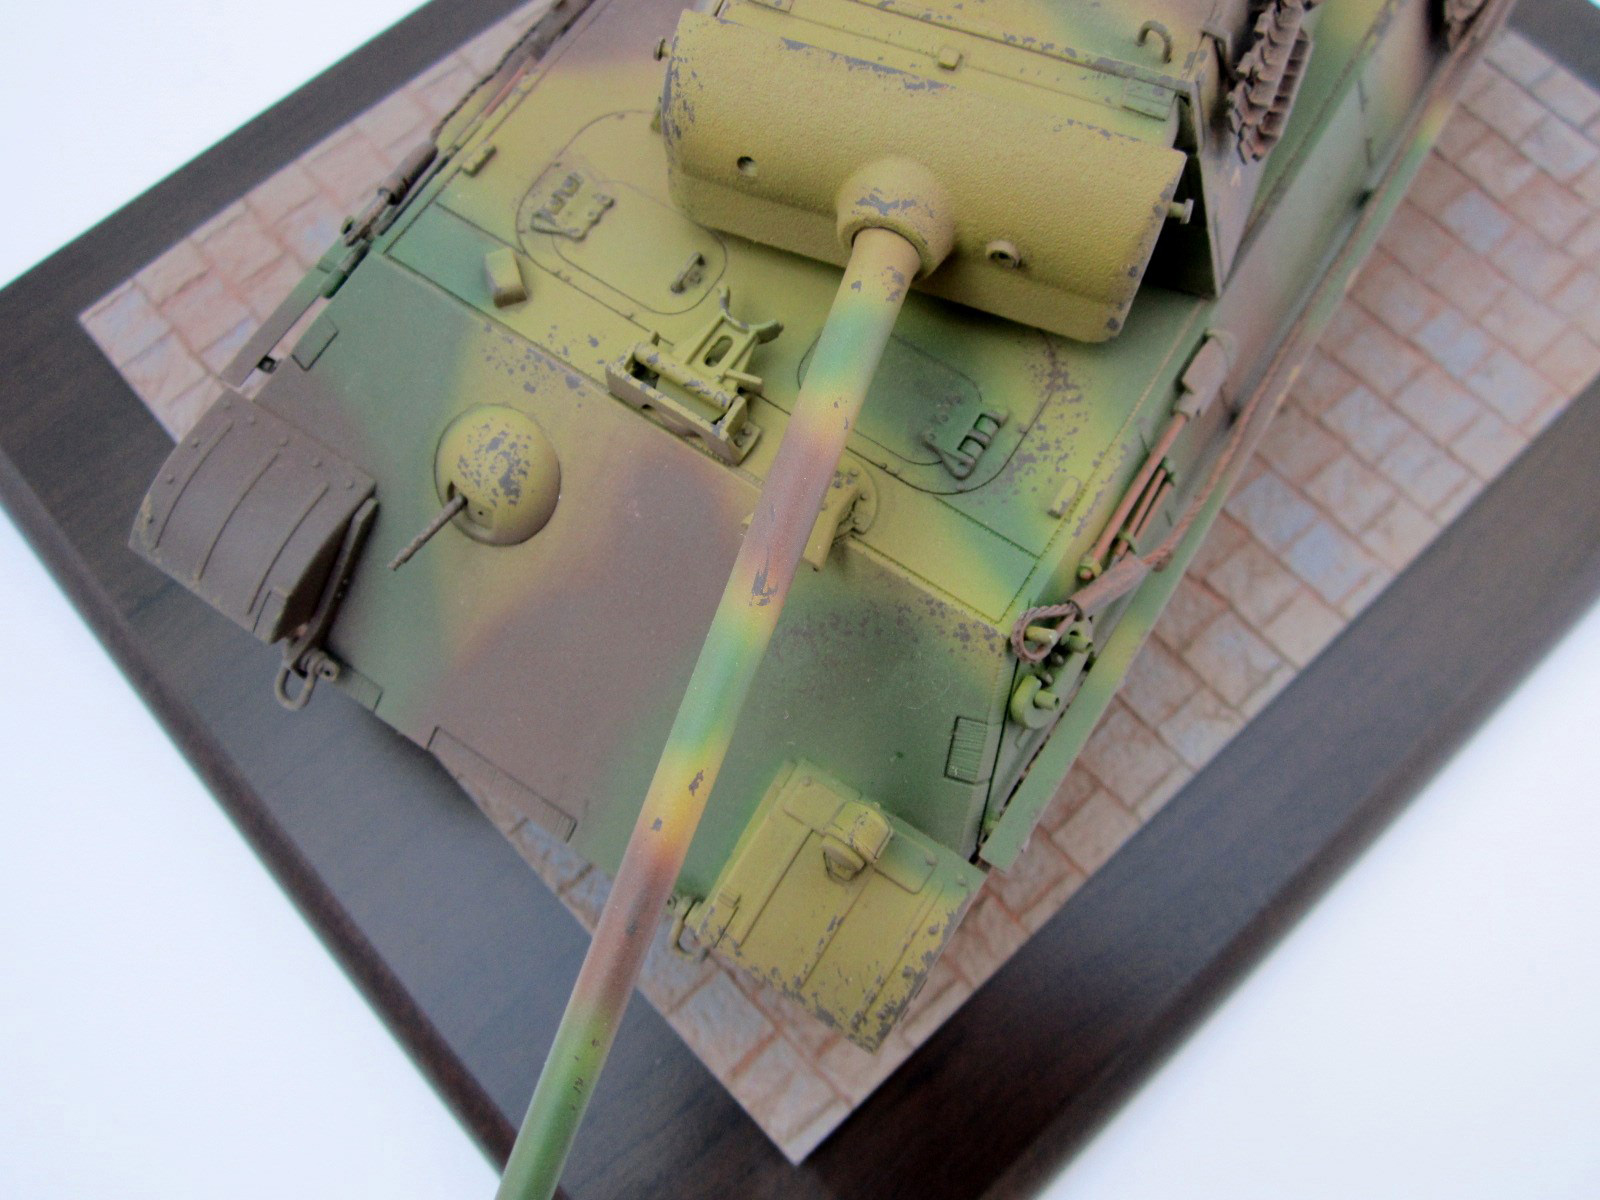
- Painting: After the tank was primed, the three camo colors painted on and decals applied, it was time for weathering. I first sprayed on a filter by using Vallejo Model Wash Desert Tan and pin washed with Vallejo Model Color Oiled Earth 76.521. Chipping was done with a sponge and Vallejo German Camo Black Brown 70.822. Rust on exhausts ports by using Vallejo Model Air 71.080 and Mig Standard Rust Pigments along with Vallejo’s Natural Iron Oxide. Then a final wash/filter by using Vallejo Model Wash European Dust. After this was allowed to dry for 24 hours a final flat coat was applied.
In conclusion, this was an enjoyable build. At times frustrating because of all the mold seams. However, the detail was very good. As to accuracy I cannot say but from pictures and a Panther walk around book the accuracy seems to be right on. Even though there are several aftermarket accessories available, building this kit straight out of the box gives a good representation of the Panther G. Finally the call out numbers for Italeri Paints and the FS numbers were a welcome addition. I highly recommend this kit.
Thanks to IPMS/USA, Italeri, and Hobbico for allowing me to review this kit.


Reviewer Bio
Phillip Cavender

Phil Cavender, IPMS/USA #50085, is a retired pharmacist from the Veterans Administration, having retired in 2011. While he explored model car building as a child, it wasn’t until 2015 that he rediscovered plastic scale modeling. His renewed interest emerged while researching his father’s military history, which led him to a local hobby shop. There, he met a former UK military tanker who reignited his passion for the hobby. After relocating to Myrtle Beach, Phil teamed up with six skilled modelers to co-found the Grand Strand Scale Modelers chapter of IPMS/USA. He now focuses on building armor models in scales from 1/35th to 1/16th.
Comments
Add new comment
This site is protected by reCAPTCHA and the Google Privacy Policy and Terms of Service apply.
Similar Reviews