
Pz.Kpfw.III Ausf. N Deutsches Afrikakorps
The Panzer III design was awarded to Daimler-Benz with production beginning in 1937. Several German companies would be engaged for full production. The Ausf N was the last variant, with many converted from previous variants. Armed with the short-barrel 7.5cm KwK 37 L/24 cannon and armored with the extra armor on the Ausf J, L, and M variants, the Ausf N performed well in Europe and North Africa, especially as infantry support. The Panzer III chassis lived on as the Sturmgeschütz III assault gun, which became Germany’s most-produced armored vehicle. The Panzer IV took over the role as Germany’s main battle tank.
DML’s box art painting depicts a Pz III Ausf. N in desert tan beside several Pz.Kpfw.VI Tiger I tanks. This probably illustrates the Pz III N’s early role with the Deutsches Afrikakorps 501st Heavy Panzer Battalion’s Tigers in Tunisia. The illustration shows plenty of stowed items, sandbags, extra track, helmets, and the raised radio antenna – and a commander figure – none of which is included. I built my model from the box but will add some of those ‘extras’ to complete my model. No escape hatch is shown, which may be correct.
This is the first 1/72 scale Panzer III kit in Dragon’s Armor Pro series. This Ausf. N variant fought with the DAK in North Africa. The kit includes all-new toolings and it draws upon multi-directional slide molding. The upper hull is slide molded as a single piece, as is the accurate lower hull. The turret is made from a slide mold, and the commander’s hatches can be shown open or closed. The mesh for the intake grills are photo-etched. This kit has already been followed by a Panzer III Ausf. L and preceded by StuG IIIs in 1/72. About a decade ago, Revell issued their Panzer III for about 25% less than Dragon now charges. From time to time, I’ll refer to it for comparison. Reviewers are quick to note that Revell provides thin-edged side and turret skirts or Schürzen. The DAK Ausf. Ns did not have them so DML is correct not to include them in this kit.
The kit consists of about 90 medium gray injection-molded parts, six photo-etch parts, a Cartograf decal sheet with one specific ‘named’ 501st vehicle, and turret numbers that allow you several options. There are two DS one-piece tan tracks. The parts diagram/instructions are typical DML with full color on glossy paper, but modelers would be better served (and DML would save some money) with a larger sheet of plain paper in black and white with more, clearer illustrations. With all kits, I recommend that you follow whatever construction sequence makes sense to you. For example, I suggest leaving all small ‘add-on’ parts until last or you will wind up knocking them off as you handle the model. I also recommend plenty of dry fitting and referring to your reference material! I usually paint my model on the trees, in this case desert sand, then touch up as necessary.
The lower one-piece hull has excellent slide molded detail. It’s not clear exactly where/how part A11 goes. None of the color paintings show the escape hatches, nor do the instructions show them. A fine raised outline is molded onto the hull sides and the escape hatch parts are provided, so rather than remove the molded-on lines, I glued the escape hatches on. My reference by Ellis stated that “…side escape doors low in the hull… were omitted after model L”. My reference by Jackson states that “The Ausf. N Panzer III issued to the 501st Heavy Panzer Battalion were converted from Ausf. L chassis.” You decide.
I suggest holding off cementing the road wheels until the upper and lower hull are together. I “painted” the rubber tires using a permanent black marker. D1 and D2 road wheels go together to make a pair, not D1 and D1 and so on as indicated on the instructions. I used Tamiya green top “Extra Thin Cement” but it melted the fine torsion bar arms/axles! I had to clean them up and affix the road wheels with cyano Zap-a-Gap Ca+ and Accelerator. I went through the same drill on the tiny return wheels which Dragon thankfully molded each pair as one part. Be careful removing them from the tree as the fine ‘string’ tree attachment will be their torsion bar arms/axle unless you melt them as I did! Friends of mine recommend using good old Testors liquid cement which I’ll go back to. For now, I’ll accept the blame for melting those axles, but caution DML that sometimes they have to forget scale fidelity and instead provide what is practical. Thicker axles won’t be seen and will make a stronger bond. Note that the drive sprocket separate housing’s (D8) hole must align with the socket molded onto the hull, so that the drive sprocket will engage it. All the double wheels that have a key and matching socket to line up (i.e. on the drive sprockets…) would benefit from a more robustly molded connection.
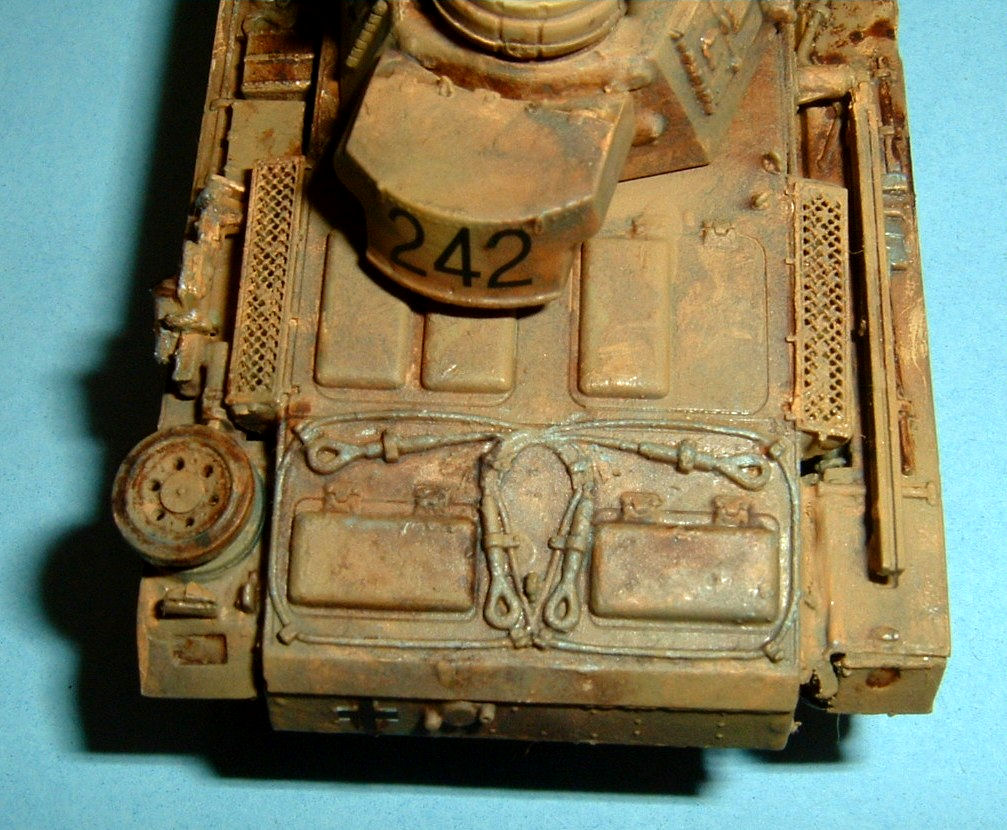
The separate fenders/mud guards require careful placement to be attached to the hull at right angles. Revell has them molded to the upper hull. DML’s instructions are confusing at first as each fender is shown near each other, facing opposite directions. Some of the tools and the fire extinguisher are molded onto the fenders and difficult to paint. DML has made a great effort though, as the lights, stowage boxes, wood block, and jack are separate parts. DML’s headlamps, Notec, and rear lights are amazingly well done and minute! Note that the final fender section on the right-hand side is scale thinness (!) and correctly has a circle molded on it. This in fact was cut out on the real tank, for if this ‘flap’ were secured in the raised position, the rear light would fit through it. Similarly, on the left side there’s a square – this too could be cut out. Don’t fill them in with putty – and judges, don’t demand that they should have! Many (all?) Ausf. N fenders had an anti-skid plating that Dragon did not simulate but Revell does. DML’s photo-etch intake grills add that over-the-top touch.
When assembling the upper hull, note that the spaced armor part A17 does fit against A16 at a slight angle, not vertically. The photo-etch plate over the front appliqué armor MB1 correctly aligns on the left-hand side, and does NOT extend across the hull from side to side. There will be a seam where A3 meets the bottom hull front that has to be filled to look like a weld seam. Add your favorite weld line to connect them. The machine gun has a hollow barrel that is simply amazing! Way to go, Dragon!! Unfortunately, the tow cables are molded onto the engine deck too true-to-scale and too difficult to paint. The six rectangular engine vents are also molded down onto the engine deck and could have been separate, raised parts. Up front, unfortunately, all the hatches and viewports are molded closed, as are the side ports. Except for the side ports, Revell provides a separate tow cable, engine vents, hatches…
The turret is molded as one main piece with the side hatches exquisitely done – but closed. The grab handles just above the side hatches are molded solid onto the roof, as are Revell’s. The counter-sunken screw heads are exquisite, as are the molded-on hatches. To the rear are the oft forgotten pistol ports just in front of the bottom corners of the stowage bin. Minute detail trims the rear stowage bin. The commander’s hatches are provided as thinner than paper halves with the padded interior, topping off a very fine cupola that is molded with all the ports closed. The machine gun has a hollow barrel – again, an amazing feat! The short-barrel 7.5cm KwK 37 L/24 cannon is hollowed out as well. The smoke ejectors are well done but are all fixed at the same angle whereas the real ones were set at different angles.
The instructions tell you that you can stretch the DS track if necessary. I found that the track was just a little short and carefully stretched it. You can always cut away excess track, or add some sag to it if it’s too long. I painted it after stretching as I have heard that if you paint, then stretch, the stretched areas won’t be painted. I don’t believe the Panzer III ran with slack track. The finished kit will definitely look the part if you “borrow” spare track and try for the box top spare track scene!
I put Future floor wax where the decals would go, applied the decals without having to trim away the clear carrier film, then covered and sealed them with more Future. The Future “disappears,” sucking the decals down so I don’t need to use a separate decal solution. When dry, I covered this with a clear flat and the clear carrier film between the numbers, etc., totally disappeared without leaving any telltale film or silvering. If it had, I would simply prick the bad areas with a sharp knife and add more Future.
I used the “named” Panzer III N that was knocked out and photographed during the war. There’s a story behind this tank. George Bradford, founder of AFV NEWS, first discovered this Panzer III N named "Mauseauge" of the 501st Independent Heavy Tank Battalion and published a photo and color illustration of it in his book Armor Camouflage & Markings North Afrika 1940-1943. Mr. Bradford is one of the pioneers who did the original research and interpretations of his findings in photos and interviews that made the difference between casual modelers and serious researchers and historians. Many of us owe him a tremendous debt of gratitude. Regarding "Mauseguge," George interpreted the black and white photo at the time that the name read as "Mauseguge" (note two ‘g’s) in red, against a pea soup green background on the mantlet, translating as “mice peeking out,” according to “…a German employee of the printer I worked for back in 1970.” Since then, George learned that it read "Mauseauge" with one “g,” “…meaning ‘mouse eyes’. This was nailed down by my (Bradford’s) German son-in-law in the 80's.” “In Tom Cockle's book Armor of the Deutsches Afrikakorps by CONCORD, you will see that he also shows Mauseauge on page 69, right above a frontal view of it numbered as 242. The 242 is VERY delicate with a fine white outline to boot. Colour is again unknown… (but) The ‘Mauseauge’ is shown as RED on an Olive Green band on the mantlet… his thinking has changed from red to black in the past 12 years.” Tom is listed as a Technical Consultant to Dragon on this kit, and though he and Cartograf got "Mauseauge" spelled correctly, they decided it should be black, not red, and the black 242s have no white outline. DML doesn’t show it, but provides a second 501st stalking Tiger insignia that Bradford shows repeated on the rear engine plate. Underneath the stalking Tiger should be a “script ‘s’ enclosed in the panzer symbol box…” not provided on the decal sheet.
I highly recommend this Panzer III N to experienced Braille scale modelers. Its biggest drawback are the potentially weak axles that could discourage a modeler. To be the best 1/72 Pz.Kpfw.III Ausf. N model available today, it would need the larger, easier to follow instruction sheet with a brief “history” of the vehicle, thicker axles, pose all hatches and some view ports open, and provide some of that stowage and perhaps a commander and other figures. A separate tow cable and pioneer tools (even if larger than scale), Schürzen side and turret skirts and brackets, and non-skid texture on the fenders/mud guards (already attached to the hull) would make this an easier and most attractive build. As is, you can kit bash with the older Revell kit but still fall short of a truly “best” Pz.Kpfw.III Ausf. N. Dragon continues to be one of the more expensive small scale kit manufacturers, but I think more modelers would be pleased to spend the money if they knew the kits truly aimed to be the very best.
I hope Dragon does not continue to release more 1/72 German vehicles when there are still so many long neglected Allied WWII tanks and soft skins, as well as non-German Axis vehicles. Their brief look at Japanese vehicles was a breath of fresh air, but “a tease” if others will be neglected! Dragon’s releases of U.S. and U.K. vehicles was encouraging, but many different Churchill variants remain to be kitted, as they did with the Sherman. In fact, pretty much all of the 1/72 major English tanks and AFVs have either never been done in injection molded plastic or exist in a poor state of the art that would truly benefit from Dragon’s superb quality. Imagine, all new, state of the art “Braille Scale” (1/72) Honeys, Lees and Grants, Valentines, Matildas, Humbers and Dingos, A-13s, Crusaders, Achilles, Comets, Challengers, Archers, Bishops, a U.S M15A1 AA half track, “and more!”
Thanks to DML/Dragon for the review sample and thanks to IPMS/USA for allowing me to build this kit.
References
- Armor Camouflage & Markings North Afrika 1940-1943 by George Bradford pg 79 has b&w photo and pg 81 has color illustration of sPz.Abt. 501, Tunisia, 1943, sand, black 242. It looks like a strip of ‘pea green’ is behind the name, “Mauseguge”.
- TANKS of World War II by Chris Ellis
- Tanks and Armored Fighting Vehicles Visual Encyclopedia by Robert Jackson Pg 119
- Panzerkampfwagen III, Osprey Modelling Manual #15 by Rodrigo H. Cabos & John Prigent.
- Panzerkampfwagen III Sd.Kfz. 141, by Nikos B. Livadas & Manuele Villa, Periscopio Publ.
- Modelling the Sturmgeschutz III, by Gary Edmundson
- Rommel’s Panzers, by Christer Jorgensen, Motorbooks Int’l Publ.
- Rommel’s Afrika Korps, by Pier P. Battistelli, Osprey Publ.
- Dragon 1/72 Pz.Kpfw. III Ausf. N DAK by Chris Banyai-Riepl
- Pz.Kfw. III Ausf. N DAK (Deutsche Afrika Korps) by Stephen Brezinksi
Additional photo captions
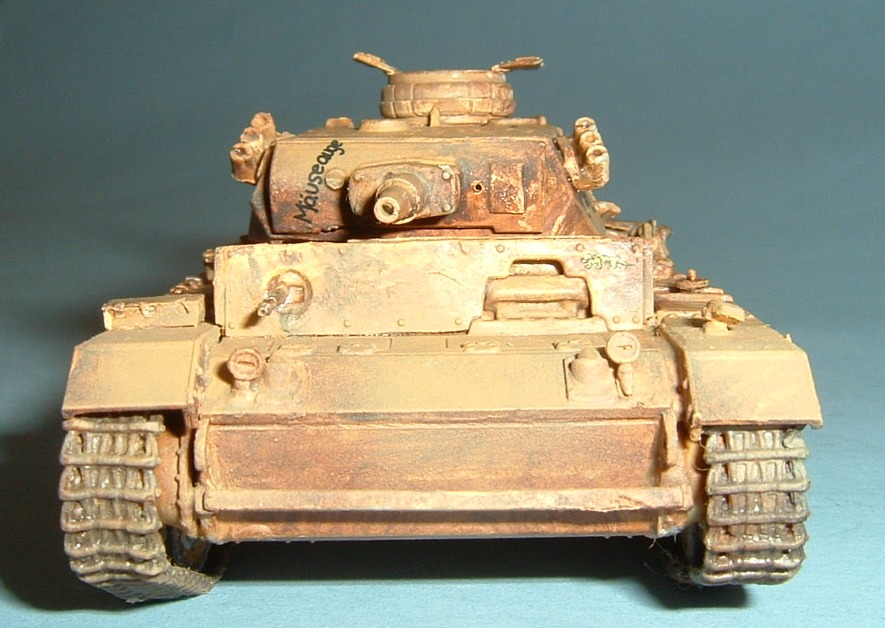
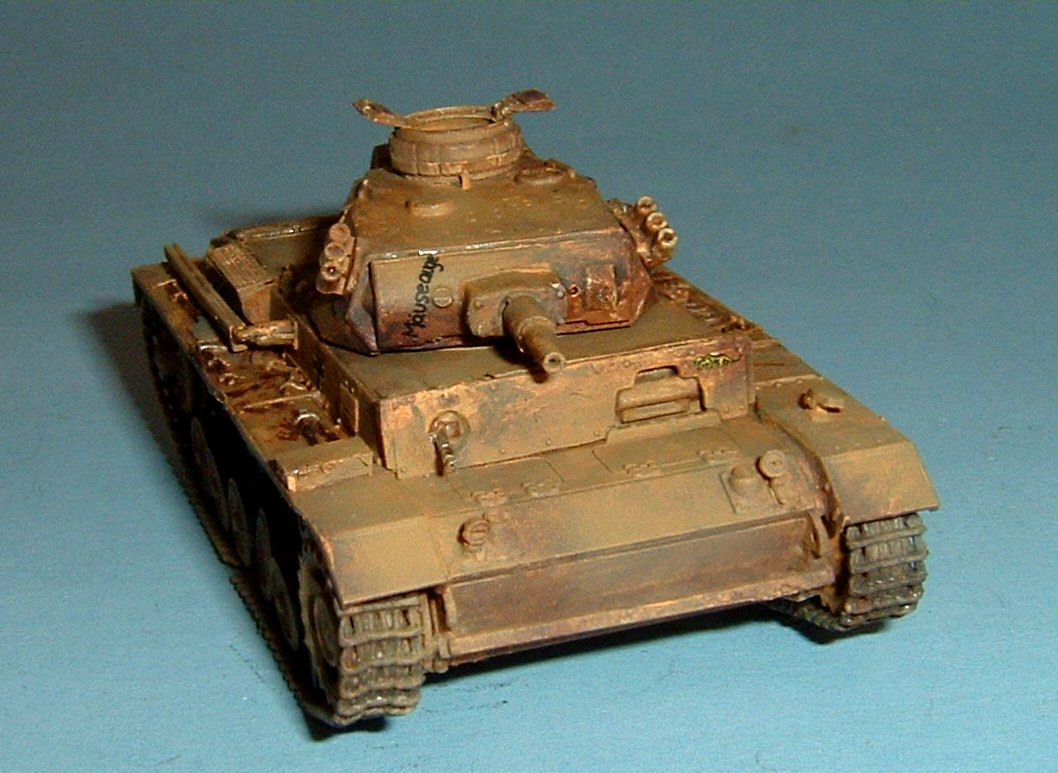
- Front view shows the name ‘Mauseauge’ on the mantlet in black, without pea green background. The tiny 501st stalking Tiger appears to the right of the driver’s visor but is hard to discern. A close look shows the mg barrel is drilled out! The seam where the hull top and hull bottom meet needs filling.
- The tiny 501st stalking Tiger appears to the right of the driver’s visor but is hard to discern.
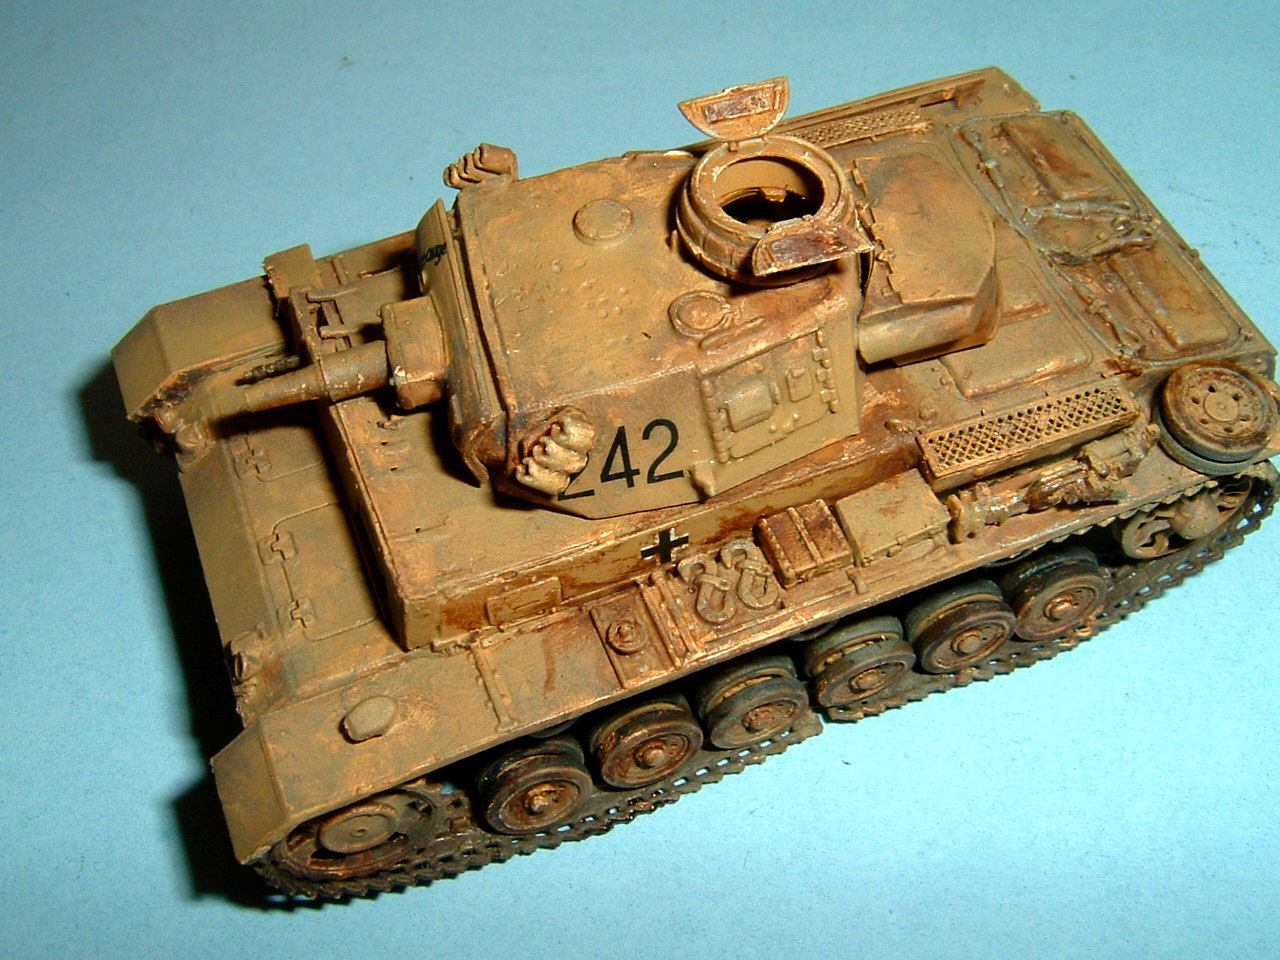
- The rear fenders are very thin, and have the square and circle knockouts indicated. A second stalking Tiger insignia could be placed on the rear engine plate.
- Note that the photo-etch plate over the front appliqué armor MB1 correctly aligns on the left-hand side, and does NOT extend across the hull from side to side.
- The tow cable is molded on the engine deck. Take care not clog the photo-etch intake grills.
- The clear decal film disappeared with the Future floor wax decal system. The commander’s hatches are thinner than paper and await the arrival of the commander. You can barely see the counter-sunk screw heads in the turret roof in the photo but they are prominent on the model.


Comments
Add new comment
This site is protected by reCAPTCHA and the Google Privacy Policy and Terms of Service apply.
Similar Reviews