
Pz.Kpfw. IV Ausf H Late Production with Zimmerit
Dragon certainly has produced a lot of Panzer IV kits and this latest one comes with some parts with Zimmerit on them, so you don’t have to apply it. This kit, other than the new Zimmerit parts, is a duplicate of their earlier kit no. 6300 (May 2009) of the Panzer IV Ausf H late production. Dragon also has supplied DS tracks rather than a set of “magic tracks”. We’ll see during the build how this works out. In the Dragon fashion we have at least 23 sprues (two of which come from their Brummbar kit) and as the box top states “over 520 parts”. I did not count the total parts, but just the parts marked "not for use" came to 158. I used about 200 parts on this model, so your spare parts box will have a large addition.
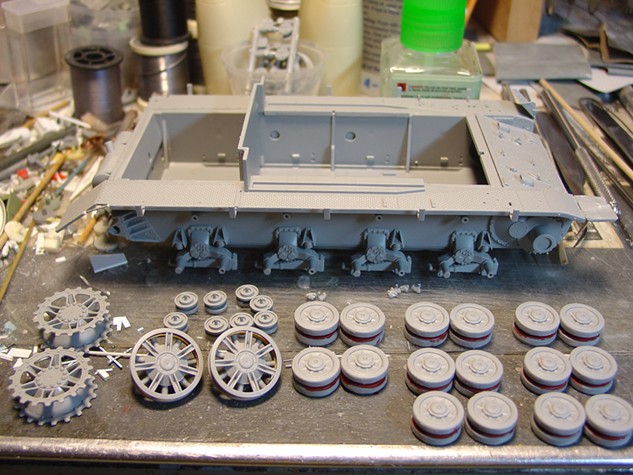
As is Dragons custom, the instructions have many cases where you are given a choice on which parts to use, but with no explanations. Since we’re building a late Ausf H, the very first choice is what type of idler wheel to make. You’ll have to check your references for the vehicle you’re building, but most late Ausf H used the cast idler wheel (parts A11, A7 and two MA 9s) while the tubular idler wheel were used on the Ausf Gs and on some Ausf Hs. Another choice is on what type of steel return rollers to use. Late Ausf H mainly used the one without the spokes (A13 and A14).
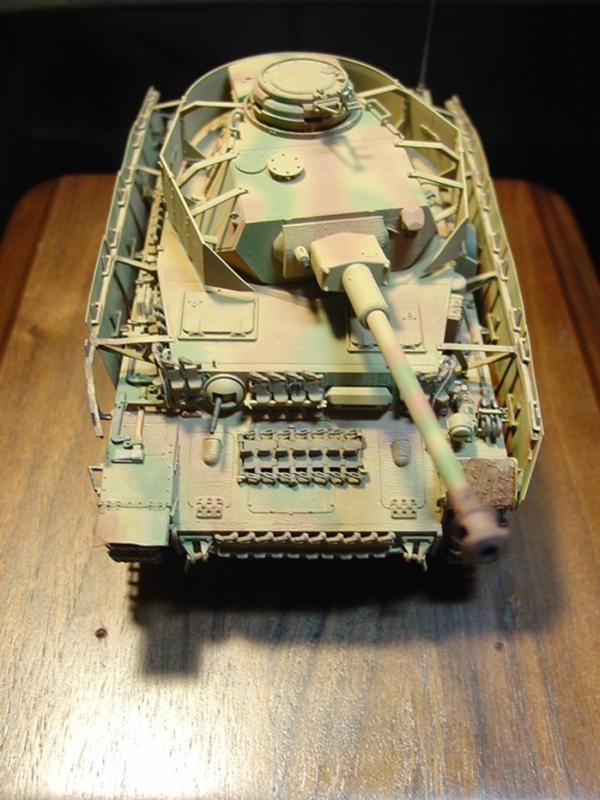
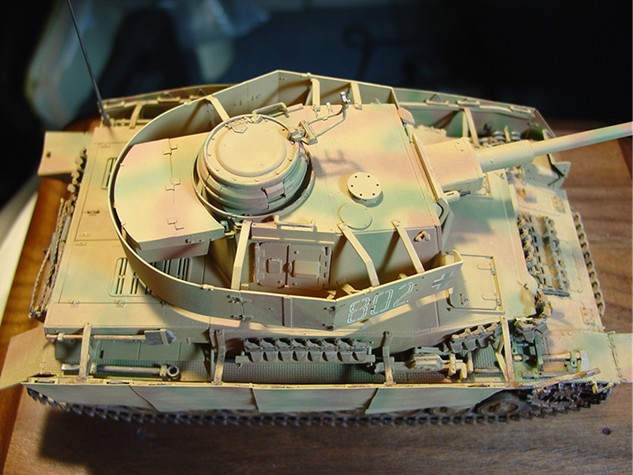
The first two pages (Steps 1-7) assemble the hull and running gear. The only thing I did differently was put the road wheels together. I didn't put them on the model until the hull was painted later. One thing to note: the hull (part X) has three pieces of plastic on each of the upper sides and to get part T3 and the fenders (K1 and K2) to sit flush with the hull these have to be removed. (see photos 1 and 2) I don’t know if these protrusions were left over from the molding process or not, but the Dragon Brummbar hull has the same pieces on its hull as well. As a personal choice, I also did not attach the spare tracks at this time, again waiting until after painting the hull.
The next page (Steps 8 and 9) has one assembling the upper hull parts and then putting it all together. I had no problems getting a nice tight fit -- just go slow and check your work. A few dry fittings will help. (See photo 3) Again I assembled the tow cable but left that off till later in the process. Steps 10 and 11 have a lot of parts as it deals with the tools that go on the fenders. Most of the choices here deal with whether you want to use the photoetch part or the plastic part. In this case, I went with the plastic parts. I removed the tools, assembling some, and spent awhile removing the seam lines from them. When that was done the tools were set aside to be painted later. After the hull was painted, I glued the tools onto the fenders.
Steps 12 – 17 deals with the turret. I had decided to keep the tank closed so some of the Dragon details would be missed. One such is the cupola, which allows you to decide which vision ports you want open or closed. Each vision port is provided with a clear part (M2) to represent the armored glass. The completed cupola has 22 parts and is very detailed. You are also given four choices for the canons muzzle break, but for the late Ausf H the third choice from the left is the one to use. The furthest right is used on a late Ausf J and the first two works on the Ausf G and the earlier Ausf Hs. Everything in these steps assembled with no surprise. The only deviation on my part was not gluing the turret side shields on at this point, as I wanted them off to make painting easier.
Since I was going to use the “schurtzen” shields, I skipped the first part of Step 18 and went to the second part applying the shield supports and braces. For the late Ausf H you’ll need to use the support with the clipped ends (N-1). The last step (19) deals with the shields, which seems to be made from what I believe to be a very soft aluminum. I removed the shields from their frame and placed them on cardboard with double-back tape. The hangers were removed, cleaned up and glued to the shields where marked with CA. After curing, the shields were sprayed with Mr. Surfacer 1200. They were flipped over and then sprayed with the primer again, when I pulled the shields off the tape had pulled the primer off the shields. This was even with me cleaning them with acetone before painting. Luckily, I have a small bead blaster so I hooked it up and with the shields on cardboard I blasted off the primer and roughed up the surface in the process. During this I was fortunate that the hangers did not blow off. The shields were then painted with the same primer and this time it stayed on. My recommendation is that before you remove the shields from their frame, use some steel wool or fine sandpaper to scuff up the surface for the paint to grab onto. Also the sand blasting made the soft material of the shields bow and I had to use a tongue depressor to flatten out the sheets. This caused horizontal marks or lines which turned out to be okay because it make the shield look distressed from action. After the shields were painted, I put them aside to be put on near the completion of the build.
As in most armor builds, the construction amounts to 40% of the time and the painting and weathering the other 60%, at least in my case. Mainly, I like paint using enamels or lacquers. I recently bought some White Ensign Models ColourCoat paints that I used on this model: WEMCC ARG11, Dunkelgelb, WEMCC AR05 Olivgrun, and WEMCC ARG09 Signalbraun. They have very fine pigments, mix up well and paint on very smoothly to a nice flat finish; this was after thinning 1:1 paint to lacquer thinner. The model and unattached parts were spray painted with the Dunkelgelb, first allowing a full day to dry. Then the brown and green were applied with the same drying time in between. During the down time, the tools, tracks and various other parts were painted. After all the paint had cured, I applied a light thin coat of flat clear lacquer paint to seal the enamel from any weathering I would do later.
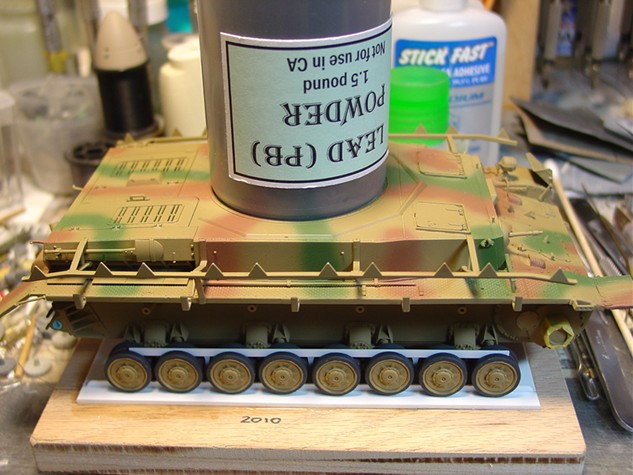
Next on the agenda was to attach the painted road wheels. This was the only instance that I feel Dragon let me down. The fit of the road wheels onto the shafts was very sloppy. So much so that I didn’t think I could get them all aligned and glued on. But, after some thought, I came up with a fixture to do the job. First I placed a road wheel on each side. While holding them in place, I measured the separation between the wheels from side to side (this came to 2.82”). I cut a piece of 1/16 inch plastic into a 3.5” x 5” rectangle and glued that onto a piece of plywood with 5 minute epoxy. I then took a piece of Evergreen styrene stock .030” thick by .080” height and cut two pieces five inches long. Drew a center line on the styrene sheet and measured half the distance to one side and then repeated it on the other side. After doing this twice, I connected the dots so to speak and glued my rails on so the .080” dimension was sticking up. This allows me to keep all the road wheels in alignment as the adhesive cures. I wanted a slow setting epoxy and finally found one at a hardware store that sets up in 50 minutes. Because the fit was so poor, I added some micro balloons to the epoxy to thicken it up, but you can use talc powder to do the same. The thickened epoxy was placed on the shafts and in the road wheel holes. One side was put on and then the other. The model was then set on the rails, alignment was checked and a weight was placed on top. (See photo 4.)
The next day everything was rock hard, straight and true and I dodged another bullet.
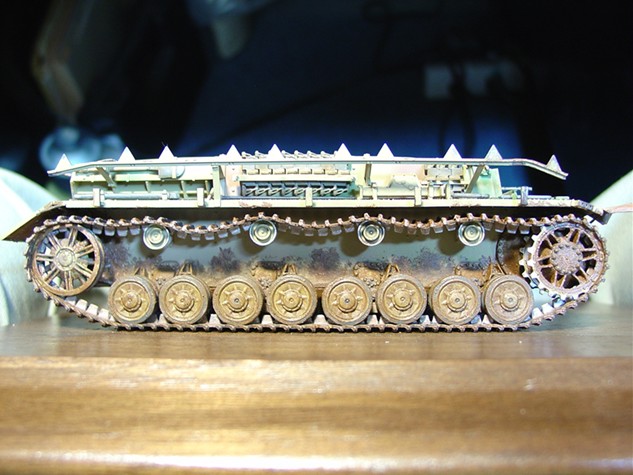
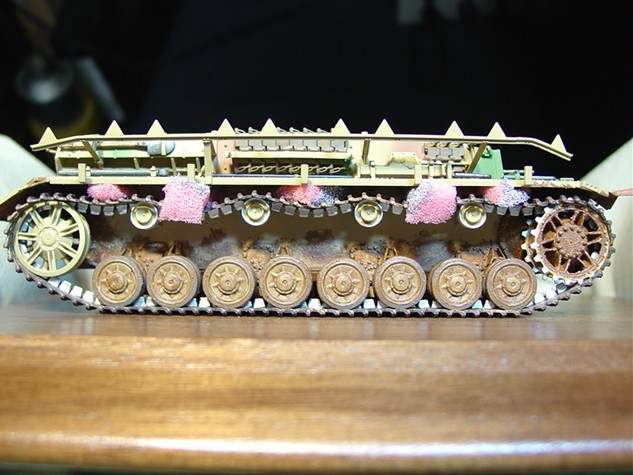
Next came the tracks, the DS tracks. Personally, I like the magic tracks or any link-to-link type tracks; just my opinion. The DS tracks at first glance look very good, but they do have that soft flexible feel to them. So, oh well, might as well give them a try. Straight pins were used to hold the two lengths of tracks to a piece of cardboard and I spray painted them with some Testors rubber enamel paint (very dark brown color). After both sides were painted, I gave the tracks a light rust color wash and painted the teeth with a flat Aluminum enamel. After test fitting the tracks to the model, I realized that with the idler wheels in their position I needed to cut off two links to get a good fit. Using a straight edge razor blade, that's what I did. Dragon claims that plastic cement will glue the two pieces of DS track together, but to not take any chances I placed the joint under one of the road wheels just to help matters out. Well, it works. I used some thin Tamiya cement and the joint cured and has held and I felt like I dodged another bullet. To get the sag on German “dead” tracks I put some foam between the fenders and the tracks and then applied the thin Tamiya cement to the return rollers. Even though these parts were painted, the joint held. When I removed the foam, I had the sag I wanted. I am officially impressed. (See photos 5 and 6.) Finally, I mounted the model to a base. I drilled a hole in the base and in the lower hull bottom, put a bolt in the base and placed the model over the bolt threads. A nut and washer hand-tightened secured the model firmly to the base for the next objective.
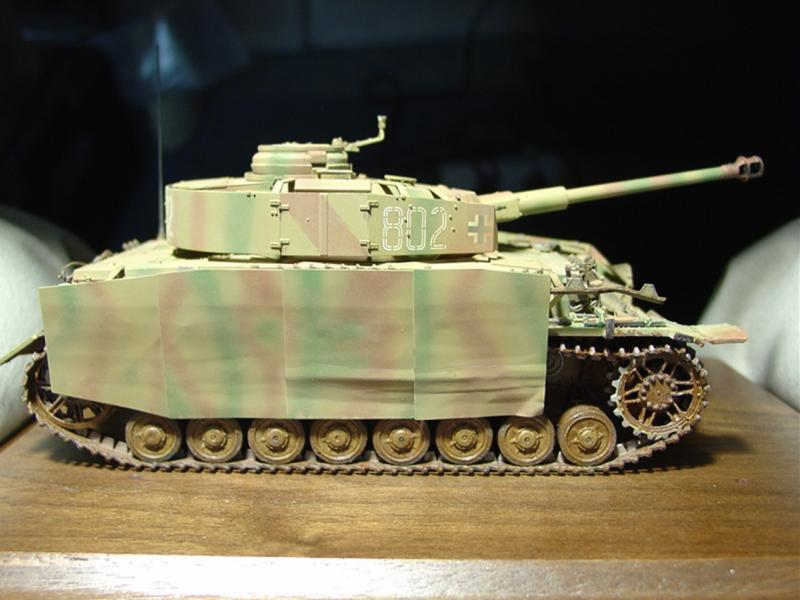
At the beginning of the build I had decided to use the kit's decals and chose to make white 802 of 8./Pz.Rgt.3, 2.Pz. DIV., Normany 1944. I must say I was surprised at how well the decals went on and how good they looked. Dragon decals are printed by Cartograf and they are very thin, spot on registration, flat and have no film to trim off. Perfect, but for being dangerously thin. If you’re not careful in placing the decals on the model with the paper still on them you risk the decals folding onto themselves in a heart beat.
So how do you like your weathering, wet or dry or maybe both?
I had decided on the wet and dry approach, which entails a muddy track, etc…and a dry dusty tank. For the dust and mud, I used MIG pigment P028 Europe Dust. As used straight, this pigment will be used for the dust and dried dirt build up. Add MIG Acrylic resin and you get your mud. The mud was placed on the tracks, around the drive gears and idler wheels, road wheels and other places. One of which was the inside surfaces of the shields, as mud will be flung everywhere. Once the mud had dried, the painted tools were attached to the fenders. Now the shields were attached. Dragon doesn’t tell you this, but you need to put the shields on by starting at the rear and working forward. (MC5 to MC1 and MB5 to MB1.) That way you’ll get the proper overlap. The plastic front shield ends are placed on last and for the late Ausf H need to be the ones with mud cut outs, N12 and N13. Various scratches and nicks were recreated using fine tip brushes and enamel paints and well as using graphite from a No.2 pencil.
The last items were now placed on the tank. The turret shields were attached to their brackets. Additional track links were attached to the superstructure for added crew protection and the tow cable and antenna were attached finishing this build.
This was and enjoyable build and I can highly recommend this kit to any armor builder. You have a lot of detail here to use as you see fit, tons of options and great potential. Just take your time, check your references and have fun.
I want to thank Dragon USA for the opportunity to review this product.

Comments
Add new comment
This site is protected by reCAPTCHA and the Google Privacy Policy and Terms of Service apply.
Similar Reviews