
Pz. Beob.Wg.II Ausf.C
History
The Panzer II was widely used in early campaigns of WWII such as the invasion of Poland, the Low Countries, and France. The main armament of most Panzer II variants was the 2cm Kw.K30 L/55 cannon, and a coaxial MG34, although the main gun was ineffective in the anti-tank role. One interesting conversion of the Panzer II was its use as an artillery observation vehicle (Beobachtungswagen). The armament was retained, and its most obvious external recognition feature was the fitting of a frame antenna on the rear deck. These Pz.Beob.Wg vehicles were successfully used in the target acquisition and artillery fire observation roles, primarily with self-propelled gun units. (sourced from the DragonUSA website).
The Kit
Dragon continues its strong (and long) foray into the seemingly never-ending line of Panzer variants...and the Panzer II is no exception. This version of the Panzer 2 sees the variation to the base C version (Ausf. C) into an artillery observation vehicle (Pz.Beob.Wg). My overall impression of this kit is a good one, as it fits nicely into an intermediate or advanced modeler's collection of WWII armor, and even more so for the modeler looking for a challenging build to compete at a show. It has all the basic elements to make it shine, and just a couple of aftermarket additions will be make it an eye catcher.
For those of you familiar with Dragon's armor kits, it will come as no surprise that there are more parts than you will use in this kit. This is a basic Panzer II C along with a long-range HF antenna (in the form of tubing), and a high-power scope (perfect for observing the placement of impacting artillery rounds) mounted between the 2 cm KwK 30 L/55 autocannon main gun and the coaxial 7.92 mm MG34. In all there are 519 parts (styrene, clear, and PE), along with 200 individual track links (MagicTrack). 197 of the styrene parts are marked “not for use”.
This kit comes with a rudimentary interior that shows off the main fighting compartment. The interior detail ends there and does not extend to the rear in the engine compartment. PE helps dress up a piece or two in the fighting compartment, but not much more. The rest of the decent-sized PE fret is consigned to the exterior of the tank. The interior is a welcome addition, especially in the ever-increasing competitiveness of the Out-of-Box Armor categories at many shows nationwide. Posing your Panzer II with open hatches AND something to look at inside definitely gives it an advantage.
Parts
- Molded in desert yellow styrene: 496
- Molded in clear styrene: 23
- Phot-etch fret: 1
- Individual Track Links: 200 (100 per side)
- Decal sheet (markings for 5 different versions)
The Build
Typical of Dragon they give you options in the instructions for different variants but fail to explain anywhere in the instructions which variant applies to the build you are executing. For example, the rear idler wheel has 3 different options, but for the Pz.Beob version I was building of the Ausf. C, I had no way of knowing unless I did some extensive research. I did do a cursory search with no luck. I'm sure more extensive research would have helped, but I wanted to press on with the build - although my educated guess is that different factories produced the varying wheel styles. As a student of German armor I am still learning the subtle differences within each class of tanks...rear idler wheels on the Pz. II C fall into this category.
Cleanup of flash, sink holes or ejection pin marks is minimal. One visible area that you need to pay attention to is ejection pin marks on the insides of the front drive sprockets, as the finished build will expose these quite easily. There are also some confusing parts of the instructions with regards to part numbering. For example, the instructions call out for a part J71 but this part does not exist in the kit, even on the parts overview drawings on the cover of the instructions.
A curious aspect of the PE is that Dragon includes PE tool latches for only two places, and the rest are molded into the styrene tool - the old way of doing business. Why Dragon did not include the option for PE latches on all the tools I do not know. This opens up the option for aftermarket addition of PE tool latches to be added.
The fit of the upper hull to the lower hull is a challenge. The parts that make up the interior of the tank will get in the way of the upper hull as it closes with the lower hull. It took some forcing and clamping while the glue cured overnight. See the corresponding picture depicting my clamping the hull shut.
The mantlet fit is tricky and the instructions are not abundantly clear as to the sequence of construction. The sequence is important yet the instructions just show a number of parts with arrows all converging on the same general area of the front of the turret.
The turret overall is a bit fiddly and you need a lot of hands to help get everything together correctly. Add to that if you wish to paint the turret interior, like I did. It takes some planning ahead, and you must paint the individual parts before you begin the interior assembly. Even if you go for a straight build without any painting (of the interior), it takes at least an intermediate level of skill to get the pieces to fit together and secured in-place.
A pleasant surprise for us veteran armor builders is the inclusion of the older MagicTrack. These are individual link track sets and each side is molded in a slightly different color gray. This makes it easy to distinguish right from left-side tracks. I point this out because other Dragon releases as of late include "DS Tracks" which are essentially one-piece tracks (similar to one-piece vinyl tracks) that on German Armor are very hard to display properly (i.e. sagging between return rollers). The MagicTrack went together without problems and using Testors liquid cement gives you enough time to pose them around the various wheels and produce the required sag. Once cured they come off easy for priming, painting, and weathering.
Finishing
When it came to finishing, I experimented with a new primer: Mr. Hobby’s Mr. Finishing Surfacer 1500, black, out of a rattle can (see picture). I can report that this primer is outstanding. I’ve seen of late more and more armor builders going for a black base coat in an attempt to “pre-shadow” so that light coats of the base color will allow the “shadows” of the black to easily show through. I then put down a coat of Tamiya XF-60 (Dark Yellow) lightened up a tad with a few drops of XF-57 (Buff). A fellow member of my local armor club turned me onto the use of Tamiya XF-71 (Cockpit Green) as an alternative to the standard green used in German camo schemes. The actual color is darker than the bottle cap so in my opinion it looks pretty good. I then put down an oil wash to highlight some of the excellent detail. I did not do anymore weathering since I like to keep my review builds relatively clean so the details and the quality of the kit is not hidden.
Conclusion
With all the build negatives aside, and they are all easily surmountable with a little bit of skill, the kit builds nicely into a specialized Pz II Ausf C. Overall I spent 17 hours on the build and another 6 painting and weathering (to include the interior) for a total of 21 hours on this light tank. I can easily recommend this kit to advanced builders of armor, and also to intermediate skilled builders with more patience and willingness to research, as well as being familiar with the build-philosophy of Dragon's instructions (i.e., numerous options for different parts).


Kit sprues
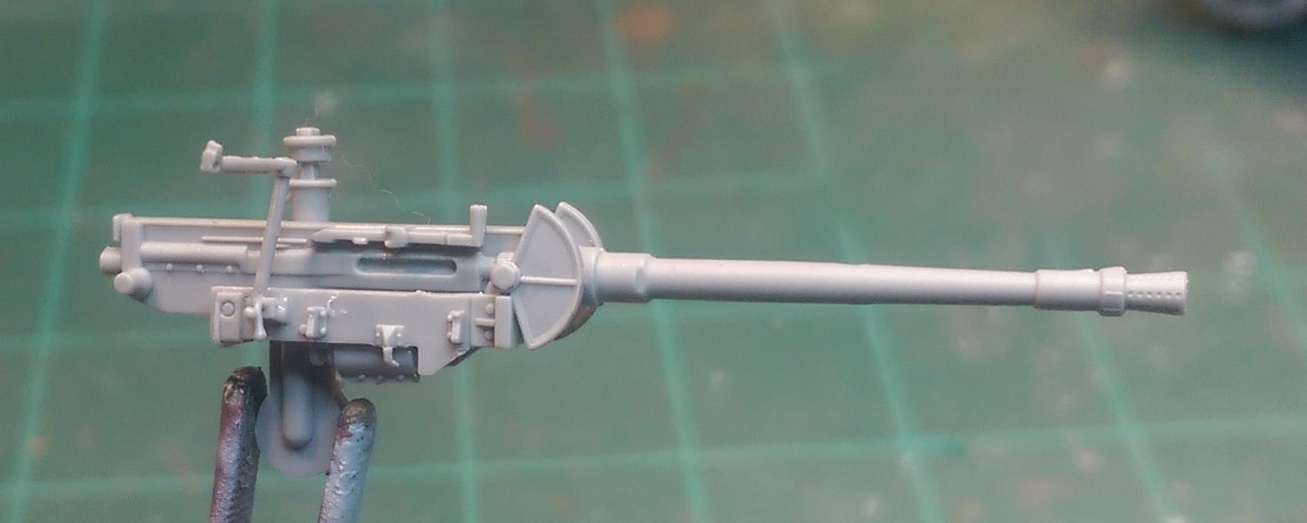
Main gun closeup, right side
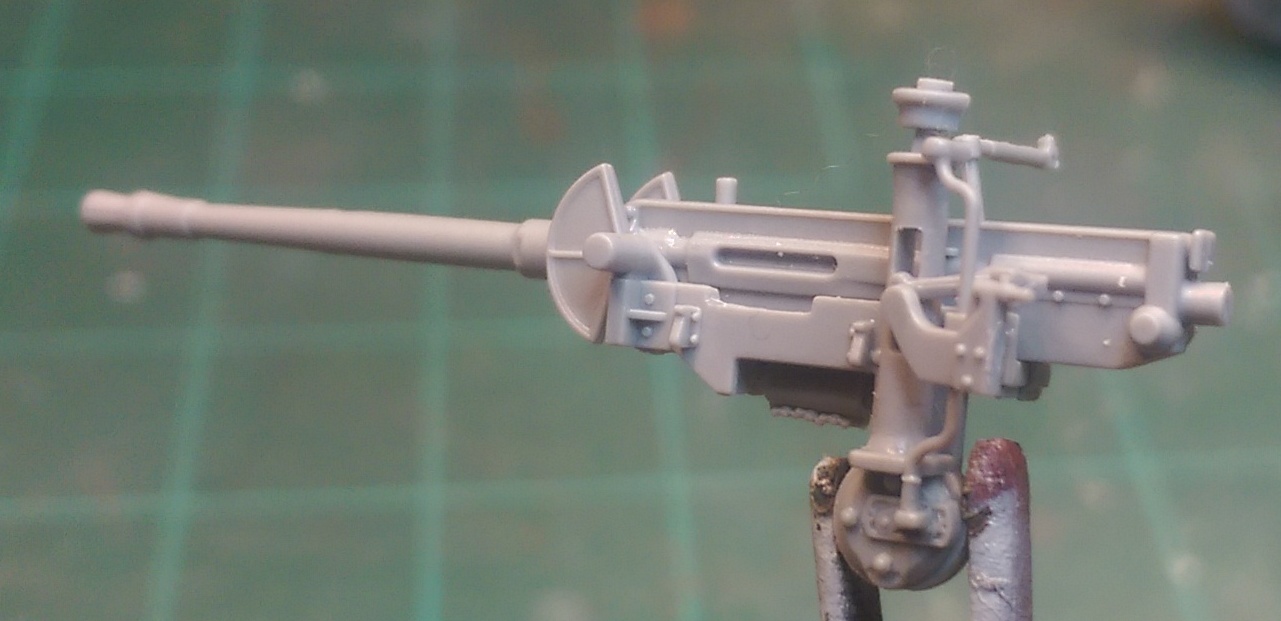
Main gun closeup, left side

Interior

Tread links
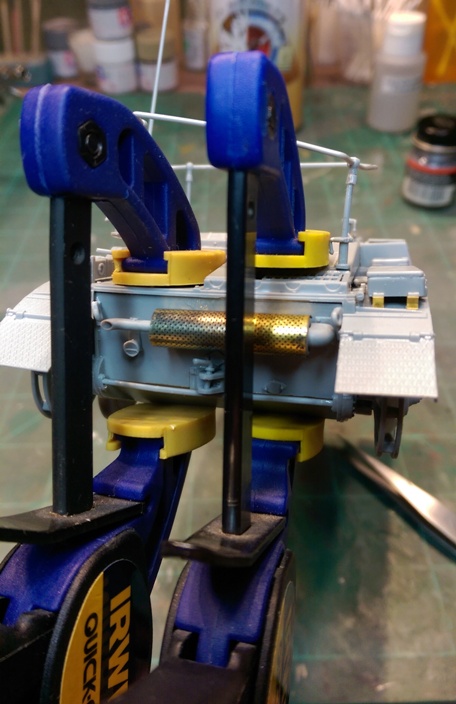
Clamping the hull shut
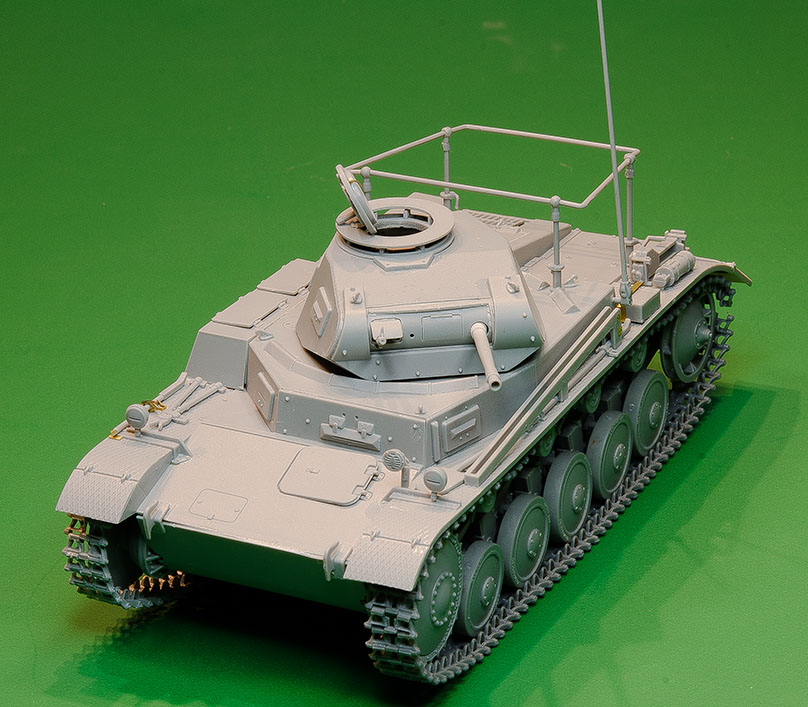
Assembled kit, front

Assembled kit, rear

Primed with Mr. Finishing Surfacer 1500, black
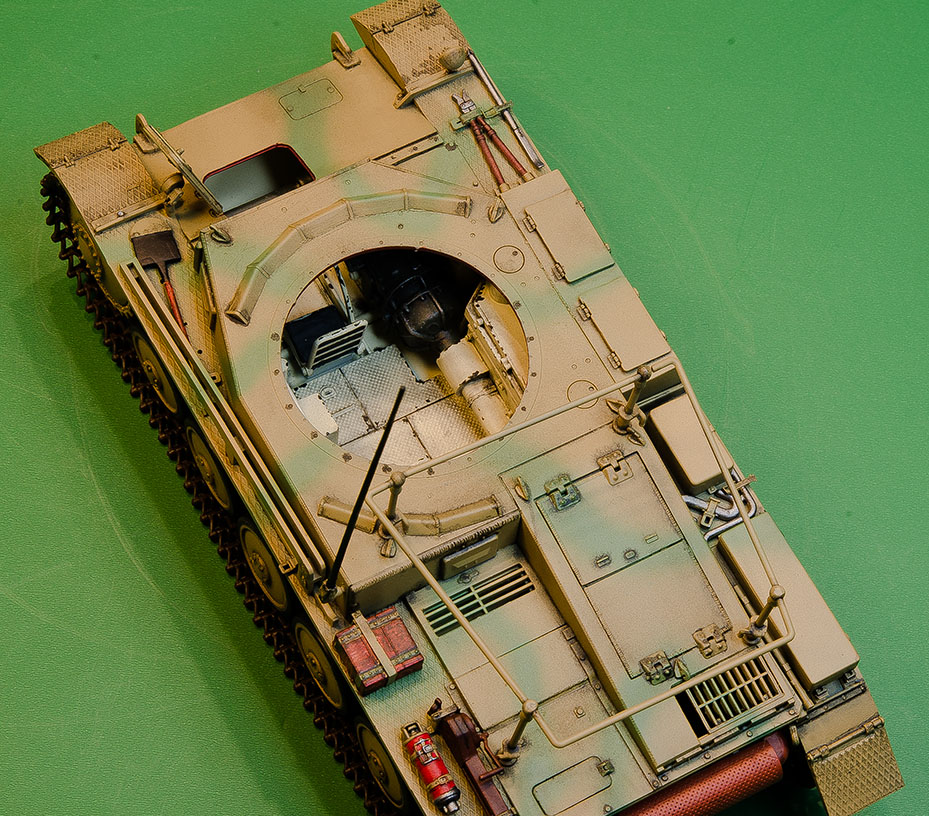
Inside
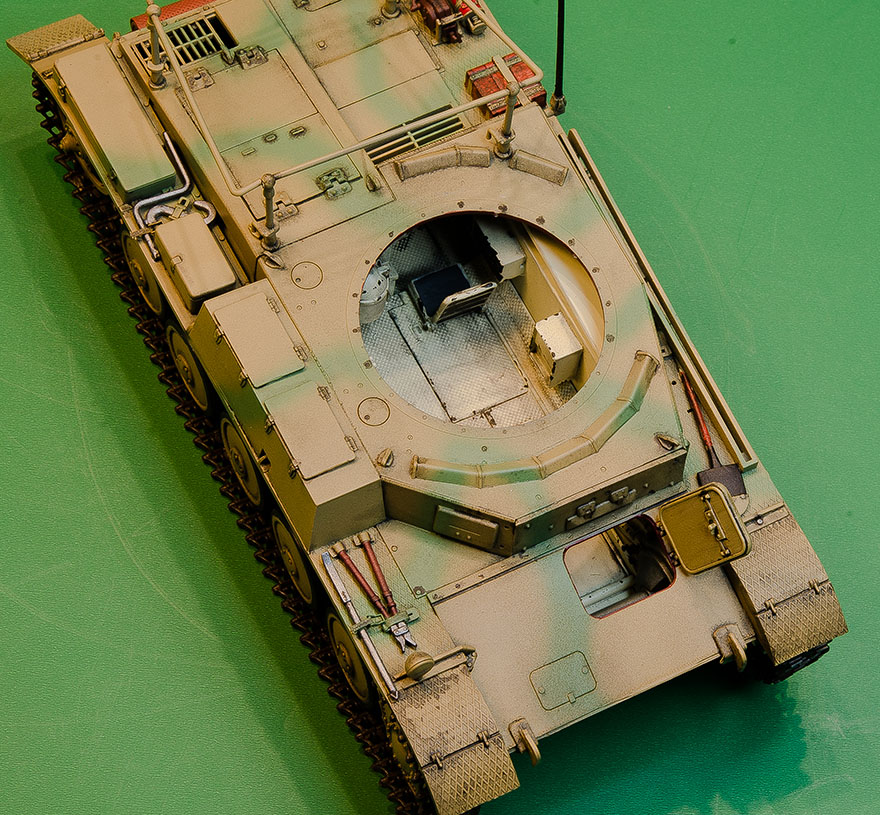
Inside, additional view

Finished model, left-front
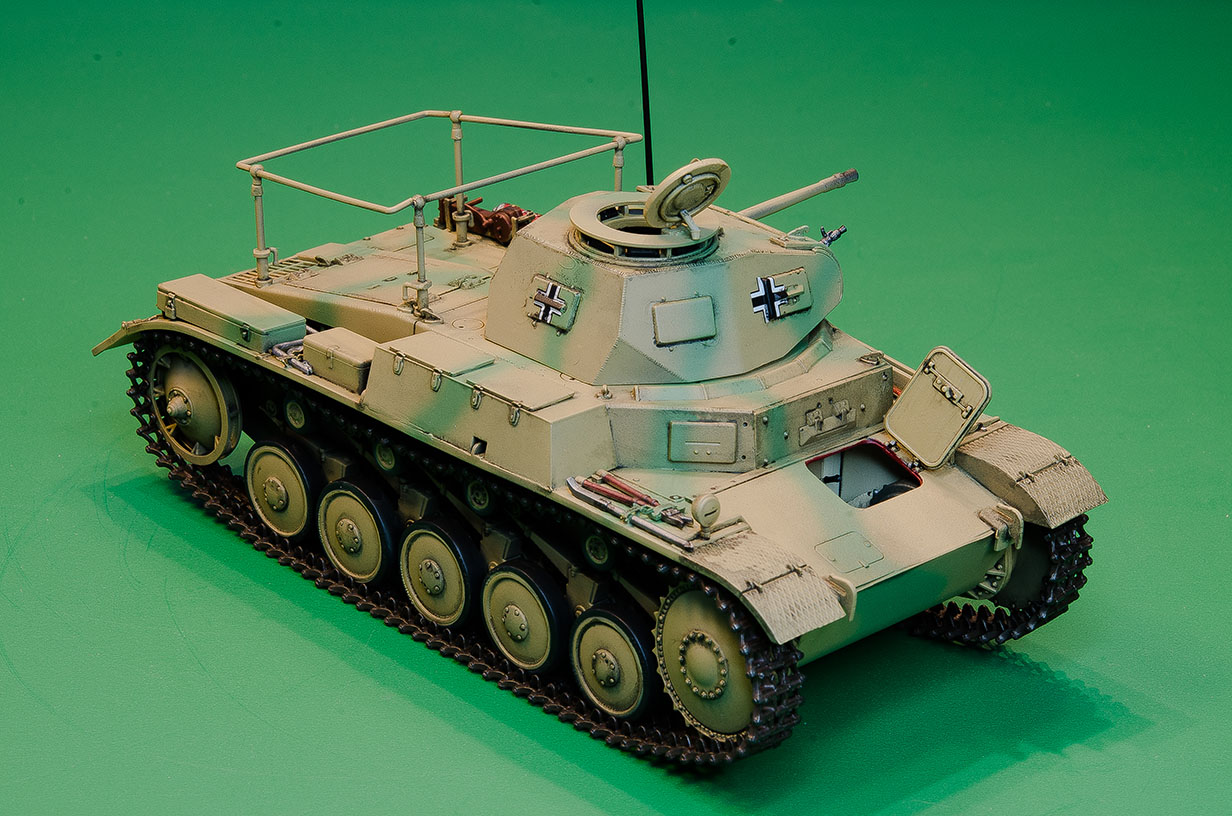
Finished model, right-front
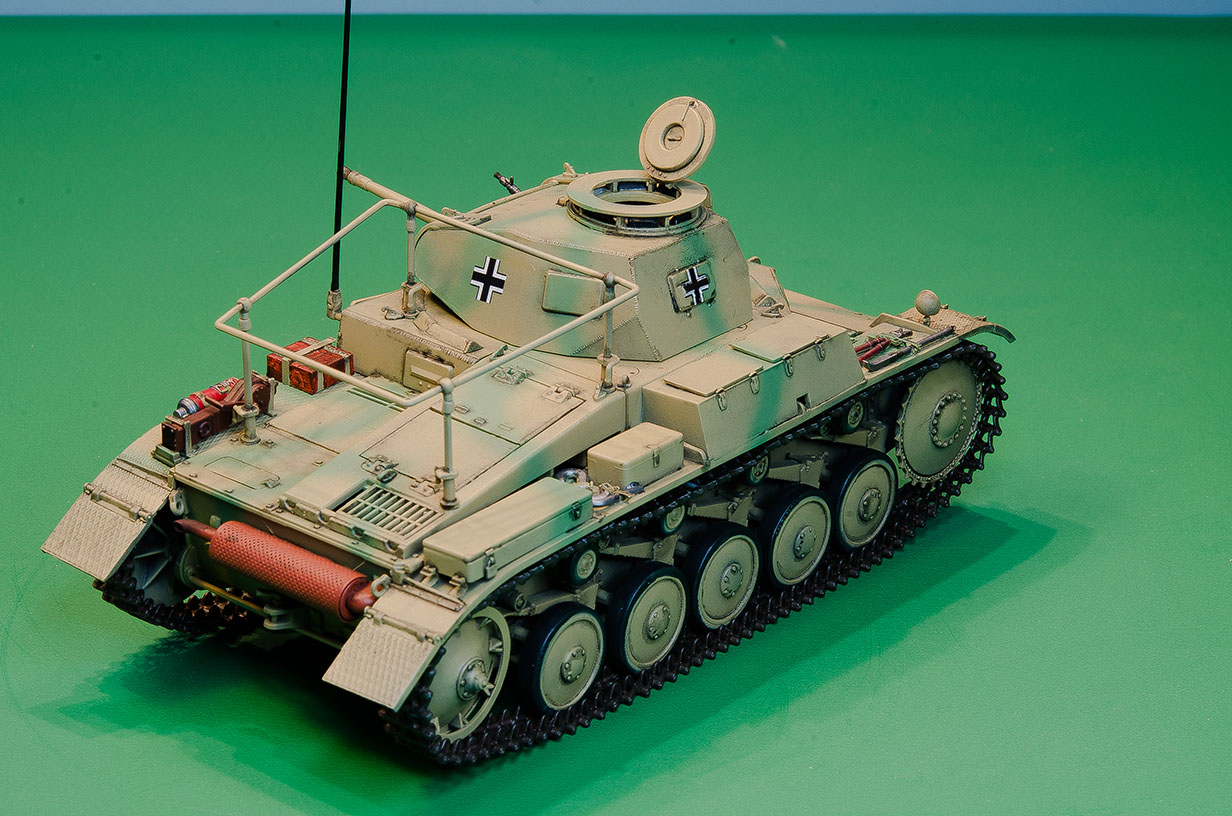
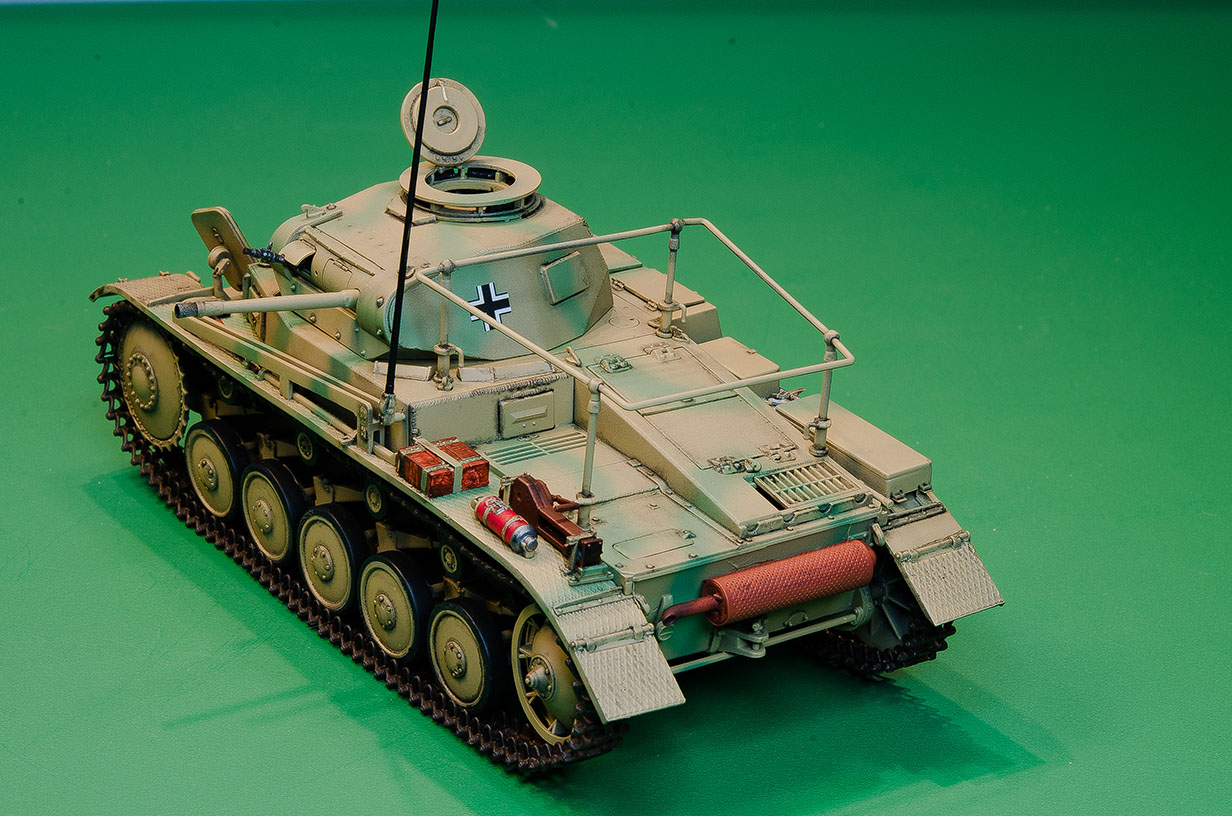
Finished model, right-rear
Comments
Add new comment
This site is protected by reCAPTCHA and the Google Privacy Policy and Terms of Service apply.
Similar Reviews