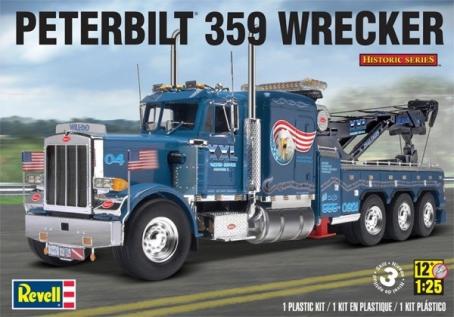
Peterbuilt 359 Wrecker
Revell graced us with the re-release of the “Can Do” and now the “Will-Do” 14 wheel Peterbuilt 359 Heavy Wrecker. This kit contains close to 700 parts of which nearly 40 are not used. The box alone is massive in size, some 20” x 14” x 5”, which sizes up well with the completed model of 18” long with everything folded up for travel. If you choose to build the kit with all the options in wrecking recovery pose it is well over 30” long and 10”wide and as much as 15” tall.
Speaking of options, both of the cab doors, the hood, and the outrigger doors can be posed in the open or closed position, the side and rear outriggers can be set as in use and the boom may be raised, extended and transversed to the left or right. I chose to build my wrecker in the travel mode but definitely played with all of the other options.
Kit Contents
- 231 - parts on 4 chrome trees
- 427 - parts on 11 white trees including the 2 Piece Cab
- 24 - clear parts on 2 trees
- 14 - Rubber tires 12 regular and 2 kind of fat
- 1 - 6 x 11 ½” decal sheet
- Chain and Thread for cabling
- 2 x 2 ½” Vinyl Screen
- 40 page instruction book
The instruction book is well laid out and follows the typical assembly sequence you would find in today’s modern car/truck kit; engine, chassis, drive train, axle, wheels, tires, cab, utility box, boom and trim. Once you get to step 15 you have a mostly finished chassis/engine sub-assembly. At this point jump to step 21 and add the left and right side fuel tanks to finish up.
Steps 16 through 21 deals with the construction of the interior of both the cab and sleeper which I chose to detail both with airbrushing, hand detail painting, washes and drybrushing. When complete none of the details in the sleeper are visible unless you choose to leave the top removable. But you can prop the doors open to show off the cab interior. Both decals and raised details are available for the dash.
With the cab and sleeper complete, steps 22 thru 27 deal with all the exterior cab and chassis details such as exhaust stacks, air filters, radiator grills, lights and chrome trim. After this you have a completed chassis with cab and sleeper awaiting the business end of the wrecker. From step 28 to 49 you find yourself dealing with the construction of the utility box, outriggers, boom, light bars, and assorted trim. At step 42, I caution you to make sure that you leave the cable spools loose to rotate so that you can add the cable after subassembly and painting.
The balance of the steps 50 thru 55 deal with options and decal placement. Lots of neat little pin striping decals and some huge logo decals.
With more than 140 hours spent building this kit, more than three quarters of the assembly time spent cleaning up the parts. Way more time than I would have liked was spent removing seam lines, clearing up details, gap filling, leveling punch marks and sink holes. In this regards the truck really shows its age.
Additionally the chrome finish on many of the parts needs extra attention. You will find that the spure attachment points will definitely mar the finished product. I bring this up now as I chose to remove the chrome from the fuel tanks, radiator grill and exhaust stacks prior to assembly. After this they were glued together, puttied, sanded, and I then reapplied chrome finish using the Alclad II system. Those chrome parts that I did not refinish needed to be attended to by either foiling over the damage spure attachment points or touching up with chrome silver paint. This clearly detracts from the overall finish. Today’s modern kits are getting away from placing the spure attachment points in noticeable locations.
Tamiya Acrylic, Model Master Enamel, and Allclad II Lacquer paints were used to finish this kit. Also Tenex 7, Tamiya Ultra Thin, and Elmer’s White Glue were used to construct this kit. For filling I only use Bondo 907 Glazing putty
This is an awesome subject matter and I was excited to give it a try. I have built many AMT tucks in the past and this was my first from Revell. At a recent Hobbytown contest I was able to talk with another builder who struggled with the same difficulties in building this kit. With a $100 retail price point I can only recommend this kit to someone who has expert level experience and is committed to the subject matter. Others will be disappointed with the struggles and poor finish (especially the chrome).
Thank you Revell and IPMS USA for the opportunity to build and review this kit.


Comments
Add new comment
This site is protected by reCAPTCHA and the Google Privacy Policy and Terms of Service apply.
Similar Reviews