
PBM-5A Mariner
The wonderful folks at Minicraft Models deserve tremendous thanks for providing this review kit. I appreciate their work to bring new and unusual subjects to the scale modeling community. The IPMS/USA Reviewer Corps also deserves thanks for giving me the kit to review. I am only one member of a large staff in the Reviewer Corps, and I appreciate all the tireless team and individual work that goes into getting the material out to be reviewed and the finished write-ups published.
The Martin PBM-5A Mariner was a gull wing, twin-engine flying boat operated primarily by the U. S. Navy during WWII. The Mariner operated alongside its better known sister flying boat, the PBY Catalina. The PBM-5A was a tricycle amphibian, with prominent nose, dorsal and tail gun turrets, fixed wing floats, and twin tails. The Mariner had bomb bays nestled in the engine nacelles on the high wing and a distinctive dorsal radome just aft of the cockpit.
Presentation (or how the kit looks in the box)
The box is about 18 x 12 x 4 inches, with a tight-fitting lid sporting colorful box art. Six sprues molded in medium to light gray plastic were nicely packed and stacked in poly bags in the main compartment. A seventh sprue of clear parts was also included in a poly bag. The clarity of the clear material is excellent. Assembly instructions and a small decal sheet for two versions were neatly tucked in the bottom of the box. No damaged or broken parts were found.
The panel lines are crisply engraved, yet subtle. Part numbers are readable. No mold release was evident. I had no difficulty with surface prep, cleaning, or paint adhesion.
Instruction Details
The 22-page letter-size instructions are clearly printed in black-and-white on good quality newsprint paper in portrait layout. General information and a brief historical overview, sprue “maps”, suggested assembly sequence, and decal placement are well addressed. Unused parts are grayed-out on the sprue maps. I did find it a little odd that parts for later versions were included, but only decals for early versions were provided. The suggested assembly sequence follows the traditional approach from the inside out using 28 subassembly steps. Cautions are provided before step 1, alerting the modeler to use the correct radome parts and to drill out the flashed-over landing gear attachment points. I blissfully forgot to drill out some of those points but the instructions are clear enough that I was able effectively correct my oversight.
The assembly drawings appear to be CAD generated and shading is used appropriately. All of the drawings are perspective views. No subassembly insets are used, allowing lots of markup space and room for notes. I mostly followed the suggested assembly sequence. I am going to highlight my experiences in the construction summary without a blow-by-blow narrative. I did choose to use aftermarket landing gear designed for this kit by Small Aircraft Conversions. Please see the related review of the PBM-5A Mariner Metal Landing Gear.
Construction Summary
The assembly steps can be roughly divided into interior structures, fuselage, wing, and detail sections. Steps 1 through 4 involve interior structures. Step 5 brings the fuselage together. Steps 6 through 16 pull together the wing and tail surfaces. Steps 17 and 28 add in all the other parts, such as the engines, landing gear, turret, etc. I had a really good laugh while reviewing the instructions post-completion. The tail surfaces are added to the fuselage in step 27, but nowhere in the instructions are the main wings referenced for attachment to the fuselage. I noted on the instructions the excellent fit of all the large parts to each other, including the wing to the fuselage. I missed the fact that somewhere between step 16 and step 27 that wings got attached!
In general, all assemblies went very smoothly. You may wish to consider how much small detail can be added after painting and decaling. I discovered that it was quite easy to add the small parts later, avoiding breakage.
Interior structures consist of a flight deck with adequately detailed seats and instrumentation. Painting suggestions are provided. I chose a restrained artistic license route and kept everything interior green, olive drab, brown or black, with a little bit of silver dry brushing as needed. I tried to make everything look a little worn and I think the results are reasonable. The various instrument boxes sit on racks and the aft part of the compartment is dominated by locker-sized instrument panels. Everything looks good, but has the sense of being slightly overstated. However, nearly the entire compartment is very difficult to see in the end. Much of the detail falls into the “hidden” category.
The fuselage has a traditional 2-half design, with the flight deck being mounted in the starboard half. Be sure to glue the windows in securely. I thought I had the windows/ports solidly attached, but when I tested them before assembly, some popped out. Do not repeat my mistake of failing to drill out all of the required holes for all the later details!
I assembled the wing floats but did not attach them to the wings before painting. I found it was easier to airbrush everything without the floats in the way. The floats have a nice delicate look and I was concerned about “shop damage.” Open and closed cowl flap parts are provided and I chose the closed version. The open ones looked almost too open, but then again I did not check them against any references. The engines are nicely detail for the scale. Be sure to carefully the test fit the engine parts, cowlings and the nacelle mount. The locator and alignment tabs are very subtle. Four and three-bladed propellers are included. I used the four bladed ones.
Beautiful bomb bays with ordnance racks are included, but strangely no ordnance was provided. I closed up the bomb bays since there was nothing to display inside. But if you have any extra depth charges hanging around, here’s your chance!
The flaps and ailerons are very nicely done, with thin trailing edges. They are hinged and are “trapped” between the wing halves. I suggest that unless the actual movement or positioning is important, that you modify the hinges for later attachment. A strange mismatch is present in the hinges of the inside flaps. The hinge pins do not match the receiving socket. This is easily fixed with some judicious trimming. The vertical twin tails have a very nice positive socket fit, matching well with the tail plane and the small braces.
The three gun turrets provided the most challenges. The dorsal and tail turrets have 2-piece domes that I found a bit tricky to assemble. The guns and the mounts required a lot of trimming to look right, and fitting the turret canopies was not as smooth as I hoped. The nose turret went together well, but it was very difficult to seat in the nose as per the instructions. I sprang the fuselage seam open forward of the cockpit while attempting to squeeze in the turret at end of construction. You may wish to install the nose when the fuselage halve go together. However one advantage of leaving the turret off until the end is that a nice space for loading the right amount of weight is readily accessible.
Finishing
The both the suggested paint schemes are the USN tricolor of white bottoms, intermediate blue sides and dark sea blue tops. I used the decals for BuNo 59349, ca. 1947, but an option for BuNo 59849, ca. 1945 is included. The decals snugged down well with Microscale solutions. Vallejo Model Air paints adhered well, especially in places where I didn’t necessarily want a particular color!
Conclusion (and other wrap-up thoughts)
This is a wonderful kit, and I highly recommend it. The minor criticisms in the review do not detract from the value of the kit. The Minicraft website calls this offering a CAD/CAM-produced kit. My sense is that the kit is indeed very well produced by this emerging technology. The fit tolerances are very close and the surface detail is very good, but a possible downside comes from the relative ease of design and production. A common problem with CAD design is that the actual human assembly process is not always accounted for. In this kit the occasional fit problem, like the flaps, the very subtle engine alignment tabs, and the nose turret might have been better proofed before production. But I truly would rather have these very small issues in exchange for having an overall beautifully engineered kit. I hope that Minicraft will be willing to take on some of the more unusual subjects as they refine their design and production process. The extra parts and unused bulkhead slots in the fuselage suggest that variants may be in the future.
As important as anything, this was a fun kit to build! It will look nice next to a descendent of the Mariner, one of my earliest builds, ca. 1984, a Hasegawa Marlin in 1/72.
Thank you again to the wonderful folks at Minicraft Models, and the seldom recognized but greatly appreciated IPMS/USA Reviewer Corps for getting me the kit to review. Thanks for letting me contribute to the work of the team!


Bomb bay structure - Interior details showing framing and the ordnance racks

Flight deck aft - Lockers of instruments!

Flight deck forward - Main instrument consoles and crew stations
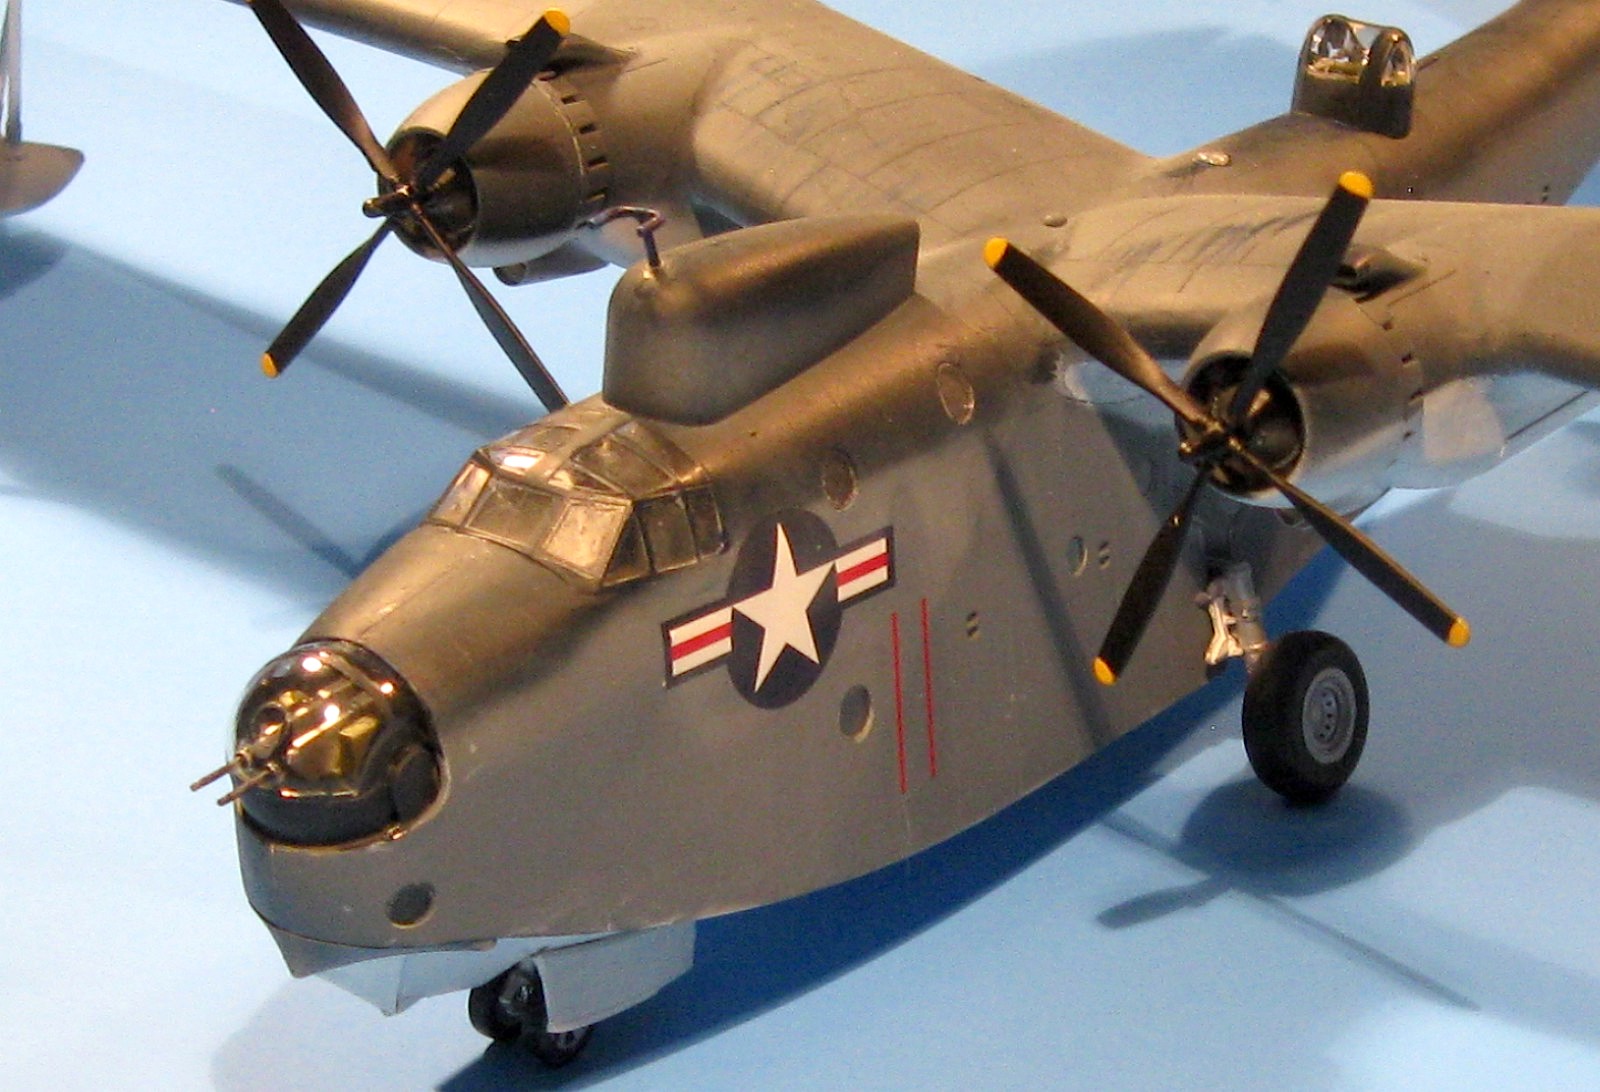
Forward port view Nose turret and repaired sprung seam(!) - The large radome is very evident.
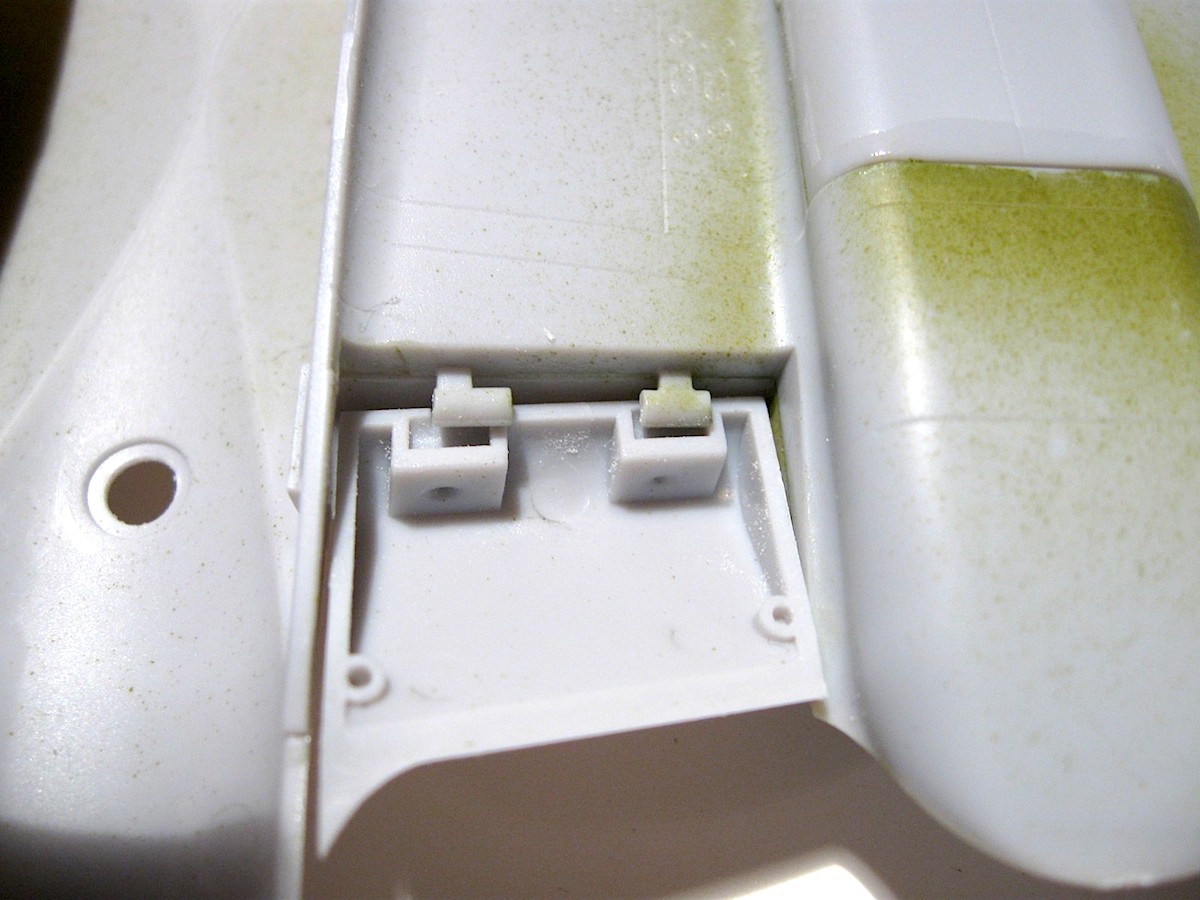
Hinge whoops - Note hinge mismatch, but this is easily fixed.
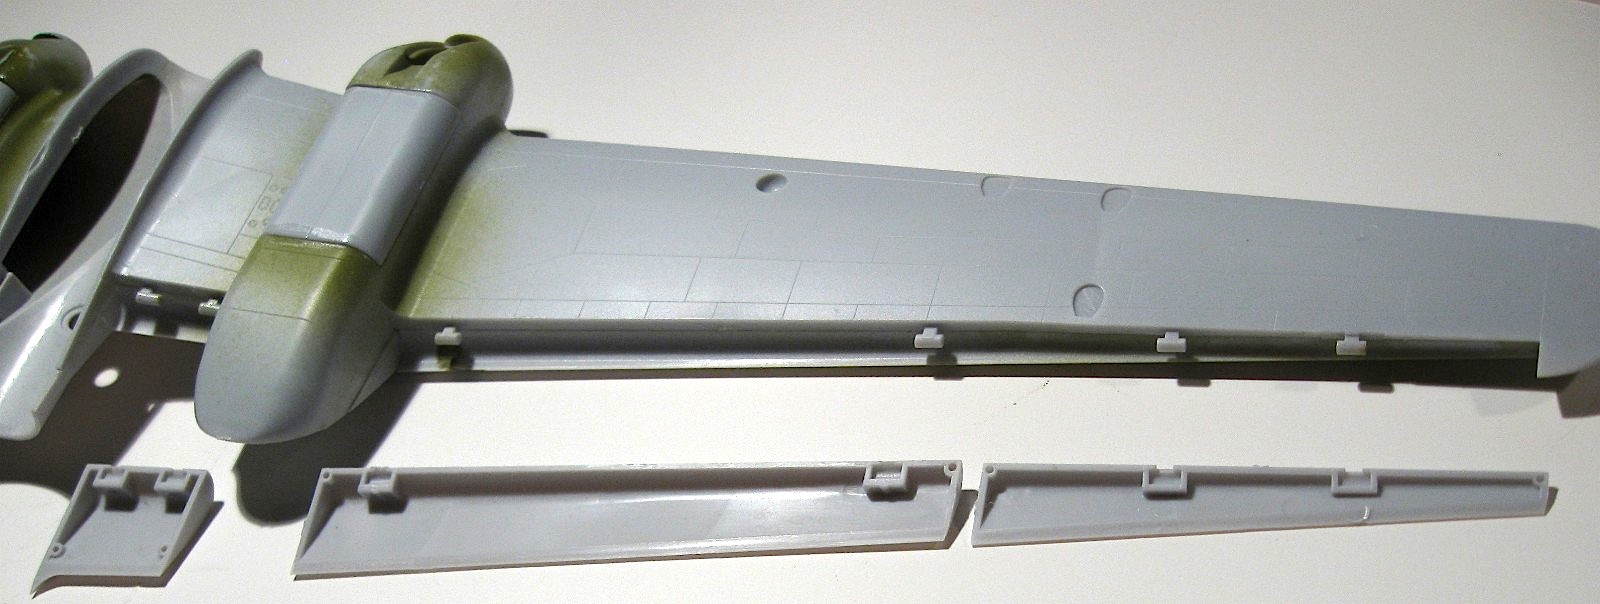
Flaps and aileron hinge details before assembly.
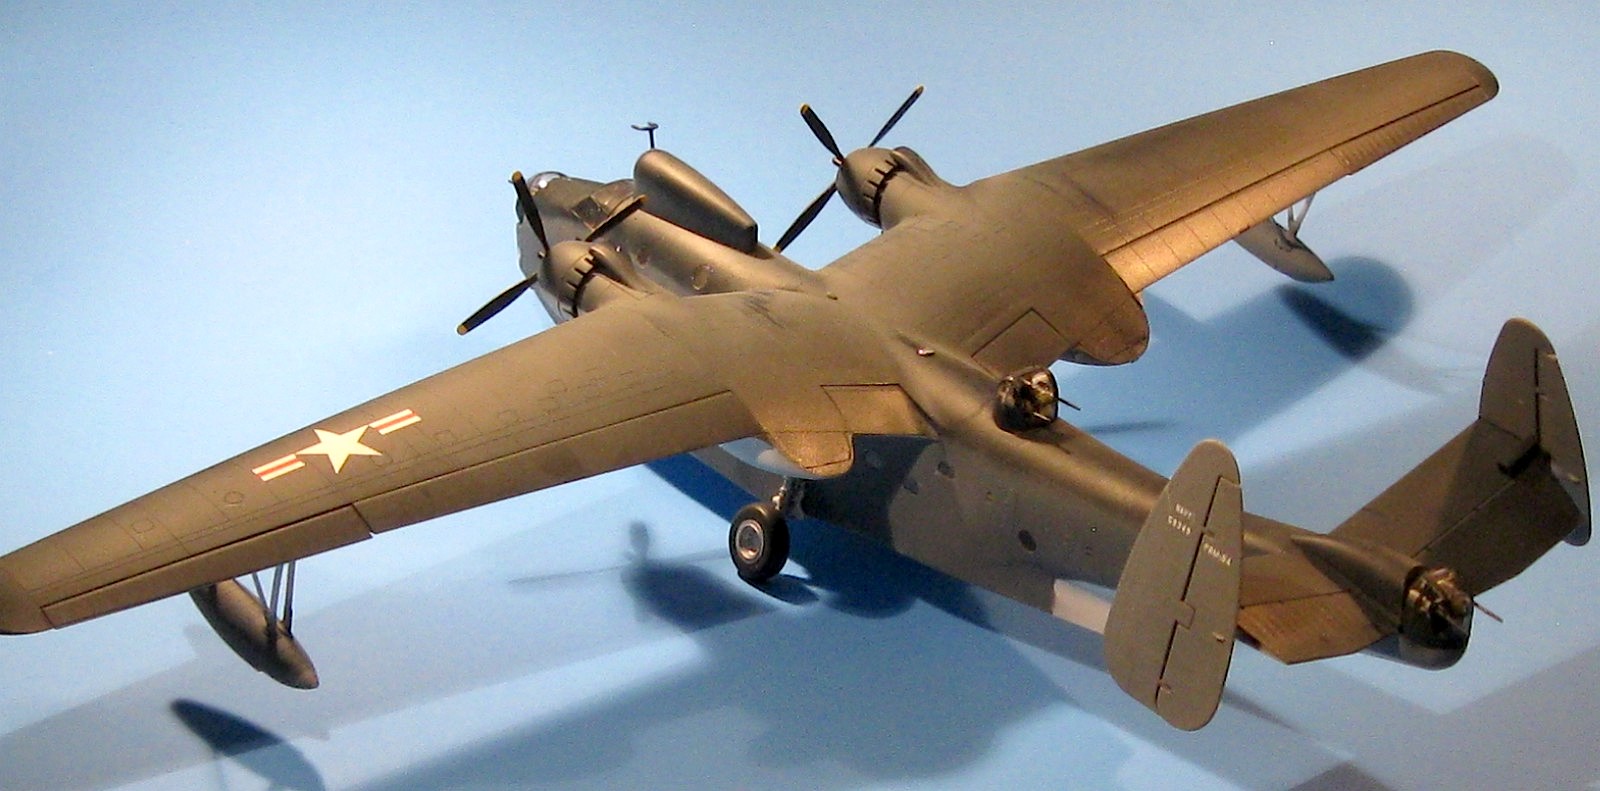
Port side aft - The model is lightly weathered and shows a distinctive profile.
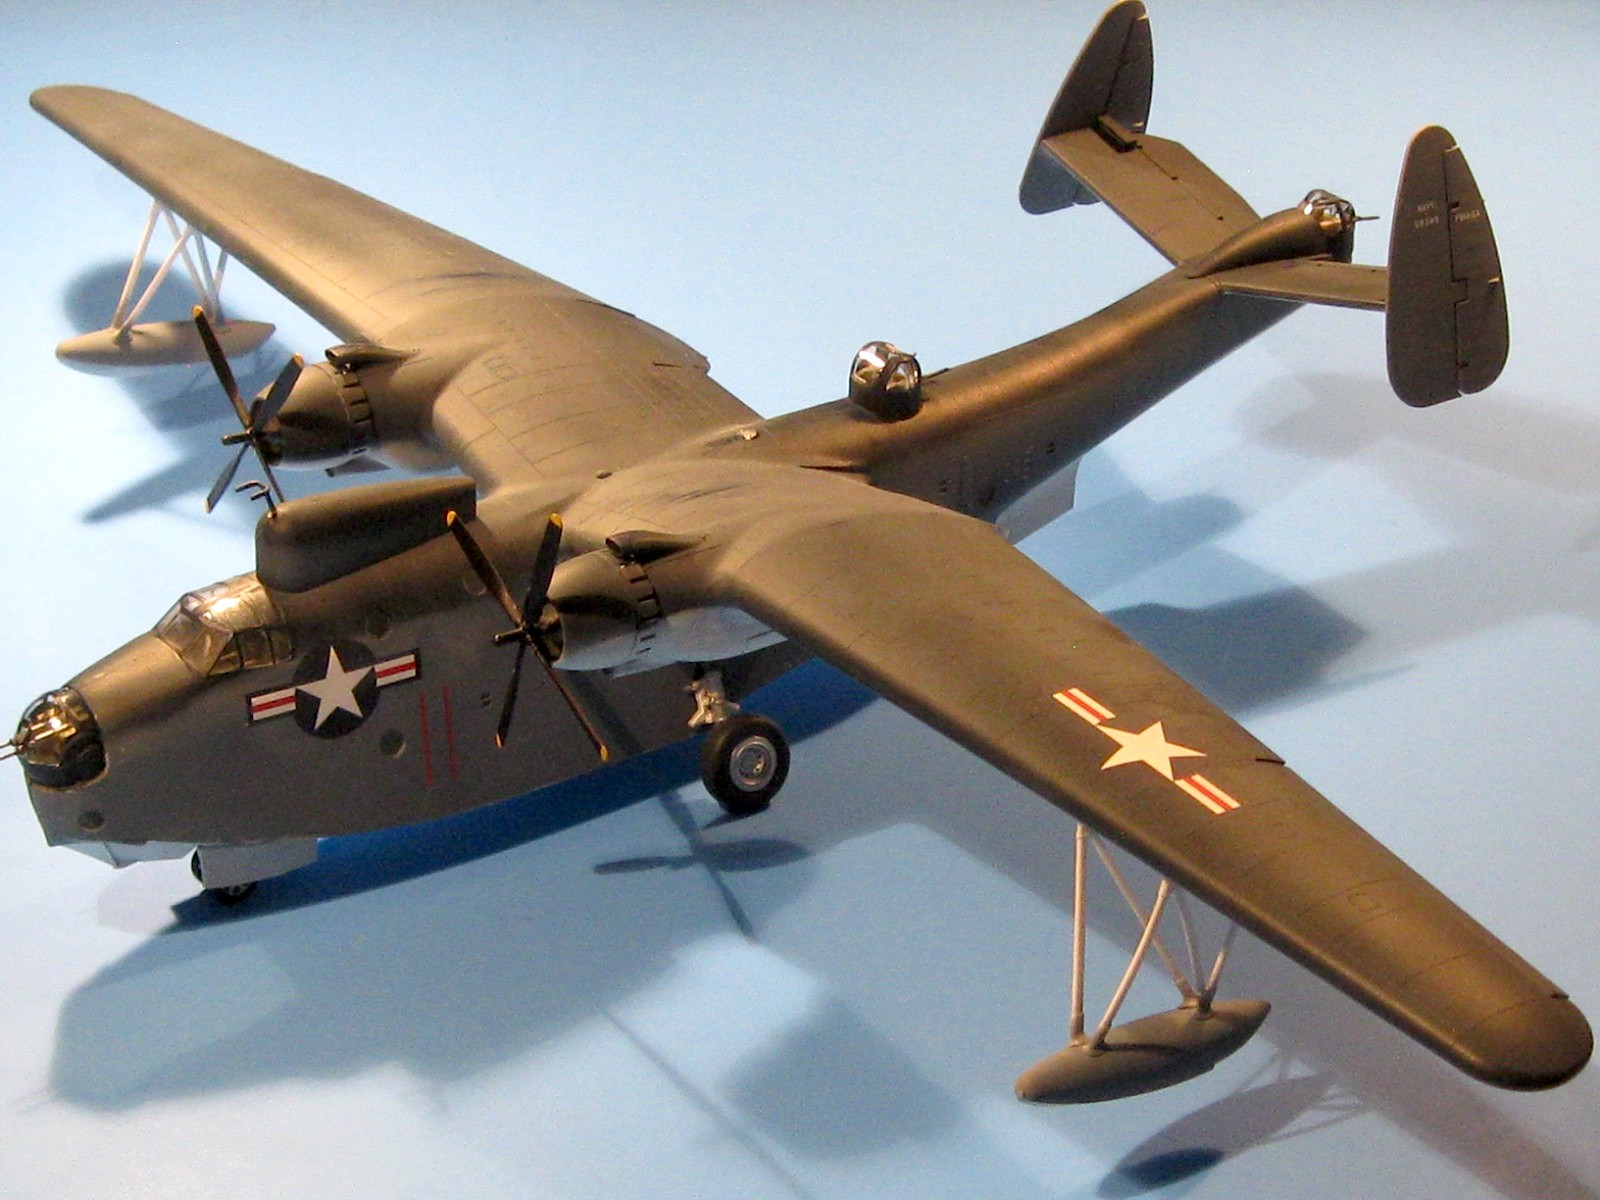
Port side full - The model is lightly weathered and shows a distinctive profile.

Port side - The model is lightly weathered and shows a distinctive profile looking along the wing.

Comments
Add new comment
This site is protected by reCAPTCHA and the Google Privacy Policy and Terms of Service apply.
Similar Reviews