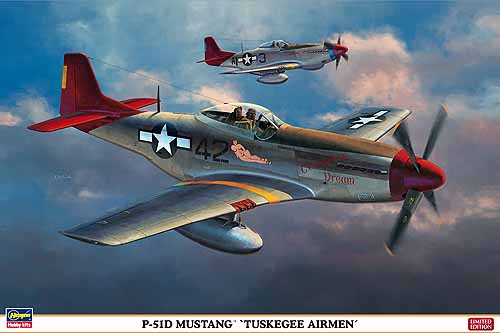
P-51D Mustang Tuskegee Airmen
History
The design of the P-51 Mustang was led by the North American design team of Ray Rice and Edgar Schmued. The first unit was rolled out of the North American factory at Mines Field (now L.A. Airport) in just 127 days; the plane, however, had no engine. The plane was initially given the name of Mustang by the British, who had purchased it from the United States.
At this time, an Allison V-1710 in-line 12-cylinder engine was installed. The first flight was in October, 1940. Many versions were made during World War II, with the D being the definitive version. It had six 50 caliber wing-mounted machine guns and a new bubble canopy.
The British Rolls Royce Merlin engine had been adapted to the D version and gave the fighter its high altitude performance and long range, required for bomber escort duties. The Mustang served throughout World War II and during the Korean conflict.
Items in the Box
The model is made from injection molded plastic, grey in color. The instructions are in a fold-out format, printed on both sides. Clear molded plastic windows and an extremely detailed decal sheet are also supplied.
Construction
Initially, I started with the cockpit buildup, pre-painting and assembling details. Next, I assembled the fuselage, tail surfaces, wings, landing gear, and, finally, the canopy glass. I had some issues (slight mismatch) with attaching the underwing to the forward portion of the fuselage. I had to use some filler putty. Note: I did not install the pilot for this kit build.
Finish and decals
I used Model Master green enamel, Floquil red, and Alclad II polished aluminum. The aluminum finish gave me a little grief as it was very thin and the application was difficult to apply. The model shows it! Much practice is needed to become perfect. The decals went on well. I mislocated the application of the pinup girl decal and had to omit the numbers. Final finishing with Testor’s glosscote on the top surfaces and Testor’s dullcote for the bottom finish.
Conclusion
The kit went together well. Extra features in the kit were bombs, 1,000 gallon tanks, and small fuel tanks. I used the small fuel tanks. The kit build is for most modelers.
I would like to thank IPMS, Hasegawa, and Hobbico for allowing me to review and build this kit.


Comments
Add new comment
This site is protected by reCAPTCHA and the Google Privacy Policy and Terms of Service apply.
Similar Reviews