
P-51D Mustang
The Aircraft
The P-51 was the ultimate propeller driven fighter for the US in World War II. Fast, maneuverable, excellent range, plenty of punch, good load carrying ability, and it could be used for any mission the higher ups thought of. While it was superseded by jets, the P-51D was used for tactical bombing in Korea, and some air forces didn’t retire their Mustangs until the 1980s. There was much excitement in the Warbird community when the Dominican Republic decided to sell their P-51Ds in 1984.
The Kit
I thought I had built this kit before, but I was wrong. The older Minicraft/Hasegawa P-51 has raised panel lines; this one has recessed panel lines. It’s a new mold. This kit is issued with new markings for 44-64076, “Jumpin’ Jacques” of the 3rdFG and 44-14606 “Jan” of the 4thFG. There are 4 gray sprues and one clear. Everything is flash-free and clean.
The Build
I’ve been doing a couple of pretty technical builds before this one, with lots of parts, PE and resin. I started this kit, and after about 1 ½ hours I came to the realization that the interior was finished, the fuselage halves were together and the wings were installed. And I hadn’t taken a picture yet. The only thing that went a little awry was the decal for the instrument panel, which folded on me. Fixable. Everything else just fit cleanly. I used a little Mr. Surfacer on the wing roots and scraped the fuselage joins. I added the horizontal stabilizers and the model was ready to paint.
Pant and Decals
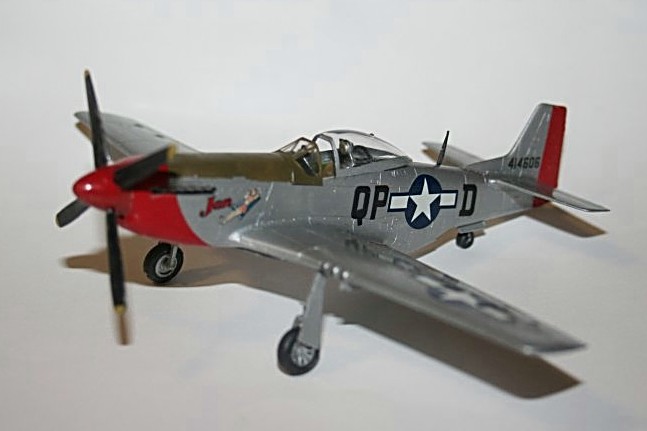
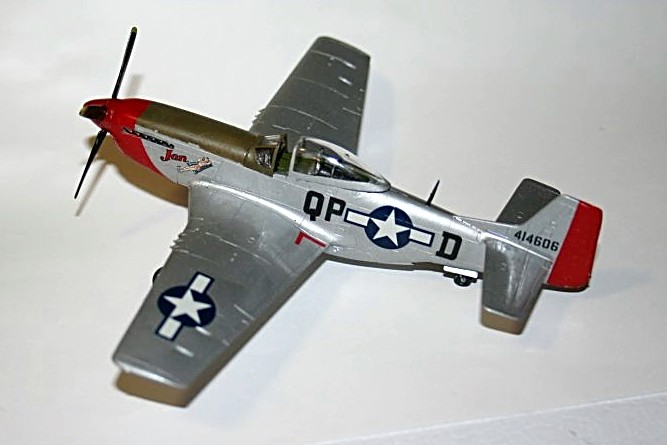
I decided to do the 4th FG aircraft, partly because I didn’t want another plane with invasion stripes. The painting was easy, using Testors Silver, followed by a coat of Future to protect the paint, which has a tendency to rub off. I added the anti-glare panel in Model Master ® OD 34087, and the black on the top of the instrument panel.
Decals were fine, except for the nose. The “stars & bars” went on fine, the serial numbers and ID letters were good, and the personal markings went on just fine. The decals snuggled down, and you can see the panel lines through the white stars.
I painted the tail with Testors red, right out of the little square bottle that they used to sell for a dime when I was a kid. (That’s a LONG time ago!) I also painted a stripe on the underside of the engine, because I was just sure that I was going to have some sort of problem there. I was gratified to find that the red decal was an exact match for the Testors red. No problems matching up the decals on the trailing edge of the rudder!
The decals for the red nose did give me a problem. I managed to get the straight edges at the top of the nose to match up, and the split for the air intake lined up pretty well. I had to fool with the spot where the decal goes around the exhausts, but managed to get that pretty close. I couldn’t get these decals to meet on the bottom near the wheel wells, but because of the red I painted before I started, it looks OK.
I then painted the spinner and installed the prop blades. The red on the spinner exactly matches the decal. Way to go Hasegawa!! I also note that the blue on “Jumpin’ Jacques” matches the Testors Blue.
Finishing
Then I put on the fiddly bits. The windscreen fits into the fuselage cleanly. No putty, just a bit of clear glue and a touch of OD. I left the canopy slid open a bit. The wheels, gear doors, gear legs and tail wheel needed only a little work. I wound up using CA to get the gear legs to stay where I wanted them; they wanted to wander using Testors or Tamiya liquid cements. Paint the antenna black, install it, and the project is done.
Evaluation
Recommended. This kit went together SO nicely, everything fit, and there weren’t any problems, except for the decals, which are always a challenge for me. And I managed to get past that successfully. Happy, happy, joy, joy!!
Thanks to Hasegawa and Hobbico for providing a fun build kit, and to IPMS/USA for letting me have a good time.


Comments
Add new comment
This site is protected by reCAPTCHA and the Google Privacy Policy and Terms of Service apply.
Similar Reviews