
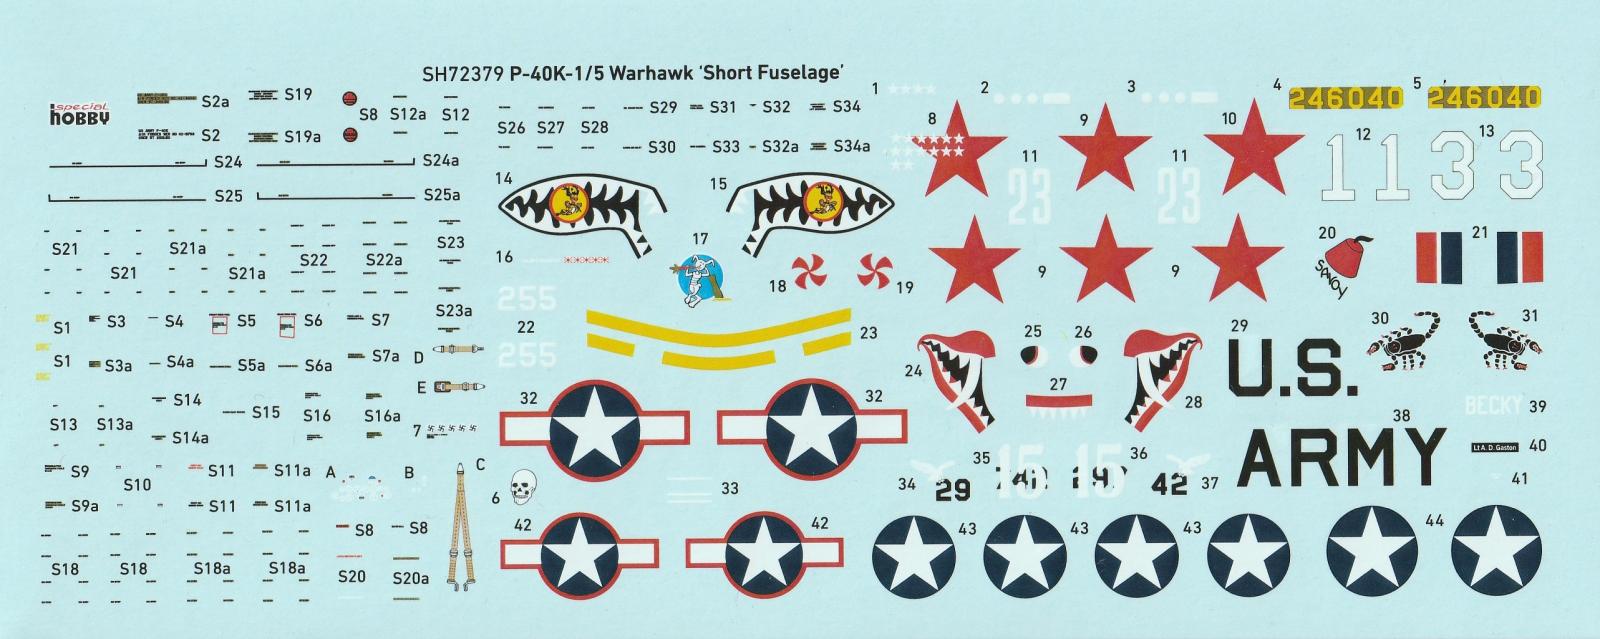
P-40K-1/5 Warhawk 'Short Fuselage'
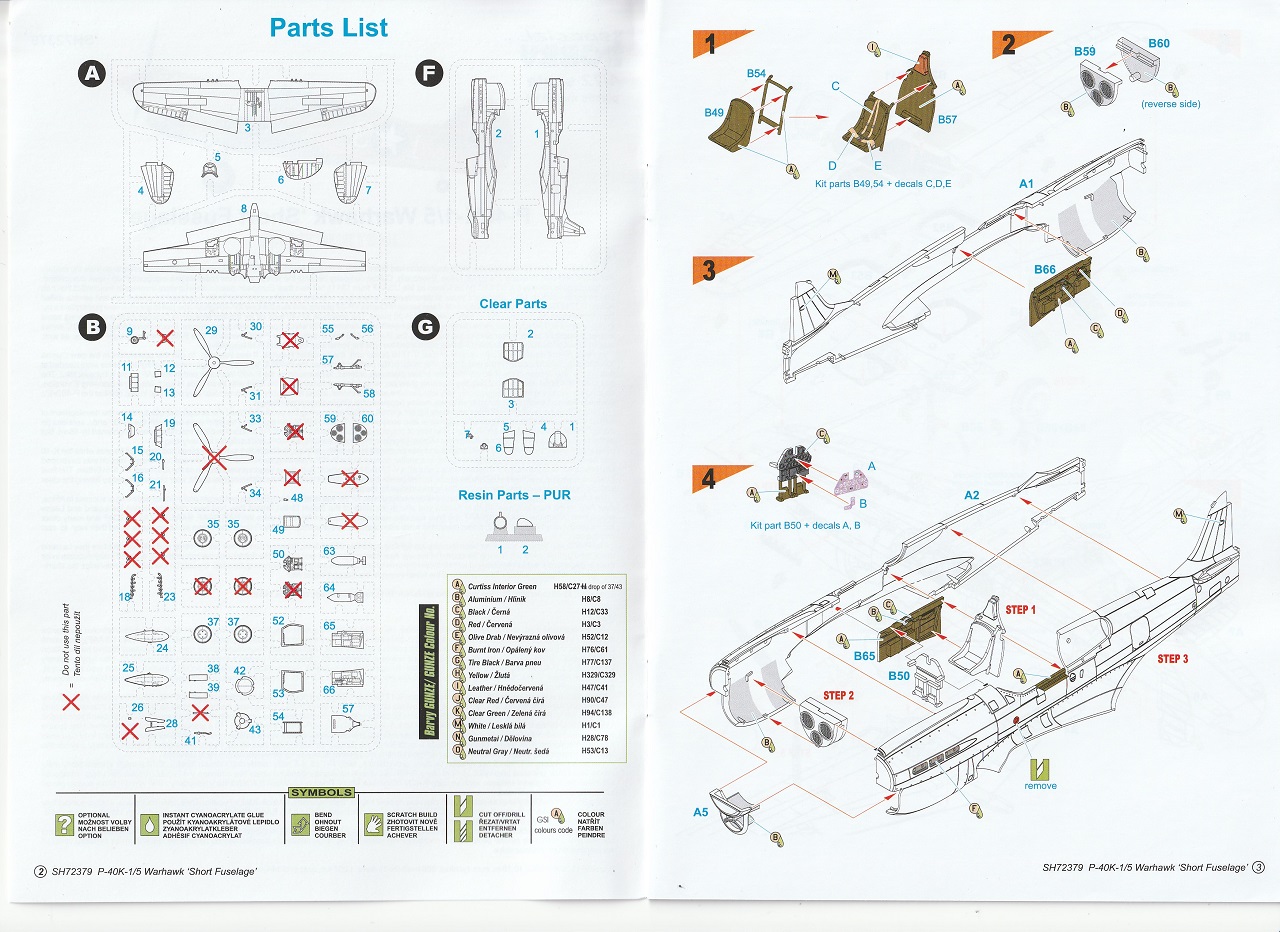
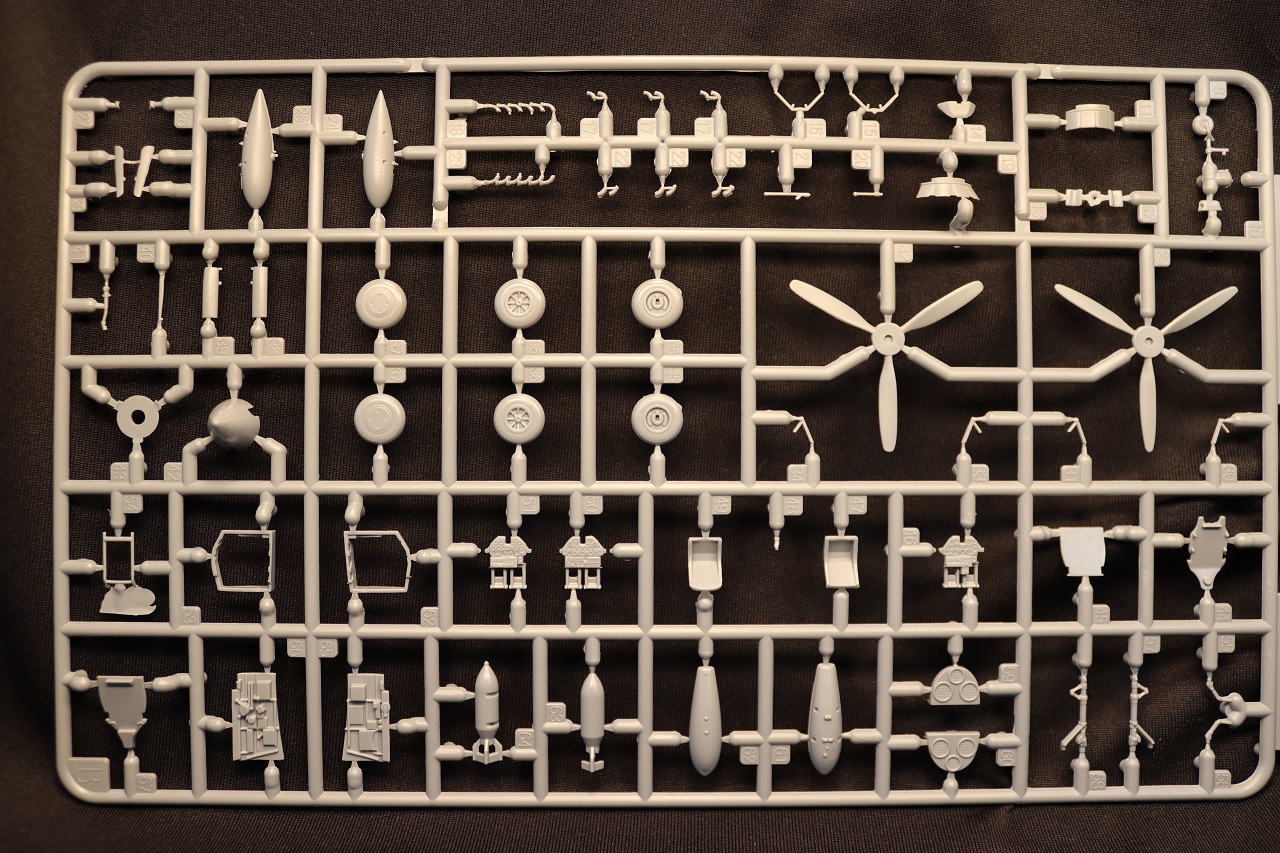
Special Hobby’s short-fuselage P-40K kit was first issued back in 2018. I am glad to see it re-issued in 2023 (you can never have too many P-40s). The kit includes three runners of gray plastic, one of clear parts, a resin antenna and mount, decals, and instructions. Runner ‘B’ has lots of parts for other P-40 versions, so be careful that you use the correct ones. The parts and decals are individually bagged to prevent damage or loss. The kit comes in a sturdy top-opening box, so it should be safe from crushing even if it winds up at the bottom of your stash. Markings are provided for three U.S. and one Soviet P-40. Color call outs are provided for Gunze Sangyo Mr. Color and Aqueous Hobby Color paints.
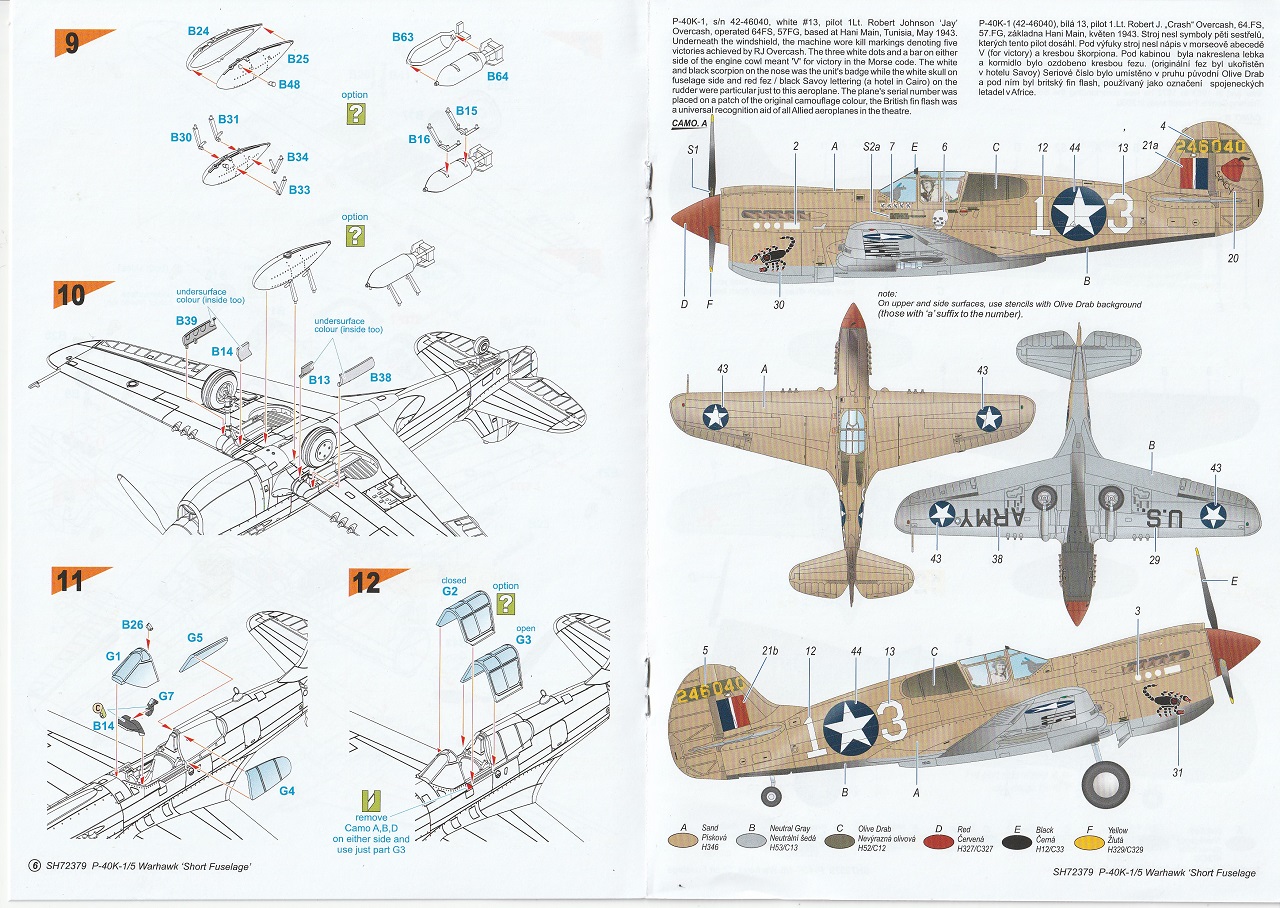
The instructions are well-illustrated and easy to follow, but I did find some mislabeled parts. The rear cockpit bulkhead is B67 not B57. The portside inner landing gear door is B12 not B14. Each marking option has a four-view color illustration for painting and decal placement. There is a fifth four-view illustration for stencil placement. The last page of the instructions shows a variety of CMK resin upgrade parts for 1/72nd P-40s.
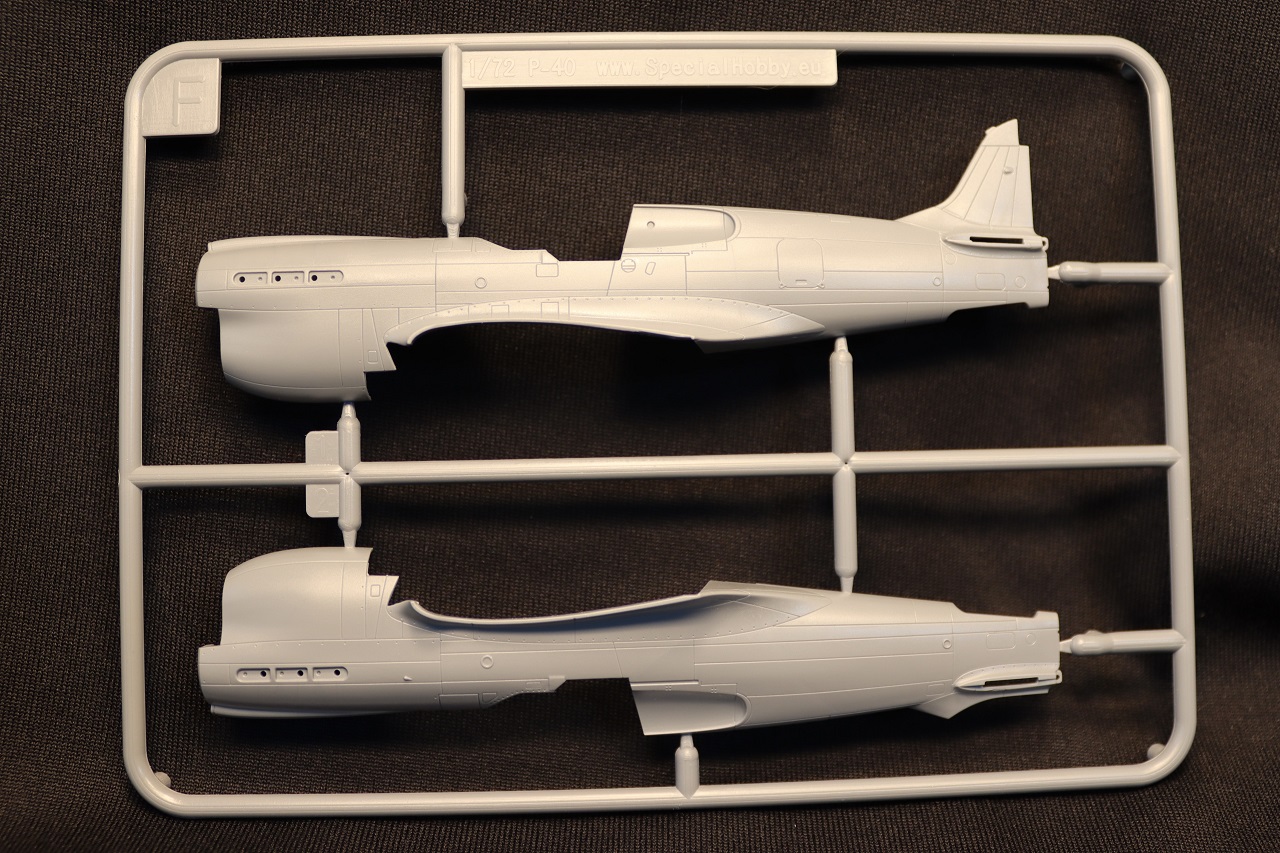
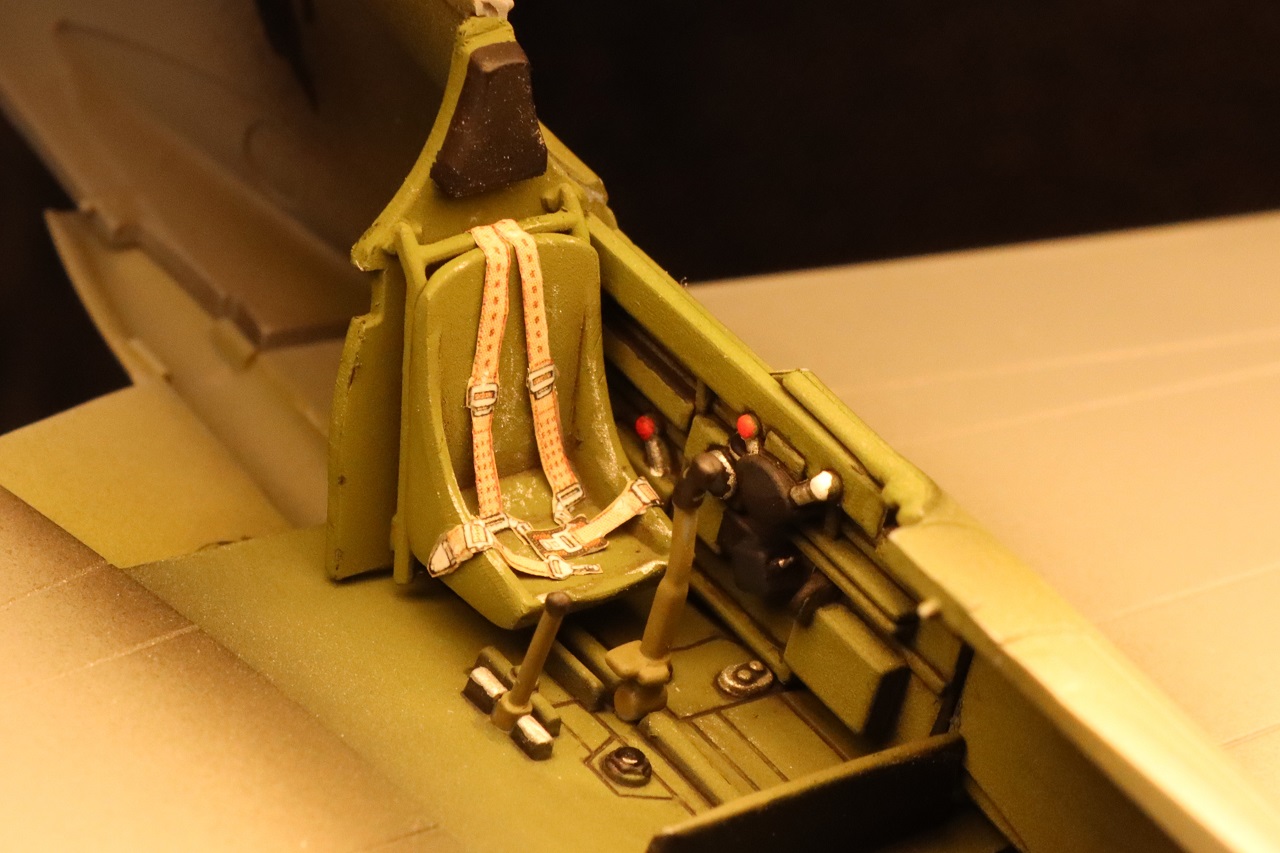
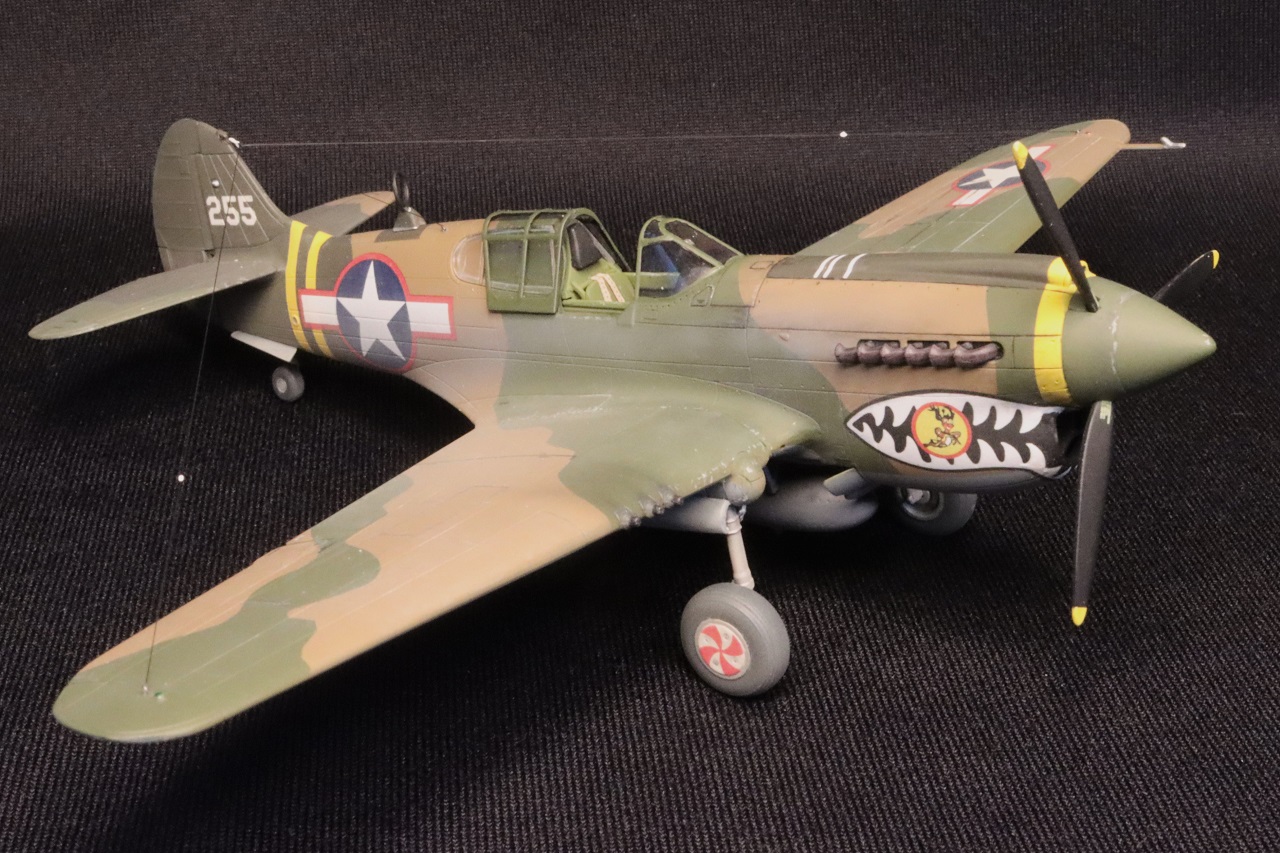
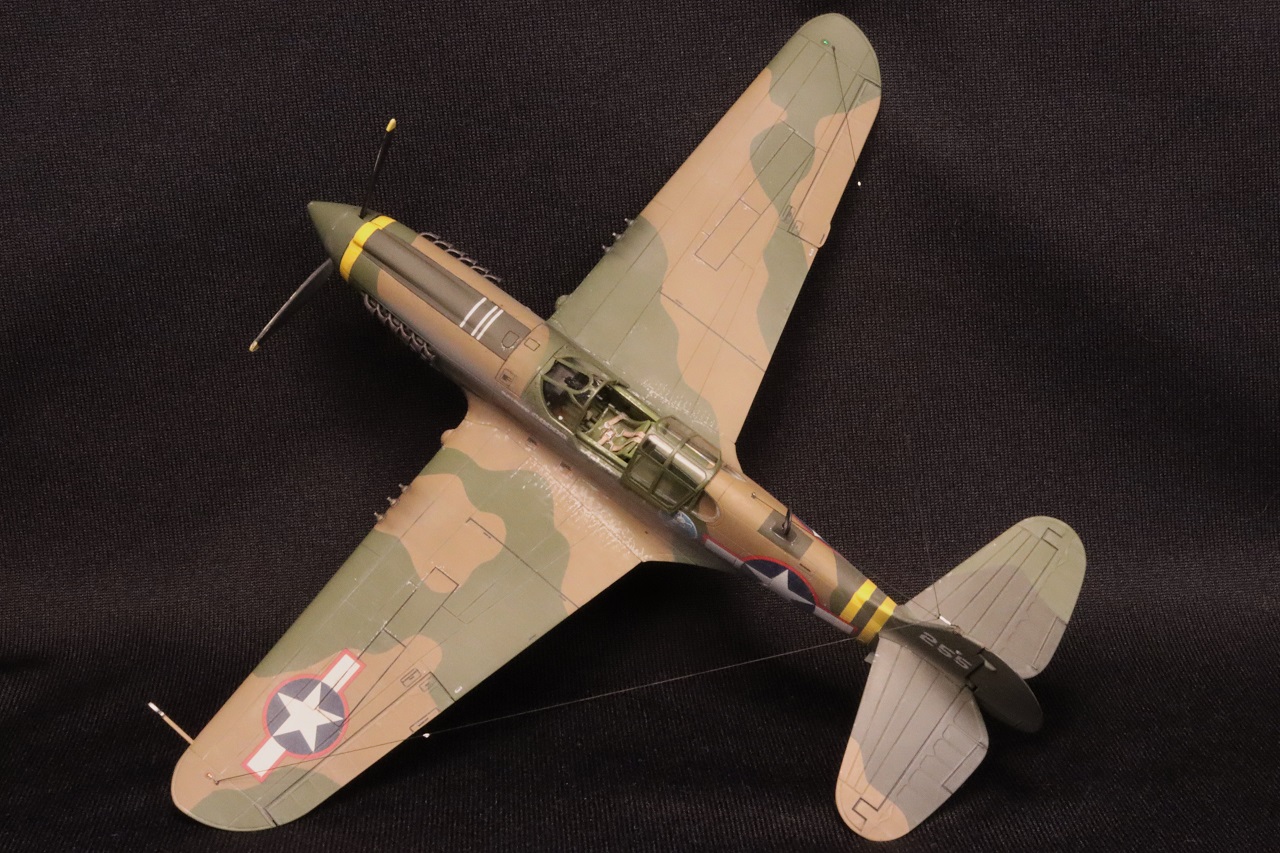
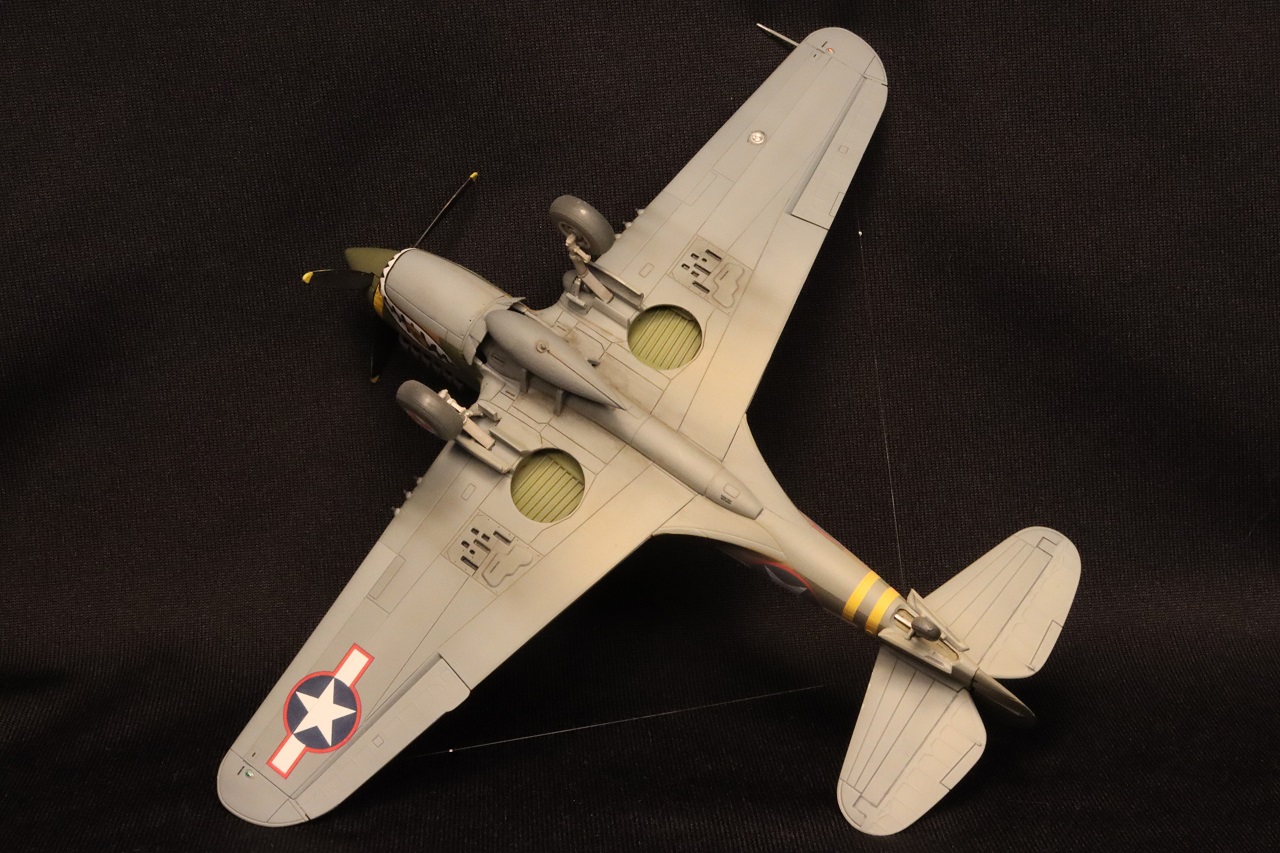
The parts have good detail for the scale. The plastic parts have some raised mold-parting lines and sometimes flash. Careful clean-up of parts will be needed to get good fits. Once the parts are prepared, fits are generally very good. The only place where I found a significant fit issue was with the cockpit coaming ‘B14’. I had to thin the coaming quite a bit to keep the gunsight from hitting the windscreen. The cockpit has separate sidewalls for interior detail and the floor is formed by the upper surface of the wing (just like a real P-40). The instrument panel has nice molded-in detail. Decals are provided for the instrument faces but I didn’t like the light-colored circles around the gauges so I painted the details on my panel. Decals are provided to simulate the pilot’s harness. The harness decals are intended to be applied directly to the seat. To make my harness look more three-dimensional I applied it to painted aluminum foil then cut the harness out and applied that to the seat.
The landing light ‘G6’ is trapped between the wing halves, so don’t forget to install it before assembling the wings. I needed to deepen the recess on the wing’s inner surface to get the light flush with the exterior of the wing.
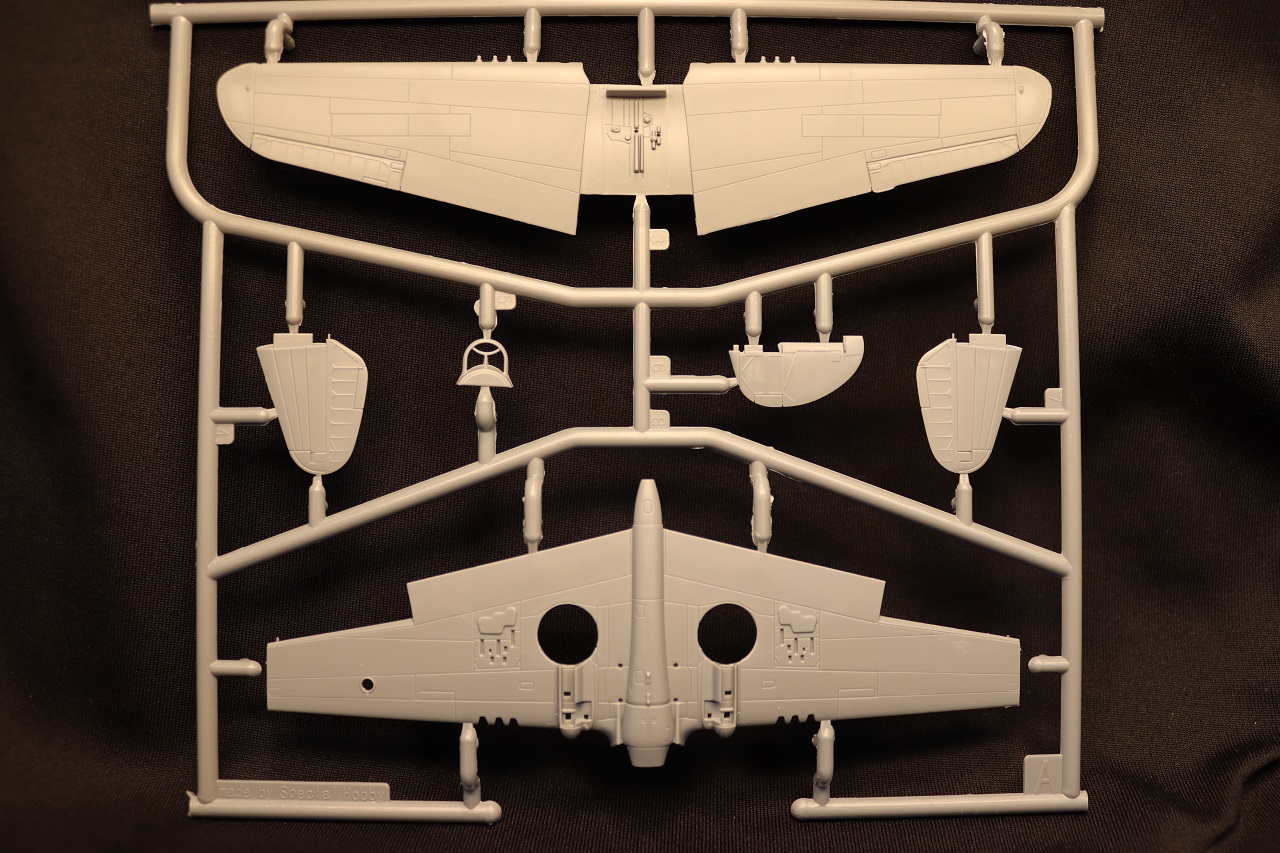
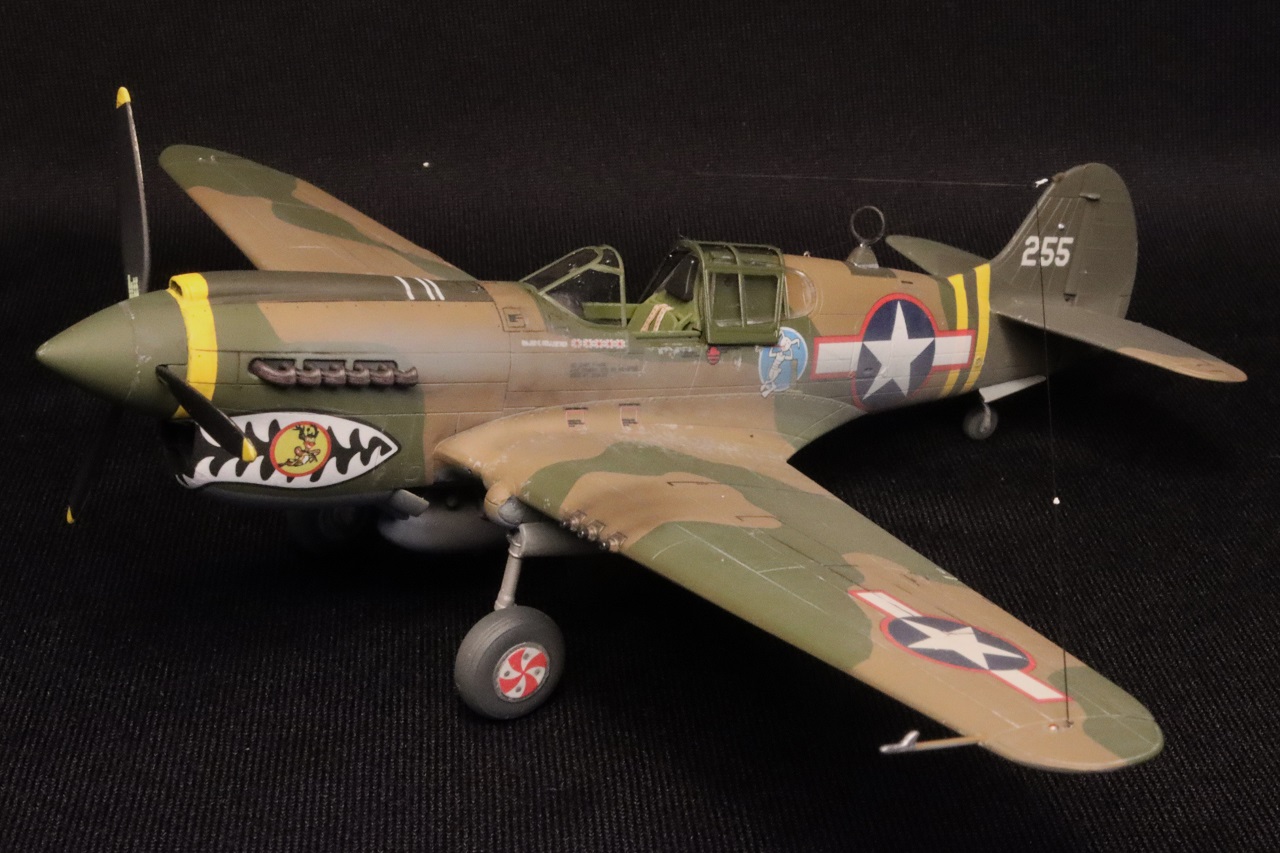
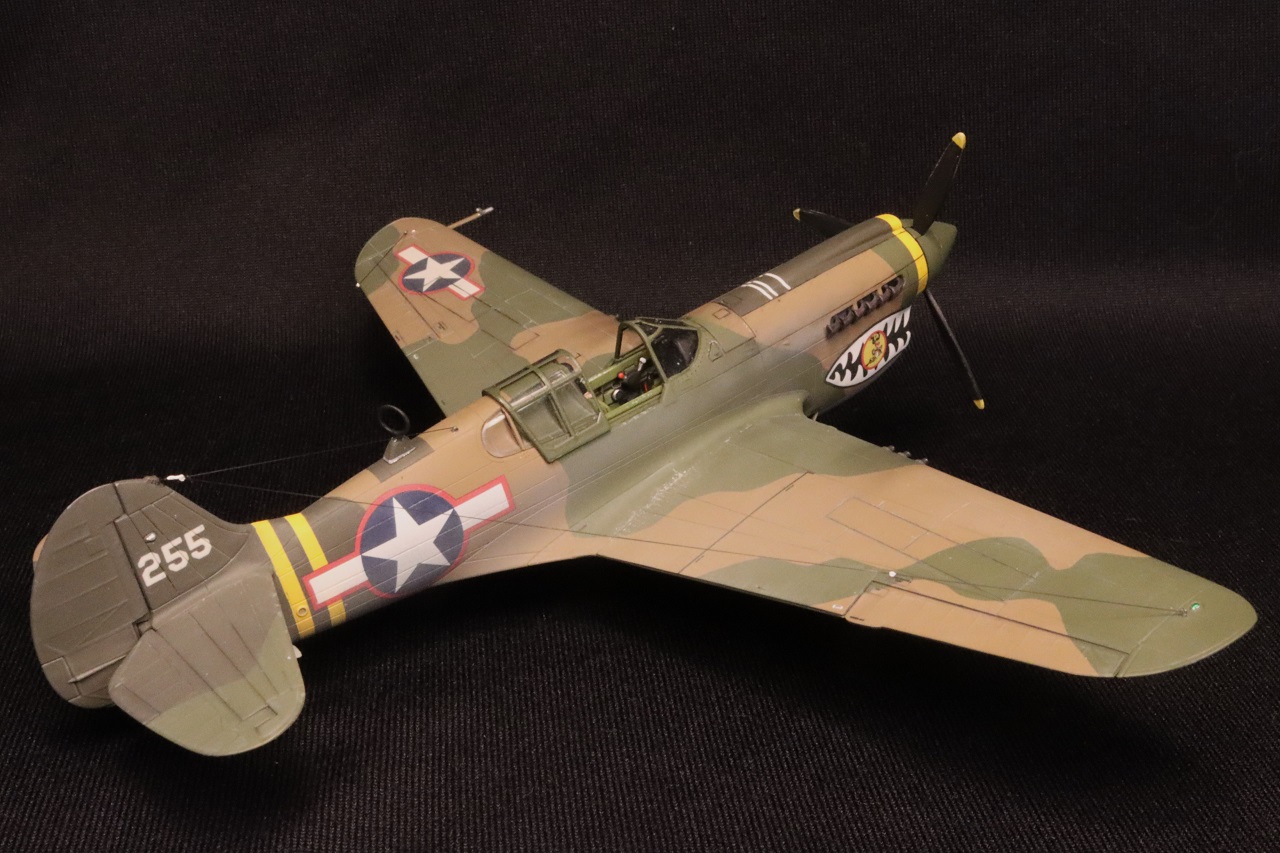
The exterior surface is detailed with recessed panel lines and fasteners. The panel lines on the fuselage and wings are narrower than the panel lines on the tail surfaces. If you like to use panel-line washes, you might want to avoid using a starkly contrasting one on the tail. I found a minor step between the fuselage and chin-scoop ‘A5’ but it was easily smoothed out with a little filler. Fabric-covered control surfaces are depicted with recessed areas between the internal framing. I would have preferred a more subtle effect, but such things are a matter of personal taste. The gun muzzles are molded with the upper wing with the seams falling at the edge of the fairing underneath the wings. This engineering makes cleaning up the seams near the guns much easier.
Clarity of the clear parts is excellent and the framing is sharply-molded making the cutting of masks much easier. Special Hobby provides two different sliding portions for showing the cockpit open or closed. If you are building an open cockpit, the part for the closed cockpit is handy for masking-off the interior. On my build the windscreen was slightly too narrow. If I had test-fit it sooner I would have removed a little material from the fuselage mating-surfaces just in front of the cockpit.
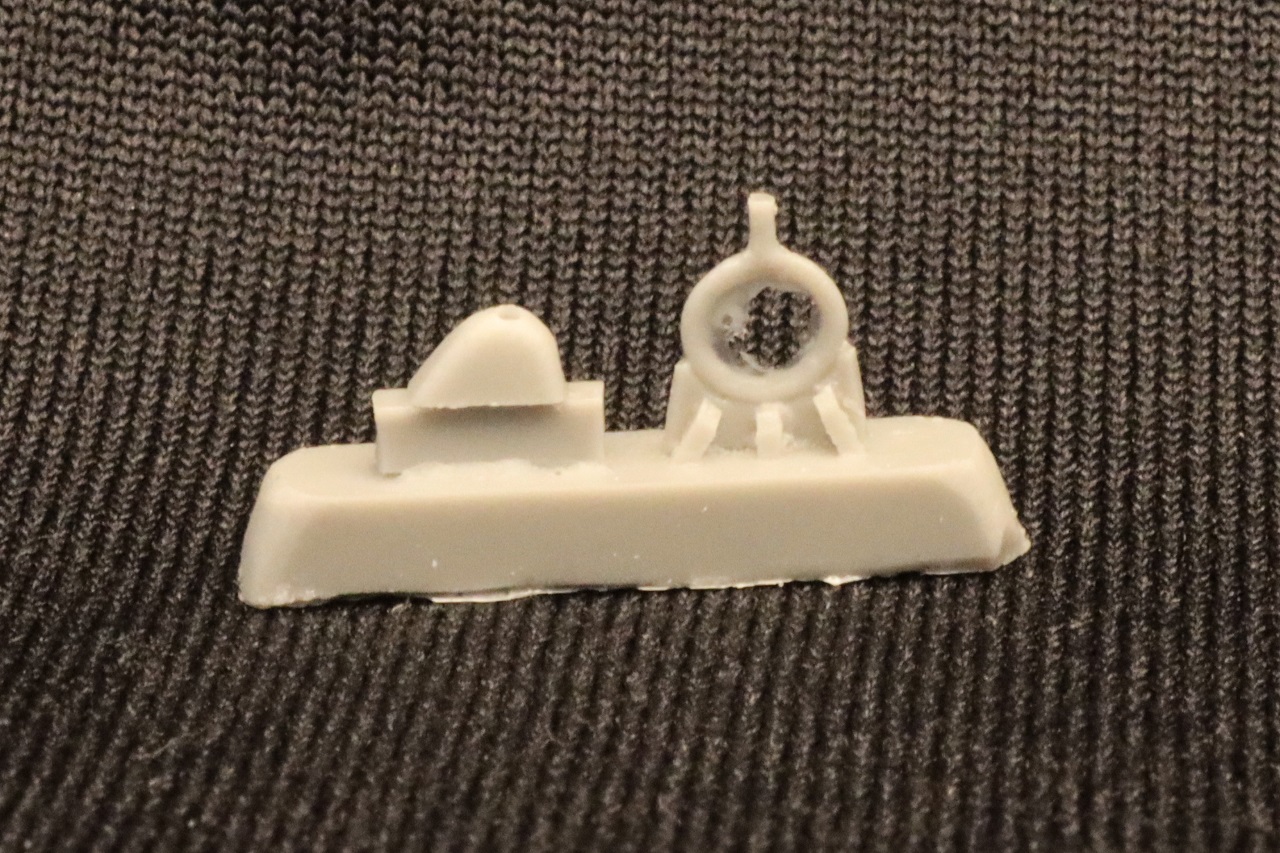
The P-40K had a small air inlet in the leading edge of each wing root that is missing from the kit. This is not unreasonable considering the scale of the kit and the fact that the vents would fall on a seam. I drilled small holes to depict these vents after cleaning up the seams on the wings. The kit provides optional parts for open or closed radiator flaps, a drop-tank, or a bomb. I opted to use the drop-tank on my build. Getting the sway braces for the drop-tank correctly aligned is a fiddly process, you might find it easier to attach the braces to the fuselage first, and then add the tank. For building marking option ‘C’ a resin loop antenna and mount are included. There is no location aid for installing the mount other than the illustration. The loop antenna is very fragile and should be installed after you’ve finished everything else.
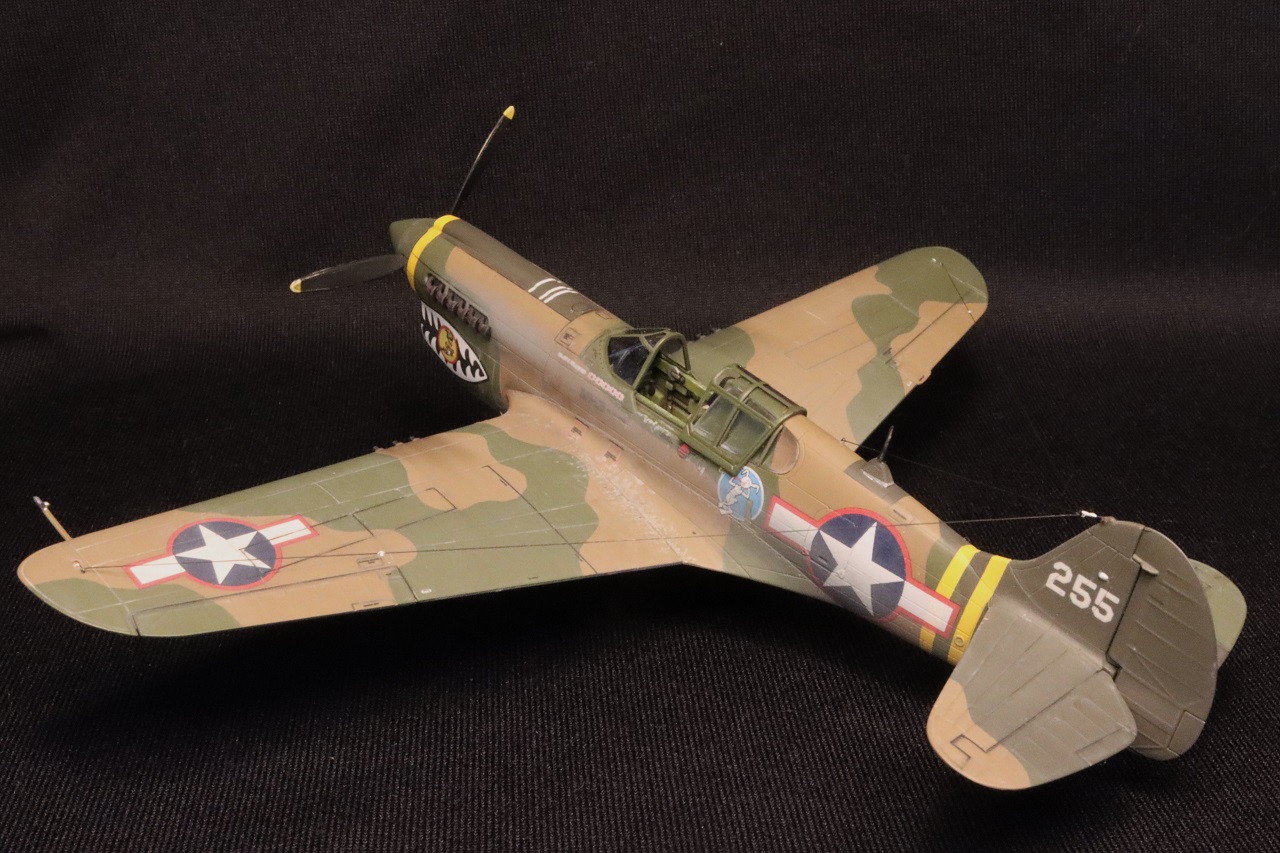
The decals provided are in good register and sharp. There are a lot of stencils to apply and I noticed too late that two of them are under the rear windows. For marking option ‘A’ depicting an olive-drab aircraft overpainted with sand, there is an extra set of stencils and serial numbers printed on an olive-drab background. The decals have very thin carrier film that disappears under a coat of varnish. The carrier film is so thin that you have to be careful not to get the edges rolled under as you slide the decals on the surface. I chose to build marking option ‘C’, the mount of Major Edward Nollmeyer. I didn’t have the recommended Gunze paints so I mixed my own from AK Real Colors and Tamiya. The yellow stripes on the tail of Nollmeyer’s plane are provided as a decal with two notches to make room for the national insignia. I found this decal difficult to apply and made a mess of it. I had to paint the stripes on my build. If you choose to use this decal, you may find it easier to cut it apart and apply it in several pieces.
This kit is not a shake-the-box and it falls together sort of build, but it is not really difficult either. A modeler who is patient with parts clean-up and test-fitting will be rewarded with a good-looking result. I really enjoyed this build and found myself motivated to buy another ‘K’ and a P-40N to build next. I am very grateful to Special Hobby and IPMS/USA for providing this review sample and I look forward to building more Special Hobby Warhawks.


Comments
Add new comment
This site is protected by reCAPTCHA and the Google Privacy Policy and Terms of Service apply.
Similar Reviews