
OS2U Kingfisher
Thank you to the great folks at Kitty Hawk Models for bringing a welcome new large-scale kit to U. S. Navy propeller aficionados. Kitty Hawk subjects are starting to fill out my collection more and more! Thank you also to the IPMS Reviewer Corps staff members who do the hard work in getting us kits to review.
This new release from Kitty Hawk fills a long-standing gap in 1:32 scale early USN aircraft. The Kingfisher is represented in the scale modeling world by very old but generally still available smaller scale 1:48 and 1:72 kits, which can be upgraded and corrected by a wide variety of after-market components. However, I am unaware of any injection-molded Kingfisher kits in 1:32 scale, let alone a modern release. Bravo Kitty Hawk!
This review is a pre-build review or scrimmage, where I am reporting on construction planning, kit option choices, evaluation of the kit, and preliminary observations. A full build will follow soon!
Presentation (how the kit looks in the box)
The kit arrived in a stout 15.75 x 10 x 4 inch cardboard box with colorful box cover art. The cover appears to show a Kingfisher on a catapult during the Pearl Harbor attack, in red-white rudder stripes and red disks centered on the white star national insignia. Decals, instructions and photo- etched (PE) materials were found beneath 5 individually-bagged sprues, with an overlying cardboard box containing a well-protected sprue of clear parts in a clear poly bag. A small PE fret was protected by shrink wrap-like laminate and enclosed with the decal sheets in a plastic zipper-closure bag.
I found no signs of mold release on any of the light gray sprues. Ejector-pin marks were found only on interior surfaces, and no sink holes were found during a quick review of the 240-plus parts. Large part surfaces have lightly-engraved surface details. I did find raised details on the top engine compartment access hatches just forward of the windscreen. The small PE fret has interior cockpit details and some external antennae.
Instructions and Other Materials
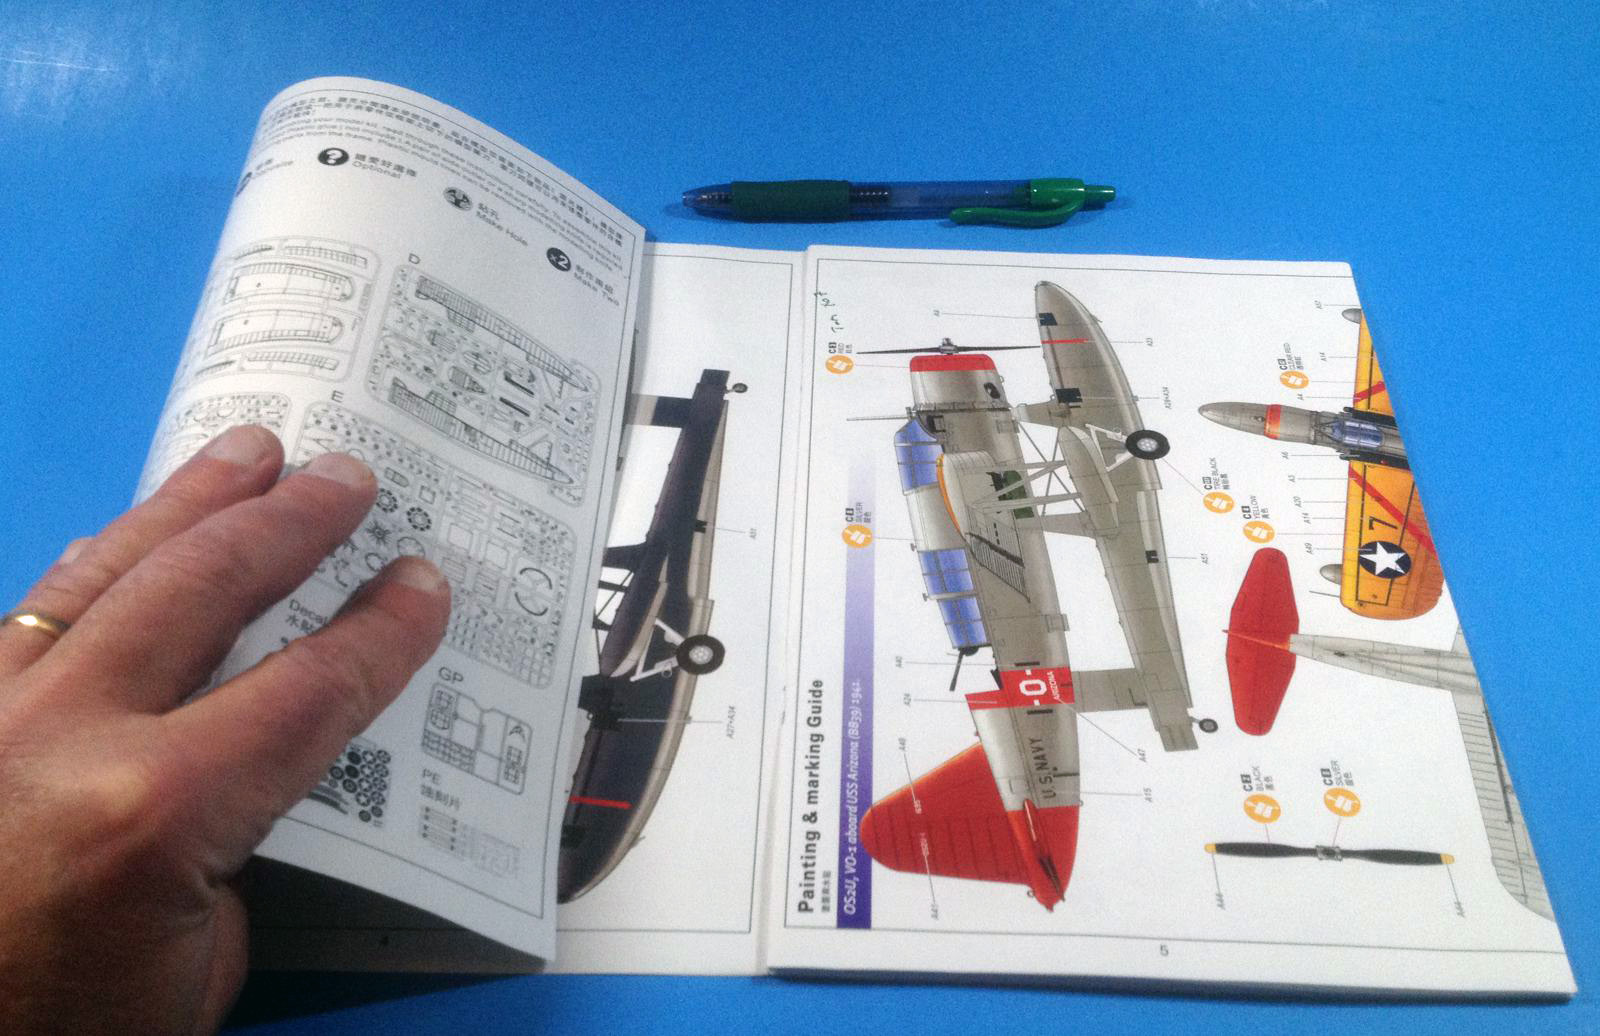
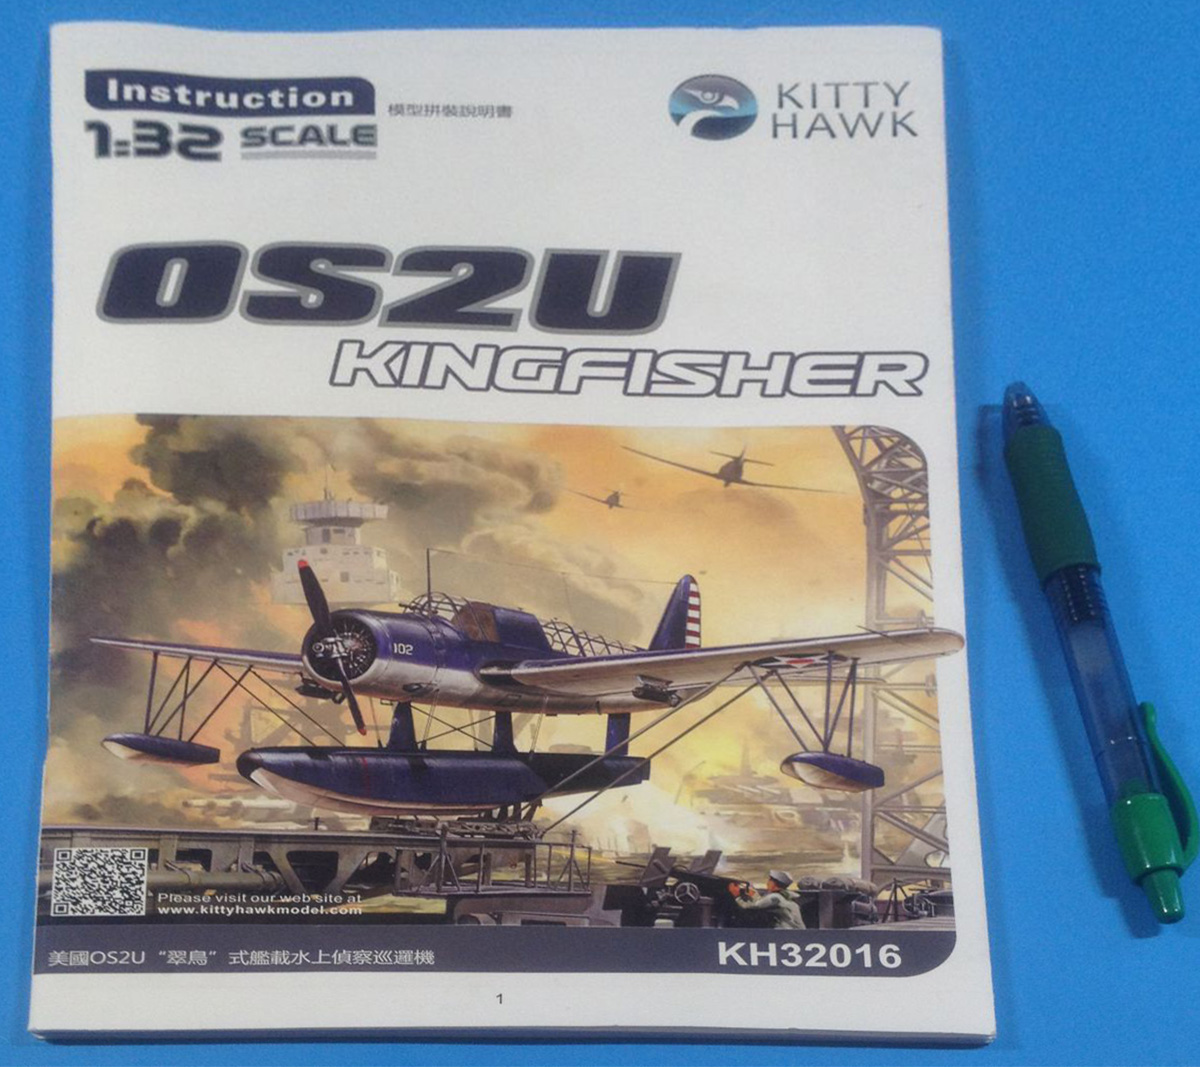
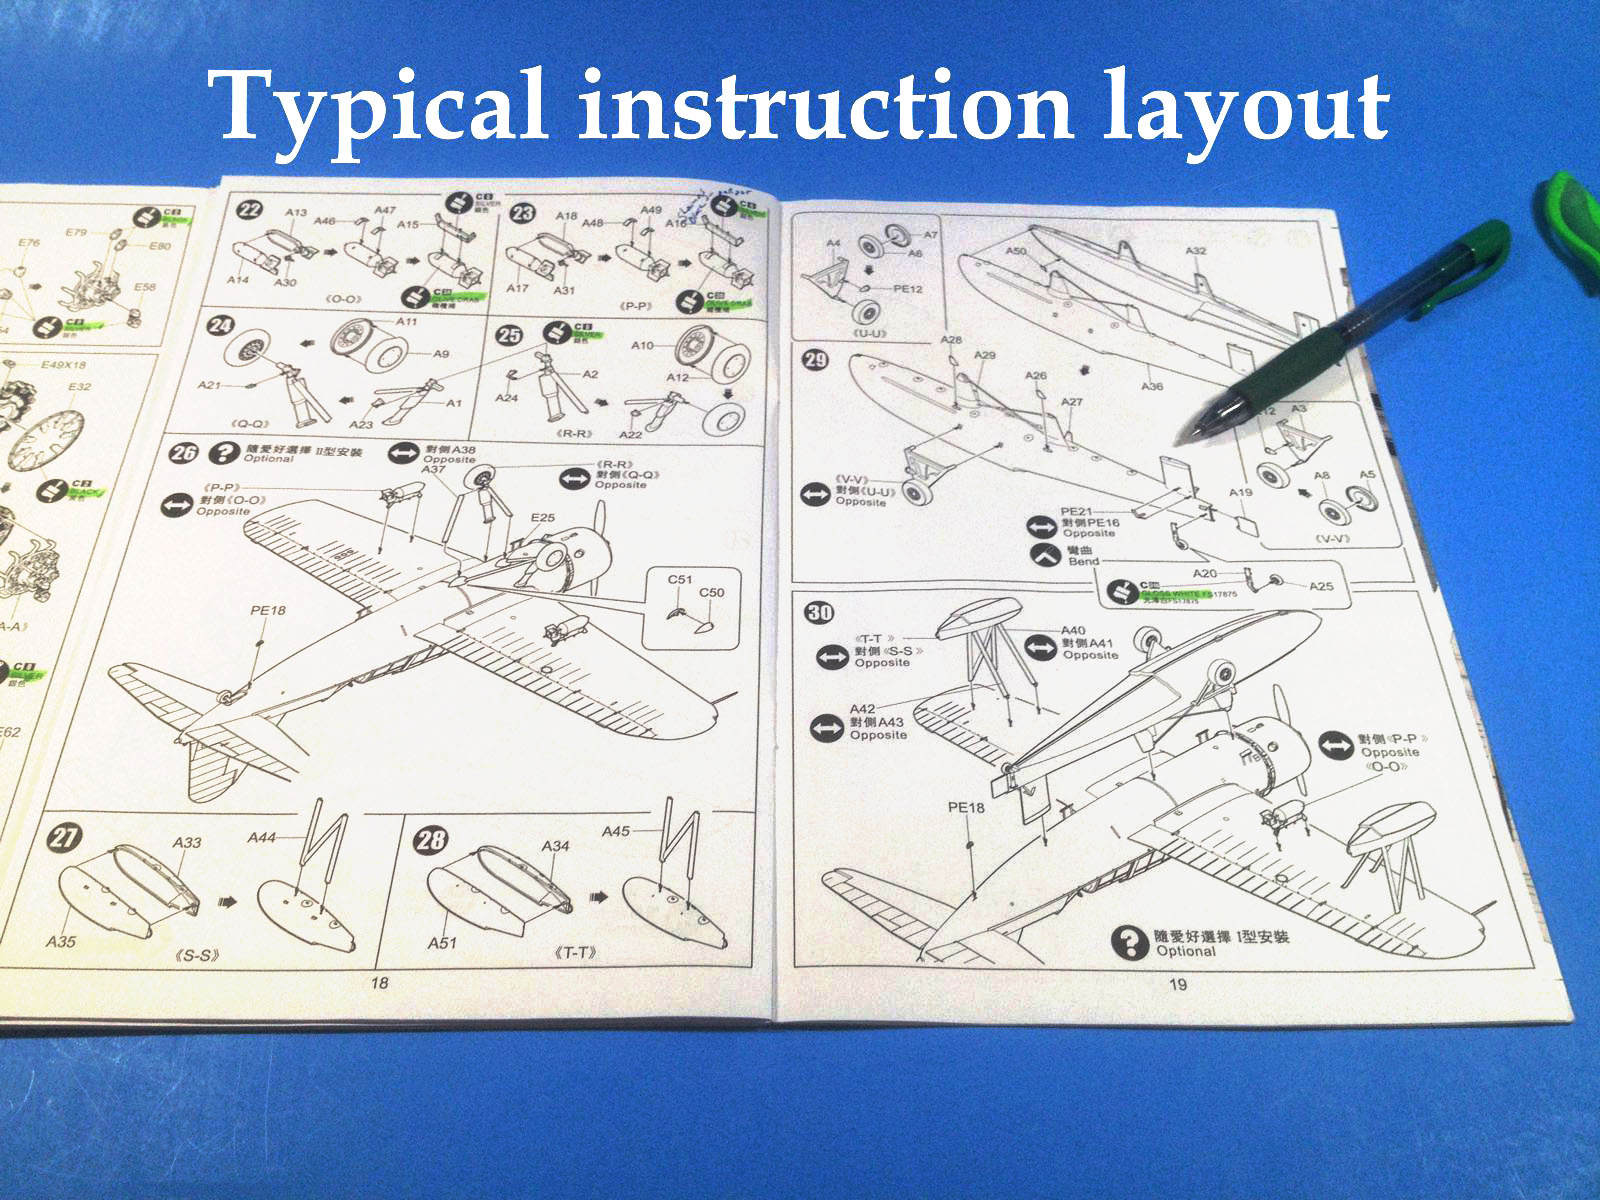
The instruction booklet is 10.5 x 7 inch (260 mm x 176 mm), 28 page center-stapled binding, including 16 pages of color glossy fold outs. A small parts map is a good reference for the various part location on the sprue frames. The 31 steps have crisp drawings, with the usual symbology for optional parts, drilling, bending etc. There is no key for the paint callouts, but it appears that the single number associated with each paint callout is a Gunze Sanyo or Mr. Color paint reference. General color names are listed, and FS 34097 is spec’d for the interior colors. Parts are provided for float and wheeled versions, with the beaching gear provided for the floats.
The suggested assembly sequence shows three or four subassemblies. The kit design is mostly traditional with right and left fuselage and float halves, and upper and lower wing halves. Steps 1 through 3 describe the engine and engine compartment assembly. There are about 70 or so parts in this group of steps. The level of detail here can used to good advantage, since the side engine panels may easily be left off to display the engine. Steps 4 through 10 will complete front and rear cockpit subassemblies, with most of the work involving the rear cockpit. There are also quite a few detail parts in this group of steps. Step 11 requires a decision for which version is to be modeled, with drill-outs required. But the instructions do not make it clear which areas are to be drilled for which version. If you drilled out everything, the might be a few extra holes! Fuselage assembly is completed in step 16, with flying surfaces completed in step 21. Bombs are assembled in steps 22 and 23. Steps 24 through 26 are for the wheeled version, with steps 27 through 30 completing the float version. Step 31 is placing the access ladder, which a very nice extra for the float version. There is plenty of room around the instruction drawings for notes. I found the instructions to be easily read for pre-build planning purposes. My instructions are thoroughly marked up with notes and cautions for me to not miss something important!
Decals
A large 12.25 x 8.5 inch decal sheet provides markings for one of 6 different aircraft. A smaller 1.25 x 5 inch decal sheet has instrument panel markings and unit insignia for one version. The six different aircraft listed in the instructions are:
- OS2U-3, NAS Corpus 1942 (float)
- OS2U from VO-1 aboard the USS Arizona 1941 (float)
- OS2U from VO-1 aboard the USS Pennsylvania 1940 (wheeled)
- OS2U-3, in Soviet Union service, 1944 (float)
- OS2U in RAF service, 1943 (float)
- OS2U-3 in USN service, 1941 (float)
I am not sure if the last aircraft, the OS2U-3 is from 1941; I found a photograph of this aircraft dated 1944. The kit markings do match the 1944 photo, so the 1941 date is likely a typo. The decals are produced by Kitty Hawk, and appear to be fairly thin. No stenciling is provided, but wing walkways and stripes are included, along with smaller black catapult cradle line-up stripes for the main float. Registration and opacity looks good on all decals.
Finishing
I plan on using a mix of Vallejo Model Air and Metal Color acrylics, Testors Model Master Acryl, and Tamiya acrylics. I am planning to build the float version of the OS2U aboard the USS Arizona in early 1941, although I briefly wavered toward the NAS Corpus version. The between-the-wars yellow-wing USN aircraft are among my favorites to model! The Arizona OS2U kit color scheme appears to be accurate. The general colors specified for the other versions also seem fairly accurate.
Aftermarket
I have not heard of any aftermarket releases for this kit. However, I would not be surprised if Eduard and other vendors plan on releasing additional PE details for the exterior and interior, or masking sets for the expansive greenhouse canopies.
Conclusion
This kit shows excellent promise of being a very enjoyable build resulting in a worthy replica of the venerable Kingfisher. However, the kit is not without a few hiccups to be addressed.
Bell (2010) describes the red-and-white rudder stripes and red insignia centers being ordered in late December 1941, and documents on the Naval History and Heritage Command website describe the red-white markings only being in place from 5 JAN 42 to 15 MAY 42. This background information implies that the box cover art is not entirely accurate, since at the time of Pearl Harbor the red-white marking were not yet required. Small oversights like this suggest a bit of required research to verify the markings of the aircraft you will model. This is really a minor point and I could certainly see myself making the same mistake.
Kingfishers nearly always had EDO floats, with some earlier versions having the slightly longer and lower-volume Vought float. The float provided with this kit measures 10 inches, equivalent to a scale 26 feet - 7.2 inches, almost exactly the length of the EDO float and confirming the kit float is an EDO. If you decided to model an early Kingfisher, be sure to confirm what sort of float is used.
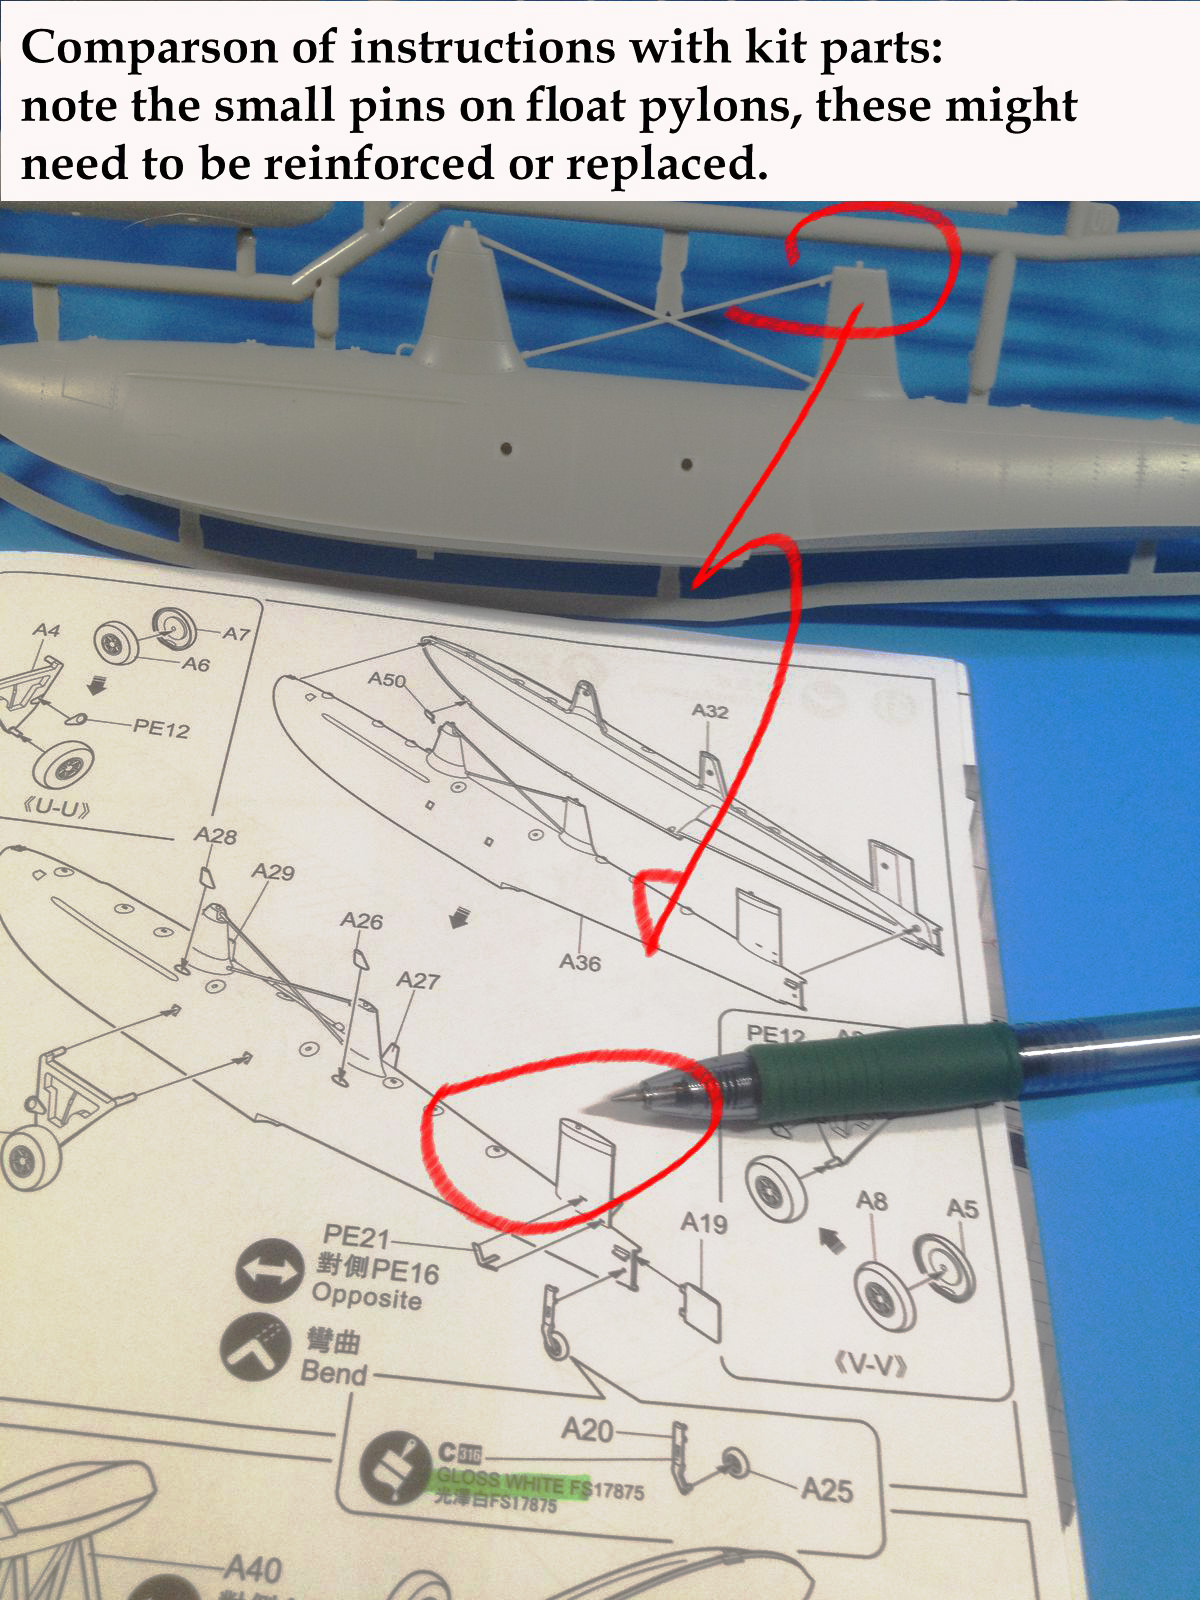
There are some details missing that I would have expected in a large scale kit, particularly one with PE provided. The 4 pairs of wire braces from the top of the main float to the fuselage bottom are not included. The stanchions for the wires are present, but the wires themselves are not and no drill-outs in the fuselage are indicated. The pullout color schematics do not show the wires, but the Kitty Hawk website photos do show these bracing wires on the example kit photos. Adding these braces should not be difficult, if prep work is done before the fuselage is buttoned up. I also did not find a pin site on the end of the 0.30 caliber flexible gun barrel in the rear cockpit. The pin site is used with the ring site mounted on the gun receiver. This is an easy fix.
The attachment points of the main float to the fuselage will be strengthened. All of the model’s weight will be transferred to the supporting float through 3 small pins as designed. I don’t think that attachment design will be very durable. I expect that I will add brass tubing or something similar to the float-fuselage joints.
This kit is an excellent value and all of the preceding comments are very minor criticisms. The choice of versions is superb, and Kitty Hawk’s overall treatment of a long-neglected subject is very welcome. So now the next challenge will be a P-6 catapult base for this bird, about 38 inches long.
I highly recommend this kit! Look for a complete build review soon. Thank you Kitty Hawk and the IPMS Reviewer Corps!
References
- Adcock, Al, 1991, OS2U Kingfisher in Action, Aircraft Number 119, Squadron/Signal Publications, Carrollton, TX, ISBN 0-89747-270-5, 50 pp.
- Bell, Dana, 2010, OS2U Kingfisher, Aircraft Pictorial 3, Classic Warships Publishing, Tucson, AZ, ISBN 978-0-9823583-4-4, 72 pp.
- Glidden, Mark, 2005, Long Live the Kingfisher!, Tamiya Modeling Magazine International, Issue 113, March, 2004, pp. 14 – 21

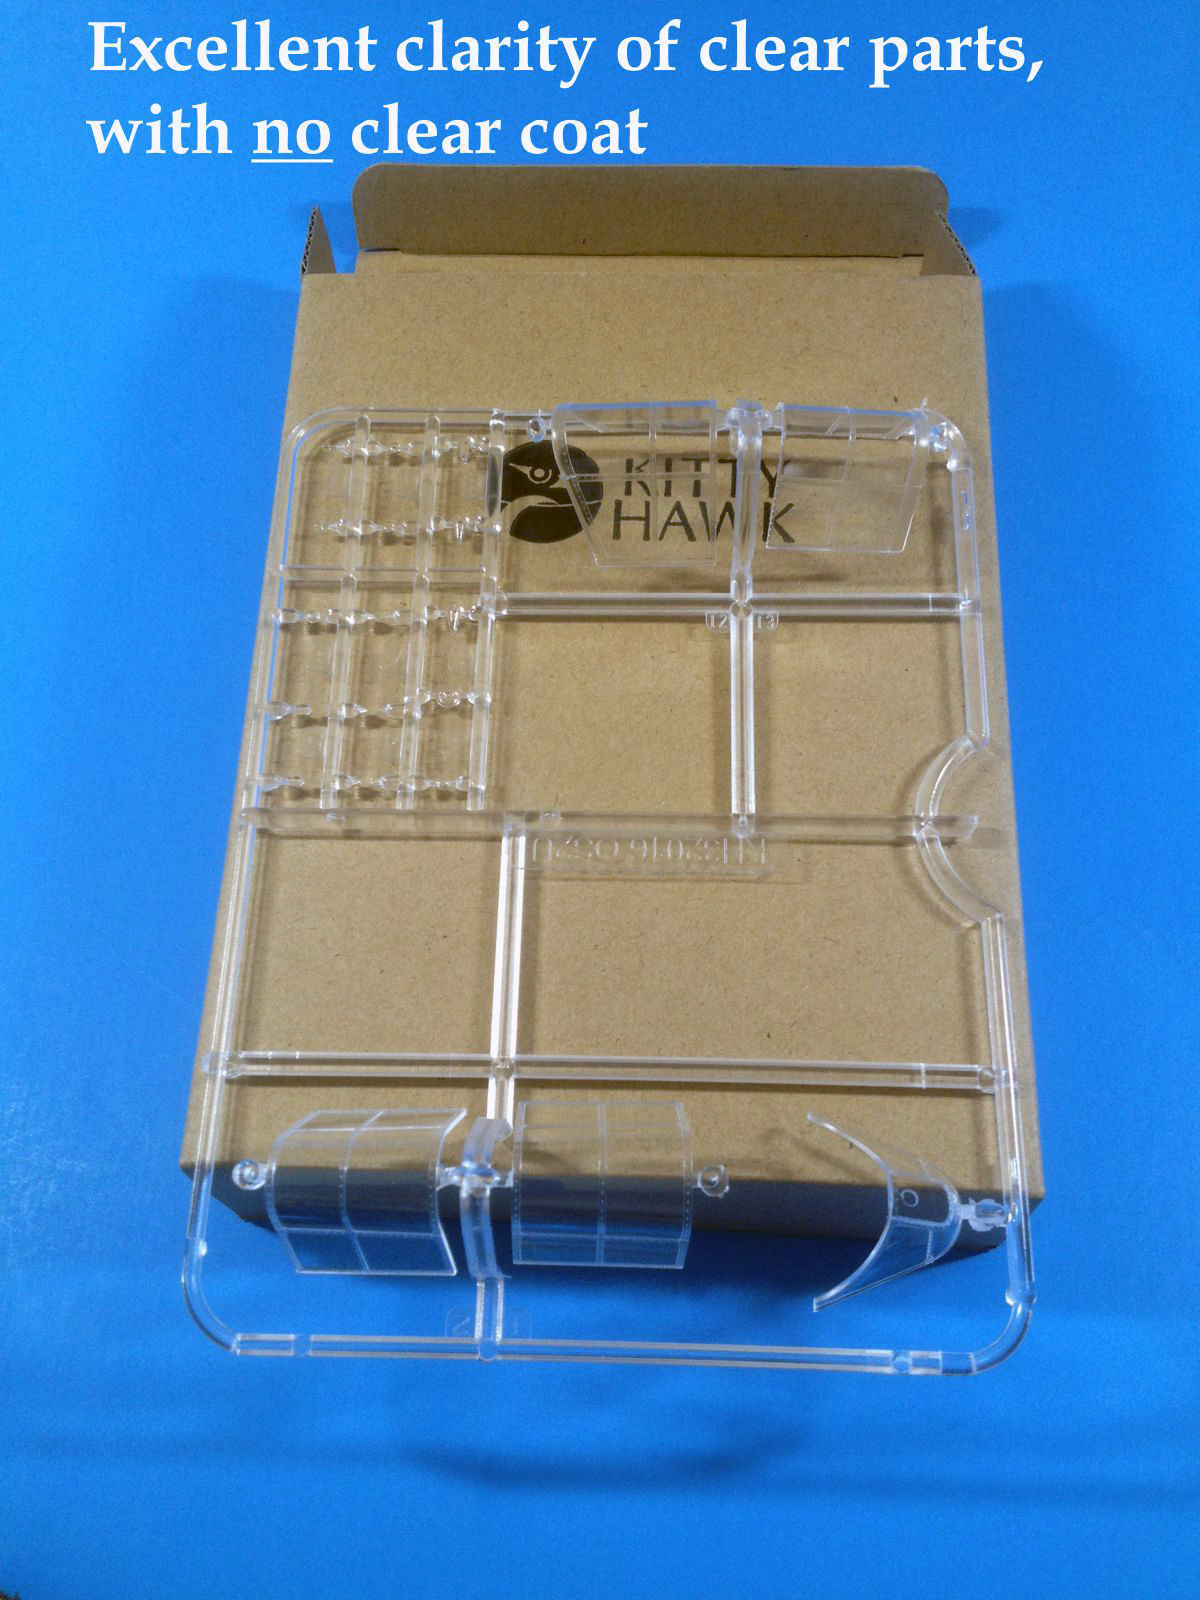
Clear parts
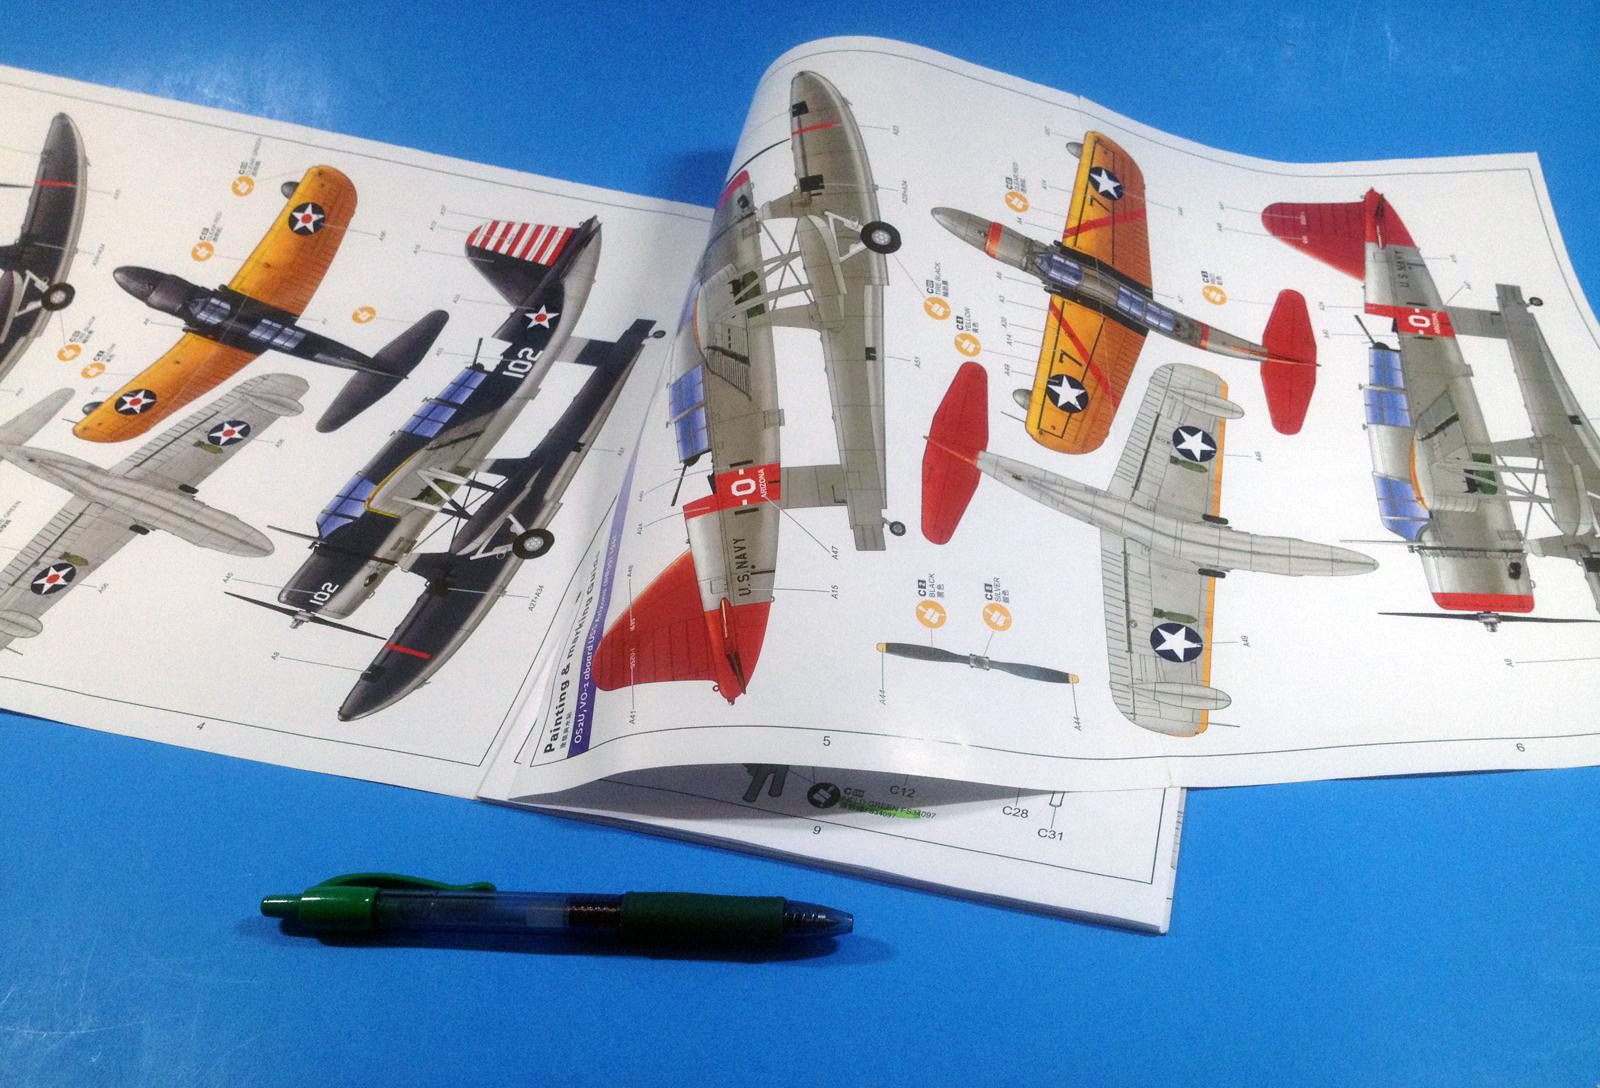
Two of the color pullouts
Color pullout and sprue map
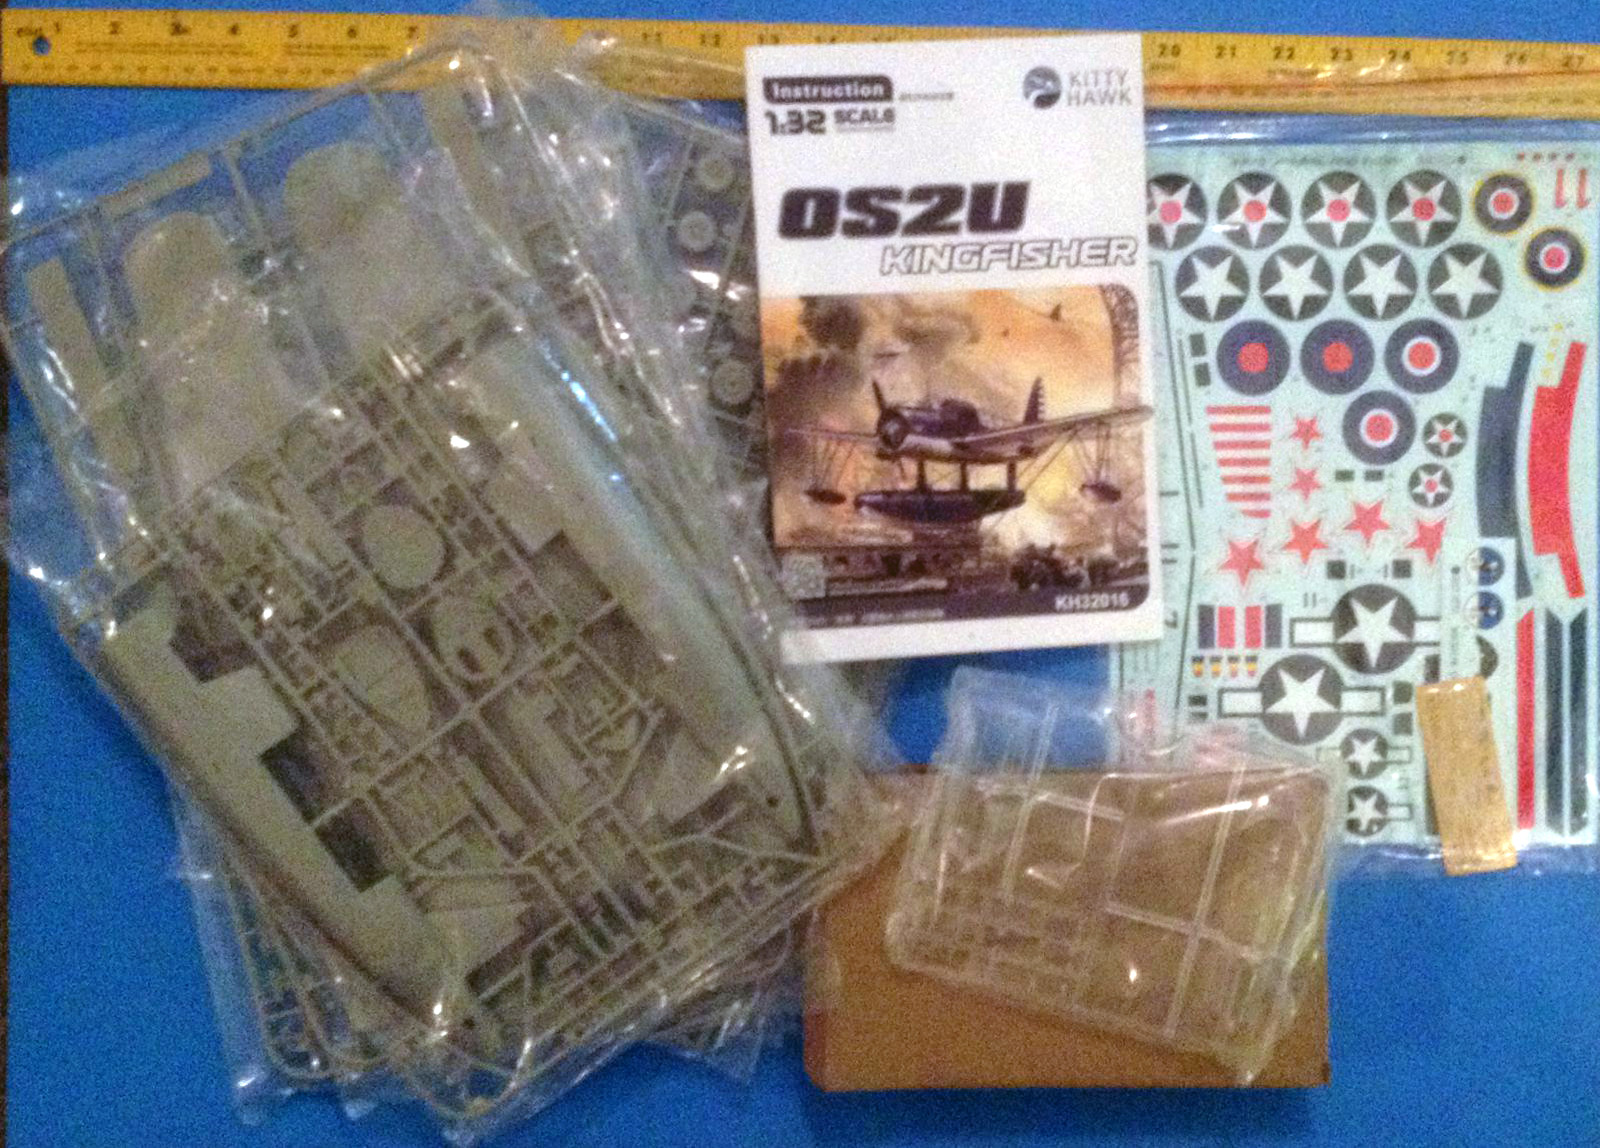
All of the parts unstacked
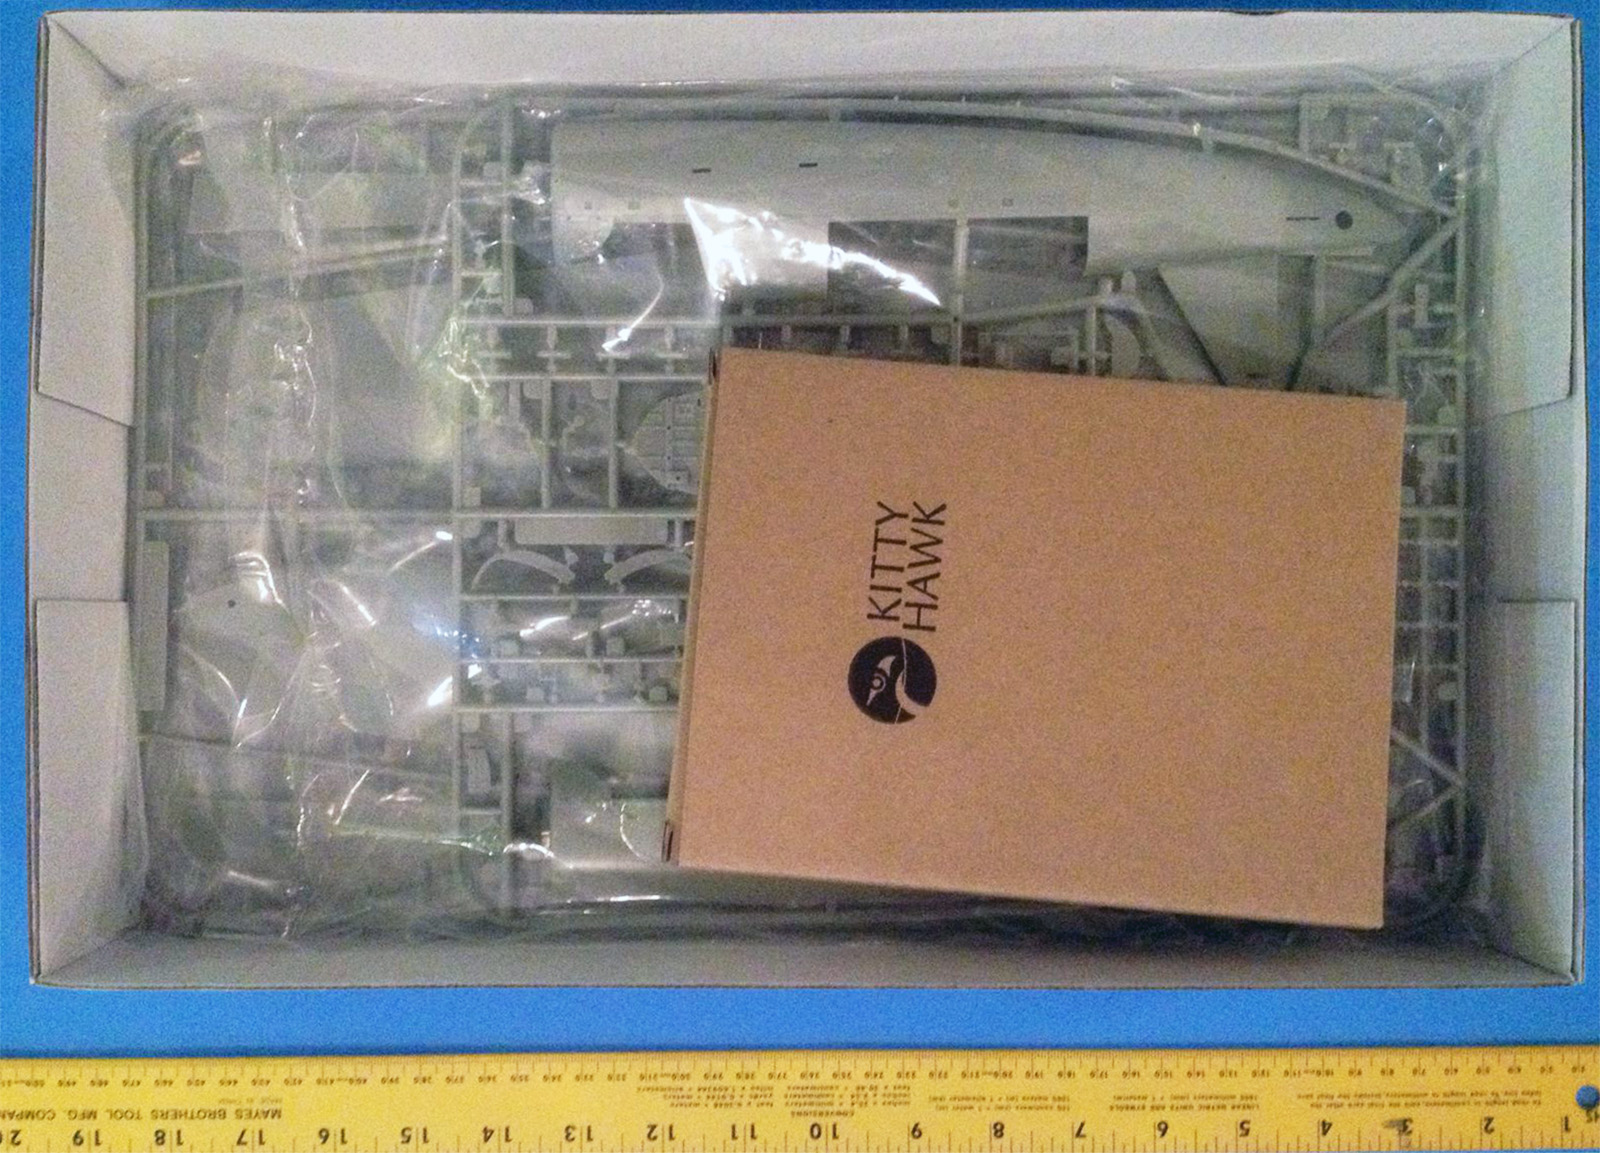
All of the parts in the box
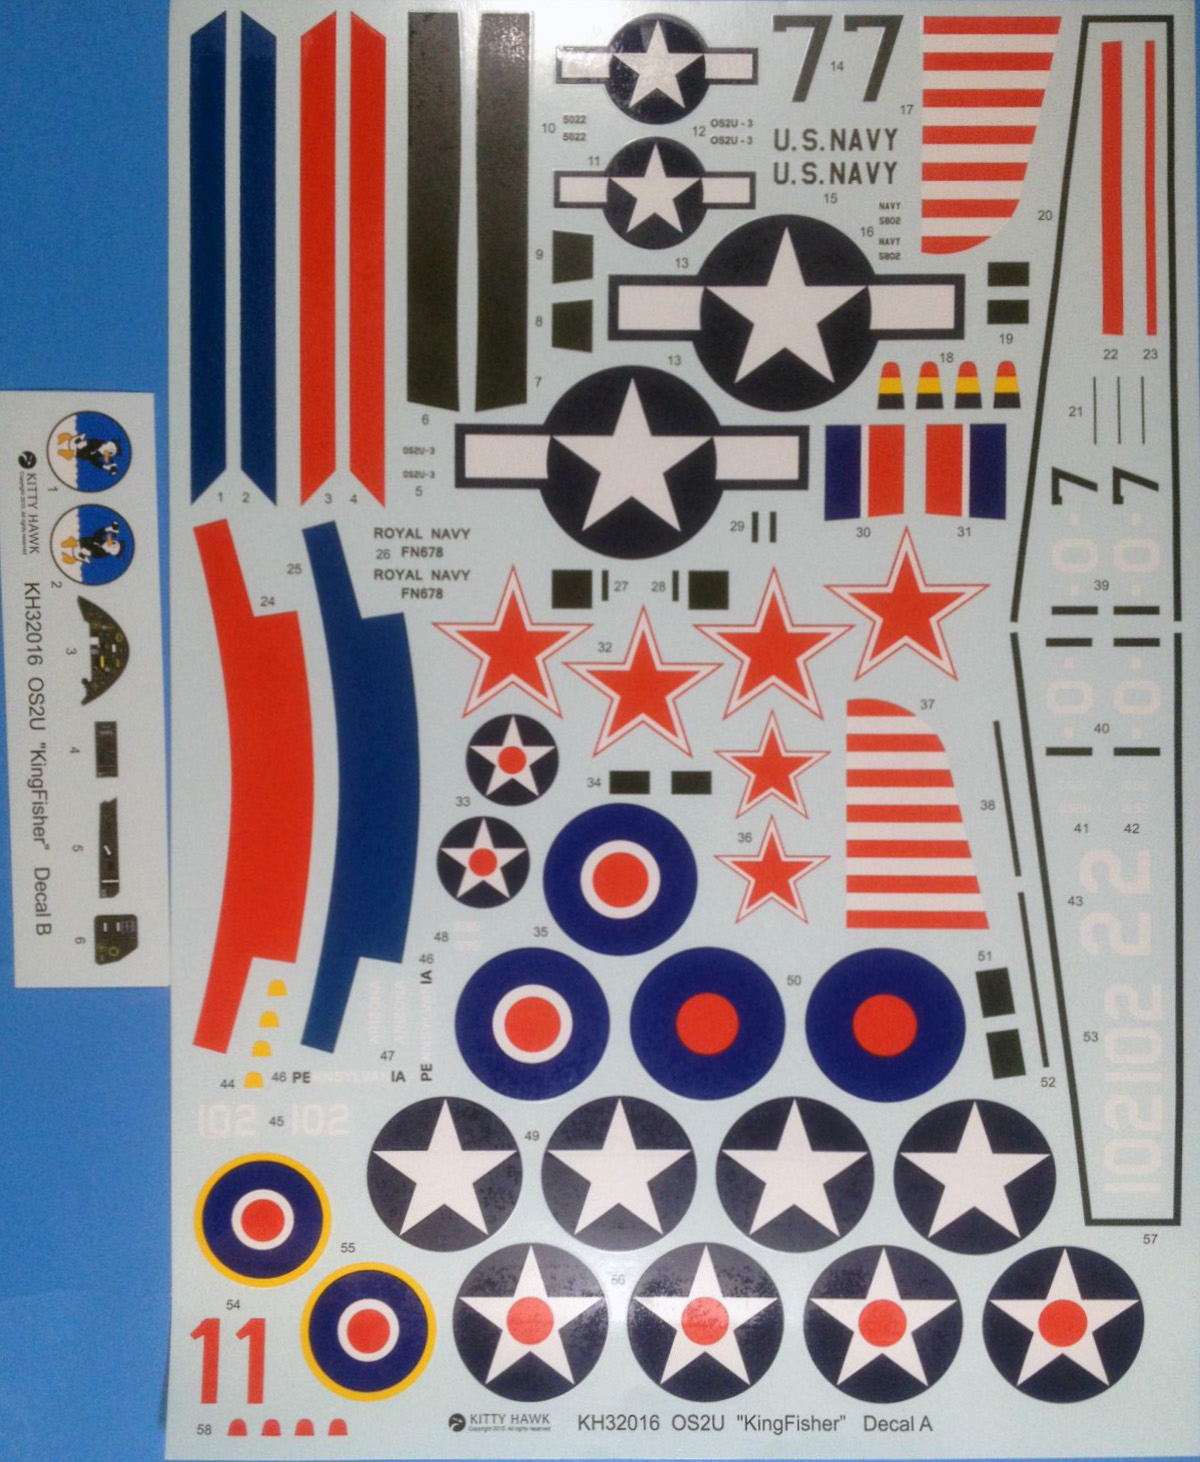
A colorful set of decals!
Float-fuselage join area

Detailed, yet roomy instructions
The beginning of the adventure…
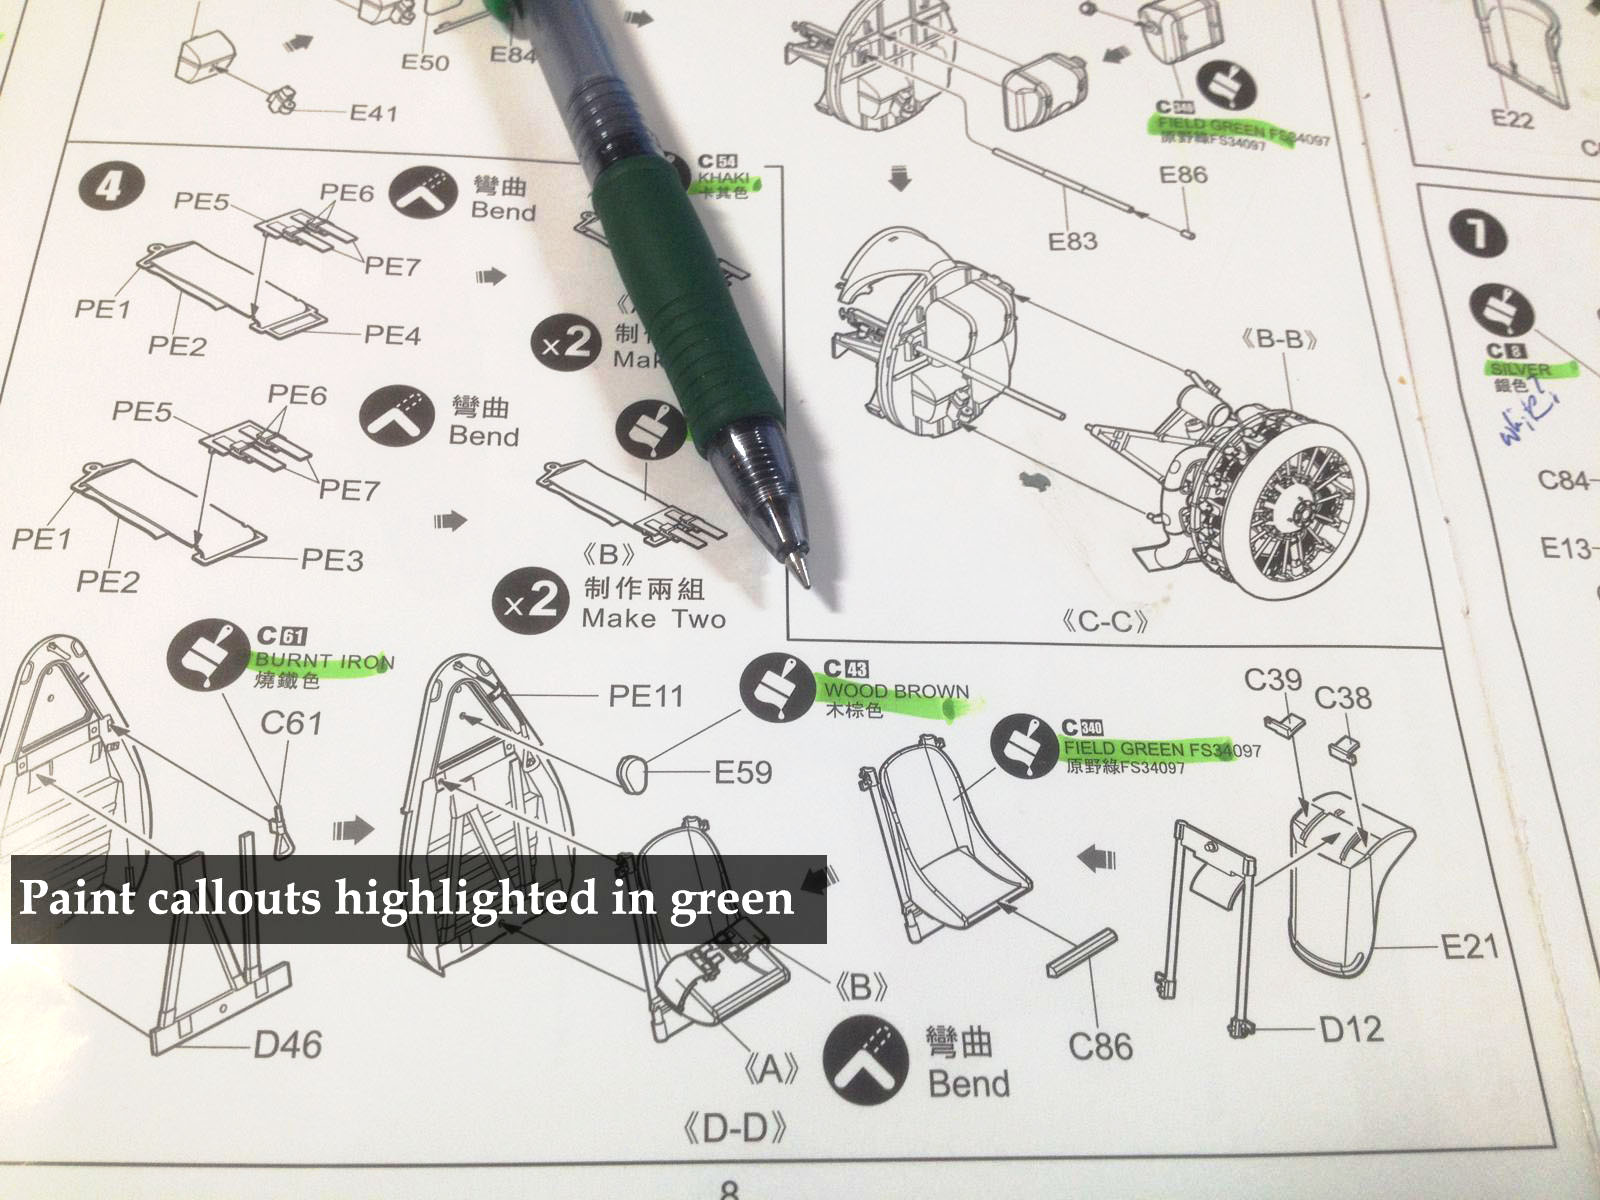
Paint callout example
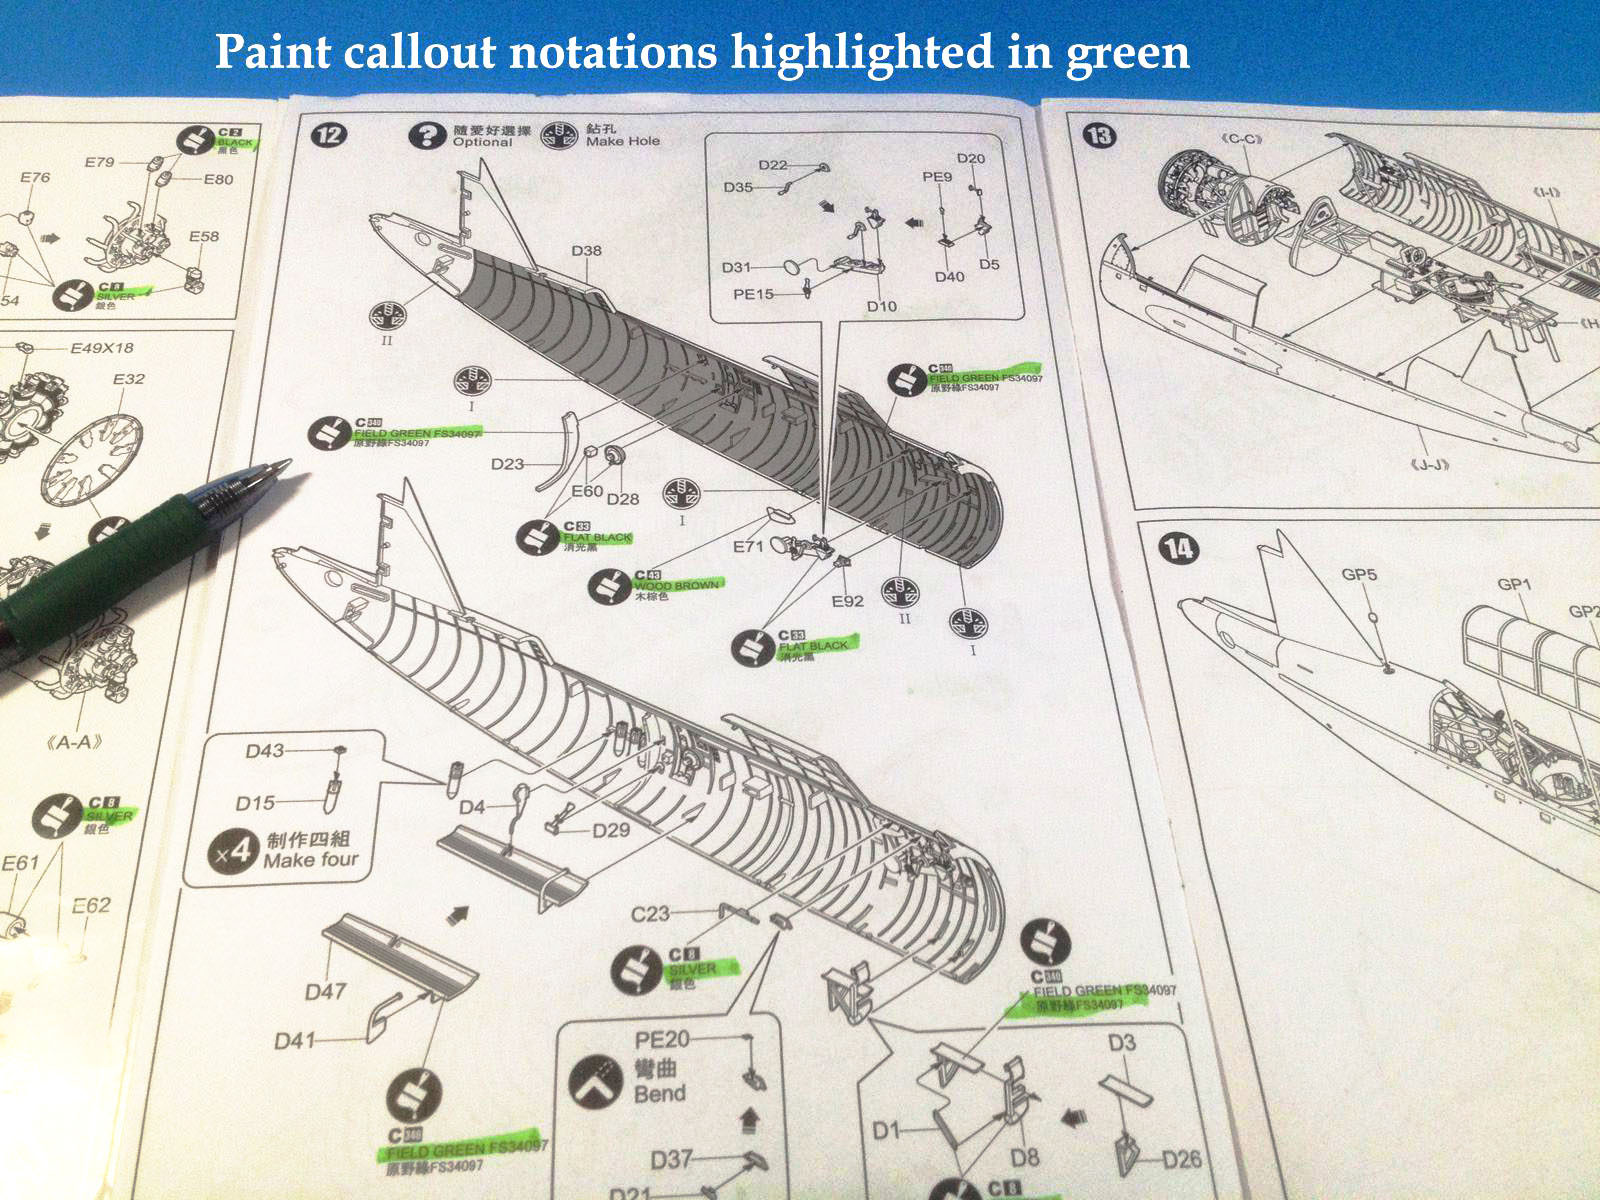
Paint callout example and drillouts
Comments
Add new comment
This site is protected by reCAPTCHA and the Google Privacy Policy and Terms of Service apply.
Similar Reviews