
North American FJ-4B Fury Cockpit Set
The Navy FJ-4 was, to many people, the culmination of the basic North American Sabre Jet. This final naval variant featured a more powerful engine which required a larger intake, a shorter, deeper fuselage, a larger tail, larger wing area and a longer nose gear. Its front line service was short, however. Although the FJ-4B was loved by its pilots, by the late ‘50’s the Fury was being phased out by newer, less expensive fighter and attack aircraft. They referred to it as the “Cadillac”, while its counterpart and eventual replacement, the A4D, was referred to as the “Tinkertoy”.
Emhar issued the FJ-4B in 1/72nd scale in 1990 and is a great kit. There are really only two shortfalls of the kit; the first being a rather basic cockpit and the second being a crude, short exhaust/jet pipe. Pavla has recently released resin detail parts for the cockpit and the exhaust.
Preparation
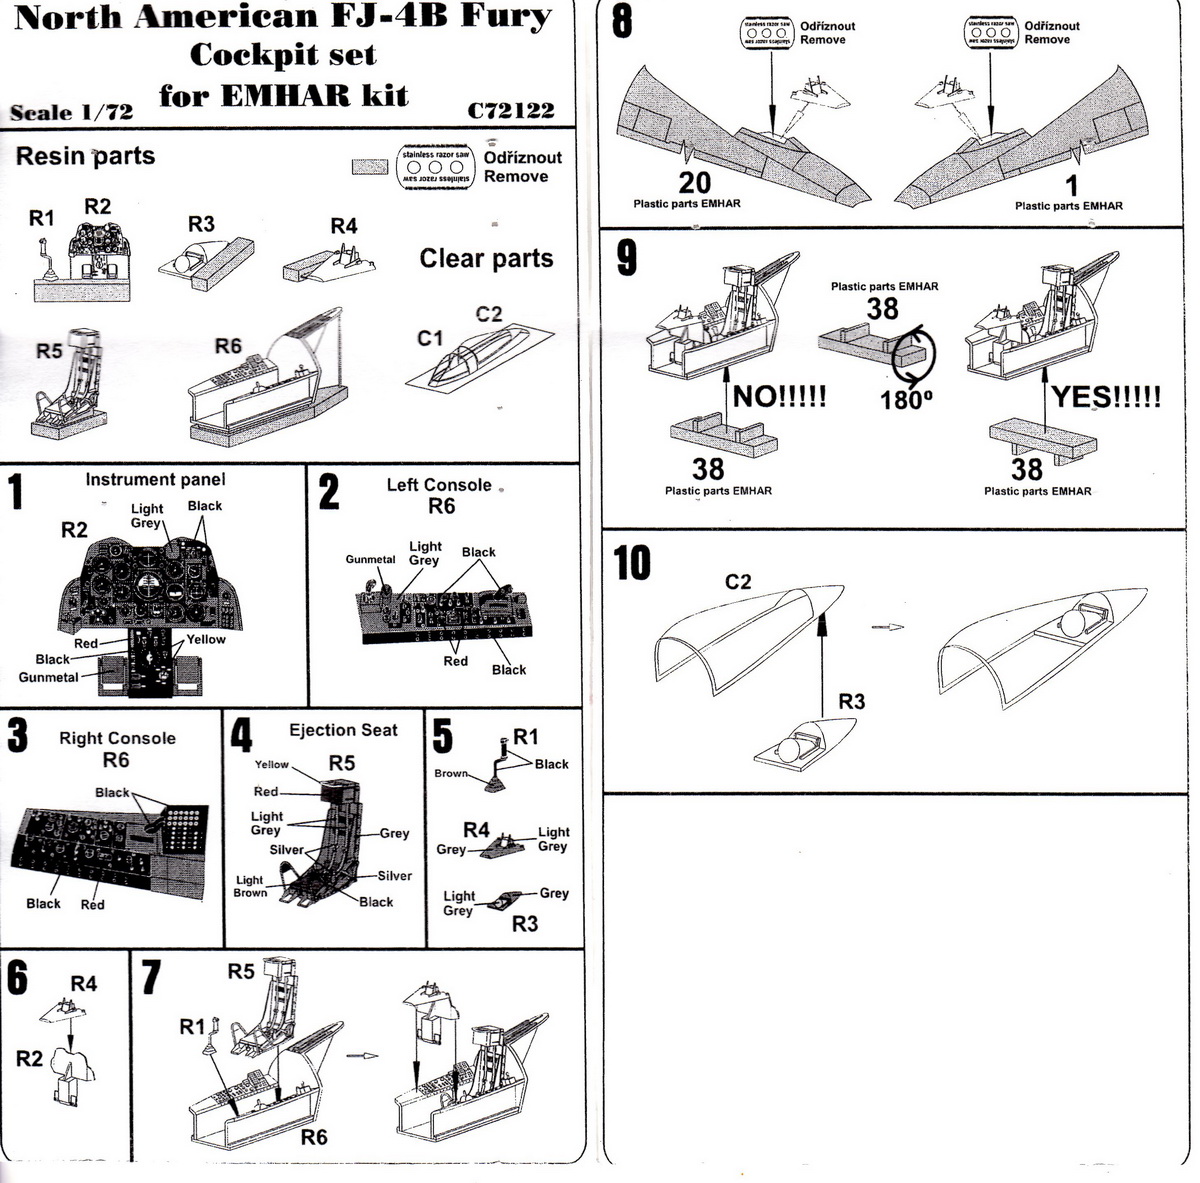
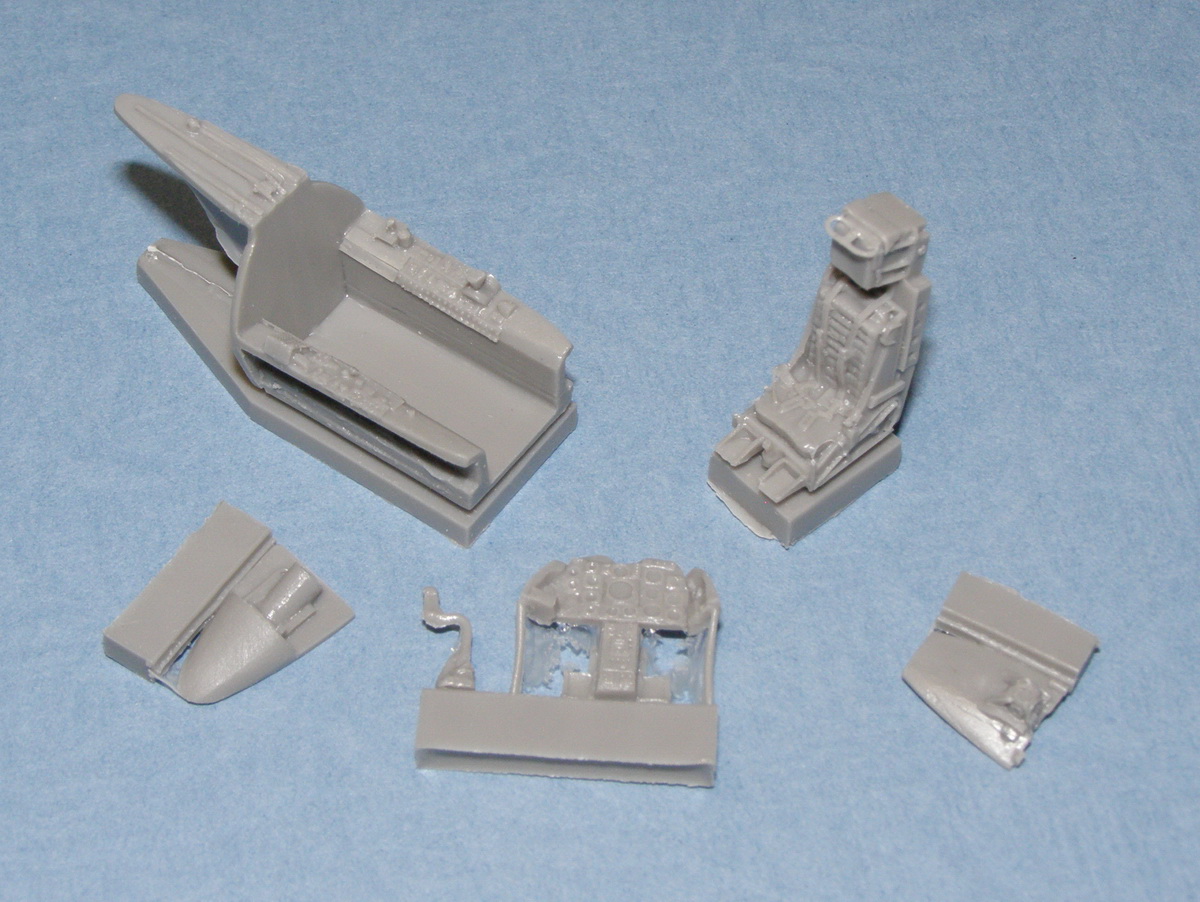
The Pavla cockpit set consists of six resin parts and a vacuum formed replacement canopy. The resin parts feature large pouring blocks which must be removed carefully. The cockpit interior and the ejection seat feature pouring blocks below the parts and are relatively easy to clean up. The instrument panel and the joystick are easy to remove but have some flash that needs cleaned up. The remaining two parts, the top of the instrument panel and the rear of the canopy, feature pouring blocks attached to the side of the parts. Care must be taken to ensure that the parts are not damaged when removing the blocks. It is very important to completely remove the pouring block from the cockpit interior and the ejection seat. The cockpit interior will sit too high and the instrument panel will not have room to fit if the block is not removed completely. With the ejection seat, if the block is not completely removed it will sit too high and the canopy will not clear.
Painting
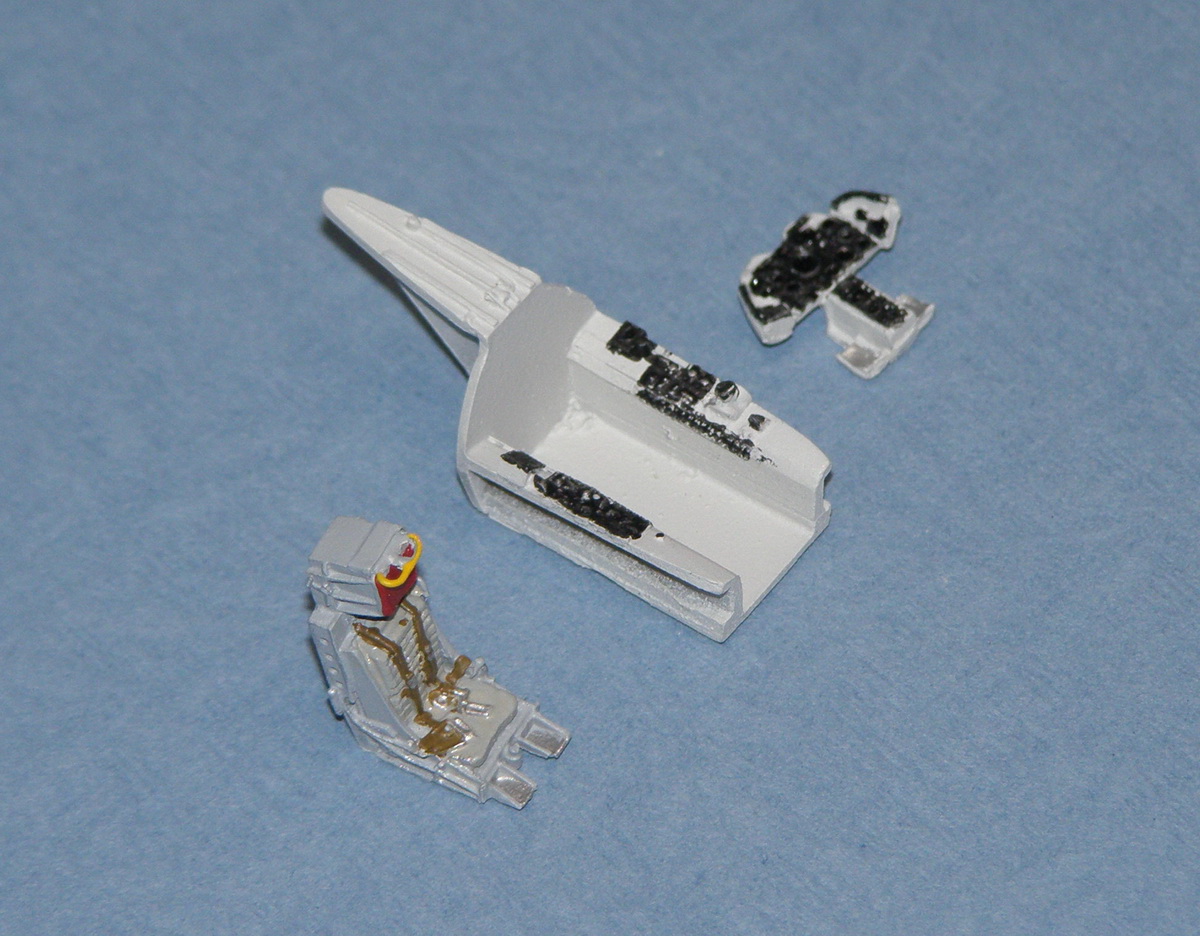
The instructions give some general information about painting – basically light gray and black. I checked the Detail and Scale book on the FJ Fury and found some great color photos of the cockpit area. Based on these photos, I painted the interior of the cockpit Light Gray, F.S. 36495. The ejection seat was painted Light Ghost Gray and the cushions Light Sea Gray. The top of the instrument panel was painted Euro I Gray. The instruments and consoles were painted Black as per the instructions and highlighted as noted.
Assembly
The instructions seem to show the five cockpit parts being assembled together and then encased inside the fuselage. In reality, the process is somewhat more complicated if the parts are to fit as designed.
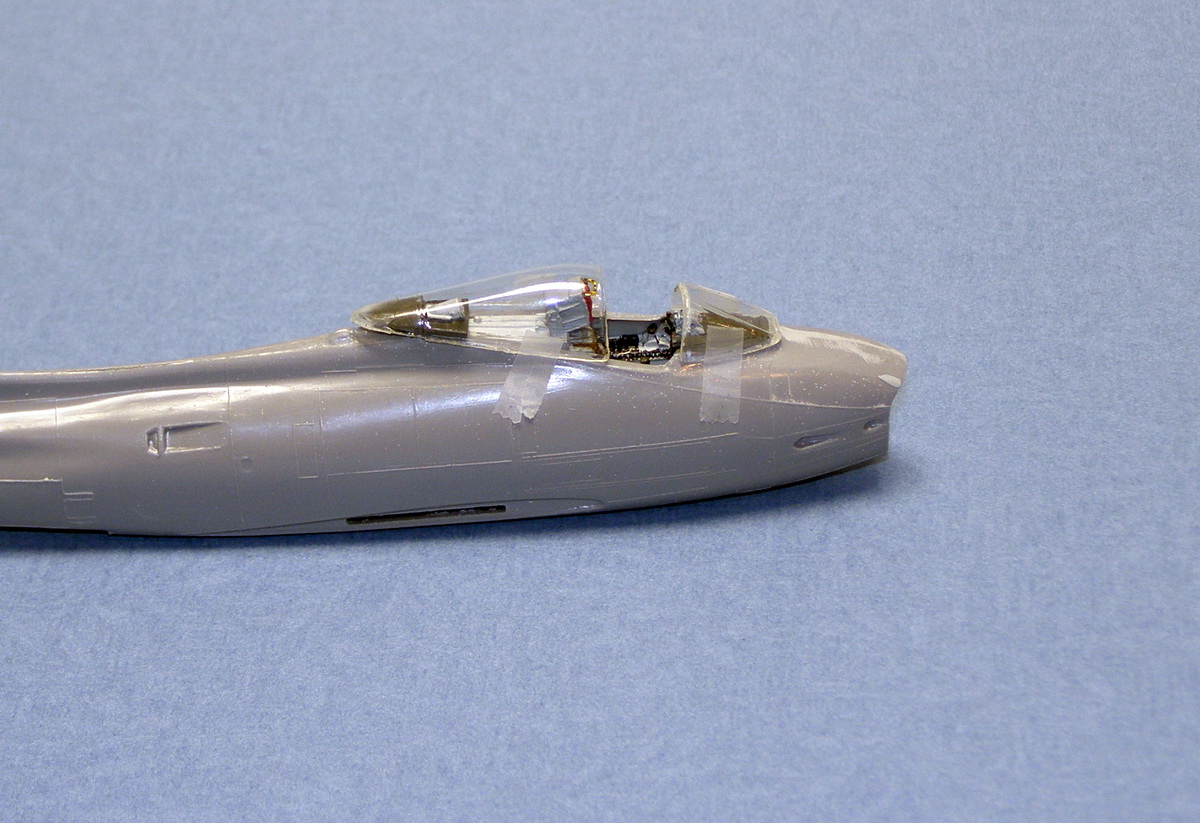
The kit fuselage has to be modified to remove the area in front of the instrument panel. This area will be replaced by the resin part. The next step was to glue the cockpit mounting bar, kit part 38, to the right hand side of the fuselage. I taped the fuselage together while the glue dried so the bar was in its proper position. Make sure to mount this part upside down as shown on the Pavla instructions. Once this part is dry, I test fitted the cockpit, part R6, into the fuselage. It was important to find a location where the rear portion of the cockpit part fit perfectly with the opening in the fuselage parts. This part was then glued in place.
Next comes the instrument panel and the top of the panel. These items had to fit on to the cockpit part and within the fuselage. In order to keep the instrument panel and the top panel, parts R2 and R4, properly aligned and firmly attached, I glued a triangular brace between the parts. This allowed me to handle the parts repeatedly in order to get them to fit properly. When I was finally satisfied, I glued the assembly into the right hand fuselage half. Once dry, the ejection seat and the joy stick are glued in place and then the fuselage can be closed. It is noted that the face curtain handles are molded onto the top of the seat. These are very fragile – mine disappeared somewhere and were replaced by P.E. parts.
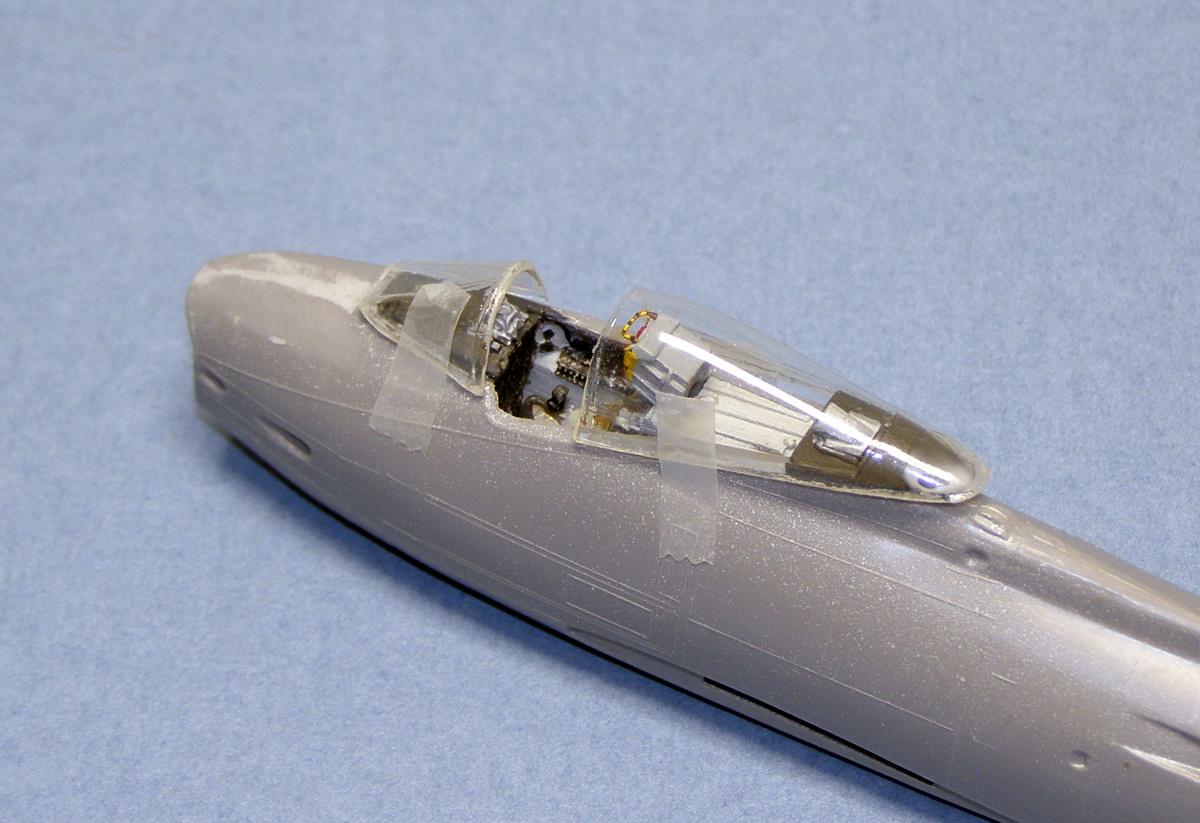
The remaining item is the canopy. The vacuum formed part is clear and is a more accurate shape. The modeler must use this part because the thick kit part will not fit over the ejection seat. The excess material from two canopy parts must be carefully removed. The edges of the parts are not too readily apparent so the modeler must cut carefully and then sand the parts to their final shapes. When sanding the main canopy to final shape, be careful to maintain the flared shape at the front edge. The resin rear canopy part, part R3, is then glued to the canopy and the windshield and the canopy are glued in place.
Conclusions
This set is well recommended for modelers of some experience. The modeler must be careful and do a lot of test fitting, but this set will enable the old Emhar FJ-4B kit to be updated to be equivalent to the latest kits on the market. A big thanks to Pavla for making this great product available to us modelers. It appears that this set can be ordered directly from Pavla at the link noted above. No prices are listed on their web site. I have seen the set also offered from Hannants as well as from some stores on e-bay.
My thanks to Pavla for providing this interesting item for review and to IPMS for giving me a chance to dig out my old Ehmar kit.
Reference Material
- Detail & Scale Volume 68 – FJ Fury by Bert Kinzey - ISBN: 0897474619
- Naval Fighters Number 25 – FJ-4/4B Fury by Steve Ginter - ISBN: 0942612256
- Squadron Signal Aircraft No. 103 - FJ Fury in Action by Jim Mesko - ISBN: 0897472454


Comments
Add new comment
This site is protected by reCAPTCHA and the Google Privacy Policy and Terms of Service apply.
Similar Reviews