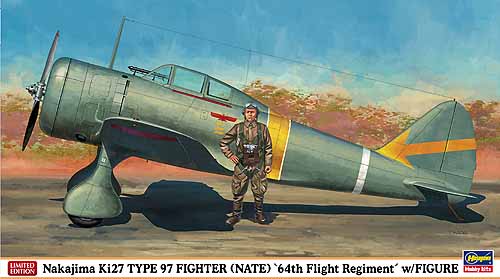
Nakajima Ki-27 Nate with Resin Pilot Figure
The Nakajima Ki-27 “Nate” was a successful low-wing monoplane, all metal fighter design used by the Empire of Japan throughout World War II. Conceived of as a private venture design by the Nakajima Corporation, the Ki-27 was soon debuted and accepted by the Japanese Army. It was the equivalent of the Navy A5M.
If I recall correctly, when Hasegawa first produced this kit it was Kit # 001, so that leads me to believe the Ki-27 was the first 1/48 kit produced by Hasegawa. I could be wrong so don’t quote me on it.
For its age the molding has held up well. There was very little flash to contend with and that was removed with a #11 blade. Assembly begins with the cockpit, of course, but here arises a problem. The color called out for the cockpit interior is Gunze H54 and is called Navy Blue. I have built four of the older kits and always believed the interior should be Nakajima interior color, a light green similar to RAF interior green. So any way that’s the color I used. The cockpit instrument panel and side details were colored black with a felt tip pin for speed. It really doesn’t matter because when it is closed up inside the fuselage you can’t see it anyhow. The cockpit fits into the fuselage almost perfectly.
While this was drying I painted the engine pieces and set them aside to dry. The radial engine with its ignition ring is pushed in to the front ring of the cowling. It is a tight fit but works fine. Then the back ring is placed and glued to the front ring. This was the only place on the kit that needed putty. I used Vallejo White putty, it doesn’t take a lot, and it dries in about thirty minutes and can be removed with a cloth dampened with water or denatured alcohol. The fuselage seams were sanded down and the cowling was glued in place.
Here’s a short cut I have developed. Assemble the landing gear struts without the wheels. While they are drying notched the wheels, (as seen in the photos) and painted them. I'll be back to this in my painting description.
Proceed on to the wing assembly. There are two small pieces that go under the wing and what looks like a siren on the port wing. I suggest you wait until the decals are on the upper wing before you install it. It may seriously interfere with the decals. After the wing is in place under the fuselage and cleaned up, glue the horizontal stabilizers and landing gear in place. Now you can paint the model without masking the wheels.
I chose to paint the model as it appears on the box art which appears to be an RLM 74 or an FS 36118. But the color called out is again a Gunze color, 128 Gray Green, which I do not have anywhere in my paint collection. So I opted to go with the RLM 74, which may be wrong but looks cool to me. After the paint was dry I snapped the wheels into place and gloss coated the model with Future.
The decals were next and they are very thin. So thin they have a tendency to curl up when leaving the paper backing. So have the paper on the model surface as you pull the decal away. I started at the tail and work forward. When I got to the number two decal that goes around the fuselage just behind the canopy I found that it was about a half an inch too short. So I used the number three decal which is slightly narrower but fits well. The only other decal problem was the long stripes on top of the wing; they go over a post near the leading edge and don’t pull down too well. Then I sprayed on some Model Master Semi-Gloss Clear Lacquer Finish to cut the glare of the Future Floor Wax.
The final small pieces, the siren and propeller, were then glued in place.
This is the fifth Hasegawa Ki 27 I have built in the last two years and as always this one was a fun build. I can recommend it for all modelers of any experience level.
Oh, and by the way, included in this kit is a resin pilot figure. I don’t do figures so I will just say that the figure is well molded and bubble free. There are also painting instructions.
Thanks go to Hobbico and IPMS/USA for providing the kit.


Comments
Add new comment
This site is protected by reCAPTCHA and the Google Privacy Policy and Terms of Service apply.
Similar Reviews