
Nakajima B5N2 Type 97 Model 3 Kate “Folding Wing”
History
The B5N2 Kate entered service in 1939, replacing the B5N1. The B5N2 was given a more powerful engine and streamlined a bit to try and make it capable of outrunning enemy fighters. The B5N2 was replaced by the B6N Tenzan starting in 1943, but continued to serve right through to the end of the war.
The Kit
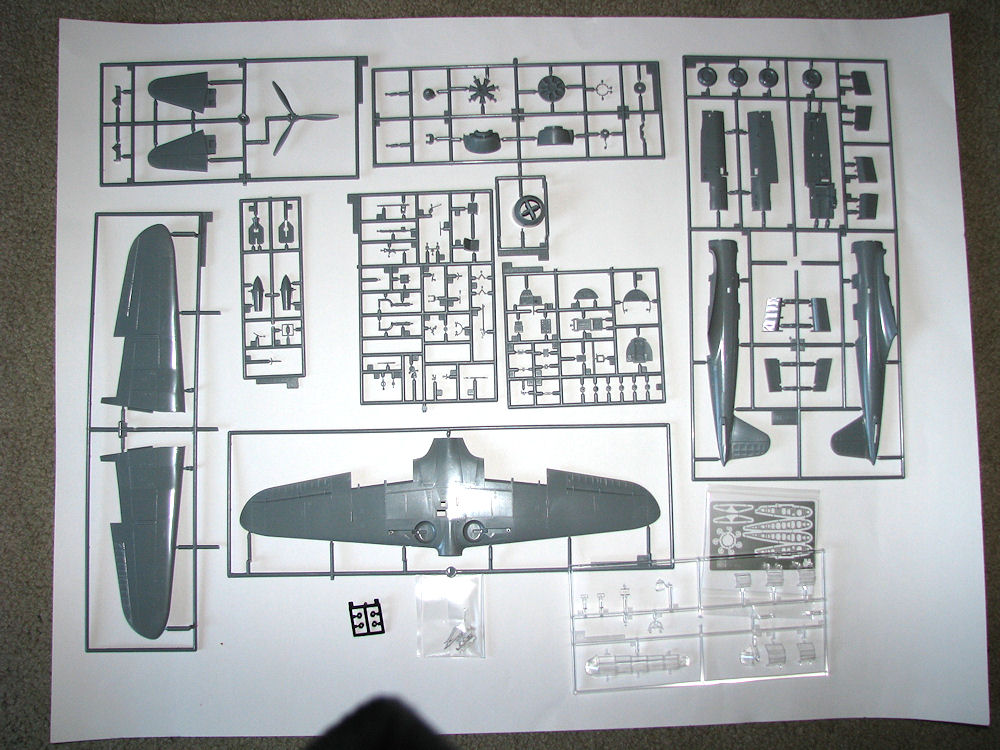
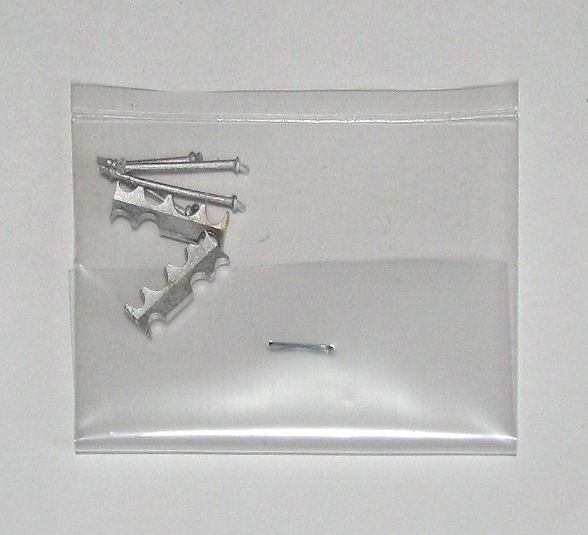
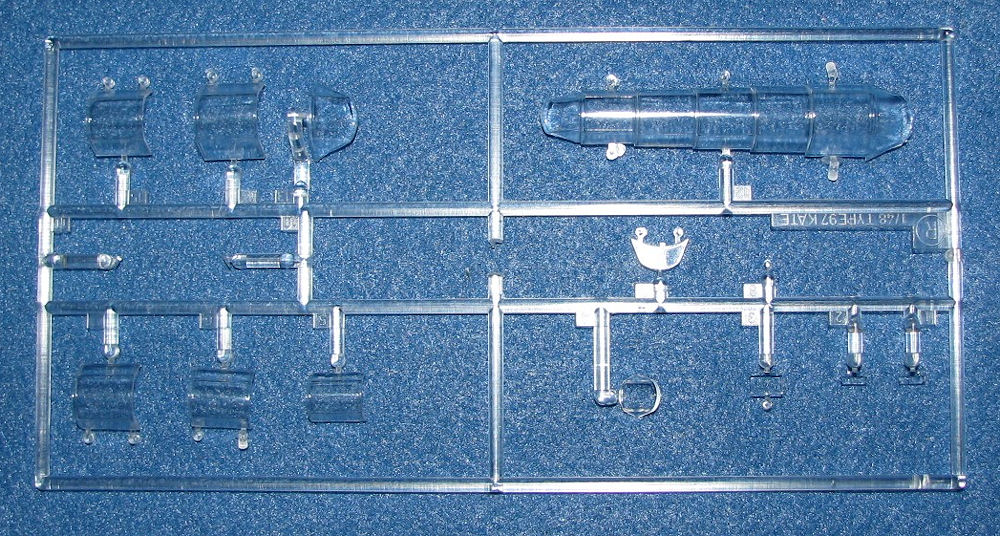
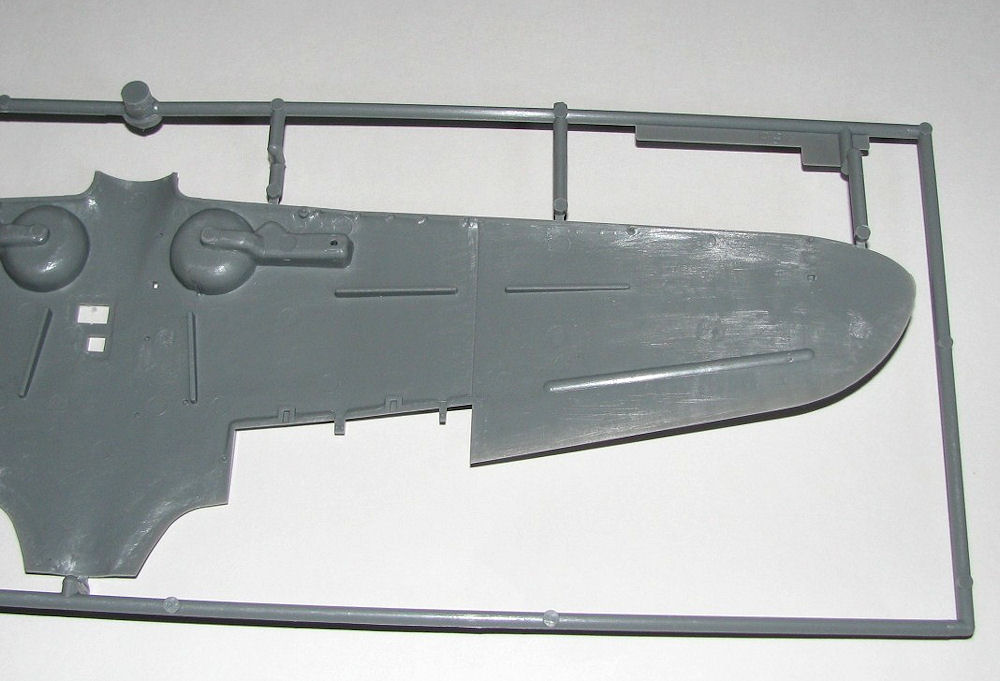
After opening the box, I was impressed by what I found – 8 sprues of medium grey and 1 sprue of clear injected plastic, 1 small (but very nice!) fret of photo etch, and, in the bag of PE, 4 white metal parts (for the folded wings). Also, for some reason, the cowling is on a sprue by itself and attached in a most peculiar manner. The plastic is flash free, the clear pieces are very nice, and the detail is above average on this kit. There are a few pin marks but nothing that is un-fixable.
Construction
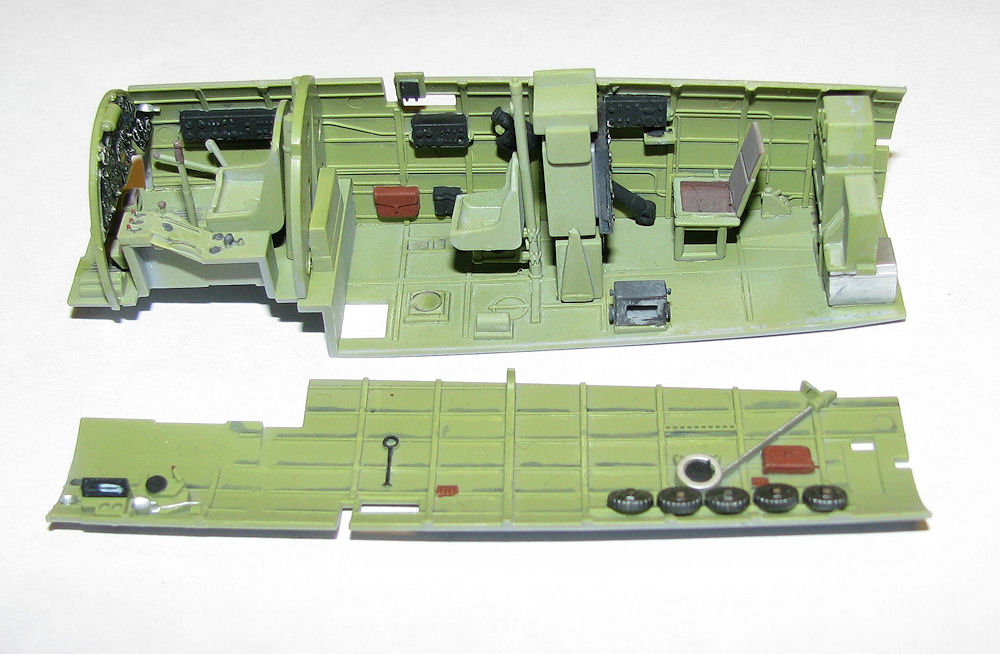
The first three steps are for the very nicely detailed cockpit tub (which consists of 33 pieces and 4 decals) and fuselage assembly. I’m happy to report everything fit perfectly and I had no problems here…except one! The instructions called for “Cockpit Color (Nakajima)”, and having no idea what that was, I searched the net and found that J-aircraft.com had a good color mixing chart. Due to only having mostly Testors Model Master paints, my mix is not quite as accurate as I would have liked.
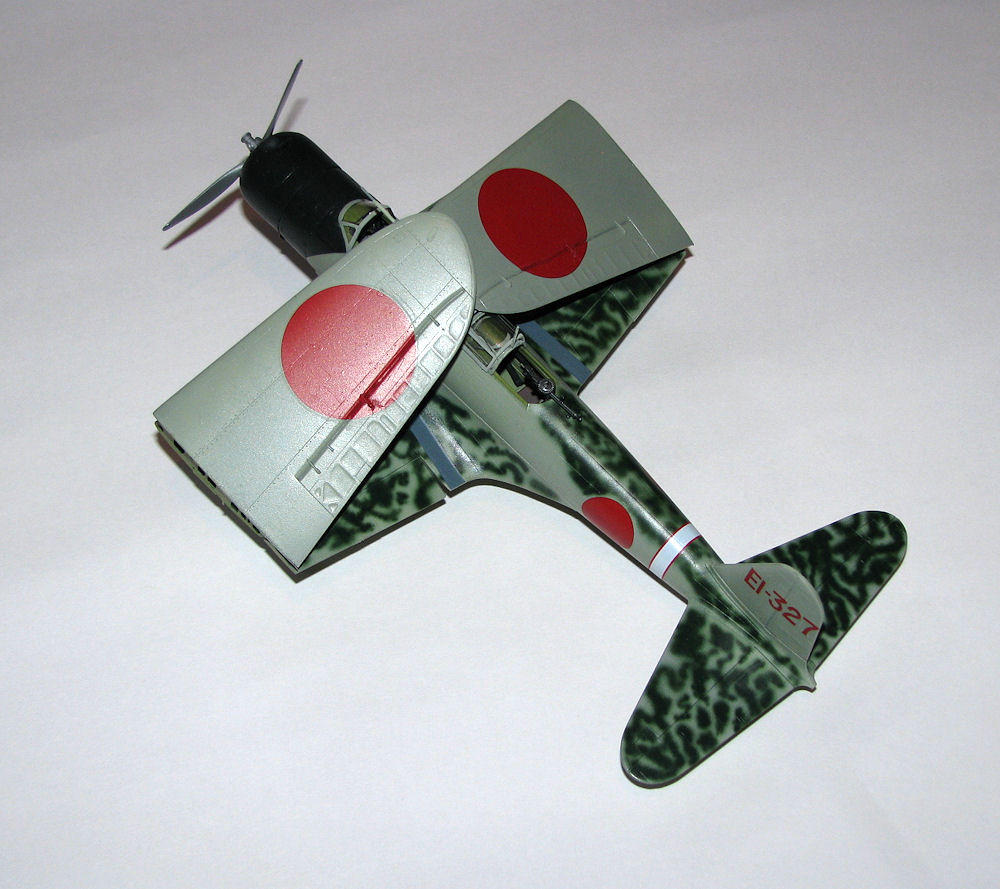
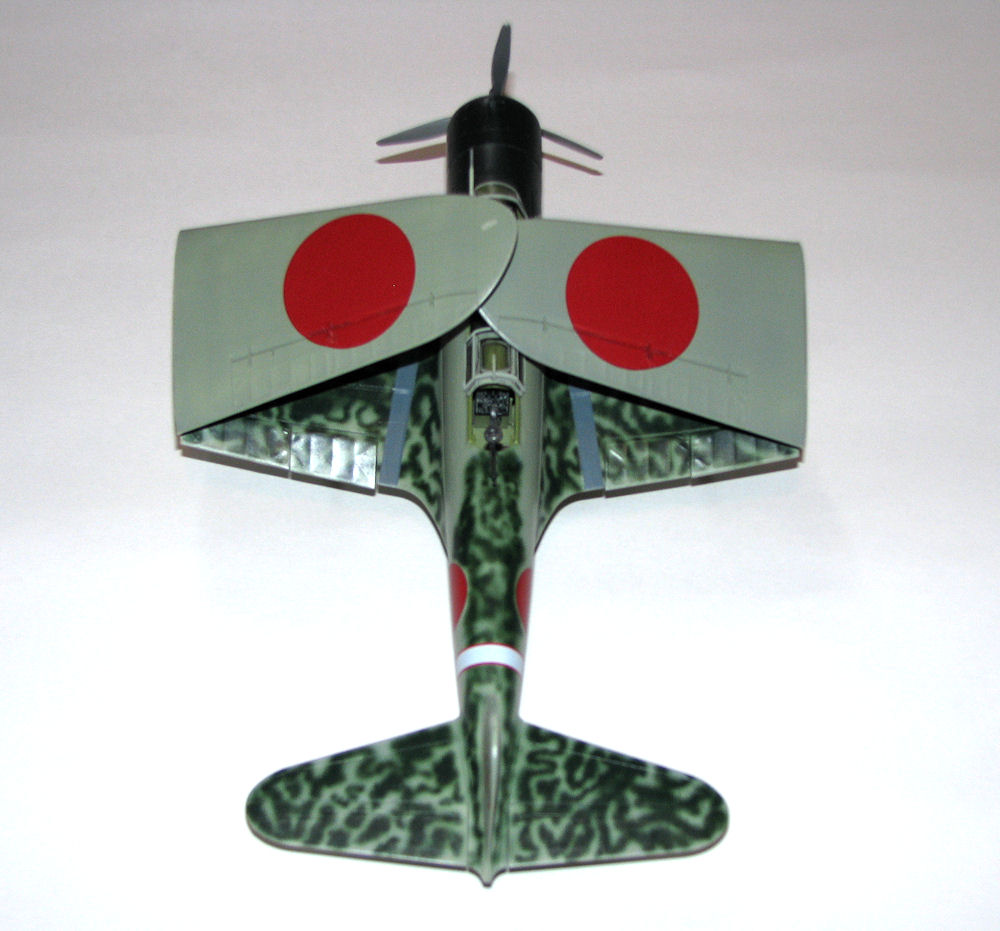
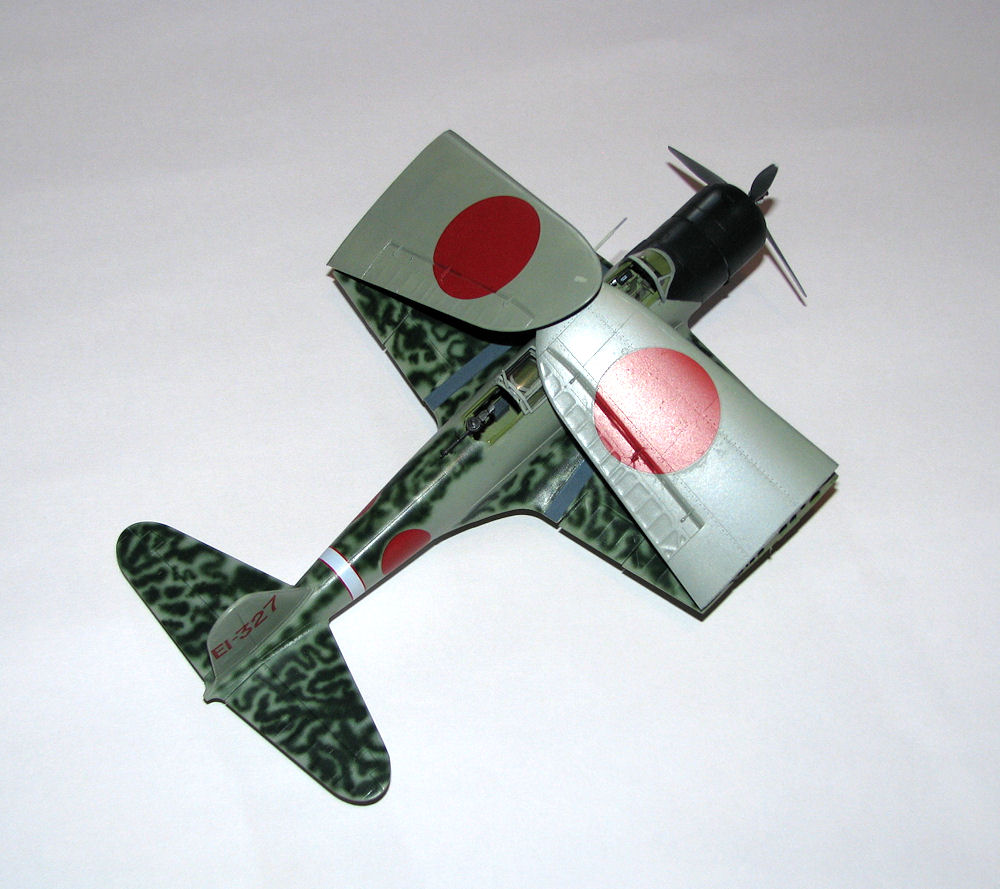
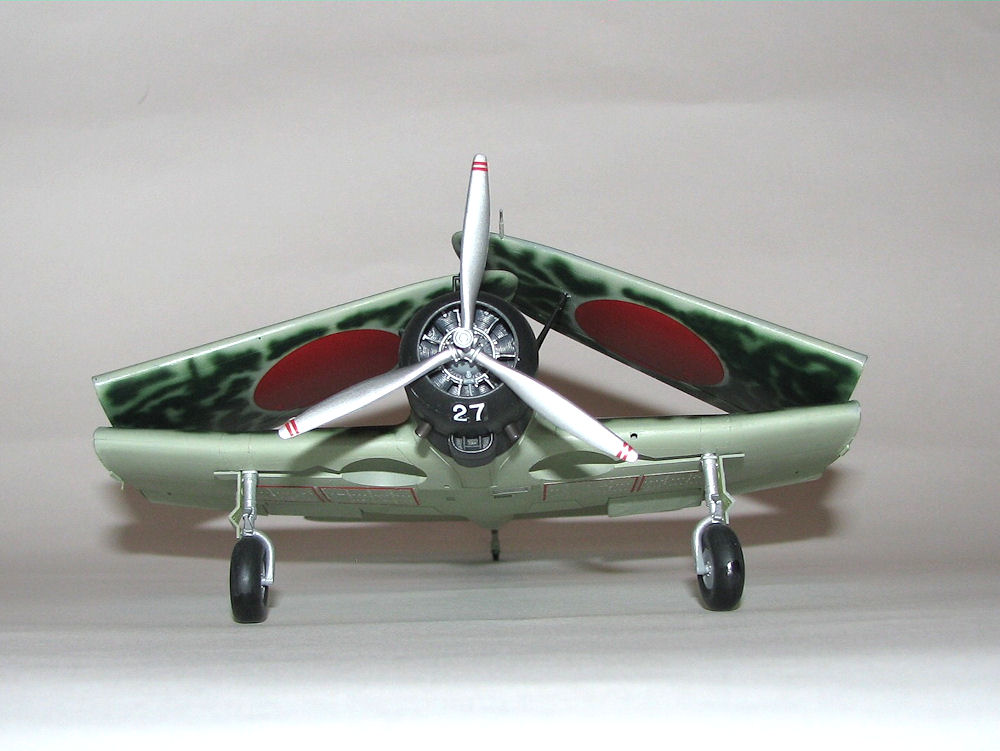
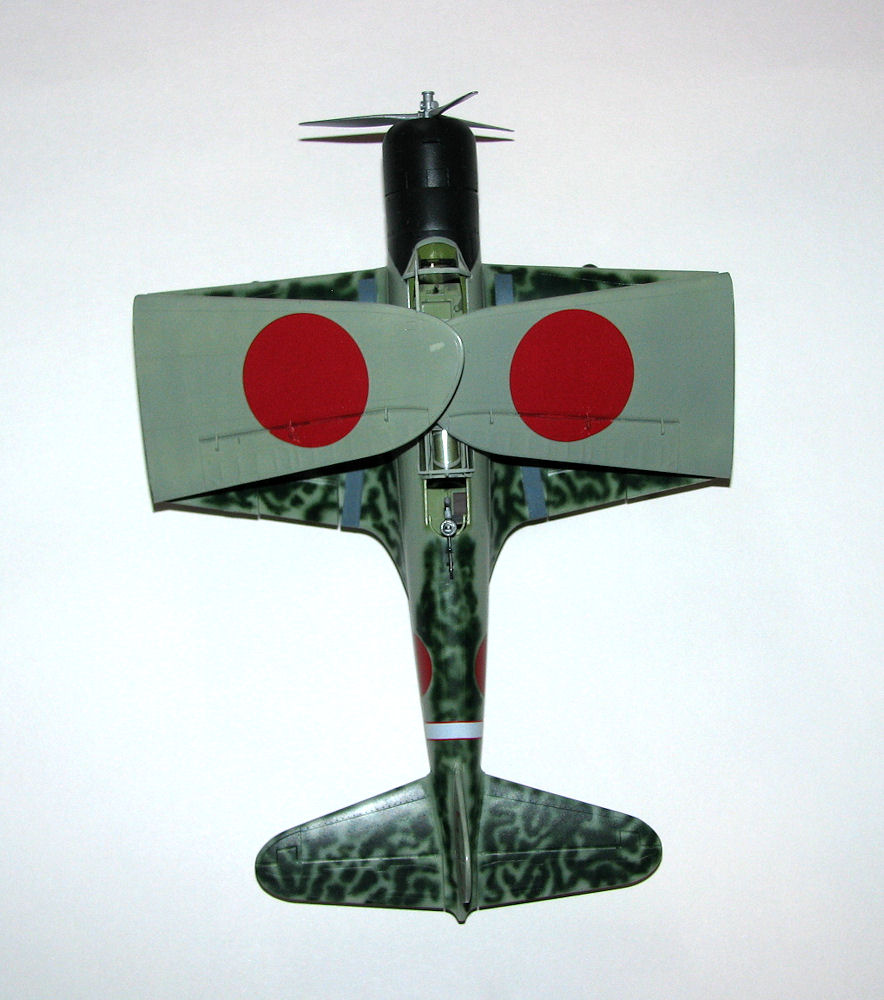
Step 4 is where you decide how to pose the wings. I never build aircraft with the wings folded, but since this is a review, why not? The lines to cut are clearly marked and slightly recessed, making life oh, so much simpler. (Two things I am not very good at are mixing paints and surgery on kits…and I had to do both on this one…UGH!) After cutting the four wing sections and filing out the notch for the white metal pieces (parts #MB 1 &2), I decided to attach all of the wing parts together and this was a mistake as I forgot to build and add the flaps…oops. At least this made fitting the hinge easier, as it took a bit of filing/sanding to get a good fit. For the cut ends of the wings, you are supplied photo etch pieces (MA 3-6) that are very nice and VERY thin – take care when using these. I made the notch a bit bigger than what was called for, as the builder has to slide the hinge into the notch after placing the thin P/E on, and I did not want to damage these by having to use too much pressure placing them in. As for those forgotten flaps, you are given a choice of posing them lowered if you want. I chose not to, but since I had screwed up and forgot them earlier, they just would not sit perfectly. So now they are slightly dropped…sigh. The only other problem I had was fitting the lower portion of the wing to the fuselage. I ended up with a small gap on the right side, but it was easily filled and fixed. Not sure if it was something I did or if it was the kit.
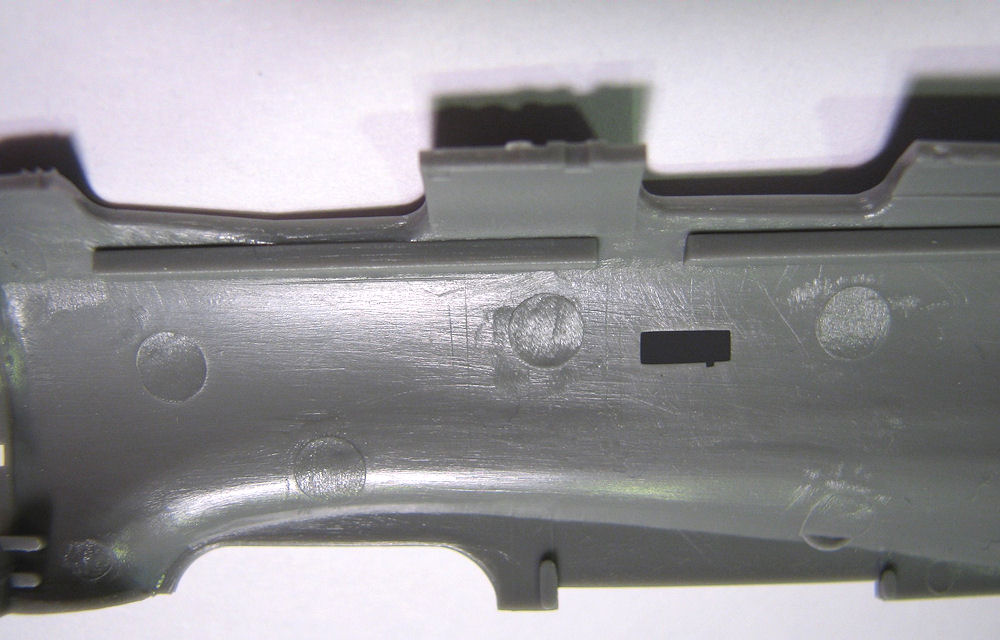
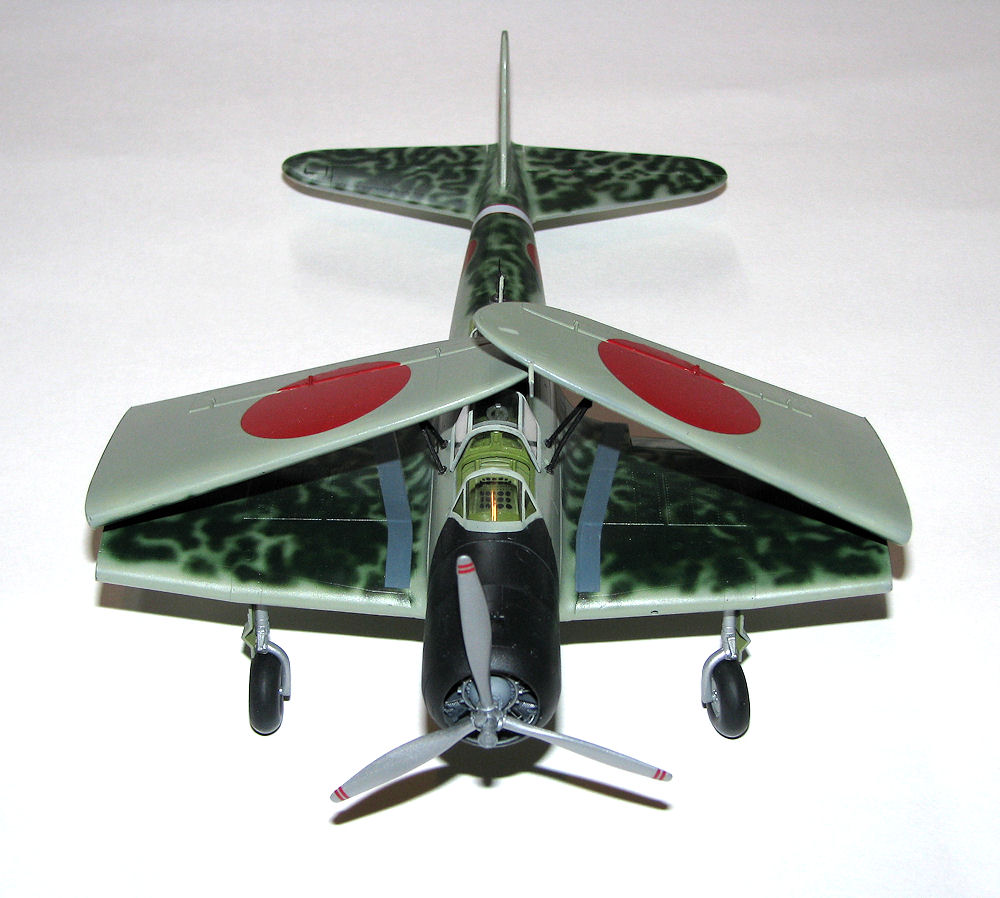
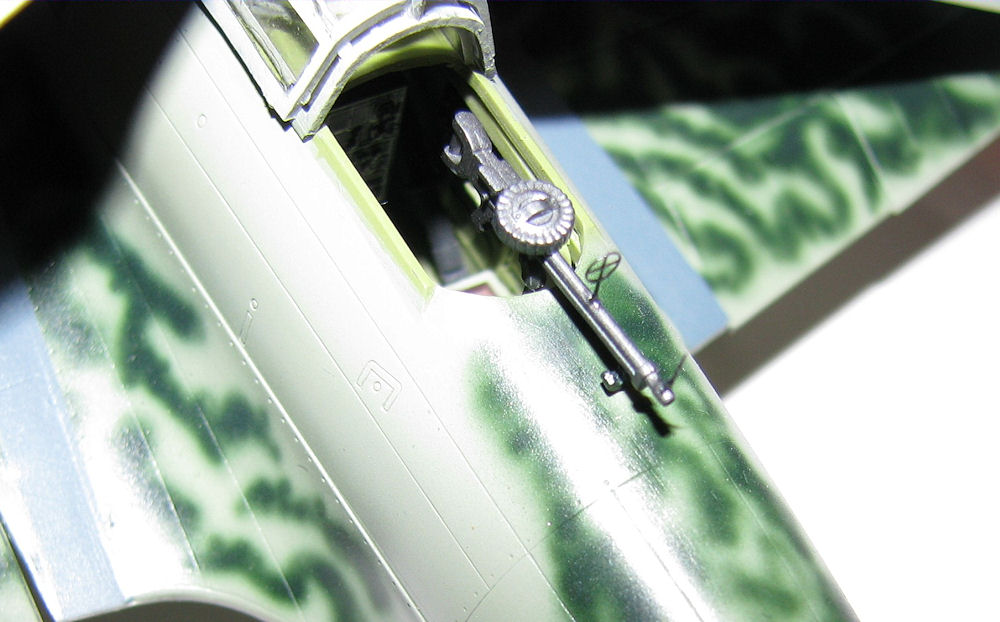
Steps 5-7 deal with landing gear, ordnance, canopy, engine, and fitting the folded portion of the wings. The landing gear was simple and easy to construct, and they look good except the tires look a bit wide and goofy to me; not sure how accurate they are. The engine is well molded and you are supplied a PE ignition harness that makes it look really nice. Again, be careful, as this is super-thin. Now, on to that cowling and the problem with it. It is molded as one piece and on its own sprue, with a fair sized piece of plastic or gate attached to the inside lip of the cowl. It is a bit difficult to remove due to the location and thickness, so be very careful or you will damage the cowl. You are given a choice for canopies, and since there is a fair amount of detail in the cockpit, I chose the open one. The transparent pieces are clear and well molded, but are a little thick. The section between the radioman/bombardier and gunner is the toughest part. To pose them open, you have to place four pieces on top of another (R 4, 5, 6, & 7). Getting these to fit took a bit of sanding on the bottom two (R4 & 5) and they still don’t look right, but better than they did before. I almost forgot to mention the Type 92 Mg that you can pose stowed if you want to, but enough of the detail in this kit is hidden, so how could I? It is nicely detailed and you are supplied with a photo etch ring and bead sight that makes it look even better. The wings slid into the notches easily, but I had to drill bigger holes for the white metal braces (MB 3 & 4). I also had to shorten (a couple swipes with a sanding stick did the trick) the tab on the metal parts for them to fit.
Finishing
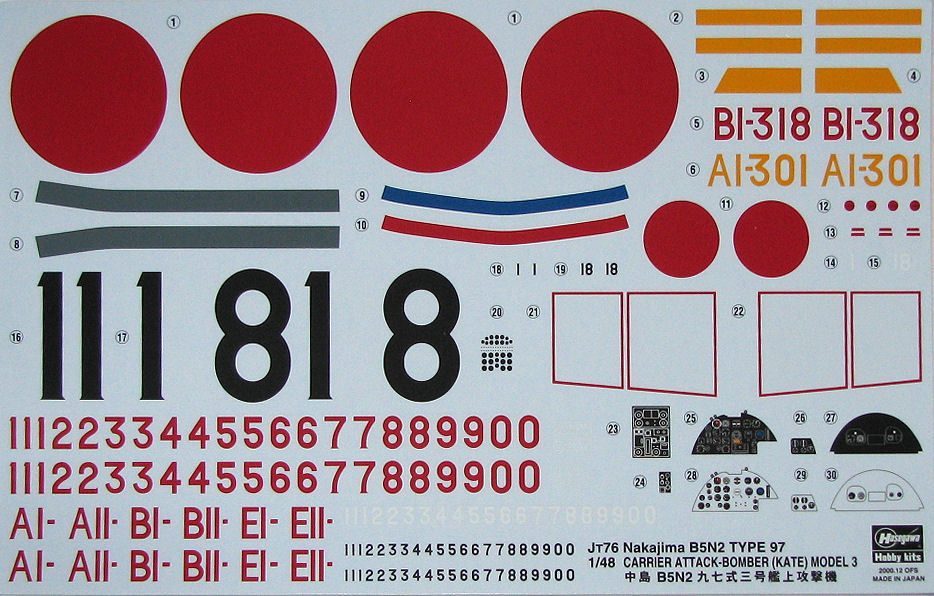
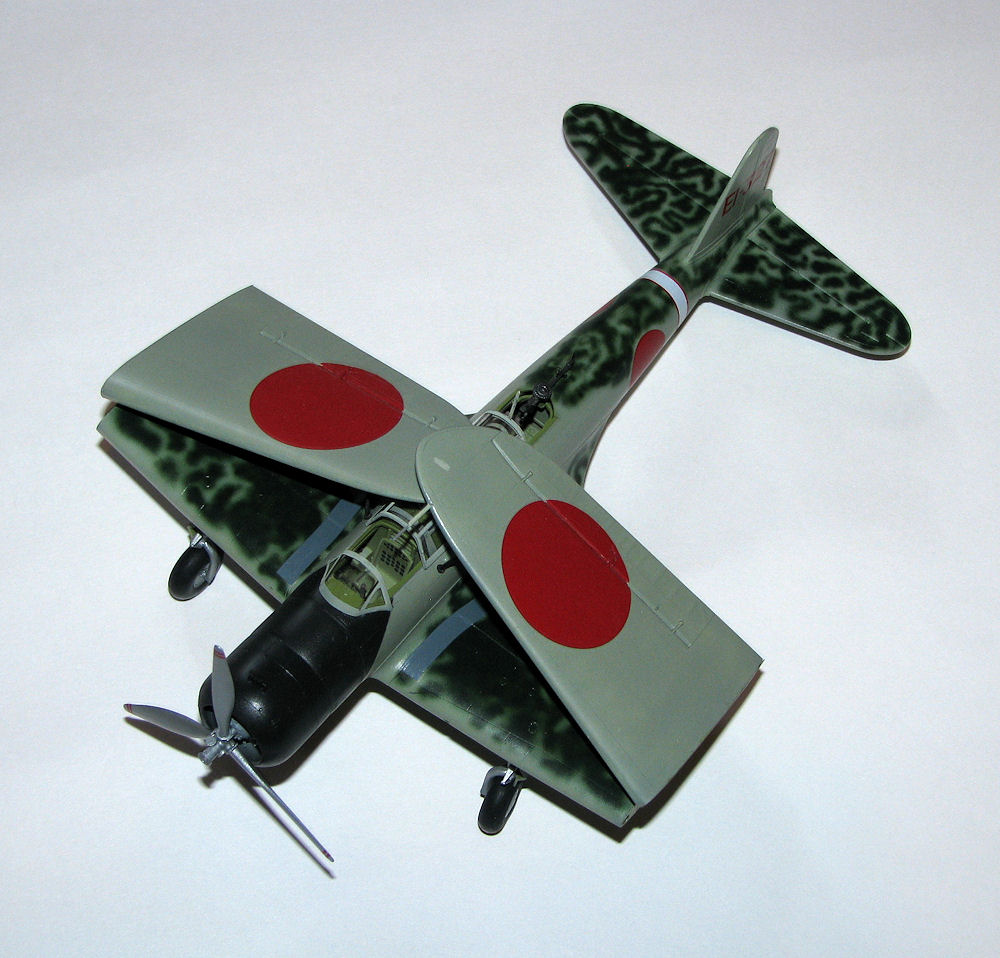
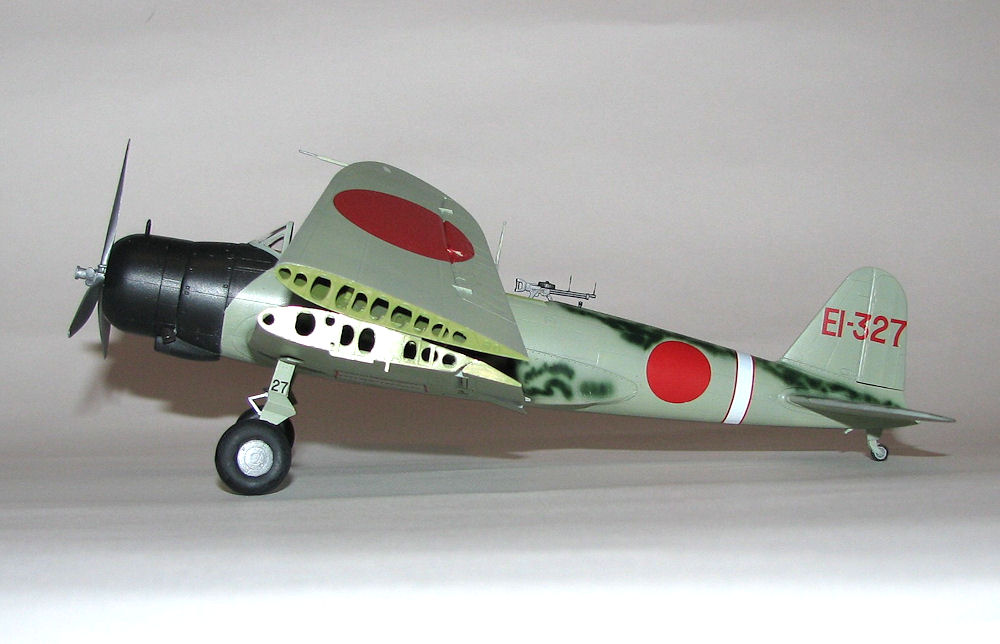
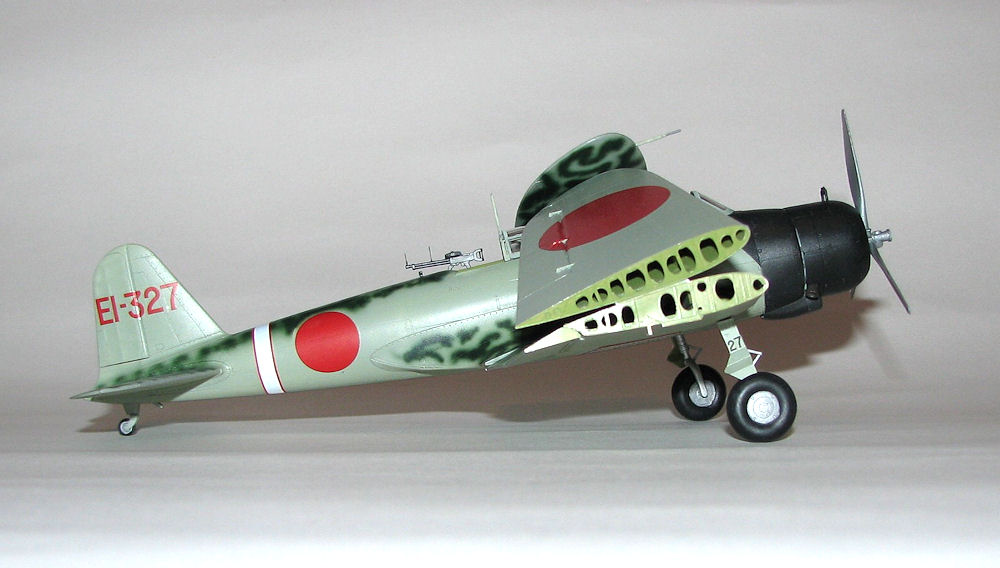
You get a really nice decal sheet with this kit. It provides the markings for two aircraft from the Pearl Harbor raid, one from the Akagi and one from the Soryu. Also included are tail codes for any of the Pearl Harbor Kates. I decided to do one from the Shokaku, as I always wanted to try this camouflage scheme. I used Tamiya XF-76 with a topside coating of XF-11. The cowl is Testors Interior black. After it was coated with Future, the decals went on smoothly with a little Solvaset except where the Hinomarus covered the ailerons. I will have to touch these areas up with paint. The fuselage stripe is from the Aeromaster set of Tora Tora Tora part 1 decals (courtesy of Art Murray – THANKS, Art!!) as the decal sheet only gives you the stripes for the two planes in the instructions.
Conclusion
This was a wonderful kit, period! The fit was very good, detail is above average, and I encountered only a few minor problems. I would recommend this kit to anyone wanting a 1/48 Kate in their collection.
First off, I would like to thank David Aiken for answering my many questions about Kates at Pearl Harbor. I would also like to thank Hobbico for supplying this kit, the IPMS review corps for letting me build it, and you for reading it.


Comments
Add new comment
This site is protected by reCAPTCHA and the Google Privacy Policy and Terms of Service apply.
Similar Reviews