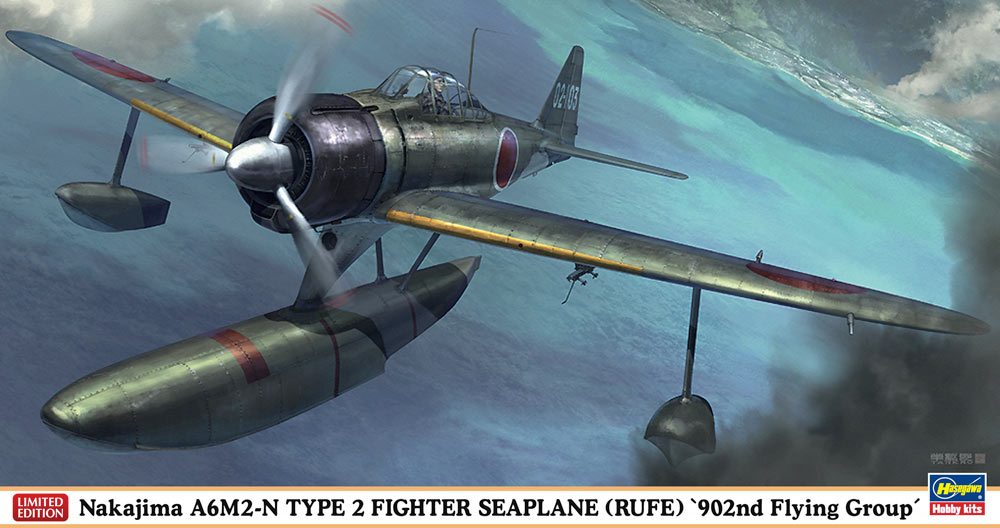
Nakajima A6M2-N Type 2 Fighter Seaplane (RUFE) '902 Flying Group'
History Brief
The A6M2-N floatplane was developed from the Mitsubishi A6M Zero Type 0, for the purposes of supporting amphibious operations and defending remote bases. It was based on the A6M-2 Model 11 fuselage, with a modified tail and added floats. This aircraft was the brainchild of Shinobu Mitsutake, Nakajima Aircraft Company's Chief Engineer, and Atsushi Tajima, one of the company's designers. A total of 327 were built, including the original prototype.
The Product
My sample came in a standard size box featuring attractive box art. The contents were well packaged and included; 9 grey plastic sprue, 1 in clear, 1 instruction sheet and 1 decal sheet. This kit has been around for a few years now and has been re-released with differing decal options.
First let’s talk about the plastic. A common practice with Hasegawa kits is the sharing of common sprues within a family line (Zeros, P-40's and so on). In this case shared from their A6M-2 Model 11 kit while the other sprues are dedicated just for the A6M2-N type 2. Lastly they have modified convertible molds. In this case A6M-2 Model 11 / A6M2-N type 2 for the fuselage. With our sample, the convertible fuselage sprue is one of those famous Hasegawa ‘swap out the empennage plug’ molds. Sadly the results are: it doesn’t line up right; it has a nasty uneven step and created mismatched panel lines. Their 1/48 P-40 line is no different and is another prime example of where ‘yes it is more cost effective’ but the quality suffers as a result.
The rest of the plastic parts exhibit nice detail, feature recessed panel lines, they’re flash free and have almost no annoying sink or ejector pin marks.
The Instruction Sheet is the typical standard Hasegawa B&W fold out. Featuring a history brief, paint color call out guide, sprue charts, detailed build steps and illustrated decal placement charts. The decals are very thin, very nice and beautifully printed.
This limited edition kit features two marking options from the 902nd and 802nd Naval Fighter Groups of World War II.
- I.J.N. 902nd N.F.G. Code: 02-103 Truk Island Nov., 1943
- I.J.N. 802nd N.F.G. Code: Y4-122 Marshall Islands Oct., 1943
The Build
I began by building up the cockpit and engine. These parts are shared with the A6M-2, Model 11 kit. The parts went together nicely and look great when completed. I added a set of aftermarket photo-etch seat-belts as a personal choice. Next I closed up the cockpit in the fuselage halves and set about correcting Hasegawa’s empennage issues. Basic modeling skills are required to perform these simple tasks that includes putty fillers, block sanding and rescribing. Now don’t put these items away because you’ll need them again when mating the wing to the fuselage.
Building up the wing. The top halves are from the A6M-2 Model 11 kit while the bottom half is relative to the A6M2-N type 2 and has a float mount instead of landing gear openings. As a bonus of sorts you get the complete sprue from the A6M-2 Model 11 kit that includes all the related landing gear items and the bottom wing half. The fit is pretty good but as I eluded to earlier, the bottom wing to fuselage is not tight and has a serious belly dip that requires putty, block sanding, and rescribing. This isn’t as bad as it may sound and I was pleased with the results.
Next; floats, bombs, dolly-cart and all the rest. First I built up the main float without any concerns other than I almost forgot to add 16 grams of ballast (not included). Then I easily built up the two outrigger floats and attached them to the wings. The bombs and bomb racks were added next. I completed them with minimal effort and had every thing attached to the airframe with no problems. The dolly is made up from 10 pieces that fit together quite well. I finished up the build by adding prop and spinner assembly, the segmented canopy and lastly the boarding ladder. Again all went together and fit nicely.
The Bottom Line
It’s a great kit and it builds up into a good looking model. I love the subject and history it represents and I’m glad to have it in my collection. I built the Tamiya Rufe years ago and yes, it’s a nice kit as well, but it has a mix of raised and recessed panel lines. On this kit I give it a 7.5 out of 10 on the Greg-O-Meter. I would like to thank the great folks from Hasegawa, Hobbico and IPMS for the opportunity to present such a fine model to my fellow IPMS brothers and sisters.


Comments
Add new comment
This site is protected by reCAPTCHA and the Google Privacy Policy and Terms of Service apply.
Similar Reviews