
Model T 1911 Touring with American Motorists
Background
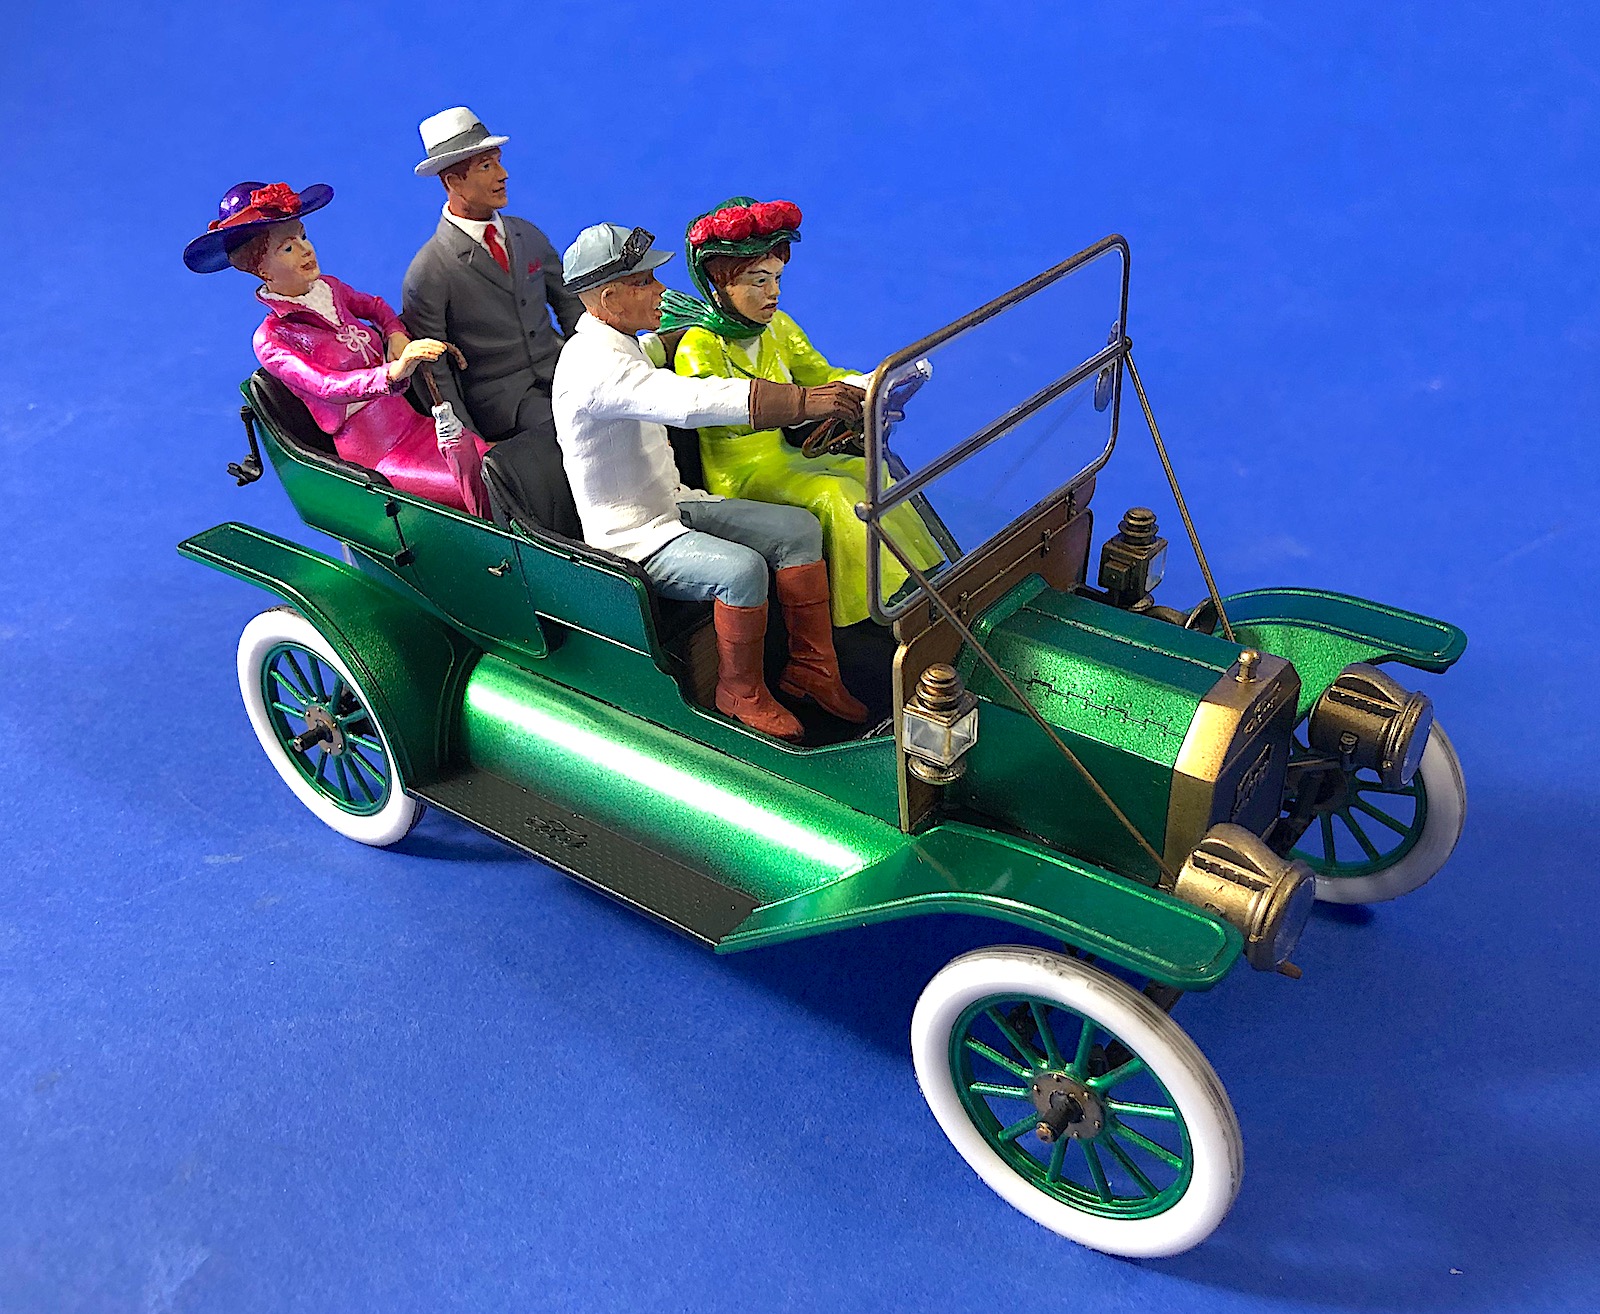
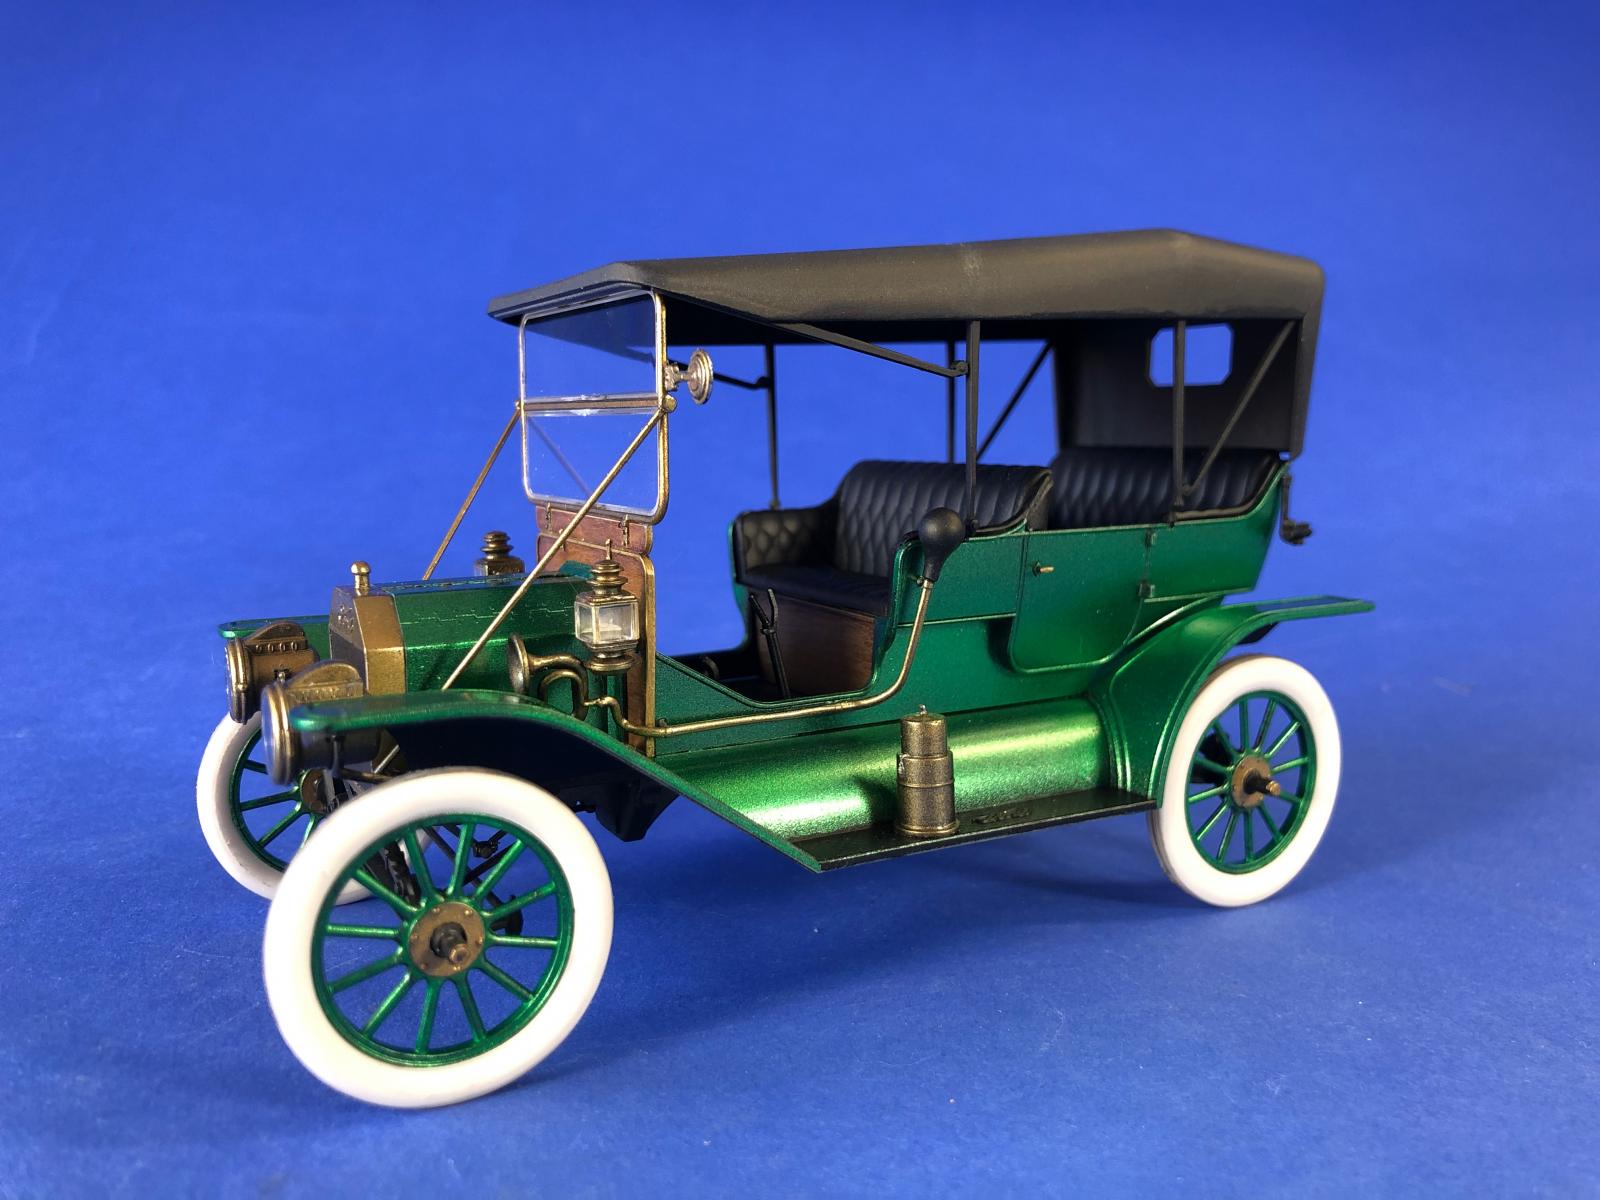
Another of ICM’s beautiful 1/24 car kits, this one a 1911 Model T Touring Car. The Touring Car body had two rear seat doors in addition to the front seat doors, two bench seats, and a foldable canvas top. This release also includes two figures, a man and a woman, in period attire. ICM’s kit is an easy build with nice fitting parts and without a lot of small parts.
ICM’s Kit
The kit comes in a 9 x 12 x 2 1/2 light cardboard box with slipcover. The box art depicts the vehicle in a dark green color with brass accessories, the male figure driving, and the woman in the backseat. The canvas top is shown in a medium gray color.
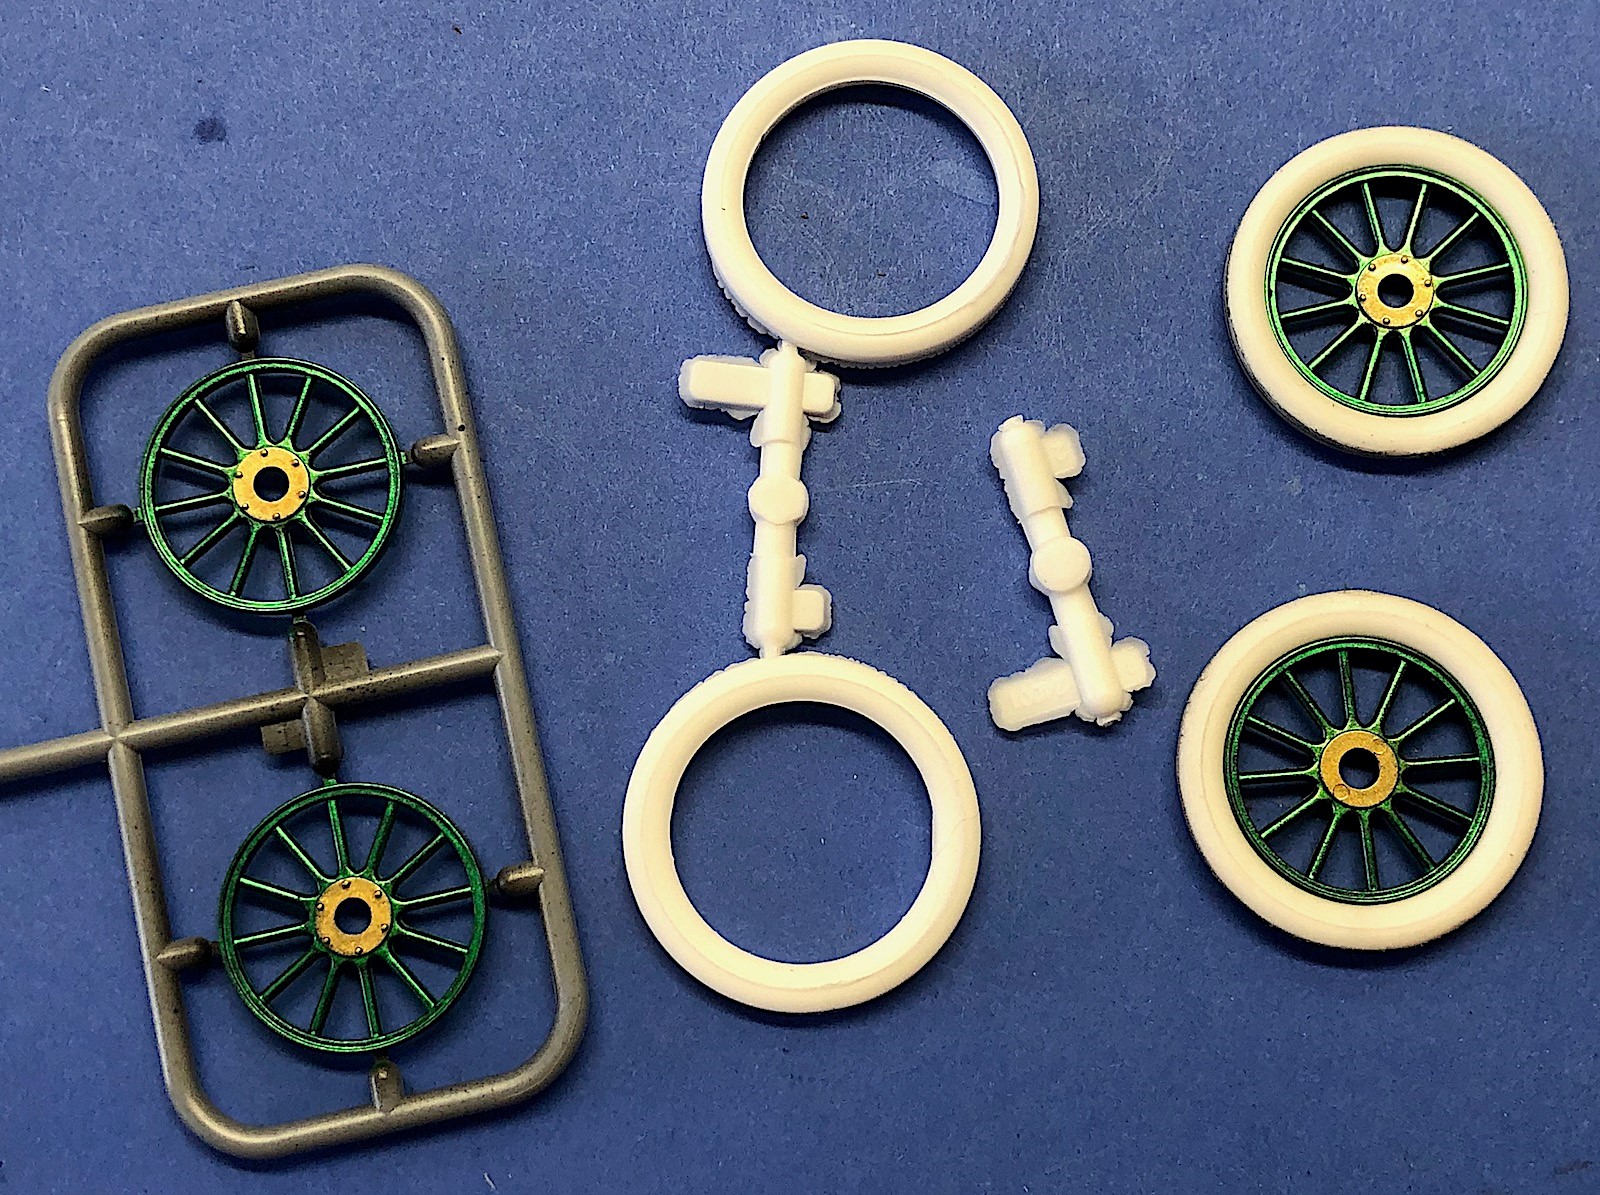
The kit comes on five sprues crisply molded in a light gray color, one clear plastic sprue, and four white vinyl tires. The detail on the parts is simple, but very good, with no apparent flash and very minor mold seems.
The instructions come in an 8 x 11 1/2 stapled pamphlet with 16 pages and 56 assembly steps. The front page gives a brief description and technical specifications of the model T touring and paint colors called out in Model Master numbers. The first two pages of the instructions includes diagrams of the sprues. The back page of the instructions includes black-and-white side profiles with color call outs. No decals are provided with the kit.
A separate page of instructions is provided for the figures with the sprue diagram and color callouts in Revell and Tamiya paints on one side, and assembly instructions and color suggestions on the opposite side. The figures are provided on a separate sprue and have good detail, although simplified. The faces are expressive with a slight smile on the woman’s face and a subtle smirk on the man’s face.
Assembly
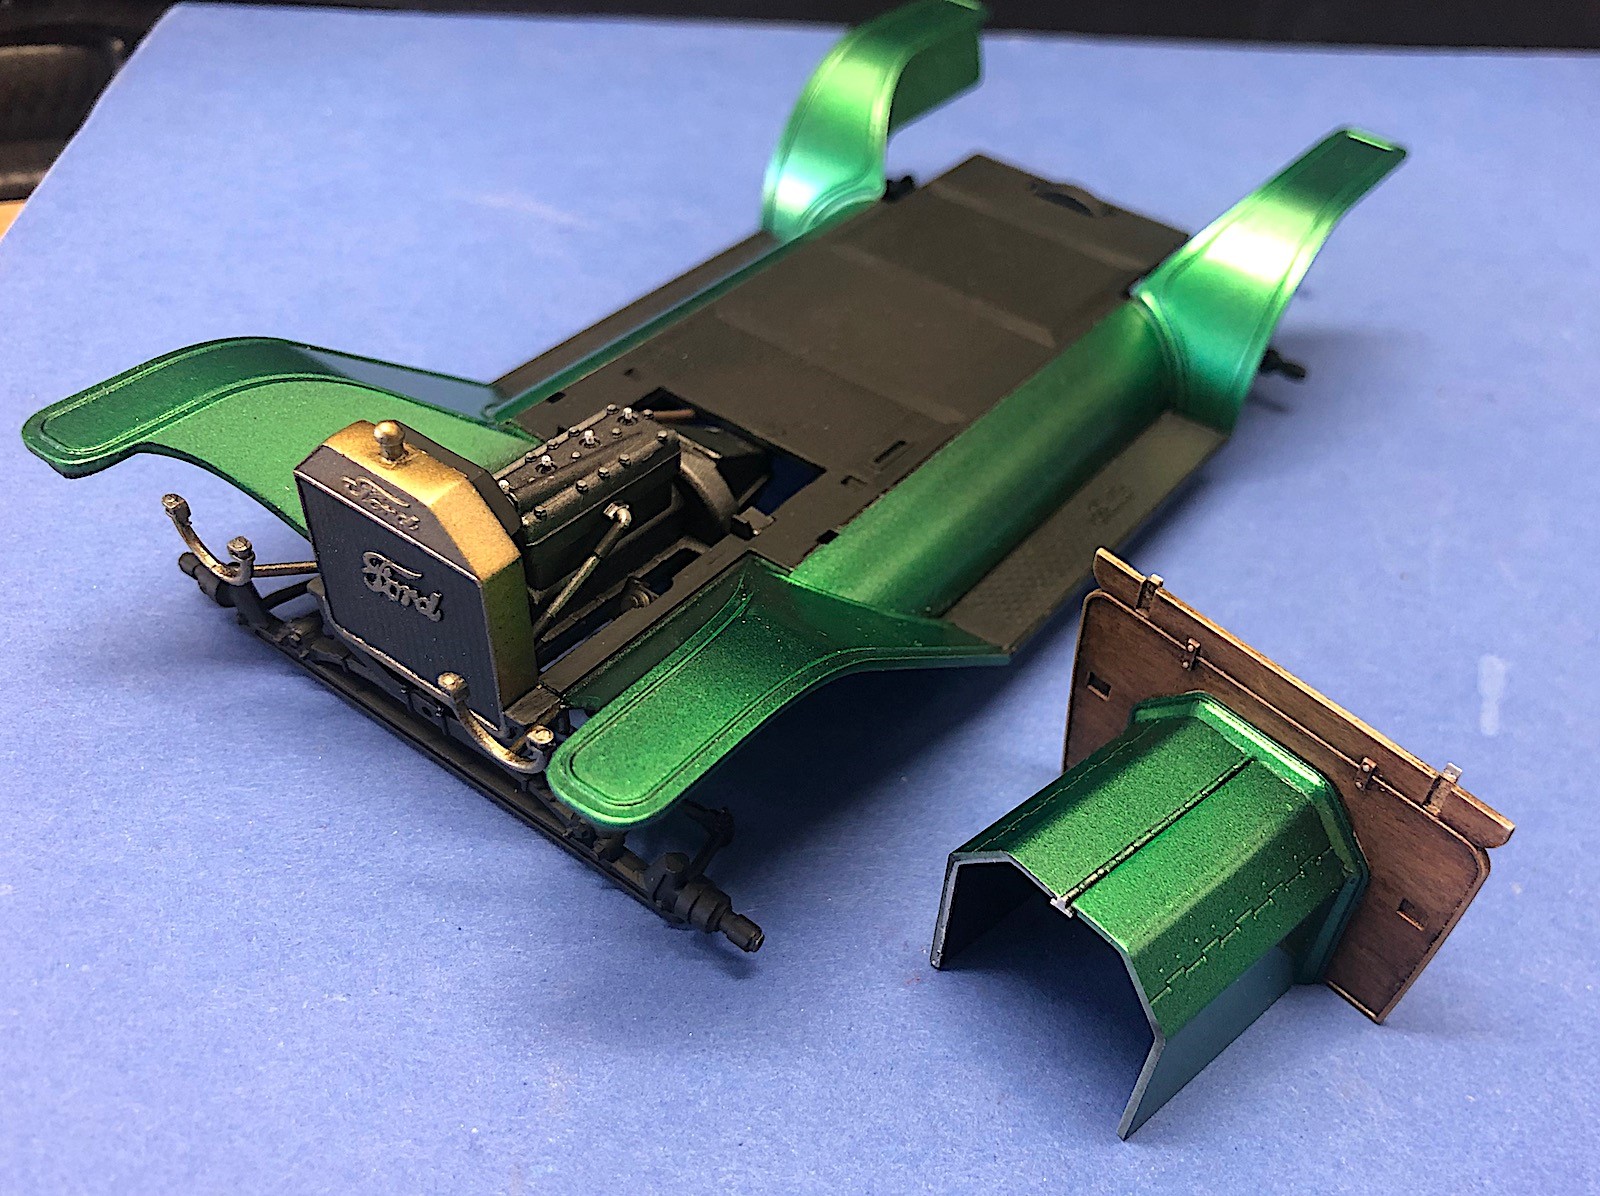
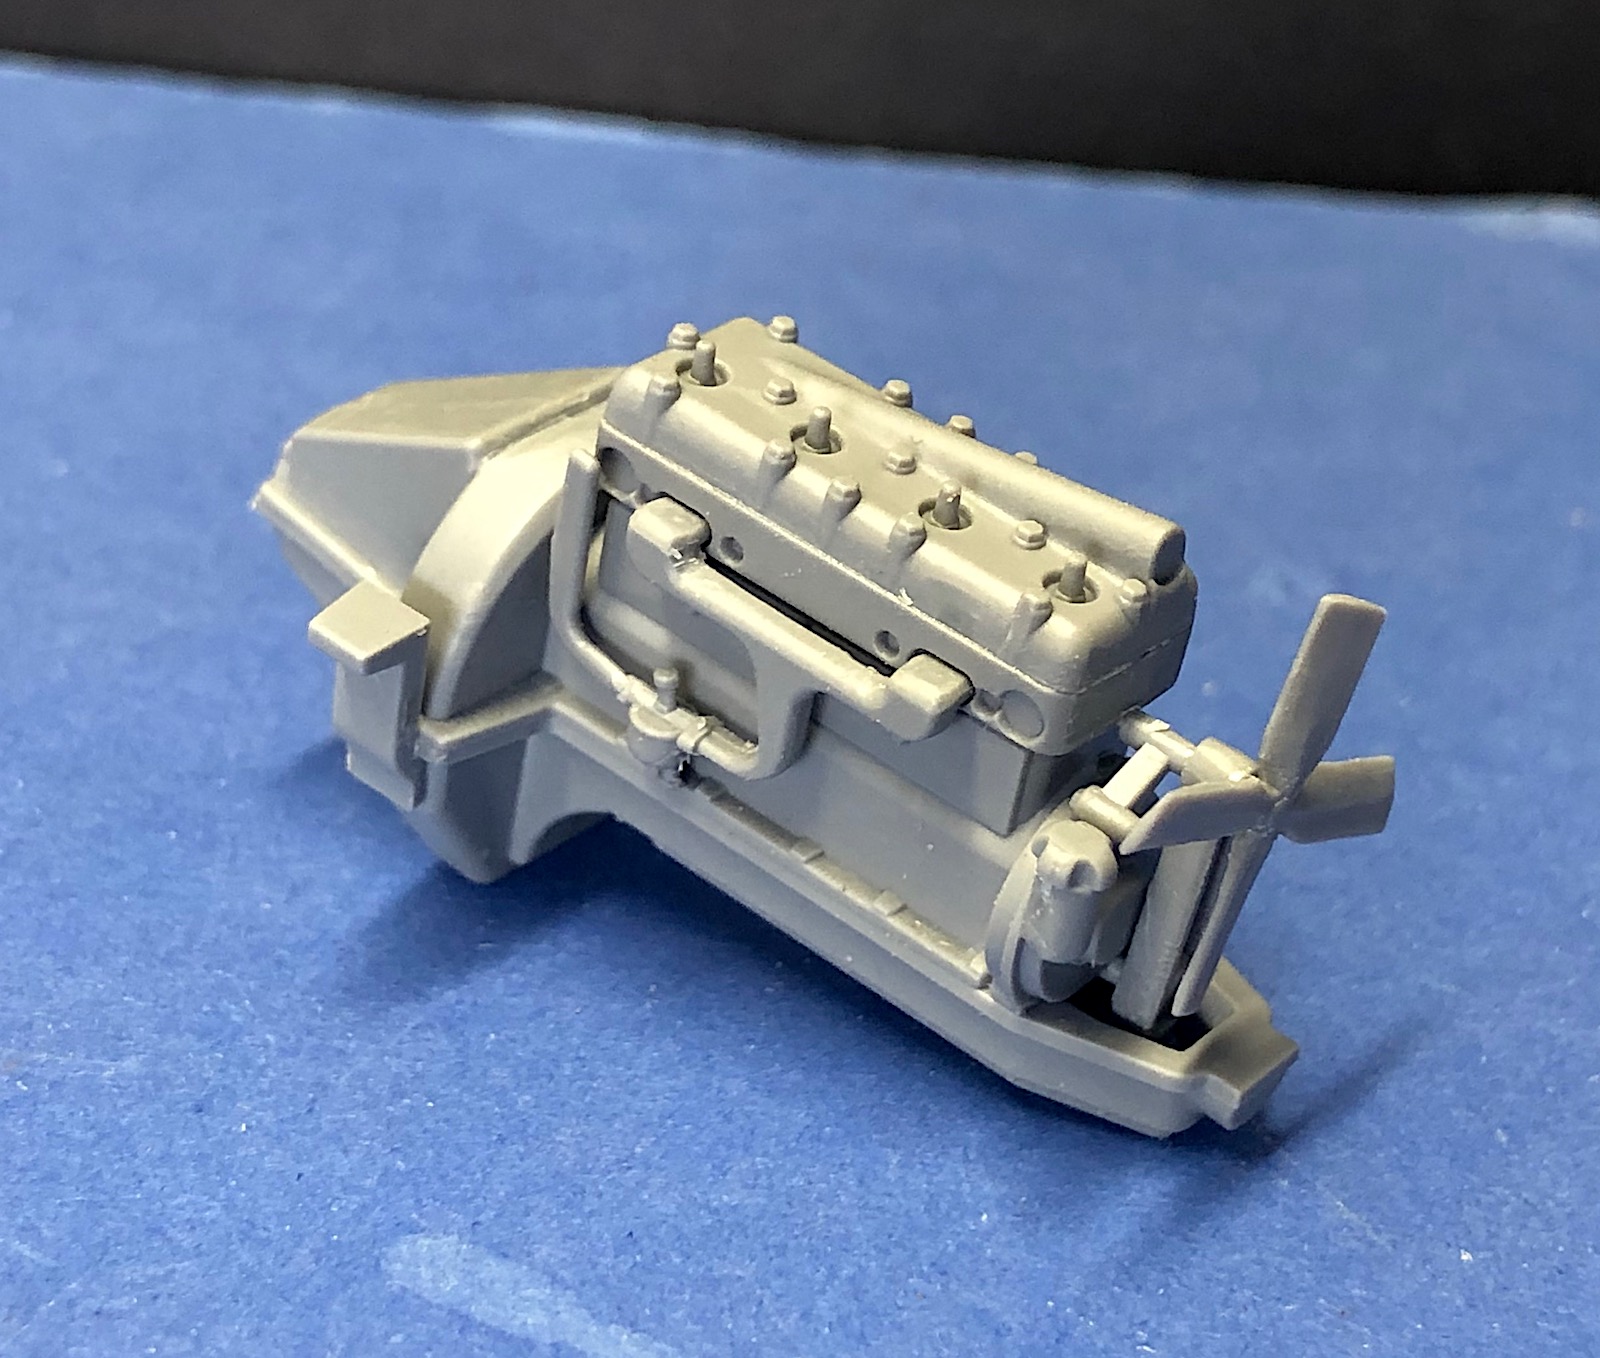
The first series of steps, six through seven, assemble the model T’s engine. The parts fit nicely, there is almost no flash on any of the parts and the mold seams are very minor. The fan blade part B26 is fairly thick, so I scraped the edges to thin it down a little bit. The kit builds into a fairly nice, but simple representation of a Model T engine. ICM has molded spark plugs on top of the cylinder head to add wiring if desired.
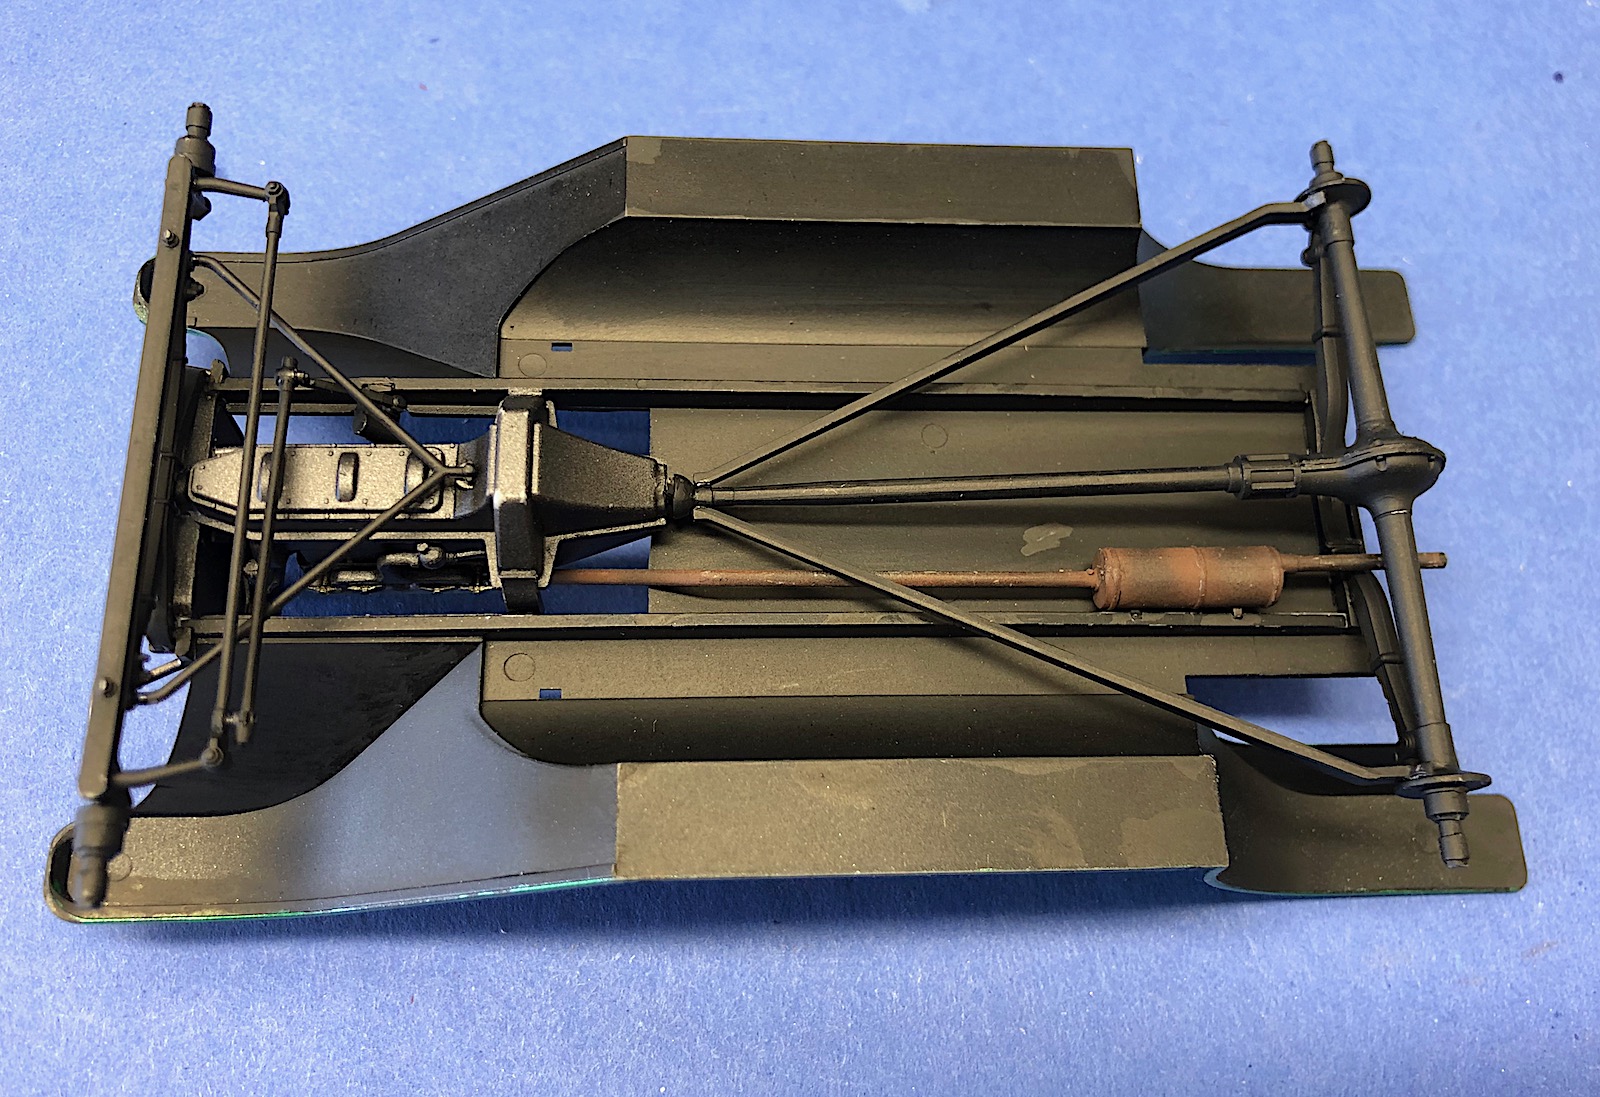
The Model T’s chassis is assembled in steps 8 through 21. There is no separate frame for the chassis, just two frame rails molded on the underside of the floorboards. The floorboards, fenders, and running boards are all molded as one piece, which simplifies body assembly. The radiator mounts to the front axle which then mounts to the chassis. Make sure that the radiator is perpendicular to the ground. The steering box, B24, gets mounted to the frame in step town. Refer to step 21 to show how the box should be installed. The rear axle and springs are one piece which is then mounted to the driveshaft and underside of the chassis.
Prior to assembling the chassis, I painted the chassis subassemblies, wheels, and suspension pieces. I Assembled the body as shown in step 28 and the body panels go together nicely and form a nice secure assembly. I dry fit the body to the chassis and everything aligns squarely. Some putty patching was required on the rear body panels. I then painted the fenders and body exterior the finish color using Mission Model Paints MMP144 pearl deep green.
Returning to the chassis assembly, the muffler, steering arm, and front control arm P7 are installed in steps 18 and 20. The front control arm mounts to the underside of the engine block, not to the steering box as it appears in the diagram. Refer to step 21 to see the control arm after installation.
White vinyl tires are provided with the kit rather than the black tires shown on the cover art. There are two different tire sizes, with the rear tires being slightly larger in diameter. The tires have quite a bit of flash, which I removed with a razor blade and sanding stick. I left the white tires unfinished except for rubbing graphite on the treads to show some wear.
Assembly of the model T body begins in step 25 with the firewall, which I painted in a wood color. There are some ejection pins on the firewall that need to be repaired as they will be visible. The engine hood is 3 Pieces, center hinge and right and left hood pieces. Cutting the hood sections along the molded hinge is necessary to pose the hood open, and would be very difficult. I did not want the hood open, so I glued the hood sections and center hinge to the firewall. This was clamped to the back of the radiator to get a tight fit. The center hood hinge section needed to be trimmed slightly to fit behind the radiator.
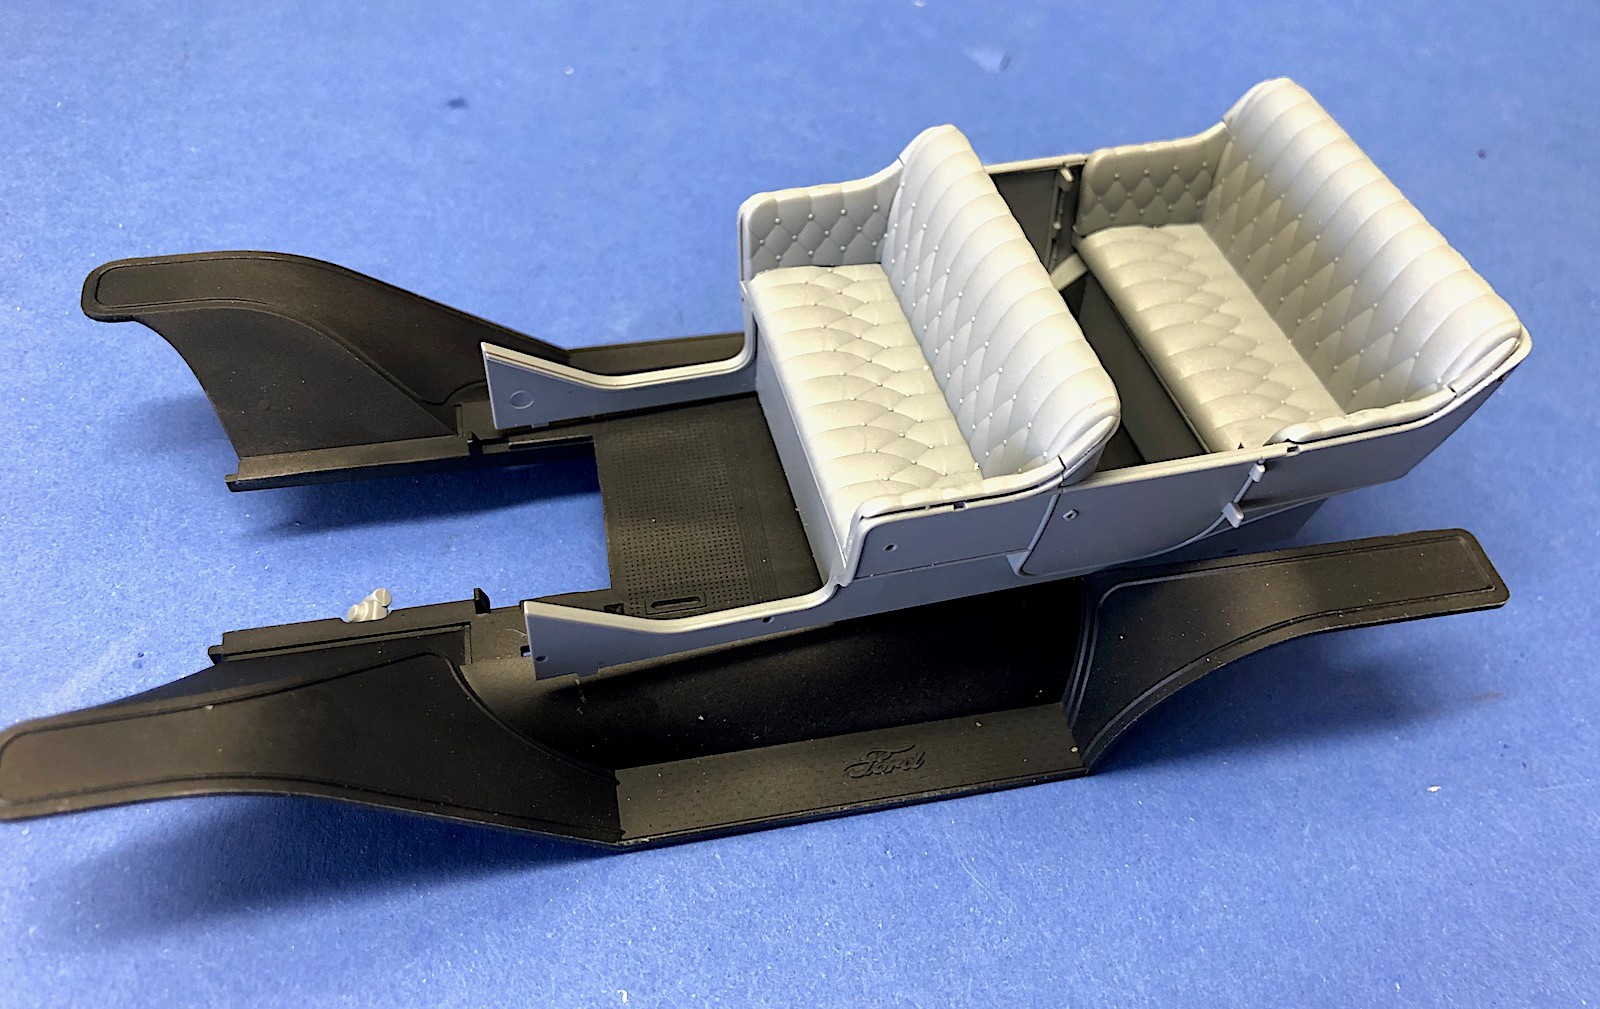
The model T’s body and interior are assembled in steps 28 through 38. The body builds into a nice, solid, well-fitting assembly. There were no problems with the body or interior.
Step 42 and 43 build and install the model T’s canvas top in the up position. The top is molded very smooth and could use some folds or ripples to provide some texture. The parts fit together and to the body nicely, although it’s not a very rigid connection. There is no top provided in the down stored position.
Lanterns for the sides of the vehicles are built in steps 47 through 50. The lantern bodies require quite a bit of cleanup and the clear lens and brackets are both over-scaled.
The horn for the Model T is assembled and installed in steps 51 through 50. The horn is molded with a cover or cap over the bugle end which is typical of Model Ts. I made the mistake of trying to hollow out the bugle end, which did not work well. It would be better just left alone.
Painting instructions for the Model T are provided on the last page of the instructions to finish the car as shown on the box art.
Figures
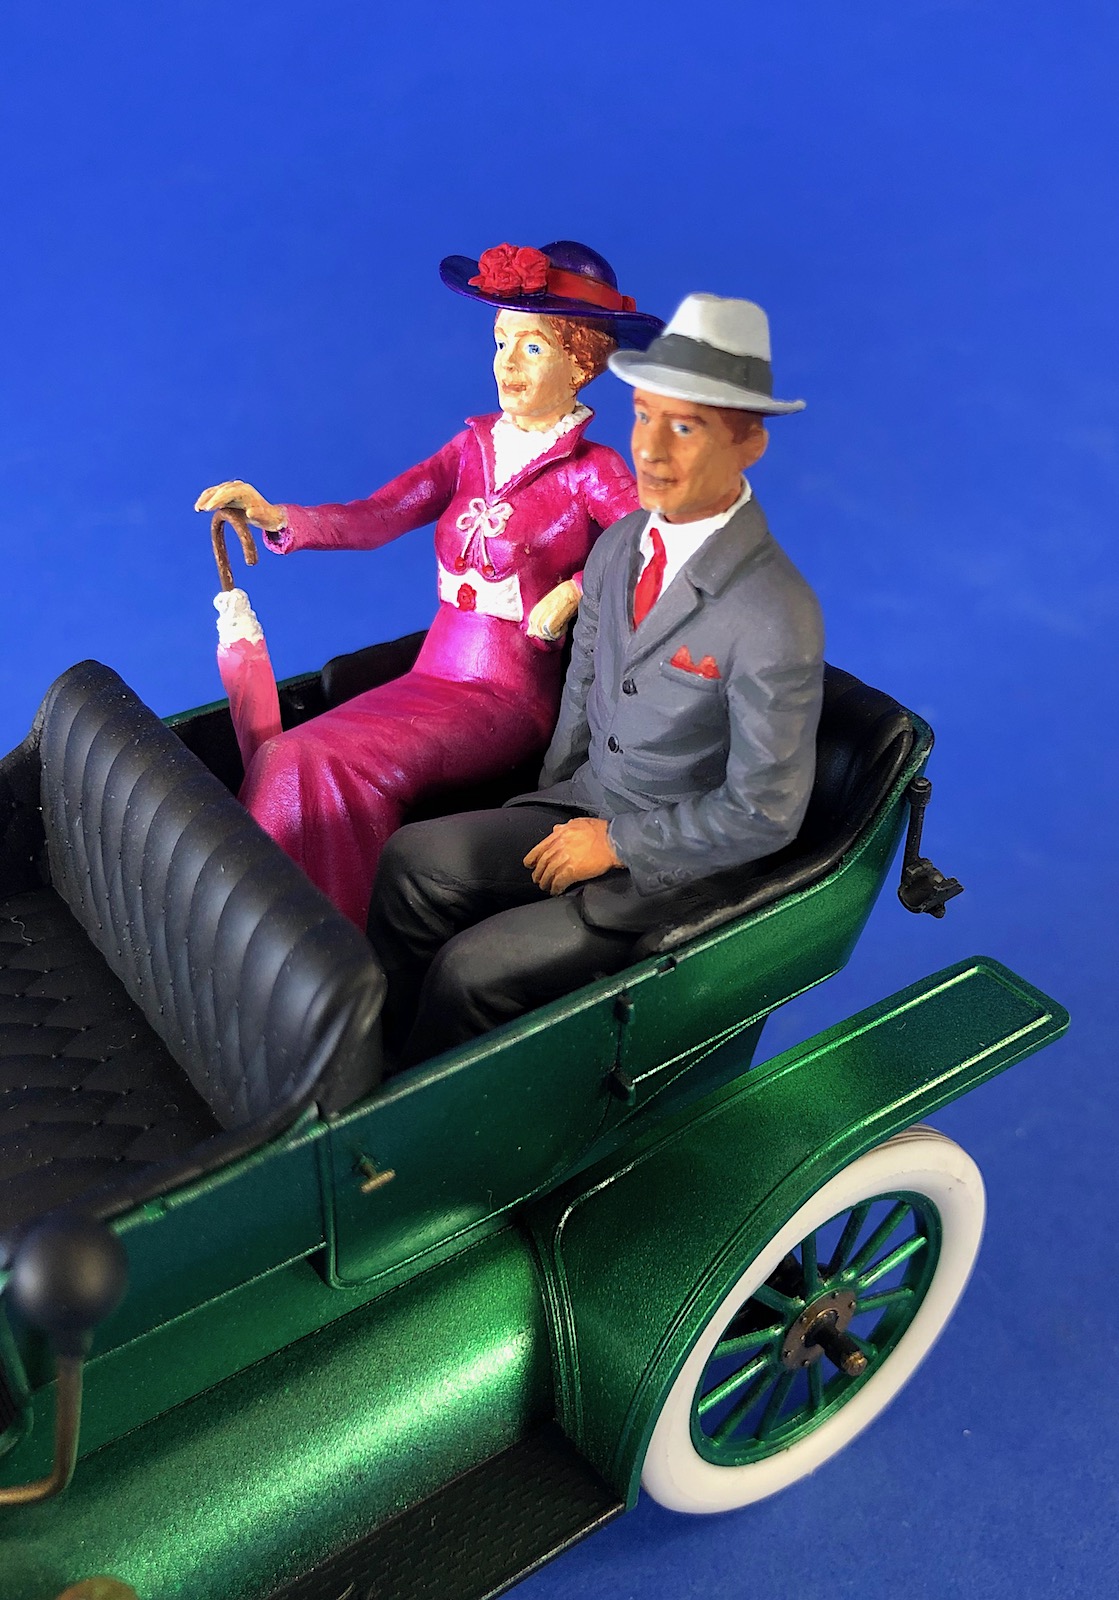
Man and woman figures dressed in period attire are included with this release of the Model T. The figures have good detail although somewhat soft for 1/24 scale. Box art shows the man driving the vehicle and the woman sitting in the rear seat. The woman’s skirt is assembled in three pieces that go together well although filler putty is required at the joints. Both the man and woman have fairly stoic expressions with a slight smile. Facial detail is very good. I plan to also use ICM’s American Sport Car Drivers 1910s which will be in the front seat. I modified the touring kit motorists to sit in the rear seat.
Summary
This is another great kit by ICM. The kit goes together easily and the parts fit nicely. There are not a lot of small parts, so the kit could be built by less experienced modelers and still provide a nice model. More experienced modelers can add detail and have an enjoyable build.
Thanks to ICM for producing these nice Model T kits and providing review samples to IPMS.


Comments
Add new comment
This site is protected by reCAPTCHA and the Google Privacy Policy and Terms of Service apply.
Similar Reviews