
Mitsubishi T-2
History
The Mitsubishi T-2 was a jet trainer aircraft used by the Japan Air Self-Defense Force. In 1967, Japanese aviation firms Fuji, Kawasaki, and Mitsubishi, each submitted proposals, and in September 1967, under lead designer Dr. Kenji Ikeda, Mitsubishi's design was selected. The official contract was issued for the development of the XT-2 was placed on 30 March 1968, with Mitsubishi as prime contractor and Fuji as Prime sub-contractor. Several other subcontracts with aerospace firms and other minor aviation manufacturers were also established.
By March 1969, the design had been finalized, and the XT-2 prototype was rolled out on 28 April 1971, and performed its maiden flight on 20 July 1971, with pilots Kenshiro Endo and Mitsui Sato in the cockpit. The XT-2 was followed by three more prototypes, and became the first aircraft of Japanese design to break the sound barrier in level flight. Two of the four prototypes were armed, and the other two were not. A total of 90 production T-2s were built, including 28 unarmed "T-2(Z)s", or "Zenkigata (early type)" and 62 armed "T-2(K)s", or "Kokigata (late type)"; some sources translate these variants as "T-2A" and "T-2B" respectively. An additional two T-2(Z)s were built but modified for the S-FX / F-1 strike fighter program. The last T-2 rolled off the assembly line in 1988.
The Kit
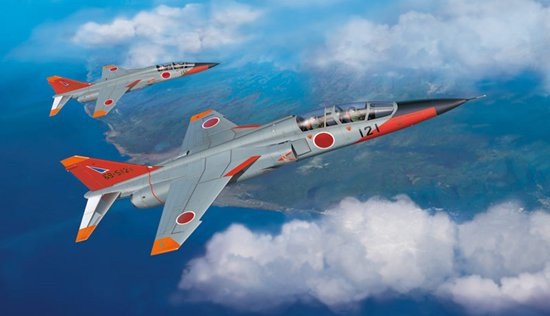
The kit is produced by Platz, a well-known maker of scale model kits. The kit arrives in a very colorful box with artwork of T2 Early Type displayed on the top. The bottom of the box shows a T2 displayed in Top, Bottom, Right Side, and Left Side views showing markings and colors. Also shown on the box bottom are the suggested colors required identified by Mr. Color and FS call-outs, and an image of the extensive decal sheet.
The kit consists of approximately 90 parts and comes on seven sprues: five grey, and two clear. The parts are nicely molded, with no flash, fine panel lines, and small sprue gates. The 6 page instruction sheet shows the suggested assembly through 10 steps starting with the cockpit assembly and progressing through fuselage, main wing, main landing gear (left and right), assembly of wings to fuselage, and antenna installations.
The kit fits together very nicely! I had no problems with gluing together any of the main assemblies, and did not have to use any filler at all. The wings and tail plane aligned to the fuselage correctly, and all the fine panel lines matched with no additional scribing required. I built Aircraft No 121. There are decal options for Aircraft 121, 101, 105, and 118. The only differences between these aircraft are the decal markings except for 101 which is silver versus gray for the rest. Decals are provided for the cockpit instrumentation. The rest of the kit construction proceeded without any issues except for the decals.
I painted the overall aircraft using Tamiya colors. I used Light Gray for the overall aircraft color, and then masked and painted the front of the fuselage and tail red, and the wing tips orange. I gave the aircraft an overall coat of gloss prior to decaling.
The decal sheet is very extensive; well over two hundred decals if you want to apply them all. The decals are printed in bright colors and are within registry but were slightly too thick. The forward fuselage and tail red comes as a decal. I could not get those decals to lie flat no matter what decal softening solution I used. The decal would not lay flat over the contoured nose surface no matter how many coats of the setting solutions were used. I removed the decals and masked and painted those areas. With the rest of the decals I had silvering problems. I would apply the decals and all looked great until I came back to look at it the next day and all the decals had silvered and lifted from the gloss coat. I consulted my club members and they suggested that I place a drop of future at the location for the decal and float the decal off on to the future and smooth it from there. This worked well enough, but I still had some silvering problems. This issue could also have been the result of having the heat on in the house (it is winter after all!), and the decals could have dried out too quickly. But this the first problem of this kind that I have encountered with an entire decal sheet. I worked my way through the 200 plus decals and the aircraft looks really good when finished.
Overall the kit is a joy to build and builds into a nice T2. The fine panel lines and the detail are exceptional for a kit of this scale. The only recommendation that I would suggest is for the Platz company to add a set of peel and stick seat belts to finish off the cockpit. I could not find an aftermarket set of seat belts for a JSDF T2, so I would use a generic set.
My thanks to Platz and IPMS USA for the opportunity to build a kit I normally wouldn't have chosen. I look forward to building Platz kits in the future.

Finished kit, from above

Closeup of cockpit exterior

Rear view of aircraft showing decals to fine effect.

Landing gear and rear of aircraft from below

Right side

Front, above

Left side

From left-rear

Underside of aircraft, showing extended landing gear

Closeup of underside of aircraft.

Closeup of empenage

From front-right looking back

Comments
Add new comment
This site is protected by reCAPTCHA and the Google Privacy Policy and Terms of Service apply.
Similar Reviews