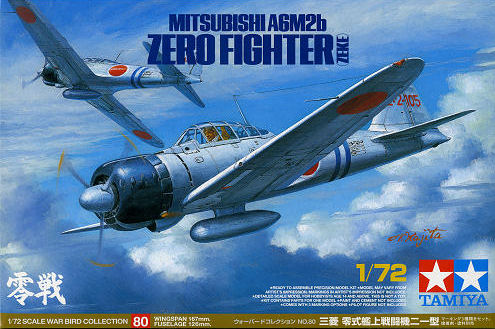
Mitsubishi A6M2b Zero Model 21
History
There is so much out there on the Zero that I will not take up too much time with the history of it. The A6M2 Model 11 went into operation in 1940. After a short production run it was modified in November, 1940, to have folding wings (Model 21).
The Kit
This kit is made up of 2 sprues of grey injected plastic and 1 clear. The parts are flash free and have very fine detail and I did not notice any sink marks. The decal sheet gives you markings for 3 different aircraft of the 2nd strike unit and was flawless.
Construction
The 10-page instruction sheet unfolds to show 16 steps for the assembly of this kit. Starting with the cockpit (of which there are 19 pieces), the assembly is pretty simple and easy. The detail of the cockpit is outstanding, to say the least. One problem I have with the kit is the control panel decals. You are given decals for the left and right side of the panel but not the two gauges at the top or the one in the middle. I used some spares that I had but it would have been for nice for Tamiya to add those. One thing to watch for is the small pieces for the fuselage halves – 8 very small pieces that were dropped one or more times! Tamiya made the engine/cowl an easy subassembly of 5 pieces that was a simple build and then set aside. The fuselage halves went together nicely and the cockpit tub, which slides in from the bottom, fit perfectly. Next were the wings and, again, no problems. They almost fit perfectly to the fuselage. There was a very small gap behind where the cowl sits but was easily filled. The landing gear went together smoothly and the gear doors went on without any problems. The cowl/engine and canopy also fit perfectly. Well, with the end in sight, the final two steps should have been easy, right?
This kit was a breeze, no problems at all…UNTIL…the final two steps. You add the counterweights and the aileron external control balance. Let’s deal with the weights first. They have no tab and there is no place marked on the wing as to where you attach them. I thought, no problem, but the way it’s shaped it just would not cooperate. These were also dropped several times as they even fought the tweezers! I ended up using a superglue gel to hold them in place. Moving on to the aileron external control balance, these have a spot on the wing, so it should have been easy. Be careful with these as they are small and oval shaped. I ended up losing one to the carpet monster and will scratch one out in the future. Even with the small problems at the finish, this kit really was a joy to build.
Finishing
I used Tamiya XF 76 for the fuselage and AS-12 for the prop and spinner, ModelMaster acrylic semi-gloss black for the cowl and pale green for the cockpit. ModelMaster interior metallic blue enamel was used for the wheel bay. The decals went on without a hitch and set down nicely with the help of a little Solvaset. The antenna wire is a strand of synthetic hair (works good for 1/72).
Conclusions
Just recently, I built the new Airfix A6M2 and thought it was a really good kit, especially for the price. The Tamiya kit takes it up another notch or two, maybe three. This is an awesome kit, no doubt about it. When I built the Tamiya 1/48 P-47, I thought that there was no way it’s going to ever get better than this…and I was wrong. I highly recommend this kit to anyone wishing to build an A6M2.
I would like to thank Tamiya for supplying the kit and IPMS/USA for letting me build it.


Comments
Add new comment
This site is protected by reCAPTCHA and the Google Privacy Policy and Terms of Service apply.
Similar Reviews