
Mirage 2000C – Gulf War 25th Anniversary Edition
Background
The Dassault Aviation company of France has been producing and exporting delta wing aircraft for 50 years. The first production series, the Mirage III, 5 and 50 started production around 1960. By the time production had ceased, over 1400 of these first-generation had been produced and various versions were in use in around twenty countries. The aircraft had a reputation for good performance, the ability to fulfill many different tasks and reasonable cost. In many cases, some components were produced in the customer country.
The Mirage III family was eventually replaced by the more conventional Mirage F1 family but when the time came to replace the F1 in 1973, Dassault Aviation again went back to the delta wing configuration. The result was the Mirage 2000. It took advantage of technology improvements such as fly-by-wire but remained economical and efficient and fulfilled a variety in tasks. Over 600 Mirage 2000 aircraft have been built and they have been exported to nine countries.
The Mirage 2000C model was designed to be an interceptor. This aircraft has been used by the French Air Force in a number of conflicts including the Gulf War. During the Gulf War, a number of French aircraft took part in air operations. The Mirage 2000C provided fighter air cover for allied forces as part of Operation Daguet. No French aircraft were lost during the operation. I believe that it still is in use by France and some of their other export customers.
The Kit
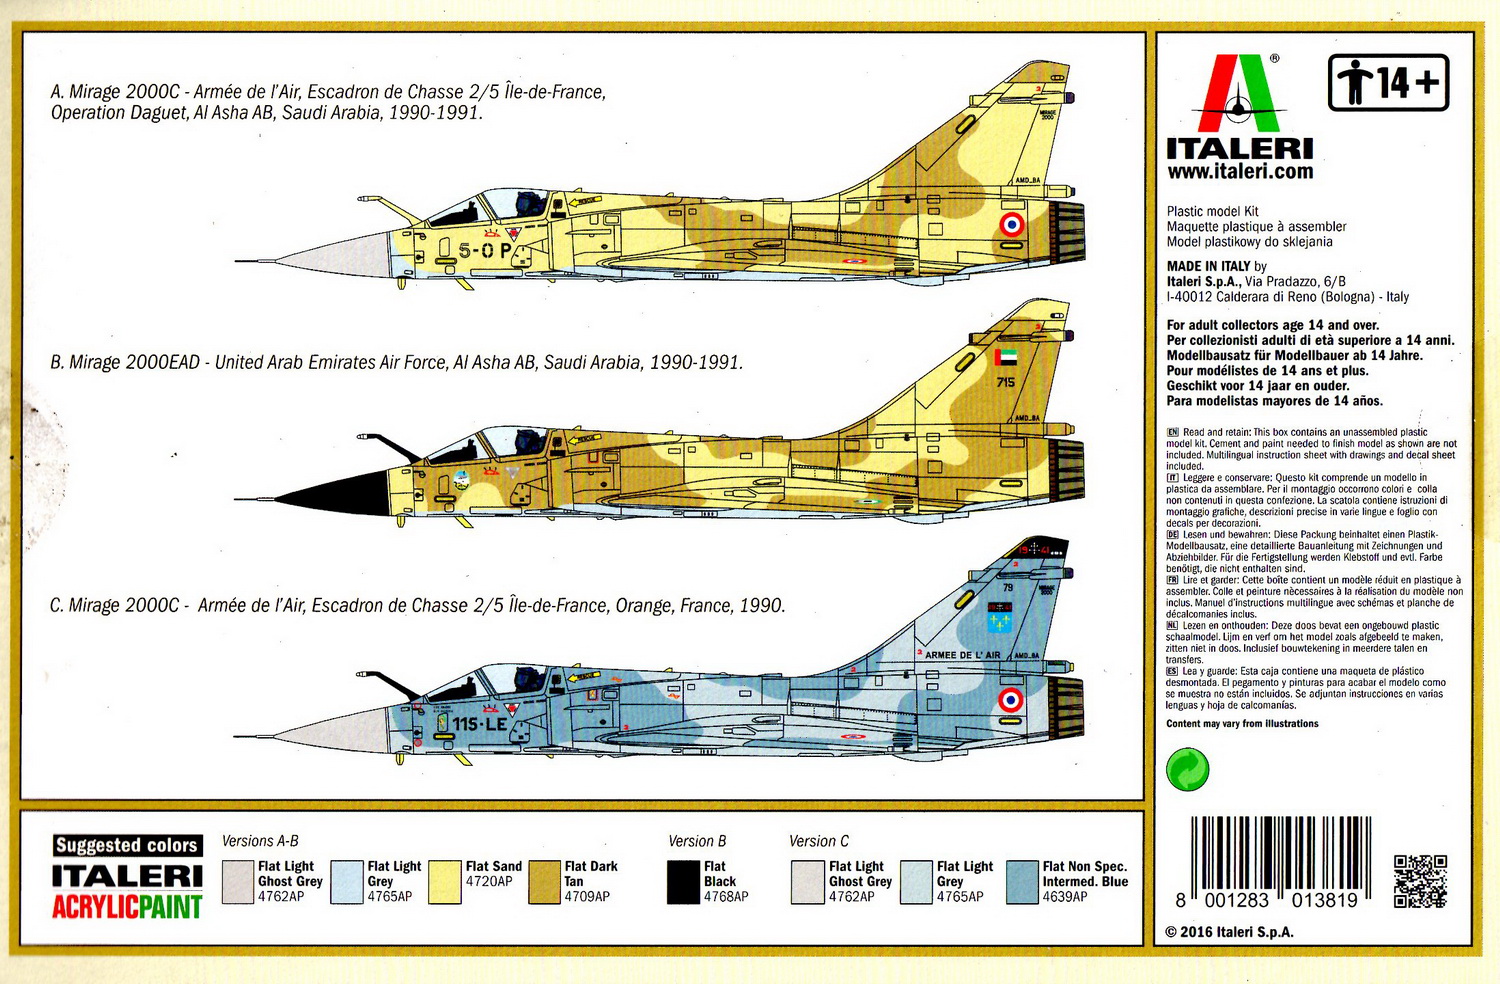
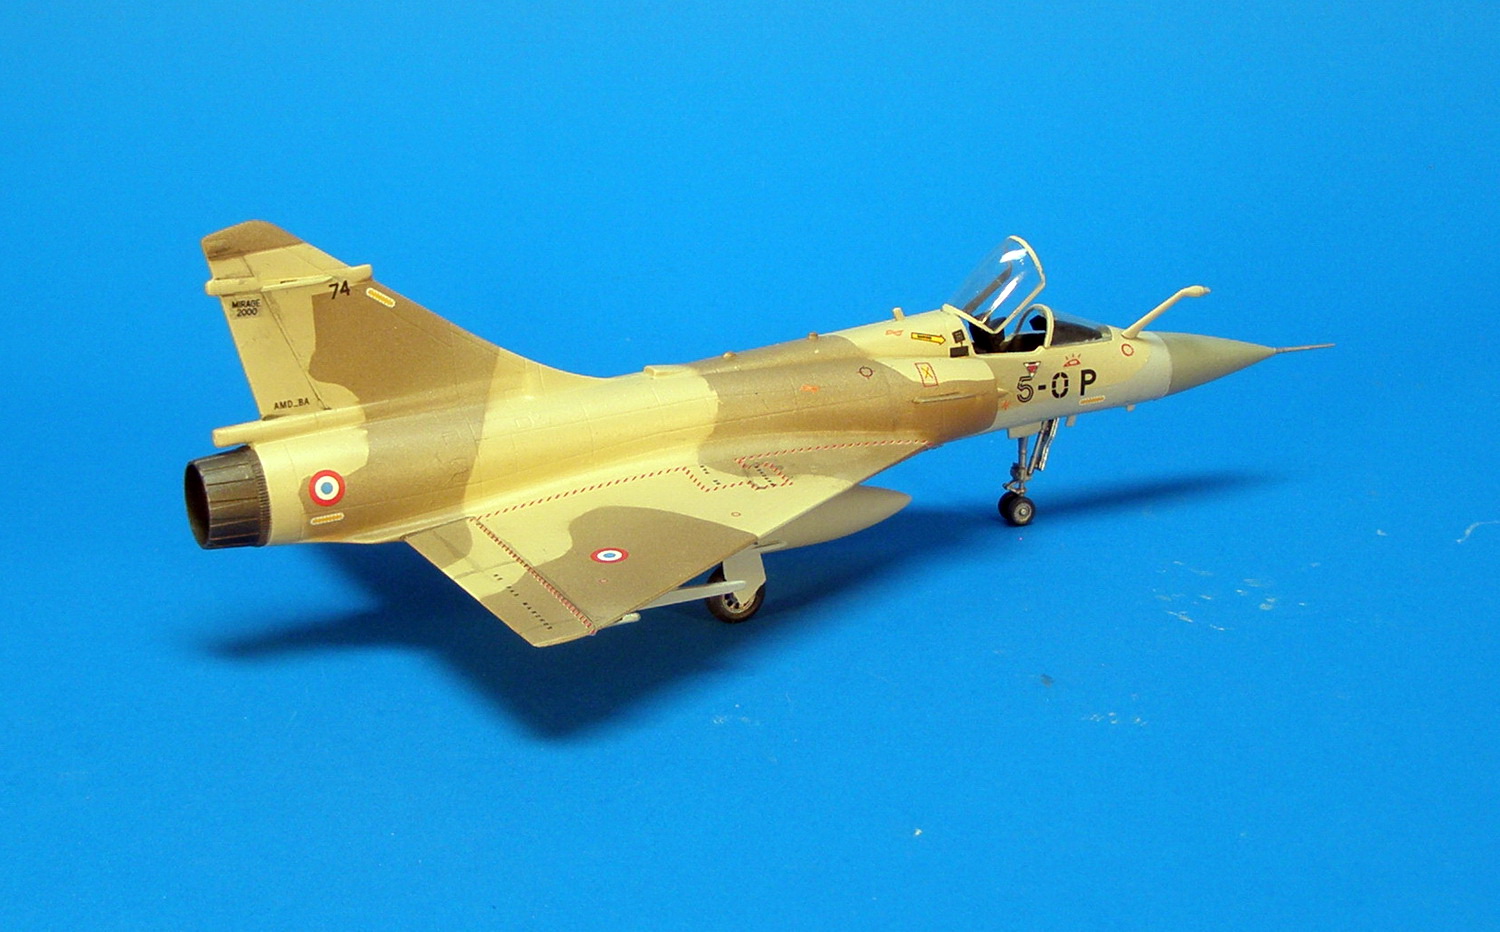
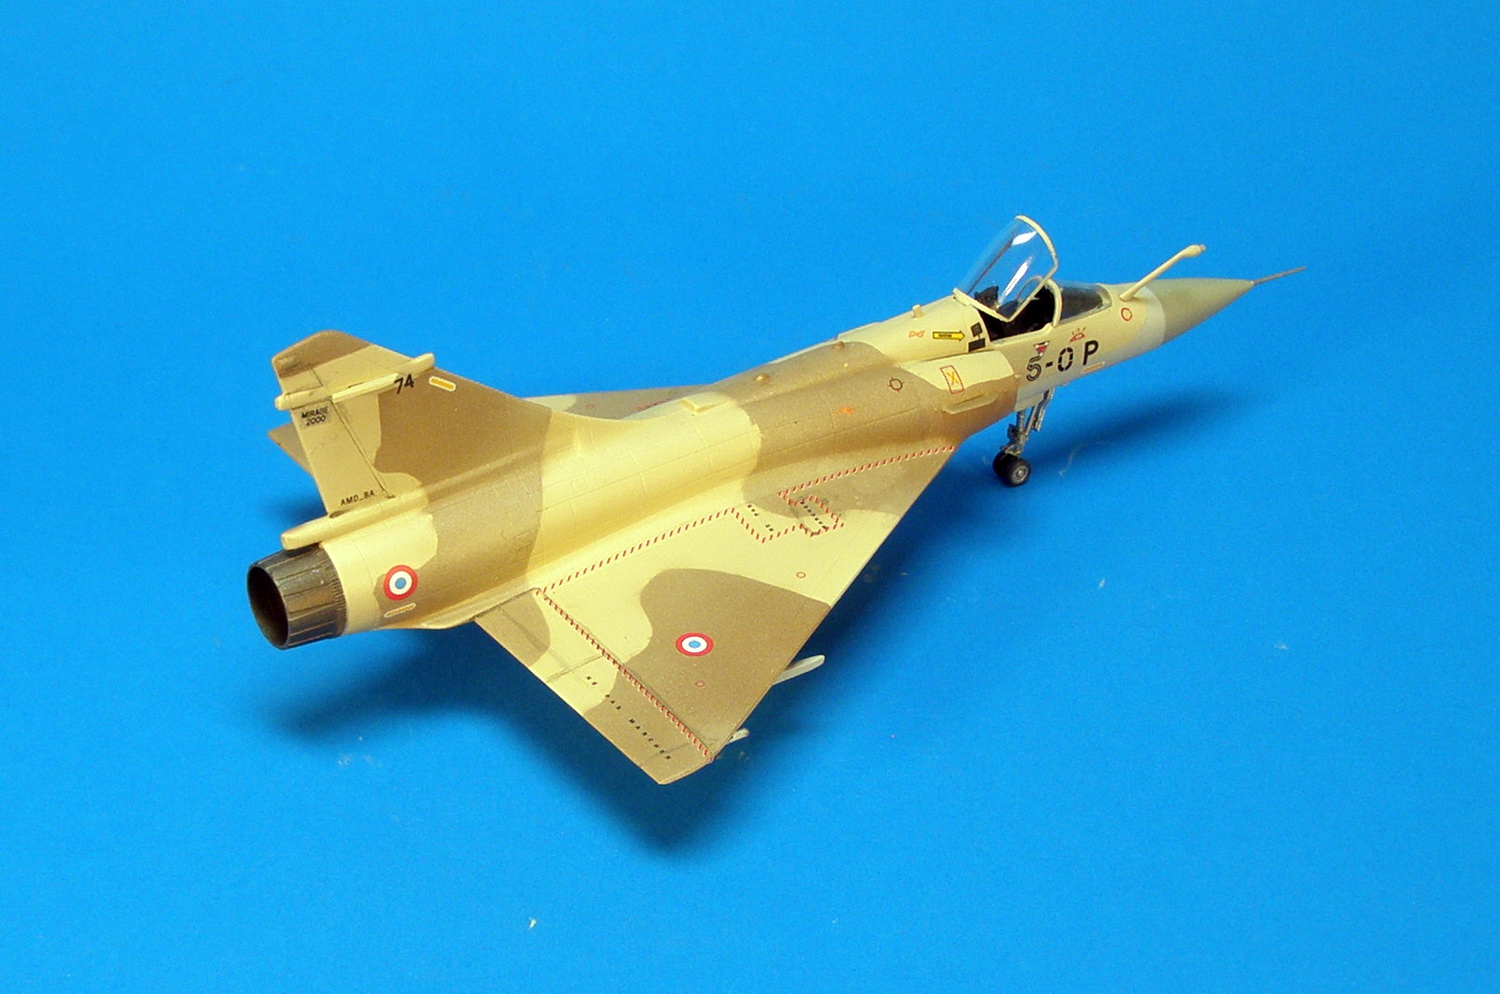
This kit by Italeri has been reissued to feature markings from the Gulf War where the US and the coalition allies drove Iraq forces from Kuwait. Three sets of markings are included. Two of them cover tan/sand desert camouflaged aircraft from the French and United Arab Emirates air forces. The third set of markings covers the same French squadron in light gray/intermediate blue European markings.
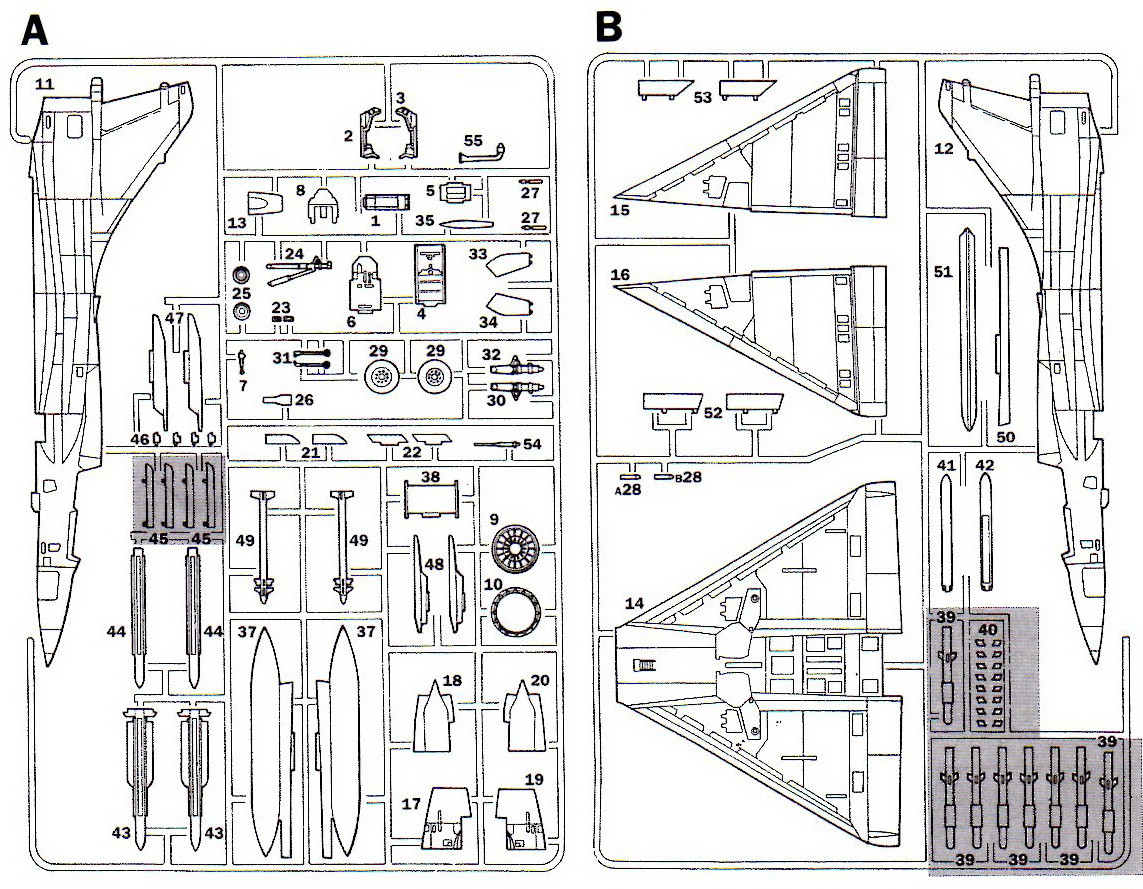
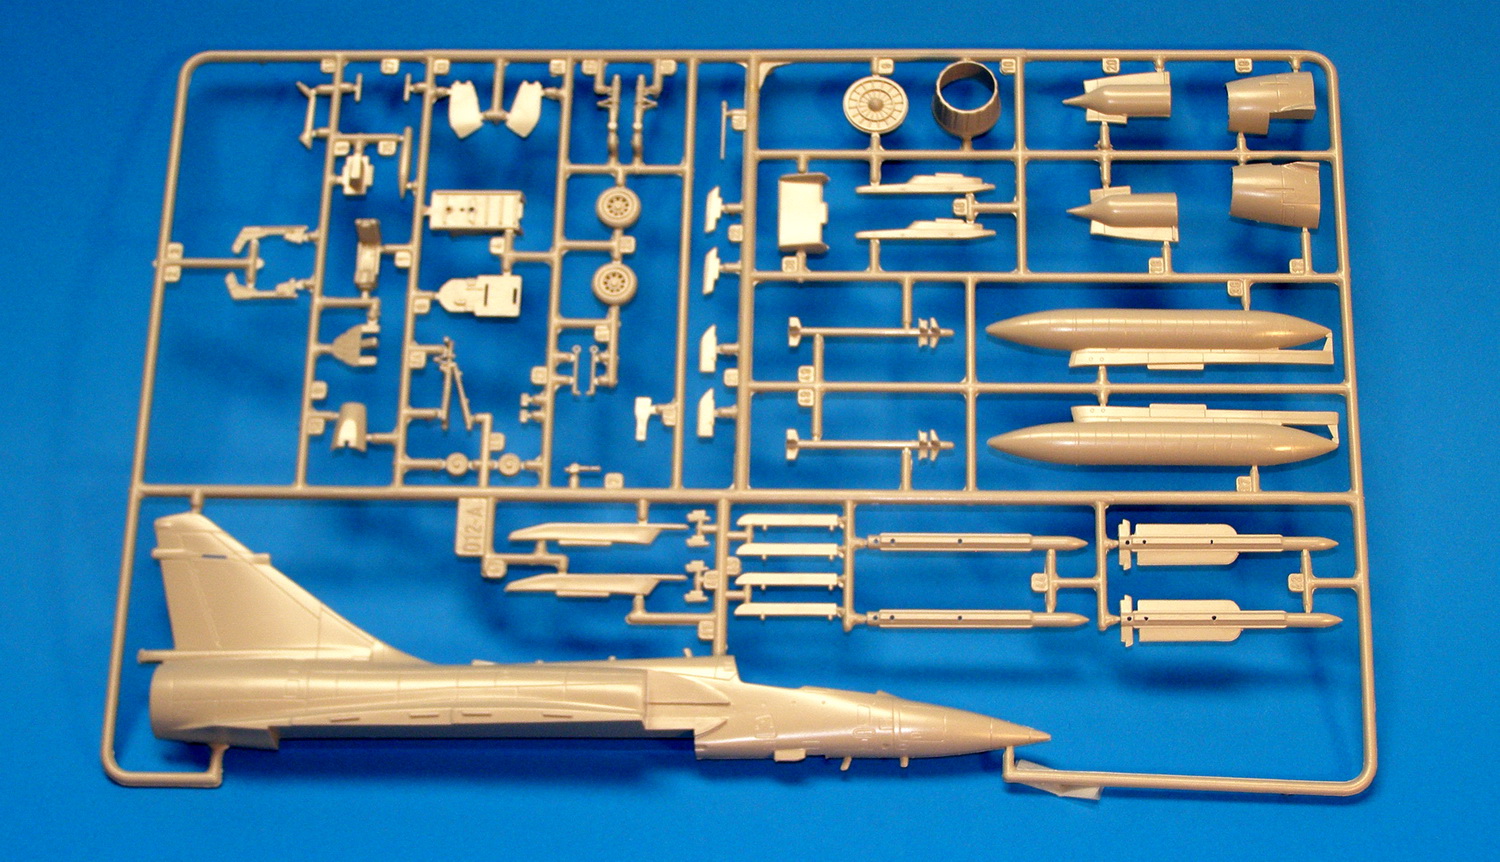
I am not sure when this kit was originally issued, probably in the 1990’s or earlier but Italeri have issued this kit at least twice before and Tamiya and Revell of Germany have also issued kits from the same tooling. In spite of the age of the tooling, this kit was cleanly molded, had nicely defined panel lines and fit together very well. The kit consists of two sprues of gray molded plastic plus a clear sprue for the cockpit canopy. The canopy can be displayed open or closed. Two different weapon loads are provided as used by Gulf War aircraft. In addition, the sprues include some additional armament from previous issues of the kit - see sprue drawing. The modeler has a wide choice of armament.
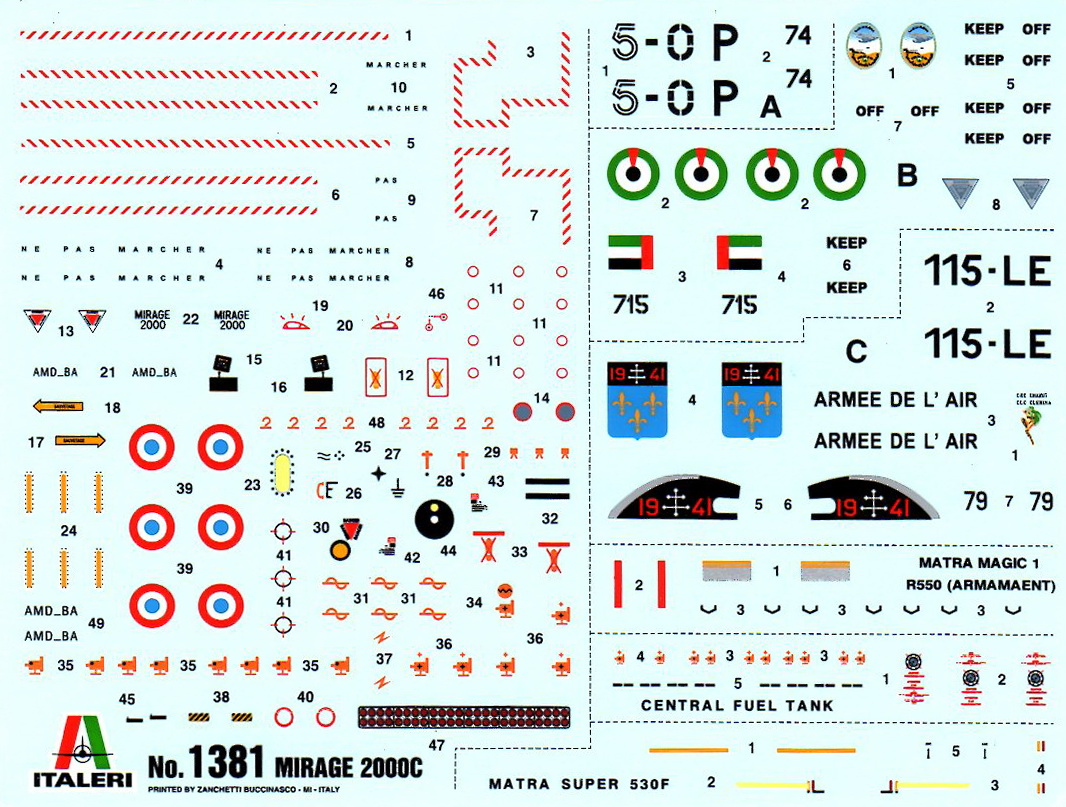
Four view drawings are provided for the three schemes and the well printed decal sheet from Italy provides all key markings plus an incredible number of airframe markings to complete the model. Color references are given based on Italeri acrylic paints. Info is available on the internet to convert these paints to F.S. numbers so that most other brands of paints can be used.
The Build
The model build starts with the cockpit. Eight parts make up the cockpit with the ejection seat. No instrument panel decals are provided but the instruments are raised and easily painted. I also added an aftermarket set of seat belts to further improve the appearance. Once the cockpit is complete, it is installed into the fuselage and the fuselage closed. Next, the one piece wing bottom and the two wing upper surfaces are installed. At this point, all parts fit well and the appearance of the model looks good. The next part is the installation of the intakes and the various small fins. The intakes are two pieces and are tricky fits. I found that some filler was needed on the bottom to make them fit well. The two small fins on the rudder fit into the slots well but the two fins that fit onto the intakes had some problems. The intakes had a shallow notch for the fins to fit while the fins had a pronounced tab. I ended up scraping a deeper notch in the intakes to make the fins fit better.
The landing gear assembly installed well and looks good. I did find some ejection pin depressions on the inside of the mail wheels but these were minor. The only other assembly problems were with the guns under the wings and the fuel intake probe. The guns are essentially square ended rods and they fit into grooves under the wings. To make them fit, either the guns need to be tapered at the back or the grooves need to be deepened. The fuel intake probe was more of a problem because there was no indication on the fuselage where it was to be mounted. The modeler needs to check out the great drawings to determine the proper location. I installed these parts after completing the painting of the basic model.
Finishing
Typically, the modeler would paint the upper and lower surfaces and then mask and paint the radar dome. As I was planning the painting, I could not find a good indication of the edge of the radar dome and there was a small door scribed into each side of the nose in the approximate area. When I checked some reference material, it appeared that this model was based on the forth prototype of the Mirage 2000 which did not have any radar fitted. This prototype was also slightly different in shape and the location of some panel or component lines.
I solved this problem by filling the panel lines of the added doors in the nose. Then I painted the upper and lower surfaces of the model. I extended this painting well forward on the nose, past the suspected edge of the radome. Next, I covered the forward part of the fuselage with masking tape and then slid my circle template over the nose. Using the drawings for the painting instructions and on the box, I determined the proper location of the edge of the radome. It seemed like an 11/32 inch circle fit the model properly. With the circle template in place, I marked the edge of the radome and then using a modeling knife, cut the masking tape through to the model surface. I then removed the tape from the nose and painted the radome in the defined light ghost gray. When removing the rest of the masking tape, the radome looked correct and there was a fine panel line at its edge - the mark made by the modeling knife cutting through the tape.
The upper surface colors were defined as flat sand and flat dark tan. The F.S numbers of these paints were 30475 and 30219. This corresponded with camo color reference material that I had but when I finished spraying the upper surface, the dark tan color seemed to have more contrast than the painting on the box and actual photos of the real aircraft. I solved this problem by thinning the sand color and very lightly spraying it over the tan color until I felt that the color contrast seemed about right.
Next came the decal application. A handful of decals completed the basic national and individual aircraft markings of the model. Then came the impressive looking wing walk markings followed by lots and lots of little airframe decals. I think that probably 300 some individual small decals are included. The drawings do a great job of showing most locations but in the end, I am not sure that I applied all of them. In any case, the model looks good and realistic. It should be noted that the drawings supplied with this kit represent an accurate Mirage 2000C. Perhaps in the future, the kit tooling can be updated.
Finally, as mentioned above, the landing gear, the canopies, and the refueling probe are attached. The landing gear seemed to fit well although the main gear doors did not have exact locations. The canopies fit well and were very clear. I gave them a coat of Future for protection and mounted the main canopy open to show off the cockpit interior. Finally, the refueling probe was attached. The location had to be determined by looking at the drawings because no mounting location was indicated on the nose of the model. I noted one other minor item missing from the kit. The production Mirage 2000C has two small pitot tubes attached to the nose. I did not try to replicate these although they are shown on the box painting. Perhaps some future photo-etched set will have them.
Summary
The tooling for this kit has been around for a while but it has held up well. This is a fairly easy kit to assemble and could be built by most young modelers with only slight experience. The decals from this kit provide three interesting schemes plus aftermarket decal companies such as Syhart provide lots of great color schemes for this kit. All in all, this is an interesting model to add to most collections of modern jets. In fact, now that I know some of the tricks to building this model, I will be building one or two others. I have some great Syhart decals that I want to use. It will be easy to fill in the nose doors before the fuselage is complete. This kit can be recommended. I would like to thank Italeri for providing a series of kits to commemorate the 25th Anniversary of the Gulf War. Thanks to Hobbico for bringing these models into the U.S. and for letting us review them.
Reference Material
- Modern Combat Aircraft #23 - Mirage by Paul Jackson. Motorbooks International. Published in 1985 but good reference for all Mirage aircraft from the III to the 4000.
- World Air Power Journal - Volume 10, Autumn 1992. Mirage 2000 is featured, Good cut-away drawing plus lots of detail photos.
- World Air Power Journal - Volume 37, Summer 1999. Mirage 2000 variant briefing. Lots of photos of users plus, main color 3 view drawing is the aircraft from this kit.


Comments
Add new comment
This site is protected by reCAPTCHA and the Google Privacy Policy and Terms of Service apply.
Similar Reviews