
Mig 29 Fulcrum w/ SAC Landing Gear
Products in this review are:
Great Wall Hobby Mig-29 and Scale Aircraft Conversions (SAC) Landing gear for the GWH Mig-29.
Introduction
The Mig 29A NATO, code name “Fulcrum”, was first flown in 1977. Designed to directly answer the newest American fighters that placed an emphasis on energy maneuvering via high thrust to weight ratios, the Mig 29 followed suite with two Klimov RD 33 engines that produce an average thrust to weight ratio of 1:1. Like its American counterparts the Mig 29 is designed to get in close and is armed with a gun and the ability to carry six AAMs as well as extra fuel in outboard mounted tanks or a centrally mounted ferry tank. Although the Mig 29’s record against U.S. fighters is not good (many were shot down in the 1991 Gulf war), it was more an issue of pilot training and politics than any shortfall of the Mig’s capability. If you have a few extra bucks (about 25K), there is a company in Russia that provides rides in the back seat of a Mig 29B. Judging by the videos I’ve seen on U-tube, it looks like the ride of a life time.
The Kit
Talk about eye candy! When one opens the large top box, the first thing one sees is the fuselage top carefully packed in its own bubble tray; removing that reveals roughly a dozen more carefully wrapped sprues of perfectly molded parts. Also included are two frets of PE, two decal sheets, an acetate sheet with the HUD screen on it and a frameable print of the box top art in a protective sleeve. A scan of these parts reveals several nice features including two complete engine assemblies, separate control surfaces and a full load of ordinance and drop tanks. The AAM missiles include 4XR73 Archers and 2XAA10 Alamos. They are molded in one piece and are some of the nicest I’ve ever seen. Also of note is the centerline fuel tank that is correctly rendered with the APU exhaust that passes through it, just like the real thing. Panel lines are recessed and very fine. You have the option of posing the engine intake FOD covers closed with the auxiliary doors on top of the aircraft open or the opposite. Since there is no pilot figure provided, it would be difficult to configure the intakes closed, but it’s nice to have the parts in case you do install a pilot. A 14-page instruction booklet that includes color profiles for the three decal options in the kit round out this offering. Great Wall gets a “10 out of 10” for presentation.
The Build
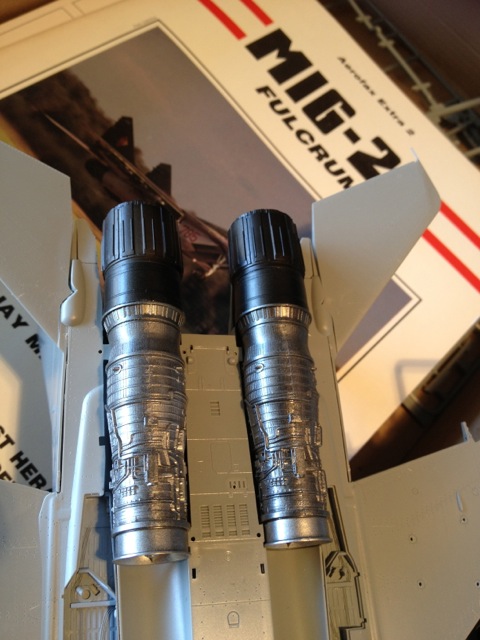
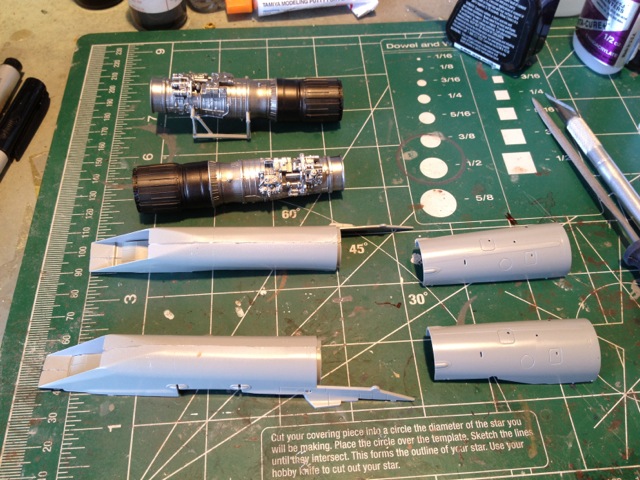
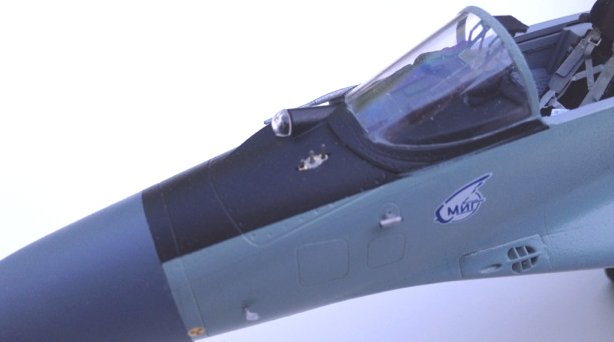
As is the norm, the build starts with the pilot’s office. The K36 ejection seat is a multi part affair that looks really convincing when assembled and painted. There are PE parts for the harness and leg restrainers. The harness was a bit of an origami project for me. It’s a two part affair that is threaded together then bent to lay flat. I never got it to look right. It seems like it would have been easier to layer separate parts but credit to GWH for including them is due. The instrument panel has separate decals for each instrument and it looks really nice when finished. Things speed up after this because the fuselage is in halves (top and bottom). The aux intake doors on top of the fuselage have separate parts for the open or closed position. The problem is unless you have a pilot or mechanic in the pilot’s seat you would never see them open. There are also some nice PE screens behind the aux intakes. The fit of these was perfect. You also get two cannon vent panel inserts, so pick the one you like. The instructions would have you install the canopy at this point but I deferred that until later. The cockpit plugs in from underneath. Next up, open the holes you want to use for drop tanks or missiles. Make sure you add a lot of nose weight. It is not mentioned but this bird will tail sit without it. The lower fuselage gets some multi part gear wells before the top and bottom are joined. The control surfaces (all separate parts) are trapped between the top and bottom sections. There’s some nice leading edge extensions on the vertical stabilizers with chafe and flare dispensers. Then we move on to the engines. There are two fully detailed R33 engines included and a stand if you want to display one out of the model. I elected not to display one but I did build the stand to check the fit. You have to add weight to the engine front if you don’t want it to flop over. The burner cans are beautiful multipart assemblies. Make sure you align them correctly as the cans angle up and you want them to face the same direction in the airframe. Mig29 doesn’t have thrust vectoring! The speed break located between the burner cans can be opened or closed. Since it’s rarely open when the aircraft is static, I didn’t open mine. Again, these steps showed small details installed but I waited until the end of the build process to add them. Then it is time to install the engines. They are trapped by two intake tunnels that include a position-able FOD door. I’ve already discussed the problem with closing them without a pilot in the seat. This was the only area I found challenging. I couldn’t get the intakes to tightly fit against the fuselage. Here and around the radome where the only places I used putty.
Painting
The color charts call out Mr. Color and Vallejo brands, neither of which I can get. Luckily, Testers model master makes a light and dark Fulcrum grey so I took the easy road and used them. The camouflage colors and patterns are almost identical for each of the three options on the decal sheet. I freehanded a soft edged pattern with an airbrush. I picked some Testers colors for the dielectric panels and the radome and Testers small bottle steel for the leading edge of the stabilators. The model was over- coated with Alclad micro gloss in preparation for the decals.
Decals
I was a bit concerned at first because I had trouble with the instrument decals sticking. As it turned out, it wasn’t an issue. The rest came off the sheet quickly in warm water and settled nicely on the model. I messed this part up by using the wrong stencils on the airframe and missile racks. I found the instructions less then clear at this point. Pay close attention and get yourself some good color photos so you don’t repeat my mistake.
Finishing touches
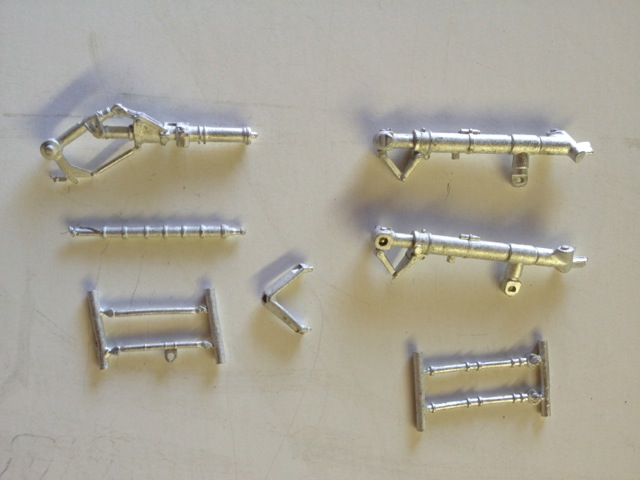
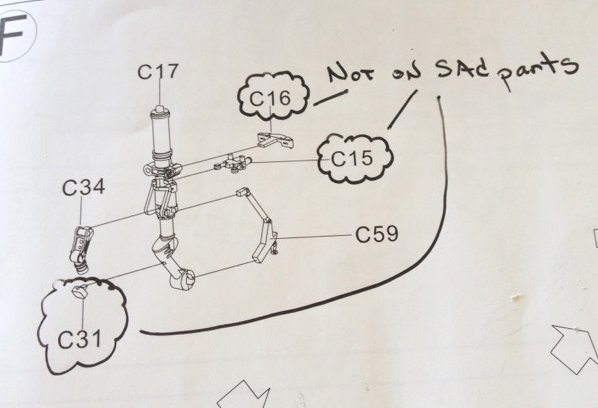
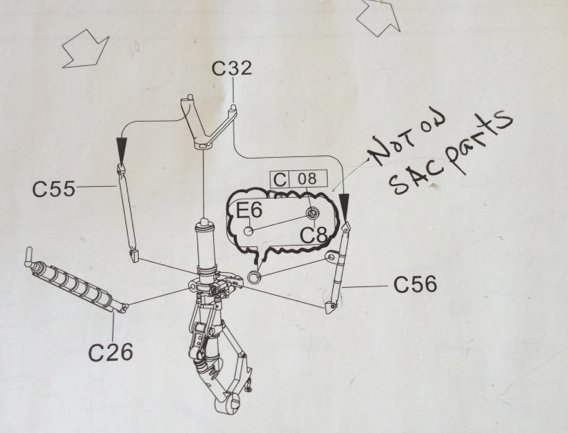
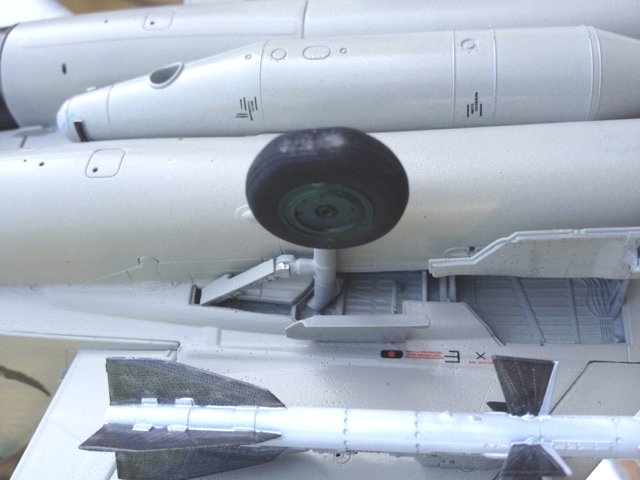
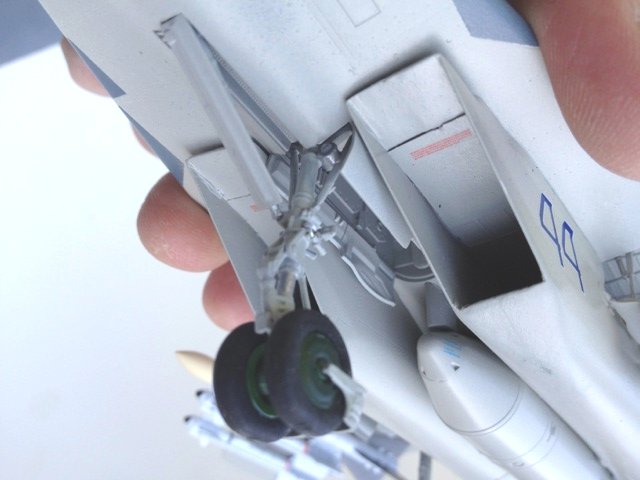
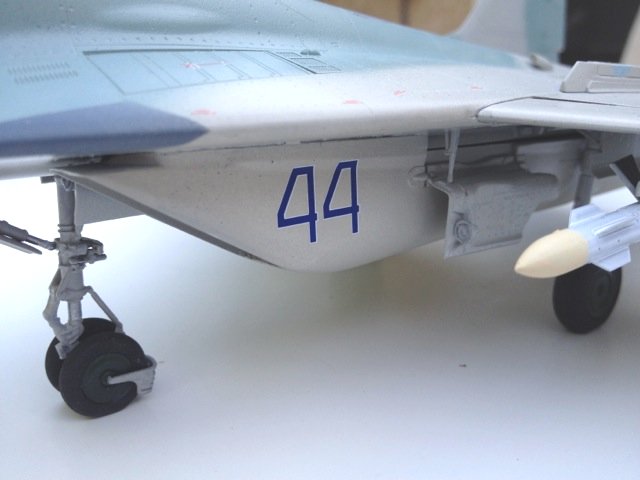
I used the SAC aftermarket landing gear parts on this build. They are replicas of the kit parts done in metal. Refer to the photos included in this review as you do have to use some of the kit parts to finish the gear. These parts are every bit as good as the kit parts with the added bonus that is derived due to the fact that SAC gear are made of metal. The tires are separate parts so you don’t have to mask hubs. You will need a good scale drawing to position the landing gear as the instruction sheet is not clear in this regard and the locating pins are not that positive of a fit. There are some PE parts for the antennas including a microscopic “odd rod” antenna consisting of four separate parts. As I mentioned before, the missiles are real beauties in this kit. With a little paint and careful decaling (don’t use mine as a reference) they really add to the finished model. I like the fact that the drop tanks and missiles included in the kit allow you to realistically display your Mig-29 in any configuration you would see in the real world.
Conclusion
Having built several Mig-29 kits in various scales, I can say this is the best representation of the type I’ve seen. The addition of full engines and separate control surfaces just adds to the value of this kit. Draw backs include the seat harness which is a bit complicated and the static wicks that are molded on the parts. They are a bear to work around without breaking them. I should have cut them off and reattached them later. Make sure you check references if you use all the stencils. Also, some good scale drawings for gear positioning are helpful. On a scale of 1-10 I rate this kit a 9, only because the intake trunks and the seat harness gave me some issues. Thanks so much to Dragon Models/USA and Great Wall Hobbies for providing the sample kit. Also, thanks to IPMS for allowing me not only the chance to build this kit but also for the grace of some extra time while I worked through a difficult family issue.


Comments
Add new comment
This site is protected by reCAPTCHA and the Google Privacy Policy and Terms of Service apply.
Similar Reviews