
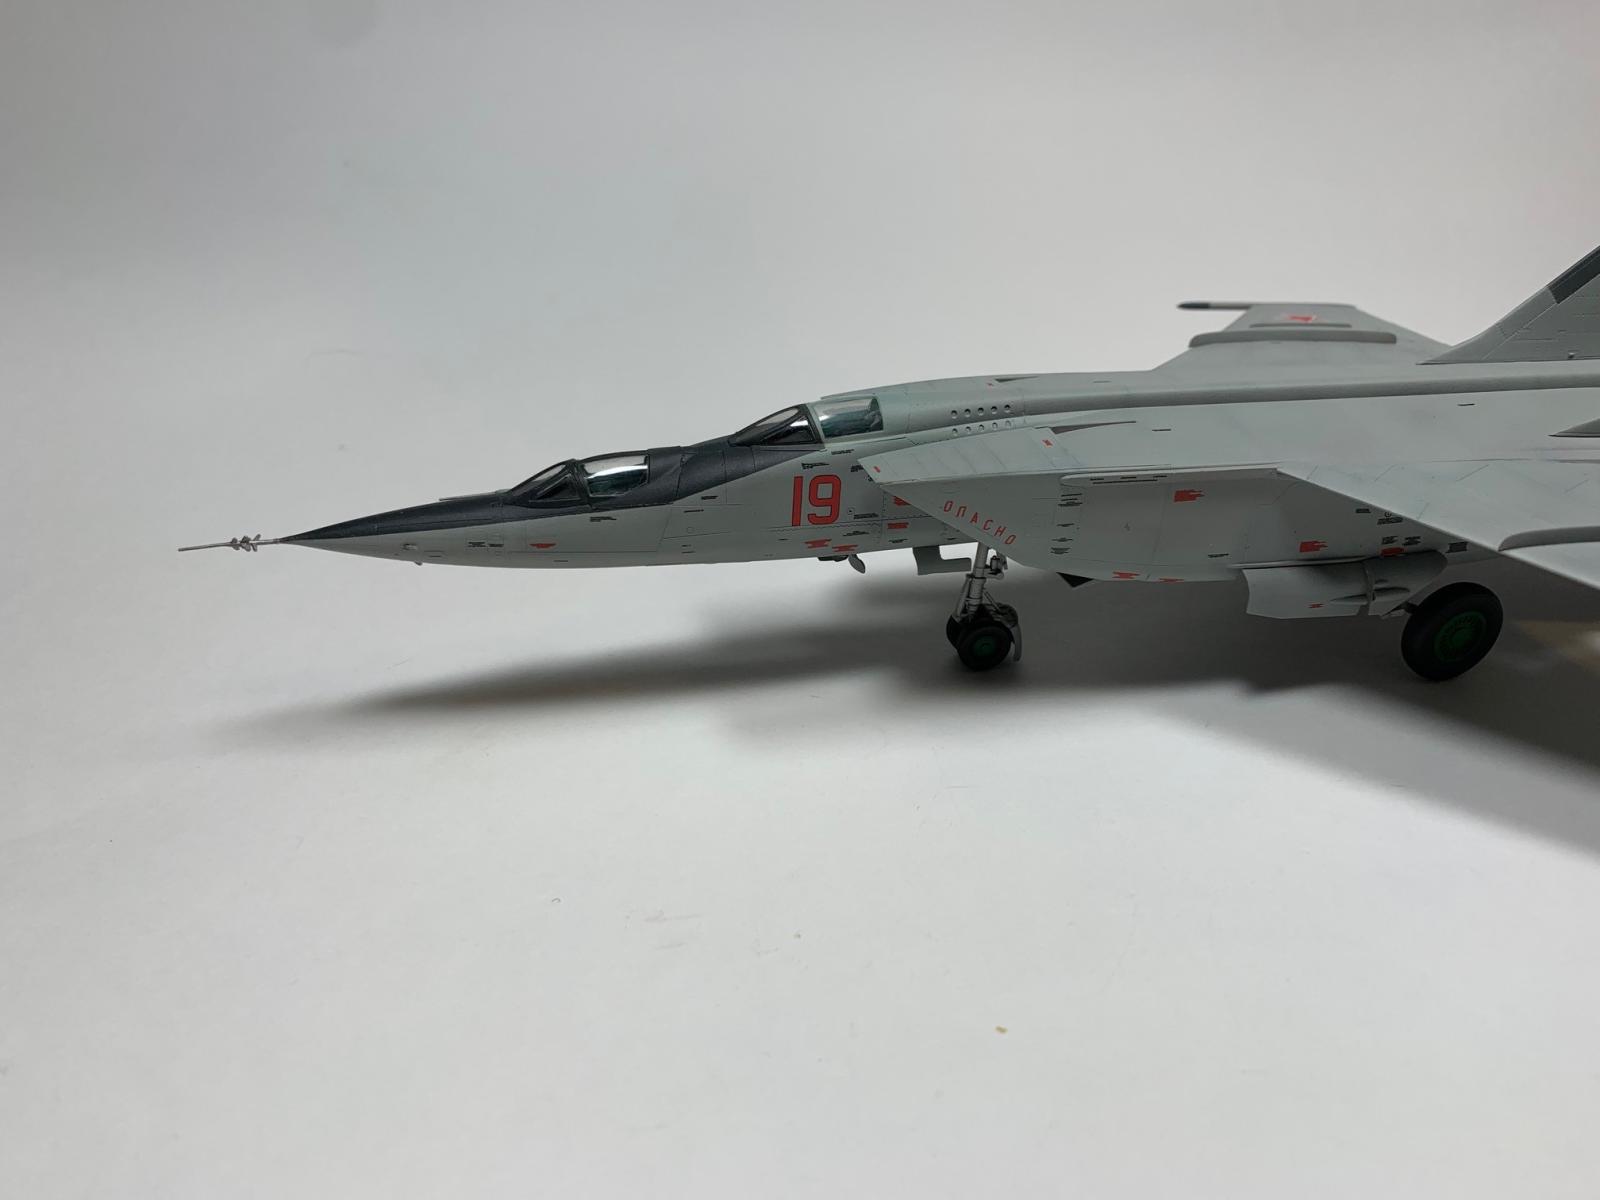
MiG-25 PU
ICM has continued its series of MiG-25 “Foxbat” kits with probably the ugliest variant of all, the two-seat trainer. Unlike the other trainers built by the Mikoyan-Gurevich design bureau where the trainer version was created by extending the cockpit aft to make room for an instructor’s seat and controls, for the MiG-25 trainer an entire new nose section was added in front of the existing cockpit along with a separate canopy for the instructor pilot.
ICM replicates what the design bureau did as the kit is clearly a standard MiG-25 PD kit with an extra sprue providing the parts for the new nose and its included cockpit, and a second clear sprue with the canopy for the new cockpit. Having constructed the original Hasegawa MiG-25 years ago, I was initially concerned about ensuring that the box shaped main fuselage would be rigid enough to stand up to sanding, etc. However, a quick review of the instructions shows that ICM has addressed this issue by including several bulkheads that really help to stiffen things up.
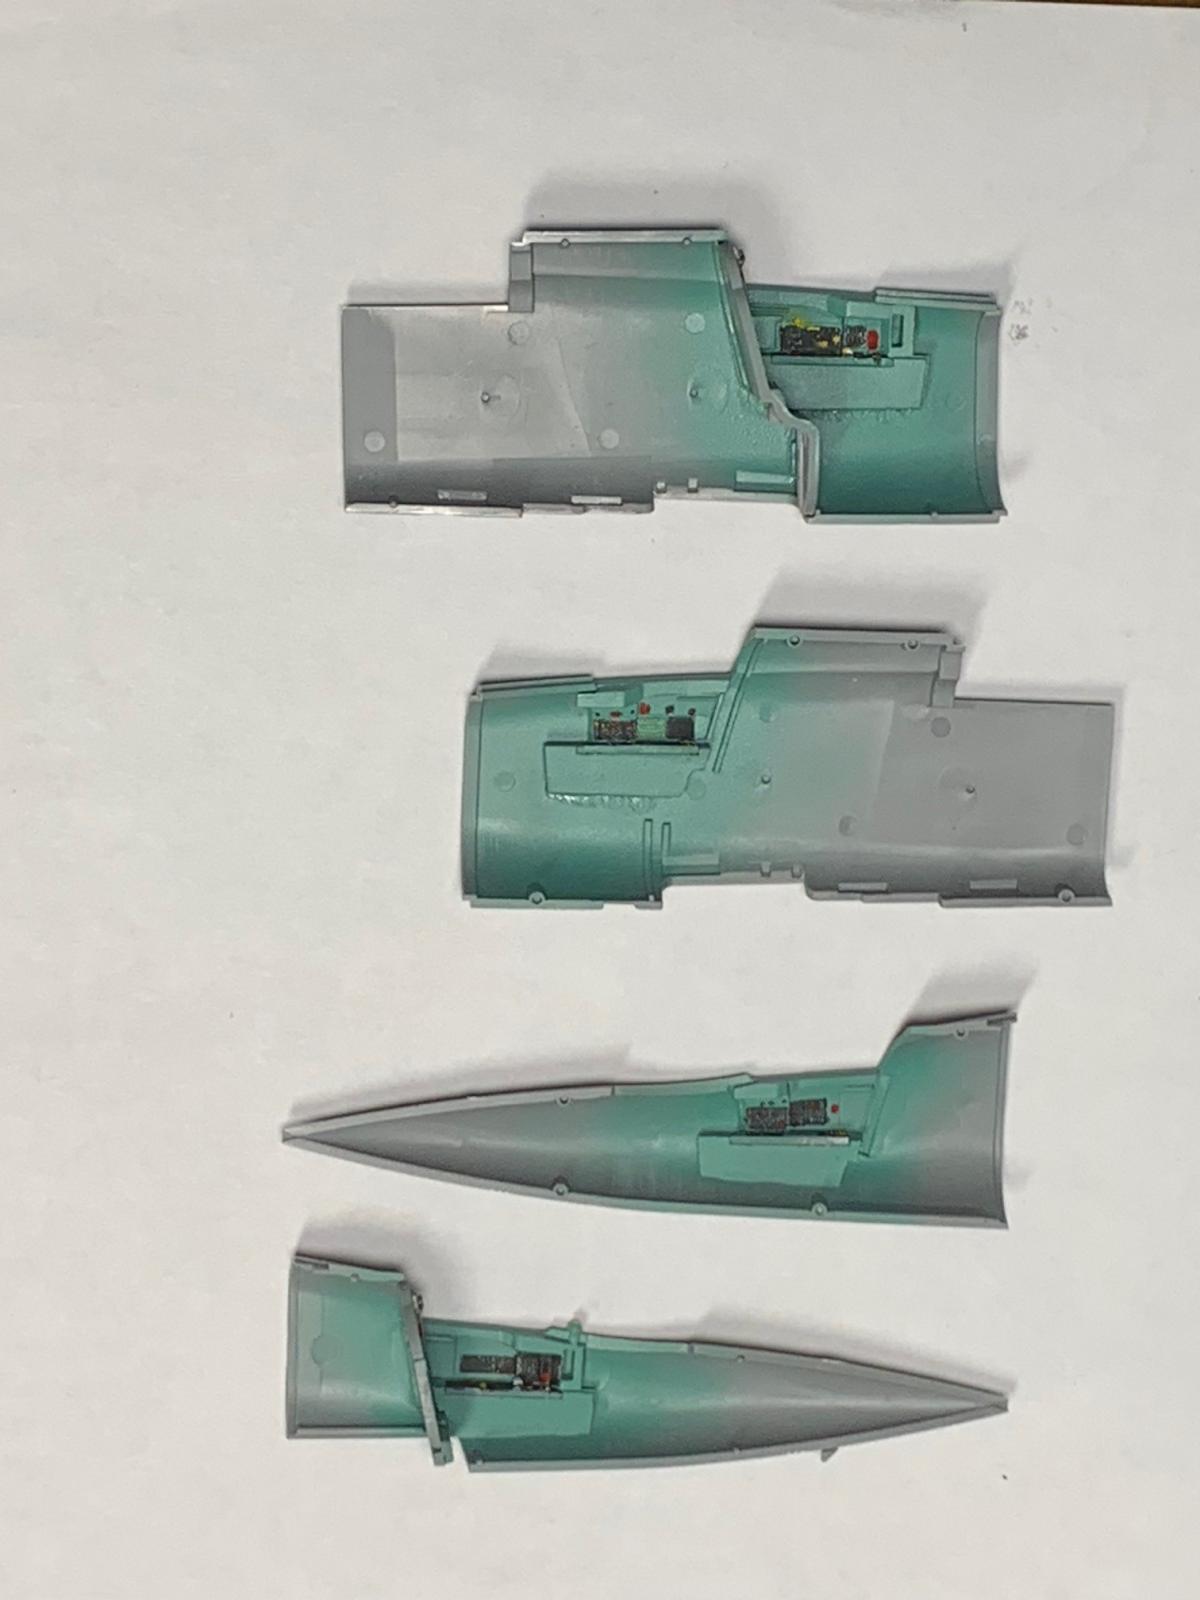
Construction of the kit is very modular and a little unconventional as rather than provide a cockpit tub that parts are added to, both cockpits are assembled from multiple pieces starting with the side consoles that attach directly to the sidewalls of the cockpit with separate parts for the rear wall and floor for each cockpit. In order to ensure that everything fits where it was supposed to, rather than assemble and install everything in one of the fuselage halves, I tacked parts in place in one fuselage half as I went along. Then I dry fit the other side of the fuselage in place to ensure that the parts were properly placed and stayed there while the glue dried. I also deviated from the instructions at times by leaving off parts that could be installed later and which I knew I would most likely break off during construction, such as the landing gear legs.
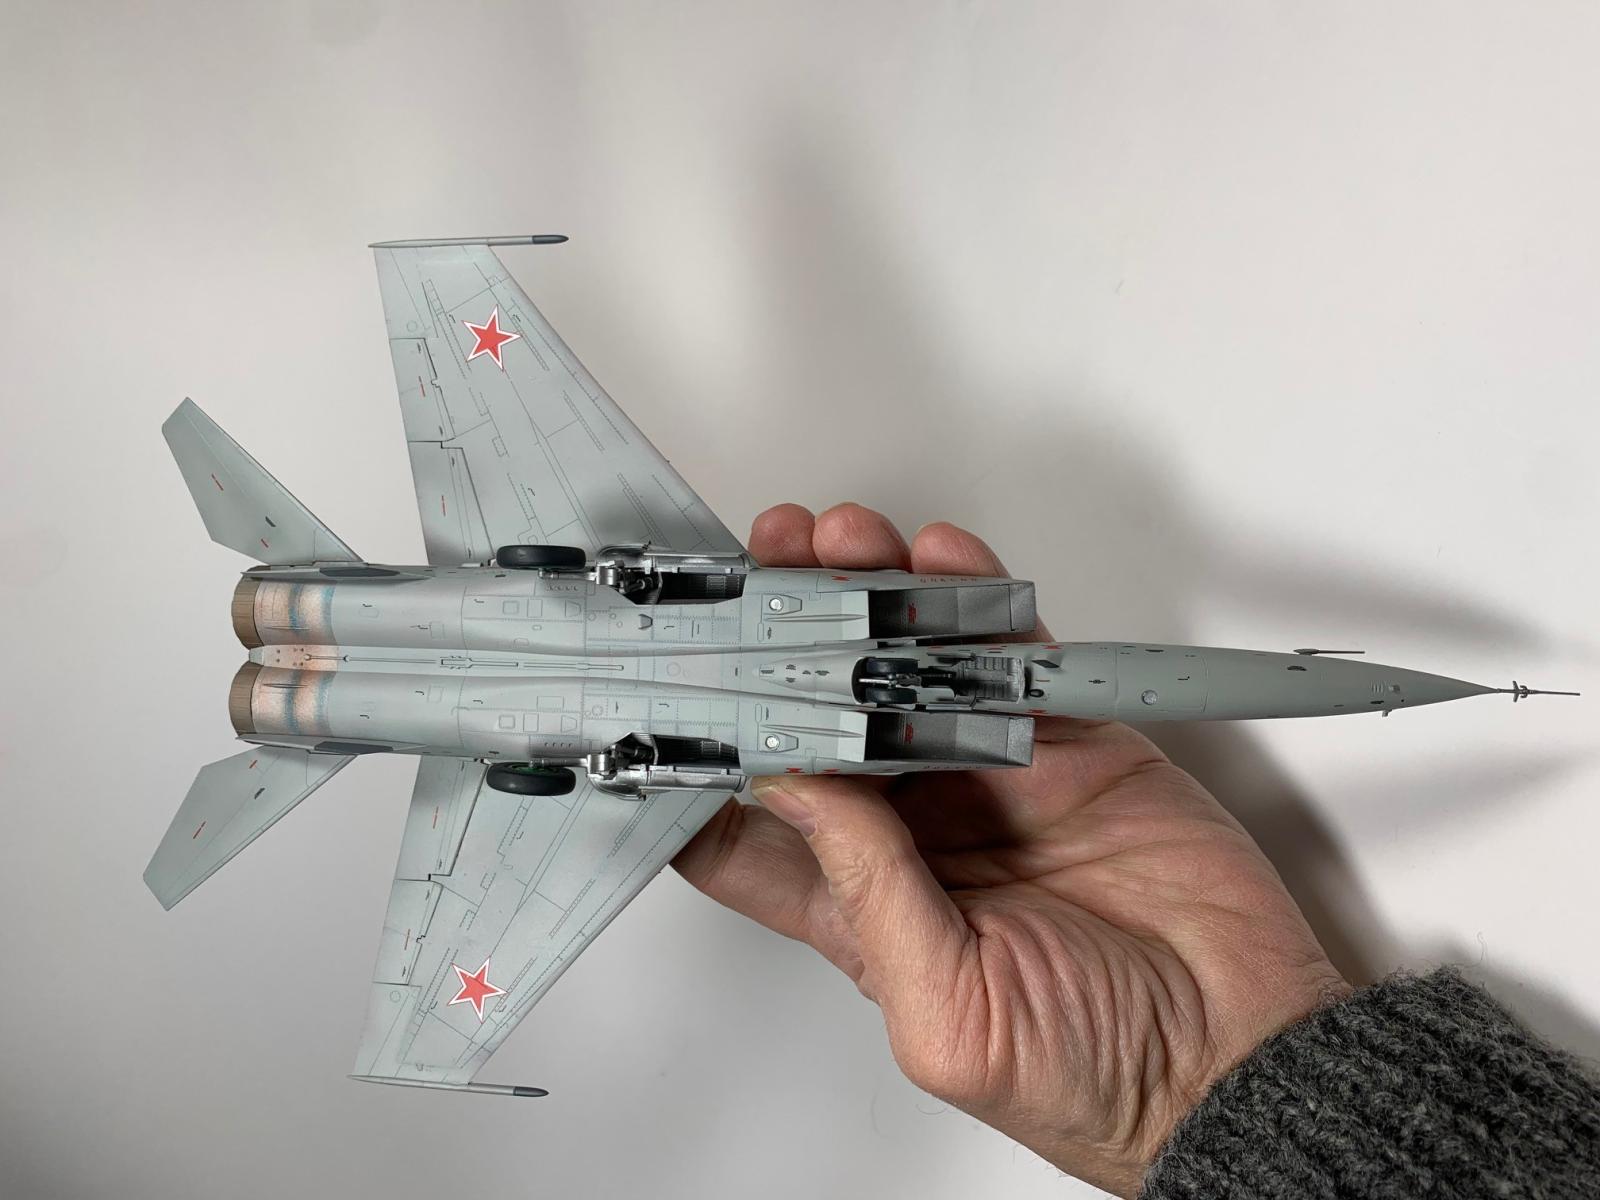
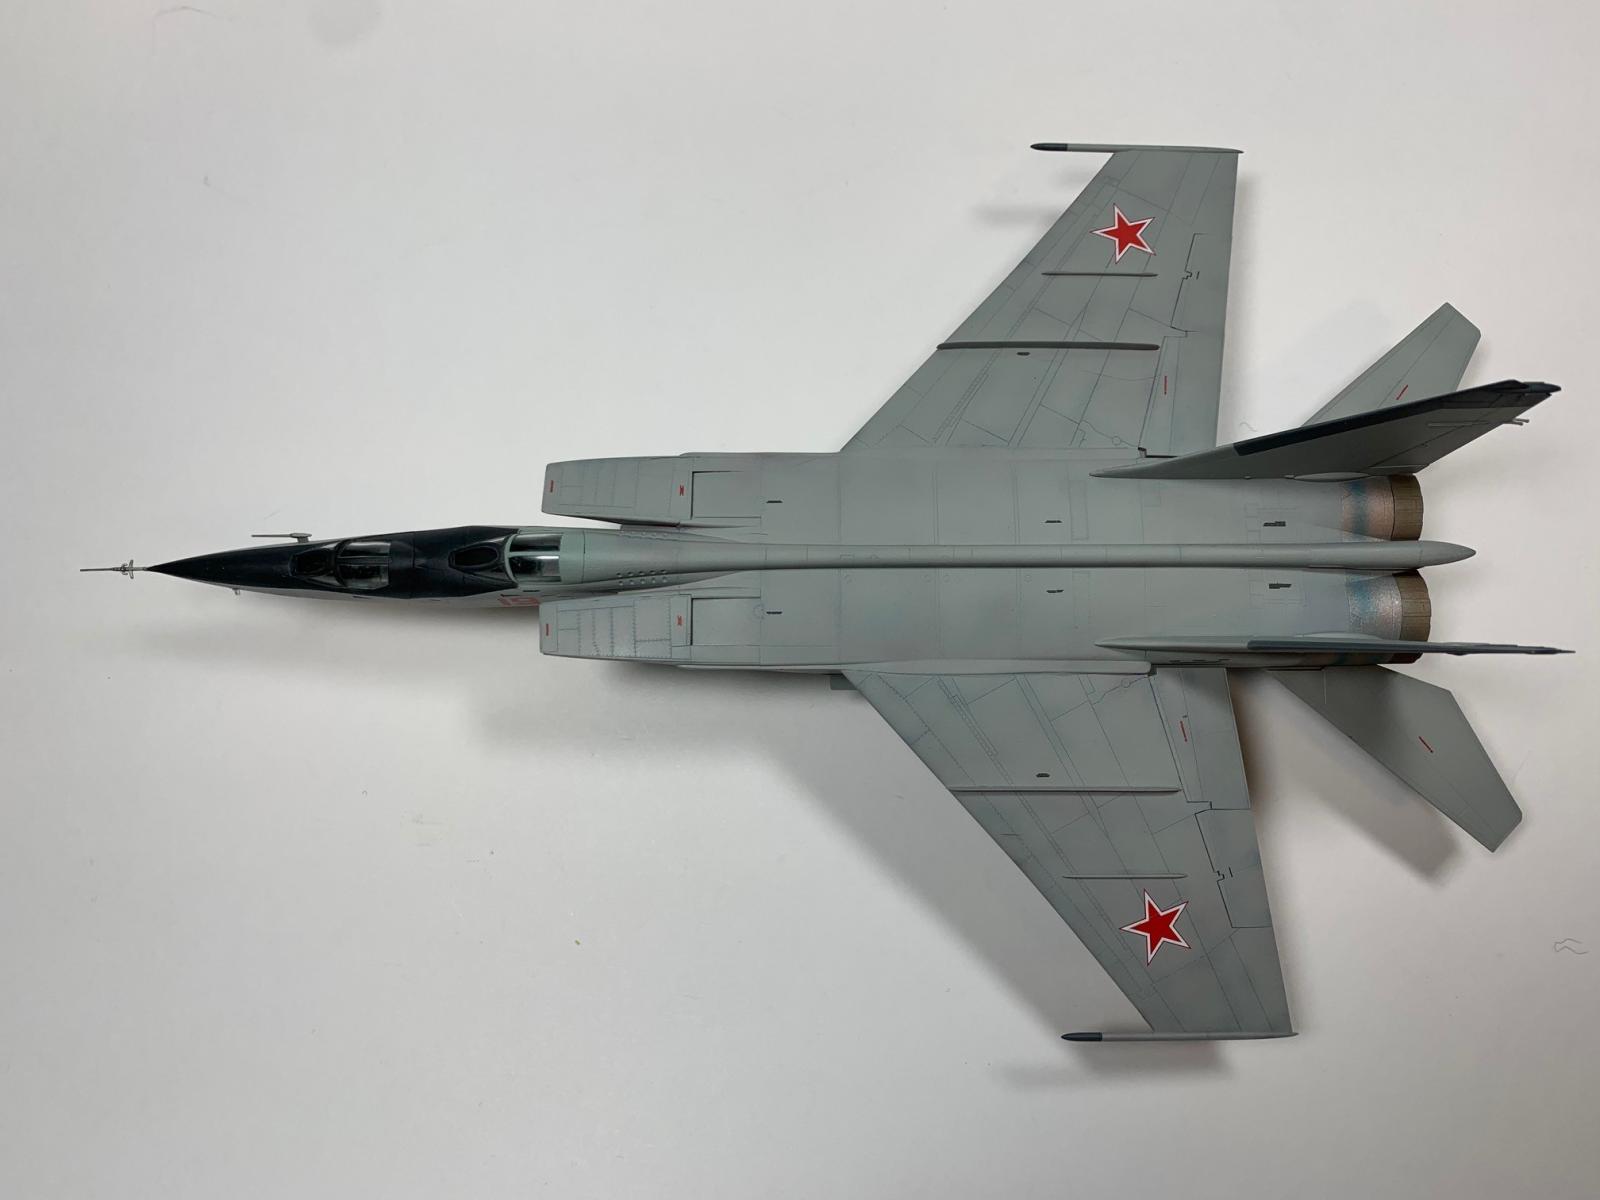
The fit of the parts was generally very good and the unique design of some of the parts such as the rear fuselage sections that contain both the vertical tail and ventral fin for that side helped to ensure that things like the vertical tails and ventral fins ended up at the correct angle. However, some parts such as the wings, needed a bit more work to get them lined up. I wish ICM had included a head-on view of the MiG-25 to help the modeler set the correct angle for the wings, so be sure to find one in your resources or online before you get to that step.
ICM’s instructions construct almost the entire airframe before adding the second cockpit. I figured it would be easier to blend in the new nose section before the nose section was added to the fuselage, so I built up both cockpits and the two nose sections first, then joined them. The joint is on an existing panel line and on one side the parts fit together so well that no sanding or filling was needed. The other side fit together pretty well, needing just a little remedial work. For some reason, the attachment pins for both the horizontal stabilizers and between the main gear struts and the wheels were cone shaped pegs rather than the normal pegs. The cones for the horizontal stabilizers were also a little long and had to be shortened as they hit the engine exhaust tubes before the stabs were fully seated.
ICM includes color callouts for most of the parts as construction goes along but there are some instances such as the steps dealing with the construction of the instructor cockpit (steps 63 on) where there are no color callouts at all, so be prepared to go back and look at other steps for clues on how to paint some of the parts.
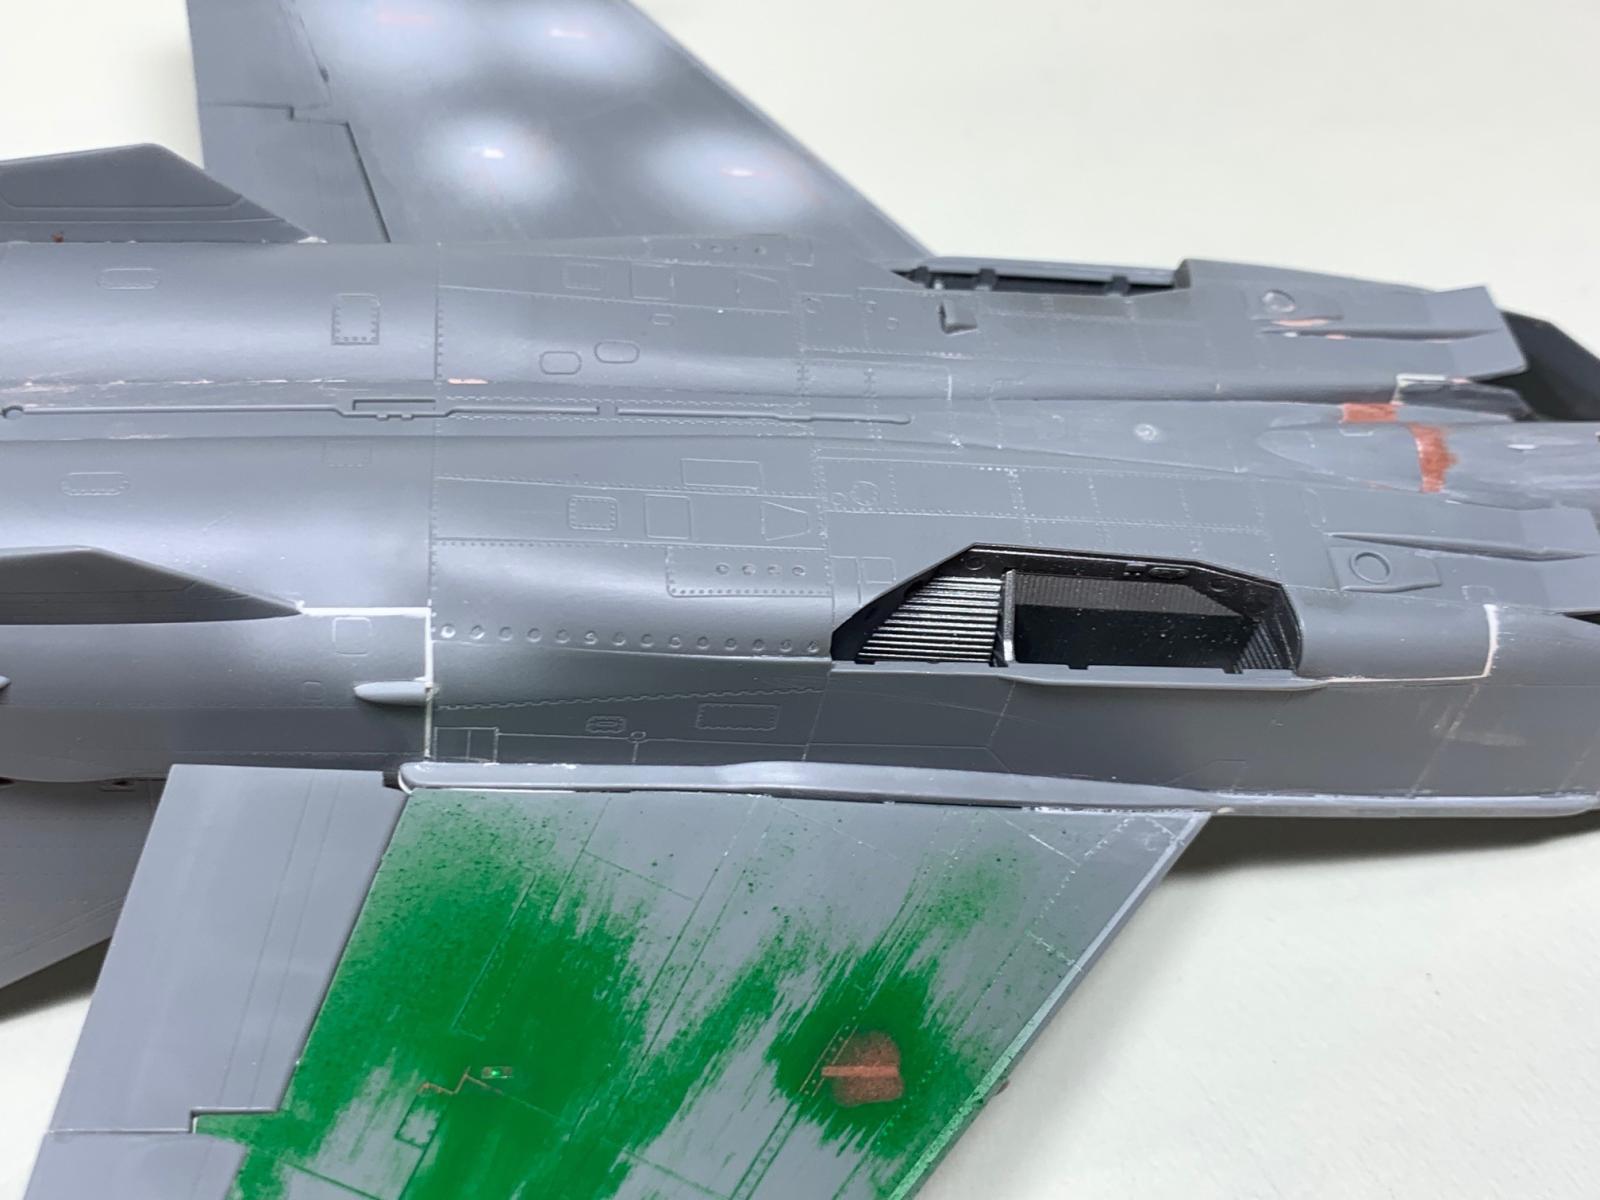
ICM‘s color chart references paints from ICM, Revell and Tamiya. I used the specified Tamiya colors for the major paint colors, but I used Model Master Soviet interior blue green for the cockpit color and Metallizer metallic colors for the exhaust parts. In retrospect, I think the Tamiya XF-80 Sky Grey color for the bulk of the airframe might be a little too light so you may need to darken it up a bit or use a slightly darker grey.
The MiG-25 has several natural metal panels aft around the engines, but as the painting instructions do not include either a top or bottom view, you will again need to consult outside sources for the shapes and colors of these panels.
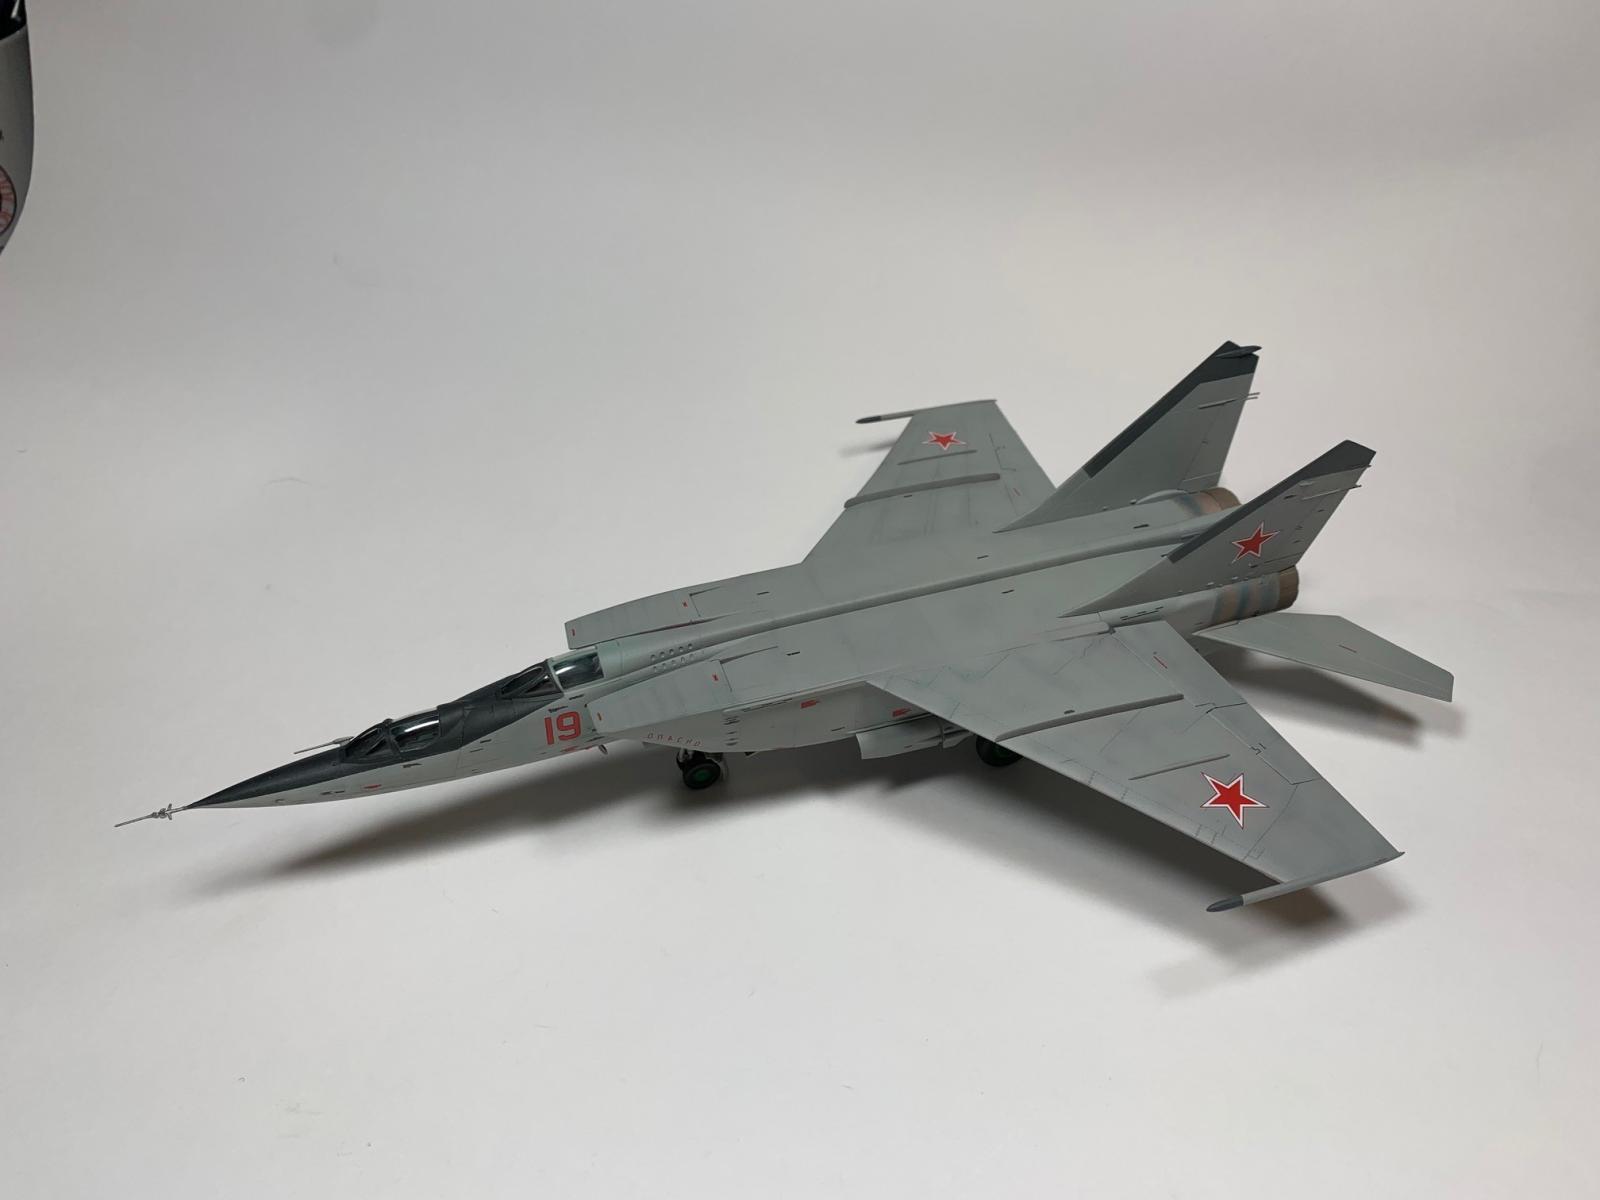
The decal sheet is very well printed, providing markings for two Soviet/Russian aircraft and a Libyan Air Force one. There is also a separate sheet with the substantial number of stencils to be applied. Fortunately, the instructions have a full page dedicated to where the stencils go. You will end up with extra stencils, as there are some numbers that just do not show up anywhere in the decaling diagram.
I really enjoyed this kit, and the completed kit really looks the part. I have already picked-up two other ICM MiG-25 kits for other variants and look forward to building them.
Highly recommended.
Thank you to ICM for the review sample and to IPMS/USA for letting me build it.


Comments
Add new comment
This site is protected by reCAPTCHA and the Google Privacy Policy and Terms of Service apply.
Similar Reviews