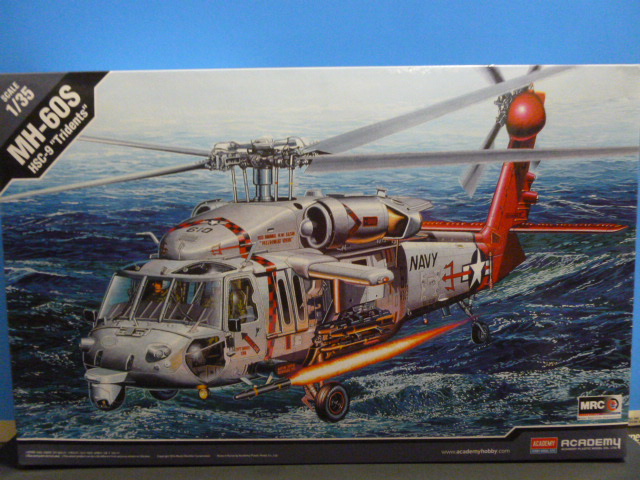
MH-60S "HSC-9 Tridents"
Short History
The Navy replaced the Ch-46 Sea Knight with the CH-60 which was later redesignated the MH-60S in February 2001 to reflect its planned multi-mission use. The MH-60S is based on the UH-60 and has many naval SH-60 features. Unlike all other Navy H-60s, the MH-60S is not based on the original S-70B/SH-60B platform with its forward-mounted twin tail-gear and single starboard sliding cabin door. Instead, the S-model is a hybrid, featuring the main fuselage of the S-70A/UH-60, with large sliding doors on both sides of the cabin, a single aft-mounted tail wheel, and the engines, drivetrain and rotors of the S-70B/SH-60.
The MH-60S is to deploy with the AQS-20A Mine Detection System and an Airborne Laser Mine Detection System (ALMDS) for identifying submerged objects in coastal waters. It is the first US Navy helicopter to field a glass cockpit, relaying flight information via four digital monitors. The primary means of defense is with the M60D, M240 or GAU-17/A machine guns. A "batwing" Armed Helo Kit based on the Army's UH-60L was developed to accommodate Hellfire missiles, Hydra 70 2.75 inch rockets, or larger guns. The MH-60S can be equipped with a nose mounted forward looking infrared (FLIR) turret to be used in conjunction with Hellfire missiles. It also carries the ALQ-144 Infrared Jammer. The MH-60S is unofficially known as the "Knight Hawk", referring to the preceding Sea Knight, though "Seahawk" is its official DOD name. A standard crew for the MH-60S is one pilot, one copilot and two others depending on mission.
What’s in the Box?
The kit has 7 sprues molded in light grey plastic with light but crisp engraved panel lines, rivet detail where it is needed, and 1 clear sprue tree. There is one new “Navy Sprue” added to the parts count, but for the most part it is just contains parts from all the previous Blackhawk lineup. There is one large Decal sheet with some very colorful markings.
The marking options are as followed:
- MH-60S, 167836, HSC-9 Tridents, AJ/610, USS George H.W. Bush, CAG paint scheme
- MH-60S, 166346, HSC-21 Blackjacks, VR/70, NAS North Island, CAG paint scheme
- MH-60S, 166322, HSC-28 Dragon Whales, BR/41, USS Mount Whitney, line aircraft
The Build
I have never built a helicopter in my life up to this point but boy I can tell you it rattled my nerves on several occasions. The helicopter’s fuselage is split into two pieces, and with some drilling and sawing the cabin is squeezed inside after all the modifications are made. The cabin is very cut and dried, and as long as you pay attention to the sprues (which by the way only the new sprue is labeled) you should be ok. I chose to keep the cabin doors closed so not much of the additional weaponry and crew accommodations where used. After the fuselage halves where fused together, I completed work on the left side engine opting to be able to display and show the engine as I pleased. The “batwings” were left bare as I believe in my own opinion that a navy helicopter should be firing torpedoes and not hellfire’s and rocket pods (I believe that’s why they have the Army Apache and the Navy/Marines have the cobra). The wheels can be painted and detailed separate from the gear and you could get away with only painting half of the wheel struts seeing as the upper half would be covered by the wings. The final stage of assembly is the front rotor blade and rear rotor assemblies which I waited until last due to fear of breaking them.
Finishing
In painting the MH-60 I used Tamiya and Model Master paints. To achieve the bright red of the tridents tail I base coated in Tamiya X-2 and then followed by several coats of Tamiya X-7. After the paint had dried after 24 hours I used several light coats to seal the Sea Hawk and prep for Decaling which was in a nice set of words “challenging”. Between Micro-Sol and Micro-Set I had to resort to using Walthers Solvaset to no avail. I tried every trick in the book from using warmer water, vinegar, a blow dryer, and they just did not want to stick, sometimes even feeling like snap-tite peel and stick stickers.
It’s was great to see a new subject of the venerable Blackhawk in a new model but I think some things could have been done better and parts count probably could have been kept to a minimum to cut back on confusion. My thanks to IPMS and Academy/MRC for giving me the opportunity to review this kit. Despite some of the difficulties I faced with it, I still enjoyed the kit and was able to learn some better techniques that will aid me in the future.


Comments
Add new comment
This site is protected by reCAPTCHA and the Google Privacy Policy and Terms of Service apply.
Similar Reviews