
Messerschmitt Me 410 B-6 / R-2
History
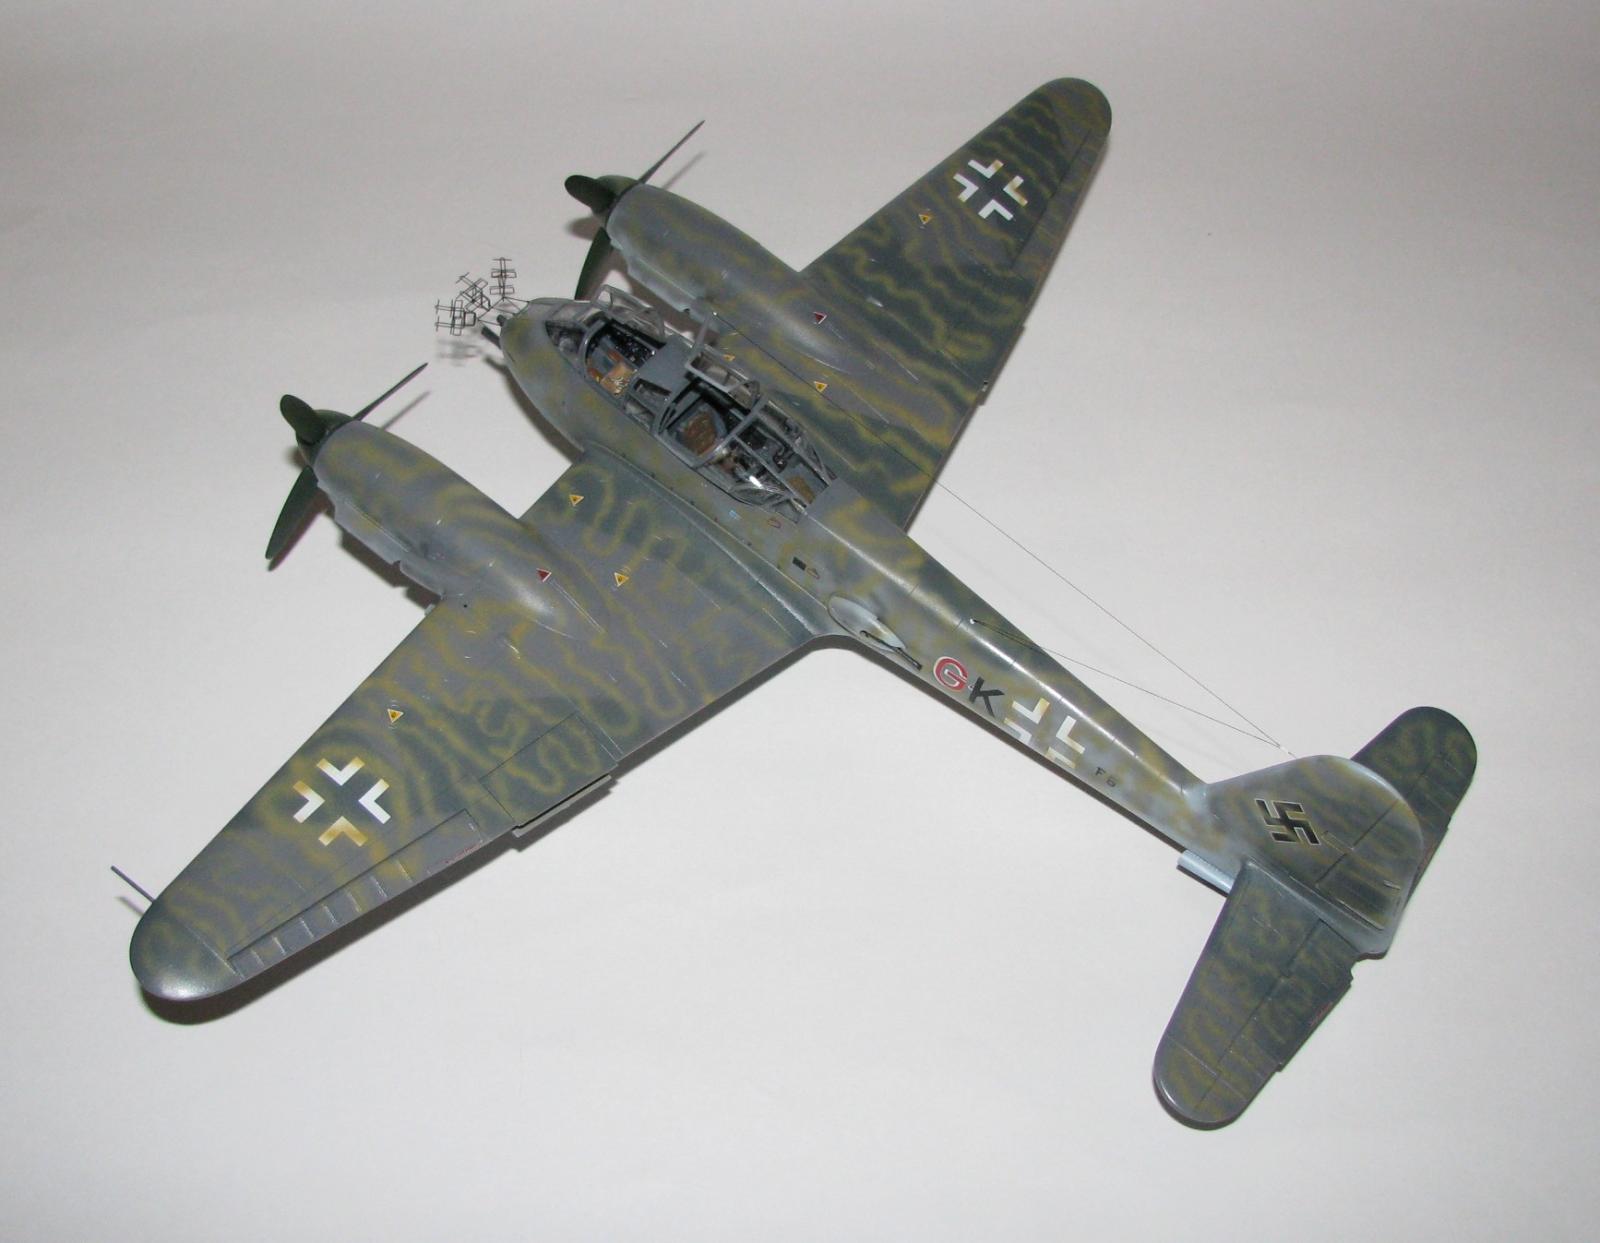
The twin engine fighter/bomber type of aircraft was a very popular design with the Luftwaffe during WWII. The Me 410 was a late war development of this concept and proved very versatile. The 1st versions were equipped as light bombers, while later variants moved more towards the destroyer style of aircraft. The B-6/R-2 had a Zaunkonig surface search radar array mounted in the nose for anti-shipping raids.
The Kit
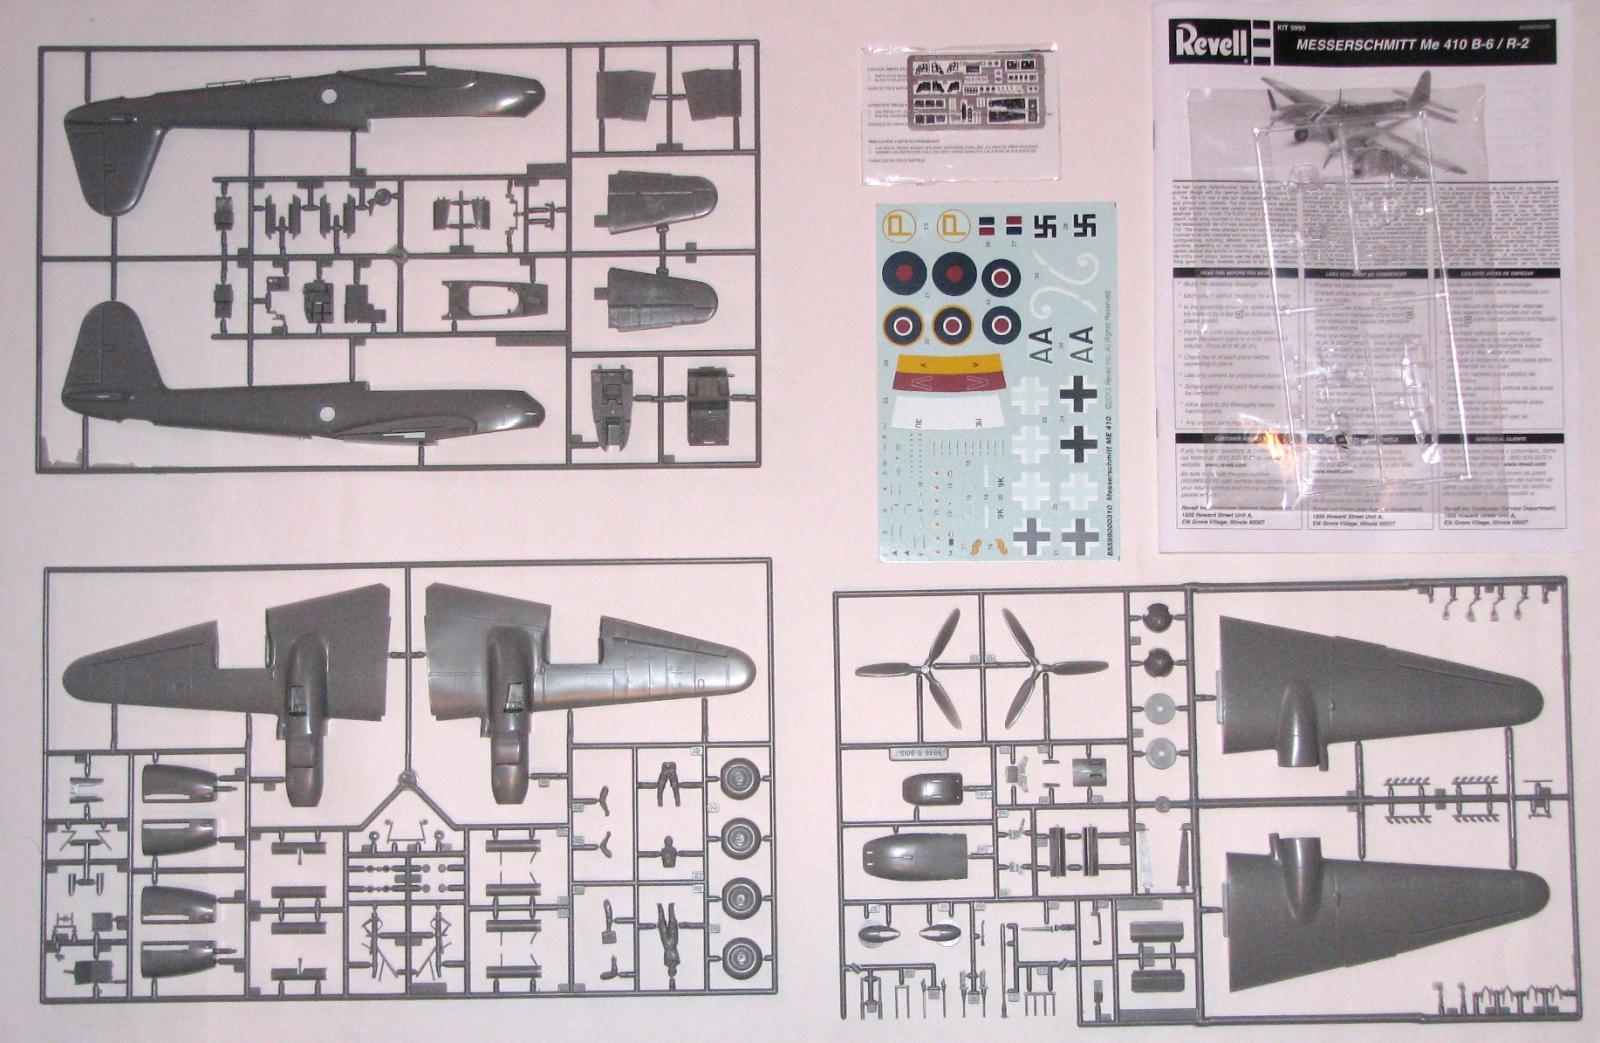
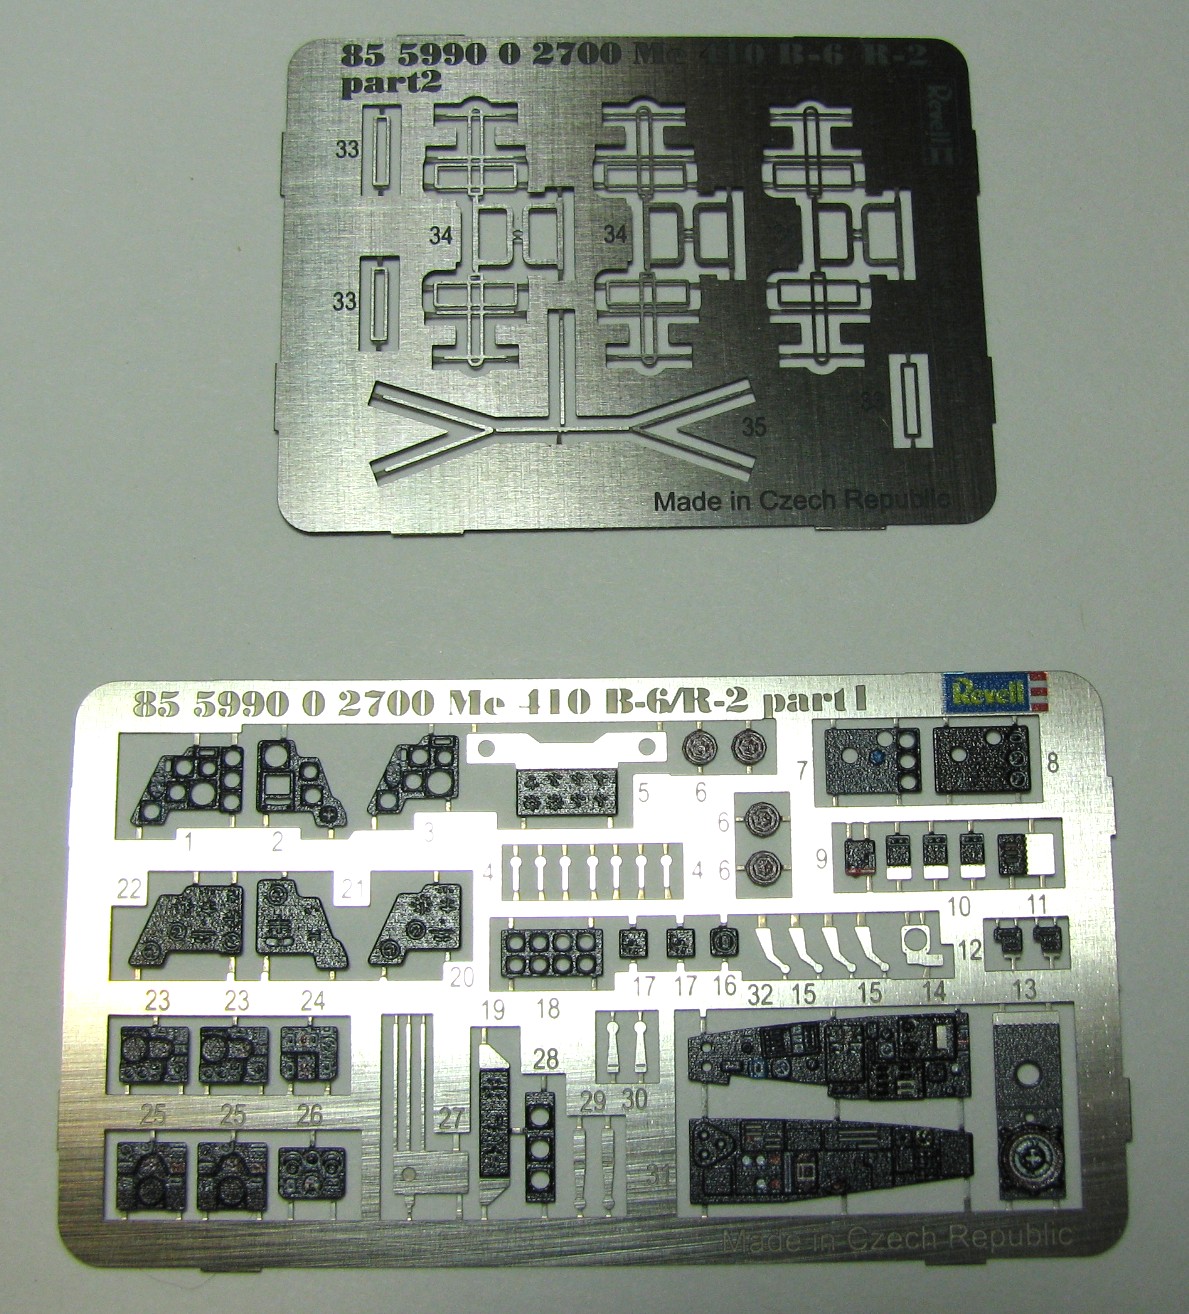
Upon opening the box you will find 3 sprues of grey & 1 clear injected molded plastic, 2 small photo etch (P/E) frets, 1 decal sheet and a 20 page instruction book. This kits debut was in 1997(Yes, I built one back then!) so there is a bit of flash on it but not too much. The canopy parts are pretty clear but also have a bit of flash on them as well. The decals are printed cleanly and have a semi-gloss finish. The P/E is nice as you are supplied with the radio faces, control panels & various levers for the cockpit along with the radar array for the nose. The one thing that I would have liked to seen is seatbelts due to the fact you have a greenhouse canopy and can see a lot of the interior.
Construction
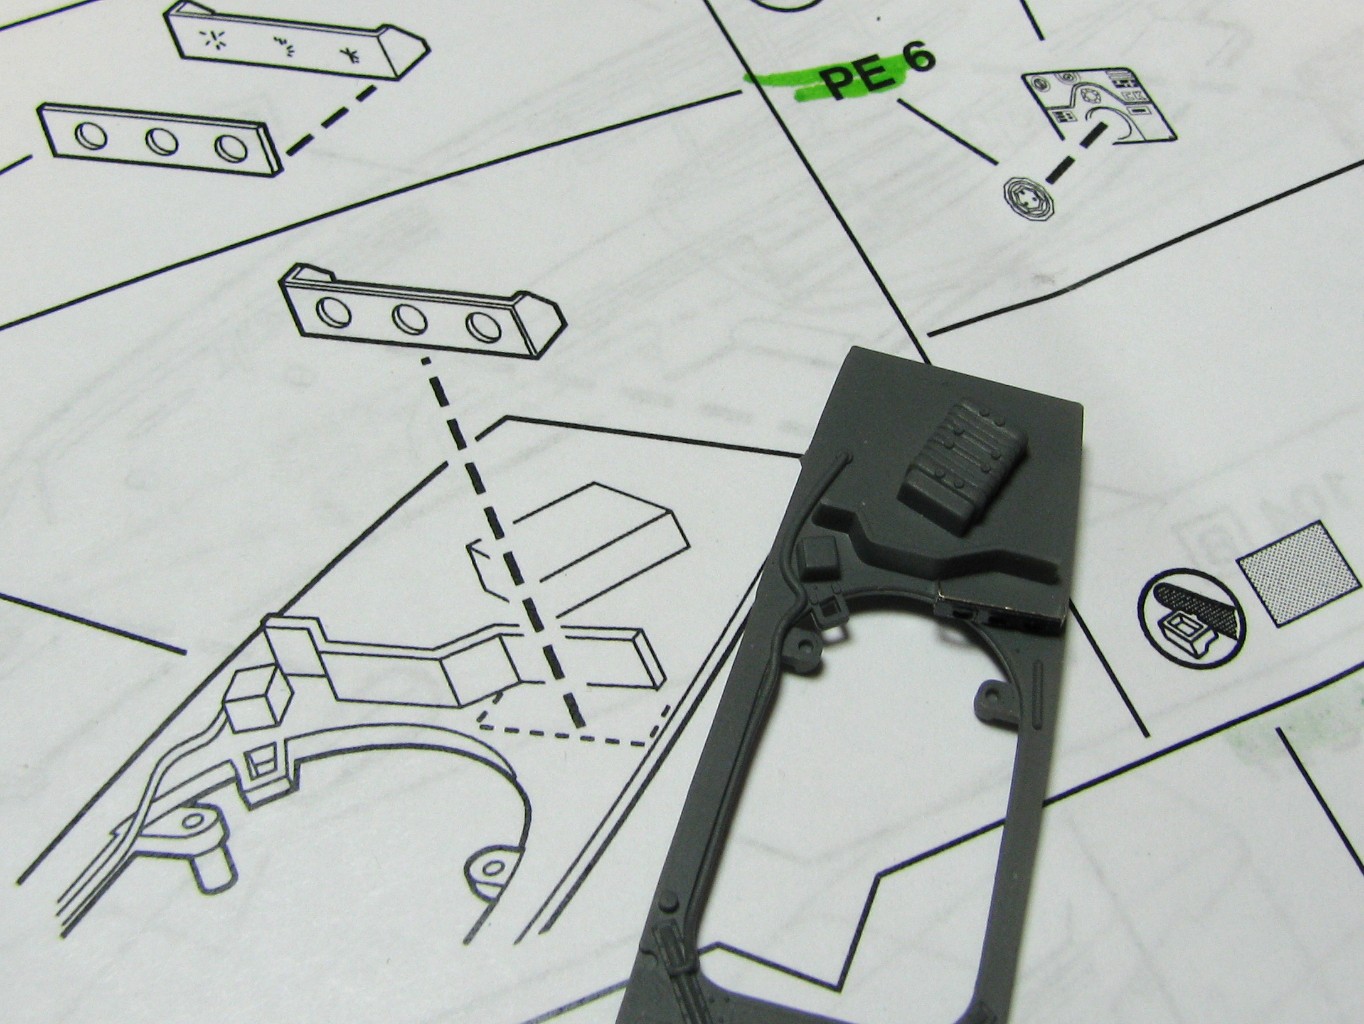
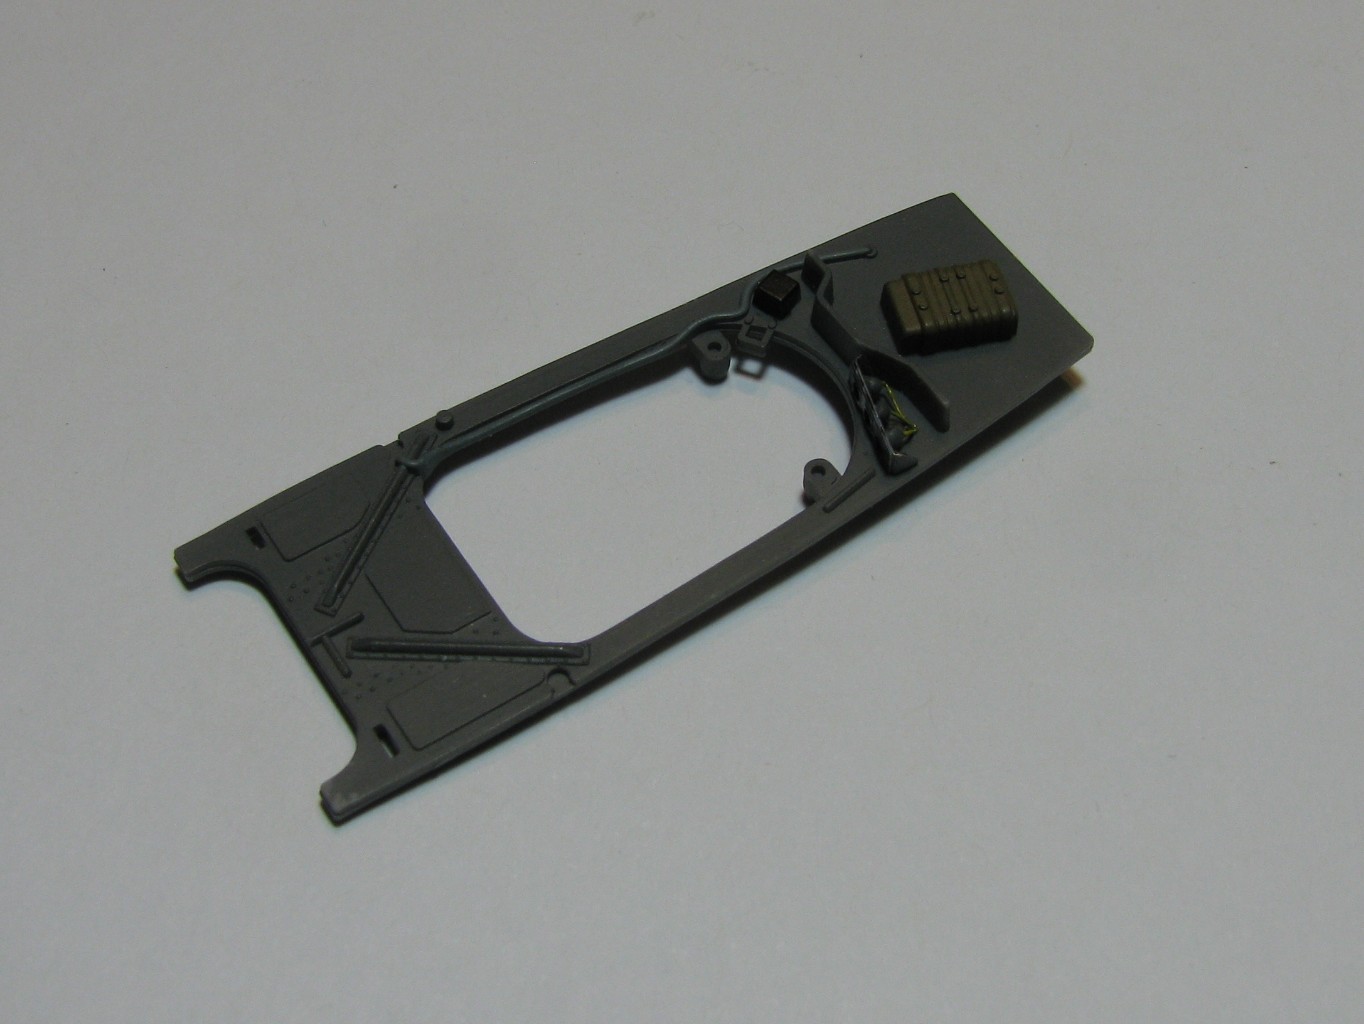
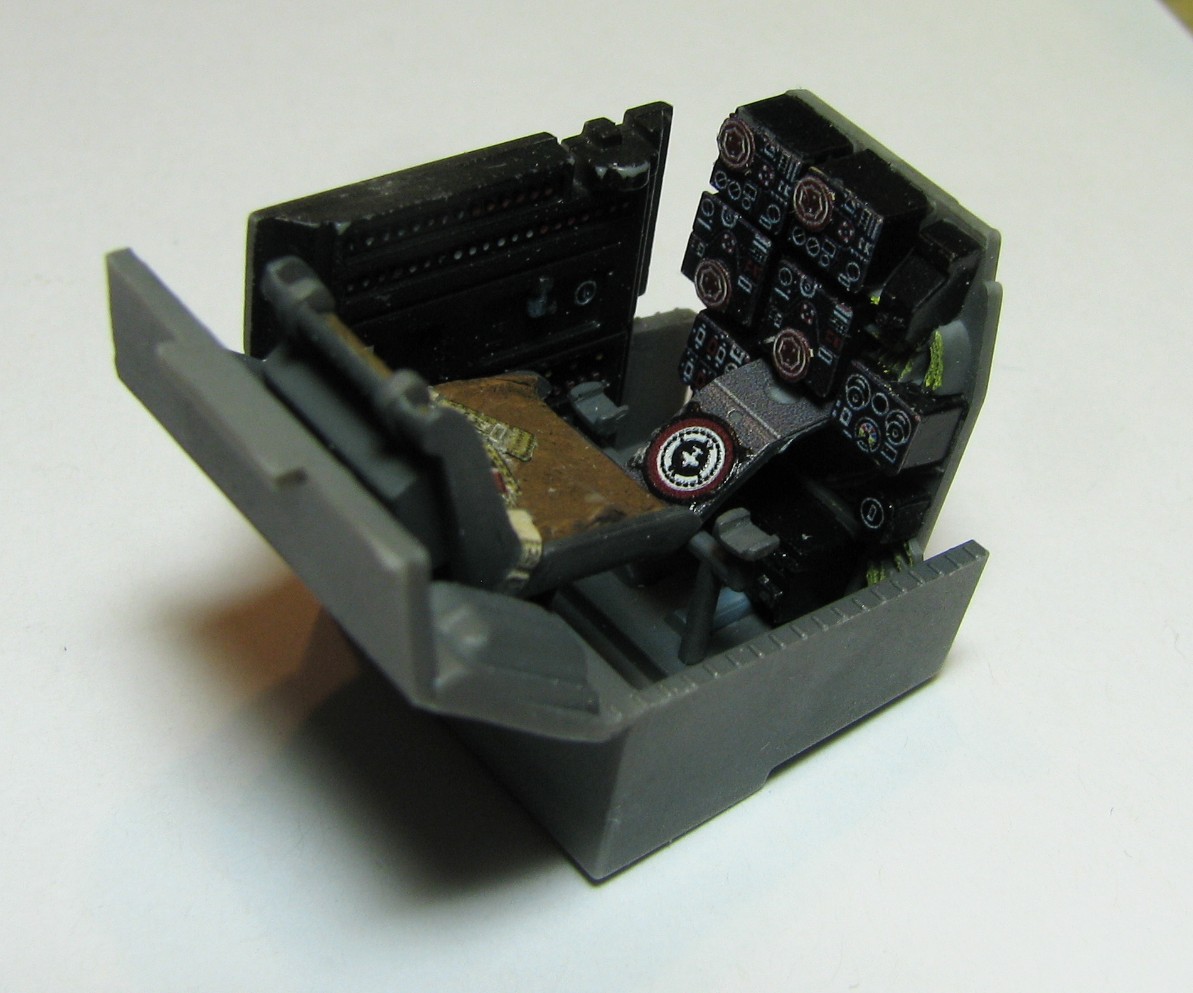
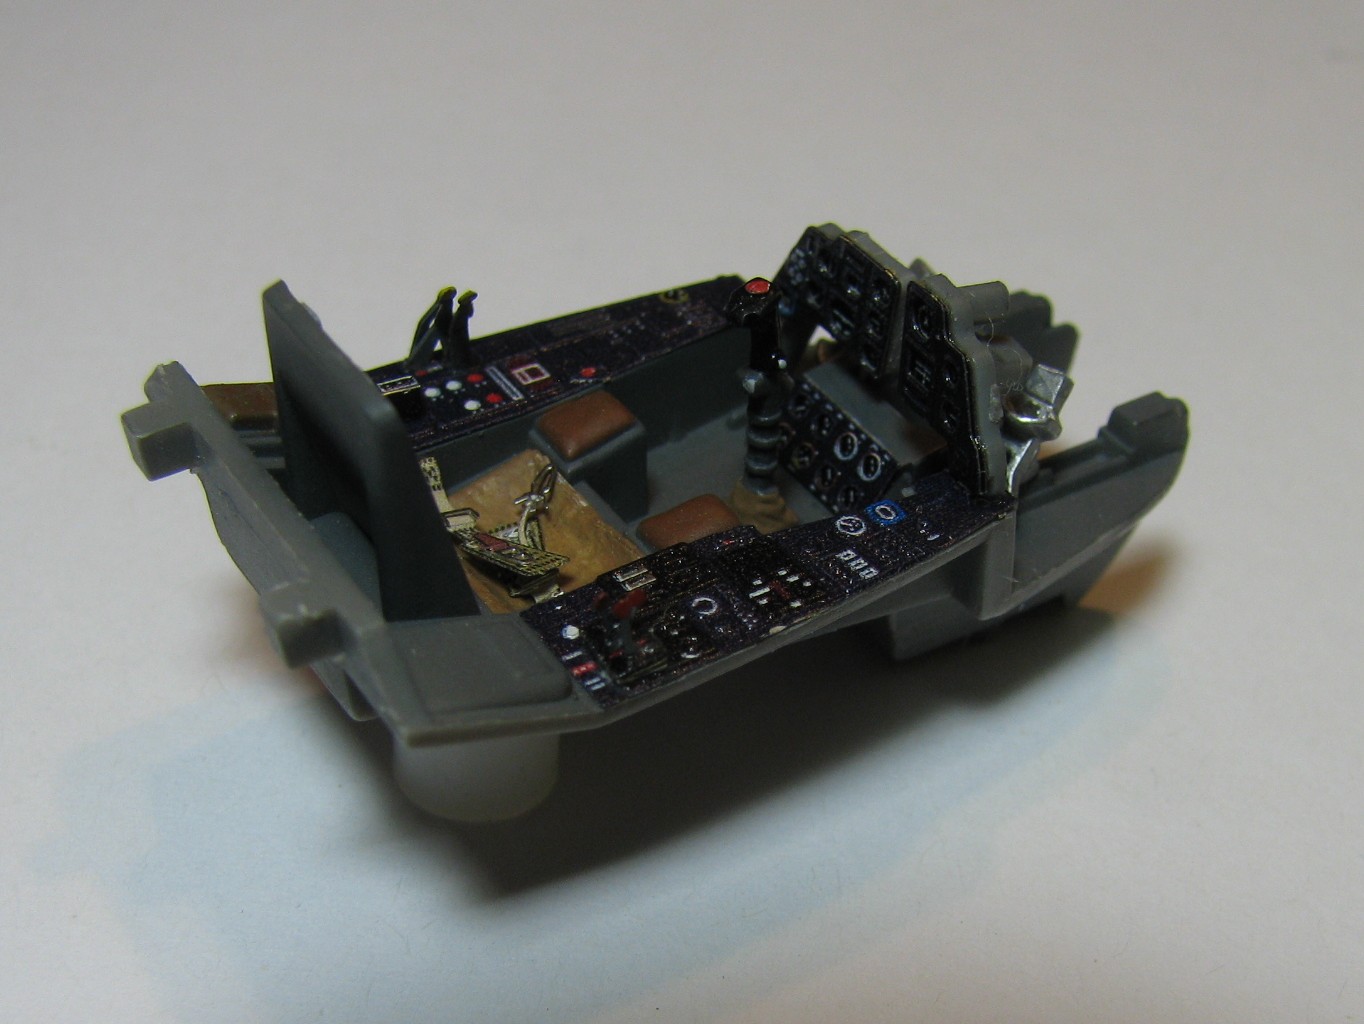
You begin with the cockpit and the first 3 steps are for the construction of the cockpit tub. I’m not kidding, only 3 steps! Of course each step has 5 or more sub-steps and the parts count for the completed tub is 49. The P/E went on fairly easy but the console and control panels are pre painted and my examples had grainy textures to them. (You will see what I mean in the photo) I did add some harnesses from my spares box and also added a seat cushion for both pilot and gunner (tissue paper sprayed with thinned out white glue then a pilot figure placed on to give it a used look). Two problems I had with this area are 1) Due to the P/E console, the right side control panel (Part #48) did not want to go on and stay put. When I test fitted the fuselage halves it popped off... twice. Finally I installed the tub to the right fuselage half first and then added the panel by gluing it to the fuselage (Guess I showed it who’s boss!). 2) The P/E parts #19 & 28 are the gauges just behind the gunners control arm and do not fit... at least not for me they didn’t. The pieces are too long and the reason is simple, the gauges are too far apart. I ended up cutting the right side of piece 19 off (The part that folds) and put in in at a slight angle so it would fit. I did add some minor scratch work to these gauges also as they did not look right without wires.
Steps 4 & 5 are for adding the detail to the fuselage halves and construction of the fuselage. I did leave off one of the P/E parts (PE 27) as I did not feel like grinding the detail off the fuselage. I checked it and you are not going to notice it much after assembly anyway. Assembly of the fuselage takes a bit of patience and since I had already installed the pilots’ compartment I just needed to add the gunners section. This is not how the instructions tell you to do it but it worked for me and the two halves fit together perfectly. Steps 6-9 are where you add the guns, final detail parts for the cockpit & tail wheel. No real big problems except the small parts need to be cleaned up and are fragile, so be careful.
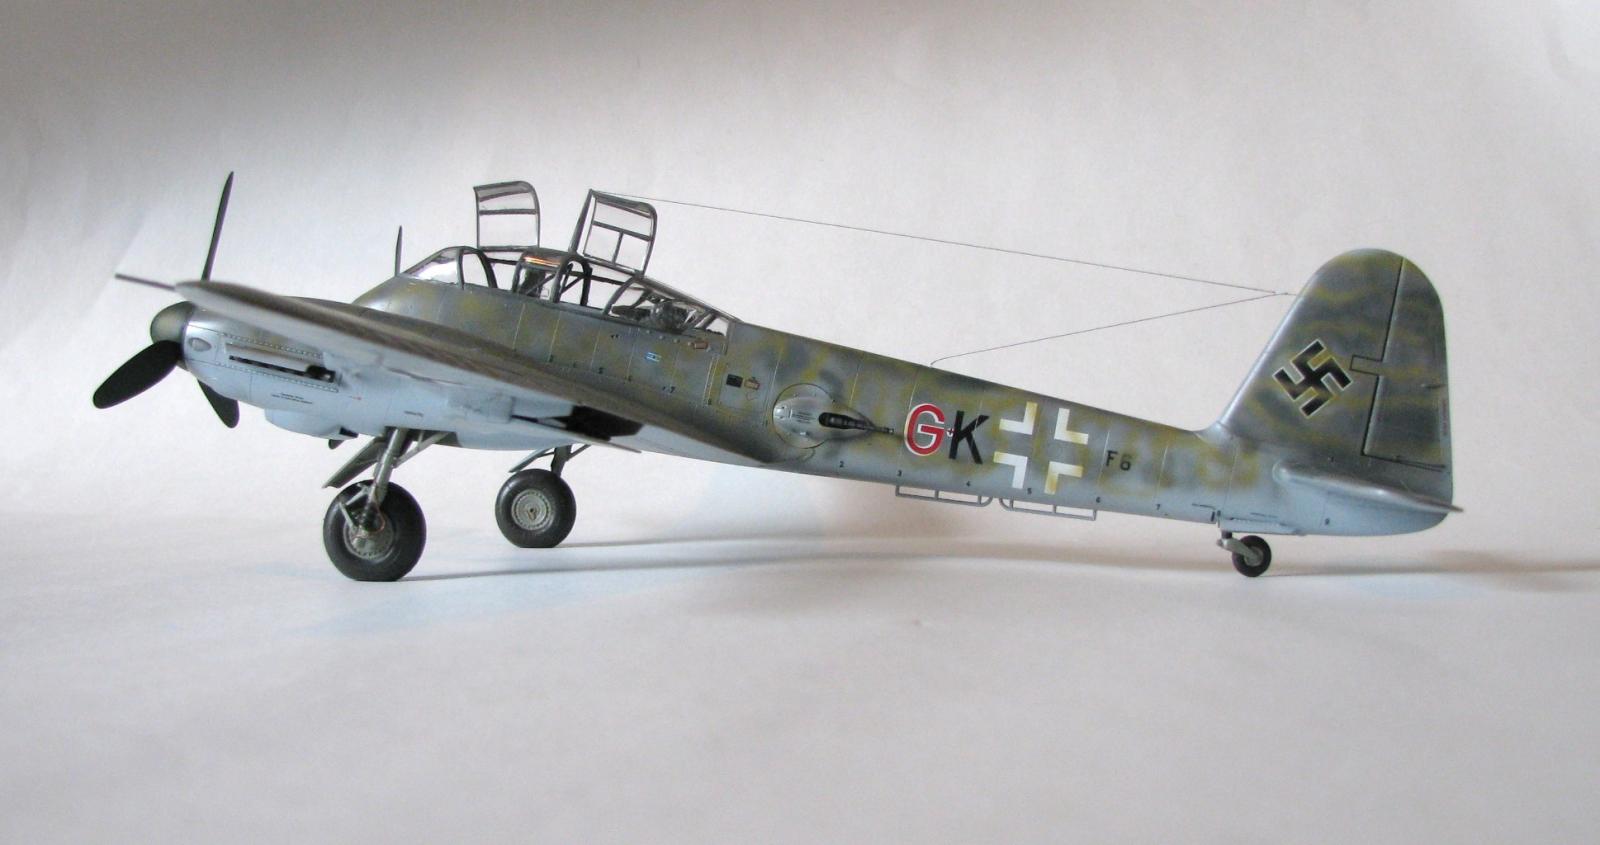
Steps 10-12 are the construction of the nacelles & wings and placement of the wings. Everything here fit pretty well and construction is straightforward. One problem area for me was the exhaust ports (Part #11) and how I would paint them and the area around them. I decided to paint the exhausts & shrouds (parts # 70 & 71) and the nacelles before assembling the parts. This worked out well for me as it only left some touch up after the completed upper nacelle was added to the wing. The completed wings fit well but I did have a small gap on the underside of the left wing, not sure if it’s the kit or something I did.
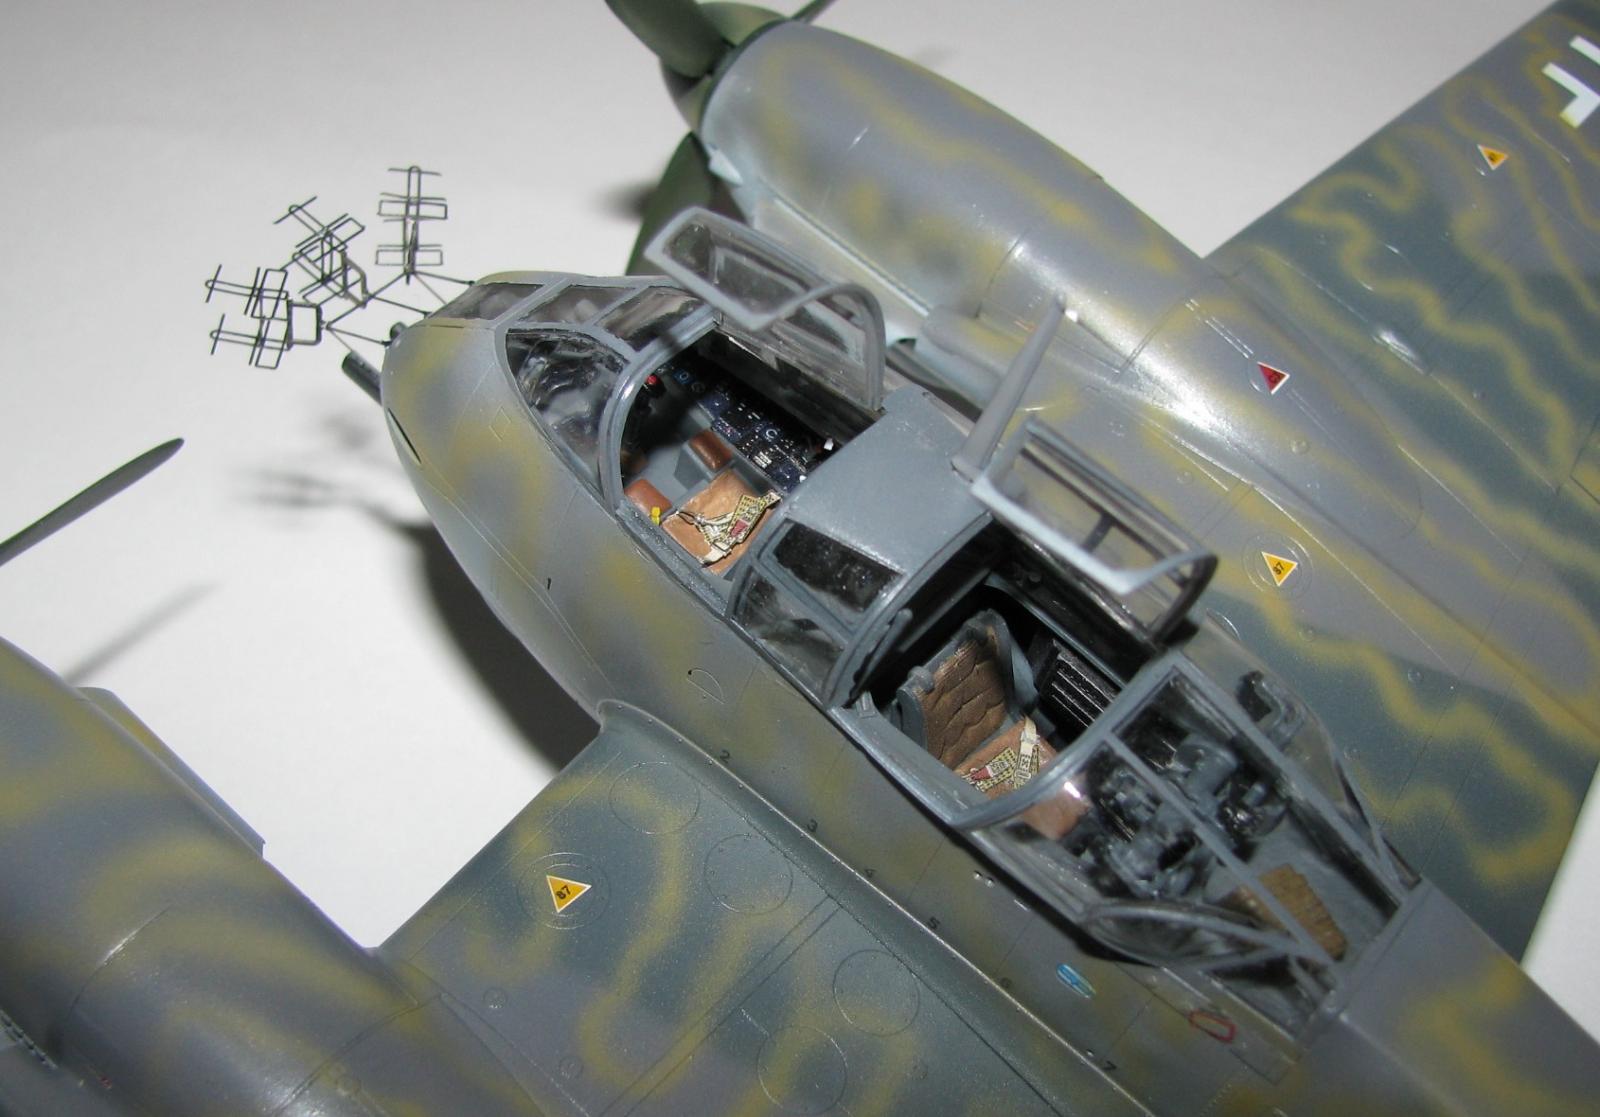
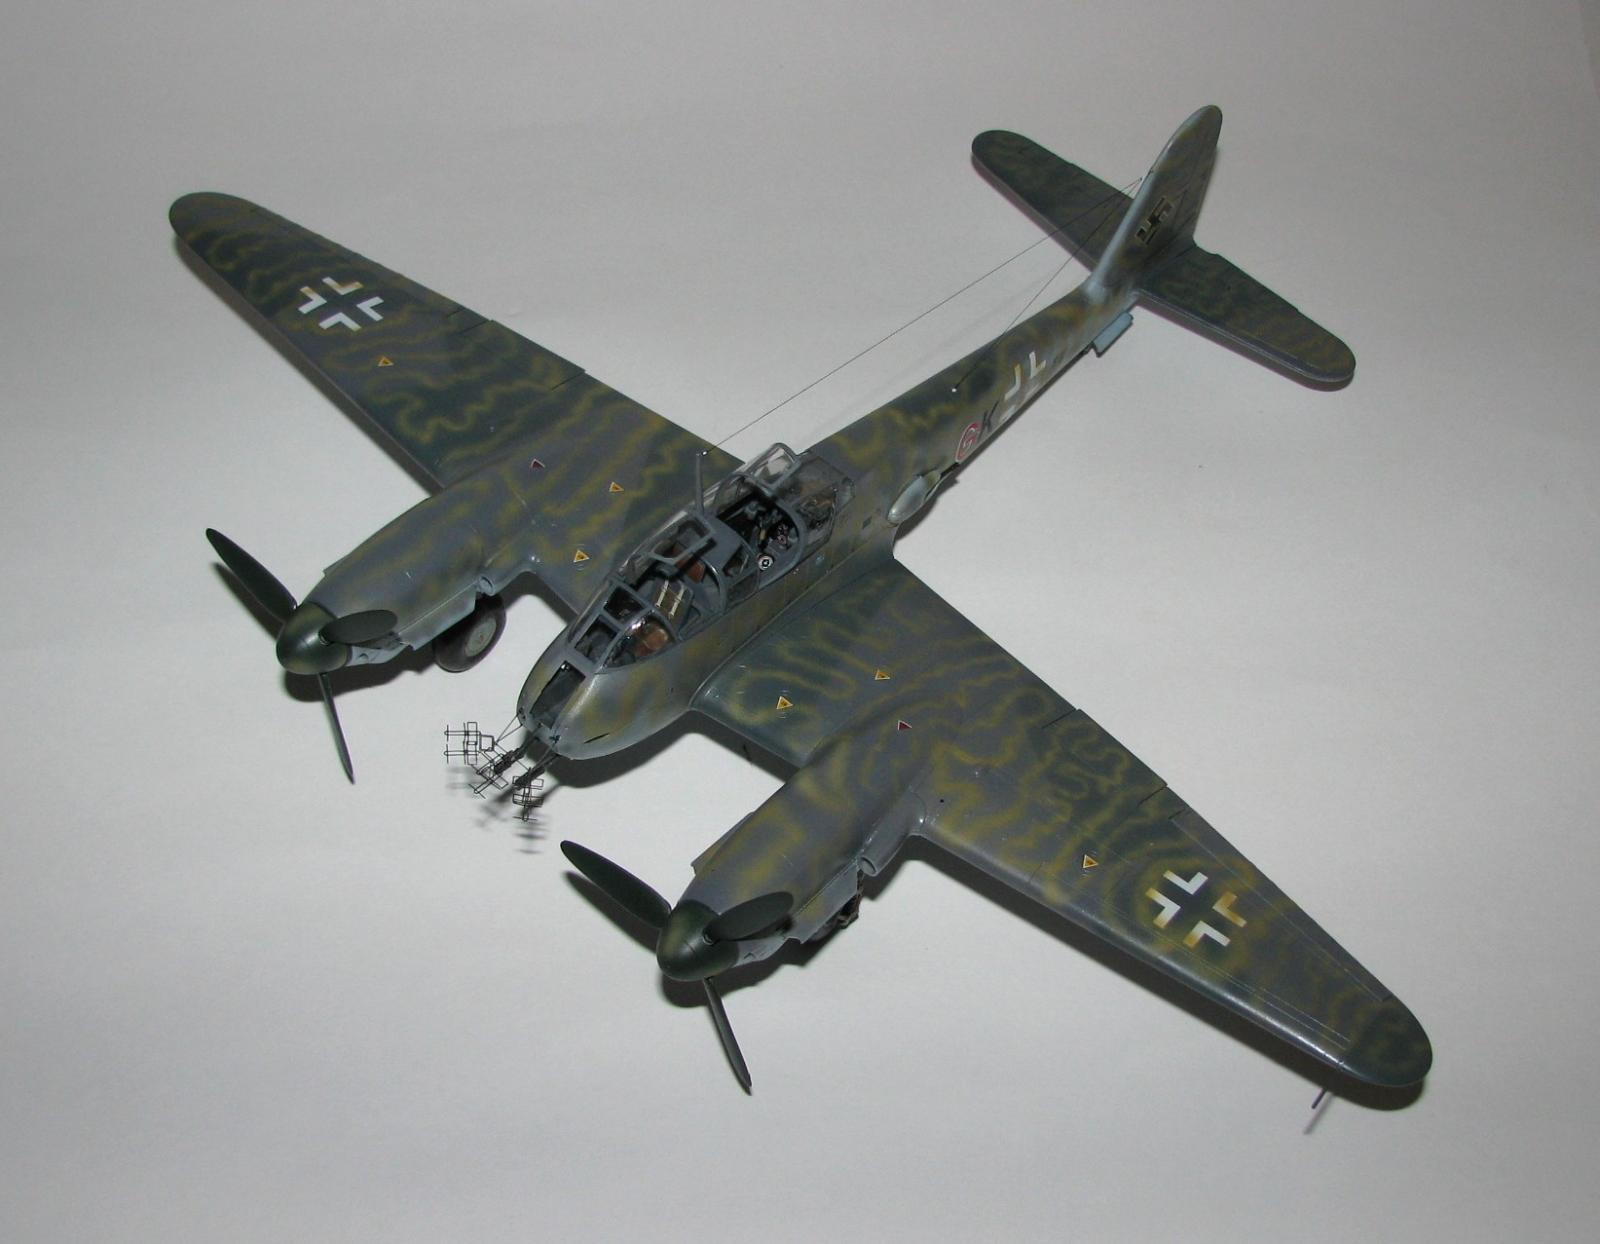
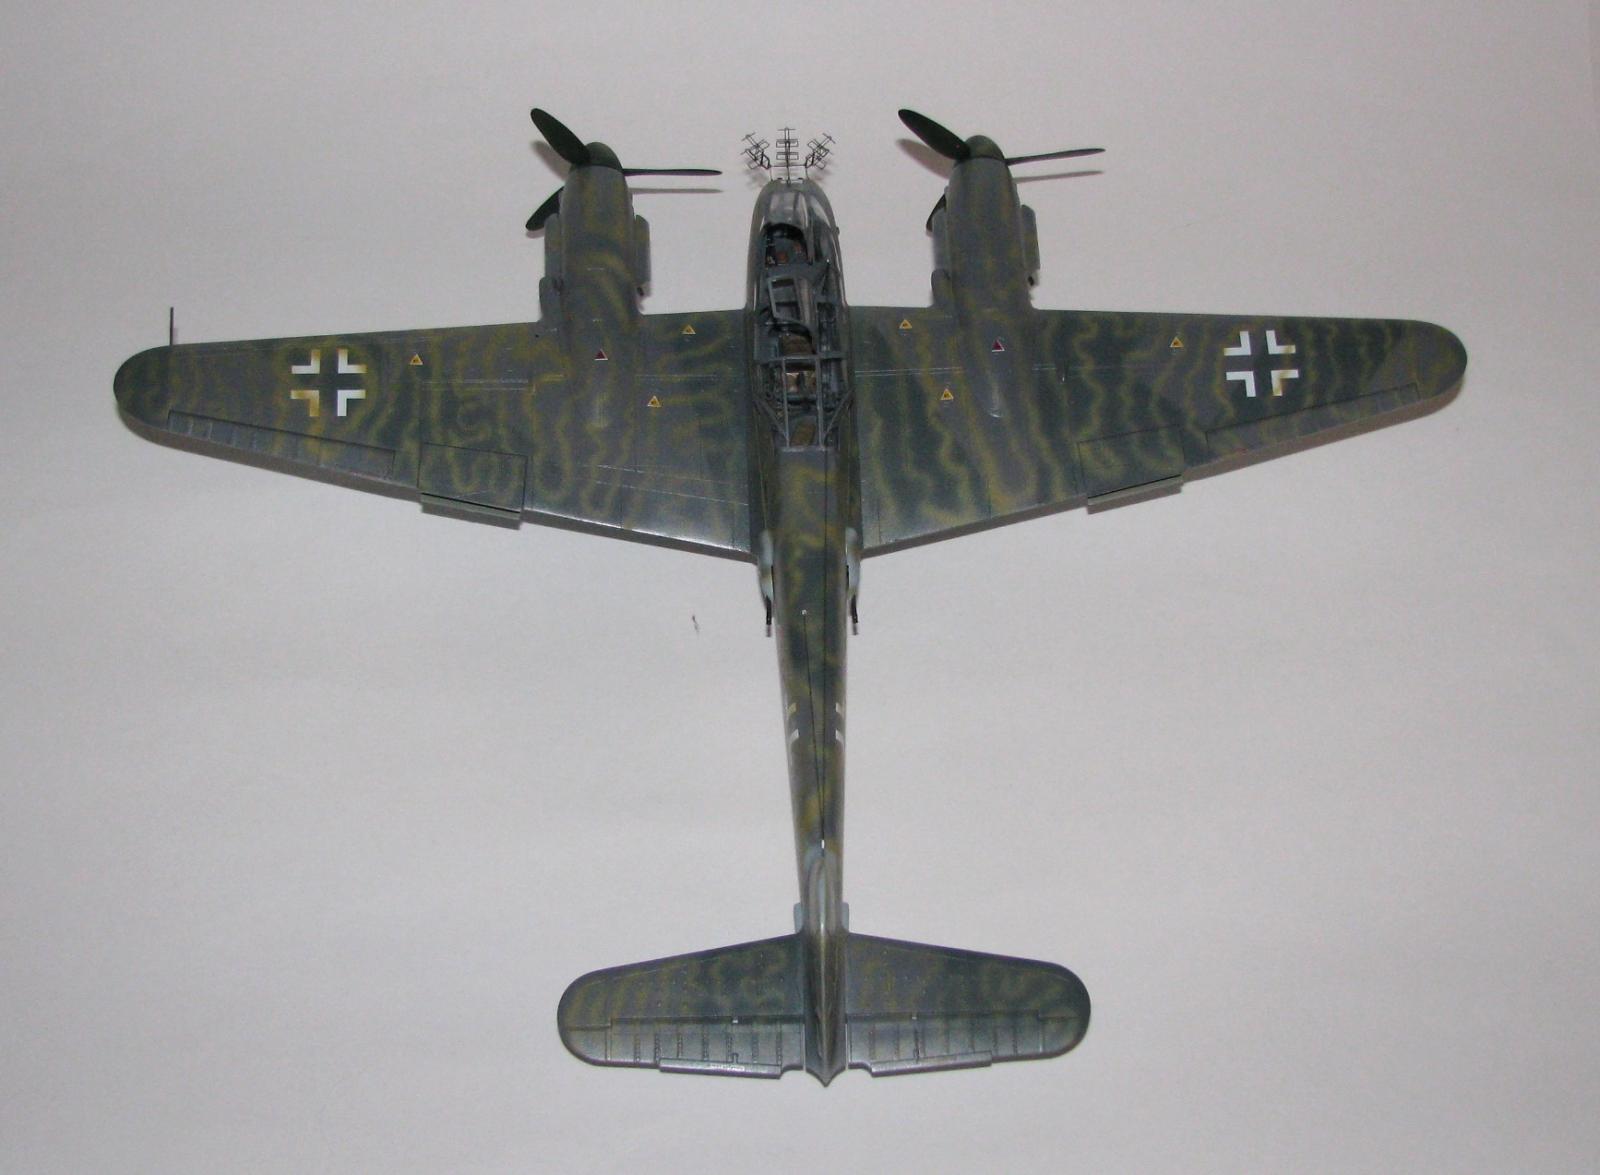
Next up is the main gear and everything went together well but the main struts needed a lot of cleaning. The pilot and gunner figures are molded nicely and can be finished now because in step 15 you add the canopy... this is where the real fun begins! The canopy is a 5-7 piece affair that was somewhat difficult to build when this kit was first released and has not gotten any easier; in fact I think it’s worse. The clear parts in my sample had a little more flash than the other parts and took a bit more time to clean up. Also, due to how the canopy pieces are set molded, cleanup is a slightly delicate affair, please be careful removing the parts from the sprue; I had a couple spots where the canopy part was damaged by me. You are supplied with two different windscreens, one with a hole and a small bump at the top for the telescopic sight and one without. With the few pictures I have seen of the B-6 / R-2, I did not notice evidence of it having the telescopic sight but it did have the bump, so I decided to use the plain windscreen and go with that. Before adding these to the kit I decided to mask the inside of the canopy and paint the roll cage as it is molded to the inside of the canopy. (Something I didn’t do way back when) Yes, it does look kind of strange, but if you don’t it still looks strange. (I wish they had made the roll cage separate but that’s the way it goes) The clear piece for the nose and the windscreen went on without a hitch but I also decided to leave the bullet proof insert off as well. (Trust me when I say it’s fragile and leave it at that!) The right side (piece #93) did not fit as well and needed a slight bit of sanding of the front and back as well as the mold seem line on the bottom where it fits to the fuselage. After all of that there was still a small gap between the canopy and fuselage... sigh. The left side part (#94) is even more of a challenge due to having the openings for the hatches which can be posed open or closed. It needs to be cleaned up and is pretty fragile so be careful when handling this part. I had a bit of trouble getting rear of this piece to stay in place as it wanted to sink down lower that the opposite part, sorry, but I did not check to see if the part was warped or not. As for the two hatches, I decided to leave them off until last so as not to break them off while adding the decals/antenna/radars and such.
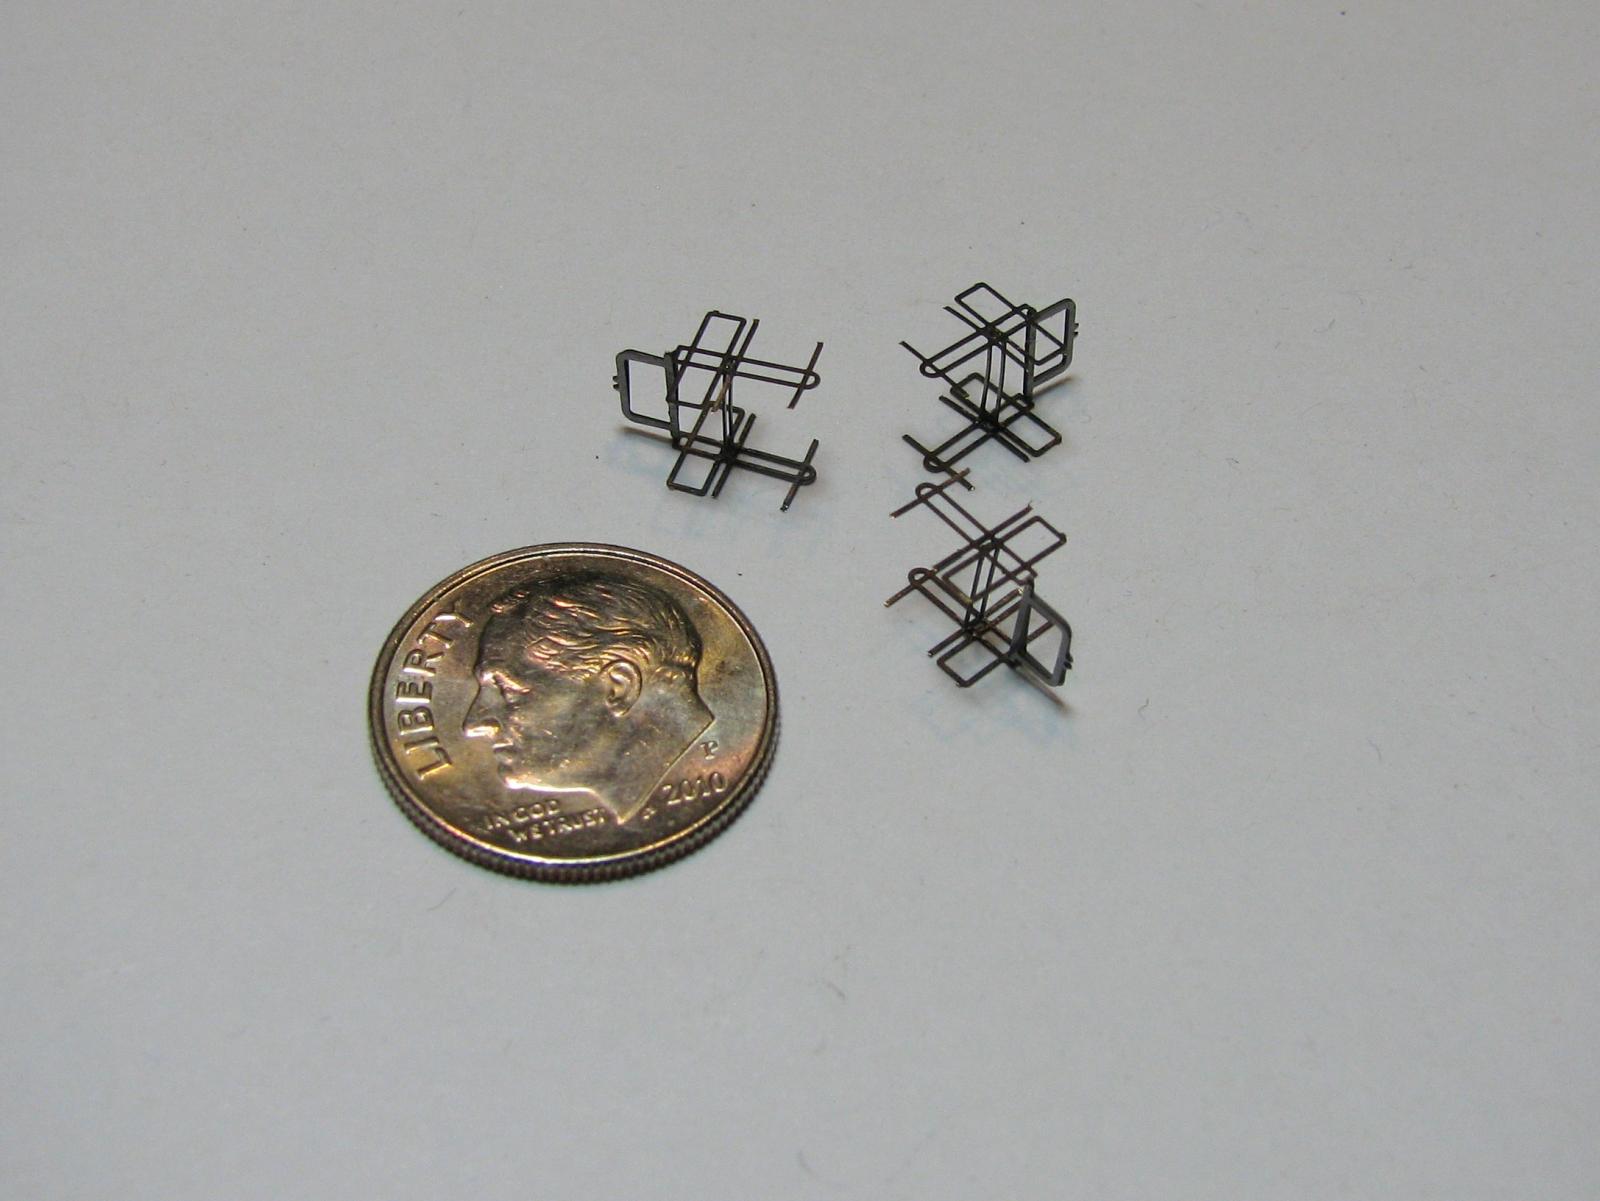
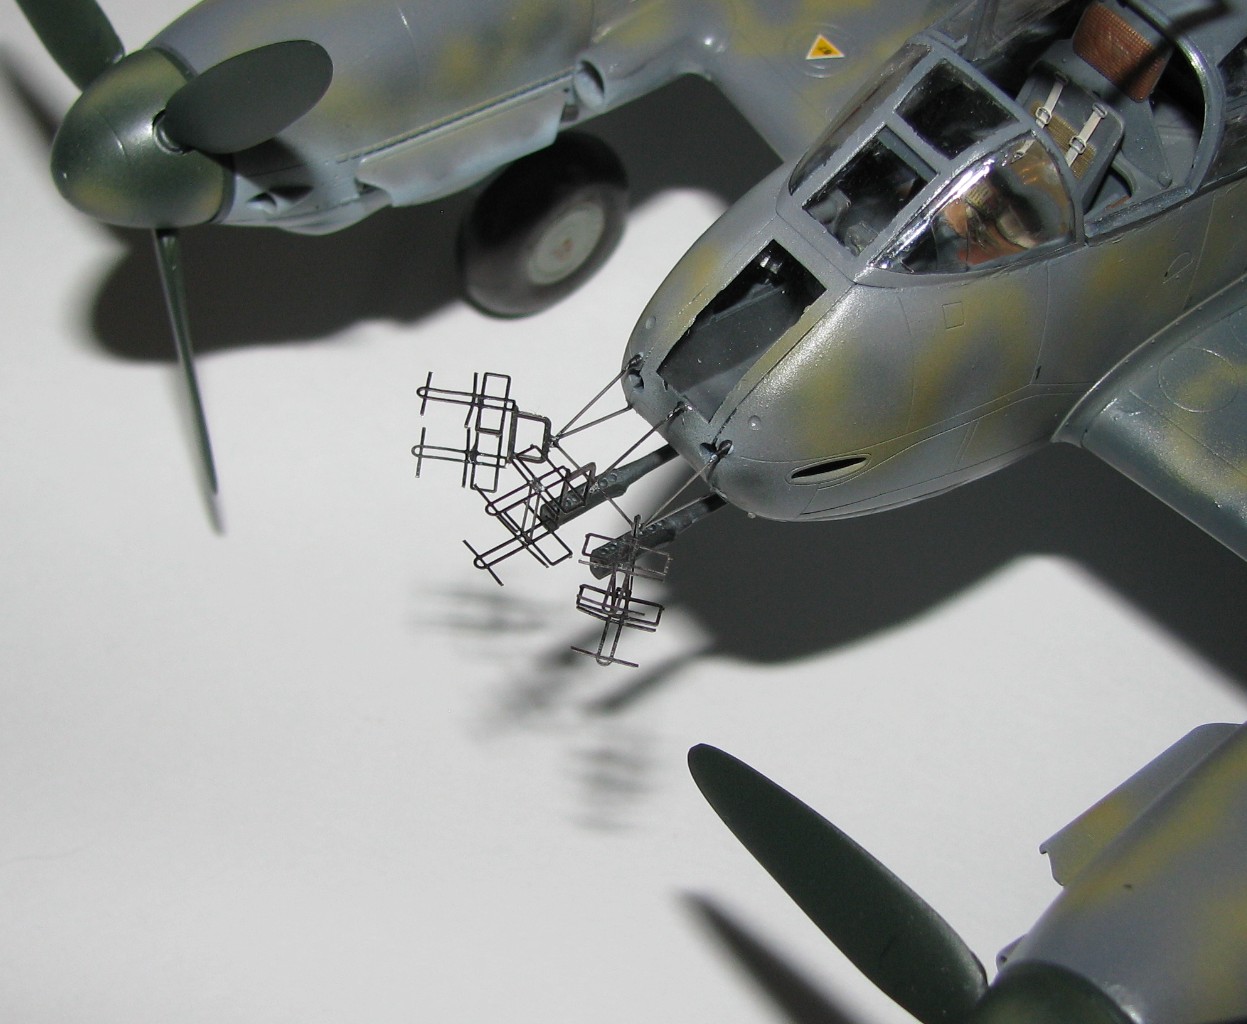
I decide to leave the propellers off until after adding the radar array as this would give me a little more room to work with. The radar is made up of 7 P/E parts and is VERY thin & delicate and a good deal of patience is required to place it on the kit. Though I am not a fan of P/E radar parts (they’re flat) it would be pretty hard to mold these in plastic. The base is a single piece and just a couple folds and you’re ready to go. I used Loctite Gel (I’m P/E challenged) to get this to stay in place, though it may not look right, it worked. The 3 mast arrays are composed of 2 parts and each has an upper & lower mast that needs to be twisted first then folded. After getting these folded there is a small rectangle piece that fits between the two masts and again I used the gel to hold this in place. Placing these on the base is quite a challenge, at least for me, and if it wasn’t for Zip Kicker I would not have been able to do it.
Finishing
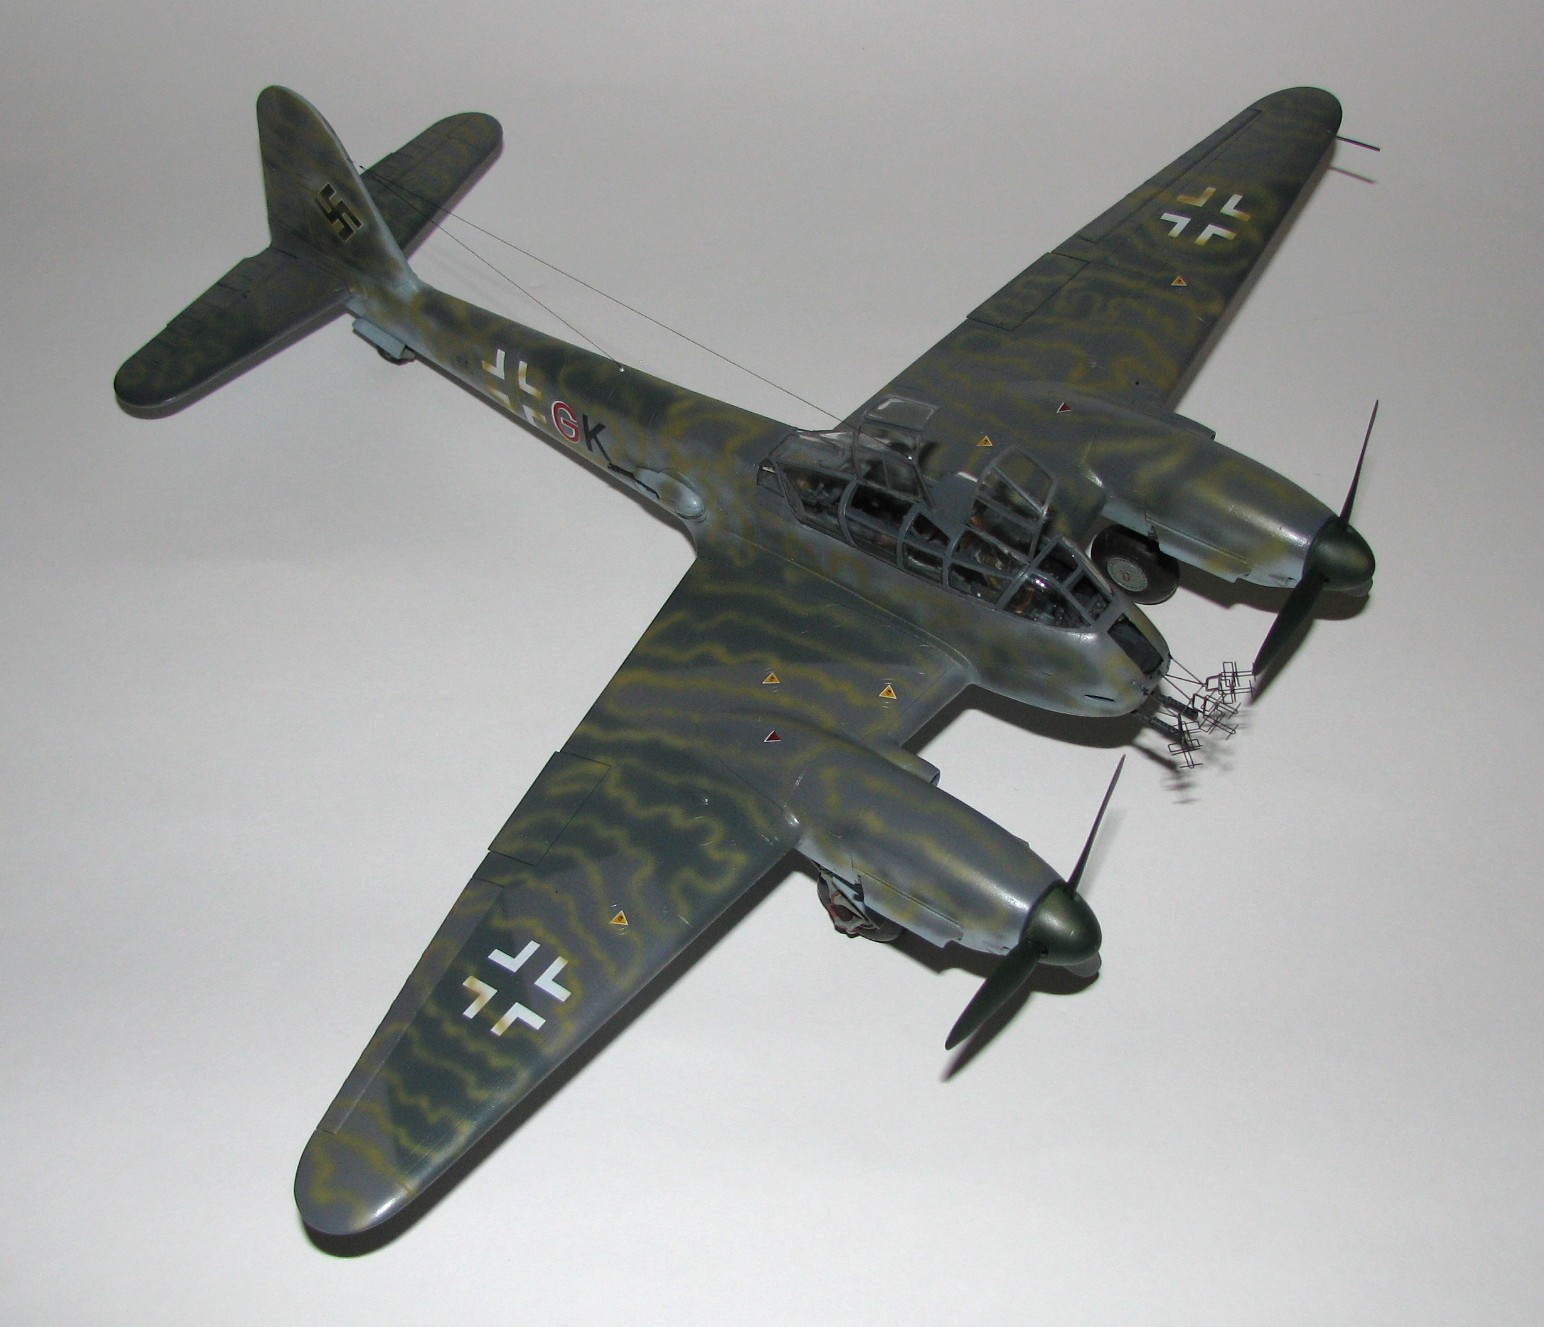
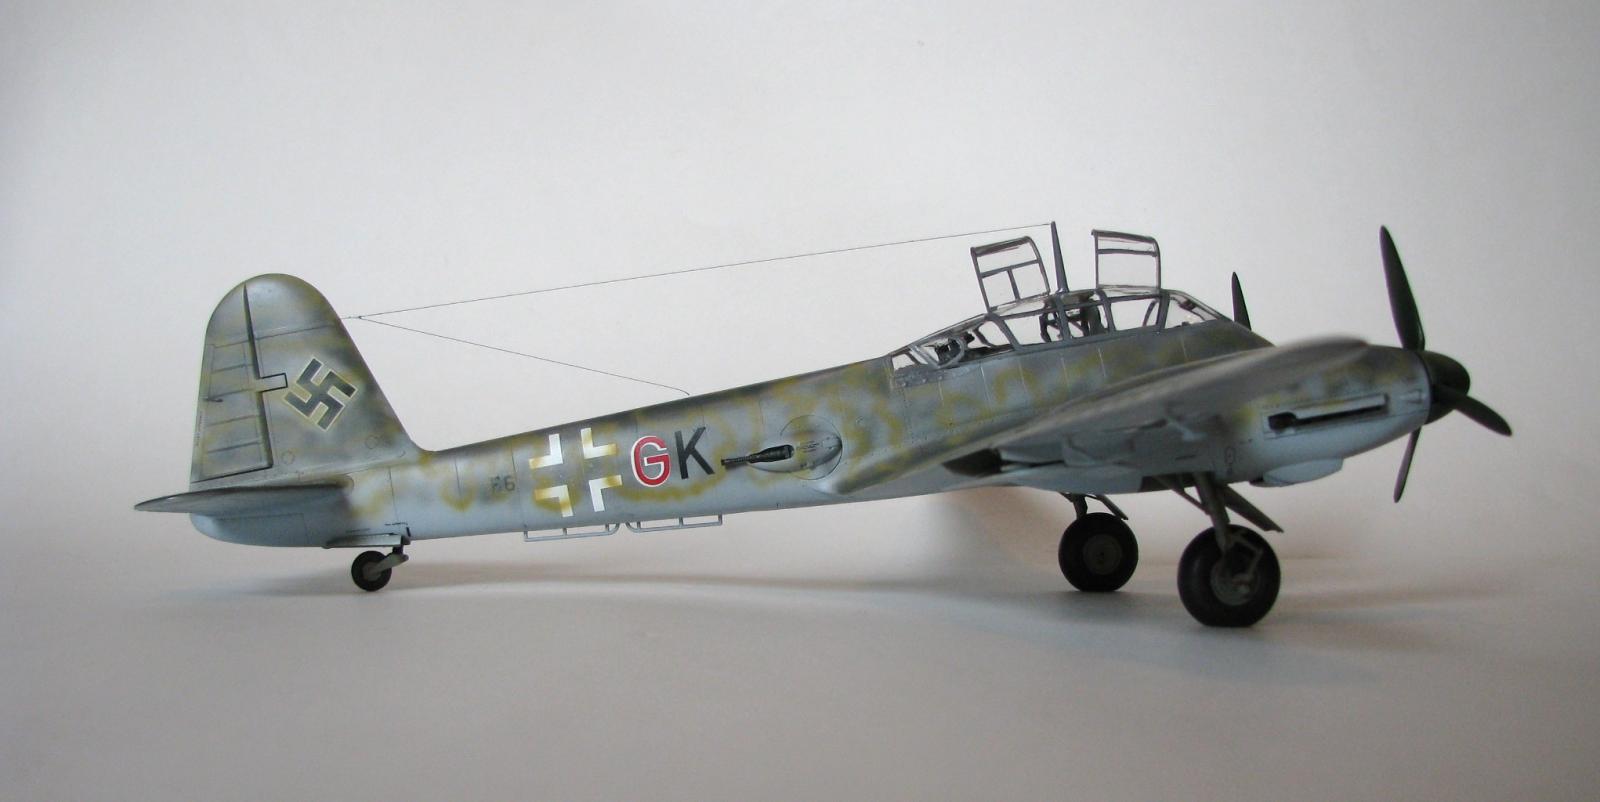
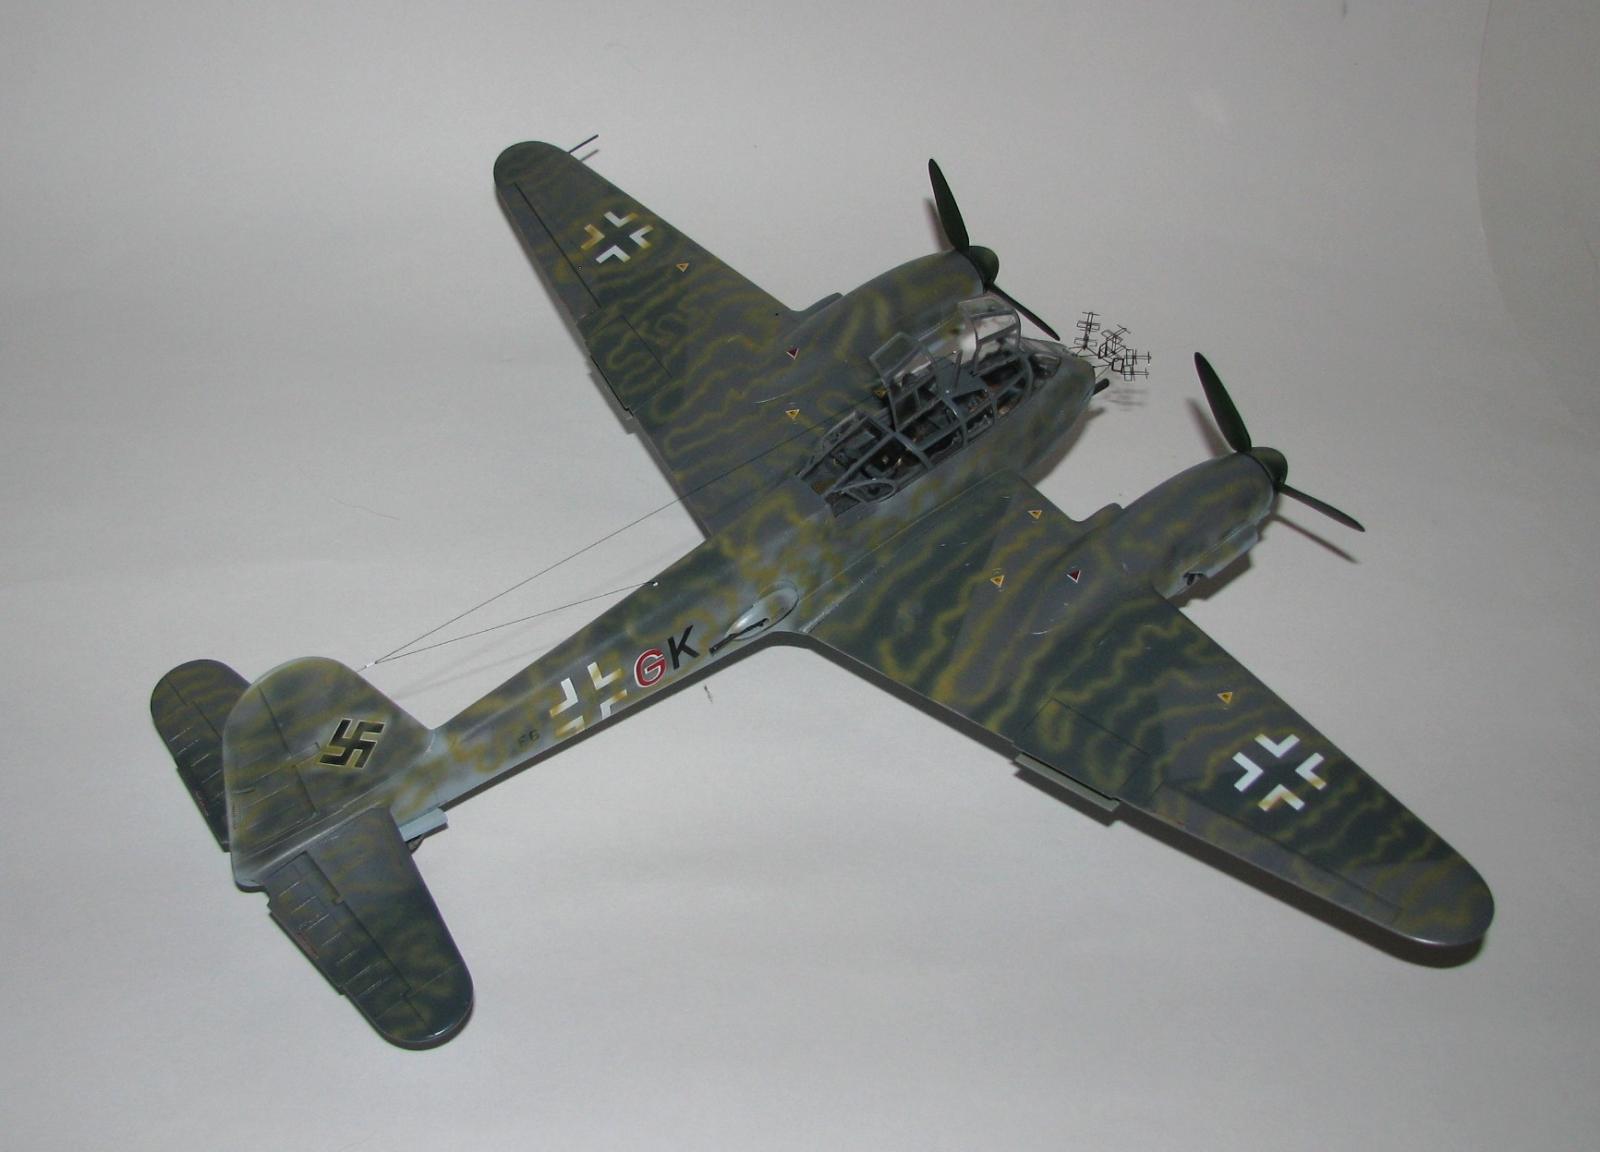
Well... since there were not many of these produced (2 or 3… maybe?) I decided to do a not too radical “what if” scheme. For the base camouflage scheme I used Testors Acrylic RLM 74/75/76 and for the meander pattern I used Tamiya XF-60 “Dark Yellow” and I wish I had used my Italian sand mix instead... lesson learned. Testors Acrylic RLM 66 was used in the cockpit, RLM 02 for the wheel wells, struts and wheels and Tamiya Black Green for the props and spinners. The decals were placed on after a couple coats of Future and they set down fairly well with a bit of help from some Solvaset. After letting those dry, and another couple coats of Future, the meander pattern was added over all of it. Again, I wish I had used the darker color Italian sand as it would stand out better, and since the markings I used are from a unit in Italy it would’ve made sense. As for the marking options in the kit…#1 is for a 410A from 1./ZG 26, #2 is the B-6 / R-2 that the British captured and tested and #3 is a 410 B from KG-51. Only the one in RAF markings had the radar on it so a what if scheme was the only way to go for me.
Conclusion
Although not newer, better, faster & stronger (Yep, I watch the 6 Million Dollar Man, what about it?) than the Meng kit, this kit still builds well... And it looks like a Me 410! Due to the P/E, I would not recommend this version for younger modelers, but anyone with experience should not have too many problems with it.
I would like to thank Revell for supplying this kit for review, IPMS for letting me do the review and all of you for reading it.


Comments
My kit came without any PE. …
My kit came without any PE. Fuselage fit around cockpit sucked.
Add new comment
This site is protected by reCAPTCHA and the Google Privacy Policy and Terms of Service apply.
Similar Reviews