
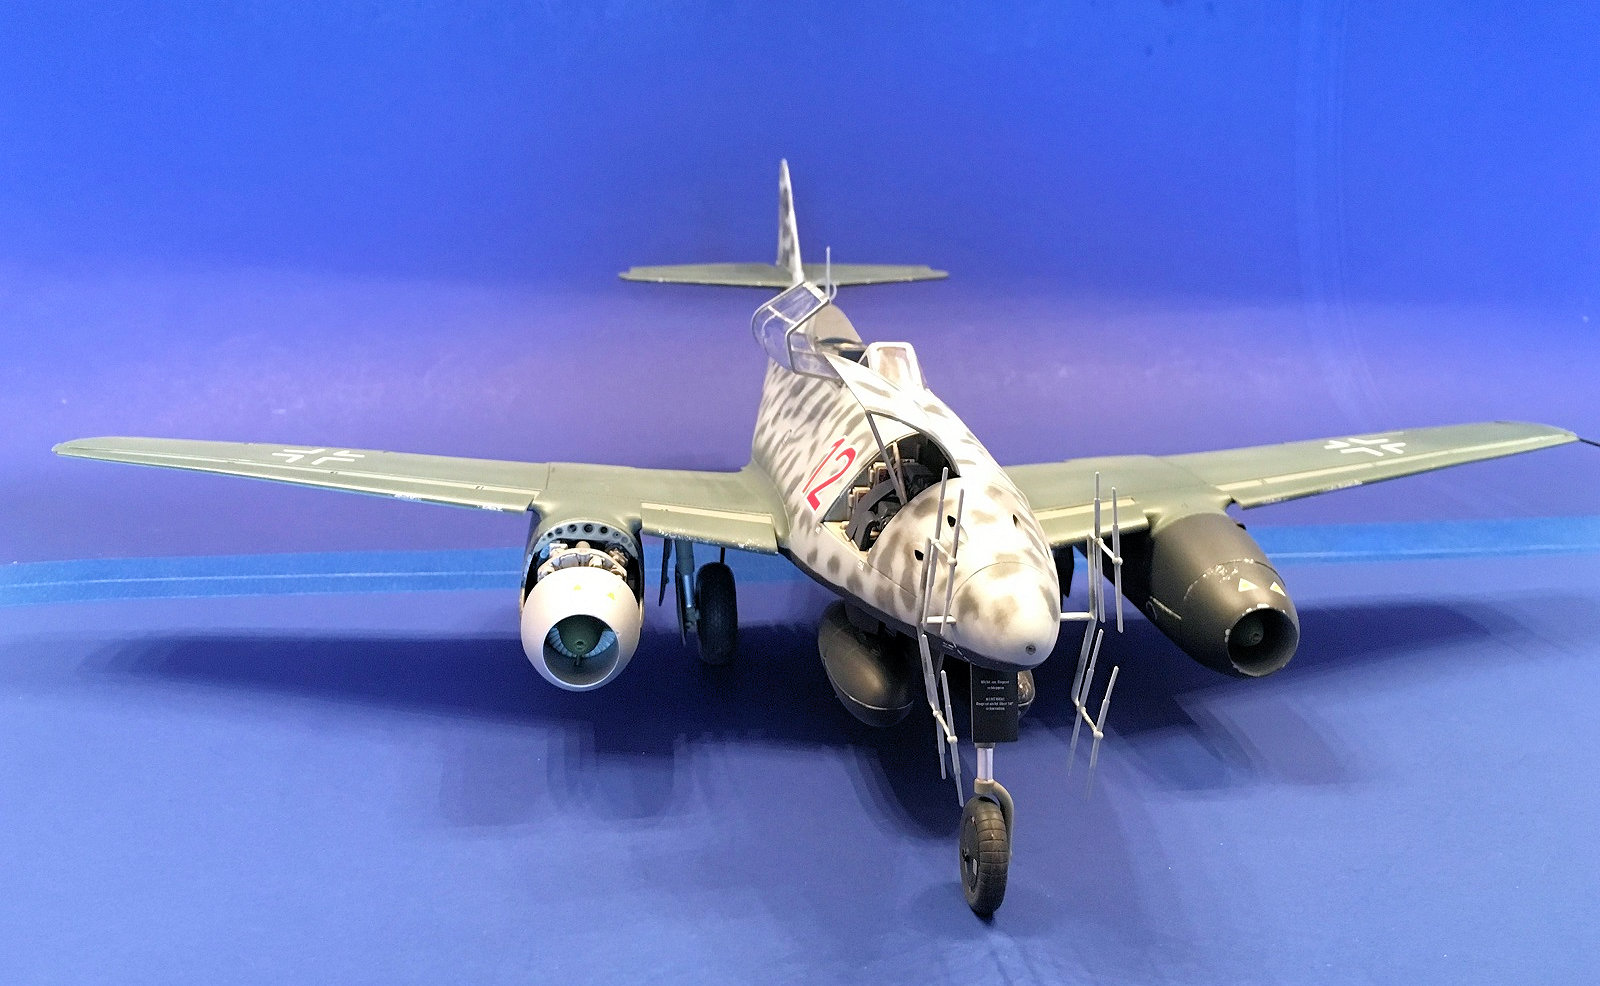
Messerschmitt Me 262B-1/U-1 Night Fighter
The Me 262 Schwalbe (Swallow) was the first operational jet fighter. Design and testing of the first German jet engine was well underway even before World War II started. Due to problems encountered with new materials needed, fatigue and German High Command intervention and delays, the aircraft did not see operational flying until April 1944. The Me 262 was highly maneuverable and faster than any other aircraft of the time, but continued to suffer from engine problems. Many aircraft were lost to engine problems or mishandling.
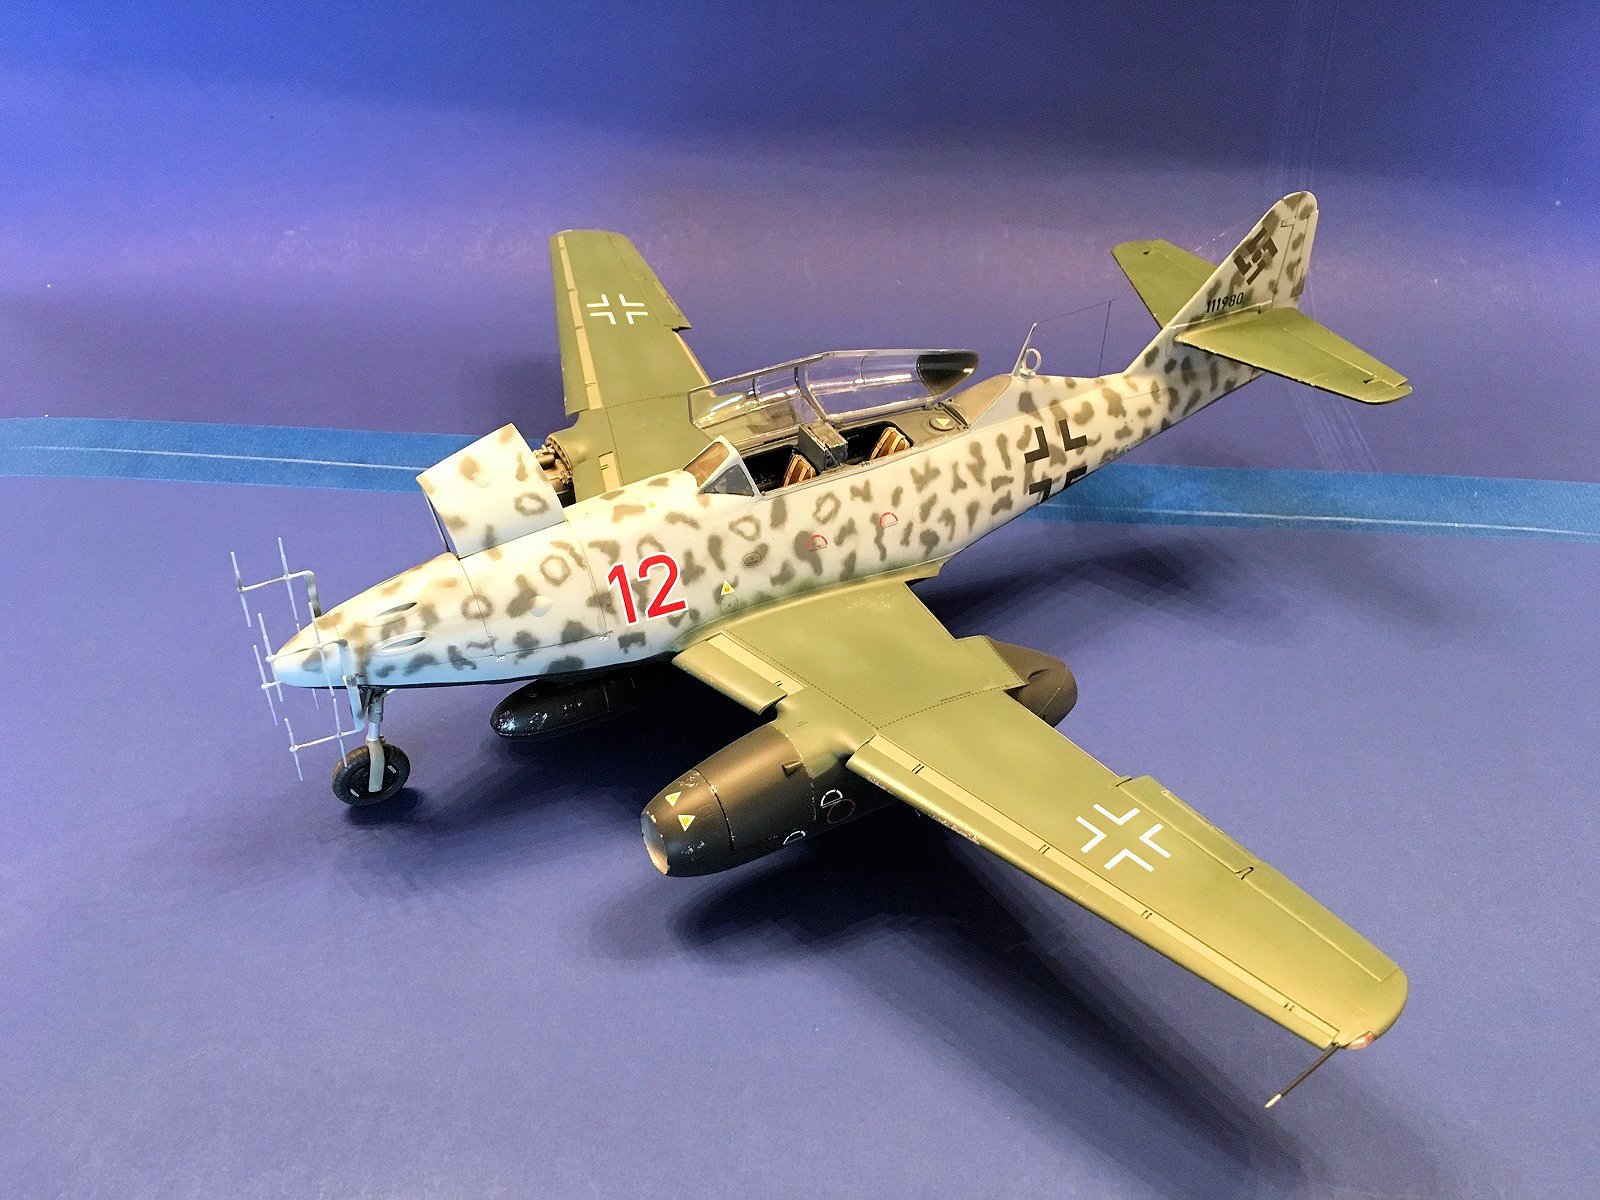
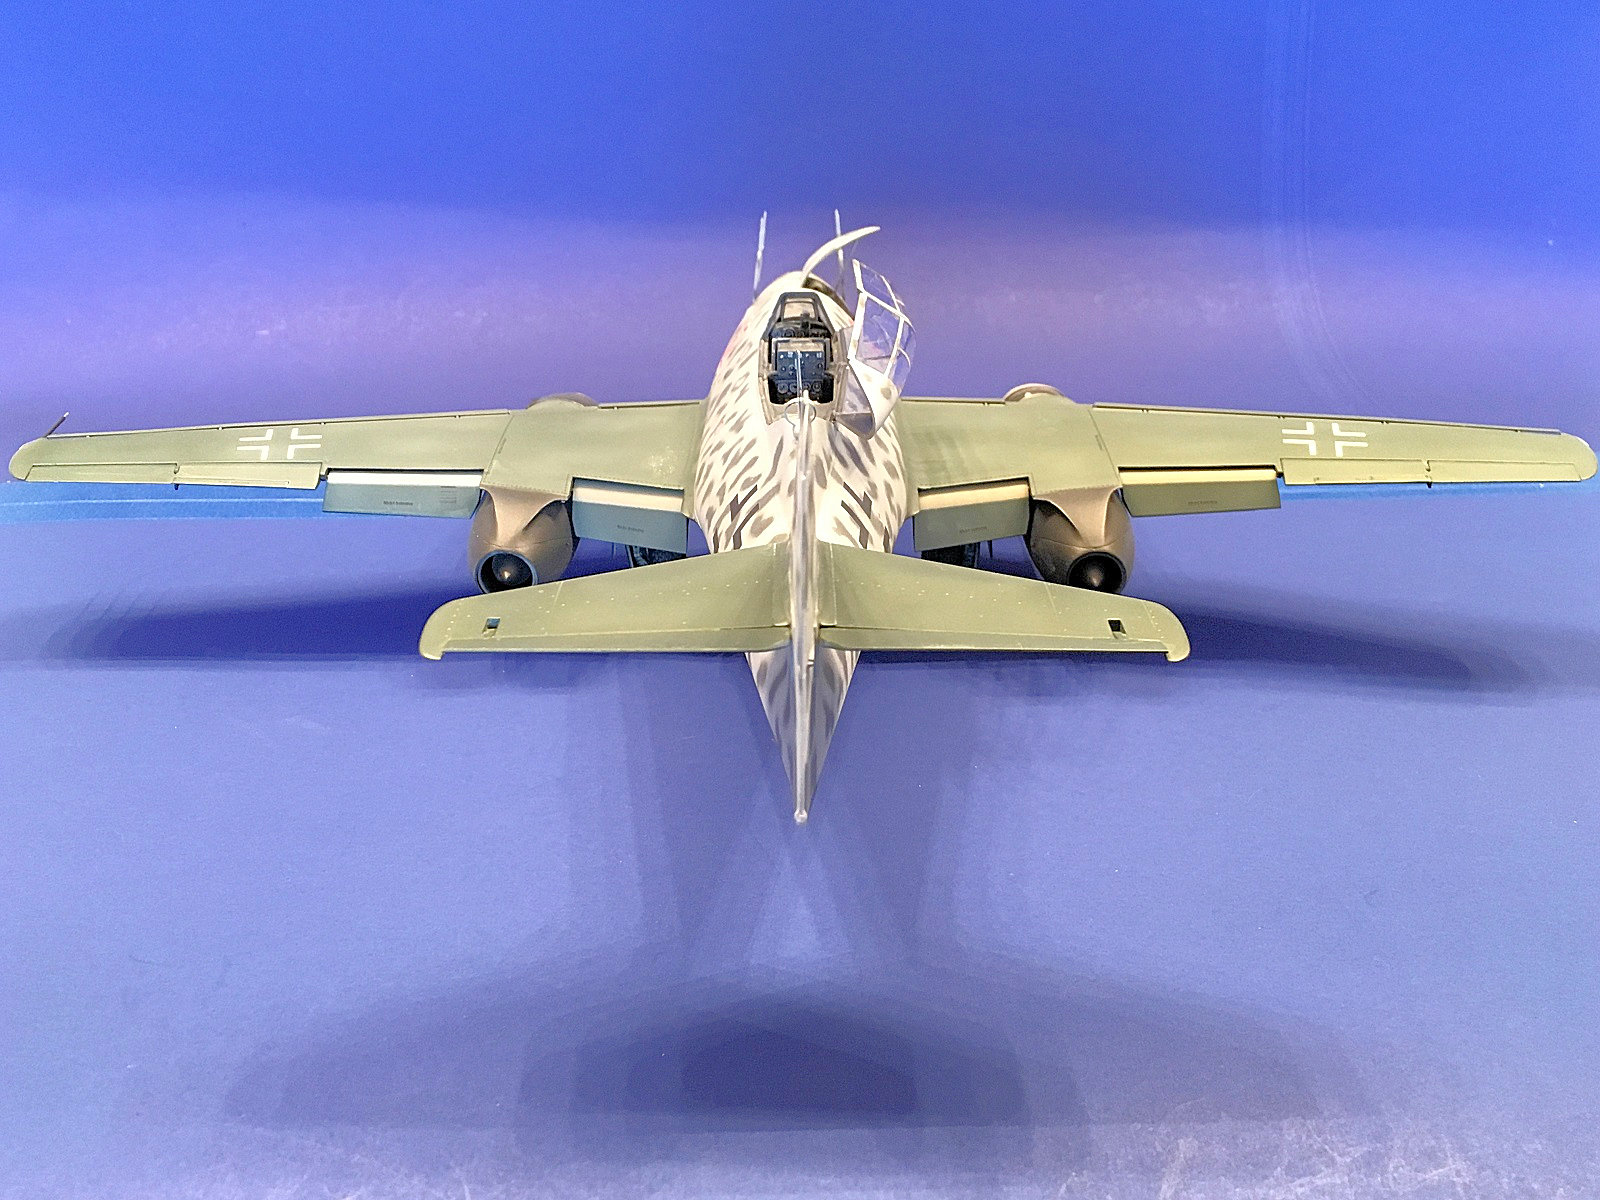
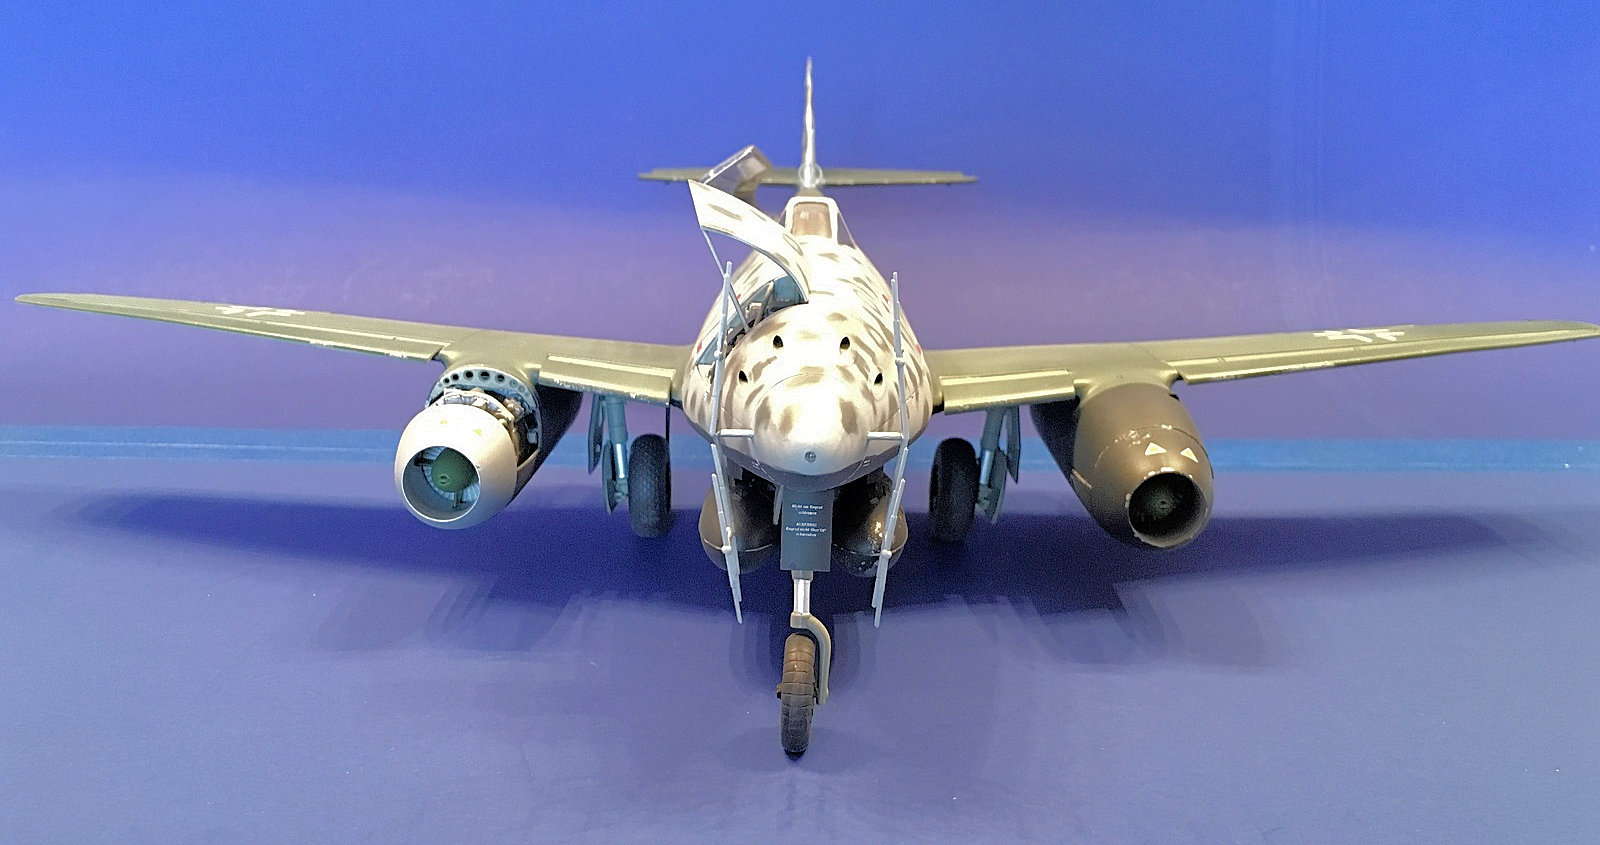
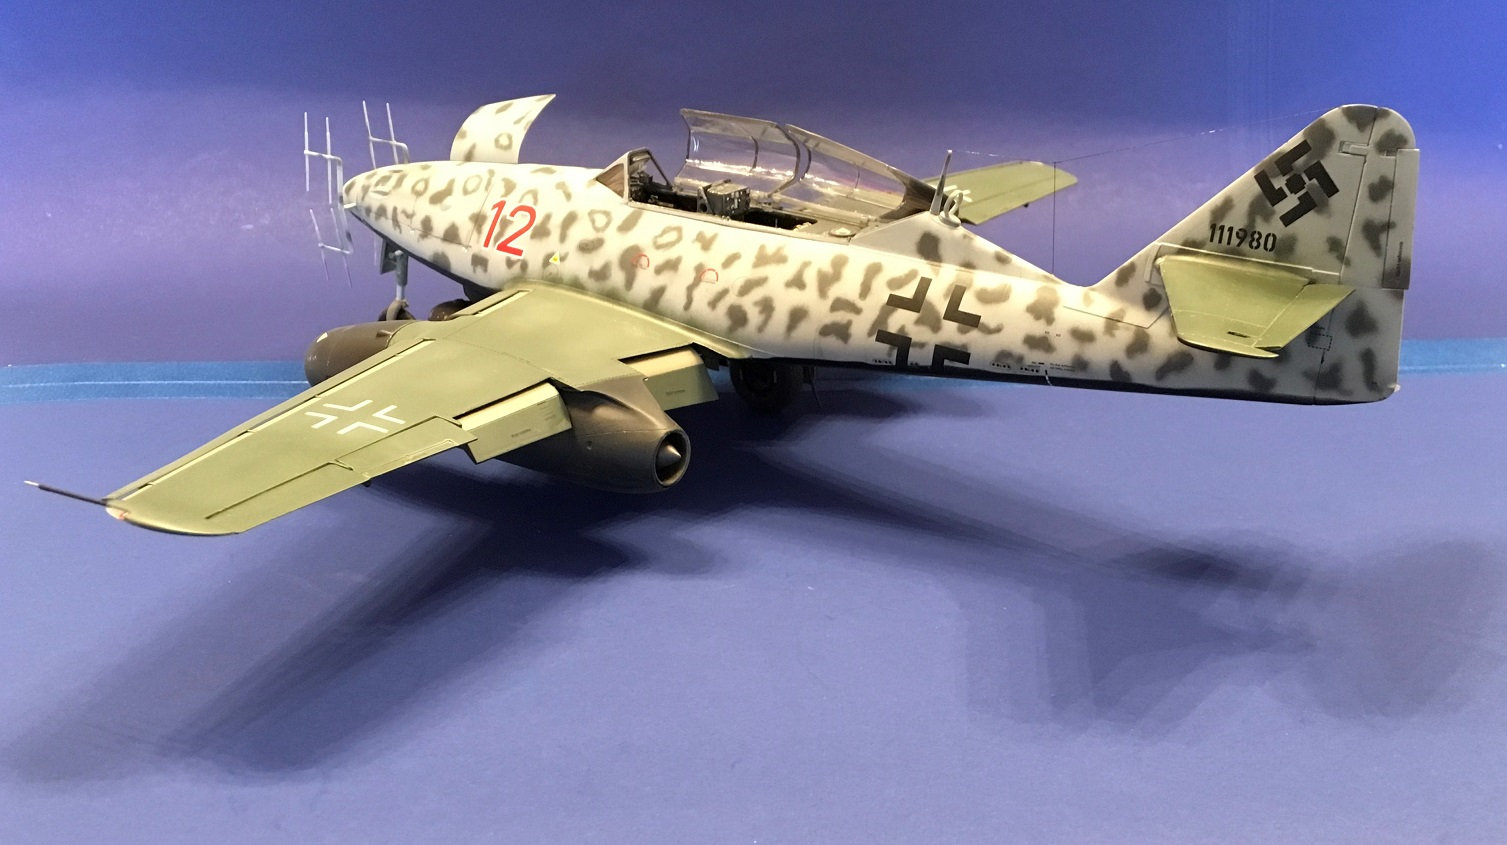
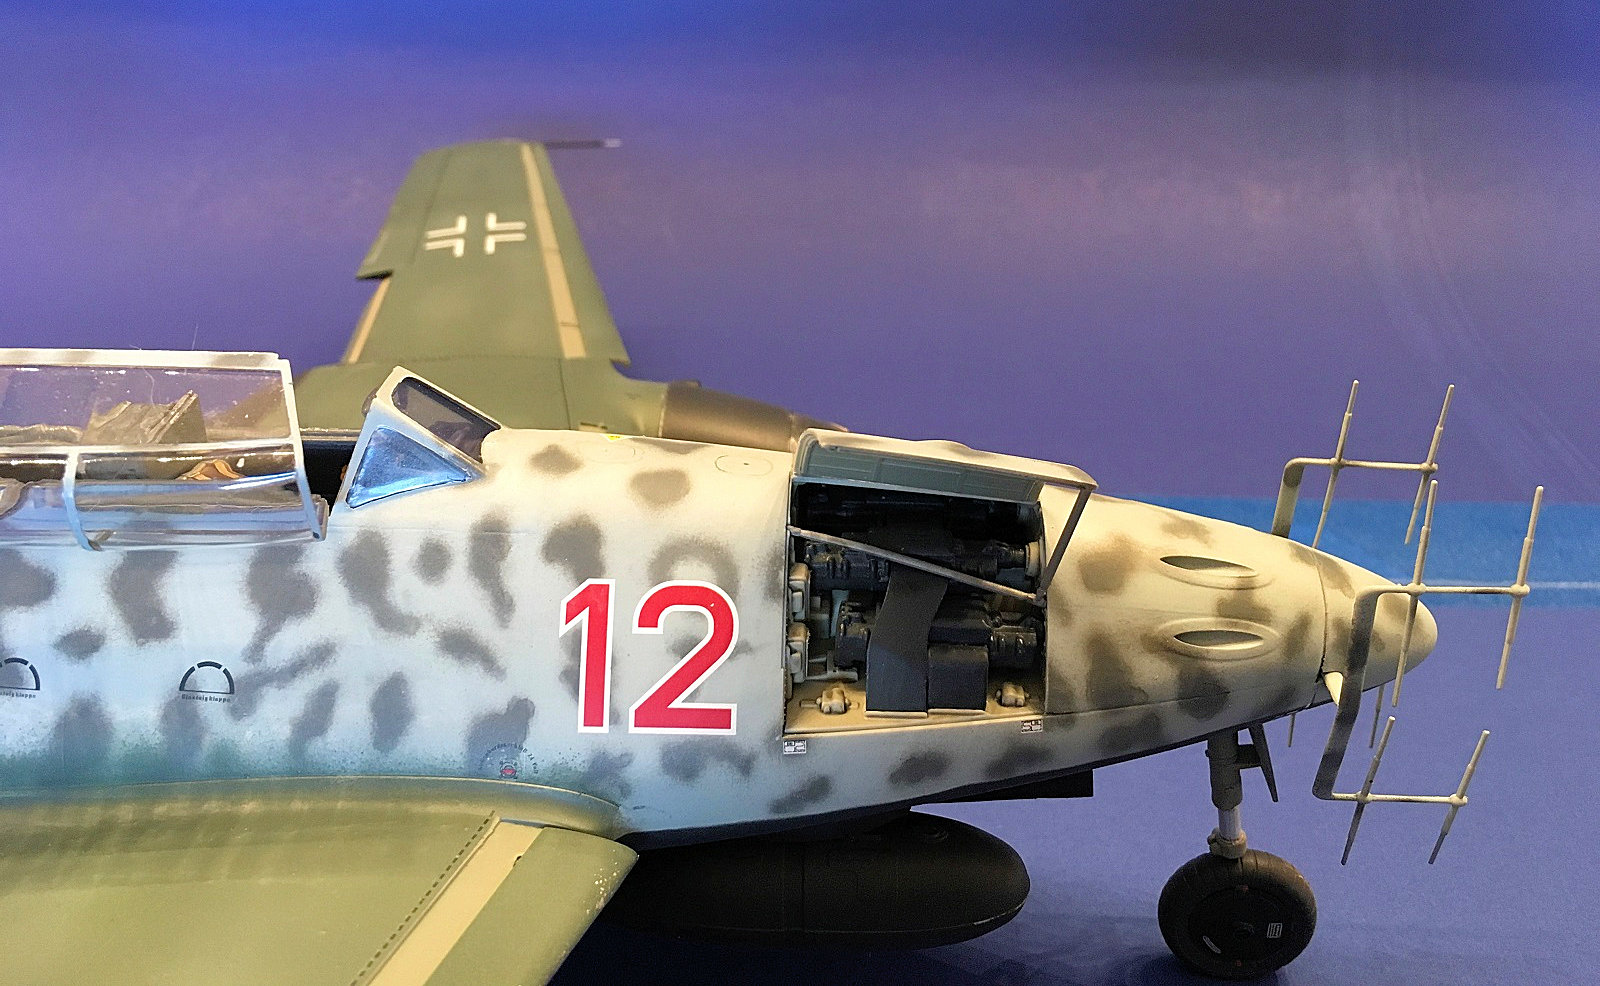
Me 262B-1/U-1 was a two seat trainer converted into a night fighter, with the addition of a FuG 218 Neptune radar. This was an eight-dipole antenna array mounted on the nose of the aircraft.
This 1/32 scale Revell Me 262 kit is a brand new kit. The parts sprue trees are contained in several plastic bags with up to three sprues in each bag. Luckily I did not see any damage or scuffing from the grey plastic parts rubbing together. The large box has a great painting of “Red 12” shooting down an RAF Mossie, but it is the standard weak end opening box. Useless for storing parts and sprues during the build, unless you cut open the top of the box. I tend to organize the parts on a portion of my bench anyway.
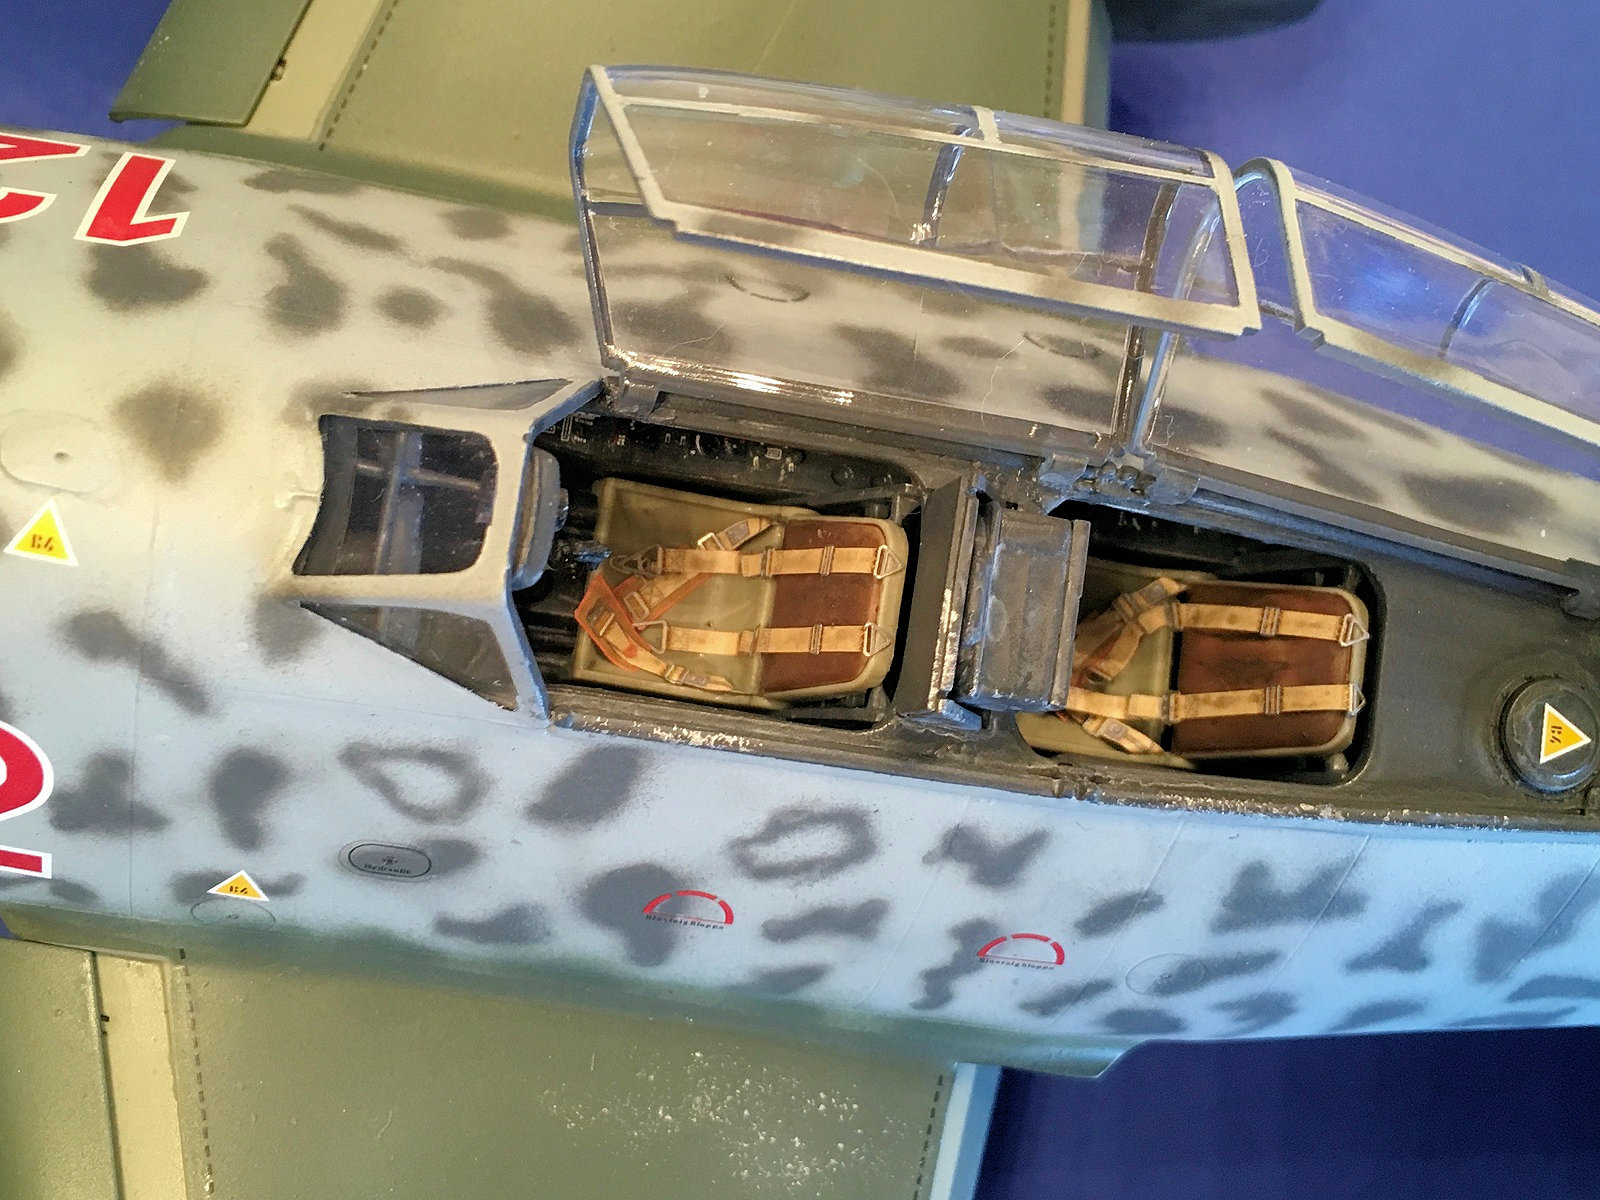
A relatively small, but comprehensive decal sheet contains markings for Red 12 and Red 8, as well as a full array of stencils. A very impressive set of decals for the cockpit instruments, side console placards, switches and controls for both crew positons are included, and in my opinion every bit as nice as the photo etch (P/E) sets available. Decal seat belts are also provided and are very useable, however I opted for the Eduard steel color P/E belts simply because they look more realistic and show relief draped over the seats than decals. You could also cut around the decal belts and keep the paper backing.
Molding quality was for the most part is very good. It exhibits fine recessed panel lines, select rivets and panel fastener detail. I was surprised with the amount of flash on a lot of parts for such a new mold. Easy to remove but surprising. Some very large sprue attachments also demanded careful and time consuming removal and clean up. I found sink marks in various parts of the wings and fuselage, as well as molding flaws and a couple of short shots along some of the control surface parts. All this can be repaired, but requires extra time and rescribing of lost detail to fix. This is disappointing to see in a brand new kit!
The two clear sprues are both contained in one plastic bag. The canopies are thin and clear. One of them had come loose, and due to the way the two clear sprues were packed there were some minor scuffs and scratches. I treated the canopies to a polish and Future/Pledge Floor Wax bath which helped remove the damage.
I like the new color format of the instructions. They are quite straight forward and mostly easy to follow. There were a couple of places that were not clear as to where parts went. The flaps were an example. If you follow the instructions, they show installing them in the “up” position into slots in the lower wing part before adding the top wing half. There is nothing on how to mount them in the “down” position, even though the instructions show the flaps down in subsequent steps. Inspection of the wings soon showed me how to install them down. An illustration would have eliminated any guess work.
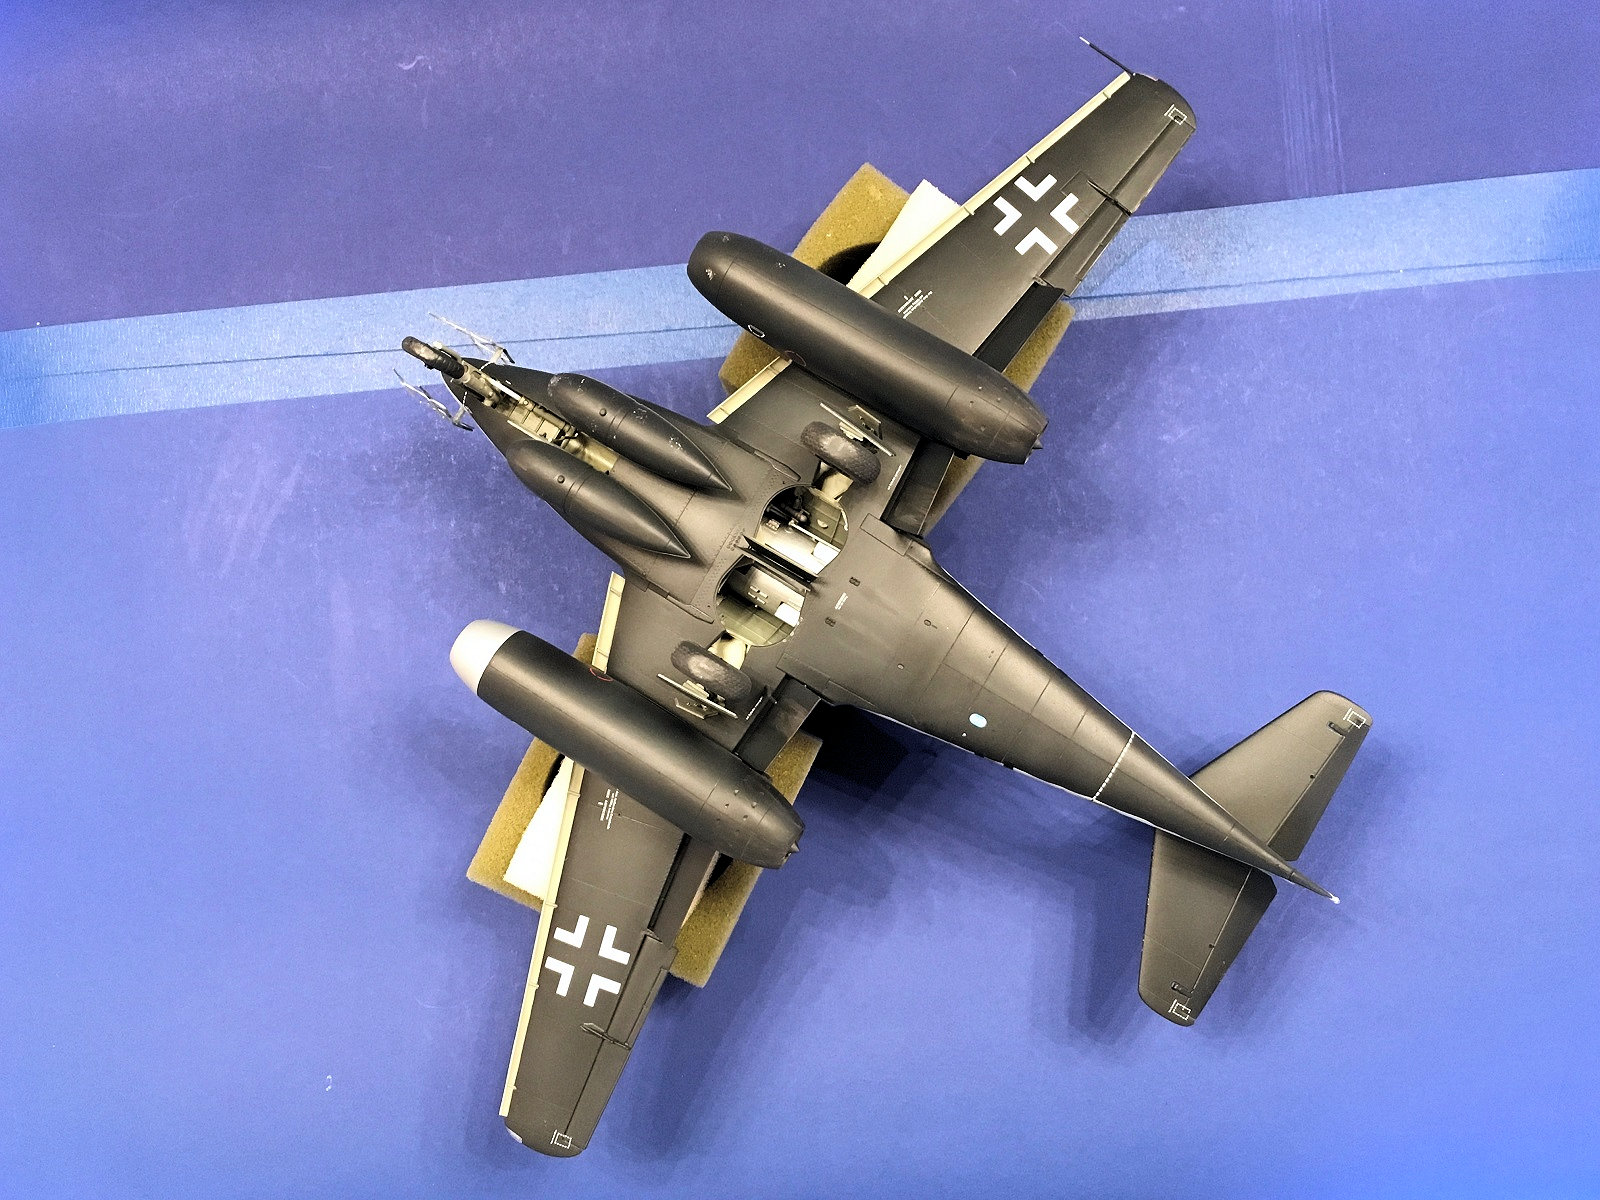
The fit of the parts was good overall. If I were to build this model again, I would assemble as much as possible before painting. If not, be sure to remove paint from any gluing surfaces, as I did. I found the fit tolerances were quite tight. I really liked the way Revell went about the main undercarriage. A short section of the leg (part F120) is molded to two axels with square ends that fit into slots in the forward and rear undercarriage bay walls (wing spars). This forms a strong and more realistic appearance to the leg. It also ensures that when inserted, the main leg will sit at the correct angle. Be careful which way you install part F120, as one side is slightly concave. The concave should face the roof of the wheel well. This again is not shown clearly in the instructions (See step 34, part #’s F120).
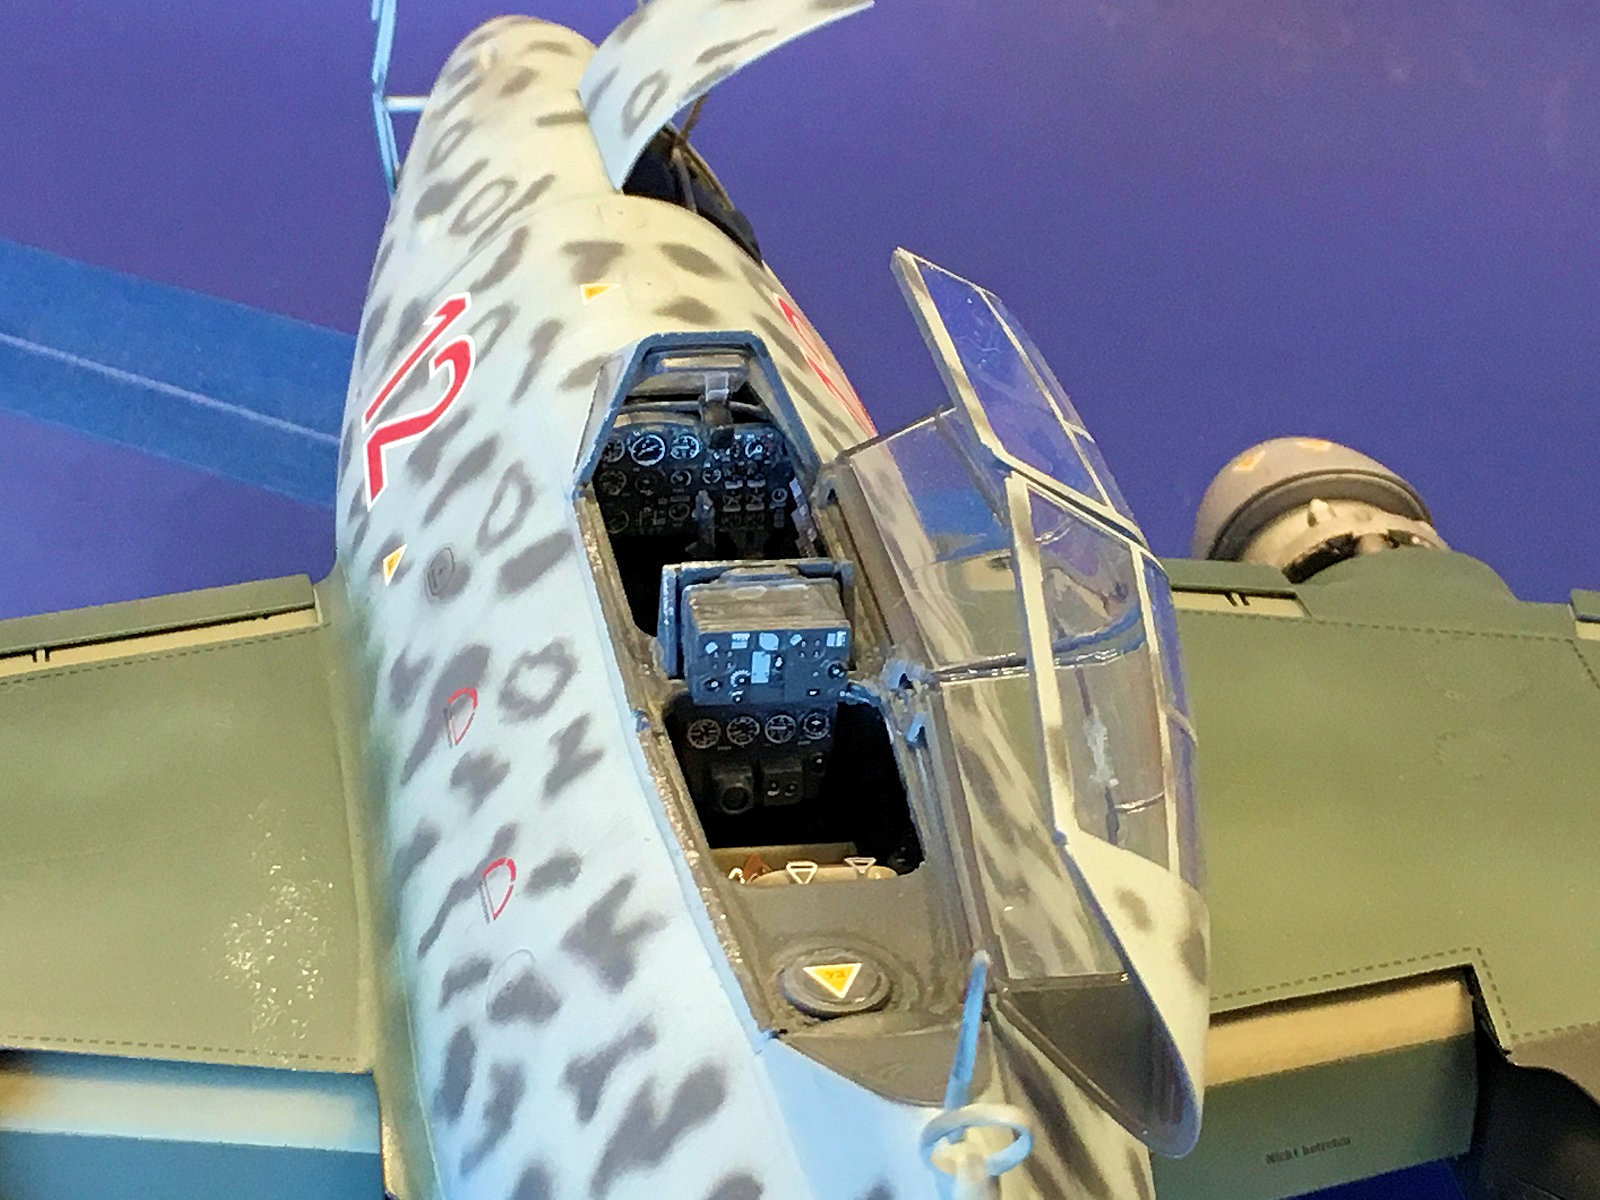
The cockpit is modular, constructed as front and rear sections and encased in tubular cockpit walls (Maybe we will see a single seat fighter?). These are then mated with the front and rear bulkheads, which also forms part of the main undercarriage bay. The raised detail on the instrument panels and side consoles is very good. The cockpit is completed with decals laid over the raised knobs, switches and panels. I reduced the height of some items so the decal could conform better, but in most cases it wasn’t necessary with a little help from Microsol setting solution. I found it easier to apply some console decals by cutting them into several parts. Before committing the decal to water, study where it will be positioned and cut accordingly.
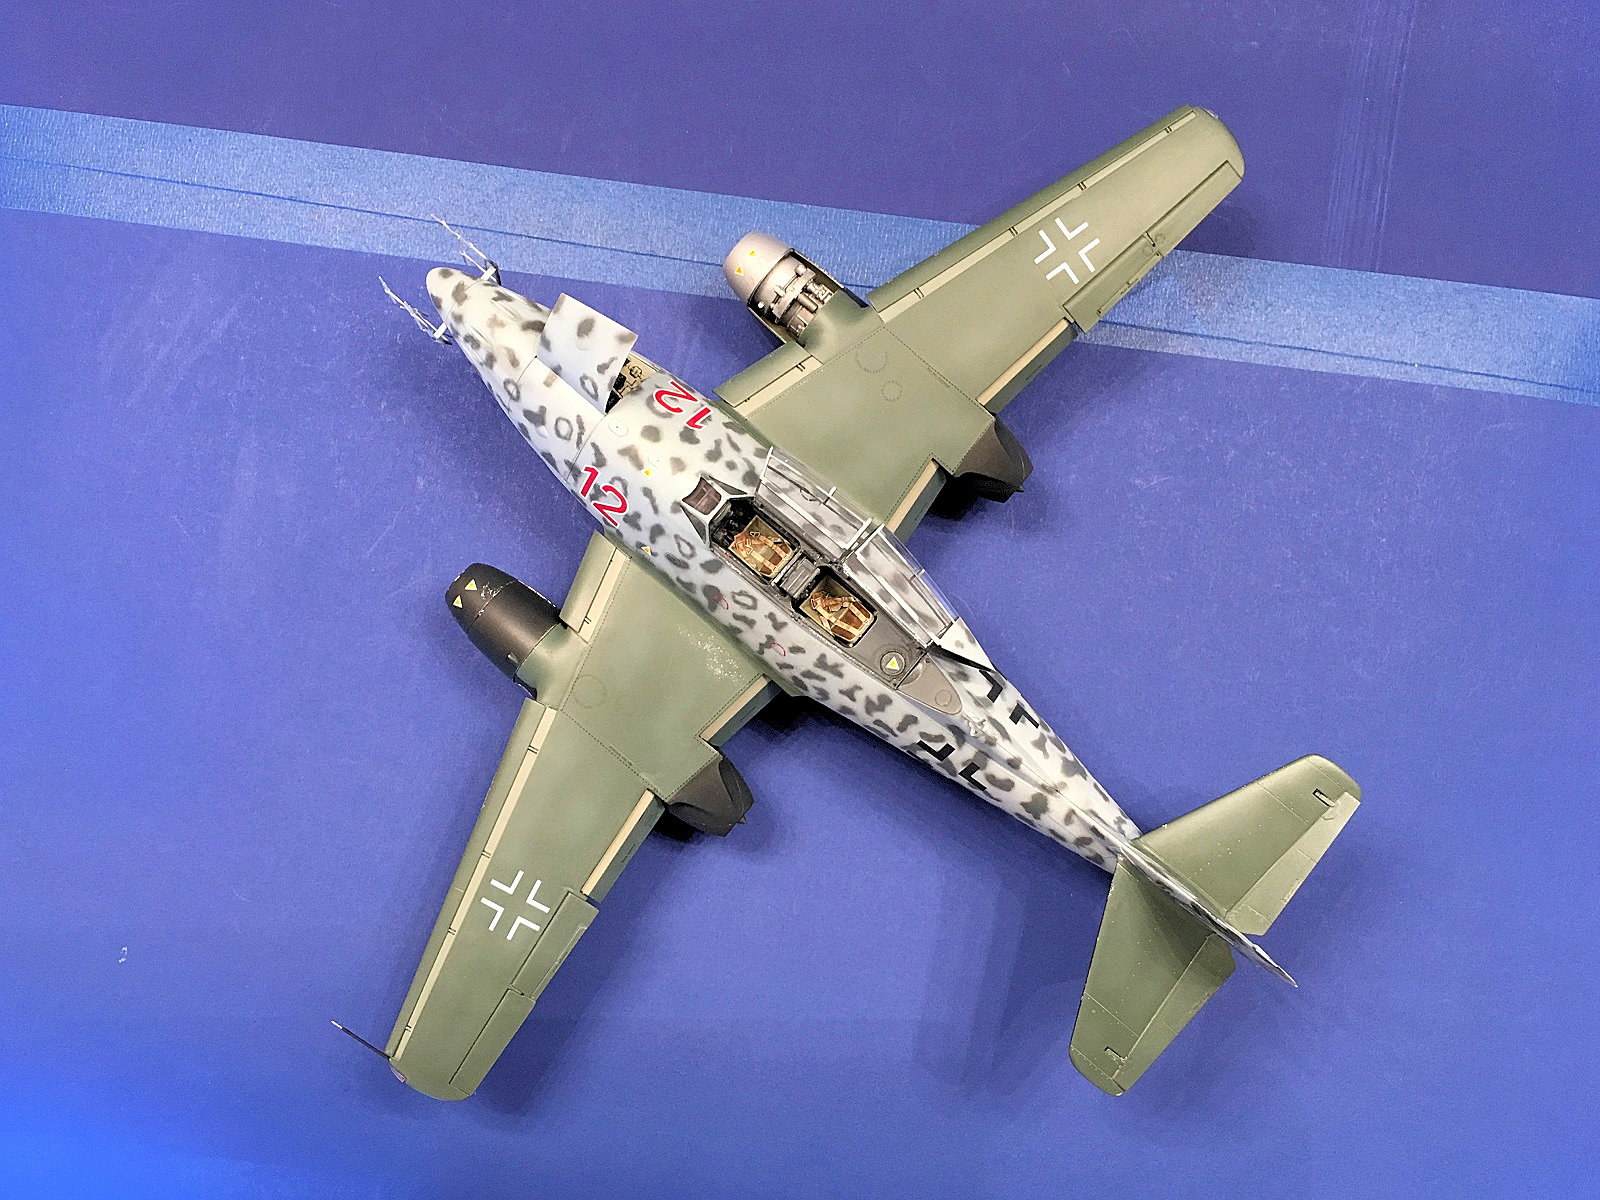
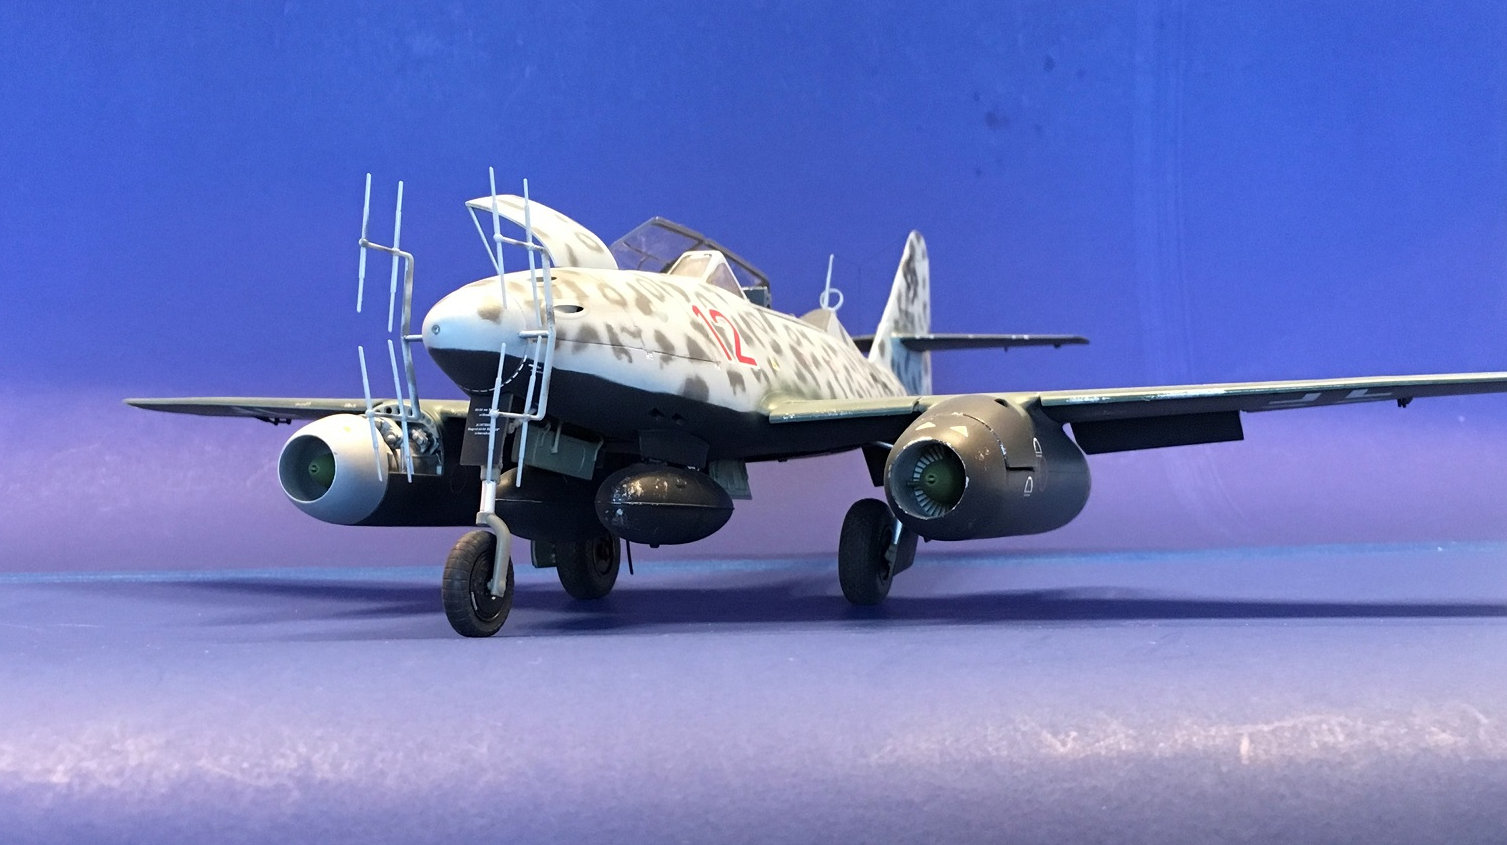
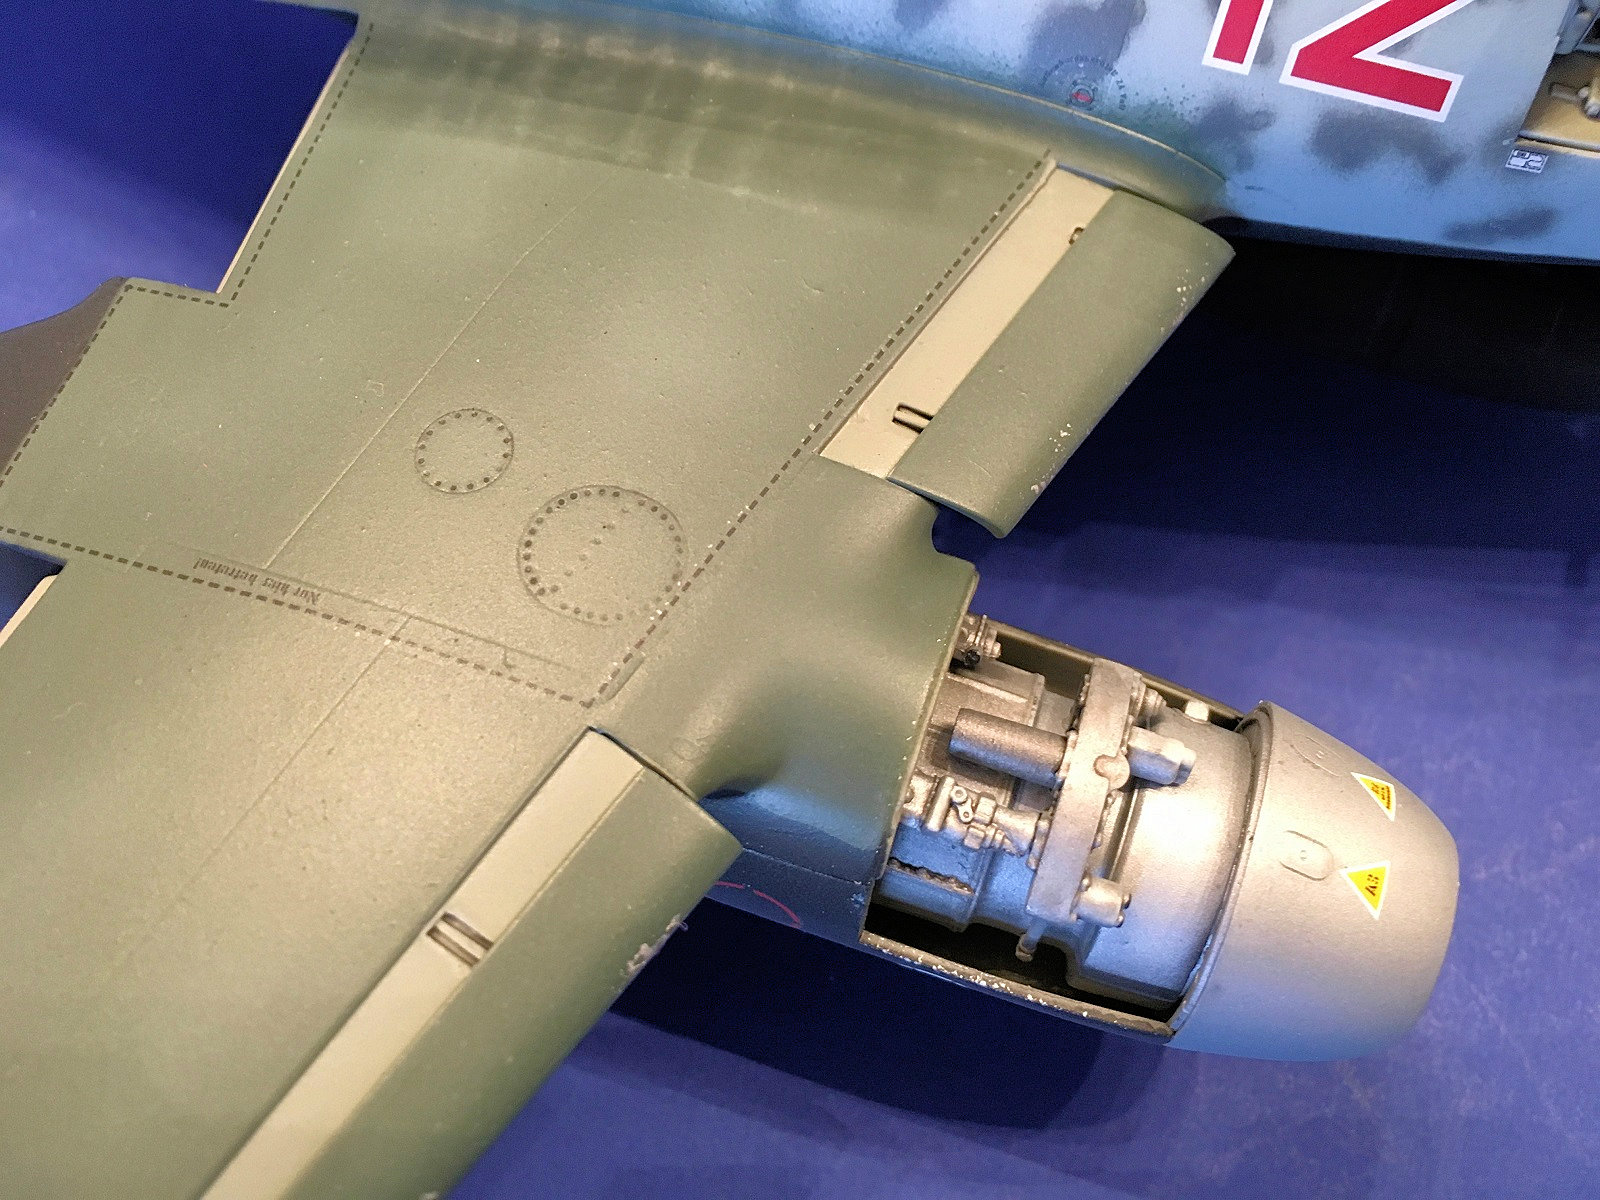
Construction of the wing produces a strong assembly and helps with dihedral. The joint between the lower wing center section and outer wing part is cleverly hidden by the completed engine and nacelle assemblies, and requires no seam filling. The completed main wheel well includes the forward and rear wing spar that helps wing alignment. The engines themselves build easily and are quite detailed, but the nacelle halves created some problems. The plastic is very thin along the mating surface underneath and I had difficulty getting a strong joint without them splitting. As these are built around the engines there was no way to run a bead of super glue on the inside surface afterward. What I should have done was insert plastic sheet tabs on the inside surfaces, apply glue to the tabs and assemble around the engines. In the end I scribed panel lines down the center and flowed liquid cement through them which helped hide a couple of persistent splits. A panel line here, I believe, is not correct but serves a purpose on my build.
The fuselage halves are glued together after inserting the assembled nose wheel well and cannon bay. No filler was used here, and the fuselage halves feature tabs that slot together ensuring a precise fit. The cockpit tub with front and rear bulkheads then slide into the fuselage from underneath. I found that the locating tabs on the front bulkhead slots needed to be trimmed as there was no way I could get them aligned. I read in another review that this may be a problem that Revell is aware of. Once trimmed everything fit ok. The underneath of the cockpit tub represents the top of the main undercarriage bay and looks nice.
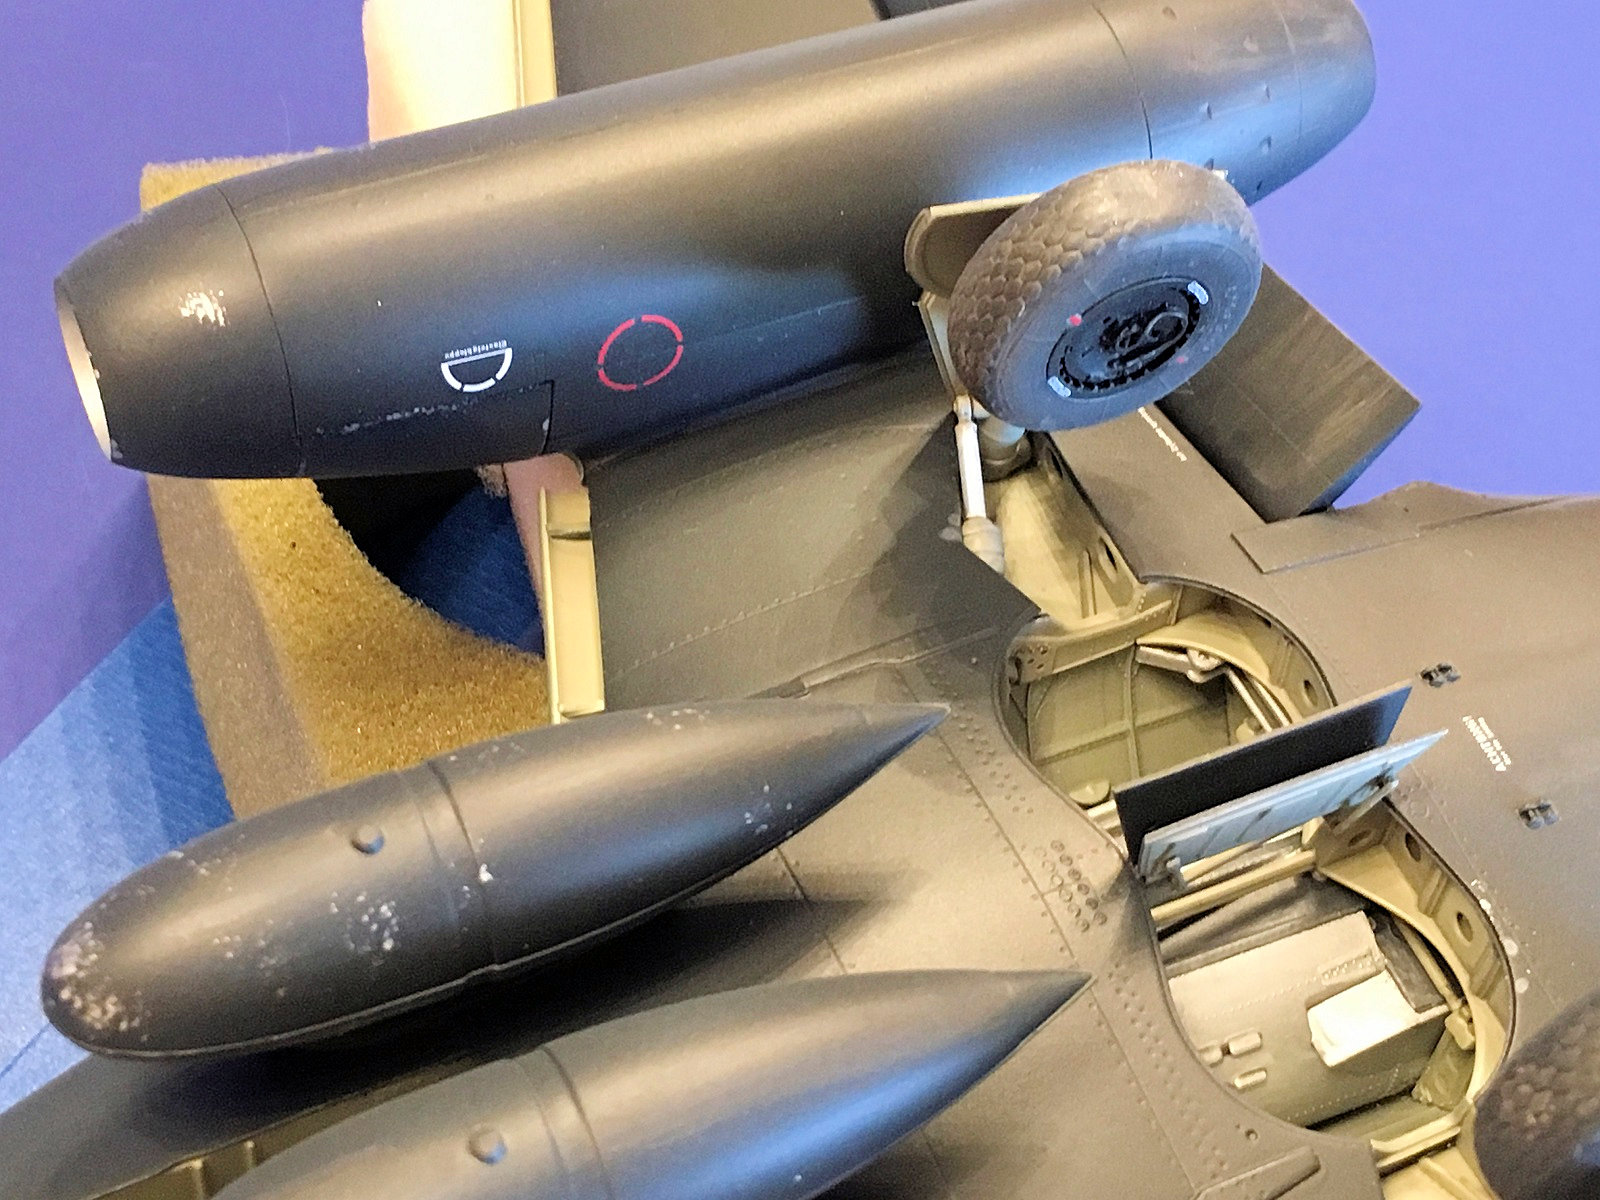
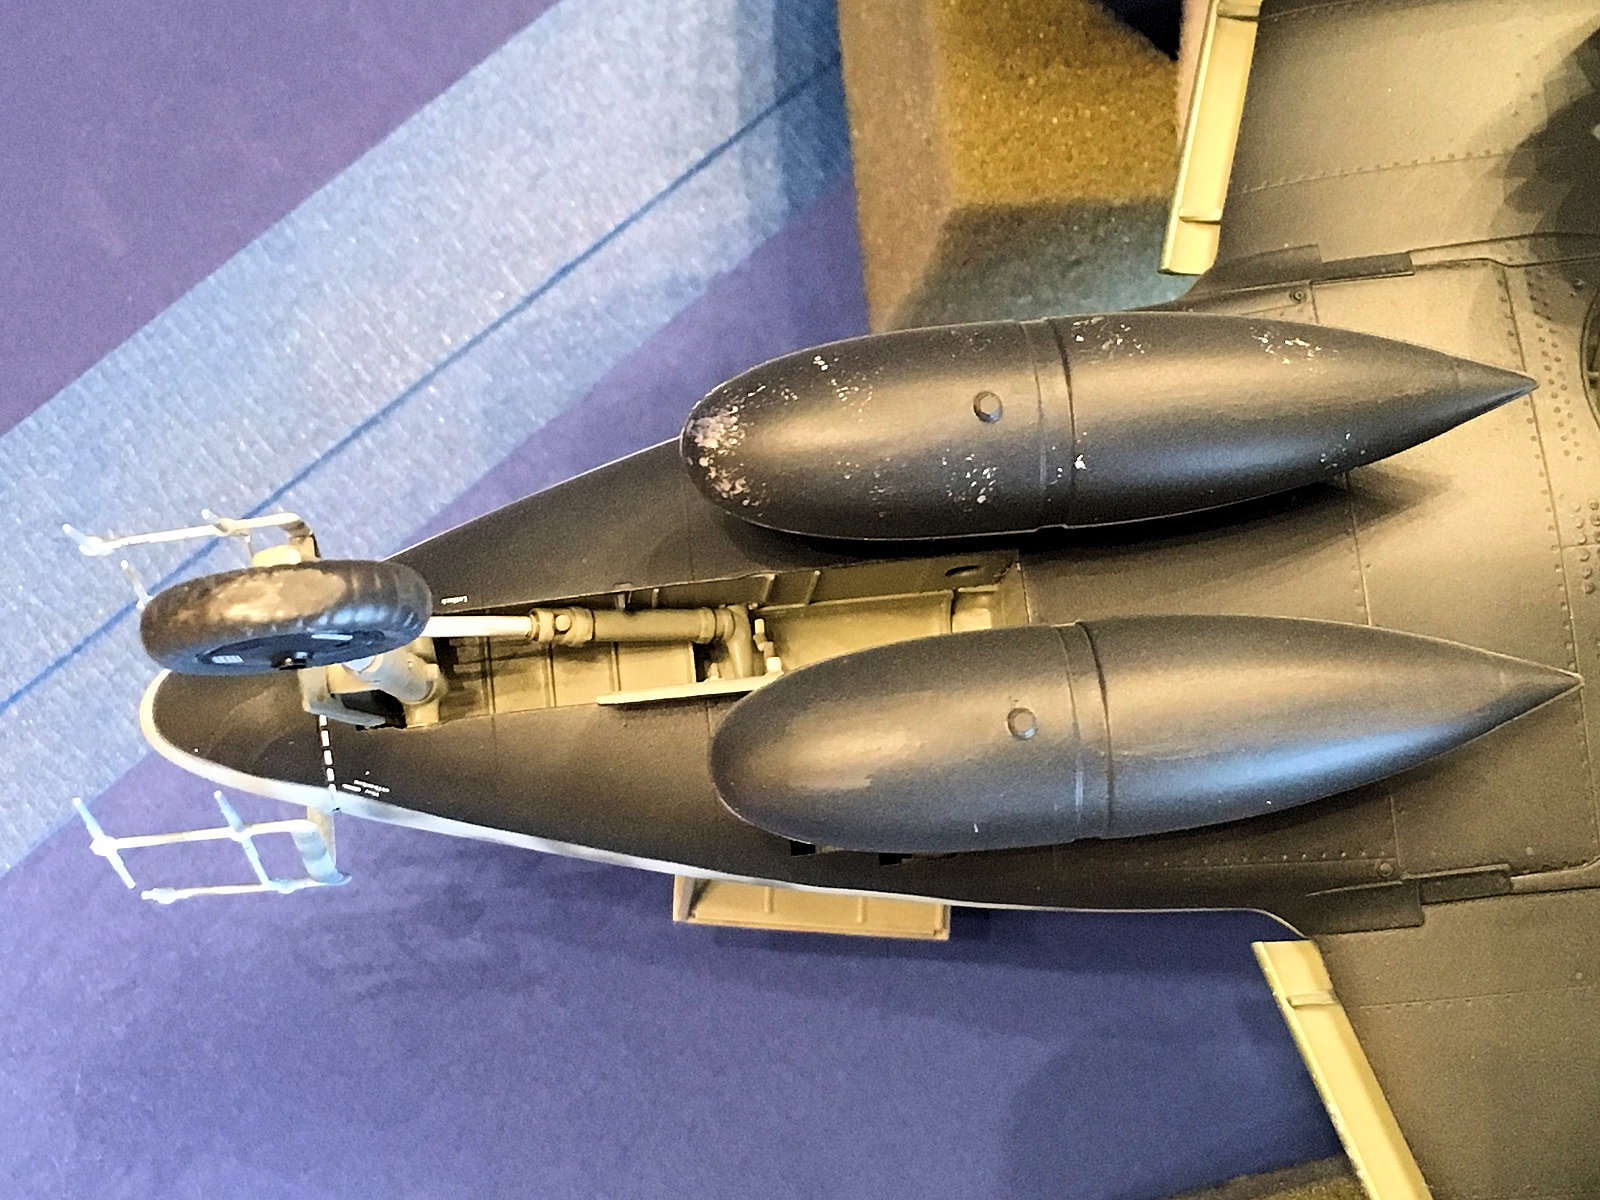
There is plenty of space in front of the cannon bay to insert weight. Just make sure the cowl will sit flush over the weights. Revell recommends 15 grams which is the amount I used with flattened fishing lead weights.
All flying controls are positionable. I attached everything neutral except the elevators that are deflected up a little. Both ailerons showed molding flaws on the upper halves and the lower half trailing edges were slightly short shot. Everything else was fine.
The windscreen includes part of the forward fuselage and fits fine. Make sure the frame that fits over the top of the cockpit sits flush where it meets the forward fuselage sides. One side of mine was raised a little and I needed filler – My fault, not the kit. Don’t forget to paint and install the armored glass and gun sight before attaching the windscreen. There was a sizable mold seam running through the middle of the tiny gun sight and its reflector glass, so I removed and replaced the reflectors with clear plastic sheet. At first, I thought the gun sight was undersized, but it appears correct in reference material I saw.
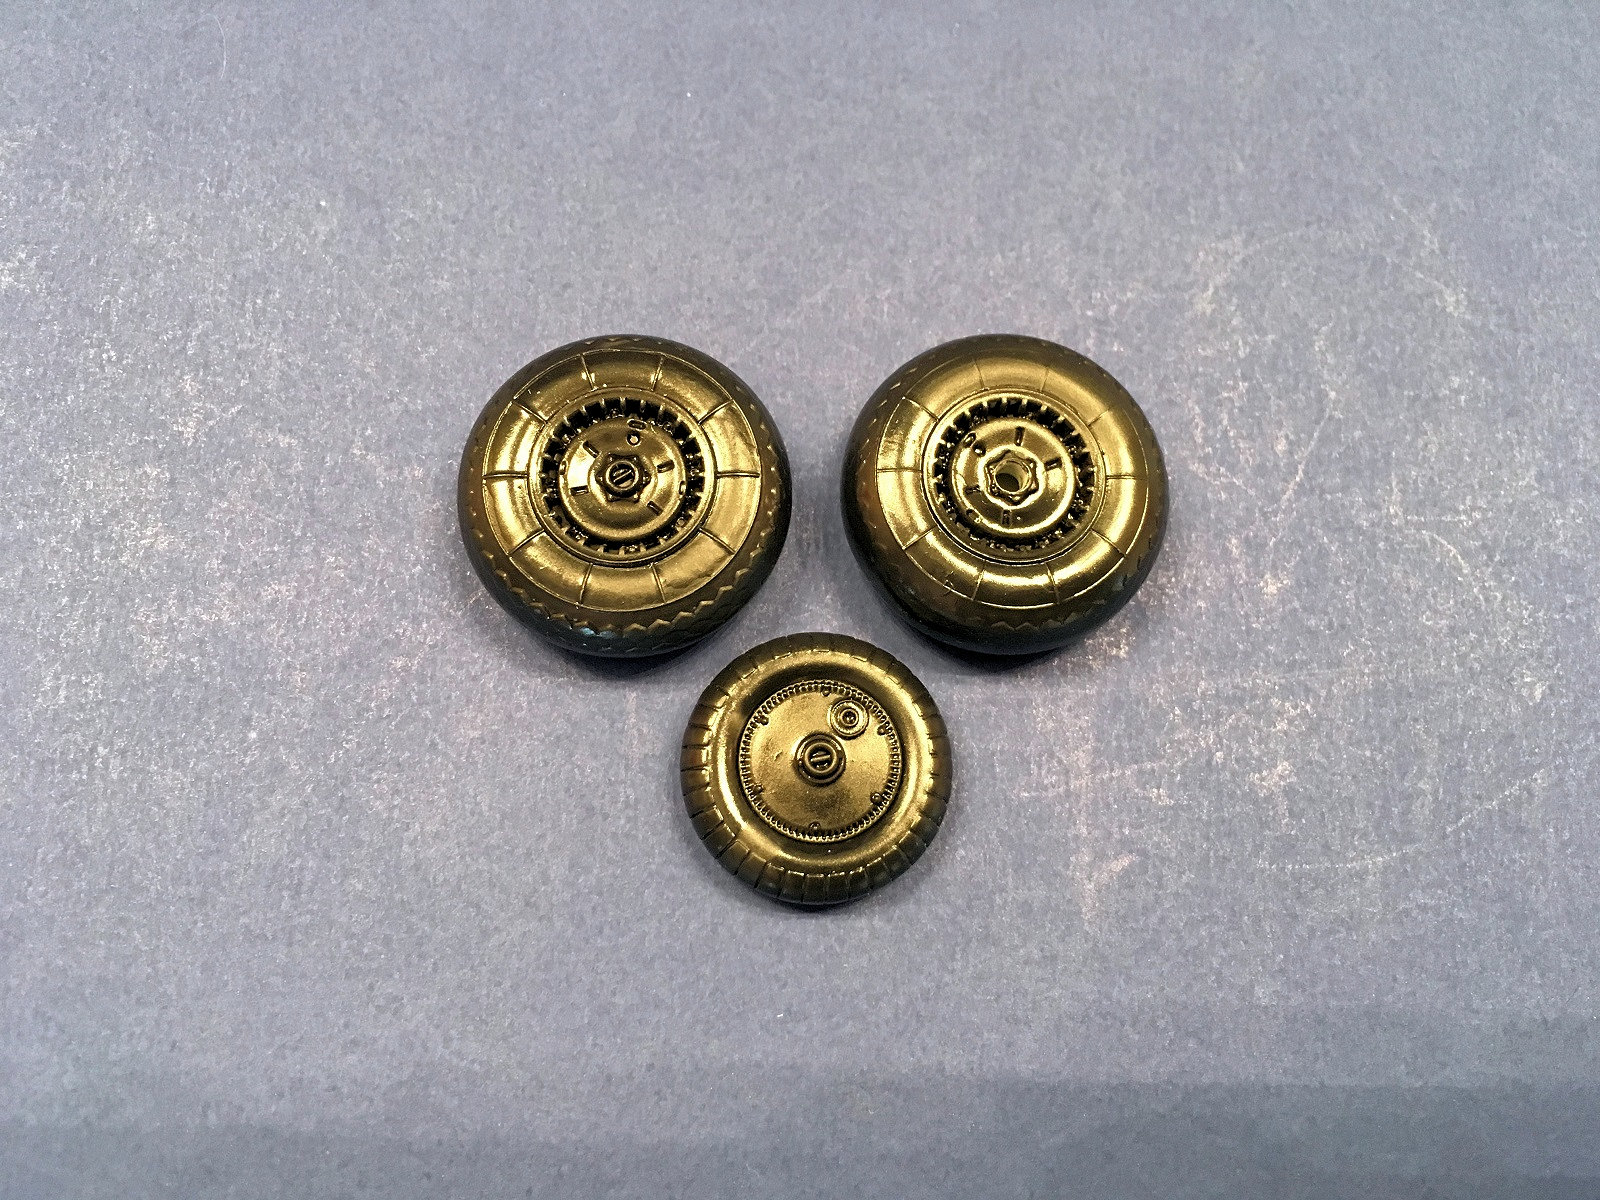
The rest of the build was uneventful. The landing gear legs and retraction struts slot into place, as do the gear doors and linkages. All the Antenna’s fit fine. The Neptune radar is delicate and care is needed to remove them from the sprue. I used a razor saw and careful sanding. The kit wheels have very nice hub detail. Unfortunately, like most standard kit wheels, the tread fades to little or nothing where the two halves come together. The main wheel oval tread pattern would be hard to scribe, and while not necessary, I replaced them with Eduard resin wheels, which also include tire flat spots.
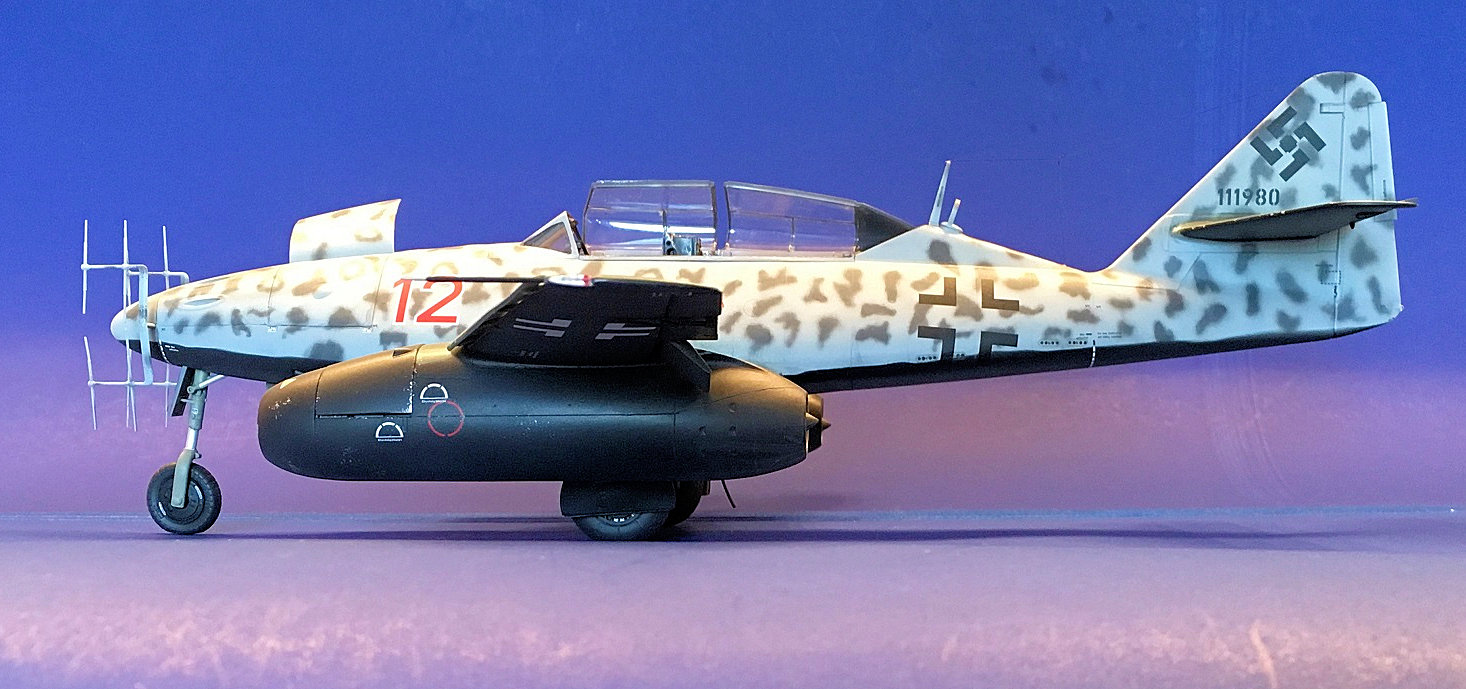
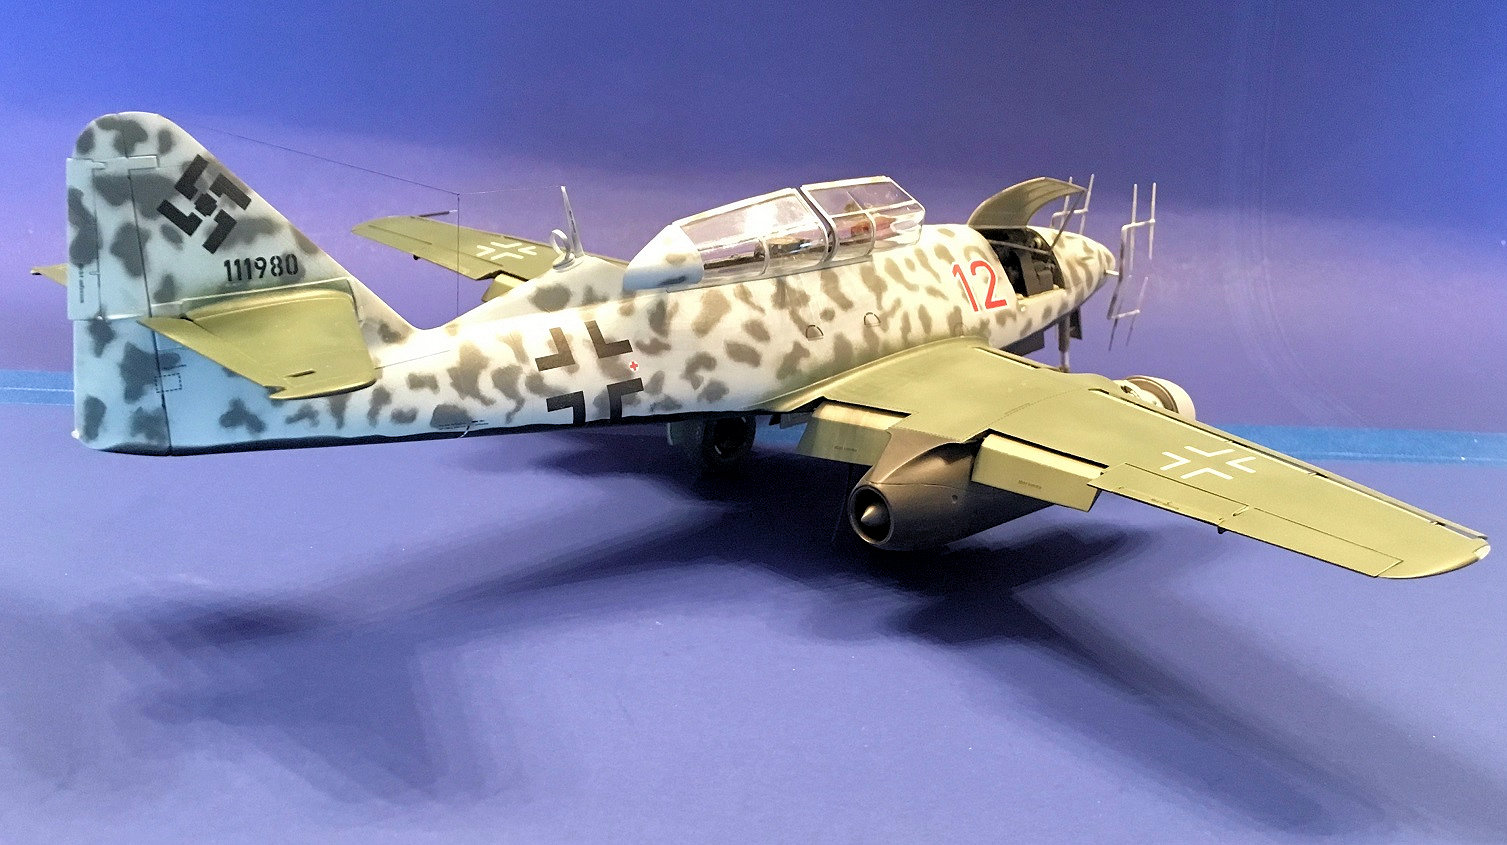
I painted the camouflage scheme for Red 12. Looking at the two pictures I found of Red 12 on the web, the instructions and box art are not quite correct for this aircraft. What I painted is strictly not correct either as the real aircraft shows circles painted all over the fuselage instead of mottles. There are only pictures of the left side, so who knows what the right looked like. I included a few circles after I saw the pictures. One of the pictures showed it post war with an RAF roundel and fin flash painted over the German markings. An interesting modeling option! I used Model Master Enamels and their RLM numbers throughout the build, and Model Master Acrylics for the gloss and flat coats. I have to admit the mottles on the box art look more appealing from a marketing stand point that messy circles would have.
The decals are really well done, and all stencils are legible (if you can read German). They laid down beautifully with a little Microsol over a gloss base. Several decals were numbered wrong on the instruction sheet: Decal number 3 and 47 need switching, 42 should be 32, 27 should be 24. 26 is the stencil on the nose gear door and also indicated for a stencil of some kind not shown on the left outboard flap. I added the Swastikas to the tail from my decal collection. This segmented Swastika is correct for Red 12. As Revell is a German company, it is illegal to include this Nazi symbol. I completely appreciate this, but as most modelers do, I added them simply for historical accuracy.
After a flat coat (with just a hint of gloss), the canopies, lights, Neptune radar, antenna’s and antenna wire were the last items to be installed.
This kit is rated “5”which is the highest on Revell’s difficulty scale. I would agree with this rating and recommend it to more experienced builders. Despite some of the challenges, I very much enjoyed building this model of an important aircraft that was pivotal in the development of the early jets. It can be said that many of the remarkable innovations are still used today! It is a very menacing, shark like weapon and I certainly would not have wanted to be on the receiving end of those cannons sitting inside a Lancaster or Wellington during those cold dark nights of 1944/45. Revell has certainly done this aircraft justice and it makes a great addition to my model room.
I would like to thank Revell and the IPMS for the opportunity to build and critique this kit.


Comments
Add new comment
This site is protected by reCAPTCHA and the Google Privacy Policy and Terms of Service apply.
Similar Reviews