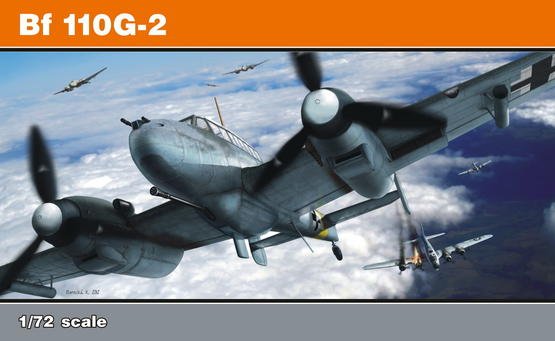
Messerschmitt Bf-110G-2
Eduard continues downsizing their 1/48 Bf-110 family to 1/72 with their latest G-2. I have wanted a G series forever, as the Italeri and Frog renditions leave a lot to be desired. You get a total of 194 parts in dark gray plastic, clear plastic, and etch. You also get canopy masks to make painting the frames easier. There are four decal options. The moldings are flash free and the panel lines are recessed and finely done. Some parts won’t be used and some are offered in both plastic and etch, so you will have bits left over for the spares box or perhaps to help dress-up other Bf-110s you have in your stash. The instructions are clear and easy to follow.
I started with the cockpit as usual; there are plenty of details out of the box, no need to add anything. Construction was straightforward; again, as with their C, the G didn’t pose any issues. You get really nice MG 81 Zwilling rear guns with etch crosshairs. The cockpit was painted Tamiya German gray and all the details painted in the various colors as per the instructions.
Construction proceeded without any problems. The fit of the engine nacelles to the wing was fiddly, just like the 110C. The fit here is very tight and needs a little trimming to avoid a step; however, even after a few sessions of trimming and sanding, I didn’t get the fit 100% — I didn’t learn my lesson from the 110C. All the exterior parts were then prepared, and as with the 110C, I made my own clothesline antenna from brass wire and plastic bits (I still think mine looks better). Everything was then prepared for the paint shop.
I painted my 110G in RLM74/RLM75 topside with mottle sides over RLM76. I used Gunze Aqueous for these colors. After a few re-touches here and there, the model was coated in Future to prepare for decals. I chose marking option “B”, Wespen nose art for 5/ZG 1. I’ve always wanted to do this option since seeing Don Greer’s artwork on the back of Squadron’s In Action on the Bf-110. The decals performed flawlessly, except I screwed up part of the Wespe on the port side over one of the MGs. In my haste, I didn’t give the setting solutions sufficient time to form the decal around the protruding MG, and the decal left a permanent wrinkle in that area. If I was to do it again, I would have held off inserting the MG barrel into the nose cone and installed it after decaling.
The canopy masks saved a lot of time painting; there are more frames on the G when compared to the C. Next, the canopies were added to the model and posed in the open position. Then all the other exterior bits were added. Some light weathering was done in the form of random paint chips and exhaust streaks. Final touch-ups done, the 110G was placed next to my newly built 110C. These are definitely the best 110s in 1/72. I like them so much I bought more 110Cs, 110G-2s, and the night fighter 110G-4. Do yourself a favor and build one – you won’t be disappointed.
Thanks to Eduard and to IPMS/USA for the opportunity to review this product.


Comments
Add new comment
This site is protected by reCAPTCHA and the Google Privacy Policy and Terms of Service apply.
Similar Reviews