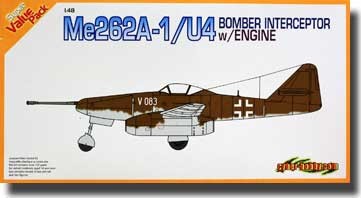
Me-262A-1/U-4
A little quick history. As the Germans got deeper into trouble at the end of WWII, the started trying more and more desperate things to try to stem the inevitable. One of these was to "up" gun the Me262 with a 50mm Mauser Mk 214A V3. That is what this kit depicts. Now to what's in the box: life for this kit started out in the Trimaster range many years ago (late 1980's or so) and the molds went to DML/Dragon who got rid of the white metal with plastic and now on to Dragons bargain line, Cyber-hobby. At the time of the initial release, the Trimaster kits were the most detailed Me262's around with, at the time, revolutionary photoetch included and extensive detailing.
The build starts with the cockpit and wheel wells and there are not issues. For the wheel wells, a large part is PE and needs to be built aligned properly so take your time. The sprue attachments are a little thick and take some work to get smooth. One quick tip, heat the stainless PE until orange and let it cool. It softens it up a bit and helps with the seatbelts and bendable parts. The cannon bay opens and has a great representation of the cannon and its large shells. This was built and painted also and includes the front gear bay. One note: LOTS of ejector pin marks which I covered with plasticard as they were in very difficult places to sand.
All that done, I closed up the fuselage and built the wings. One of the options with the wings is to have one or both of the Jumo 004 engines exposed and two very nice engines are included. I like the shape of the 262 so I used the closed nacelles. Fit here is a bit iffy and even with time, putty will be required and more when the nacelles are attached to the wings. The wheel bays are built and attached to the bottom wing. As most who know these kits are aware, there are no flaps or slats present in the kit. It was ready to attach the wing and here's another tip. The back part of the finished wing just has a butt joint with the fuselage. To get it to mate better, attach a small piece of plastic card at the back to the wing to adhere too.
I built and test fit the landing gear and was ready for paint. Xtracolor RLM 76 on the bottoms and RLM 81/81 splinter on the wings and 81 on the fuselage - nice, easy scheme. The decals went on well and I thought I was coming down the home stretch - NOT. After the decaling, I wanted to get the kit up on its gear. I added my finished and painted gear and plop - down on its tail it went. Hmmmmm - a tail sitter. I looked all over the instructions, not a word about adding any weight to the nacelles or the nose or anywhere else. I could leave as is and put a prop under it or ... tear my entire painted canon out and put some weight into the nose. Cursing heavily, I did the latter gingerly to my already painted and decaled kit. While I should have known that Me262 models are almost always tail sitters, it is not right not to have that anywhere in the instructions. I added the gun cover, puttied and repainted and was past the hard part.
I added a little weathering, the canopies which are remarkably thing and the small bits and was done. A shelf model but one of an interesting variant the no one else makes in any larger scale.
I can recommend this model to those with some patience and PE experience only. The price is superb for what you get and with some kits under your belt, a nice looking model can be made but it requires some skills. Also, put some weight in the nose!!!!!
My thanks to all the excellent people at Dragon Models USA for a chance to review the kit.


Comments
Add new comment
This site is protected by reCAPTCHA and the Google Privacy Policy and Terms of Service apply.
Similar Reviews