
Me 163S "Habich" Two-seat Trainer Glider
First, thanks to Pavla for first producing and then providing this kit to IPMS/USA for review; your excellent products continue to amaze me!
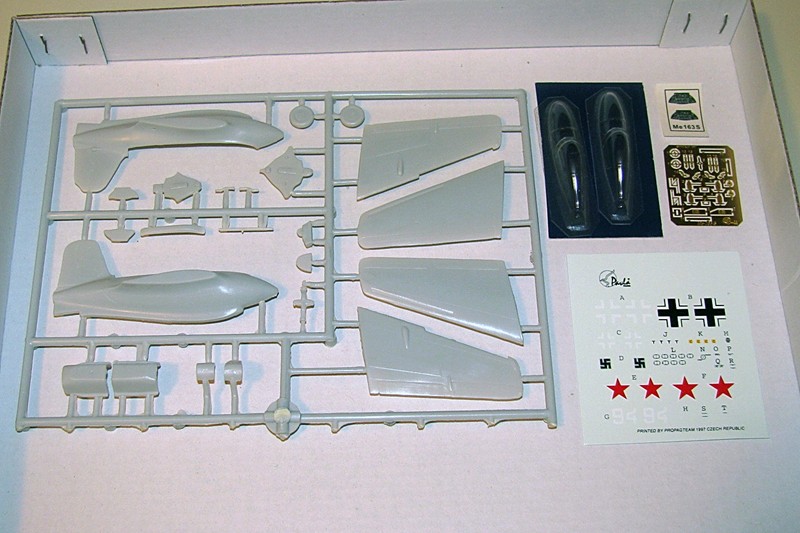
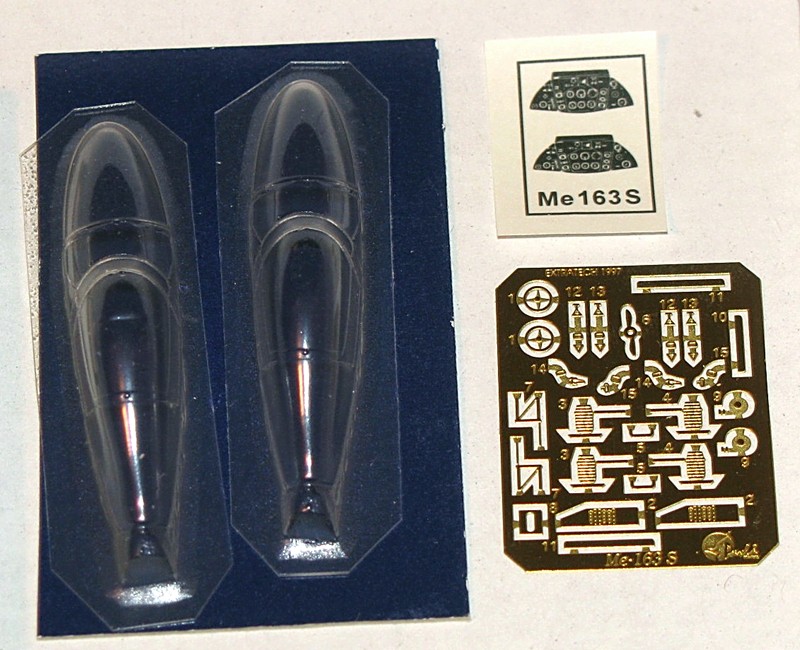
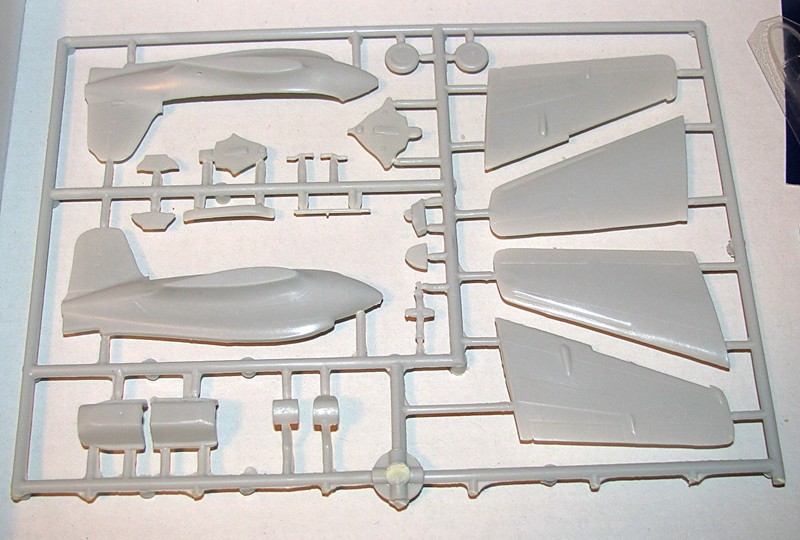
This is an extremely simple kit; yet it has complexity in the fact that it is a limited production item and therefore has ejection pin towers for cleanup. Fortunately these are all on the inside of the kit parts… it also has extremely small photoetch; be forewarned if you are an old guy like me. The overall presentation is excellent; I had little or no issues with getting things in place. The instructions are basic diagrams, showing where everything is supposed to go. I caused a minor problem in that the rear cockpit needed to be installed a bit higher than I installed it, as there are no locating pins or rails. The kit contains a runner of parts, one Photoetch fret, two excellent clear canopies, and a decal sheet with optional Luftwaffe and Soviet “captured aircraft” markings.
One other thing you, as a builder, need to know is that the ejection pins on the inside of the model are substantial. I tried to “clip” the ejection towers off the model and ended up with a hole to be filled behind the opening for the canopy. This was my entire fault. I should have (as I later determined and followed the practice of) used a Dremel tool to clean up the interior. These pins are also on the center of the wing halves; use a razor saw here and finish with sanding.
The interior is where I started; consisting of two basic seats, separate tubs, control sticks, and photoetch seat harnesses, levers, and trim wheels. Instrument panels are paper, to be cut out and glued in place. Use of a magnifier is recommended; this stuff is miniscule! I followed my usual practice of cementing the harnesses to the seats first, as they are unpainted, and then dry brushing. In this case, I installed everything, painted it dark gray, and then attempted the dry brushing. Nope; due to their size, I had difficulty painting details, so I just gave it a shot and called it good since the canopy was to be closed. At this point I installed the cockpit tubs; here’s where I erred in not having the rear one high enough. I had installed the canopy after assembling the model, but would recommend you go ahead and cut it out now to use as a height indicator for the rear tub.
Anyway, after cementing the fuselage together, the wings were next. You will have to carefully sand the butt joint for the wings after assembly; a bit of filler and it’s done. Same for the canopy; it will require filler (I used Vallejo, as it is appropriate for this type of work and doesn’t require sanding afterwards if you are careful). Mask, and to the paint shop!
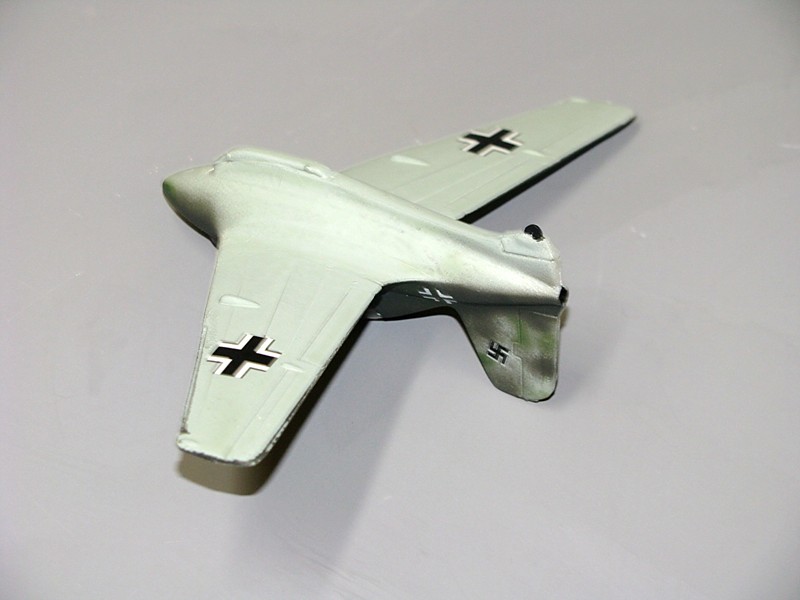
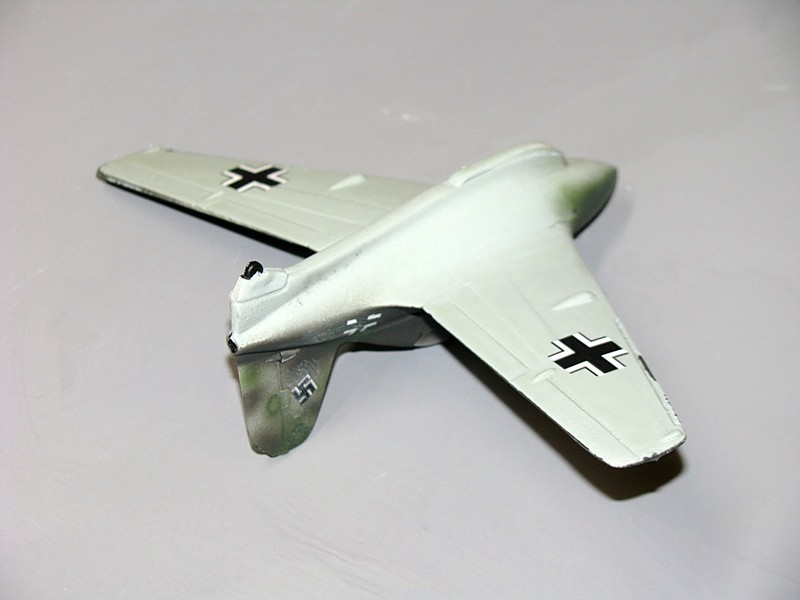
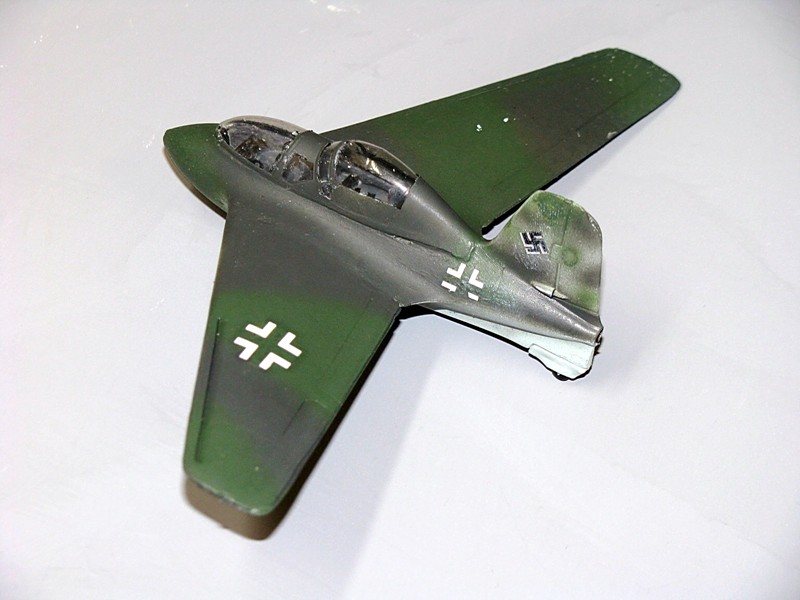
I used Tamiya Spray Luftwaffe German light blue to do the underside RLM 65 color; the upper colors were freehanded using RLM 81 and RLM 84 from Modelmaster’s acrylic range. A coat of gloss lacquer, and it was time for decals. These worked well except for the last upper wing cross; as I attempted to slide if off on to the model, it disintegrated into several pieces; at this point my self-imposed deadline prevailed, so there is no replacement yet on the right wing. After a dullcoating I was finished.
As this is a towed glider without an engine, I left off the “T” and “S” stoff fuel markings. I opted not to install the skid extended and launch dolly in place; all my past Me 163’s have been in the flight-ready position. I may use this model in a diorama someday “after flight”, even though the skid and tailwheel would normally be extended. OK, the real reason is the main structure for the skid is photoetch, and it went flying. Same for the nose prop. It was not my day… particularly since these items are about 1/8” long, so I didn’t even bother. No time to scratch build new ones, other projects loom in the murk.
All in all, a quick different weekend-kind of assembly; I would rate this model 8 on the scale for out of box building.


Comments
Add new comment
This site is protected by reCAPTCHA and the Google Privacy Policy and Terms of Service apply.
Similar Reviews