
McLaren MP4/2C
The McLaren MP4/2C is a legendary Formula 1 racing car that debuted in the 1986 season. Designed by Gordon Murray, the MP4/2C was highly successful. The car featured an aerodynamic design and innovative technical advancements.
Powered by a turbocharged TAG Porsche engine combined with the car's lightweight construction and advanced aerodynamics, it was hailed as a marvel of engineering, pushing the boundaries of Formula 1 racing.
The talented McLaren team, led by the exceptional Alain Prost, enjoyed a remarkable 1986 season. Prost's stellar performance not only secured him the drivers' championship but also clinched the Constructors' Championship for McLaren. The MP4/2C's outstanding performance and reliability were pivotal factors in the team's triumphant campaign that year.
The Kit
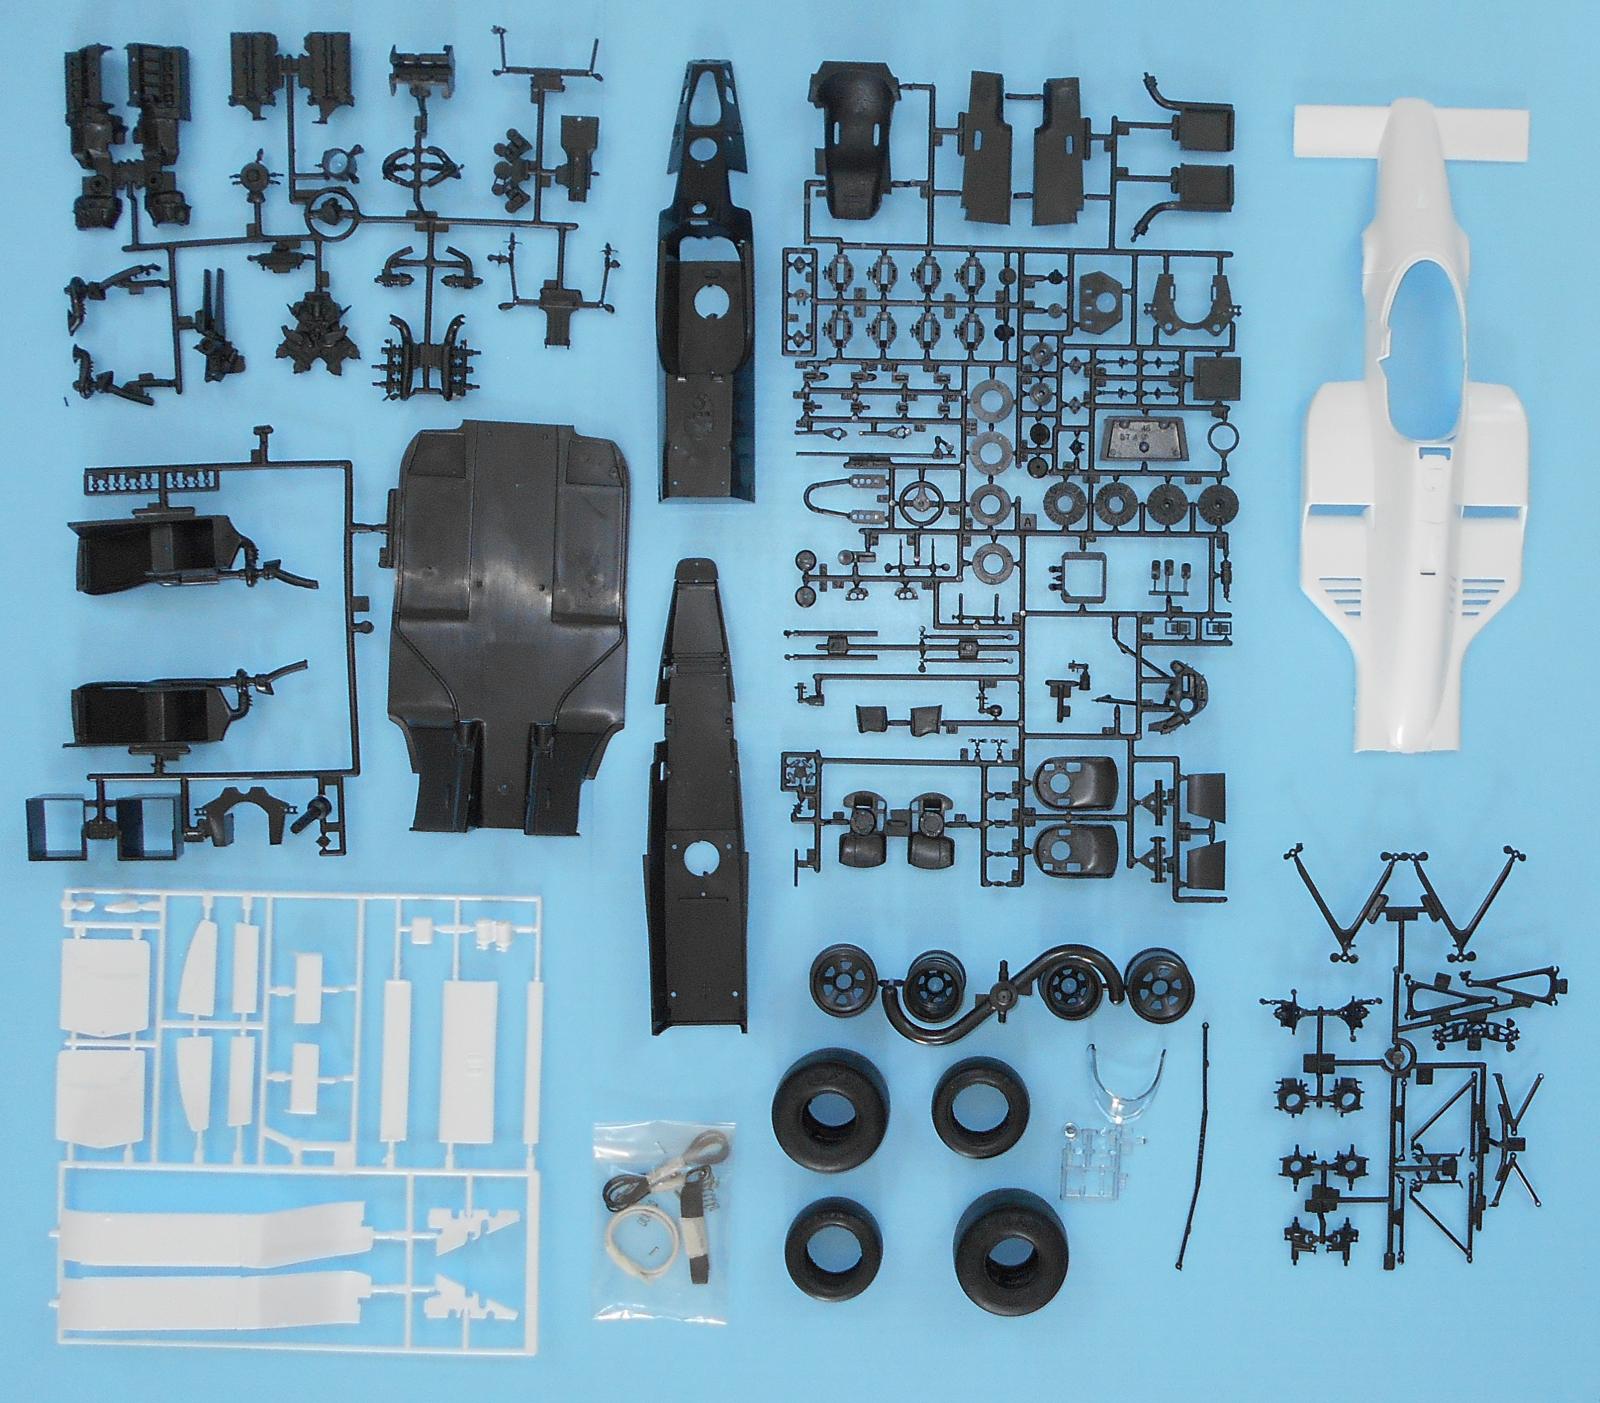
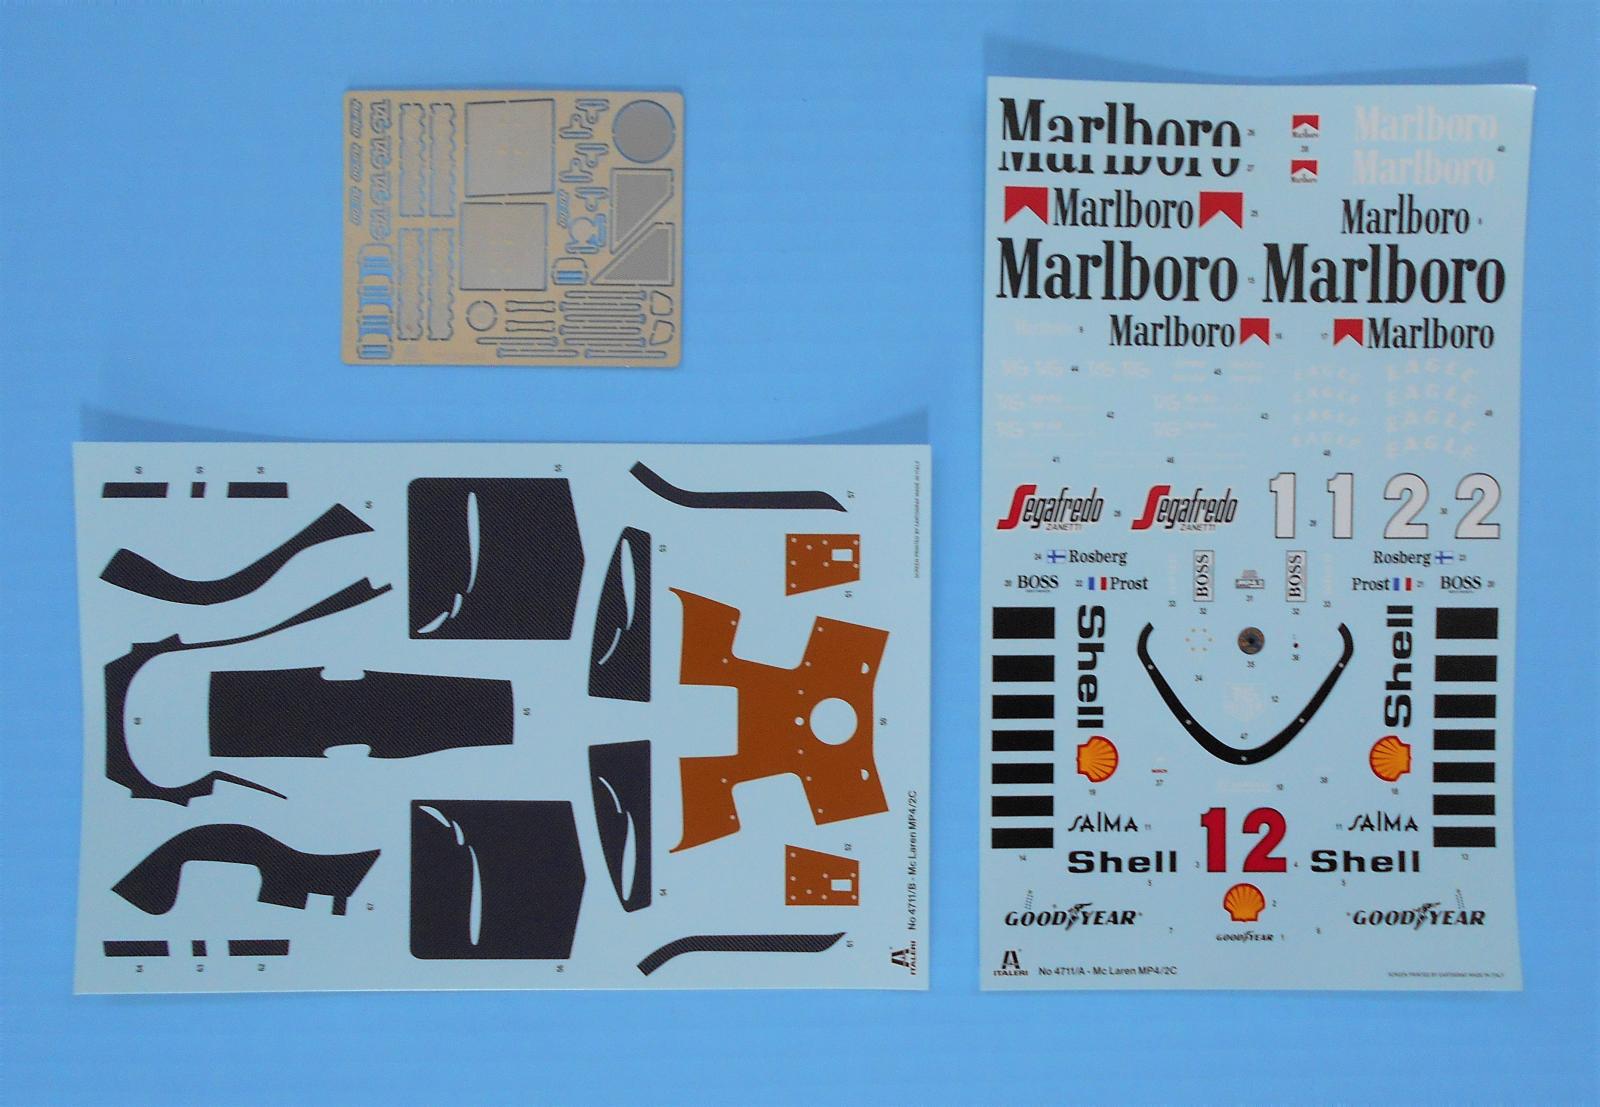
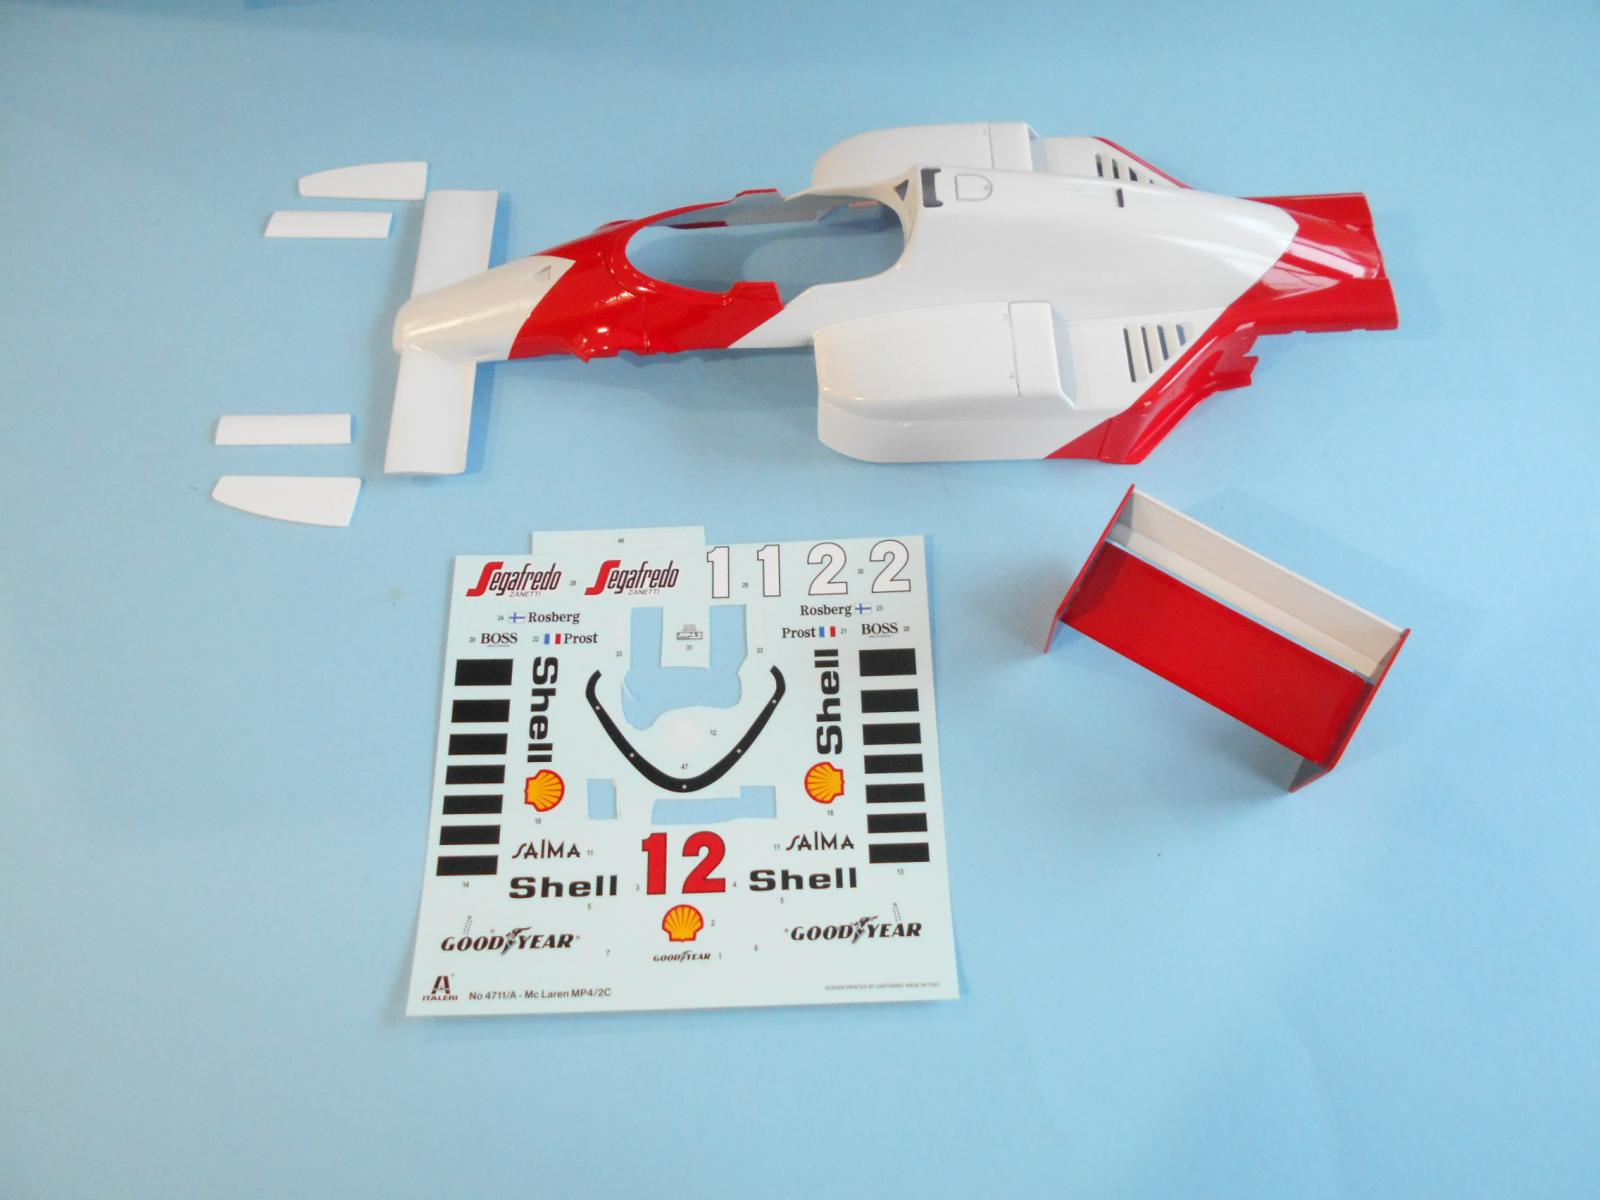
This is an enhanced reboxing of the kit originally released by Protar in 1986. The kit has over 250 parts molded in black, white, and clear with rubber tires, screws, wires, springs, etc., 41 Photoetch parts, and includes new Cartograph waterslide decals sheets for the 1986 Championship #1 Alain Prost or 1986 Championship #2 Keke Rosberg.
The kit features a detailed active suspension - a highly detailed TAG Porsche engine – real rubber tires and a removable body cowling. This kit is rated at a skill level 5 for the advanced builder.
Finished dimensions are ~ L–14” x W-6¾ “ x H-3 “.
Construction
There are a lot of parts for this kit, and many of them are quite intricate and delicate. They will require extensive cleanup and test-fitting for a good result.
The decals that come with the kit are produced by Cartograph and are very good concerning color and register, but because they are so thin, it can be difficult to apply them without adequate surface water to arrange them on the model. They’ll also require a little longer to come loose from the carrier film than other brands. You’ll need to stretch them out to remove wrinkles and trapped water bubbles.
The PE tree comes with some nice items. It features two different engine script sets, grills, covers, seat belt hardware, and straps. Some of them will need to be painted.
The instructions are extensive and you’ll do well to study them in their entirety before you begin. Most details are well described but you need to examine the parts against the instructions to get an idea of location. All the parts are identified by number and sprue, including the decals, PE, and accessory items like tubing and screws. Pay careful attention to those identification numbers. Even so, some instructions are a bit vague and it appears certain tubes and wires are routed to nowhere, and just get tucked behind something else without clarification.
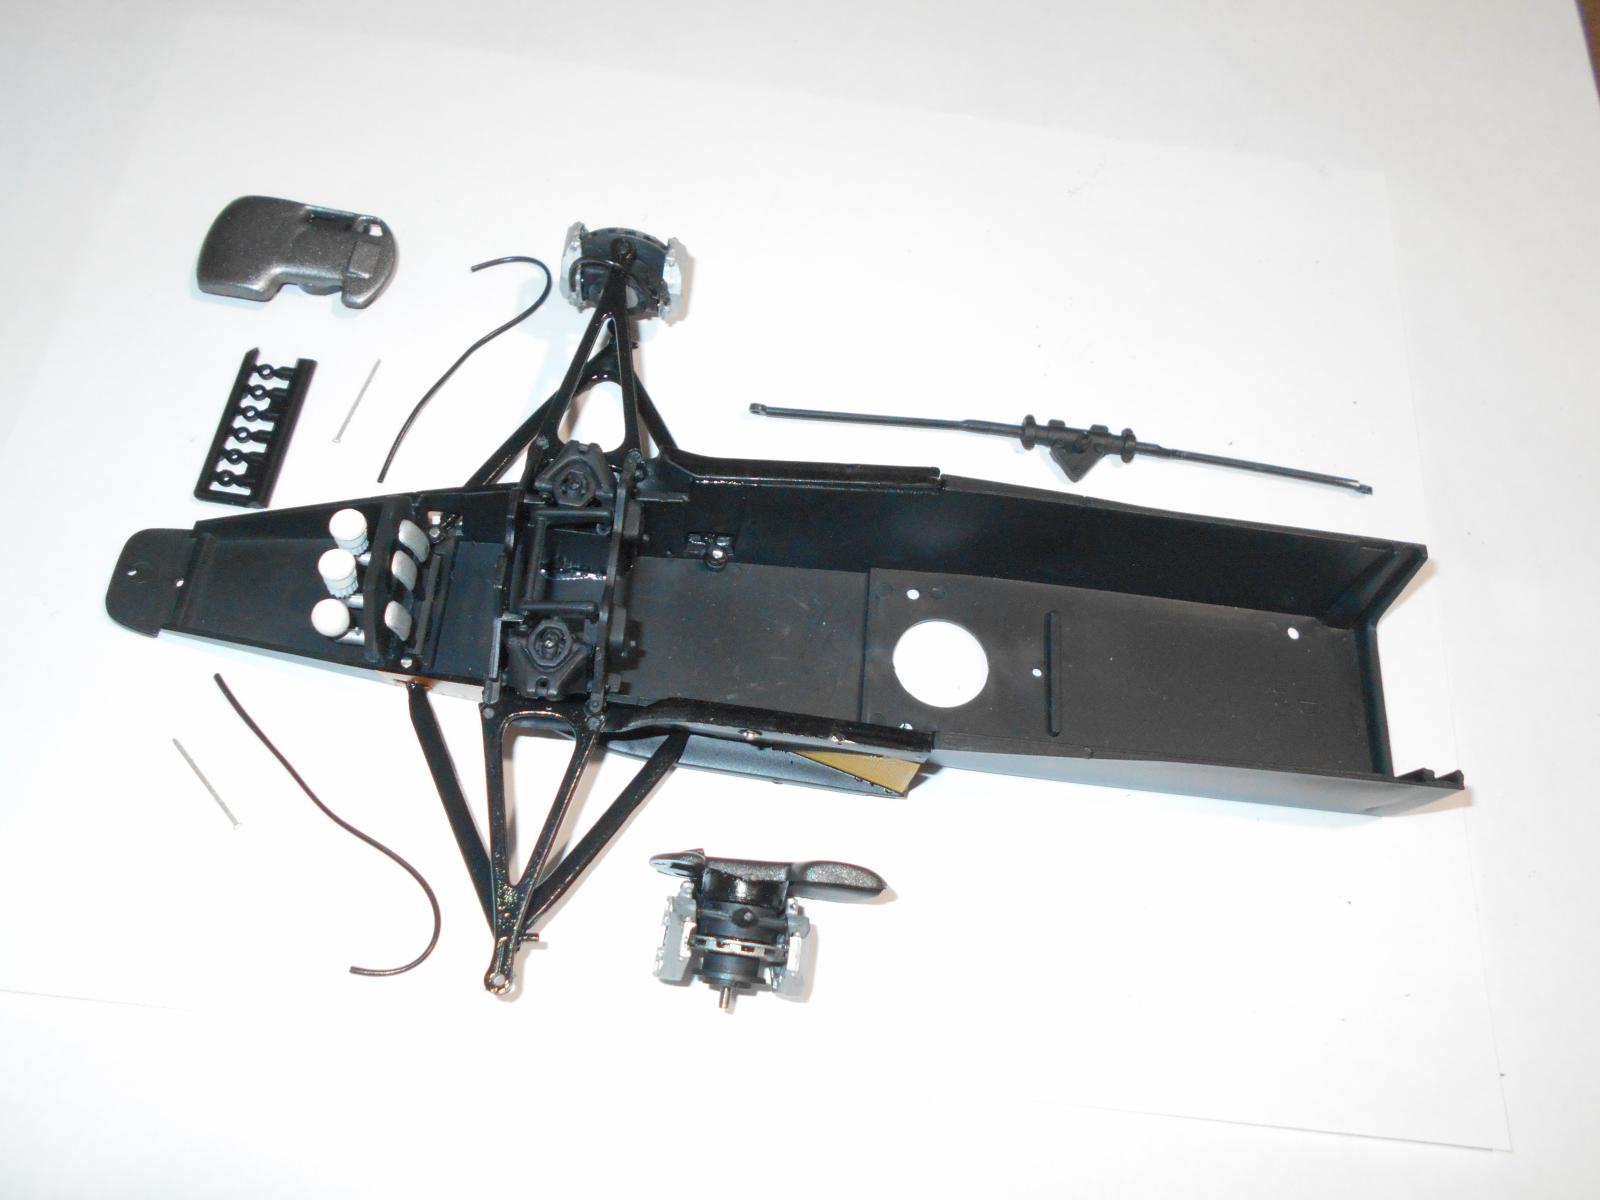
After marking up a copy of the instructions with paint colors, some bulk painting for white, black, and aluminum parts will help. Once dry, I started by reinforcing the mid/forward side panels with a thin strip of styrene on the backside of the molded-in crease for strength.
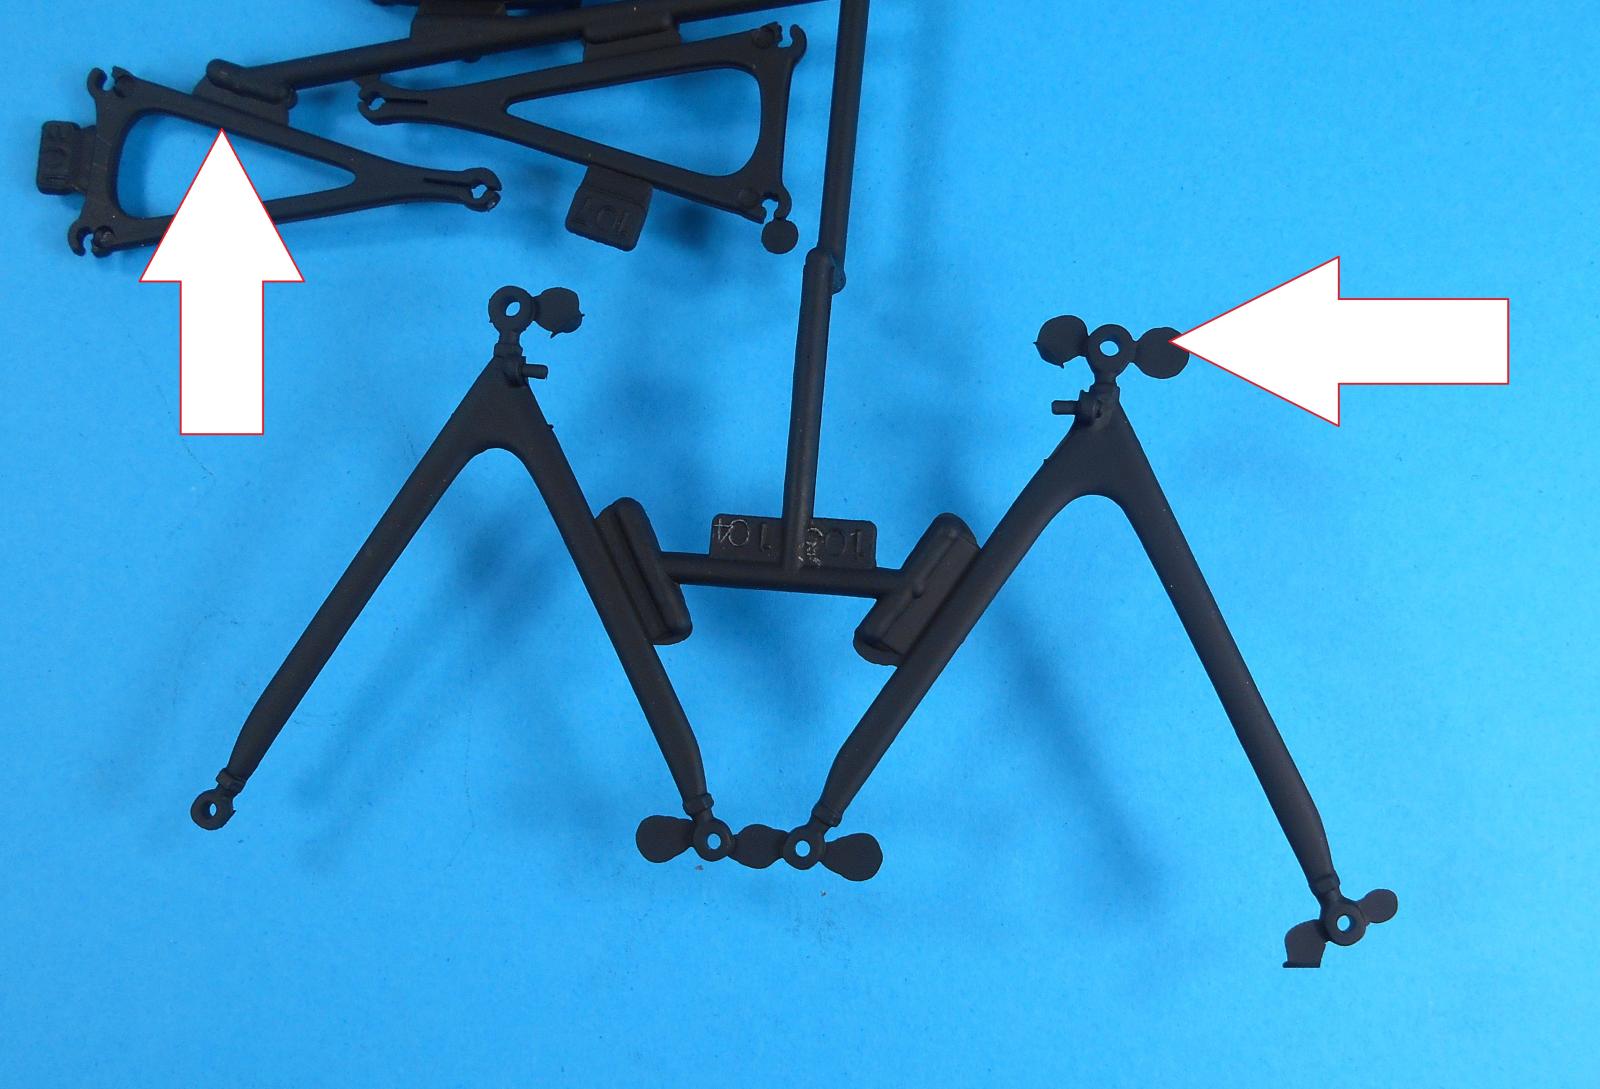
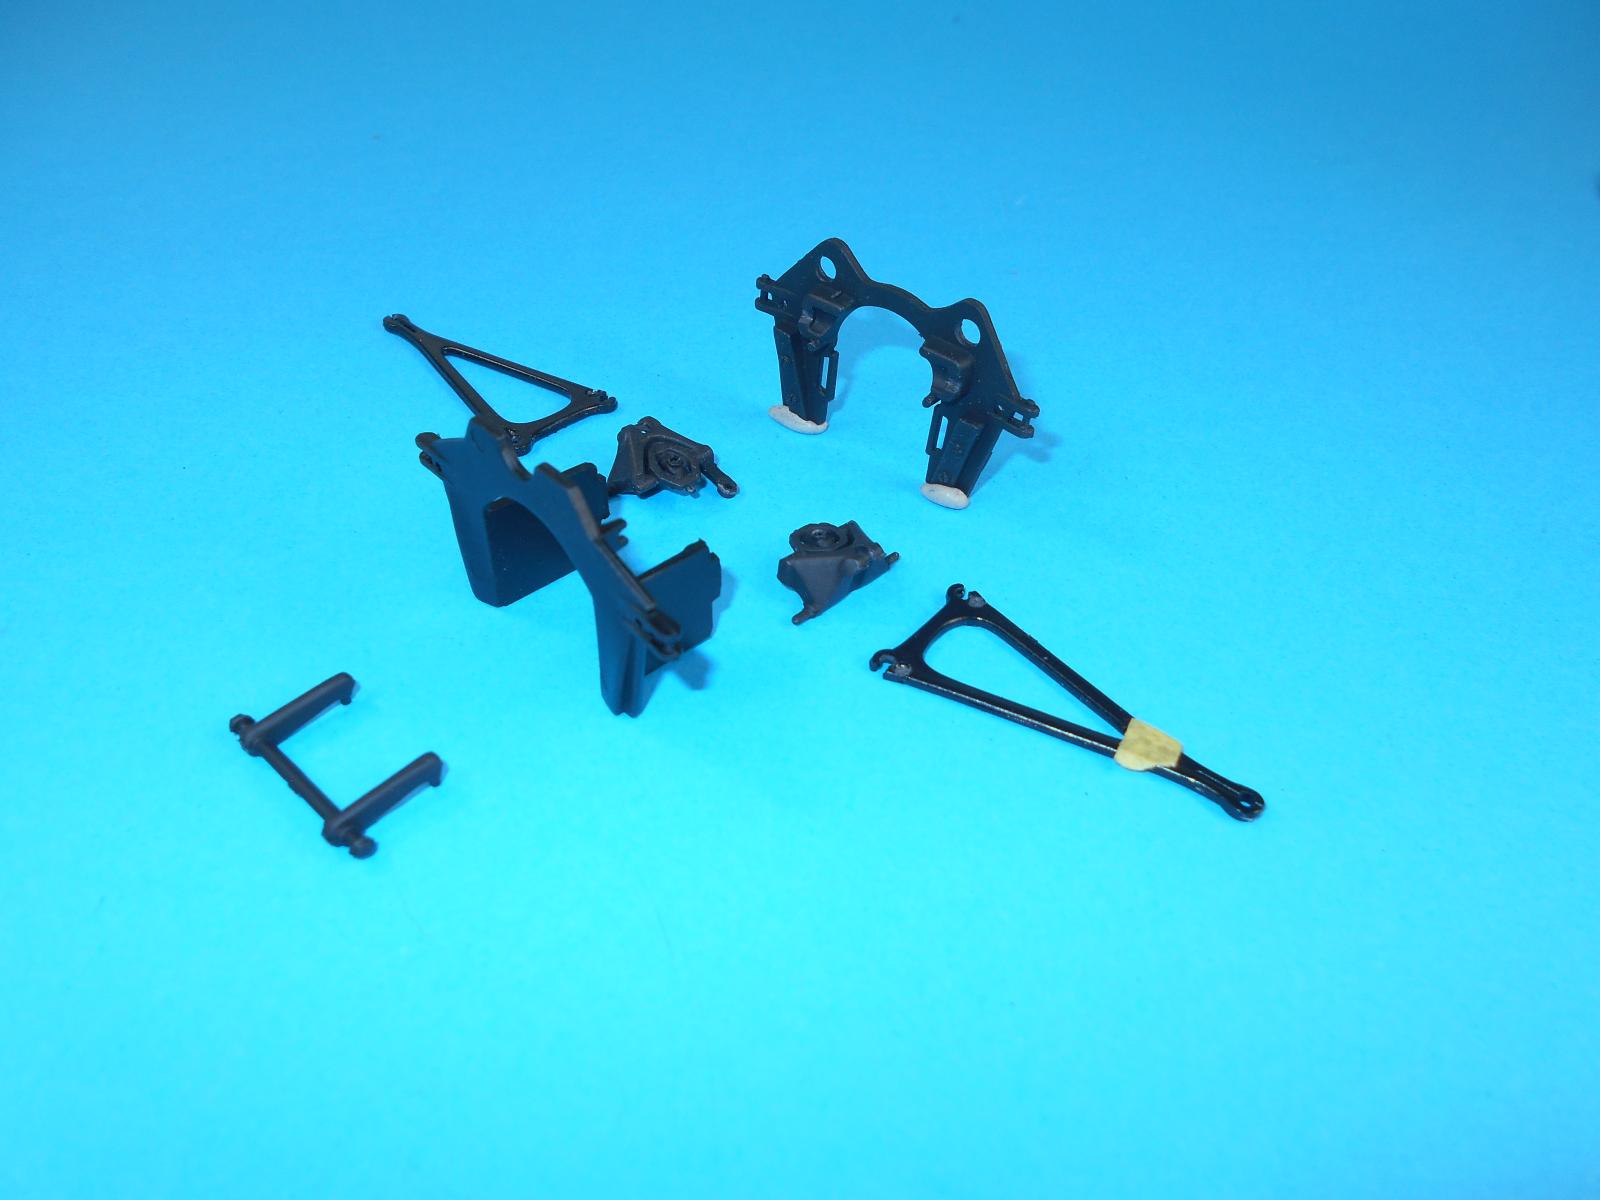
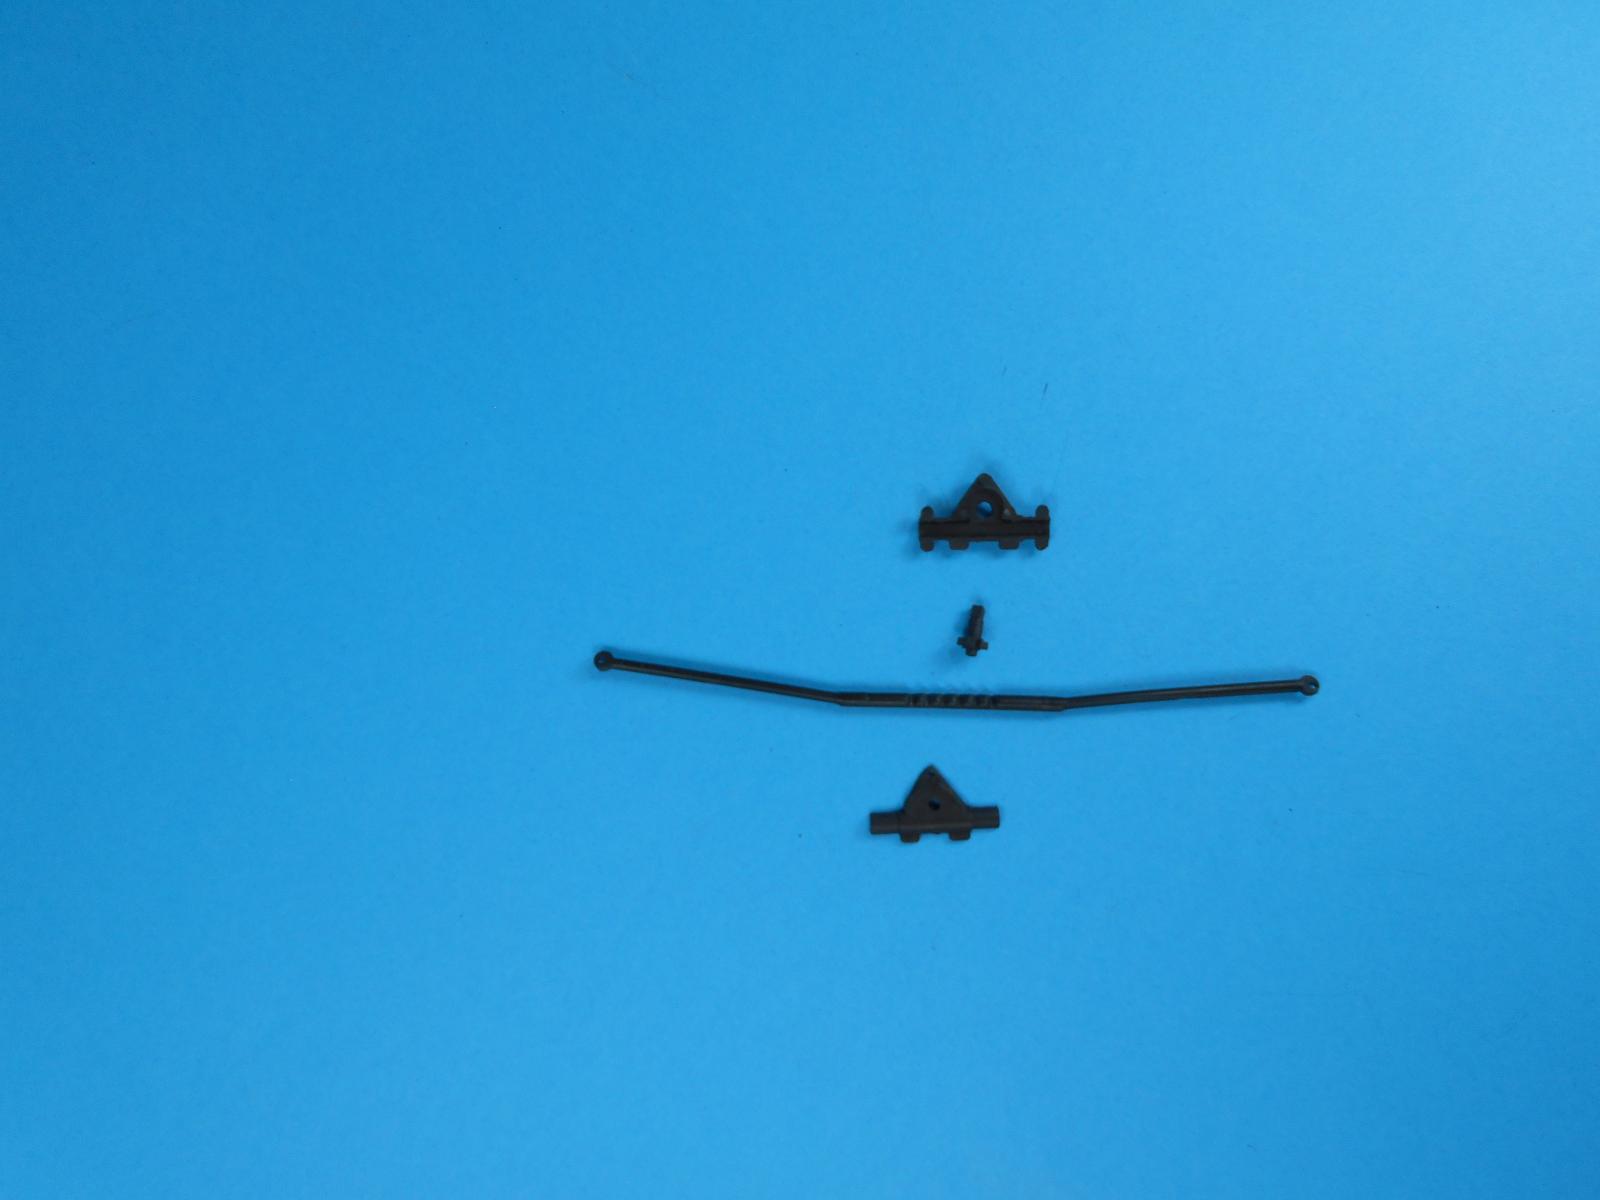
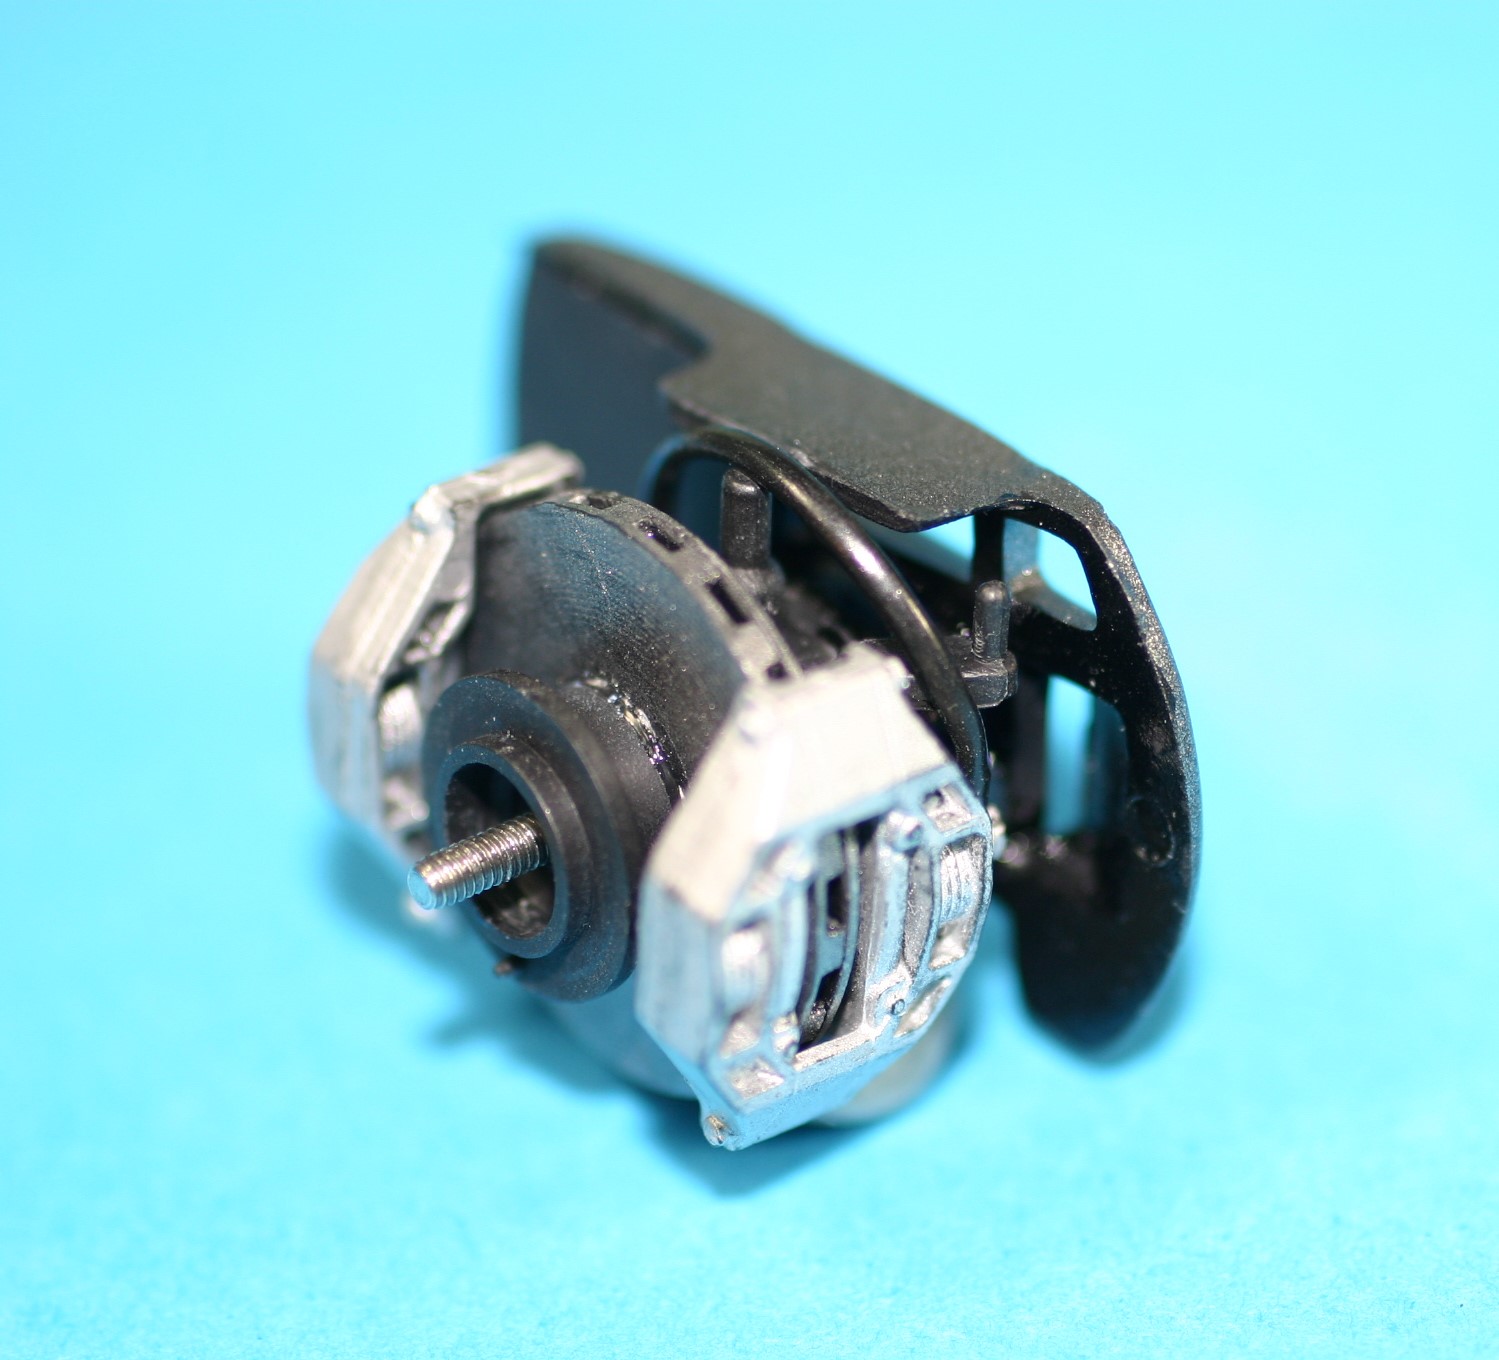
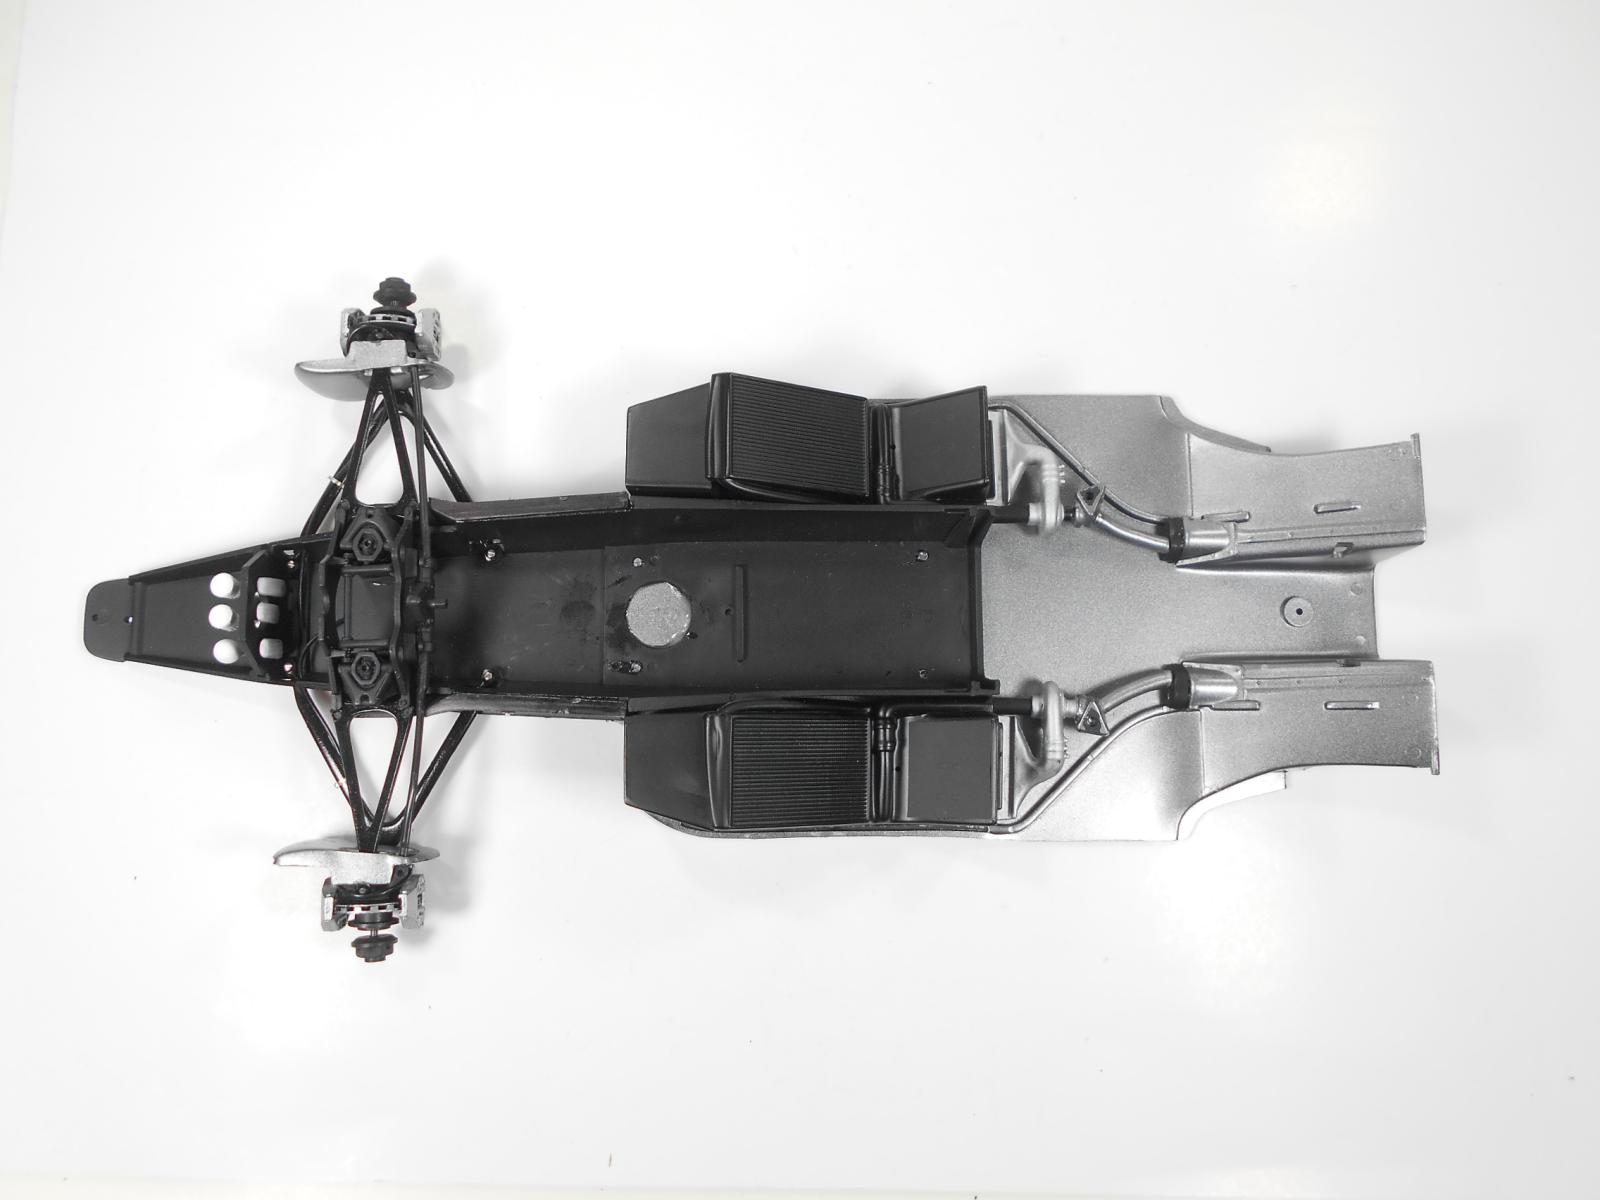
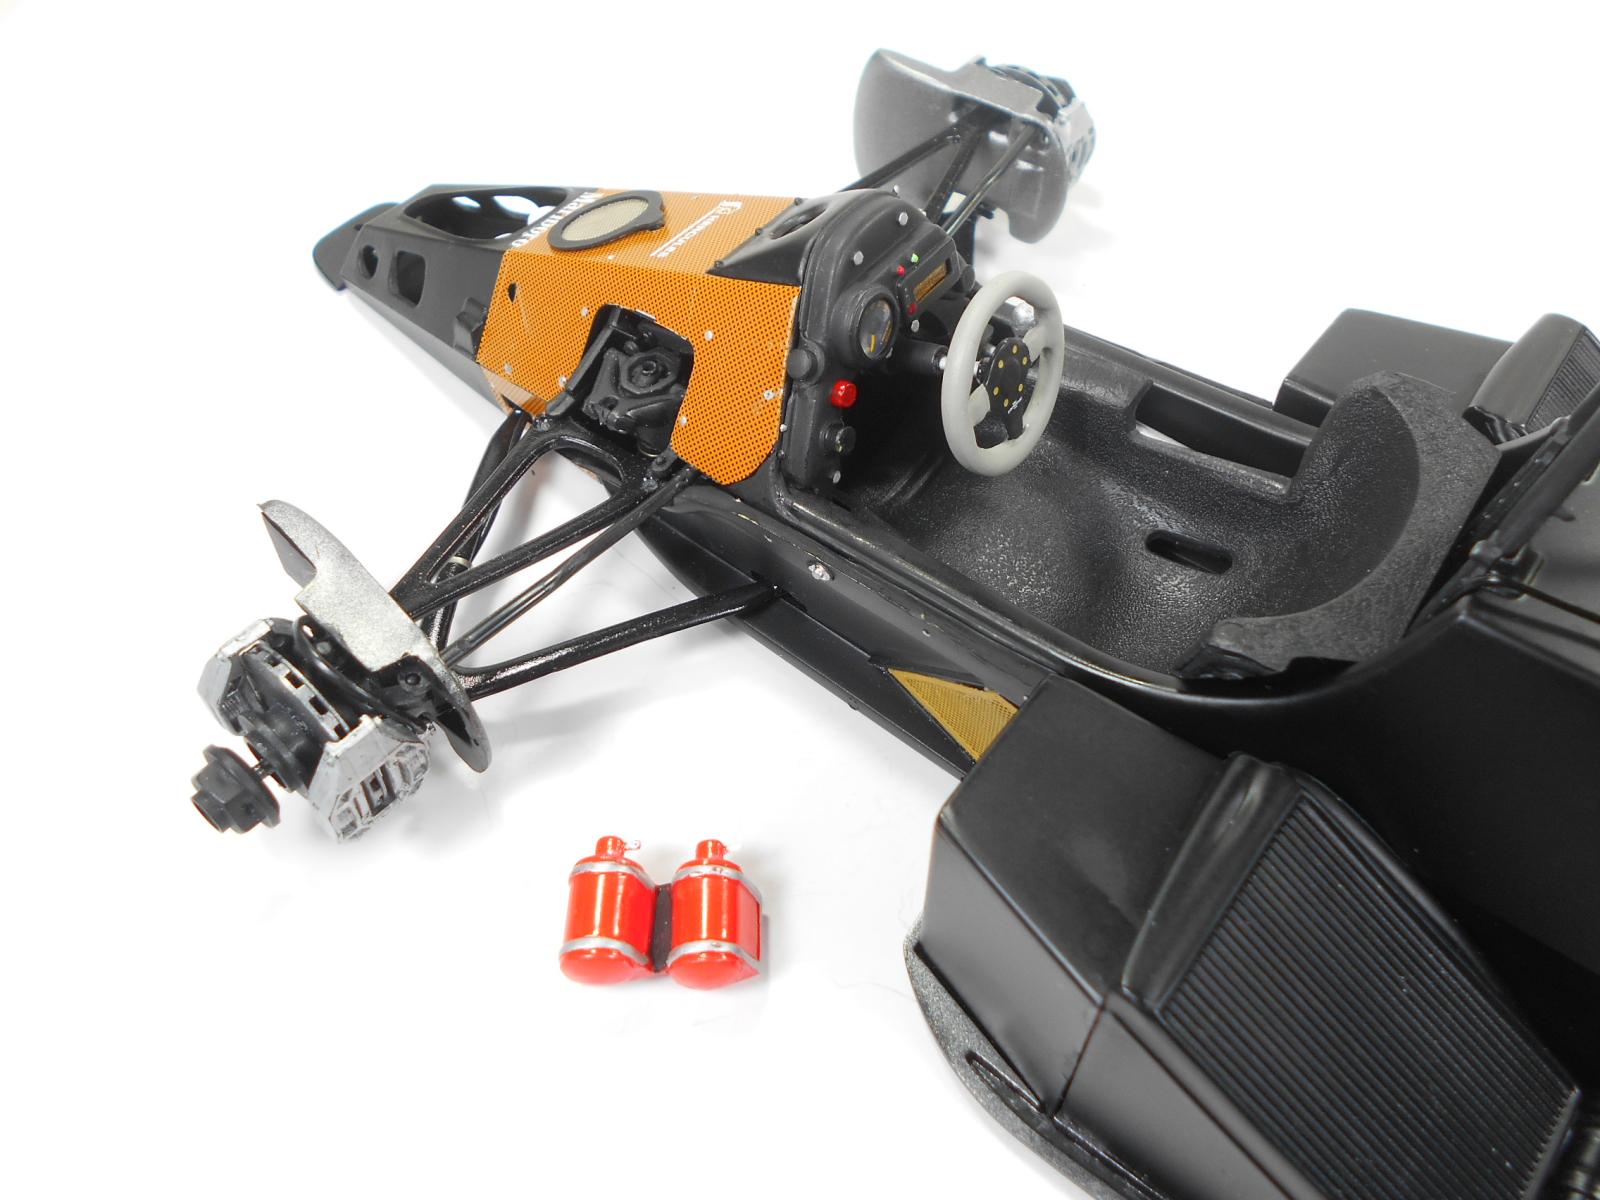
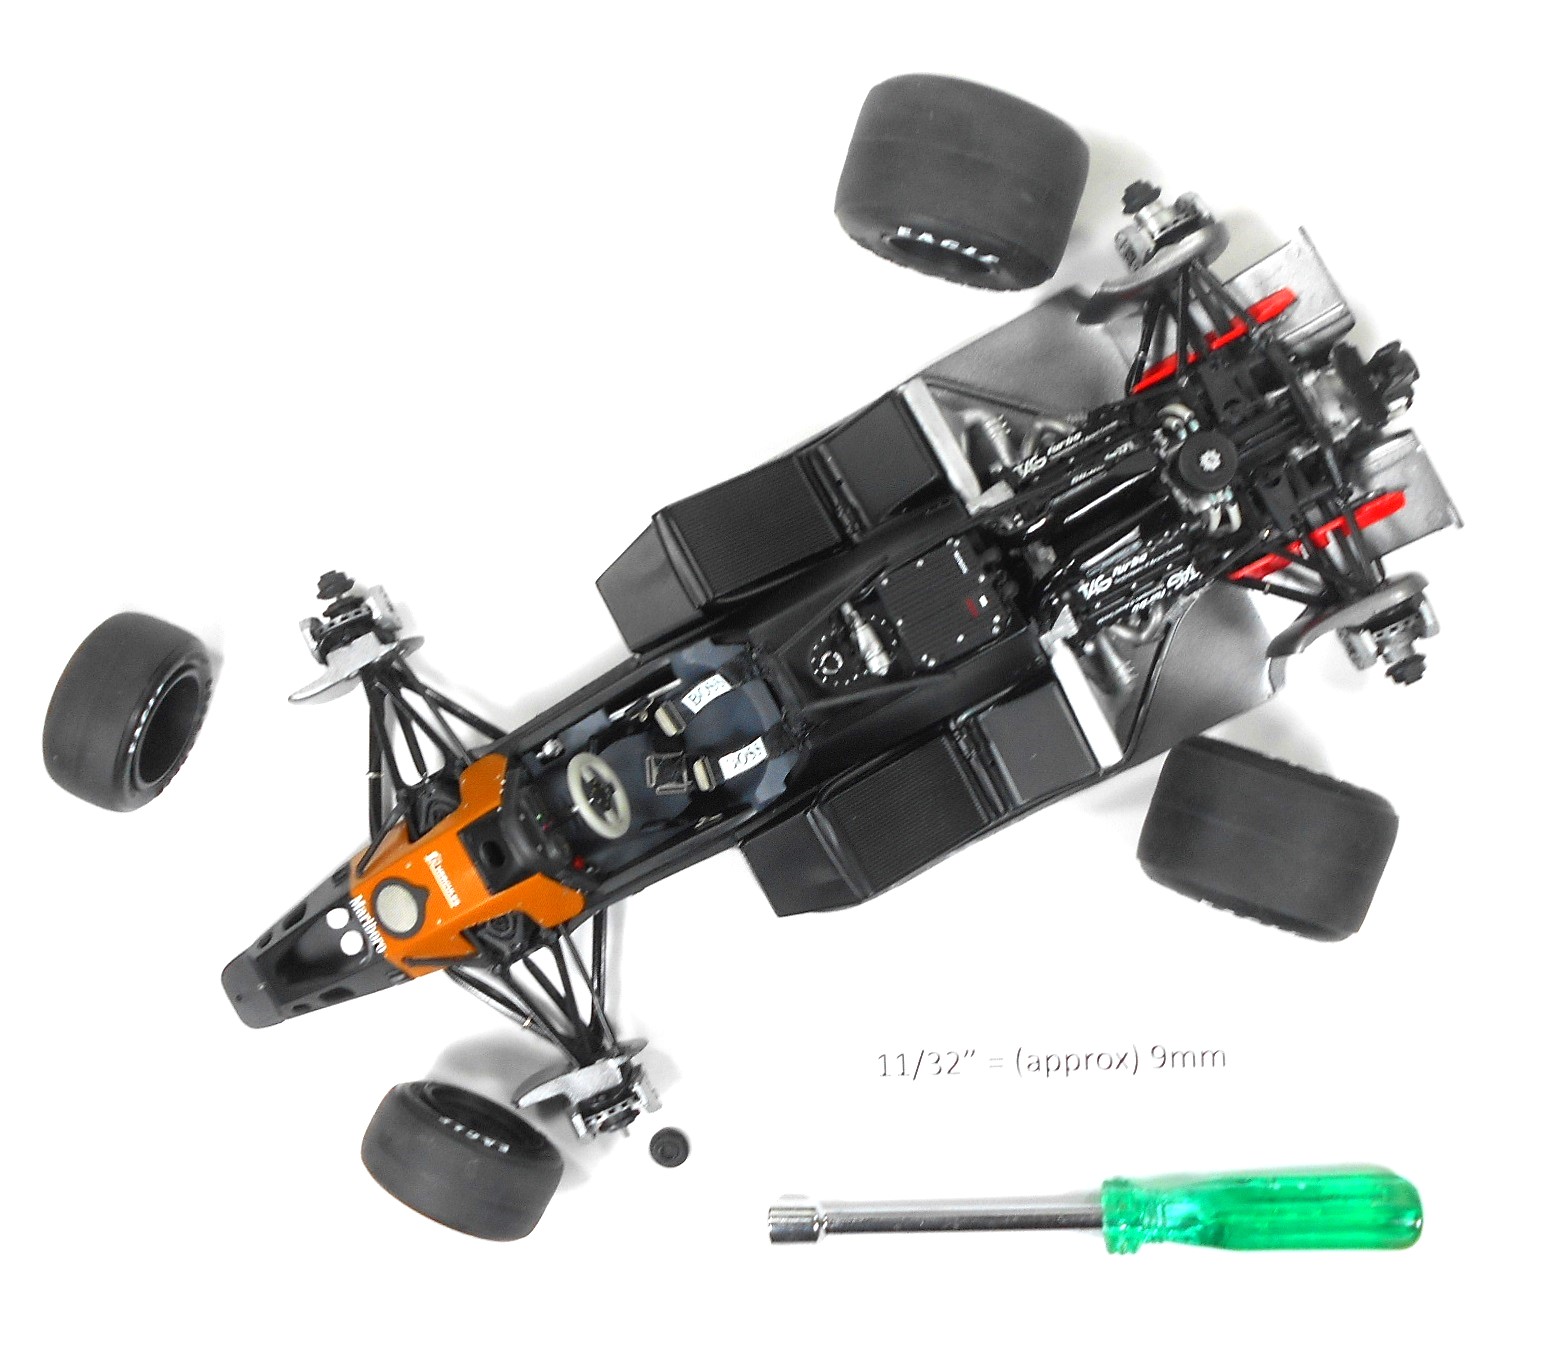
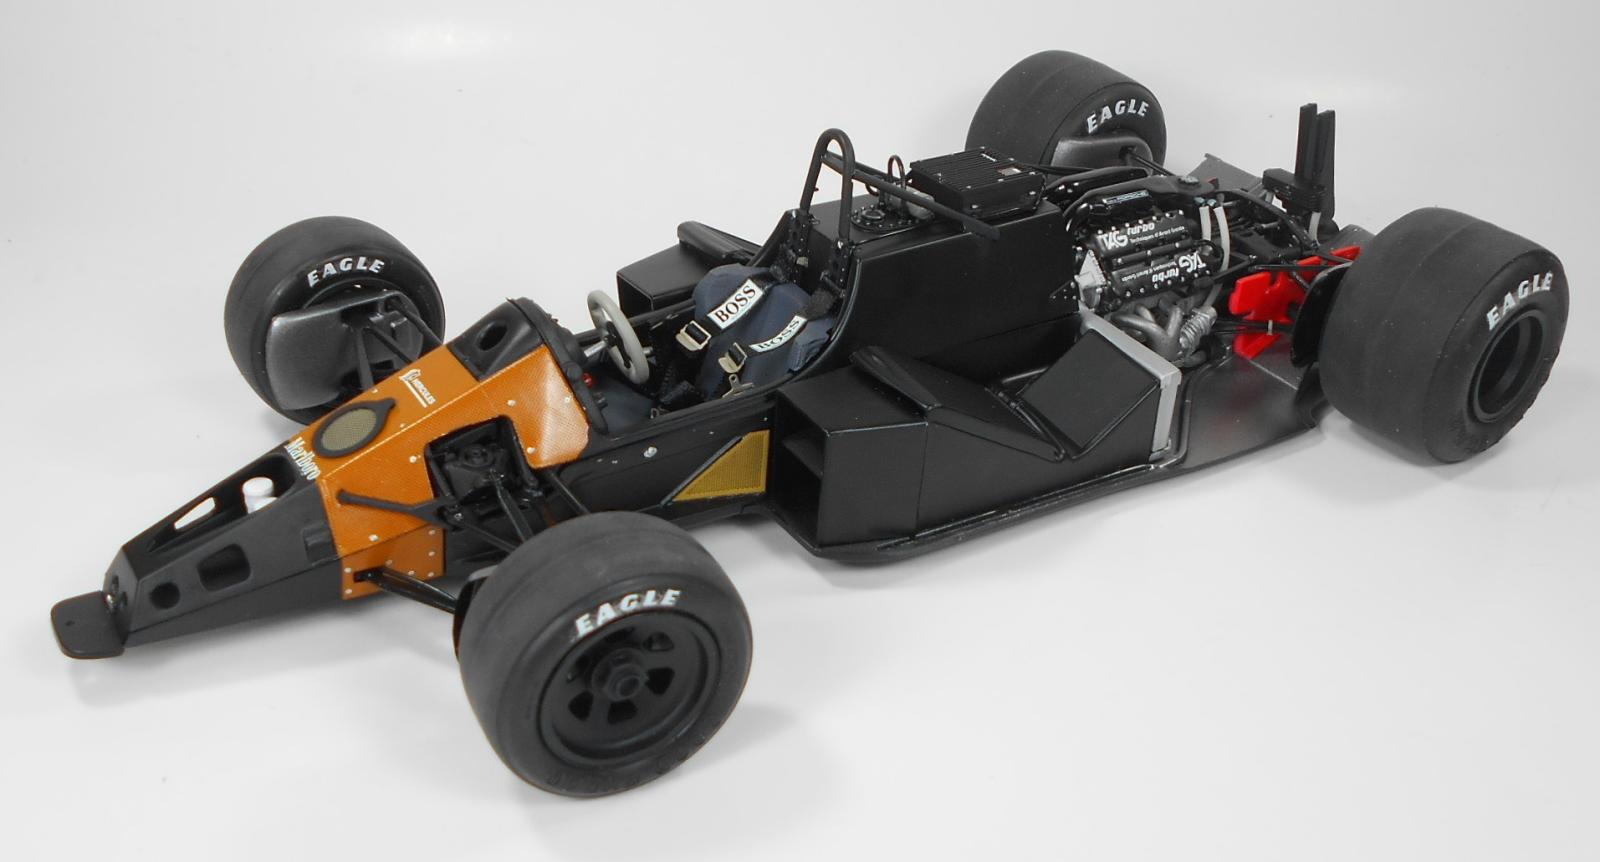
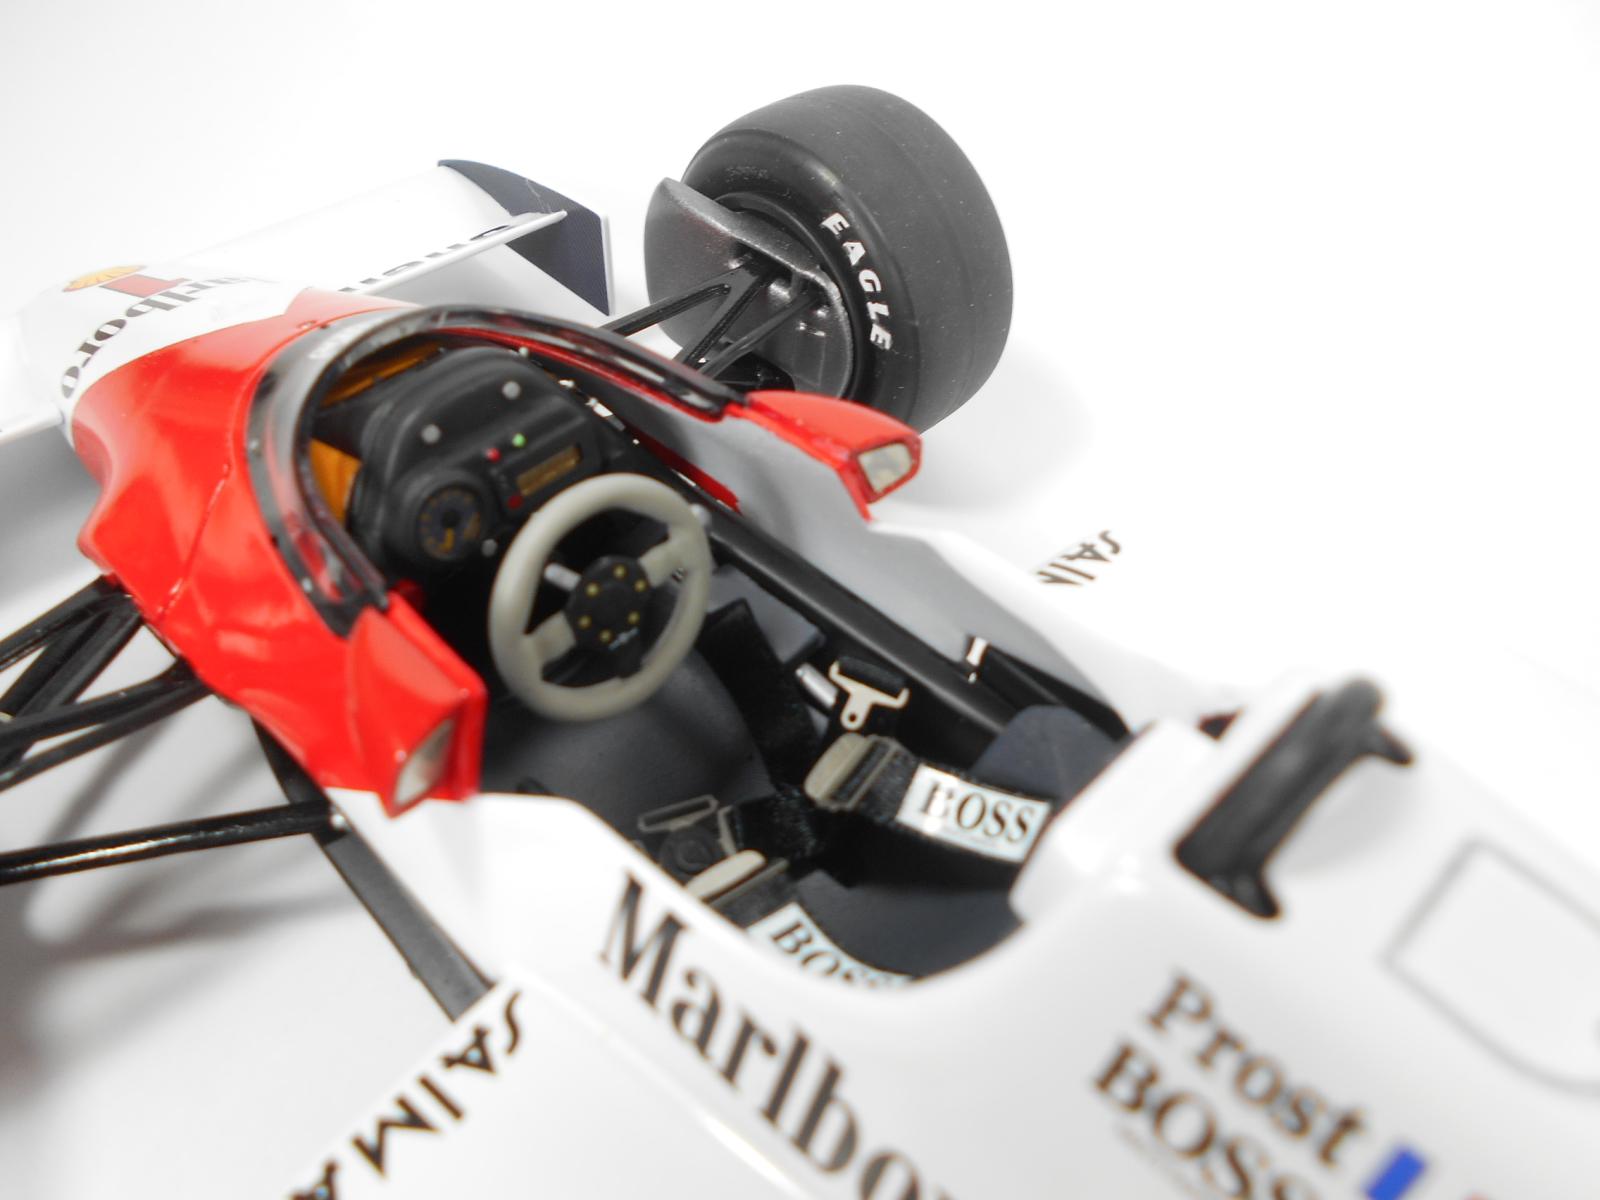
Assembly of the front suspension and bulkhead is first and it includes a genuine rack and pinion steering mechanism as well as active suspension metal springs. There are overflow sinks that must be carefully removed for some parts. You’ll have to make sure the items all move and function properly. Some gluing instructions should be avoided to allow unrestricted control arm motion and the rack and pinion gear needs opening up for smooth operation. Once the bulkhead/suspension is in place, the brakes and inner fenders are assembled and added up front. The brakes are quite detailed and clearance is tight, but they will rotate if the caliper is added with disk rotation in mind.
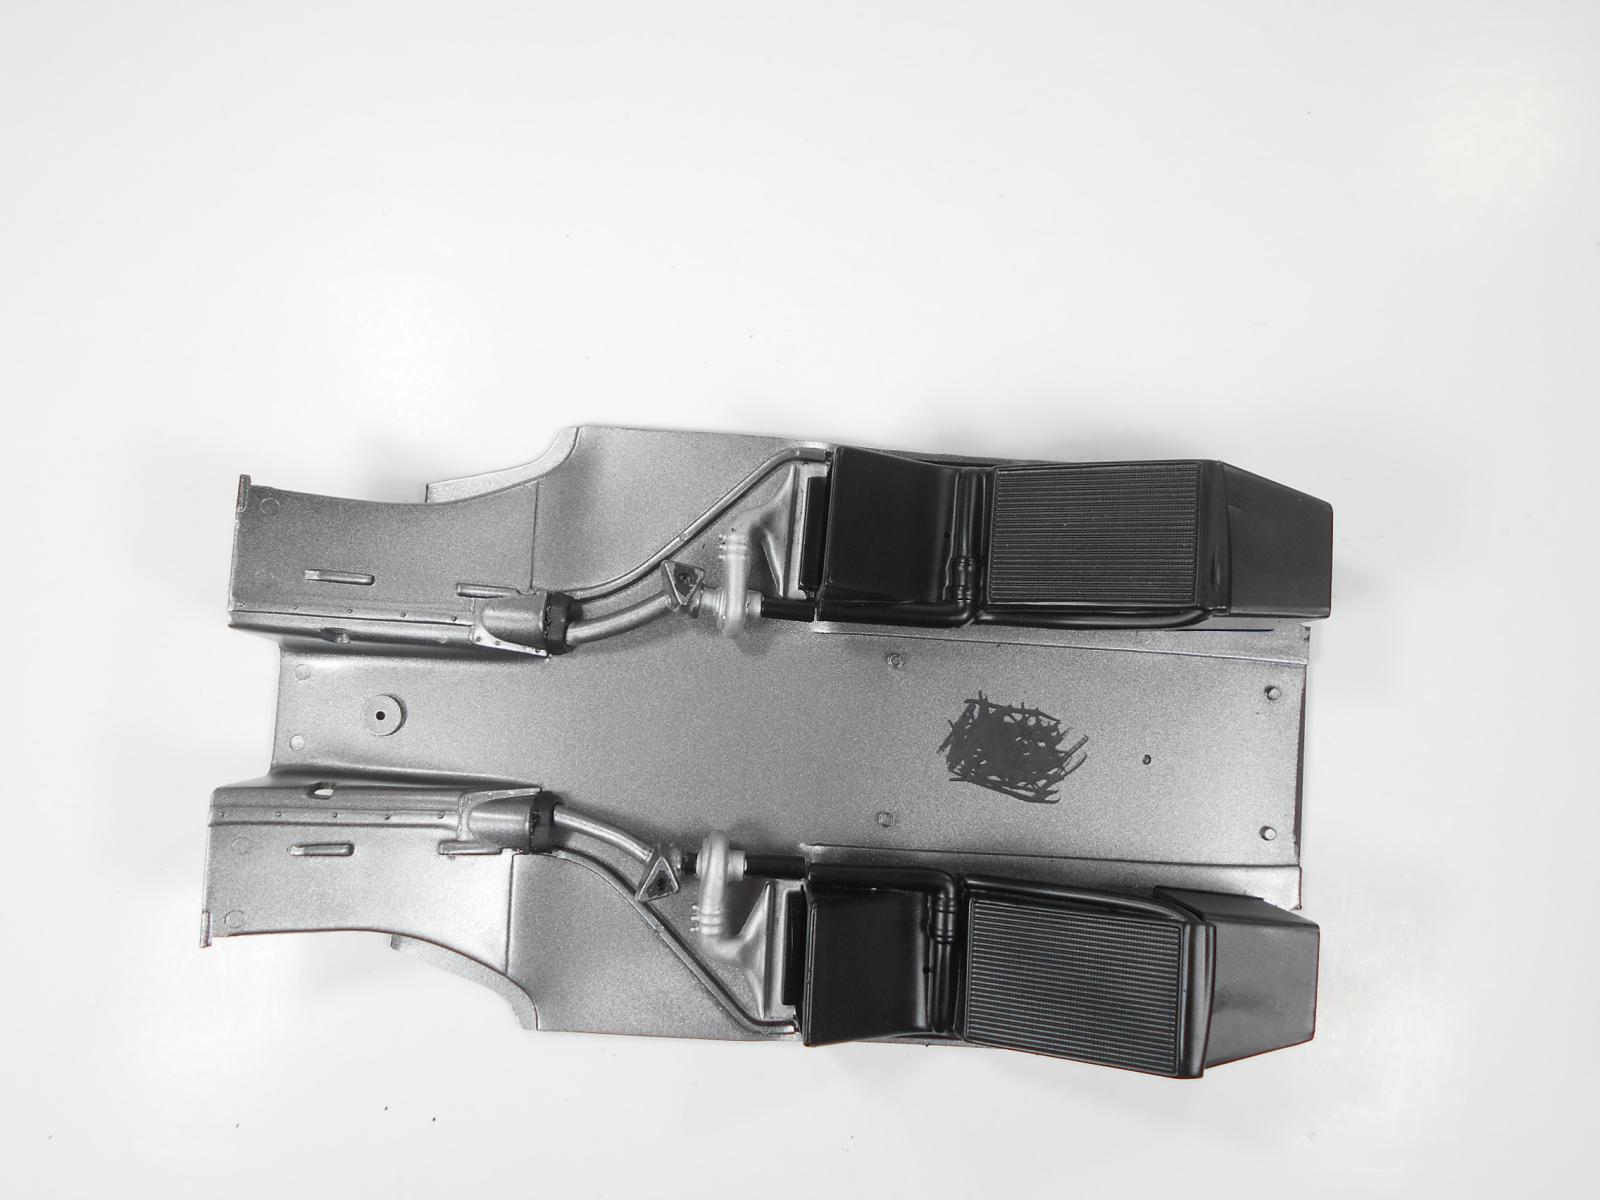
I painted the rear chassis plate Graphite Metallic next and added the intakes. I then glued the front section and rear plate together. I had to take about .040 off the front edge of the rear plate for a good fit. This gave the assembly time to dry before building the engine.
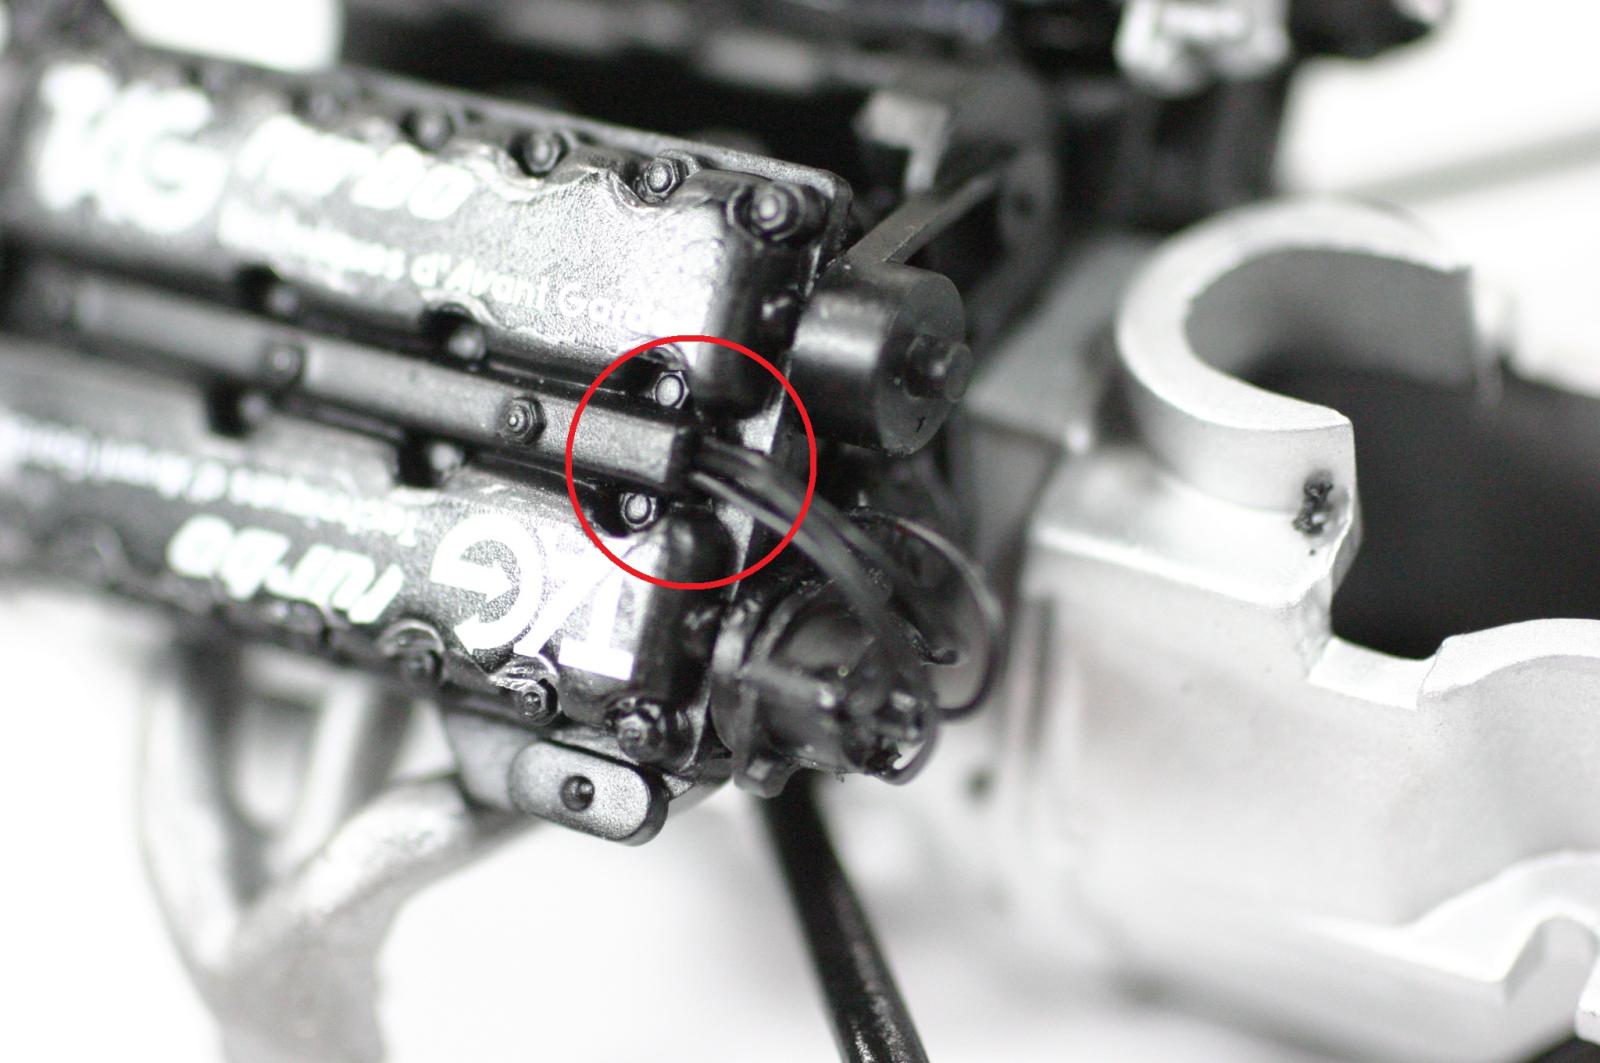
The engine is a model in itself, and the upper covers have three different choices to provide scripting. I opted for the simple waterslide decals but you have a choice of partial or full plate PE parts also. The instructions gray out the distributors #27-29, but they don’t indicate replacement parts and they are called for in the diagram. I drilled out the two distributors on each side and wired them with painted copper wire, running them toward the engine under the center cover strip along the cylinders. Careful test fitting of all the components is necessary.
Apply the PE grills and decals to the front section and note the red tanks that are under the forward cockpit bulkhead. I opted not to install them. The instructions indicate adding the driver’s seat after the instrument panel/steering assembly is installed. From test fitting, there was not enough clearance to do that. The tanks interfere and are completely covered anyway. You could wait till near the end to add the steering to the cockpit after the seats are installed if you want to use them.
With the front and rear sections, engine and cockpit installed the wheel assemblies can be added. The kit comes with a plastic tool to screw the wheel hubs in place but I found using an 11/32” nut driver provided the necessary torque. The tires are really nice but the OWL tire engravings are too shallow for accurate detailing. The box art shows RWL tire markings where the whole of the letter is painted. I did use the Eagle logos, but they don’t stick well to the tires either.
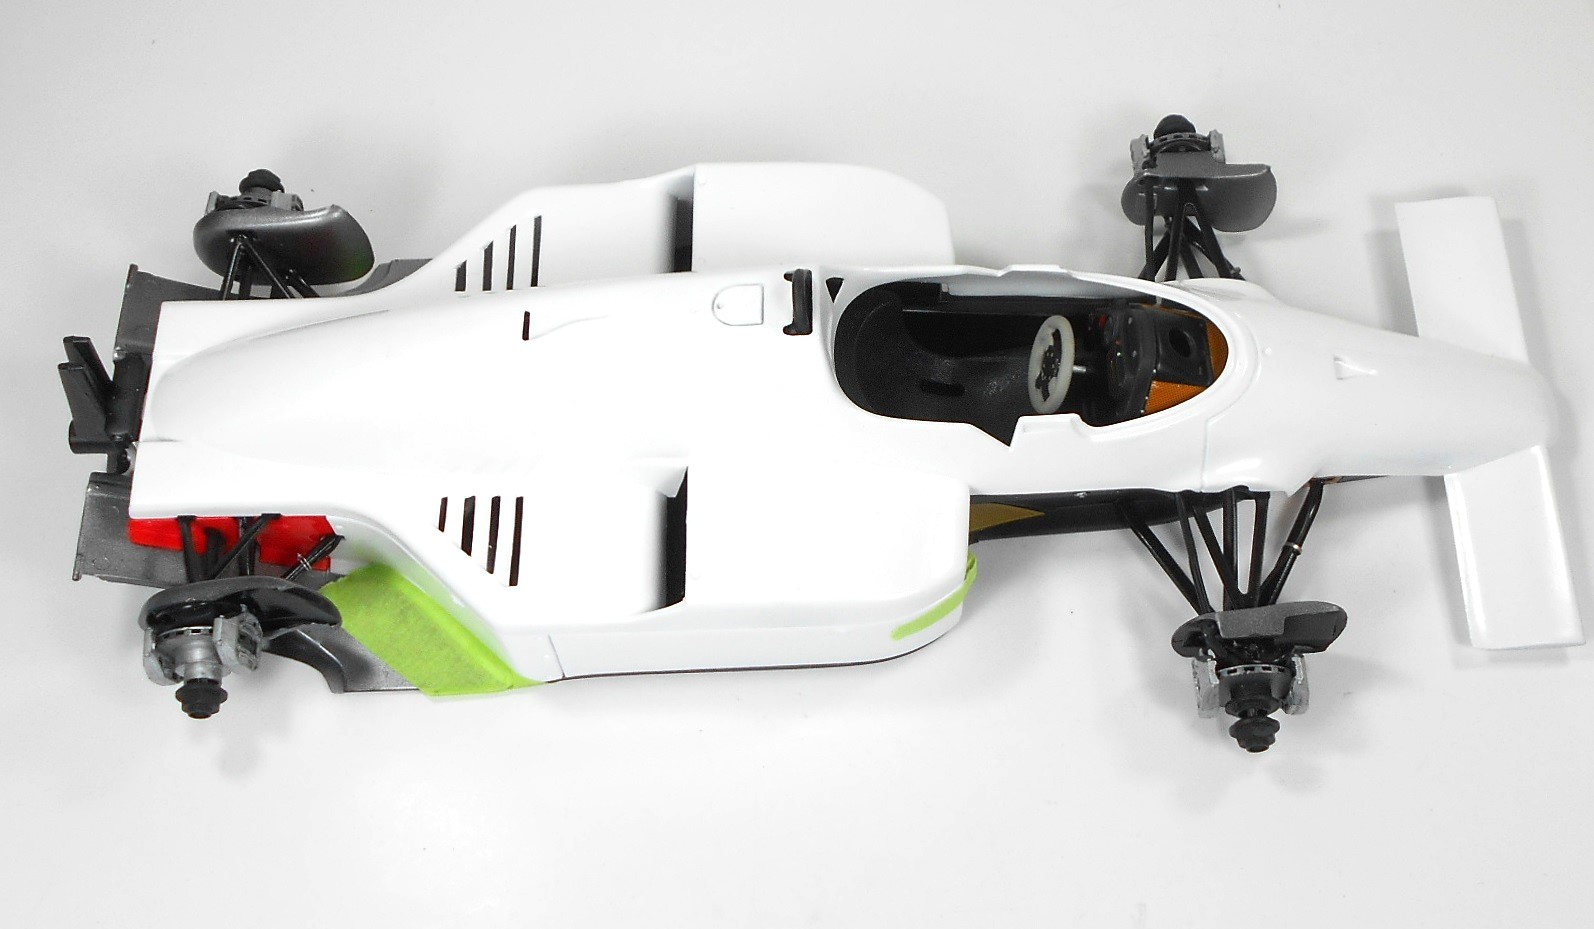
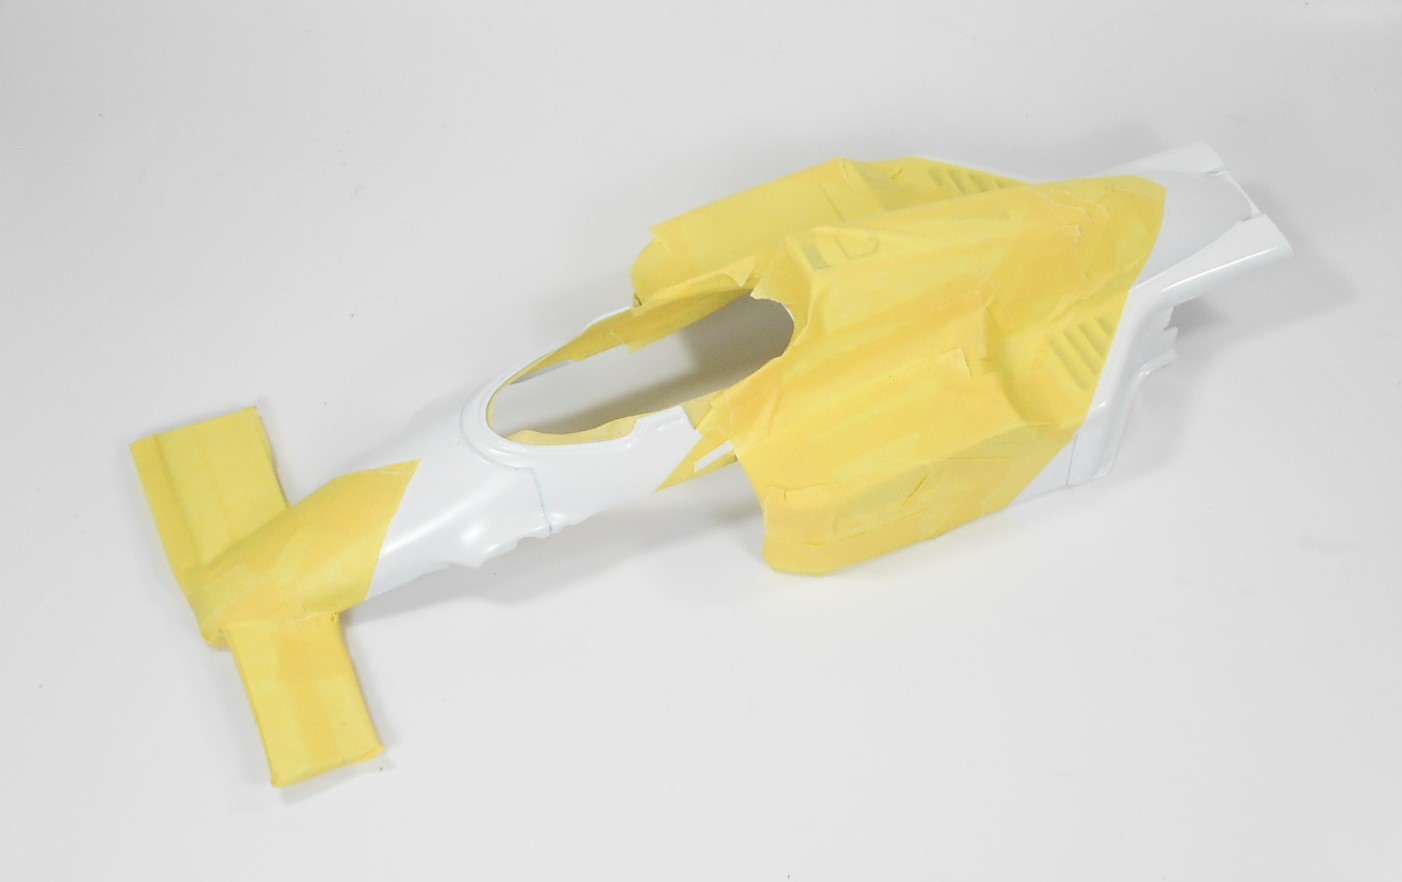
With the rolling chassis assembled, body prep and painting are next. Careful masking of the body along the faint demarcation engraving will produce a striking and complimentary paint scheme just like the original car. Patient application of the decals will result in a very nice-looking replica. This includes the front and rear spoiler assemblies. The rear section is a bit tricky to construct. Fully paint and decal the rear wing components. When they are dry, add the horizontal slats to one side with some slow-setting glue and when tacky, but still pliable, add the other vertical side panel to the opposite ends of the slats.
Conclusion
This kit was designed in an era where authentic details were the mantra for kit design. As such, I would sum it up by saying it is a detailer's dream and a builder's nightmare. Much of that is due to the amount of cleanup and continuous dry-fitting that are required for removing/repairing flash, massive sprue connections, ejector pin marks, and general parts fit. Some of that is due to available molding requirements at the time of the original issue, and also from dimensional stackups.
That said, with subject matter the king of model considerations and a fair amount of work – this kit will yield a gorgeous and fairly accurate replica of the legendary McLaren MP4/2C!
Disclaimer
For historical accuracy, tobacco-related advertising decals are included, however, do not consider their usage here as an endorsement of those products.
I want to thank Italeri and the IPMS respectively for providing the kit and an online platform for this review.


Comments
Add new comment
This site is protected by reCAPTCHA and the Google Privacy Policy and Terms of Service apply.
Similar Reviews