
Maschinen Krieger 44 Type Mk44 Ammoknights (Smartgun Equipment Type)
This is another excellent kit in the Hasegawa Machinen Krieger series. The kit is not too difficult to assemble, so beginners can enjoy the modeling experience. More advanced modelers will enjoy building another unique machine in this series, and the creativity allowed in finishing and weathering the machine.
Background
The Maschinen Krieger Story (excerpted from Wikipedia)
A nuclear World War IV in 2807 kills most of Earth's population and renders the planet uninhabitable. Fifty-two years after the war, an interstellar union called the Galactic Federation repopulates the planet and sends colonists to the surface.
Fearing civil unrest and the colonists forming their own government, the Federation gives the Strahl Democratic Republic (SDR) the right to govern the planet in the late 2870s. In response, the colonists create the Earth Independent Provisional Government and declare independence from the SDR. The colonists hire mercenaries who are descendants of WWIV veterans to form the Independent Mercenary Army (IMA). They attack the SDR forces and the battle to control Earth begins in 2882.
Over the next four years, the SDR and IMA fight each other at several locations worldwide while developing new technologies along the way. The war turns up a notch in June 2883 when the IMA deploys a new weapon to devastating effect - the Armored Fighting Suit powered armor. The SDR eventually builds their own AFS units. New on the field is a sophisticated IMA Smartgun, - the Mk44 Ammoknight (Smartgun Equipment Type), perfect for blowing apart mindless SDR constructs at maximum range.
The Kit
Originally issued by Hasegawa in 2014 as a two machine kit #64107, this kit has been reissued as a one machine kit with pilot, kit # 64007, part of Hasegawa’s great Maschinen Krieger series.
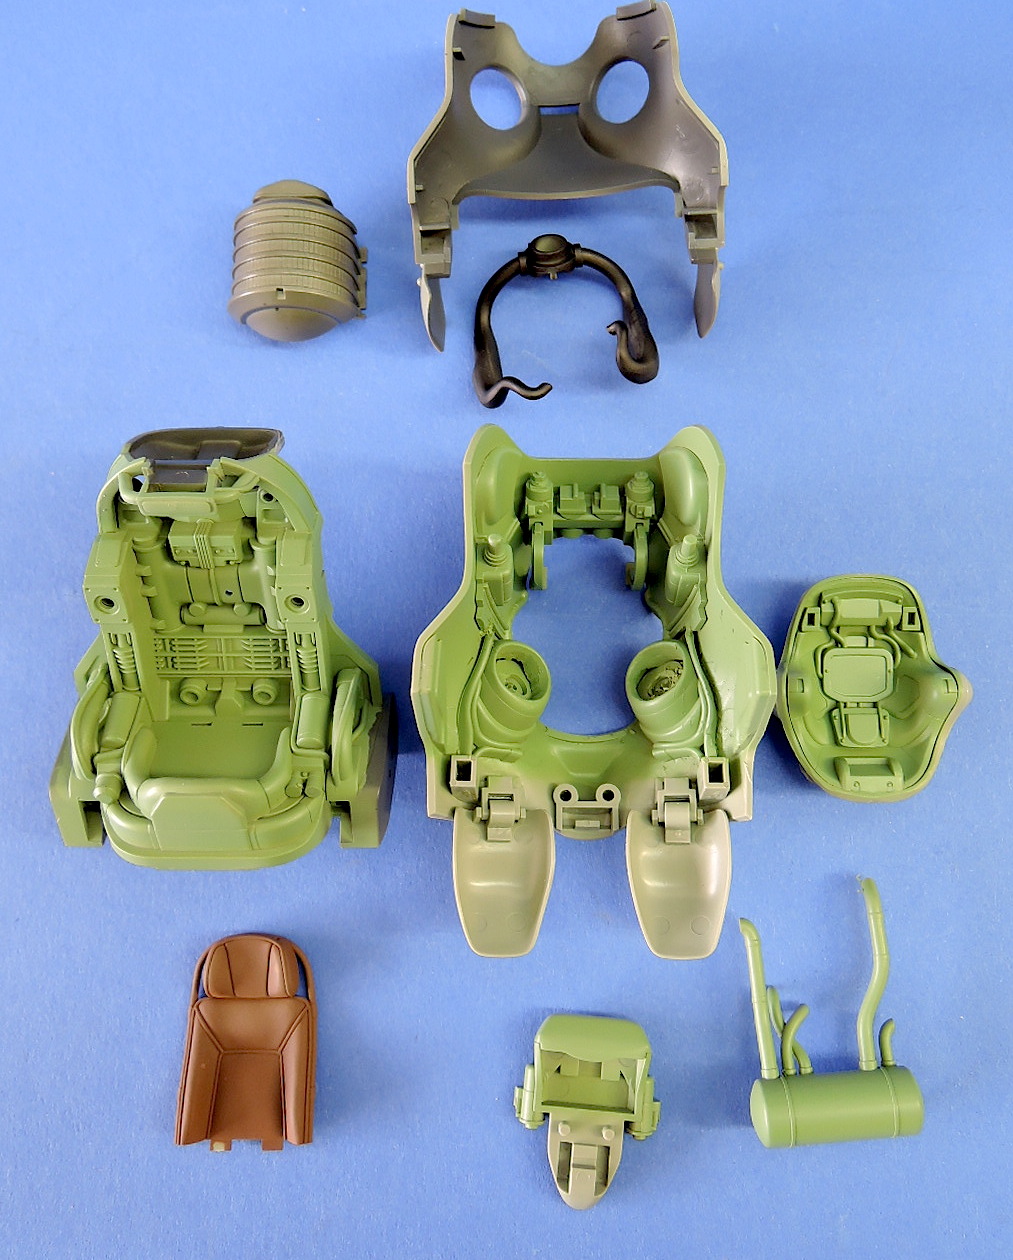
The kit comes on nine gray sprues, one dark gray vinyl sprue of polycap joints, two beige sprues containing the pilot figures, one clear plastic sprue, and one vinyl sprue with black hoses. Kit also includes a decal sheet and a card with four painting and marking options. All of the gray plastic sprues are contained in one bag, and the remaining sprues are in another bag. There was some minor scratching of the light gray parts due to them rubbing together in the bag.
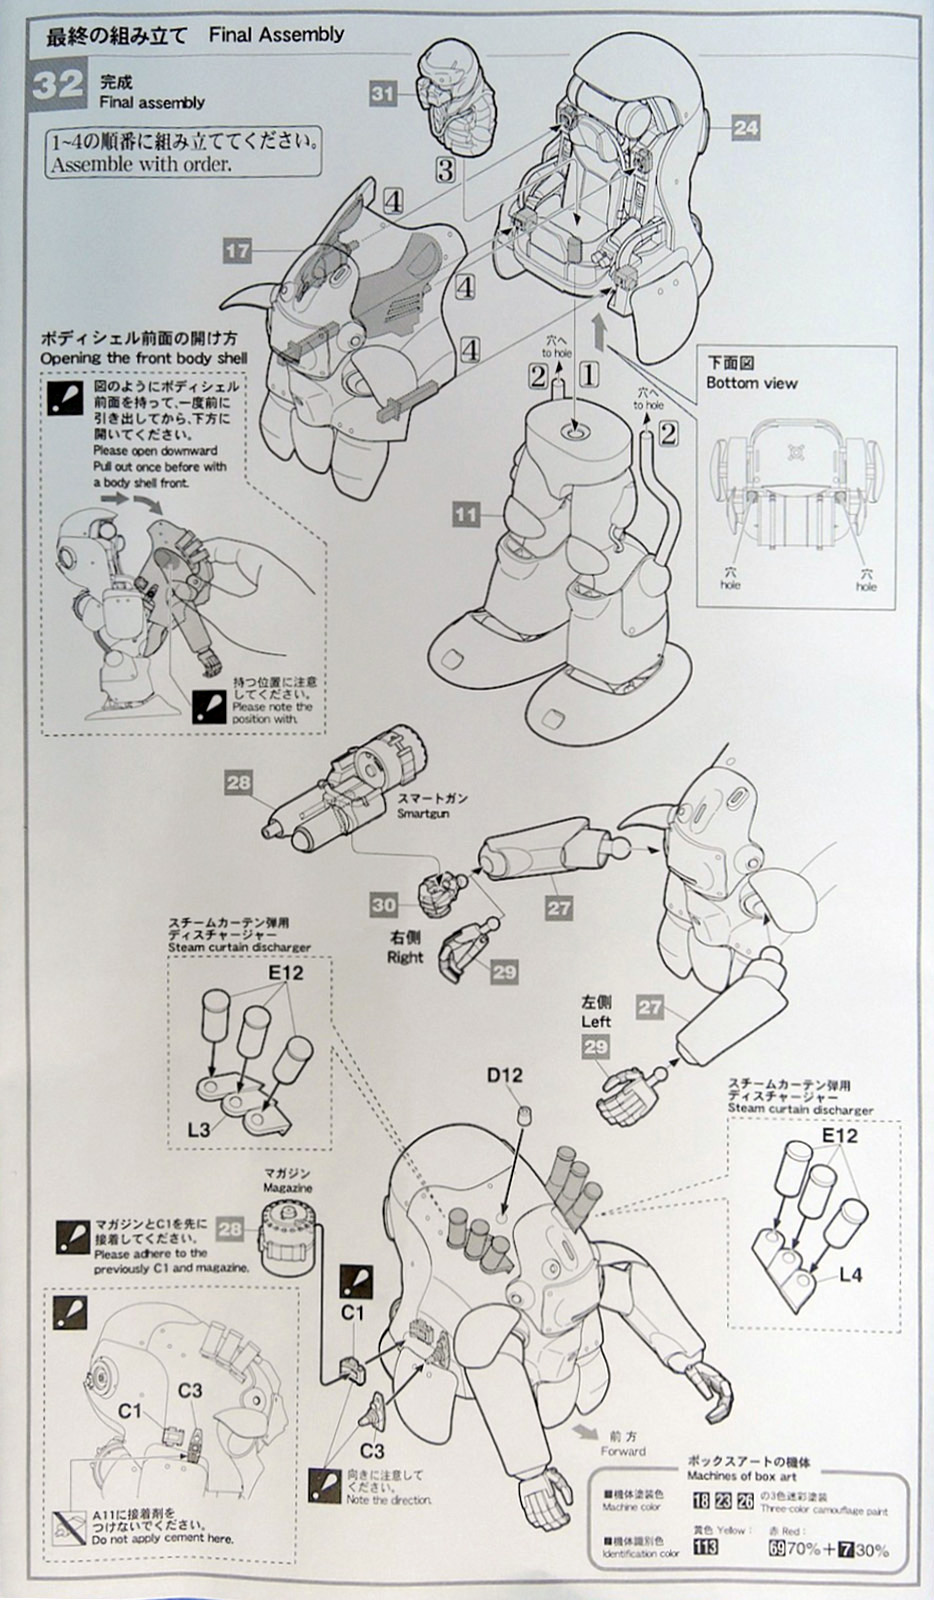
The instructions are on a 10-page foldout with 32 assembly steps. The instructions include detailed painting instructions with each of the assembly steps, using Aqueous Hobby Color or Mr. Color pants. A detail layout of each of the sprues is included for handy identification of parts. The instructions are in Japanese and English, with identification of the assembly, and a few assembly instructions. The instructions use exploded line drawings and are quite clear. The color marking guide is mostly in Japanese with only the name of machine version in English. The marking guide has the decal numbers and locations but the detail color callouts are on the separate instruction sheet.
Assembly
Assembly begins from the bottom up, starting with the feet and ‘slippers’, which look like they weigh a ton. Hasegawa uses polycap joints between many of the parts. These are flexible connections that allow the machine to be posed, and disassembled for painting. Assembly of the feet and legs goes well and all of the parts fit nicely.
In the step number 12, the hatch, parts D5 and D6 don't have locating pins, so I just eyeballed their location.
Steps 12 and 13 both install rivets, part B1, to the hatch and body shells. There are two options for the rivets: attached with connectors to the sprue, or molded onto a flat piece to be sliced off. I tried both methods. The rivets with the sprue connectors were clipped off using my MicroMark type sprue nippers to cut off the connector on the back of the rivet. I also sliced off of the molded-on type rivets using a sharp X-Acto knife. I then used a wax tipped grab stick to place the rivets onto a drop of liquid cement on the body. Both options worked well, with the sprue connector type rivets projecting further, probably because all of the connection didn't get cleaned off the back of the rivet. Both options add nice detail to the body shell.
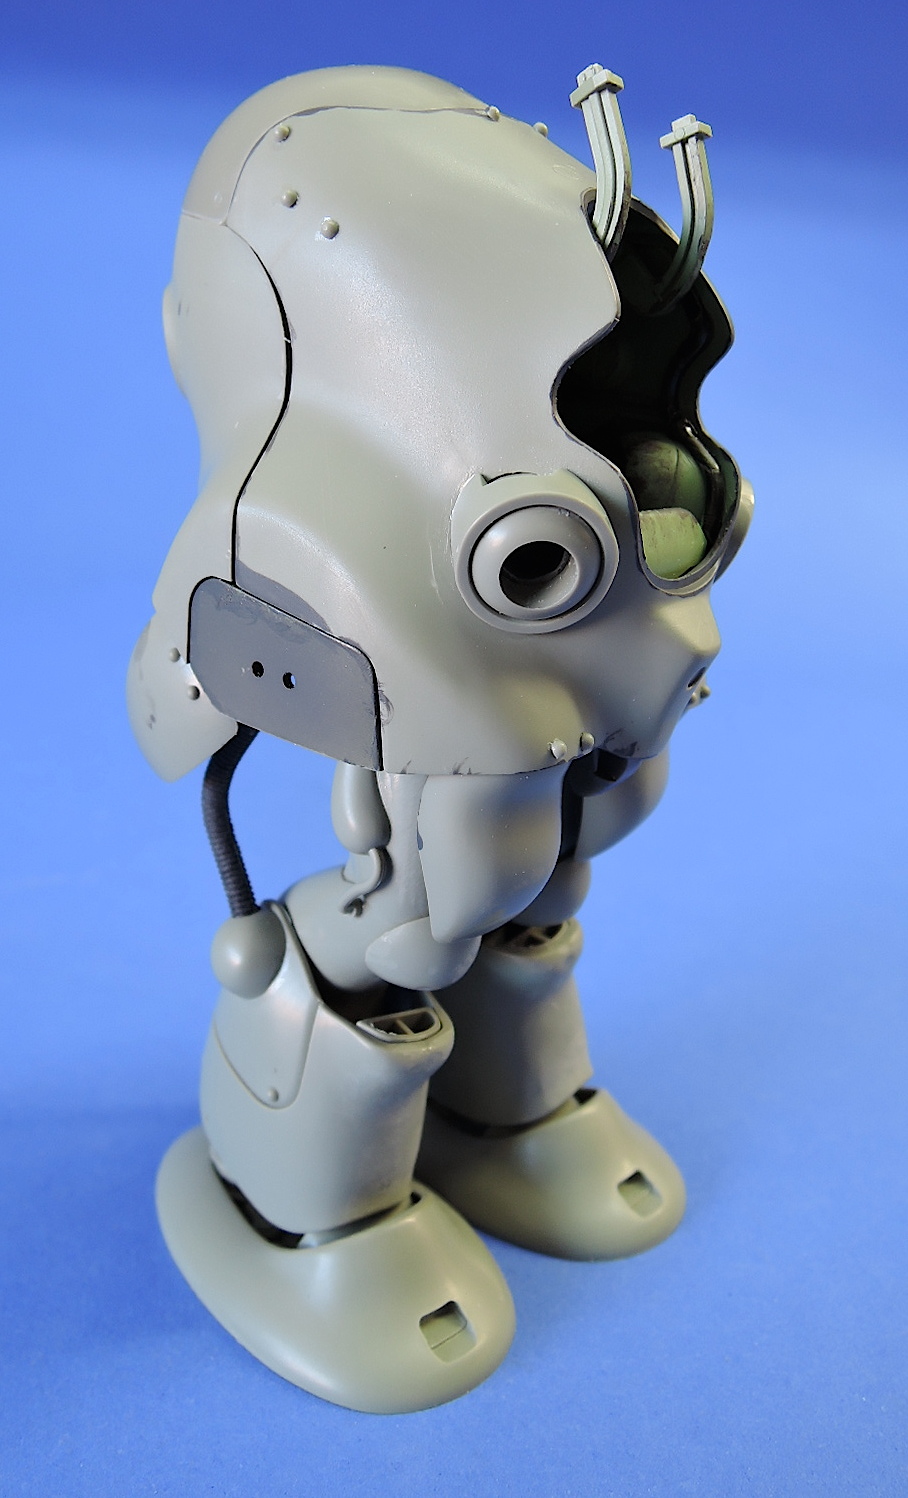
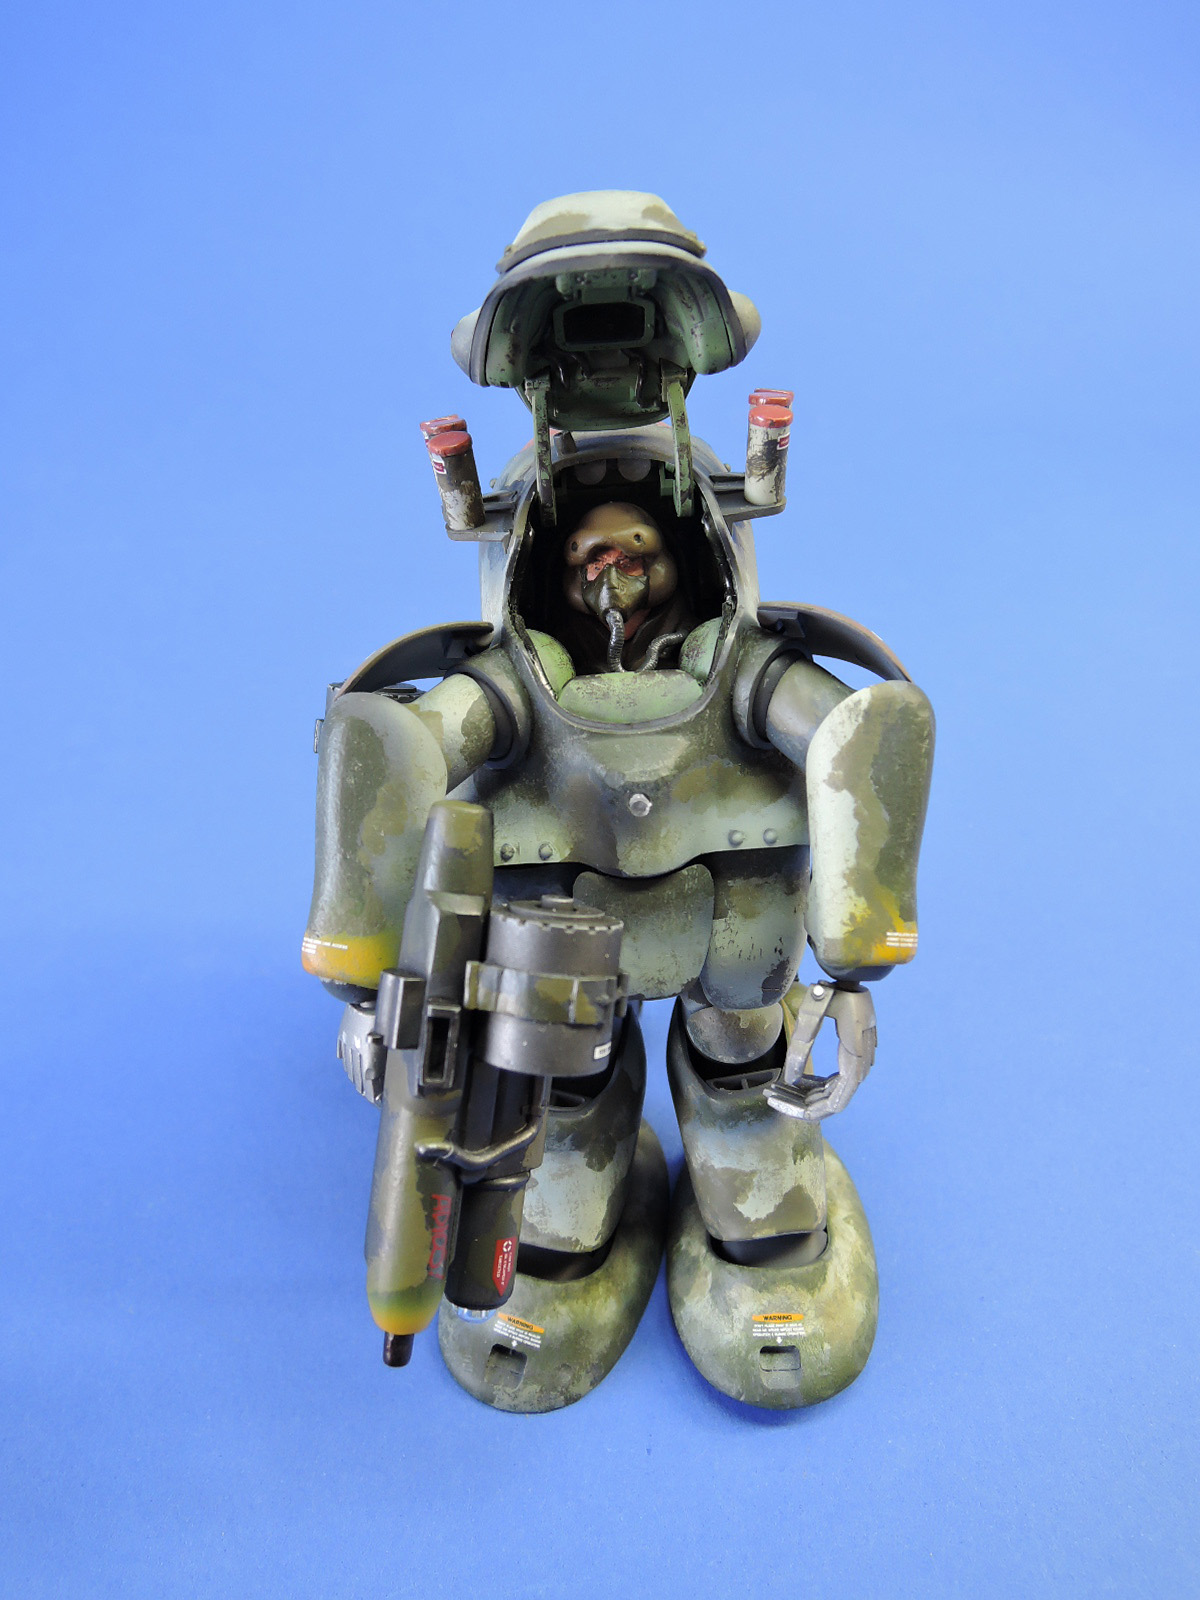
Steps 13 through 17 install several moving parts that require care gluing to keep them flexible. I want to have the pilot figure standing next to the machine and the hatches open to view the detailed interior. I hollowed out the backs of parts C21 and C22 to represent openings for the pilot’s arms. There are some gaps in the piping with these parts that needed to be filled with putty.
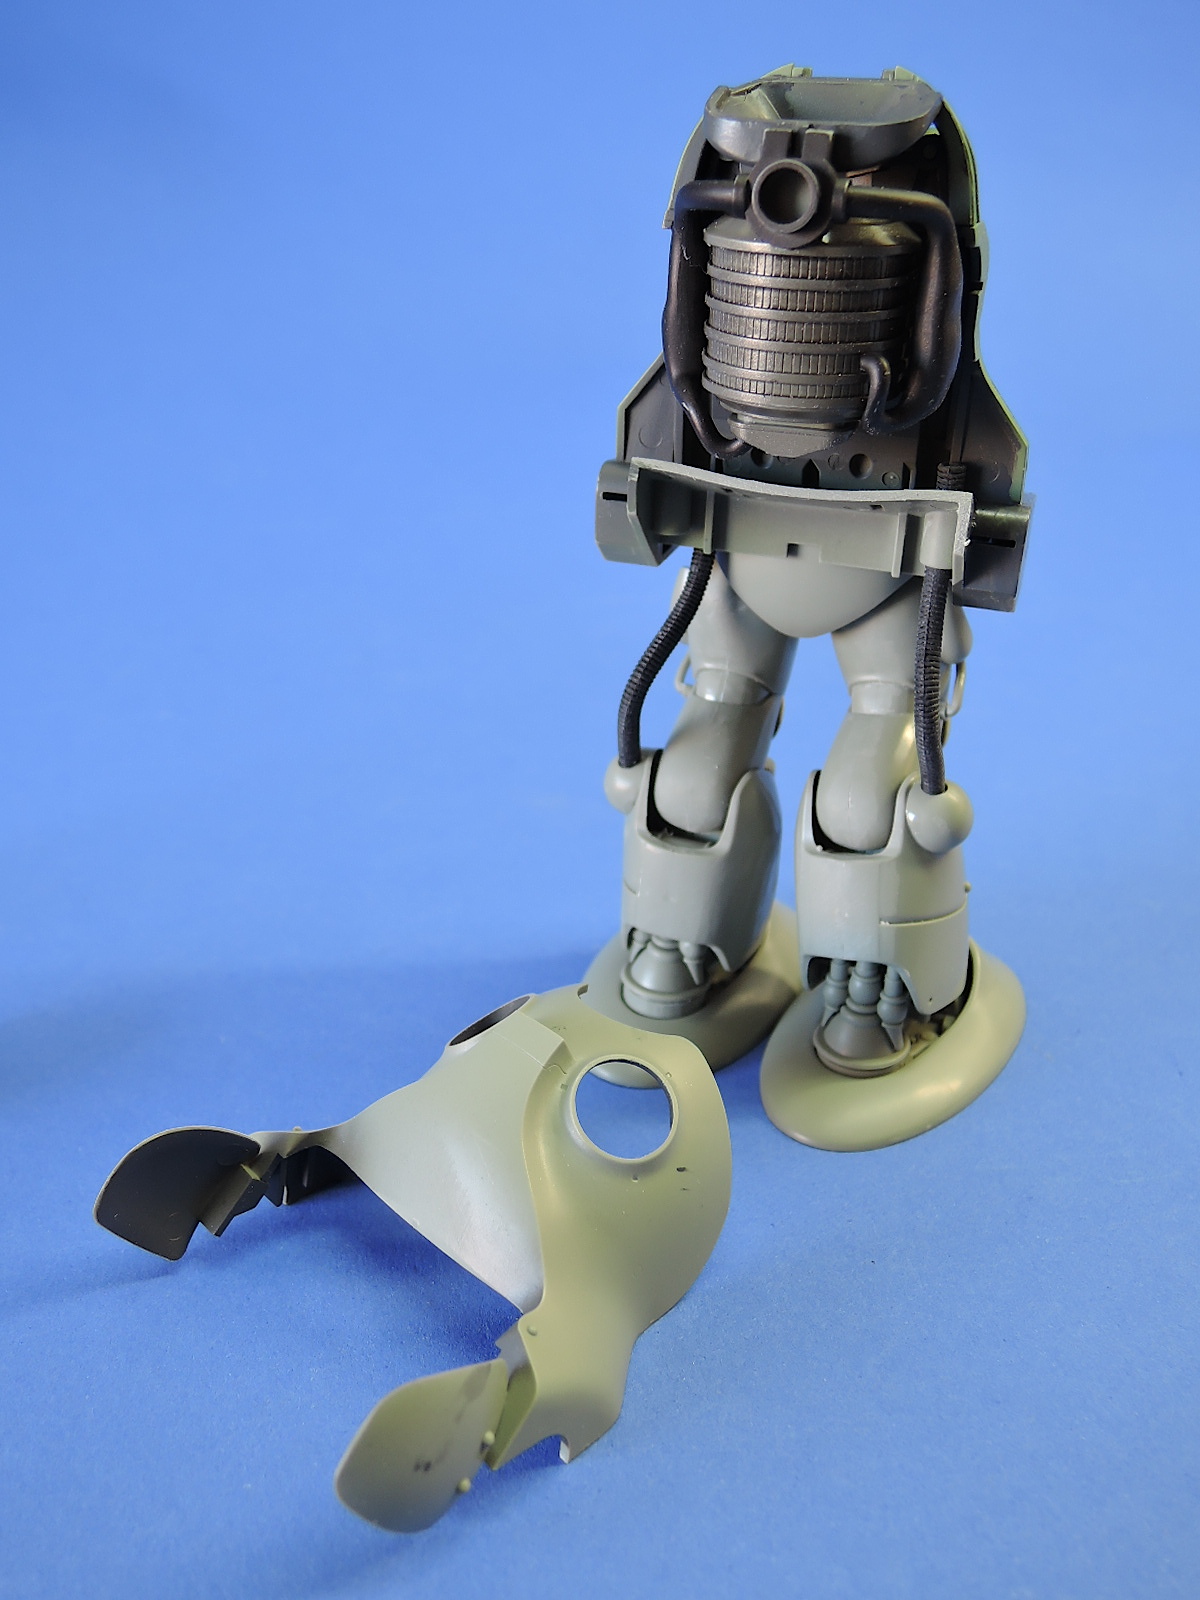
The rear body shell A1 is installed in step 20. I needed to do some fitting of the tabs to get the part to fit tightly. The body front should be test fit at this point to get a good joint between the two body parts. Fitting the front shell required shortening the upper end and drilling out the holes that they go into. I also had to widen the holes that the struts, parts D14, fit into. Looking at the size of the pilot it seems possible, although difficult, for him to enter the vehicle through the front hatch. I want to display the interior on my machine so the entire body front will slide out and down to allow the pilot to enter and exit. This will also allow displaying the nicely detailed interior. By chamfering the struts, parts D14, the body front can be displayed in an open position.
After step 20 I decided to paint the interior parts before the body conceals them. Only a few of the pipe colors are called out, leaving the rest of the interior do the imagination. I tried but was not able to find any reference photos online, probably because these machines won't be invented until 2883.
Steps 21 through 24 assemble various armor plates and the fuel tank on the rear of the machine. Step 22 includes options for armor plates or access panels for the engine. The fit of the parts is again excellent. Step 25 through 27 installs the arms and the polycaps allow them to be positioned. Step 28 is the construction of the Smartgun, which looks to be a nasty weapon with two large magazines. The magazines are assembled from a series of rings rather than halves to avoid seams. Step 29 and 30 construct the hands, with two options for the right hand depending upon whether it will be holding the Smartgun.
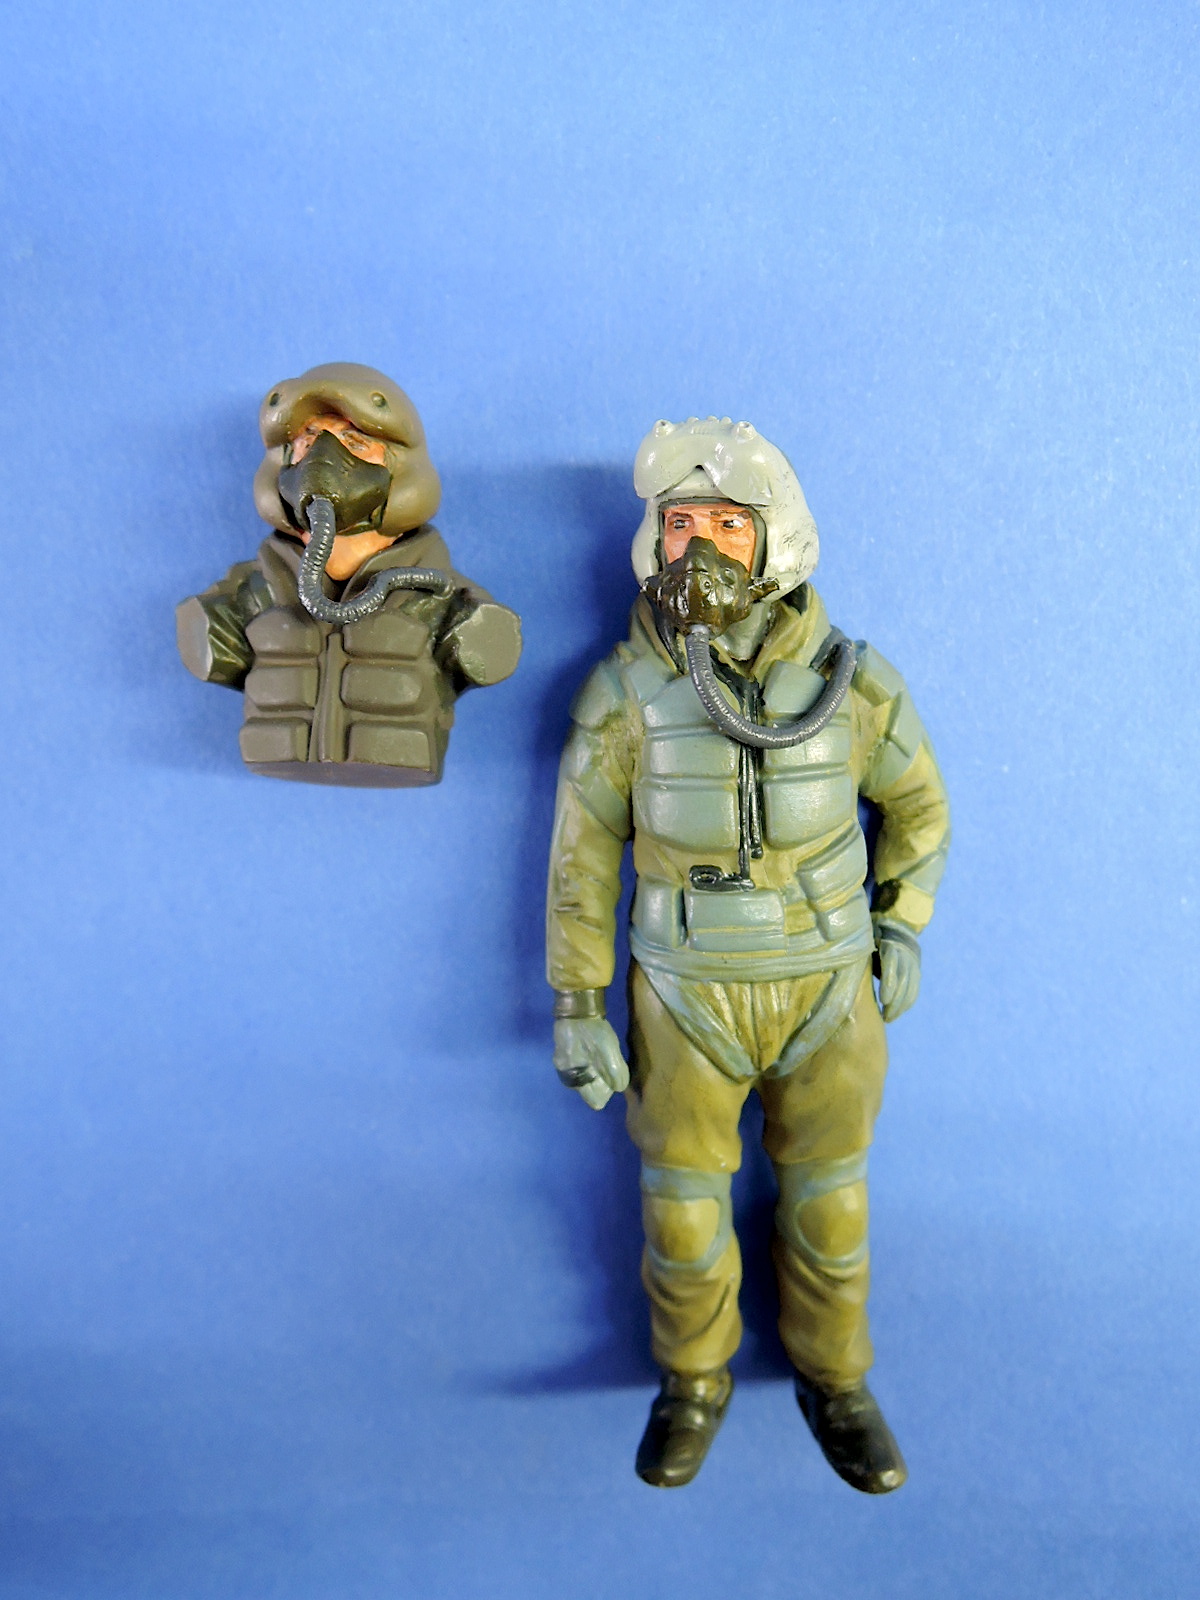
Hasegawa provides two pilot figures: one maneuvering pose for inside the machine, and one standing pose for outside the machine. The poor guy for inside the machine has no arms or legs, which is convenient as there's no space for them in the machine anyway. The armless guy could be used with an open hatch, but not with the front of the vehicle opened up. The figures are nicely cast with very good detail. Separate oxygen masks, hoses, and goggles are provided for the pilots. The standing figure did require some filler where the arms attached to the shoulder.
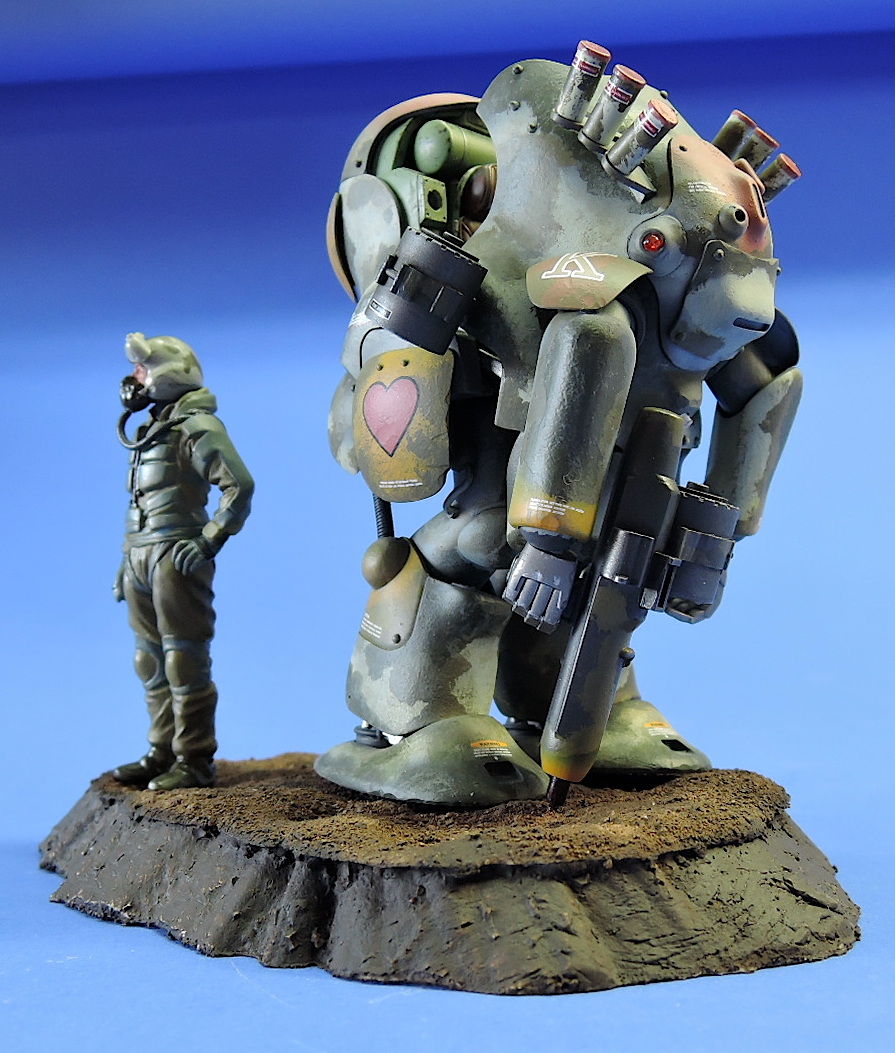
At this point I competed finishing and installing decals on the machine. The use of the polycaps conveniently allows disassembly to paint the subassemblies of the machine. I followed the color callouts in the instructions for the machine as pictured on the boxtop. In addition to the detail colors in the instructions, the colors for the machines on the boxtop and color profiles are called out on the bottom of assembly step 32. The three-color camouflage scheme is Mr. Color numbers 18 black/green, 23 dark green, and 26 duck egg green. The boxtop illustration has a brush-painted appearance to the camouflage, so I applied number 26 as a highlight with the airbrush, then used numbers 23, and 54 khaki green applied with a brush to give the hand-painted appearance. I dry brushed Mr. Color 60 RLM02 gray as highlights and to mottle the appearance. Once the machine and the pilot were attached to the base I touched them up with some Ammo Dark Earth pigment.
Decals are included for several different unit configurations, several different number types, and numerous small warning labels. Hasegawa’s decals are very sharp and even the smallest warning label is legible. The details have virtually no decal film outside the image. The decals are fairly thick but respond well to several coats of MicroSol and settle down to the textured surface.
Conclusion
This is another excellent addition to Hasegawa’s Machinen Krieger series and was a lot of fun to build. The fit of the parts is excellent and the polycaps allow the figure to be posed in different configurations, and disassembled for painting. All of the body panels fit together so well they can be assembled without glue to allow disassembly.
This is not a difficult kit to build so even beginning modelers can enjoy assembling the kit. More advanced model builders will enjoy the opportunity to be creative in the finishing and weathering of the machine.
Hasegawa deserves thanks for producing another excellent model and continuing the Machinen Krieger series. Thanks to IPMS for giving me the opportunity to build this great kit!


Comments
Add new comment
This site is protected by reCAPTCHA and the Google Privacy Policy and Terms of Service apply.
Similar Reviews