
Macchi MC.202 Folgore
Italeri has brought out the long awaited 1/32 scale Macchi MC.202 Folgore (Italian for Thunderbolt) just in time for the 100th anniversary of the Regia Aeronautica (RA; Royal Italian Air Force). The MC.202 was a development of the earlier C.200 Saetta, which was a radial engine design. The MC.202 used the Italian built version of the German Daimler-Benz DB 601A engine and a redesigned more streamlined fuselage. Considered to be one of the best wartime fighters to serve in large numbers with the Regia Aeronautica, the Folgore served on all fronts the Italians operated in.
The Folgore entered service in July 1941 and immediately proved to be an effective dogfighter. The Australian Ace Clive Caldwell who fought a variety of German, Italian and Japanese fighters during WW2 stated the Macchi C.202 was “one of the best and most undervalued of fighters”. The C.202 also had its problems: it could enter a dangerous spin, it was insufficiently armed, with just two machine guns that could easily jamb. The radios were unreliable. The oxygen system was inefficient, causing up to 50-60% of the pilots to break off missions, sometimes even causing fatal accidents.
The Kit
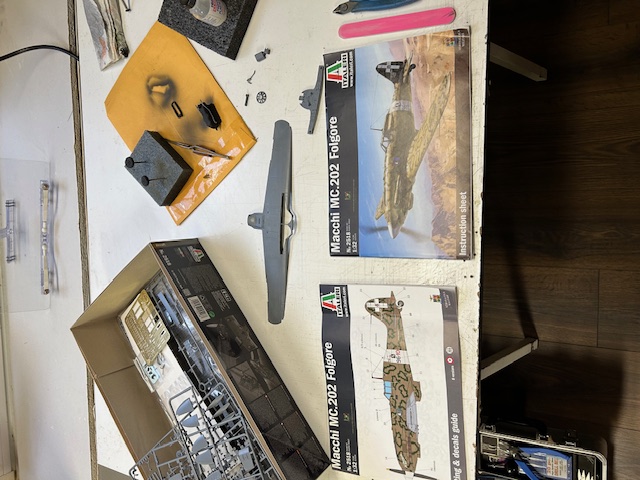
The kit comes in a big sturdy two-piece cardboard box with a nice box art picture of the MC.202. The kit comes with 211 parts in grey plastic, including four parts not used; seven parts in clear plastic, including one not used; five 3D printed instrument panel parts; one brass photo-etch fret with 162 parts; one length of white vinyl tubing; one length of black vinyl tubing; one length of fine wire; and two decal sheets covering eight subjects and the individual smoke rings. The instruction book is big with nice large drawings of the parts construction and there is a separate book with the eight different versions and decal placement instructions.
The Build
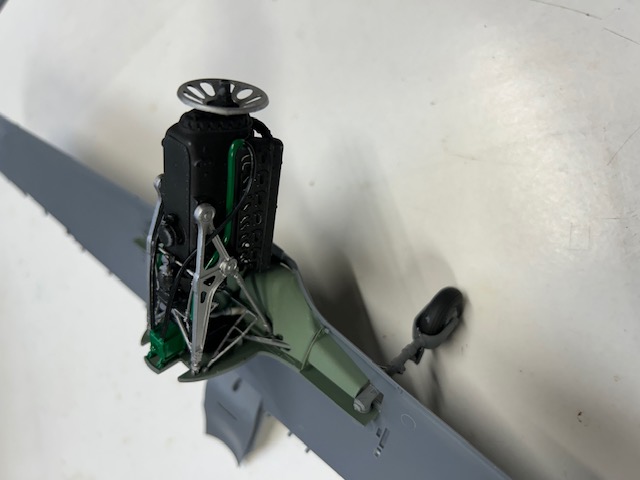
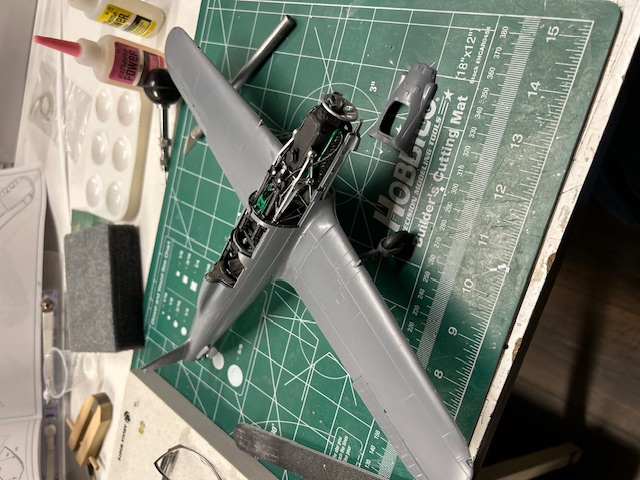
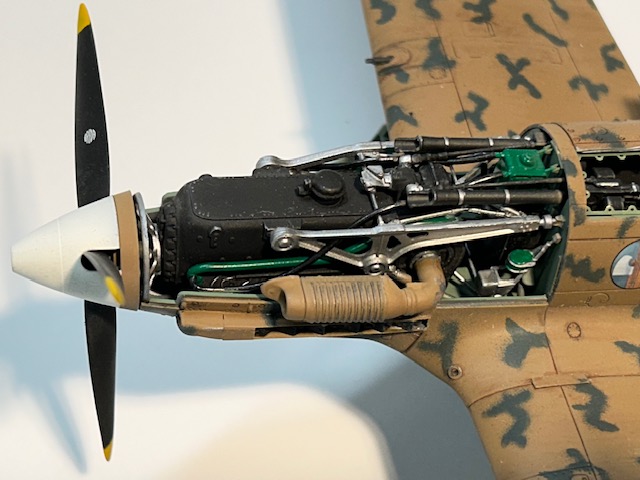
The build begins with the engine, which is out of the ordinary, most instructions start with the cockpit. The engine is well detailed and goes together nicely. There are vinyl tubes that are installed on the engine at this point.
The call outs for color are given a letter designation which is on page 3 of the instructions. Thankfully the colors are called out in commonly used colors and federal standard numbers, so it’s easy to find the appropriate color.
Once the engine and mount are completed the wing spar and bulkhead are put together with associated parts depending on which version you choose. The main landing gear is next which gets attached to the spar, which has some nice detail. The main gear tires are molded with a flattened bulge which I think is a little too much. The whole assembly then goes into the lower wing section that fits fairly nice. I have read some reviews of people not liking the main gear being installed at this point and worrying they might break them off, but I had no such problem. There is an inner wheel well cover that consists of four plastic and two photo etch parts that is installed at this point that I feel doesn’t quite fit the area it goes into not to mention the round ejector pin marks that need to be cleaned up. Once the engine assembly is installed into the spar you have to try to line up and glue the vinyl tubes to different areas which can be a real pain not to mention the larger white vinyl tubing looks way too big for the scale. The tubing is rolled up from the factory and has a set to it that makes it hard to keep straight when glueing.
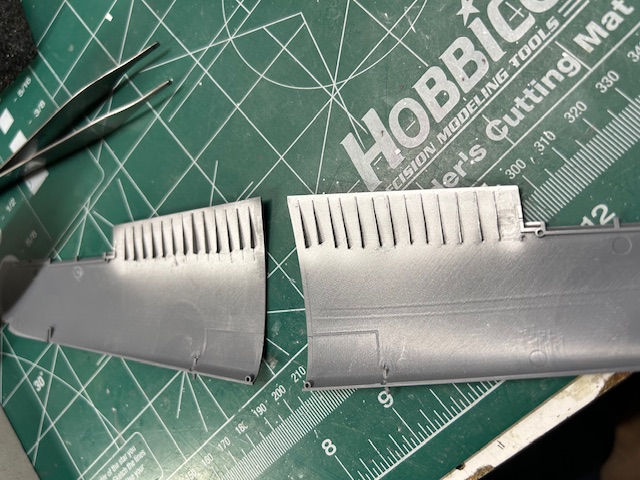
Next is the guns and platform, the guns are fairly detailed and install easily. The flaps are next with the option of open or closed, I chose open and added some detail to the top wing also. The position lights are also installed.
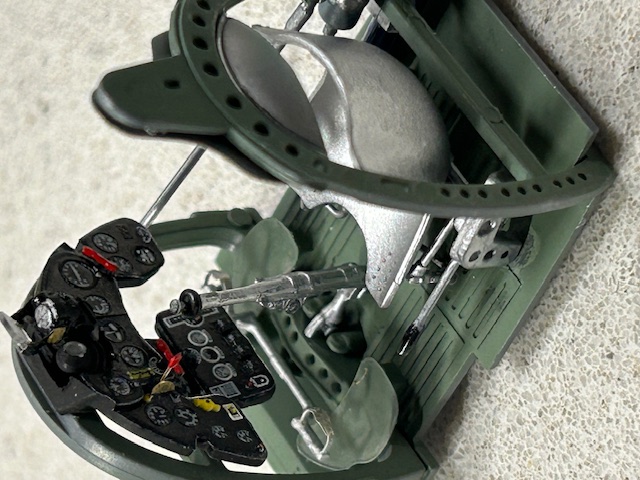
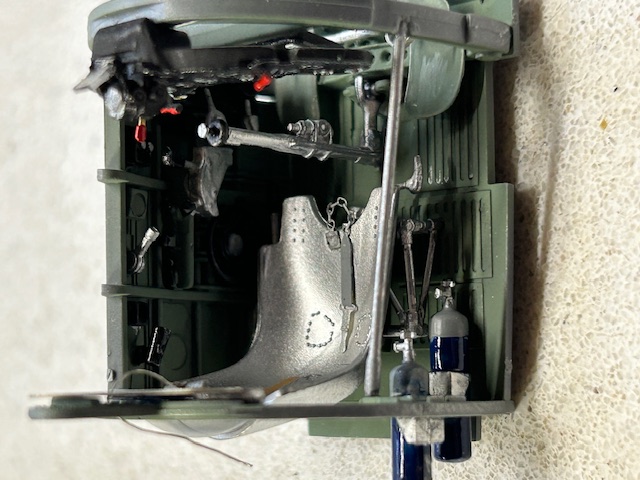
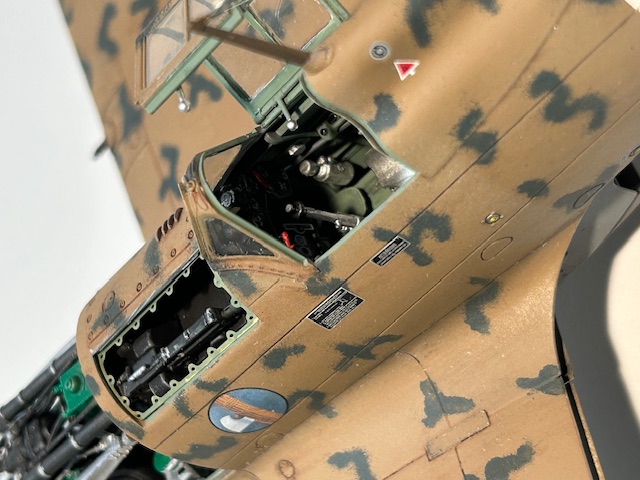
Now comes the cockpit build with a lot of detail. This is the first time I have used a 3D printed instrument panel and I love the ease of install and the detail of it, I don’t think I will ever use anything except 3D from now on. There are many photo-etch parts used in the cockpit, some are a bit small and fiddly, but it is well worth the time in the end. I think it took me about ten hours just to do the cockpit build. The cockpit now is installed into the fuselage halves along with the tail wheel. Now here is where I have a problem, I believe the tail wheel gear should not be installed at this point but there is no other way because it gets sandwiched in between the fuselage halves. I must have broken off the tail gear 2 or 3 times before I decided to leave the broken tail gear piece off until the end. In the end the cockpit and fuselage went together well with no fitment issues
The next step is installing the fuselage and upper wing halves to the lower wing and engine compartment. Everything lined up pretty well and there were no major fitment issues. The ailerons are installed next along with some photo-etch detail parts for the top of wing and ailerons. The fuselage is turned over and the bottom side is added with the oil cooler under the engine and the radiator in the middle of the wing. Both radiators are made up of plastic and photo-etch parts. There are also photo-etch detail parts for the bottom of the wing.
The landing gear covers are next with three separate sections and associated photo-etch parts. The landing gear covers are well detailed and look good once assembled. The one smallest cover has a small PE part that needs to be curved to go around the landing gear and was a pain to get the right curve and attach it in the right place. I left all the gear covers off till the final assembly.
Next was the engine cowling and air cleaner intake, it was pretty straight forward with no issues except the ejector pin marks that needed cleaning up. The exhaust stacks were next and kind of a pain to install. After some thought, I would recommend installing them when building the engine. Next is the gun cover on top of the fuselage which can be displayed open with PE or closed. Next the propeller and spinner, cockpit canopy and fuselage end cone, all with no issues.
The tail feathers are next with two options available depending on which version you choose. PE parts are recommended for the tail feathers but opted to not put the PE on the bottom of the horizontals, the pieces were so small I could barely hold them with tweezers.
The radio antenna is last which I saved till after paint. There are small PE brackets that are placed on the vertical tail and the antennae mast that the small wire that is supplied is attached and strung between the two brackets. There are two plastic parts that are considered insulators that are extremely small and hard to handle.
Paint
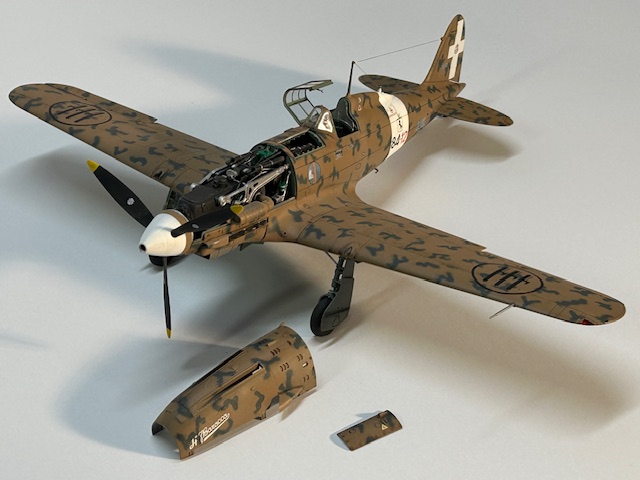
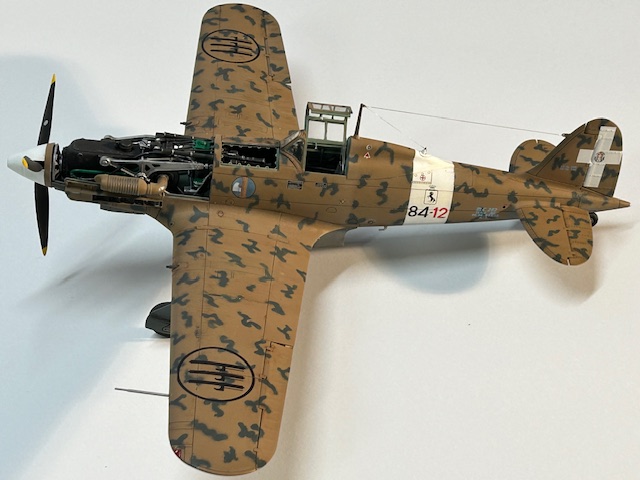
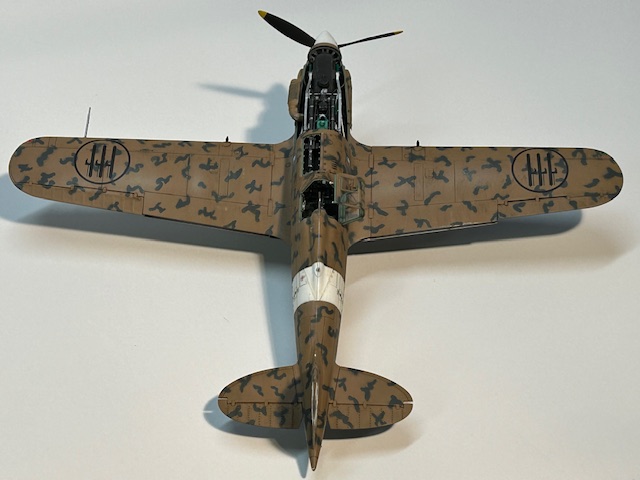
So, I decided to go with version B for the paint scheme and not deal with all the smoke ring decals in some of the other versions. I laid down a base coat of Model Master aluminum lacquer to check for any major imperfections and as a base for doing paint chipping. Model Master enamel Dark tan FS 30219 was used as the base color on top and Dark Gull Grey FS36231 for the bottom. The white stripe on the fuselage I used MM Gloss White. Once dry I used MM enamel Swartz Grun RLM 70 for the green squiggly camouflage with my Grex Tritium G3 airbrush at a low pressure which turned out pretty well. I laid down a coat of gloss clear lacquer over the whole fuselage for the decal application. The decal installation went fairly smooth except for the first wing roundel I applied, it fought me for about 15 minutes trying to get it placed correctly, I thought for sure I was going to destroy it. But in the end I won. The rest of the roundels went down better. After the remaining decals were applied and dry, I sprayed a coat of MM flat clear lacquer to finish it off. The decals looked really good with no silvering and with good color register, it almost looks like they were painted on, one of the best decals I’ve used OOB. The decals were printed by Cartograf
Conclusion
All in all, it was a pretty decent build, it took me longer than I expected with all the photo-etch available. In the end it took me over 70 hours to complete.
This is Italeri’s first foray into 1/32 scale WW2 fighters and they have done a good job. I am not a rivet counter, and I don’t know if the shape is correct or not. The model sits somewhere between Revell’s simple 1/32 offerings and Tamiya’s uber kits
Pros
High level of detail; understated surface detail; very nice cockpit detail; photo-etch and 3D printed instrument panel; detailed engine; very nice decal sheet with smoke ring camouflage
Cons
A number of prominent ejector pin marks that need attention; some fitment issues; heavily bulged and flattened tires; extremely small photo-etch parts; tail wheel installation
I would like to thank MRC for the model example and to IPMS USA for the opportunity to build and review this model


Comments
Add new comment
This site is protected by reCAPTCHA and the Google Privacy Policy and Terms of Service apply.
Similar Reviews