
Macchi M.5
History
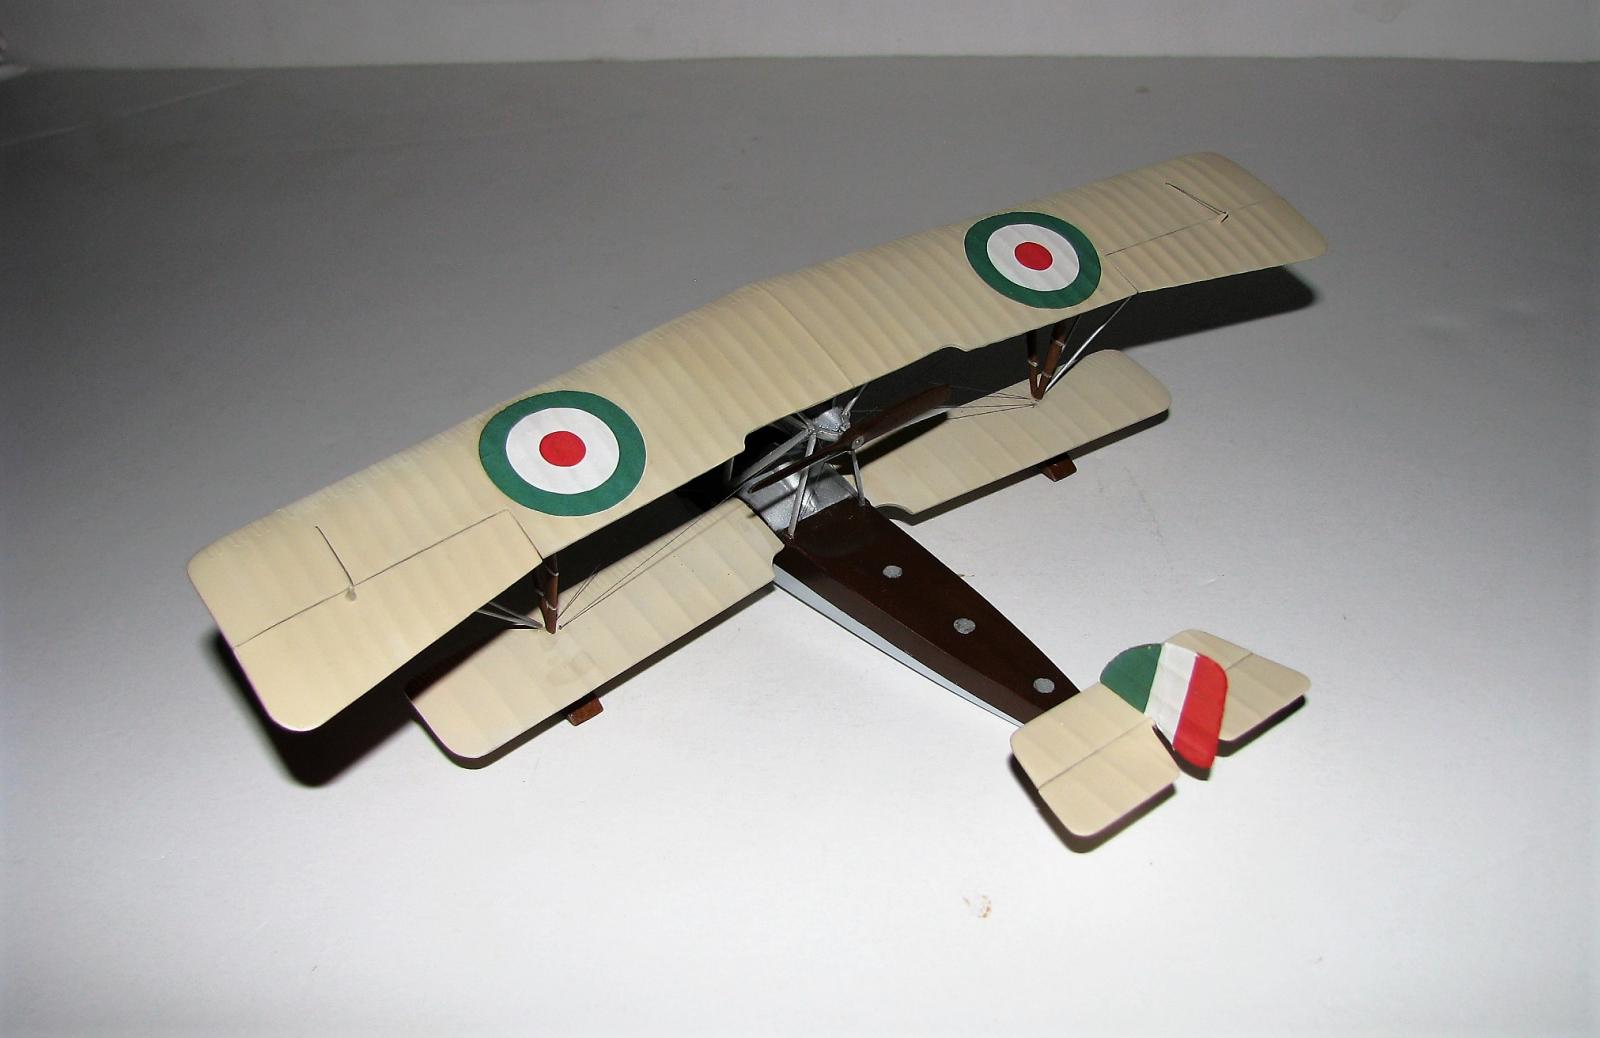
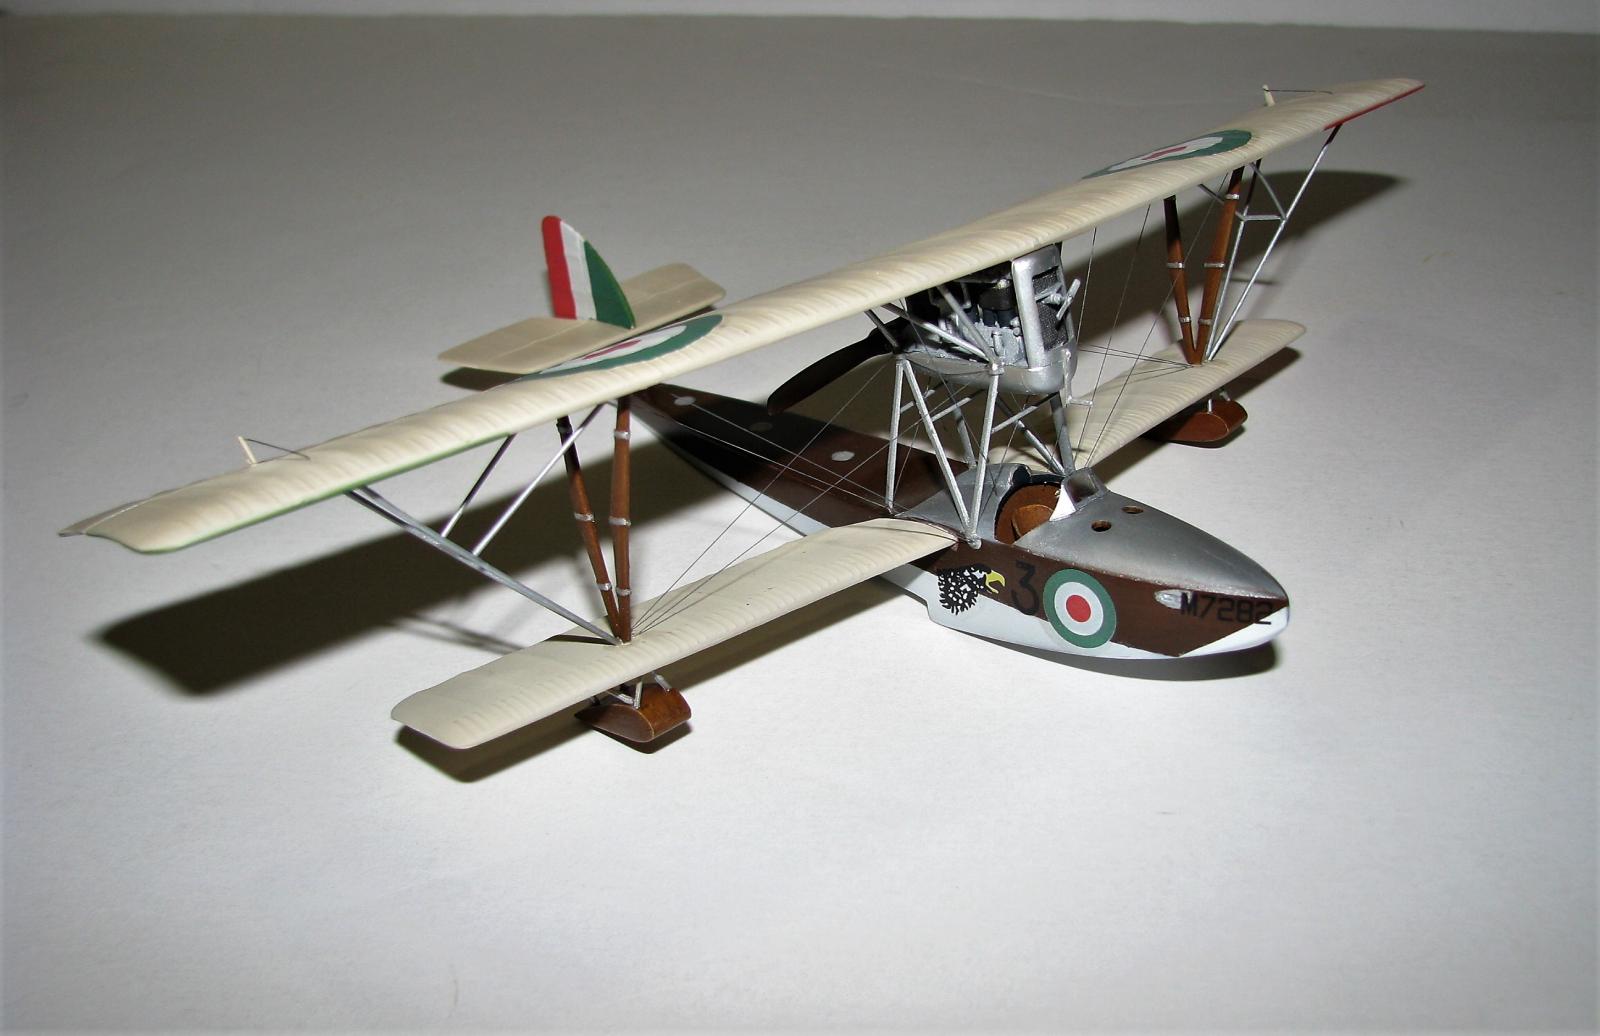
The Macchi M.5 was a flying-boat fighter developed by the Nieuport Macchi company of Varese in early 1917 and introduced in service in autumn 1917. Initially armed with a single Fiat machine-gun, and featuring a tail structure held on struts, the production M.5 had an armament of two Vickers guns and a tail structure resting on the fuselage. It was an extremely fast and maneuverable airplane, that managed to gain an ascendancy over the enemy seaplane fighters and even claimed victories against the Phönix land fighters.
The Kit
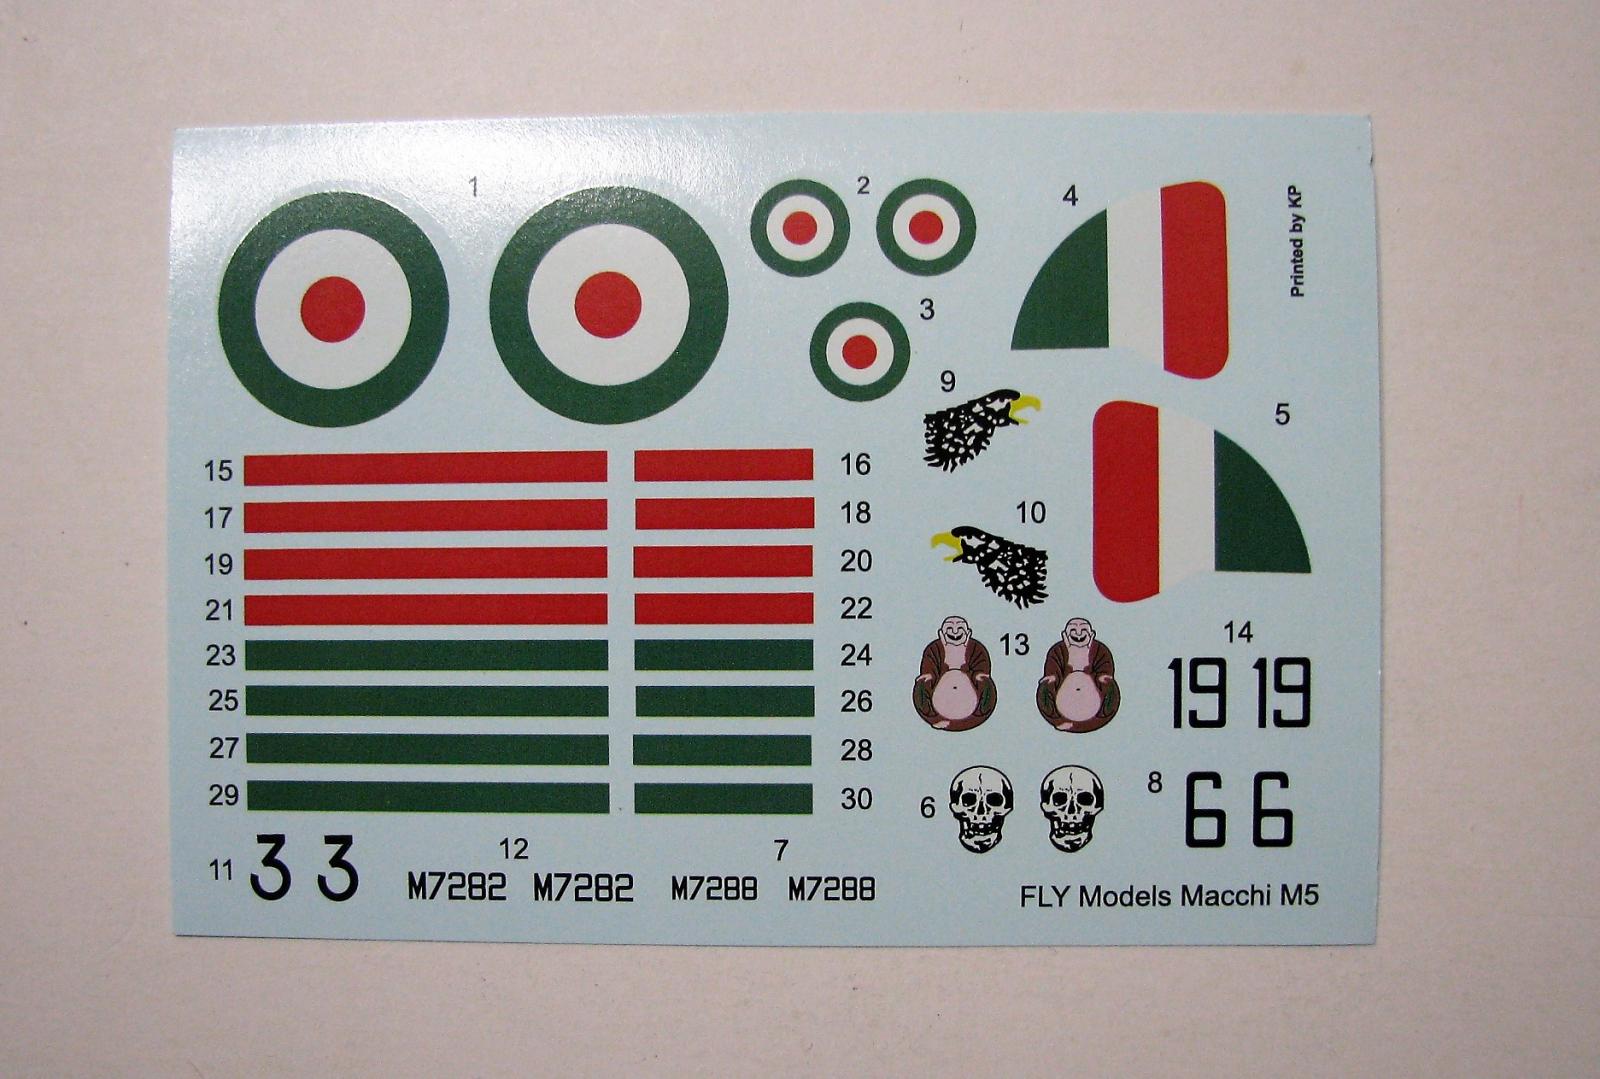
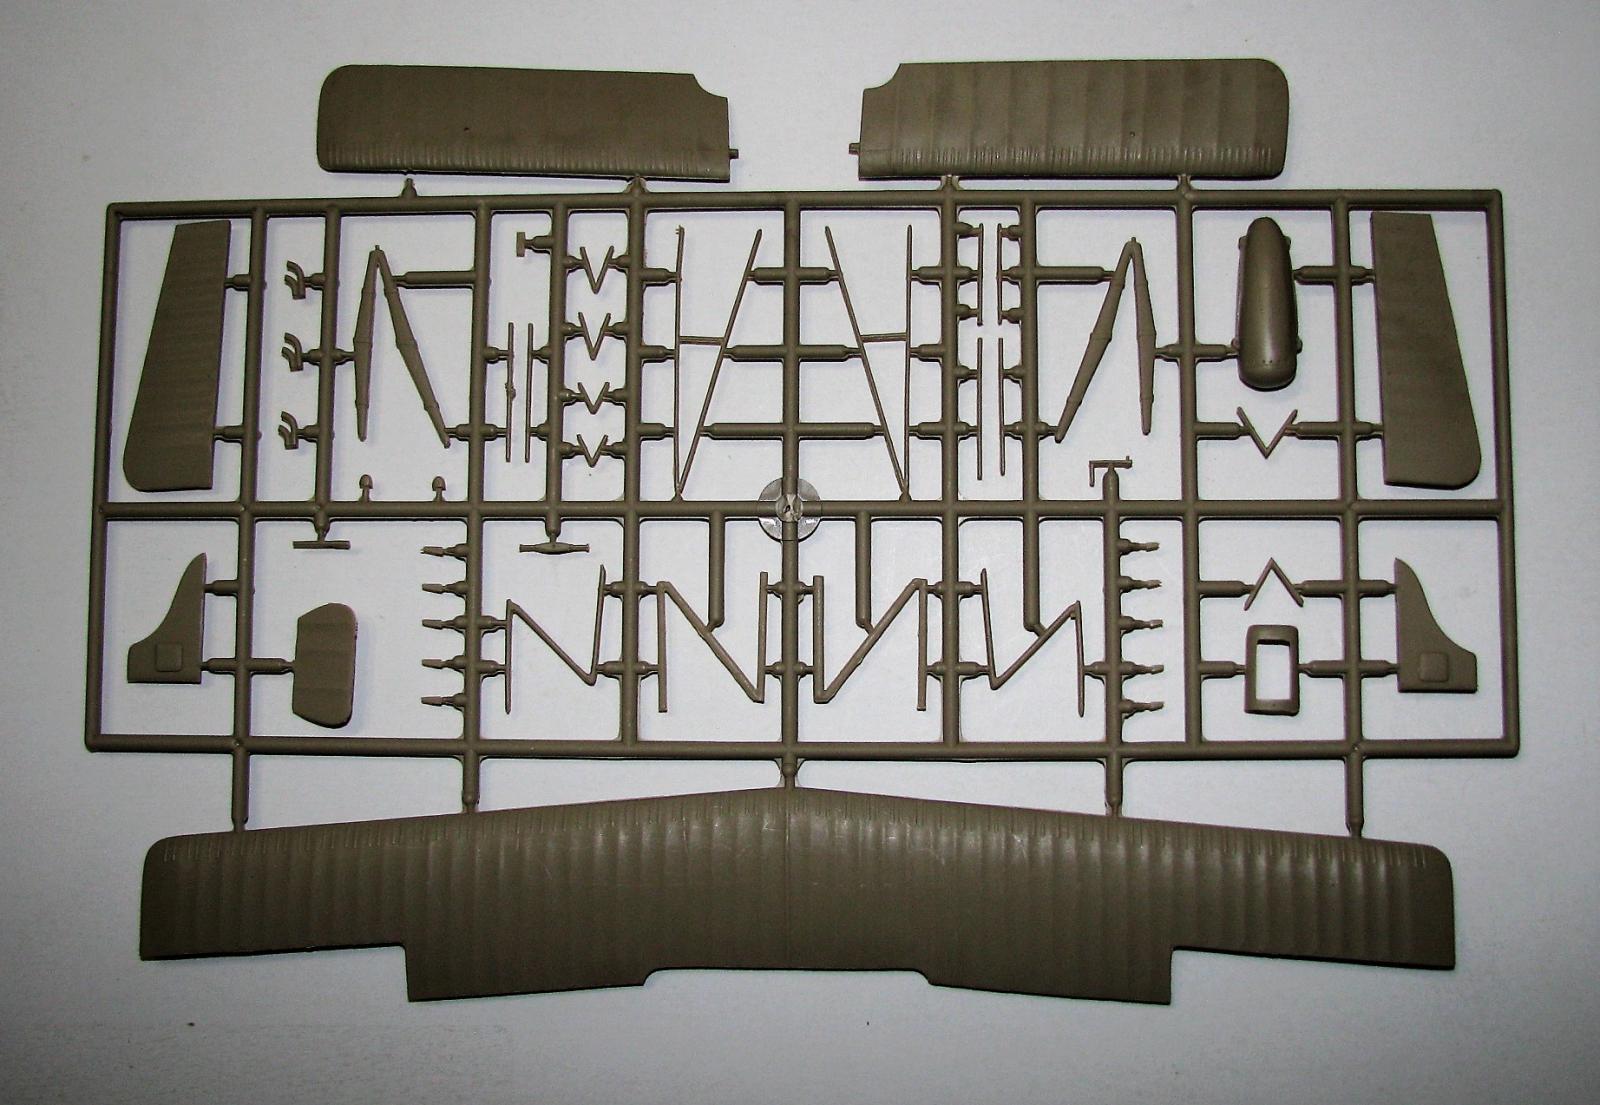
Upon opening the box you will find a bag containing 2 sprues of tan-colored injected plastic, a clear piece, a small bag of resin parts, a two-sided instruction page and a sheet of decals. The plastic is molded well and has no flash; however, some parts have a thick mold seam line that is tough to remove…especially some of the wing strut parts. The clear piece is thick and my copy was not clear at all. The resin parts are nicely molded and crisp. The decals are a bit grainy and a couple are out of register but all in all, look nice. The instruction page has 17 steps (each step has multiple construction areas on it) and a parts breakdown on it.
Construction
Steps 1-4 has you building the cockpit and fuselage and the only problem I had was the small instrument panel would not fit. I ended up cutting the molded plastic rod off and using a thick piece of wire. I also drilled all the holes for the rigging at this time as it would be easier now rather than later. I did add Eduard fabric belts as this added a little extra to the pit. Steps 5 & 6 have you adding the rear deck, bottom of the hull, lower wings and part of the tail assembly. Before adding the lower wings, the fuselage was painted and decaled as I figured it would be easier to do this now rather than trying to do it with all the rigging in place. The only problem I had was the wings as there is just one tab to hold them and it is not sturdy, also it makes it a little more difficult to set them in the proper angle. (This would come back to bite me later) I recommend adding a second pin for that.
Step 7-9 is where you add the rudder and elevators, but I decided to leave these off till later, and you also start working on the engine. There was a problem fitting the engine into its ‘tub’ and I had to use my Dremel tool to clean it out. Also, the bottom of the engine was sanded down a bit and all was well.
Steps 10 & 11 have you finishing the engine (it’s comprised of 14 or 17 parts depending on which exhaust you use), I decided to leave the 2 side shields off as they did not fit well, and then adding it to the fuselage….THIS is where the fun begins! The engine sits on two N shaped supports and on the real aircraft there are horizontal cross braces under the engine, halfway between engine and fuselage, one behind the other. For some reason, the kit does not provide these and are really needed as they do provide a lot of stability for this area. Also, it would make this part of the assembly much easier as the supports have flush joints at both ends and getting the engine to sit property was a bit of a pain….this was no fun for me.
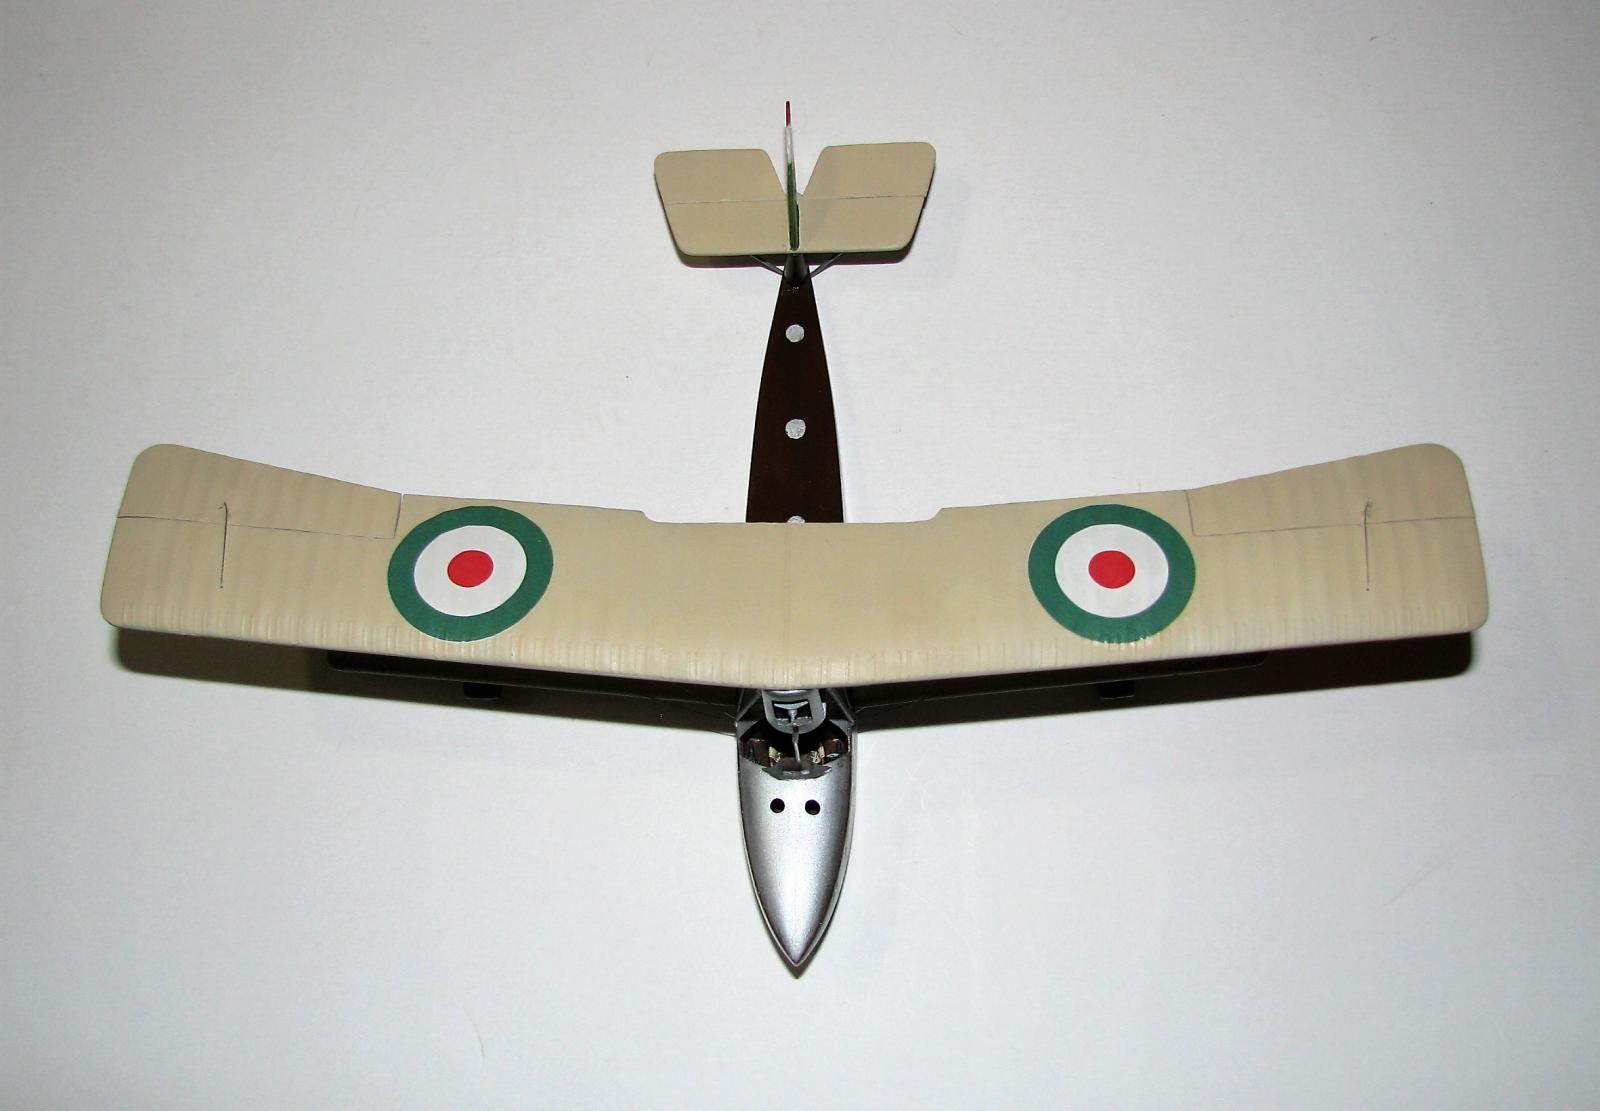
Steps 12 & 13 are the construction of the upper wing and the instructions show you to build all the outer wing struts. This was strange to me as both V struts attach to the lower wing, not each other on the actual aircraft. I decided to place just the main interplane strut and attach the outer one after the wing was in place. I also, due to my clumsiness, decided to leave the ailerons off until last…..history proved me right!
Step 14 is where the upper wing is added to the fuselage and you are given the rigging diagram. The problem I had here was the cabane struts. They did not fit well and I ended up cutting them apart to place them. I honestly do not know if it was the kit or something I did but please be aware of this area. I do know I messed up this part of the assembly as my upper wing sits back a little too far (Remember I had problems setting the lower wing at the proper angle?). The thin interplane supports were added here as well as the cross-bracing but be careful of theses ad they are thin and break easily. I had to use evergreen for the bracing as the kit pieces both broke. I used transparent sewing thread for the rigging as it is strong enough to help support the wing.
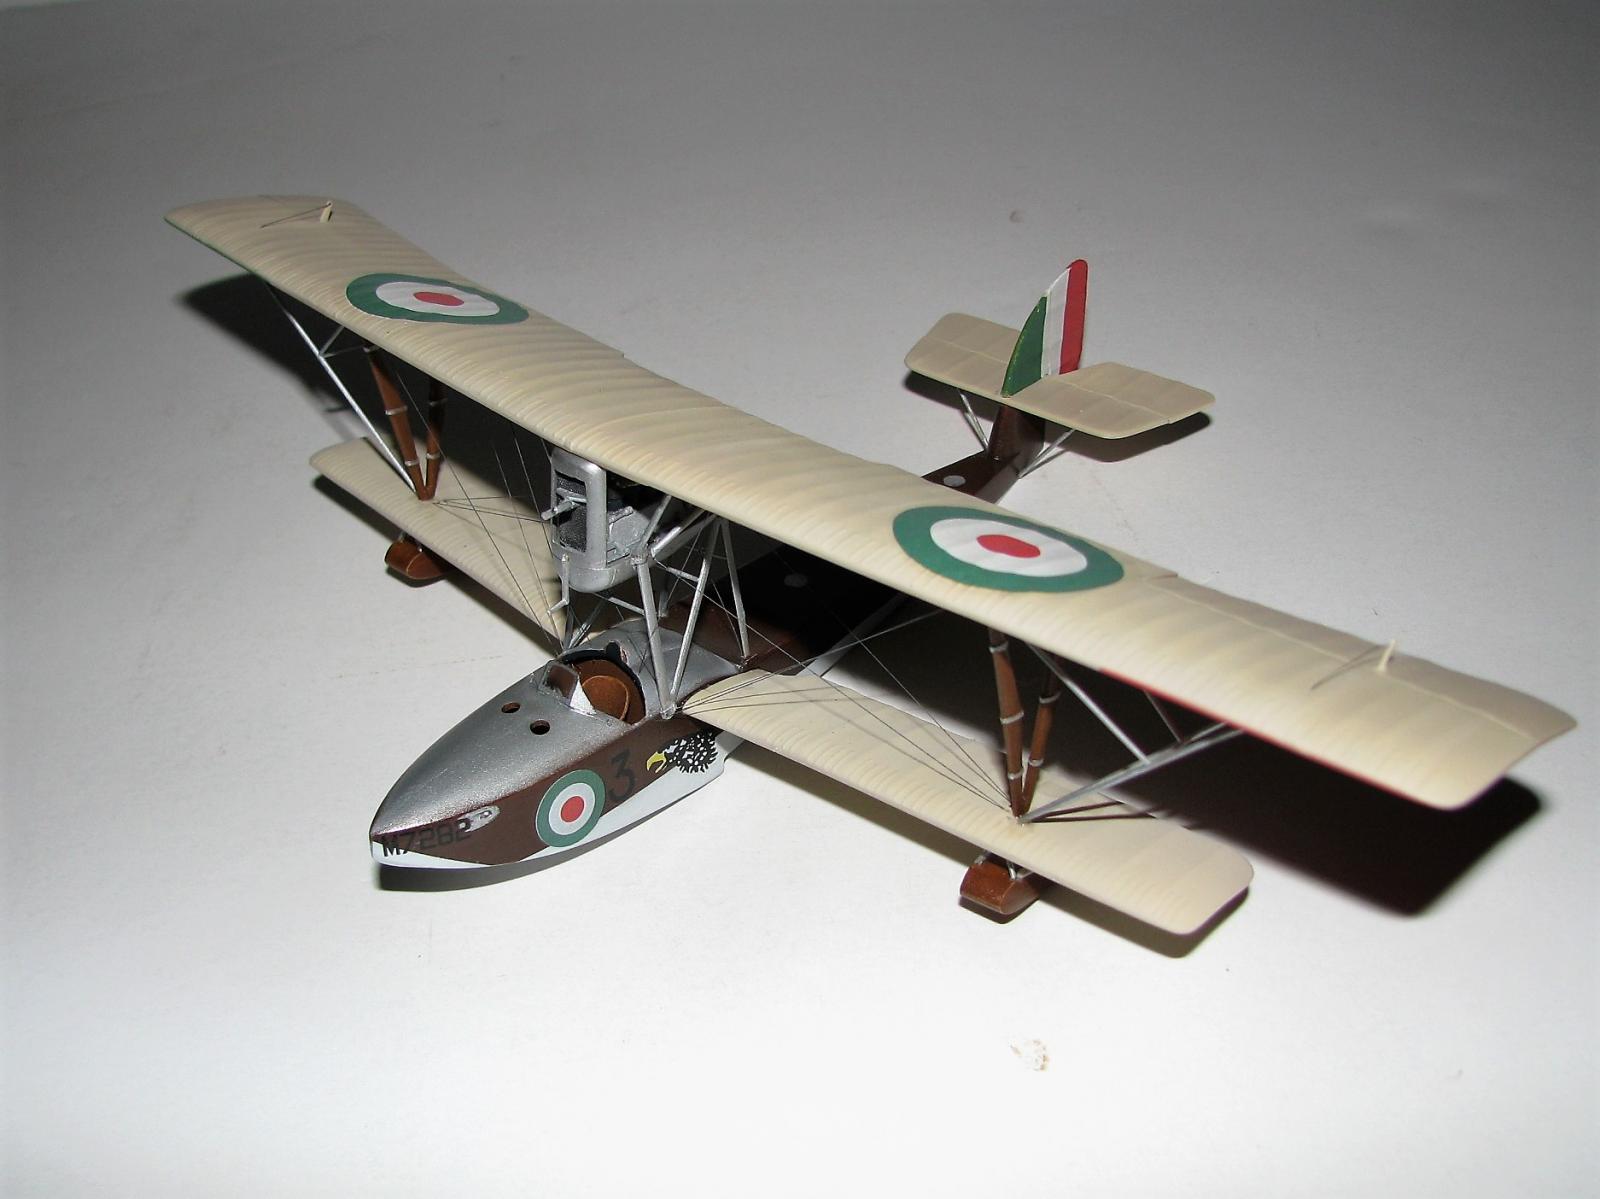
The final steps are where you add the wing floats and windscreen and I also added the ailerons, rudder, and elevators. The only problem here is that single tab holding the lower wing broke….SIGH. After fixing that I was able to attach the floats and take some pictures before any more accidents happened!
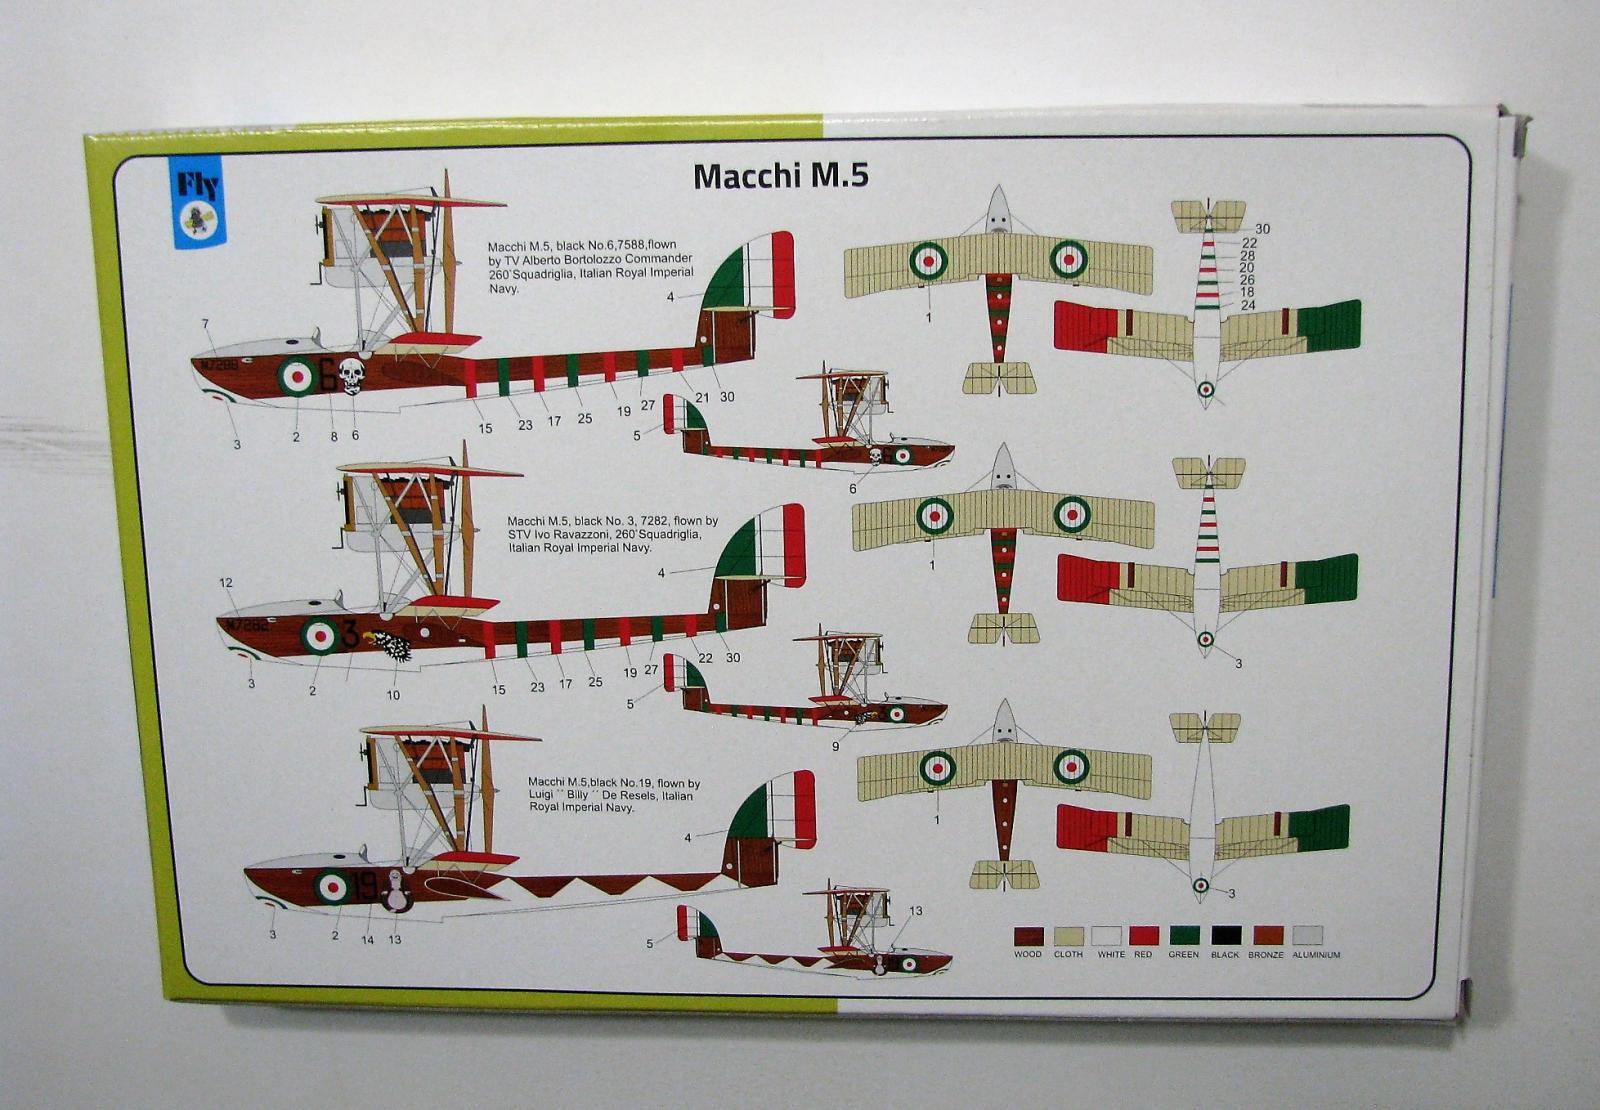
Finishing: I used Model Master Sand for the fabric surfaces, Tamiya acrylics for the red, white and green, Winsor Newton oils for the natural wood areas and a few different paints (Testors Metalizer, Alclad, VERY old Pactra, and Tamiya) for the aluminum areas. You are given 3 marking options:
- N0. 6, 7588 of 260 Squadriglia, Italian Royal Imperial Navy
- No. 3, 7283 of 260 Squadriglia, Italian Royal Imperial Navy
- No. 19 of the Italian Royal Imperial Navy
The decals went on the flat surfaces fine but when I tried to add the rear fuselage stripes, they just broke apart and no amount of Solvaset would make them work so I left them off.
Conclusion
Even with all of the problems I had with this kit it still is pretty nice. I would not recommend this for beginners and as I am just an average modeler maybe not even average modelers. If you are an aficionado of WWI aircraft and have experience with 1/48 WWI aircraft kits AND want a challenge this kit is for you!
I would like the thank Fly Models for this kit, the review team for letting me try it and all of you for reading this.


Comments
Add new comment
This site is protected by reCAPTCHA and the Google Privacy Policy and Terms of Service apply.
Similar Reviews