
Lockheed T2V-1/T-1A Seastar
Lockheed’s derivative of the venerable T-33 as the Navy’s carrier-capable jet trainer, the T2V/T-1A bears a strong family resemblance to the T-Bird, but was a far different animal. A redesigned and strengthened wing with leading edge droops, different flaps, and boundary layer control was a big item, while a strengthened fuselage and gear, plus the raised rear cockpit for better visibility by the back-seater, gave the Seastar its characteristic humpback look. Larger tail surfaces, intakes, tailpipe, and an uprated J33 engine were included. Additional fuselage speedbrakes were added to the fairings aft of the wing, and other improvements were added as well, along with upgraded ejection seats, a hefty arresting hook, and a catapult hook.
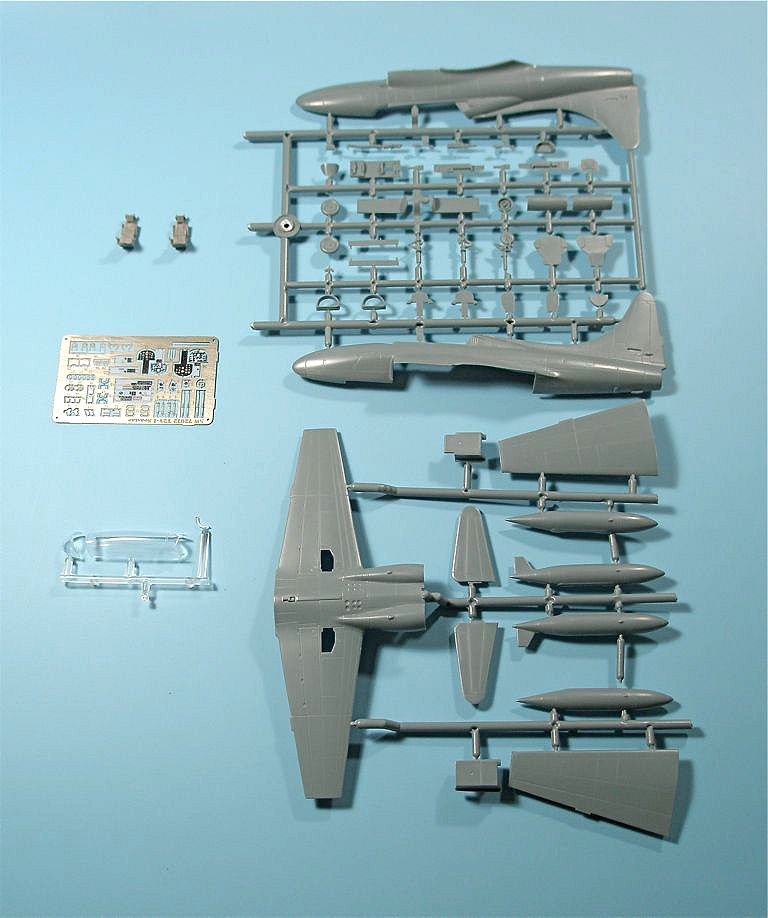
The kit’s plastic parts have really nice recessed panel lines, and the detail parts are excellent as well. The pre-painted photo etch fret is a nice touch and was easy to handle, even though it was my first time working with one of these. I liked it a lot, though I didn’t use all the pieces. A pair of resin Martin-Baker ejection seats is provided, which have cast-in seat and shoulder belt detail, so I opted not to use the photo etched ones to detail them.
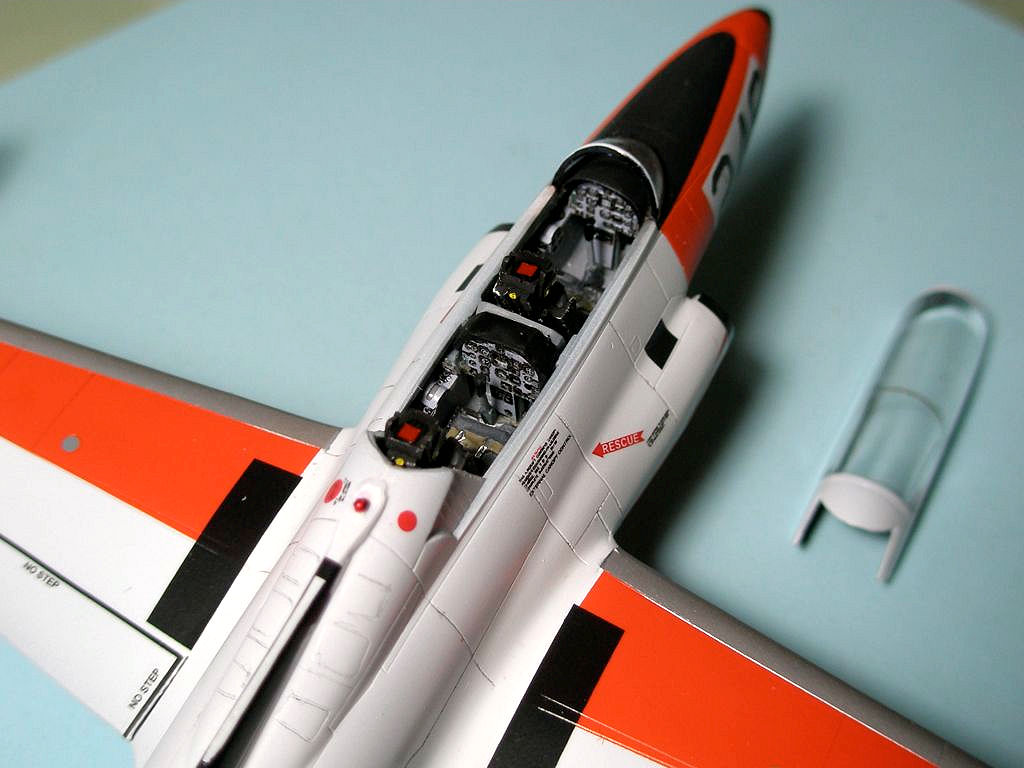
There are two separate cockpit tubs, and after building each one up with its own instrument panel, I had some difficulty getting them to sit correctly inside the fuselage halves – this was my only real problem assembling the kit. The assembly of the forward cockpit and the nose wheel well sets the fore-and-aft position of the front cockpit as well as the cockpit deck angle, and without a little modification, doesn’t allow the cockpit to sit just right. If I were to build another one, I’d thin down the underside of the forward cockpit floor plus the roof of the nose wheel well before gluing them together.
I ended up trimming the instrument panels to make them shorter, so as to not extend way above the canopy rail. The glareshield in the front cockpit has to fit over the forward instrument panel and should lie at a shallow angle – and before cutting down the instrument panel, mine had a good 30-plus-degree angle to it. In the end, I think it all looks right according to my reference – Ginter Naval Fighters # 42.
The cockpits, nose wheel well, interior walls for the intakes, and the exhaust pipe need to be added before the fuselage is closed up. The lower wing-to-fuselage junction needed filling and sanding, and the upper fuselage’s intake contours didn’t match up very well with the lower wing’s. Once the intake lips were glued in place, filling and some judicious sanding took care of that.
The landing gear is nicely done, and the photo etch detail parts can really make them pop. The clear parts are very nice, but in order to pose the canopy open, I had to force its aft edge down over the turtledeck…it’s made to fit in the closed position.
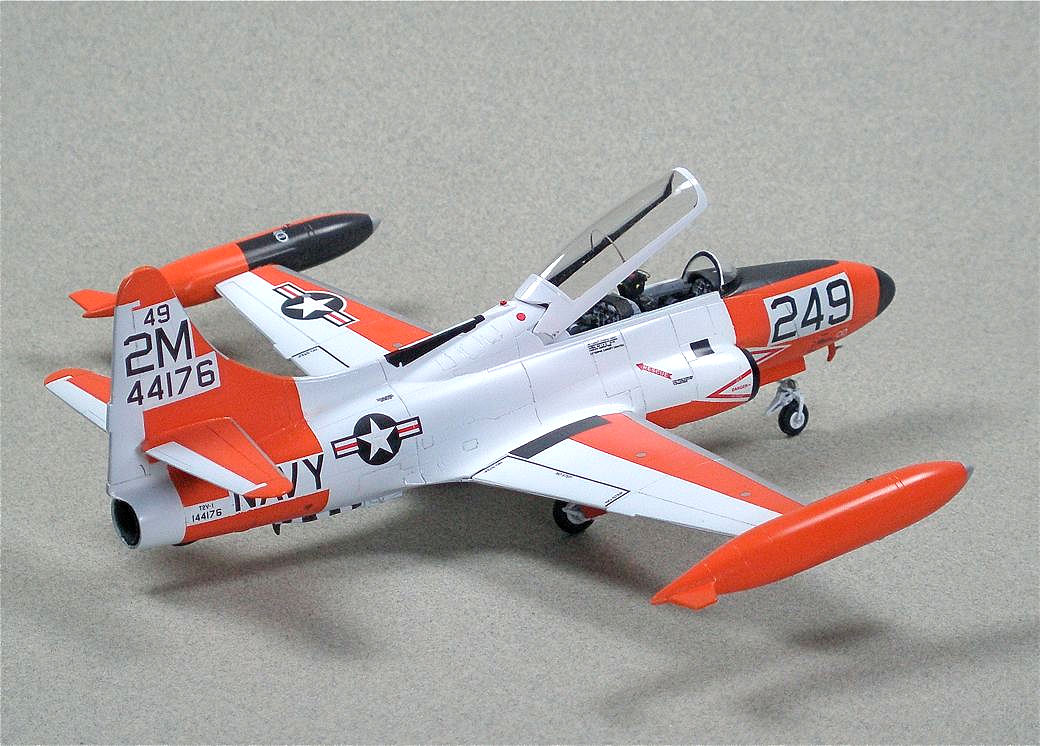
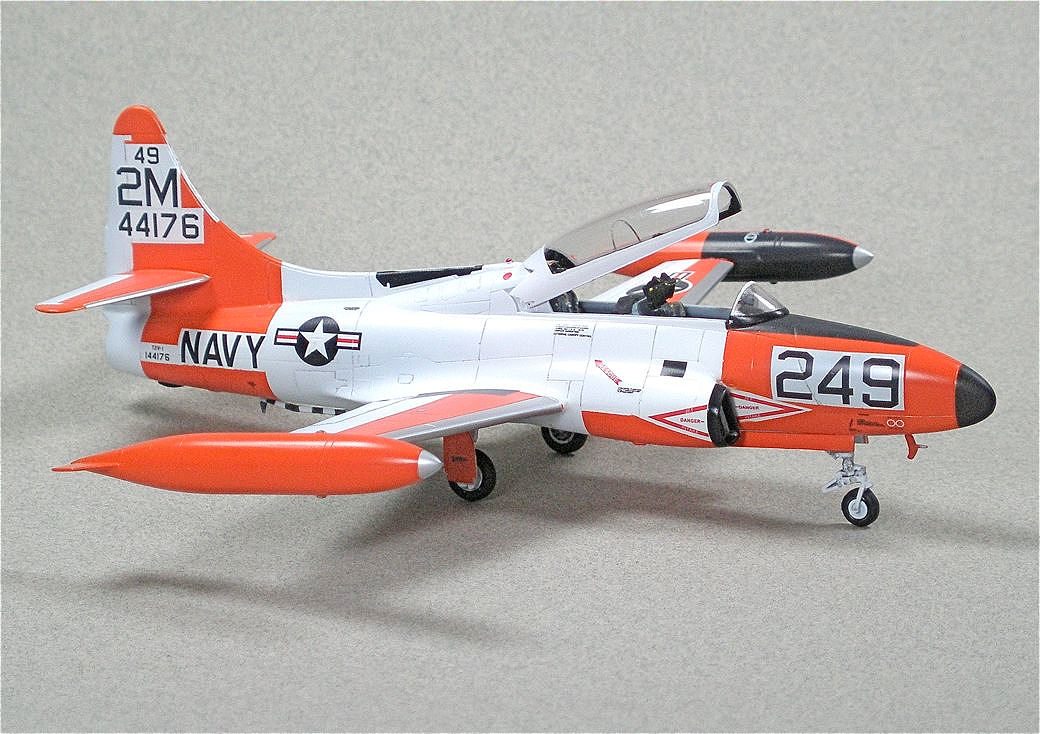
The kit provides decals for three markings options – two in orange-and-white trainer scheme and one overall gray station aircraft from Washington, D.C.. I chose to model the Seastar from NAS Memphis, since I took my first Navy physical at that base back in the dark ages (at least, that’s what my kids think).
The Eduard decals are meant to make the modeler’s life easy, because where markings go on the orange areas, such as the nose and tail, the decals are printed on white backgrounds. The idea here is to paint the nose and tail sections orange, then apply the decals and – voilá! – instant white areas with black markings. Unfortunately, the decals are so transparent that what you end up with are black markings on a pink background. I tried a test piece of decal before I painted my model, and after seeing this feature, subsequently masked off all the white areas before spraying the orange. It was a little extra masking work, but it’s better than a pink background. The decals have complete stenciling data, are very thin, and require a little TLC to avoid their folding back on themselves, but they settle down nicely and look super.
There are two “bumps” on the bottom of the fuselage, one behind each intake; the left one was the lower anti-collision beacon, but I couldn’t find any documentation of what the right one was, nor any photos of it. I left it alone, figuring Sword must’ve put it there from their research study of the real aircraft.
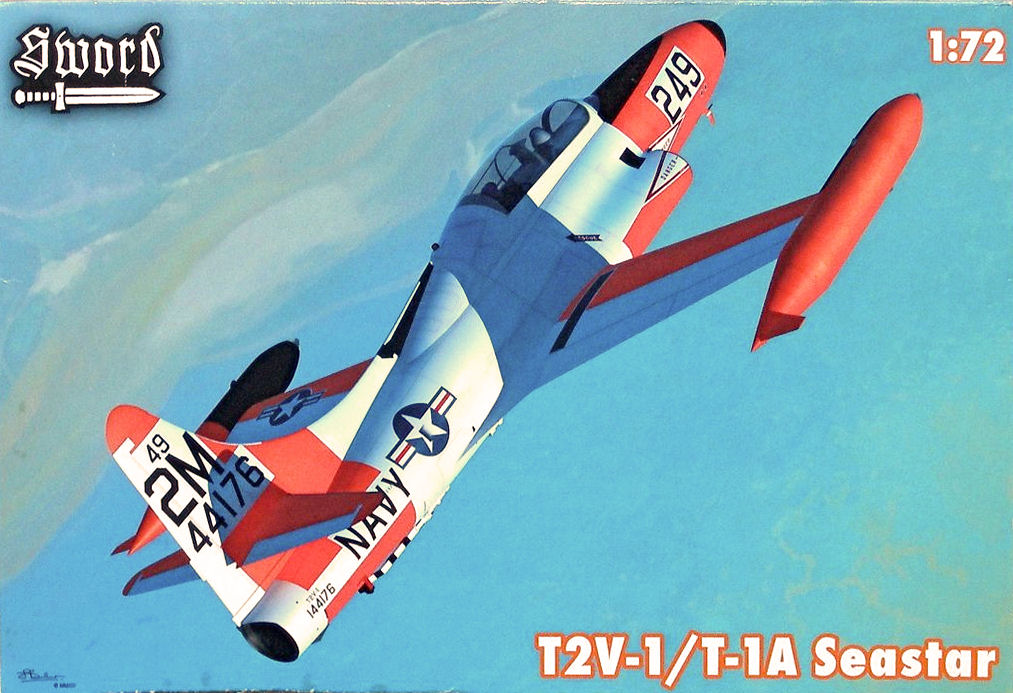
When completed, the model sits right, looks right, and scales out right. The interior looks terrific, and prior to attaching the canopy and blocking the view, I shot a photo of it. Sword’s got a winner with their new Seastar kit – besides the subject matter being long overdue and filling a hole in my 1/72 stable, what you get in the kit is a real honey for the money. I have to also add a kudo for whoever’s doing Sword’s box art…it’s beautiful.
Thanks to Sword and distributor MMD-Squadron and IPMS/USA for the opportunity to build and review this little gem. Definitely look for this one at your local hobby shop.
Photo Captions
- Photo 1: Cover of the kit box.
- Photo 2: Parts are beautifully detailed and photo etch fret is pre-colored.
- Photo 3: Three markings options are provided.
- Photo 4: A peek inside the cockpit prior to attaching the canopy.
- Photo 5: Finished model, left front view.
- Photo 6: Finished model, right rear view.
- Photo 7: Finished model, right front view.


Comments
Add new comment
This site is protected by reCAPTCHA and the Google Privacy Policy and Terms of Service apply.
Similar Reviews