
Lockheed Martin F-22A Raptor
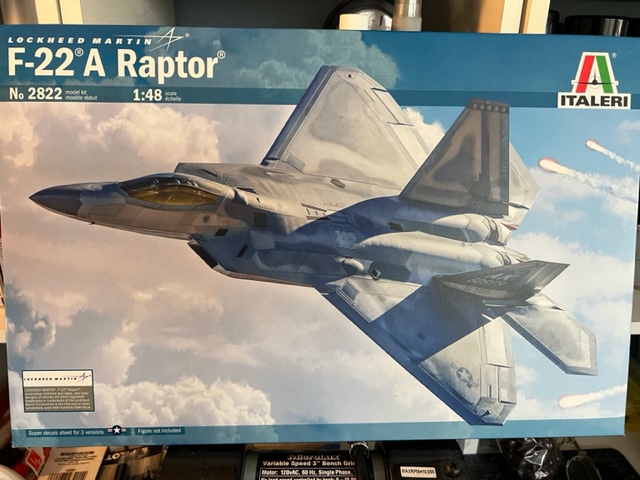
This review is of the Italeri 1:48 scale Lockheed Martin F-22A Raptor, kit #2822, a 2022 reissue of their 1999 kit with new decals. The kit claims to represent the F-22A production version. See Photo 1.
The box contains two large bags of parts, one small bag with the slightly gold-tinted canopy and clear head up display screen, the decal set and a 12-page instruction booklet with sprue diagrams printed in black and white. Decals are provided for three different aircraft. No pilot figure is included. The model’s surfaces have finely engraved panel lines, which after painting I decided to highlight with pencil or wash. This would have been made easier had I pre-scribed the lines so the acryl painted areas would not obscure the lines to the degree that they did. I ended up using a black pencil to faintly highlight the lines. It was a chore keeping a frequently sharpened pencil point inside the grooves given the zig zag patterns of the plane’s panels. A clean eraser was an essential tool. However, in my mind this gave a nice touch to the overall look of the model.
Fortunately I did some pre-fitting of the wings and fuselage before starting assembly. The joint between the upper front and rear fuselage sections proved to be a fit problem. The pre-fitting revealed difficulty in making the joint, having to get a pin on the rim of the upper front section under the front edge of the upper rear fuselage. I decided to glue these pieces together before gluing them to their lower halves as is indicated in the instructions.
I originally believed this kit might be a good one for a more novice modeler, particularly if one closes up the weapons bays and other access panel doors, but that is not so. Albeit fixable, the jet engine inlets were a problem that took some doing to get to an acceptable condition. I was also going to build this one strictly out-of-the-box, but I decided that I wouldn’t be satisfied without adding some enhancements to the cockpit. All of these issues will be described in more detail below.
It should be noted that the F-22 has many unusually shaped parts that are not intuitively recognized and locatable as with typical aircraft. Study of the instructions is important in this regard. More detailed instructions, and in color, would be welcome, especially for less experienced modelers.
In short, however, this kit builds into an impressive model that I am very pleased with, but it took some doing.
The Build
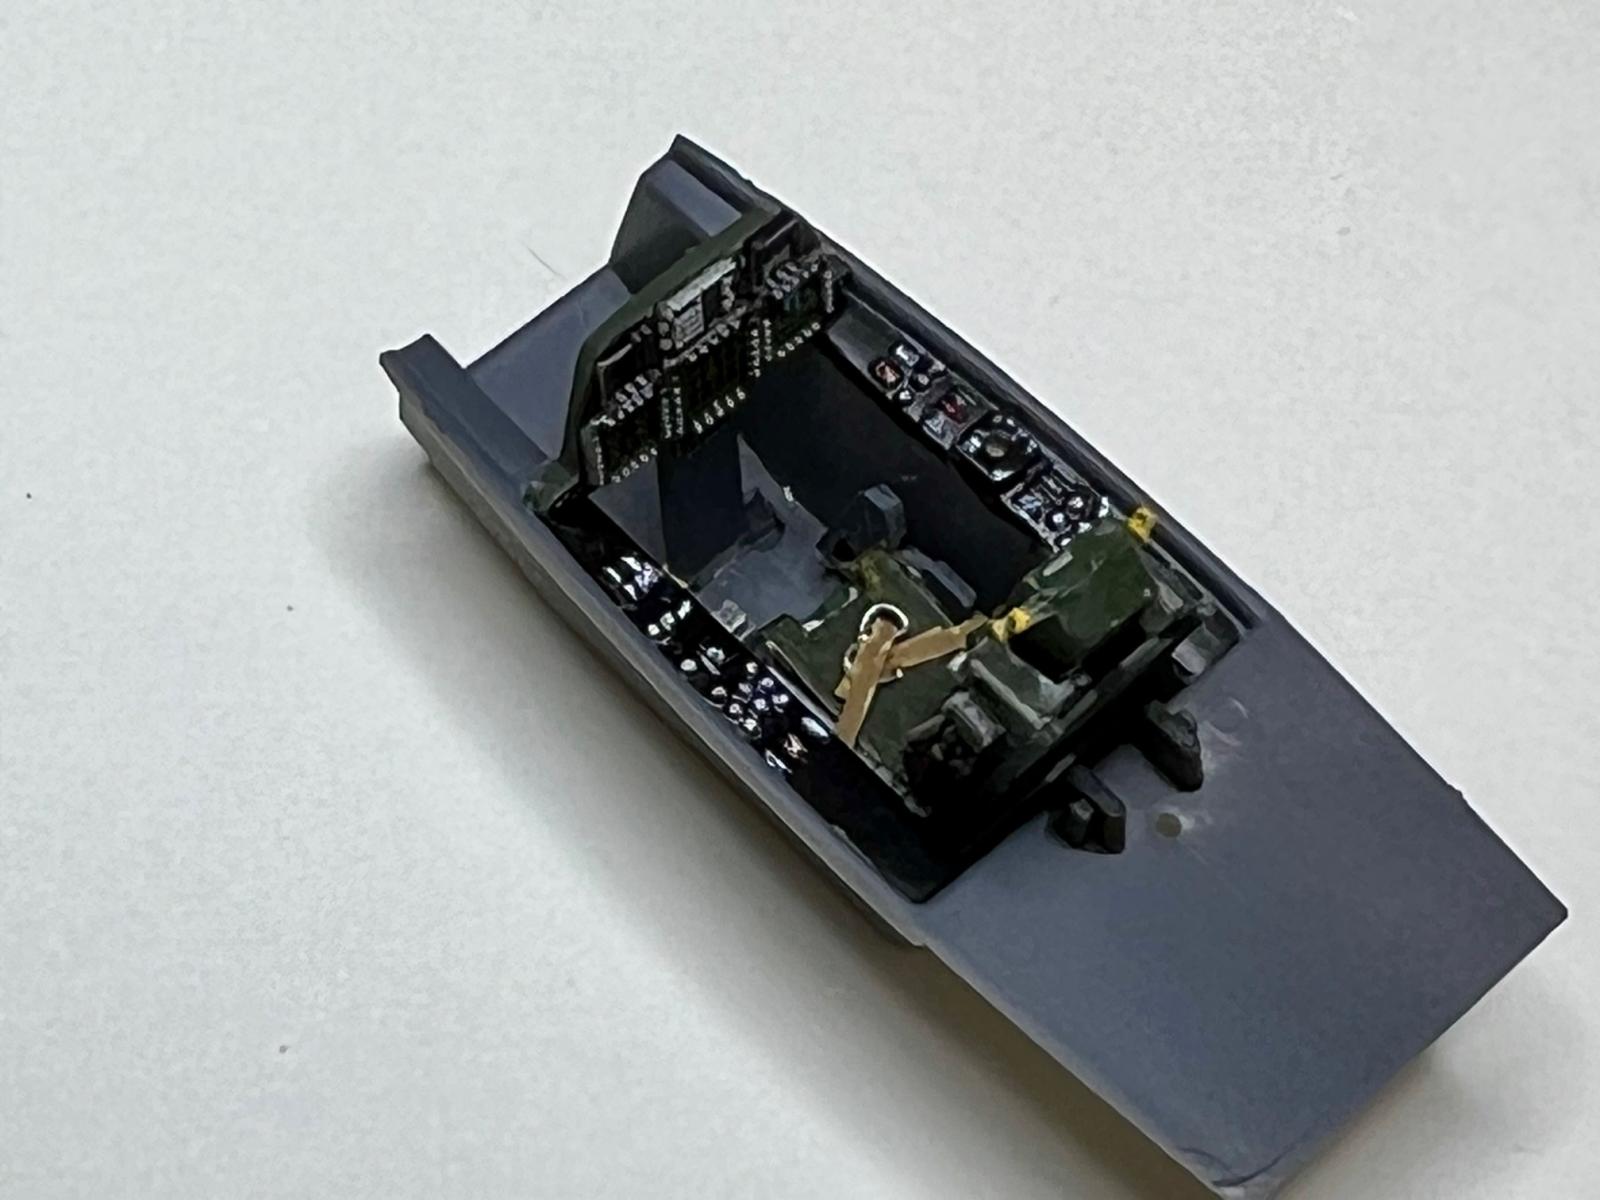
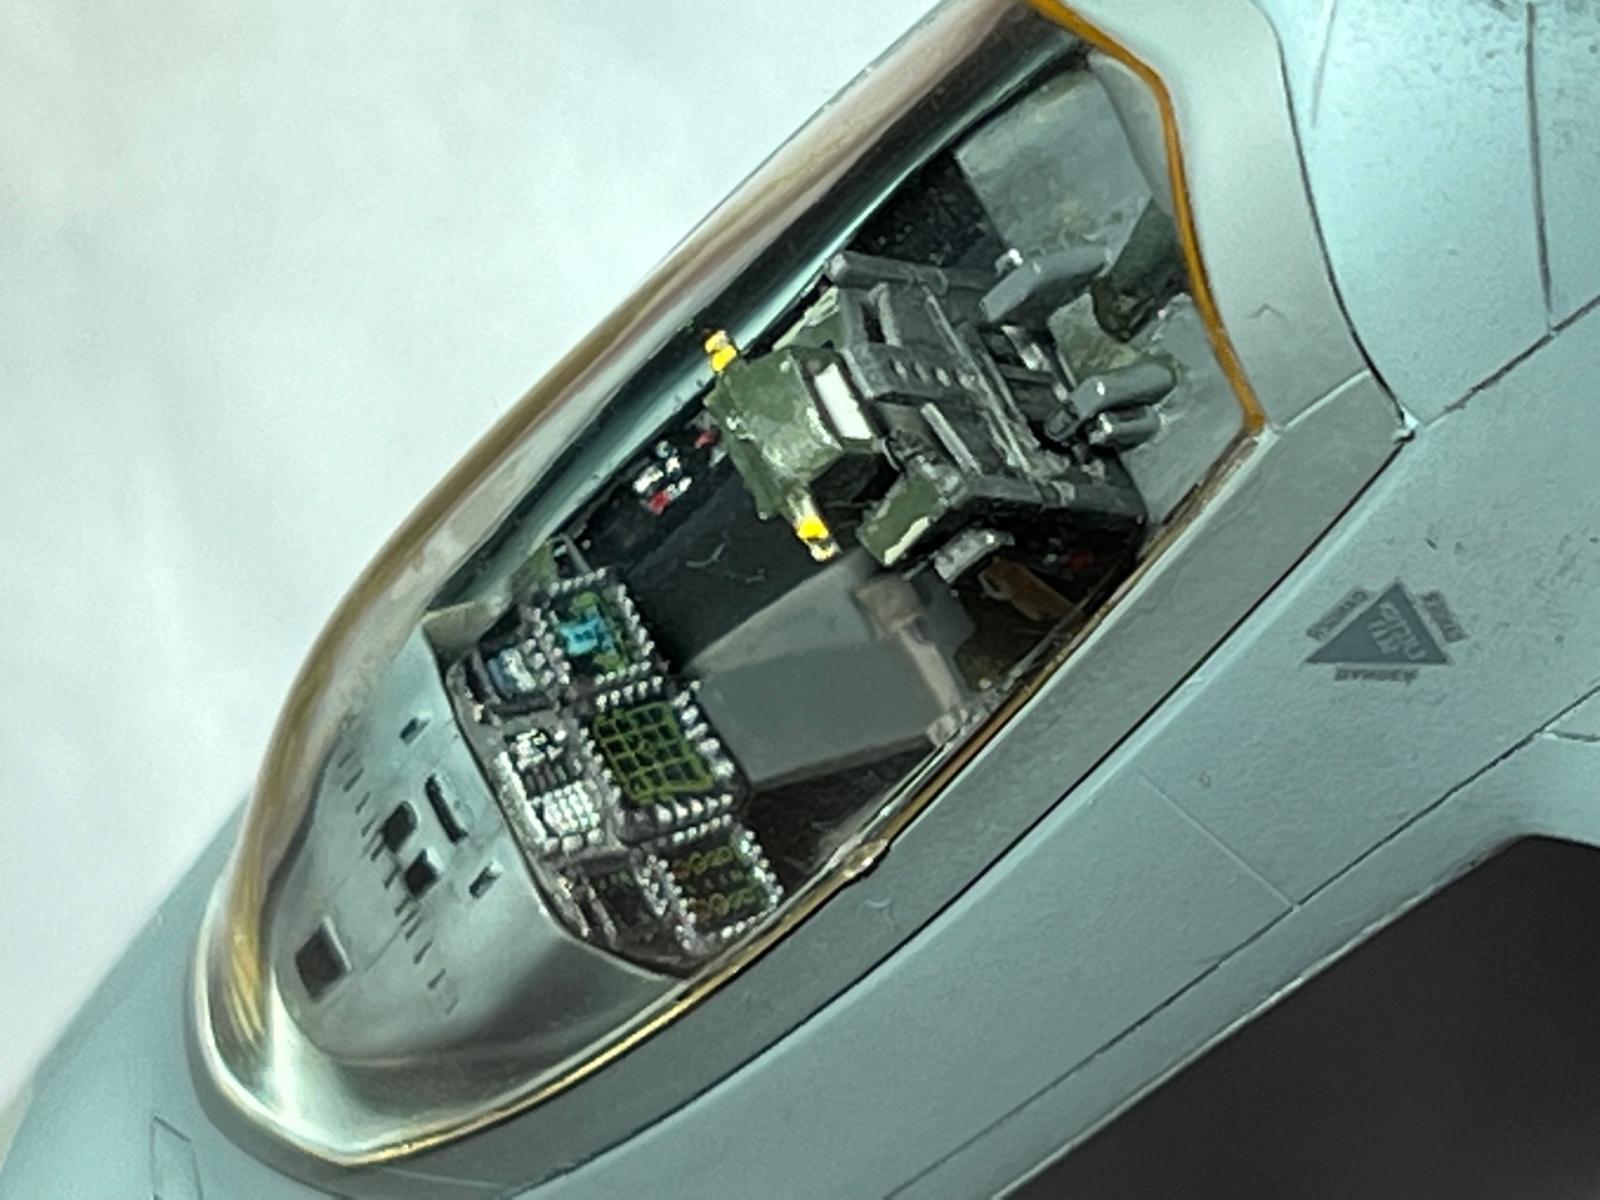
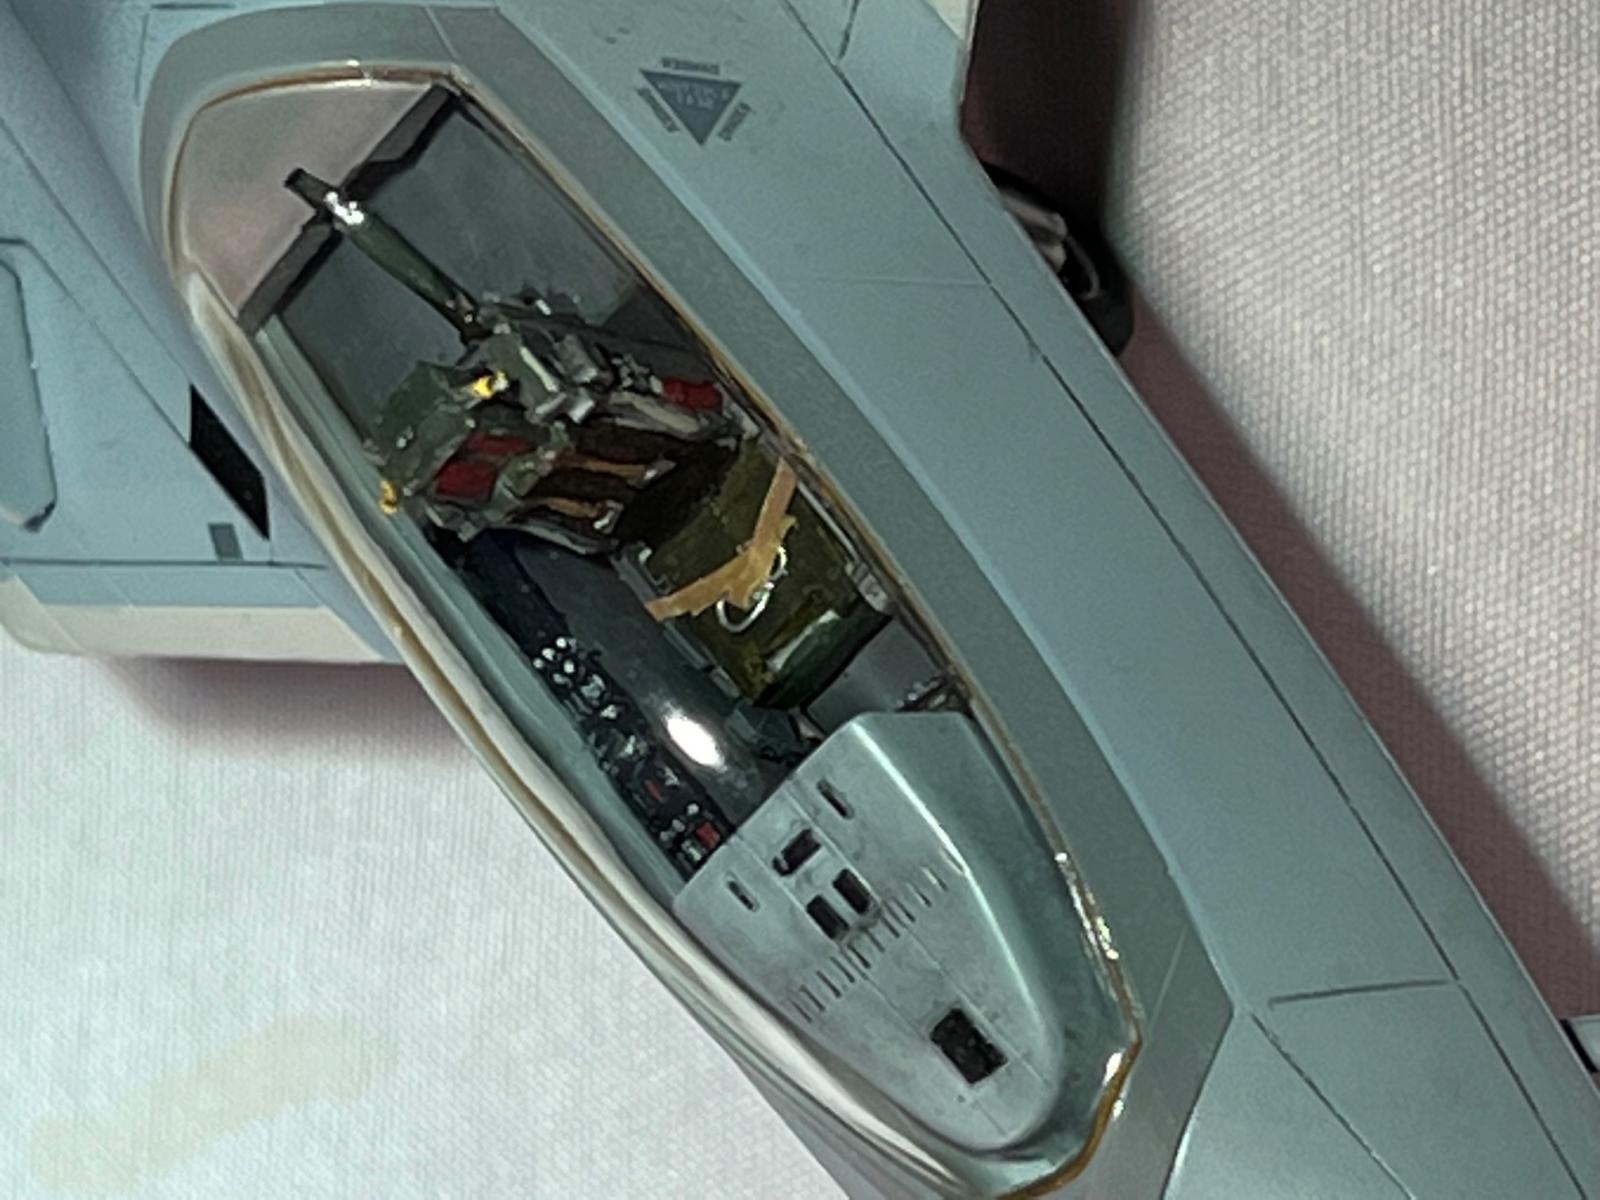
As usual, the assembly begins with the cockpit. The latter lacks the detail found in more recent models, possibly because this kit was originally issued before the aircraft became operational. In any case, I decided to paint the raised features of the side panels (using the “paint them white, then black, then scrape off the black” method), but the main panel had no embossing. It was to be decaled. However once I got the side panels done, the decaled main panel did not look good by comparison. So having recently obtained and reviewed the Red Fox 3D Acrylic instrument panels that were made for a different F-22 kit, I affixed the main panel sections from that aftermarket set to the blank panel in this kit. That worked out much better. I also added seat belts made from tape and buckles made from bent 30 gauge wire. See Photo 2.
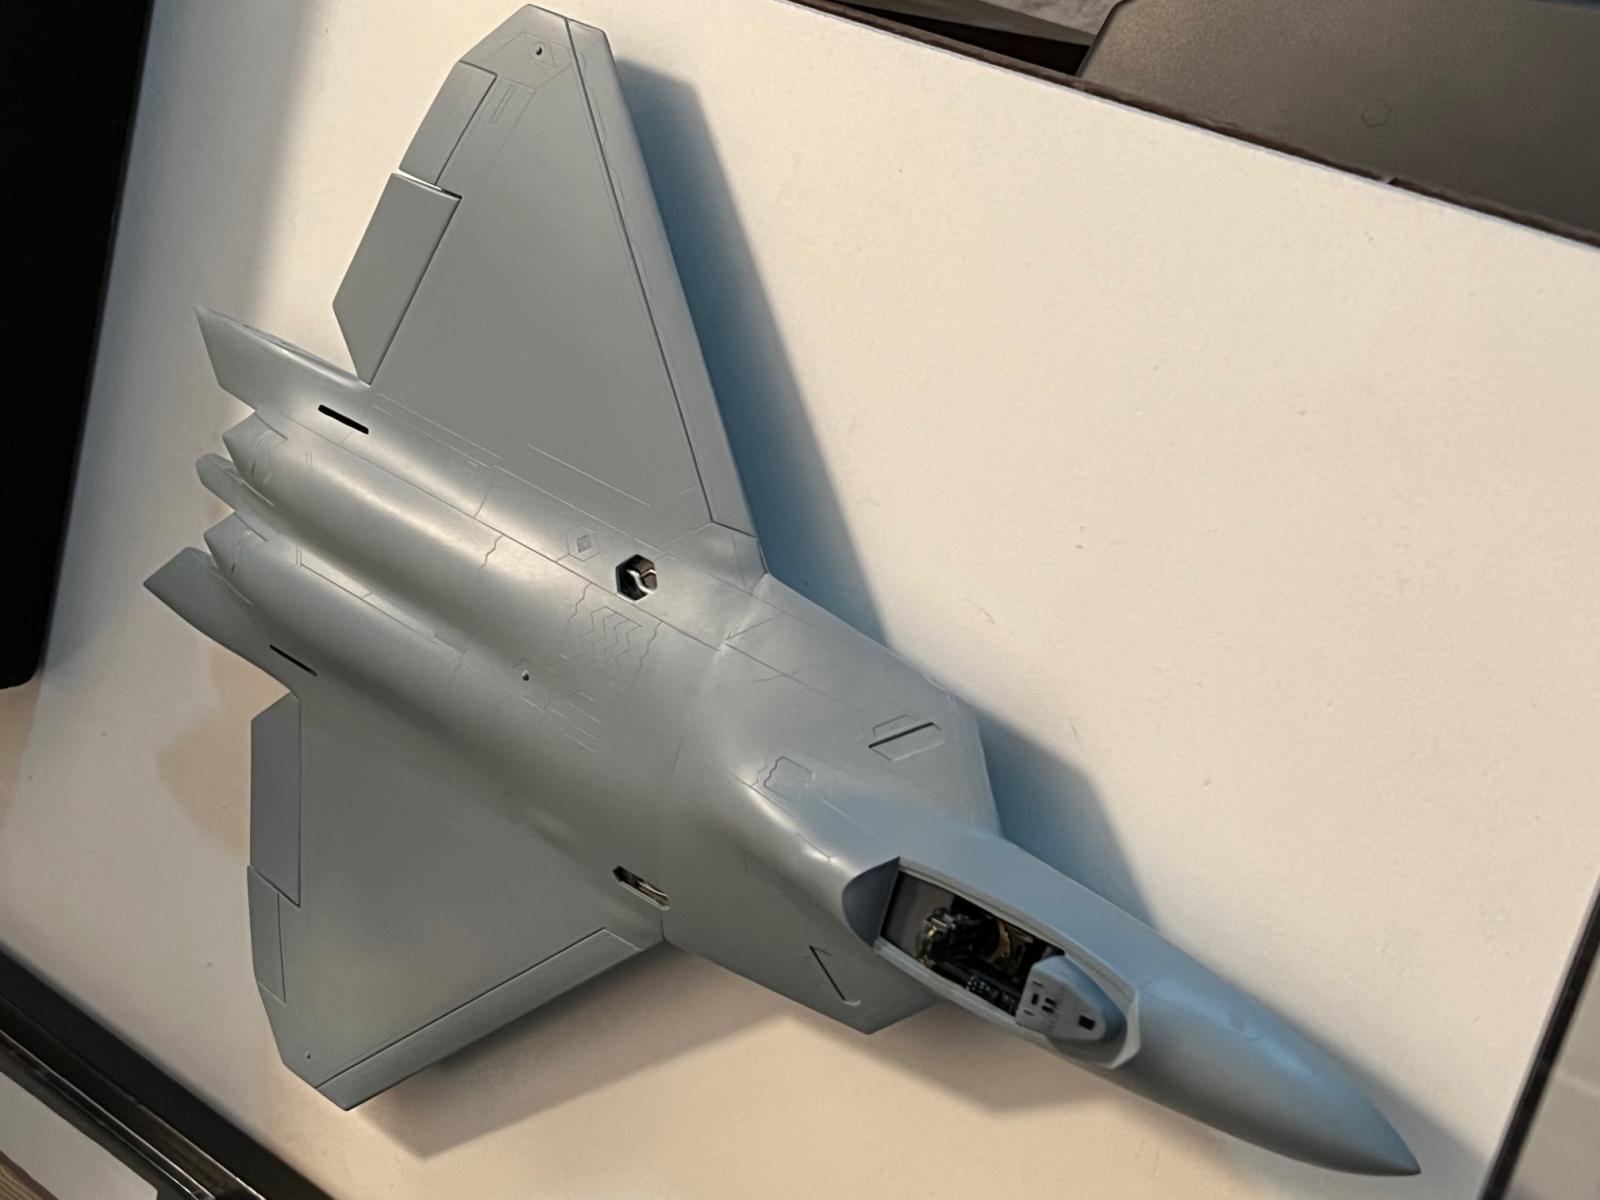
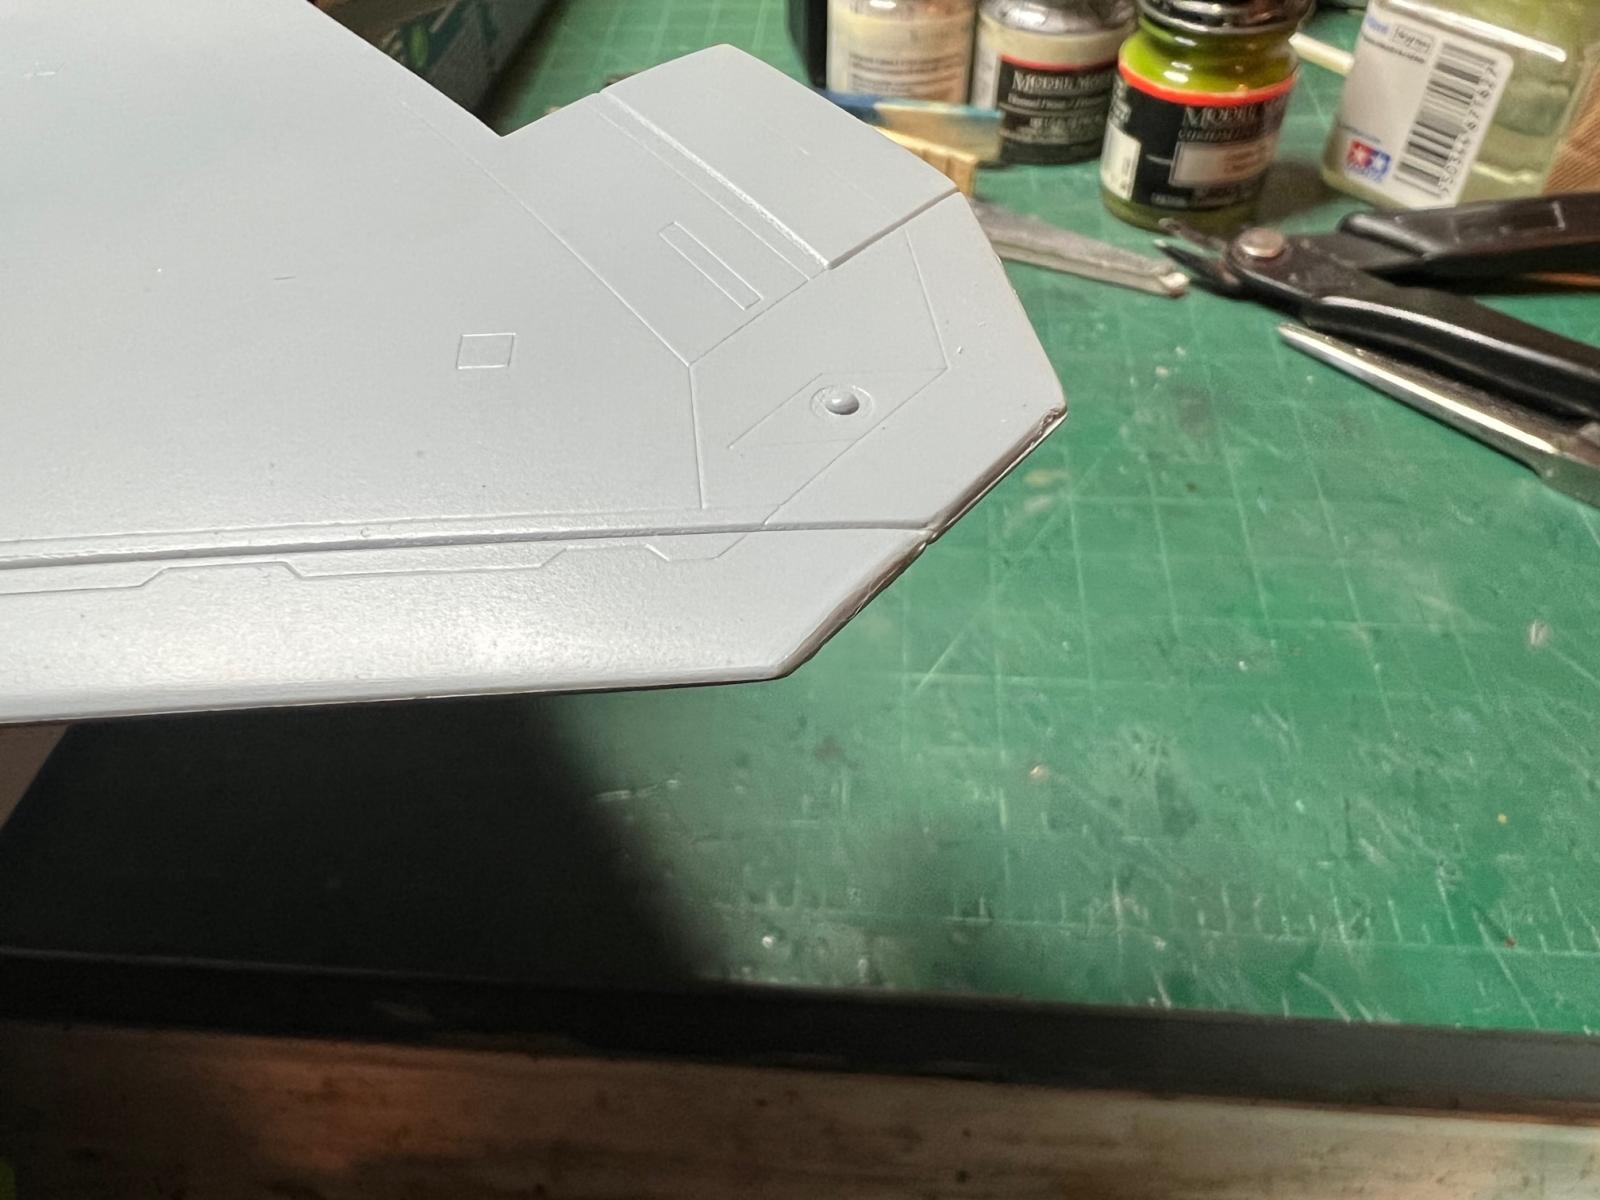
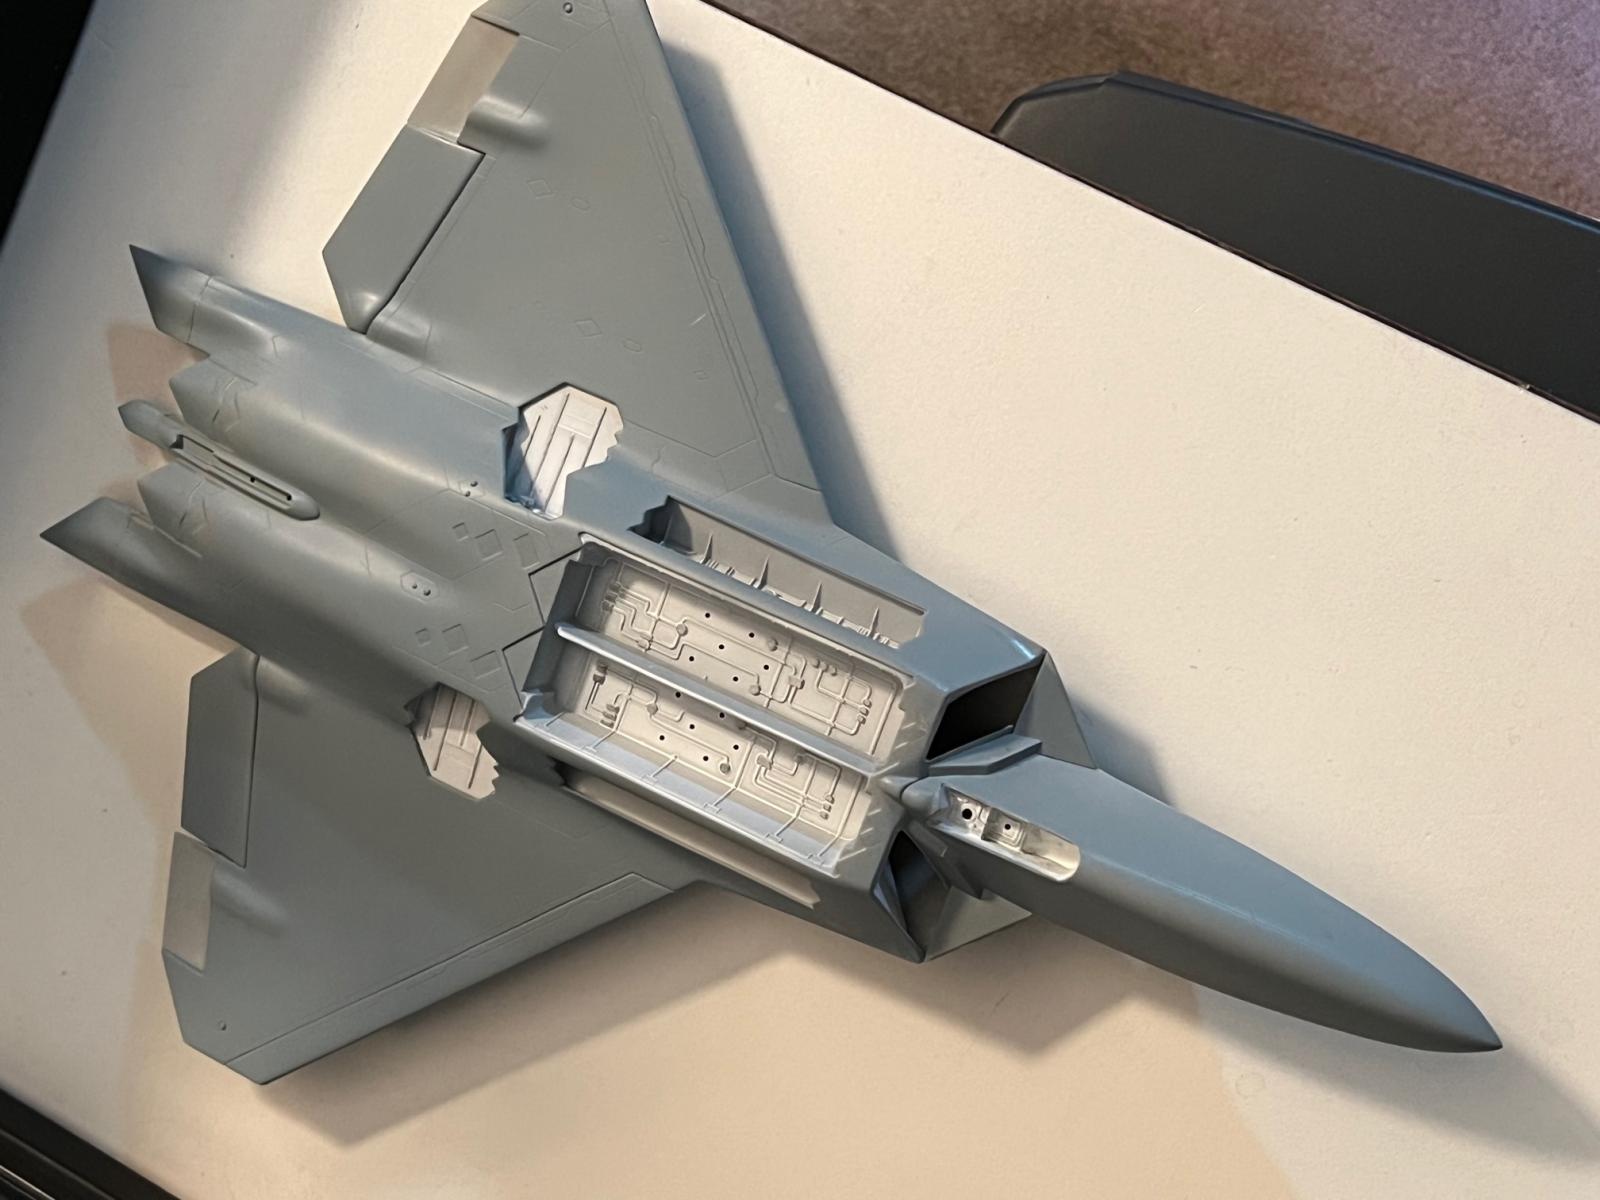
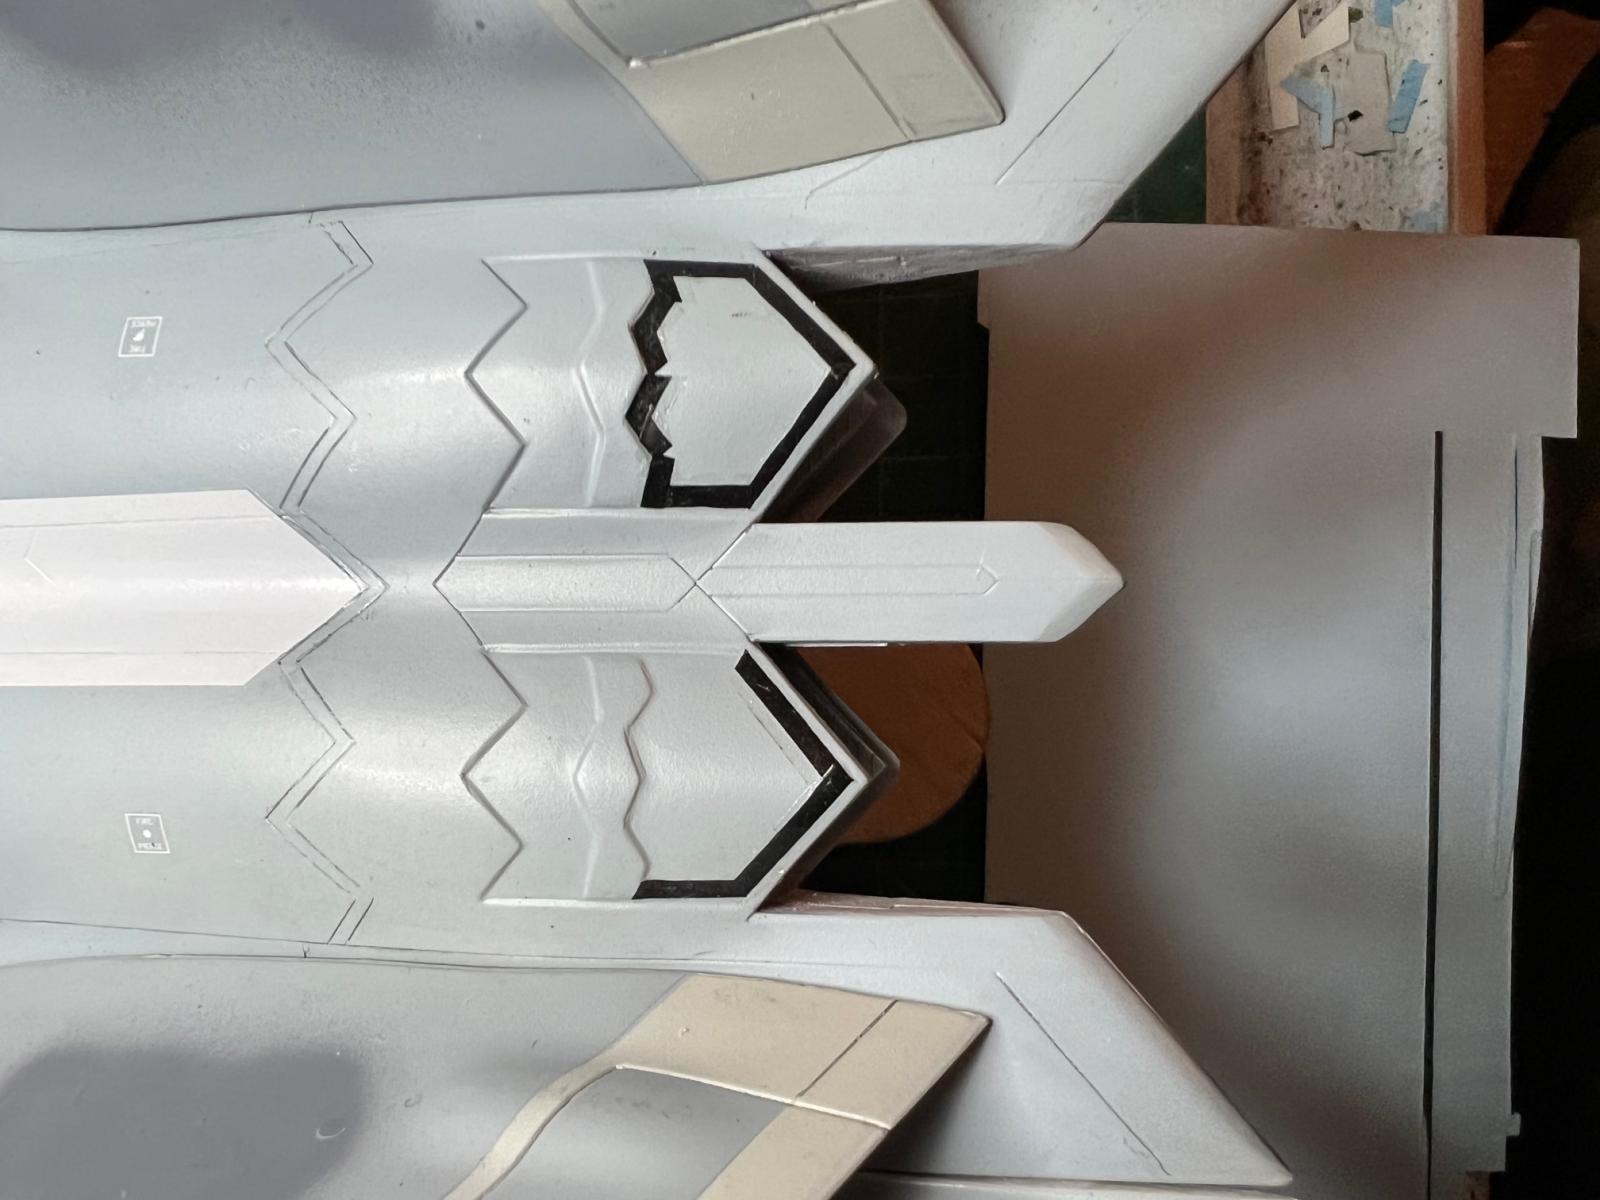
The front and rear upper fuselage sections are not glued together until Step 5 in the instructions, but given the problem revealed in the pre-fitting, I glued them together at this point for the purpose of dealing with the joint, which not only had a seam, but also revealed a valley between the parts that had to be removed. This took a while as there were panel lines on both sides of the seam. I sanded and rescribed multiple times to avoid losing the panel lines altogether. This took a few hours of effort, but it was absolutely necessary. I believe the seam line itself could be part of the plane, but the “humps” along both sides of it had to be leveled off. Photo 3 shows the sanding partly completed. One of the many zig zag panel lines shown had to be repeatedly rescribed during this sanding effort. Only after this was done did I proceed with the installation of the cockpit into the front upper fuselage section, the addition of the wheel wells, weapons bays and jet exhausts into the lower wings section, and completion of the assembly of the wings and fuselage. See Photo 4. Note that there were a few misaligned edges around the wings and fuselage that needed sanding. An example is in Photo 5.
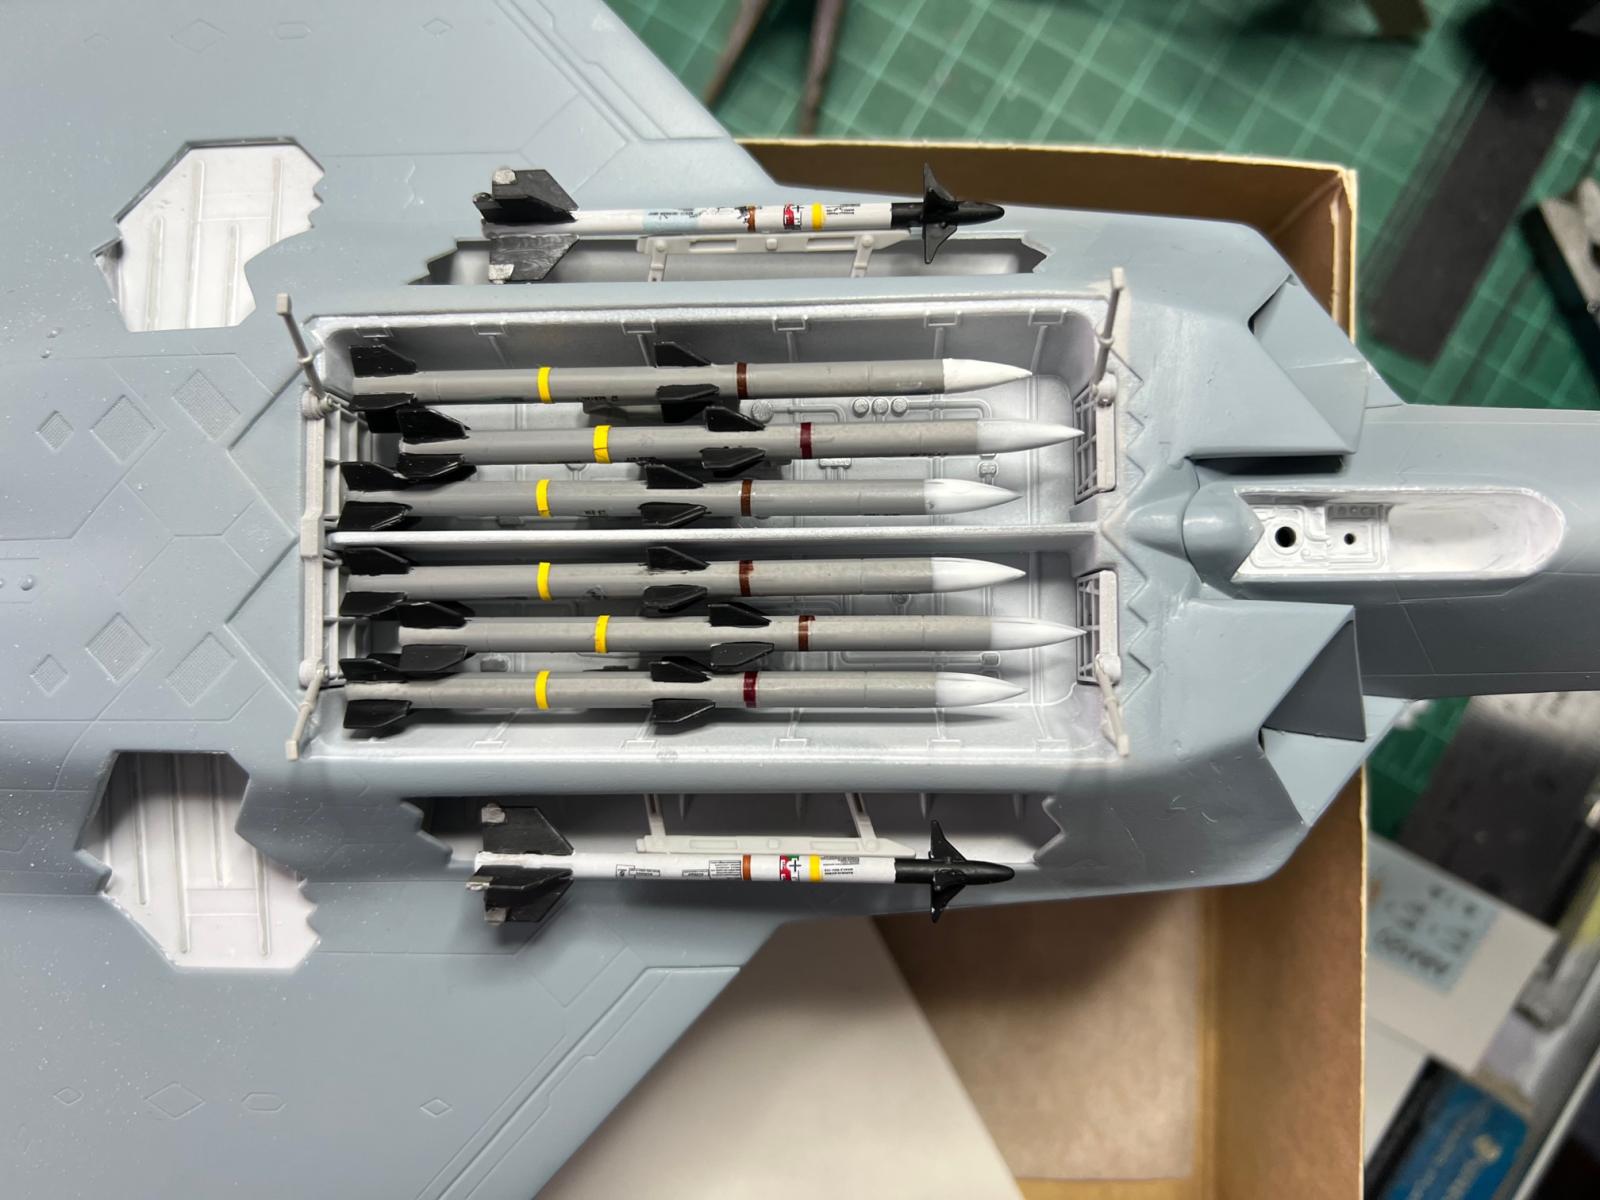
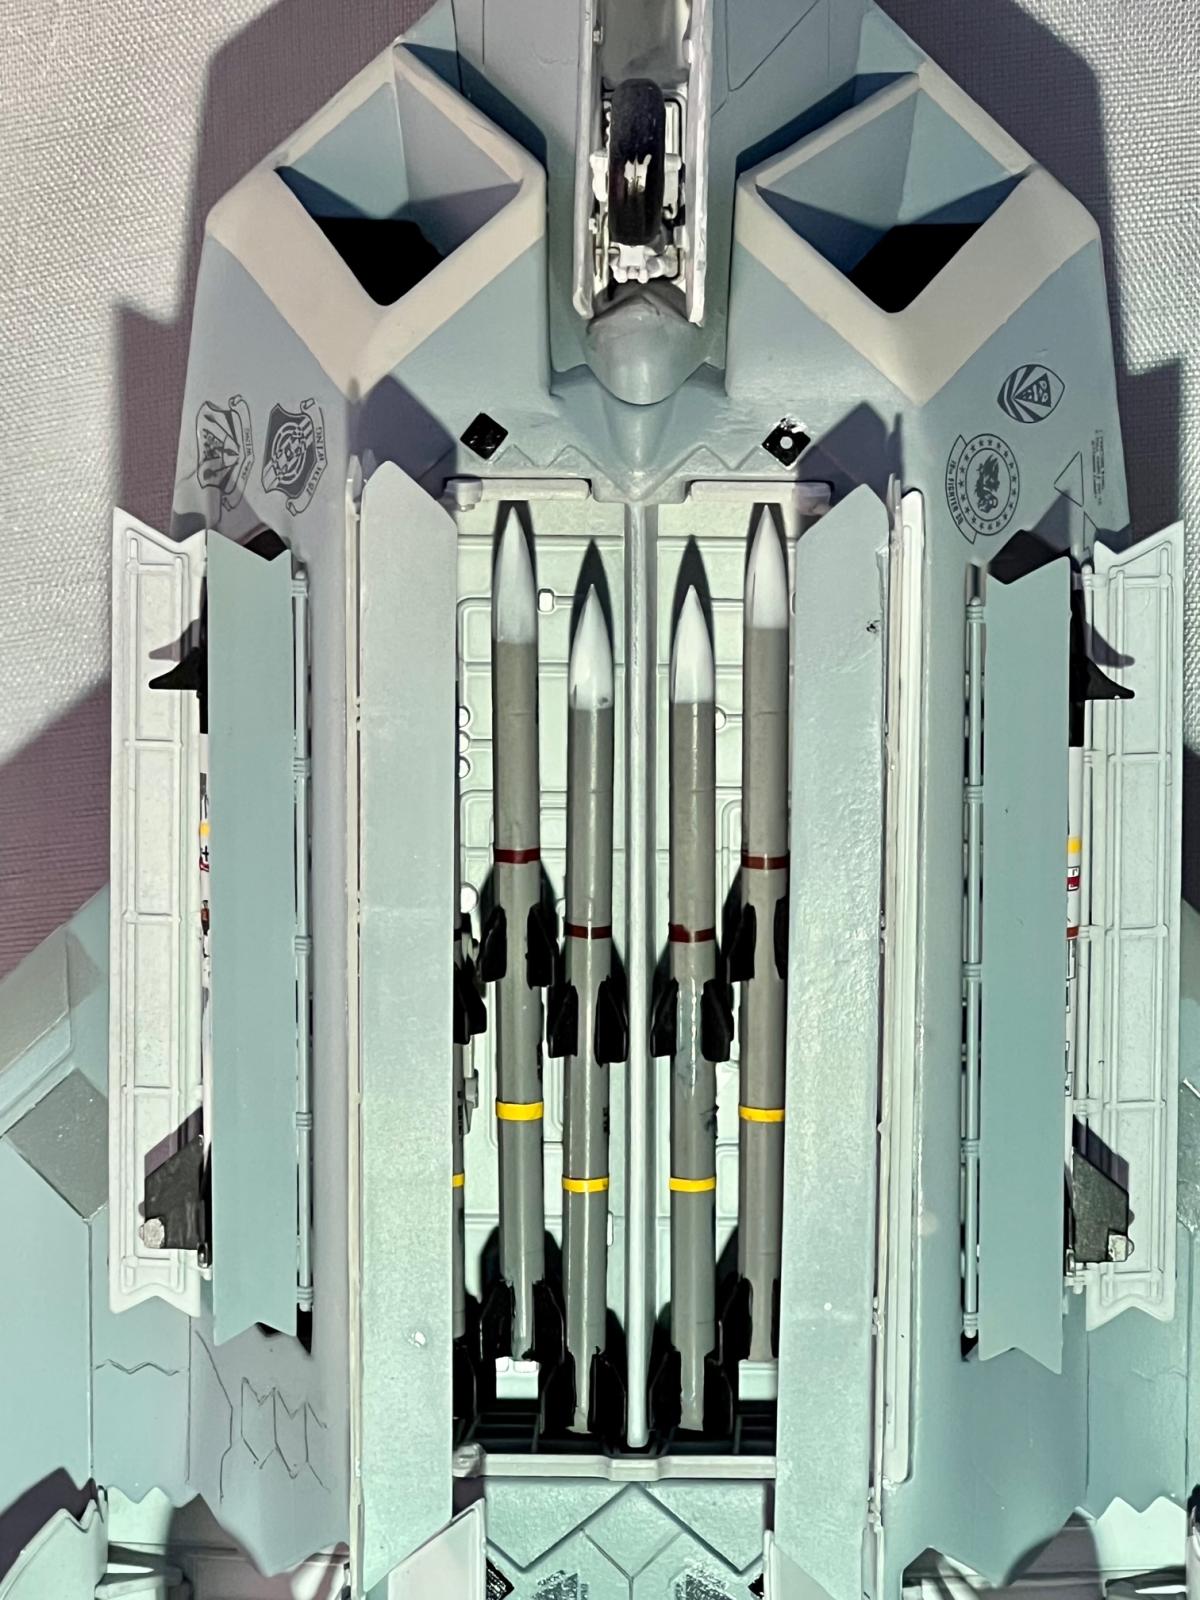
I decided early on not to attach the underwing pylons and JDAM bombs as I couldn’t picture an F-22 as a fighter-bomber, although given the USAF’s history, I won’t be surprised if this plane is asked to do things it was never designed to do. I did however decide to busy things up a bit by opening the weapons bays and putting in the six AIM120s and two AIM9s. This definitely complicated the build, but the results proved to be worth the effort. Photo 6 shows the weapons and gear bays prepped for the missiles and landing gear. The doors, weapons and gear are added in Steps 7 through 10. One odd issue was that the kit decals had only two sets for the six AIM120s, so I went to the decal stash and pulled out similarly looking stencils from old Microscale USAF aircraft decals and applied those instead. While the missiles are well inside their bays and the decals are mostly unseen (Photo 12), I added them, nevertheless.
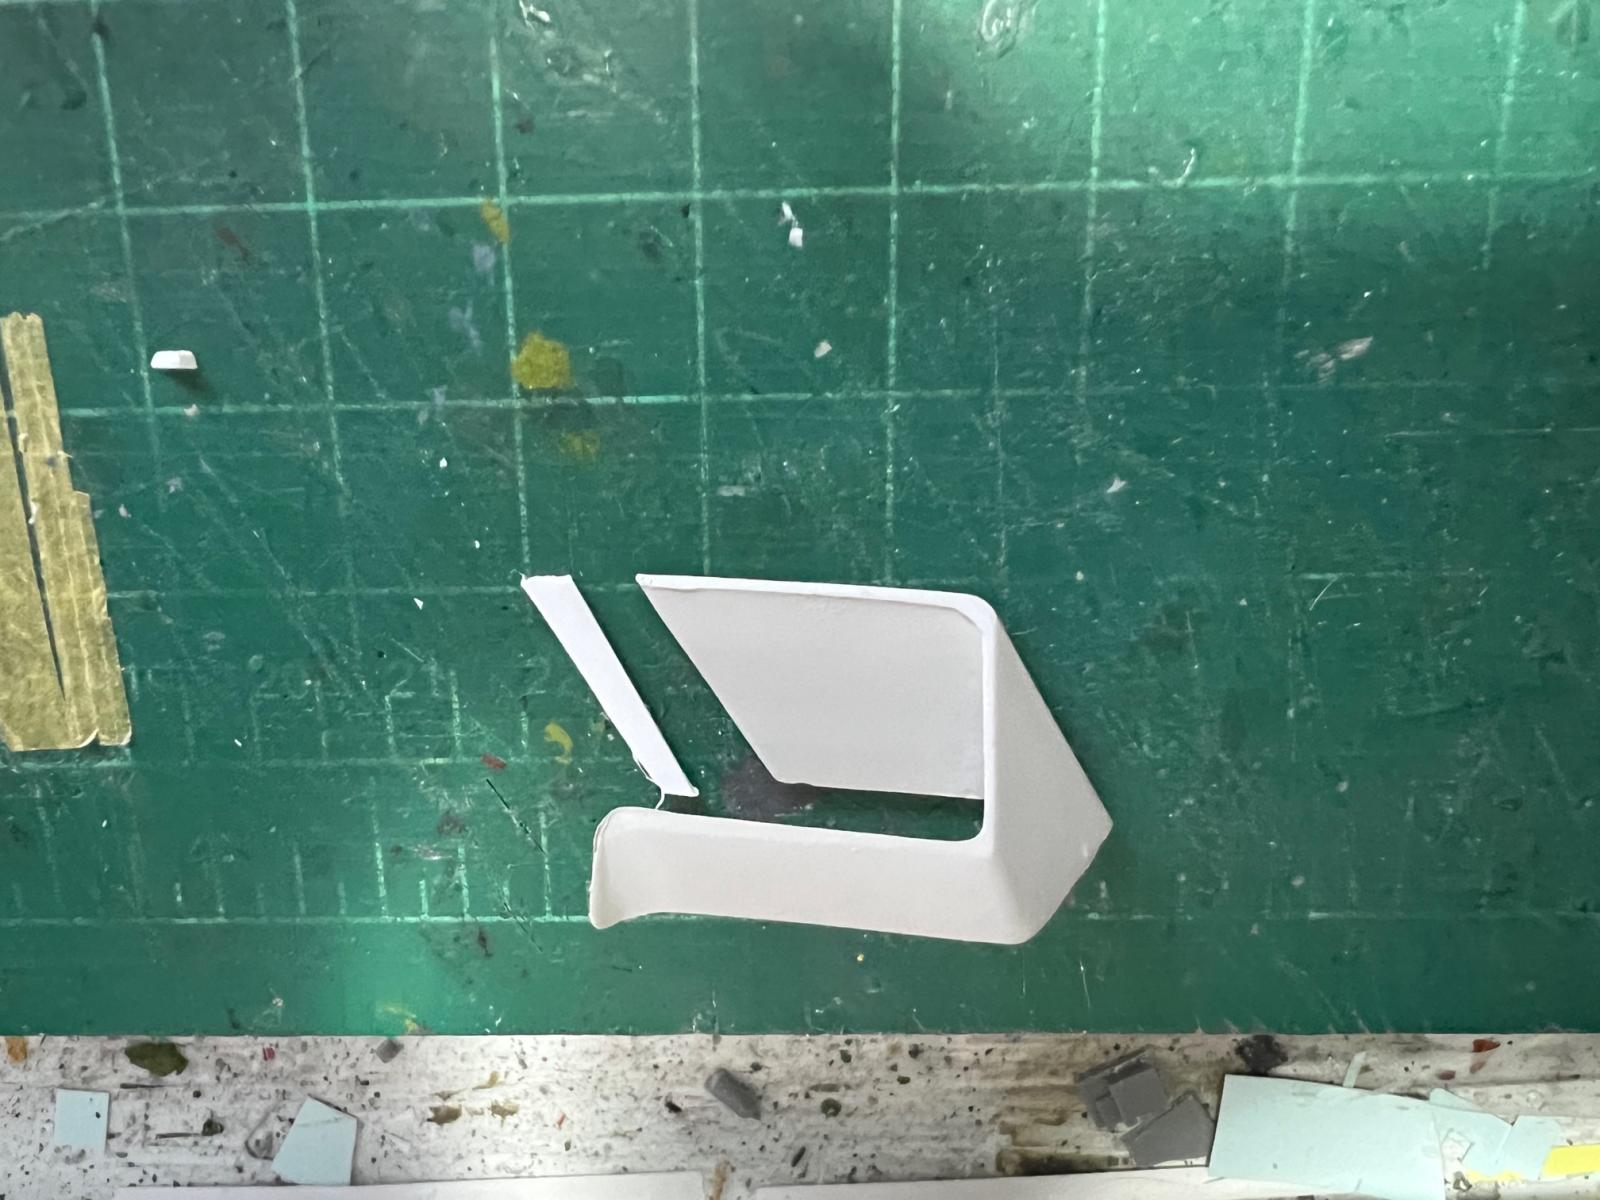
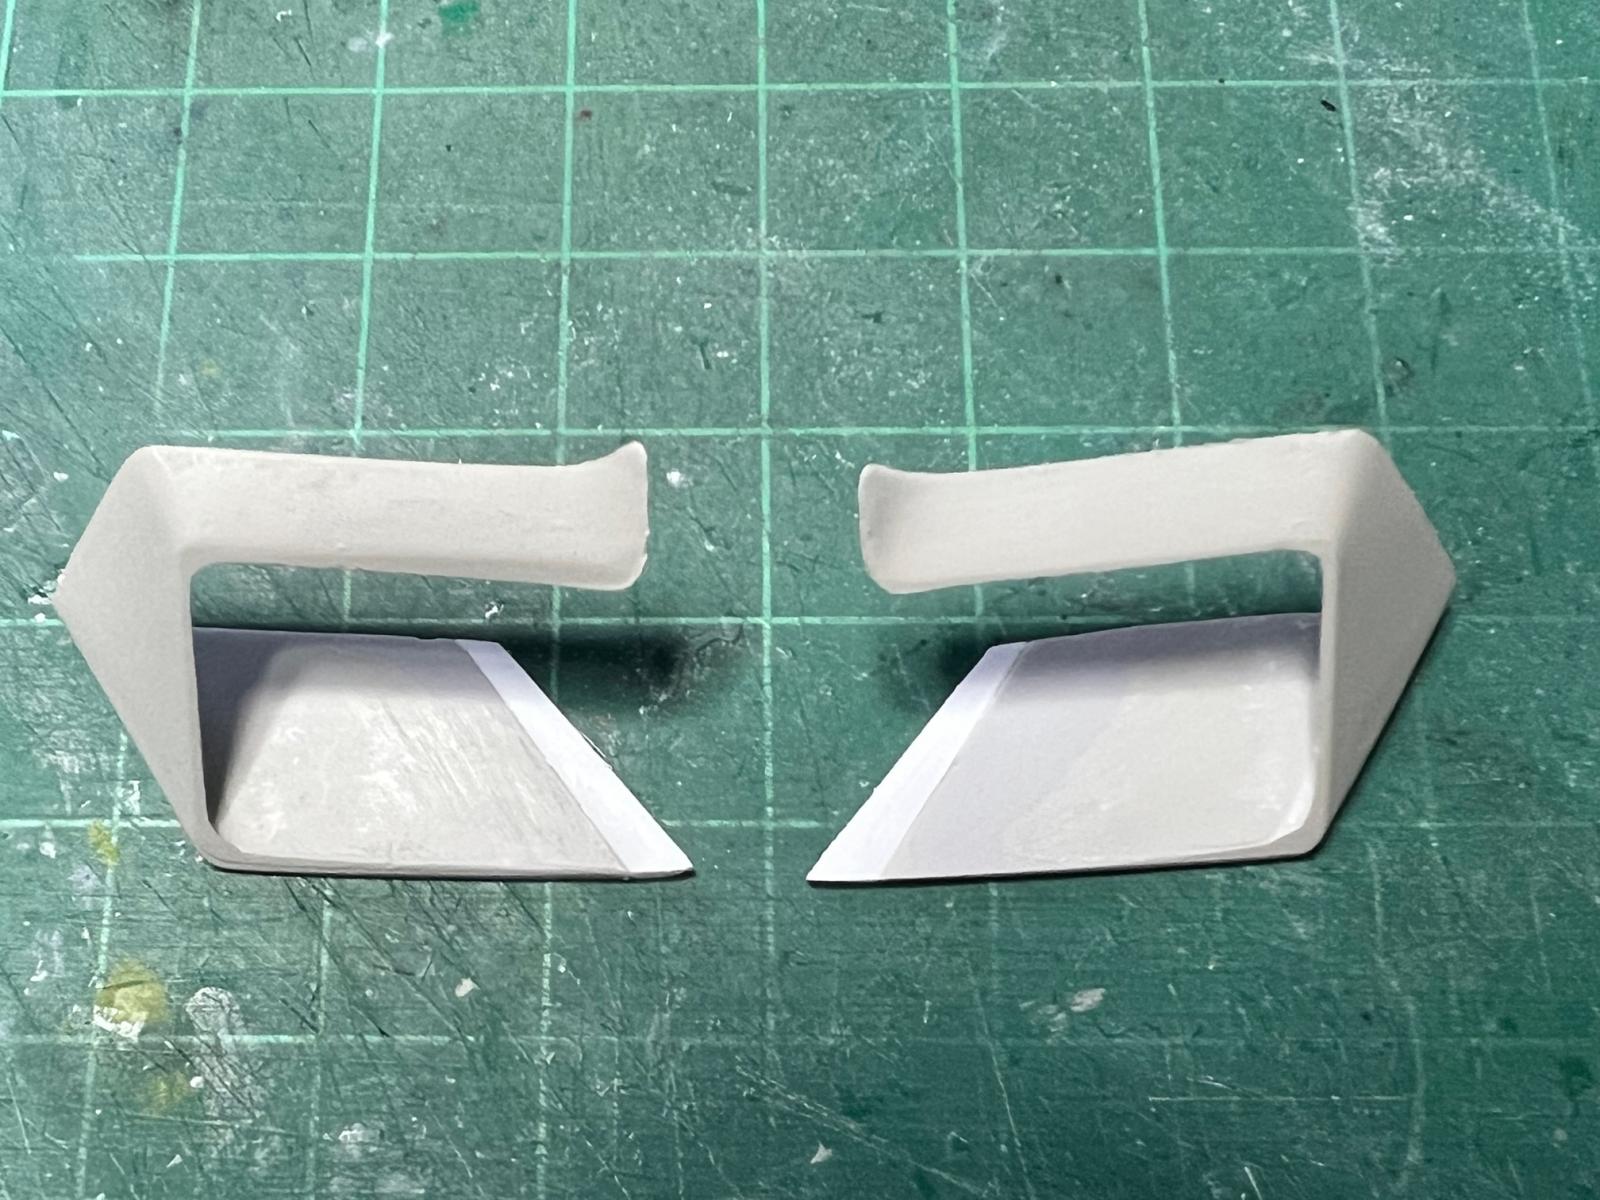
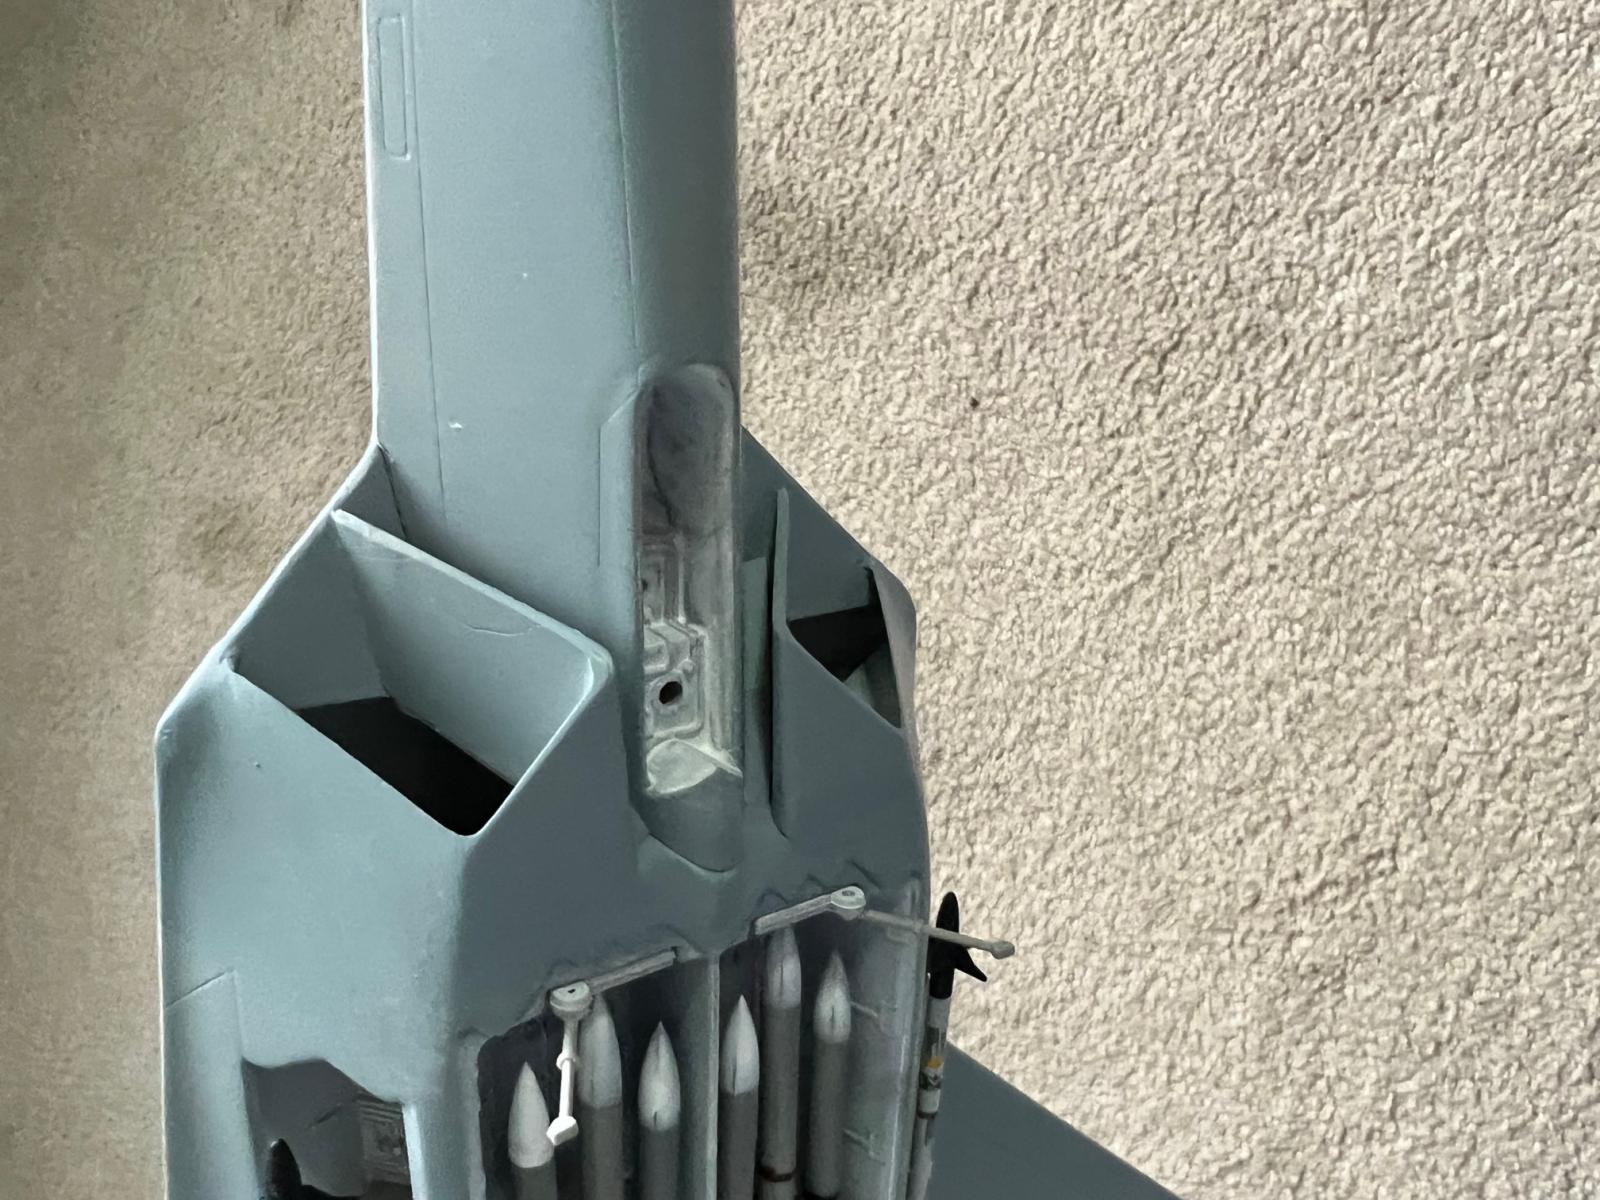
The greatest challenge in this kit build was the fitting of the rectangularly shaped jet inlets, parts 52A and 53A, to the fuselage sides. I first tacked them on to see what needed to be done. See Photo 7. This pre-fitting revealed a lot of work would be required to get them faired in place. Instead of repeated filling and sanding of the gap in the inside wall after gluing them in, I decided to first add plastic cut to shape from Plastruct sheets. I glued on the extra plastic pieces, sanded them smooth, and primed and glued them onto the fuselage. I then applied a considerable amount of my favorite gap filling mix, talc and CA glue, set it with accelerator and proceeded to sand and contour the inlets into the fuselage sides. They are not exactly squared off but after all the work to get them in place as they are, I didn’t want to spend any more time or effort on them. At least they’re symmetrical. See Photos 8 through 11.
I faced another problem of my own doing. Somehow I lost one of the nose gear doors. Regardless of how long I searched, I couldn’t find it, so I had to scratch-make one from sheet plastic using the remaining one as a guide. See photo 13. Close enough.
There were a few minor issues that were easily taken care of.
- Interference between starboard flap and the horizontal stabilizer. I sanded the flap edge slightly and sanded the location tabs of the stabilizer to shift the stabilizer backward to eliminate the overlap.
- Part numbers of the horizontal stabilizers are incorrect in the Step 11 inset. Part 84 glues to 87, 85 to 86, not as shown.
- Step 7, Inset P calls out the AIM120s as white. The inset detail indicates a medium gray body and white nose.
- Step 7, Inset S, I believe Parts A51D and B51D are reversed. Be sure the long edge of the rectangular tab at the end of the door actuator is to contact the door.
- Parts 24A and 25A don’t quite match up well with the intake openings. I fitted them in the best I could with no filler. It turned out to be a non-issue.
- The trailing edges of the ailerons, Parts 12D and 13D, needed to be thinned.
- The port side horizontal stabilizer upper surface panel line is off register. Painting the light gray edging evenly conceals this well enough (for me) without having to fill and rescribe it.
- Five hinges on each weapons bay door provide minimal gluing surfaces. CA glue is needed to get them on quickly and in proper alignment. I spread accelerator across the hinge surface first, put CA on the hinges and placed them in position. See Photo 14.
Painting and Decalling
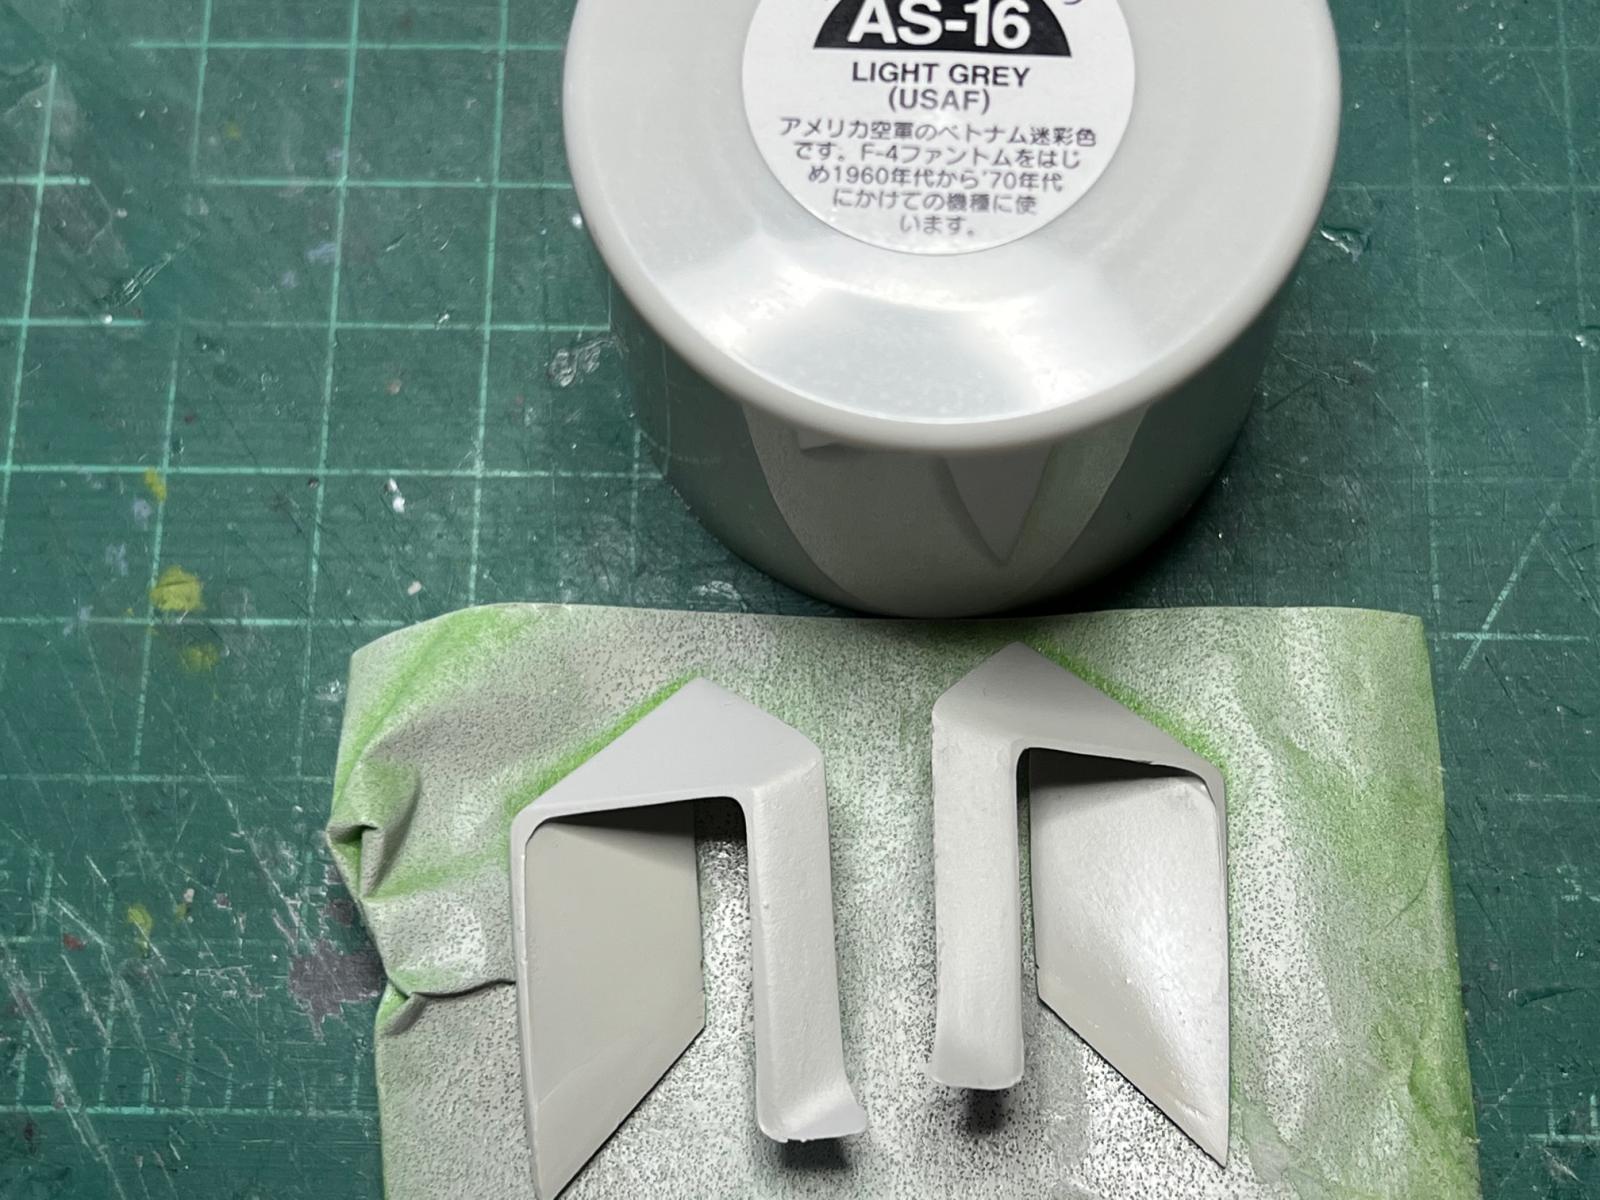
I struggled with the color legend in the instructions. They list four different gray shades and gunmetal, with FS numbers, but the various gray legend blocks are not differentiated enough to readily determine which is which on the plan and elevation diagrams of the plane. Color coding would be much appreciated. Although I have about eight different brands of model paints on my shelf, I mostly use Testors and Tamiya paints. Using the FS numbers, I found which shades of the latter brands were equivalent and took my best guess at the locations of those gray shades in the color legends. I used Tamiya AS-26 Light Ghost Gray for the overall base color, and Tamiya AS-16, USAF Light Gray, as the lightest shade depicted on the diagrams. I could not determine from the color legend where the Dark Compass Ghost Gray, FS 36320, was placed. I checked on every picture I could find to see what the real F-22s looked like, but they all varied somewhat in the photos. I ended up basically using three of the shades. The irregular darker gray blotches on the upper wings, tail surfaces and fuselage are Tamiya XF-53, Neutral Gray, an acryl thinned 2:1 paint to thinner, sprayed freehand at about 20 psi with an Iwata HP-C. All other areas and edges were masked and painted with the AS sprays from cans, including the dark gray edging of the lower wing and tail surfaces, using AS-7, Neutral Gray (USAAF), the Tamiya match for XF-53. The Tamiya AS series of sprays are my favorite aircraft paints. They give great coverage, are fast drying, provide a degree of sheen that is appropriate for scale aircraft, and don’t obscure panel lines as the XF-53 did somewhat on this model.
The last areas I painted were the gunmetal sections at the jet exhausts. These are zig zag shaped depressed areas for both engines at the top and bottom of the rear fuselage. Due to the rounded edges of these areas, I could not get an even masking tape seal. So in addition to trying with masking tape, I tried brushing freehand, outlining with decal strips and painting inside the strips, and using Black Chrome Bare Metal Foil. The last two methods gave the best results with the decaling method the cleanest. See Photo 15.
I decided not to spray the model with gloss clear before applying decals, and instead used Decal Fix, a Vallejo product, brushed onto the spot where the decal is placed. Decal Fix appears as a white glue-type product. I’ve done this successfully in the past and it worked here in spite of the flat paint surfaces. The decals in this kit are superb. The film is perfectly clear with no hint of silvering. They truly look painted on. Once dry, I masked the canopy and oversprayed the model with Humbrol Varnish Matt 49 from a spray can. With a couple quick passes, Humbrol Matt Varnish provides the flattest clear finish I’ve ever achieved on a model. I also like Humbrol Black Matt #33 spray, the flattest black paint I’ve ever used.
Final Thoughts
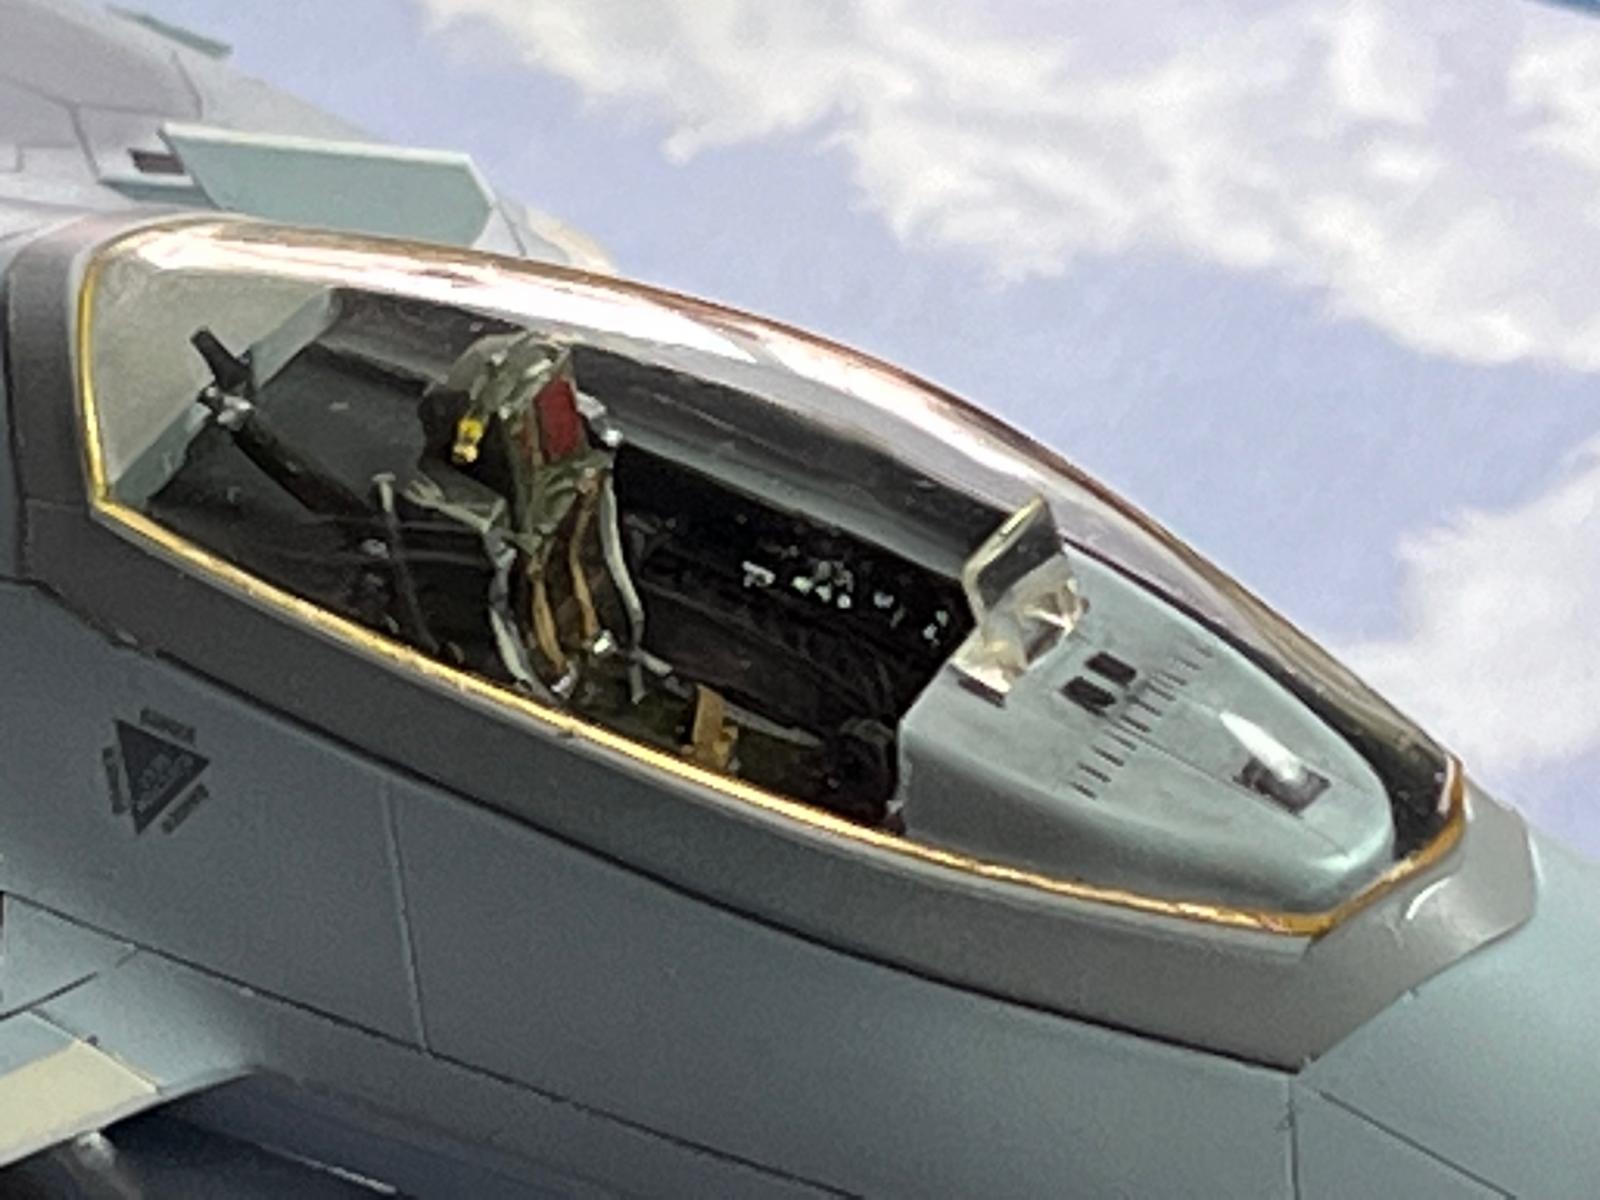
I completed the model by adding the two pitots to the front fuselage and four open access panel doors atop the wings and fuselage. Also, the canopy in this kit is so clear and undistorted that I decided to glue it closed. There is no need to glue the canopy open to display the cockpit interior. I attached it to the canopy frame using Tamiya X-22 Clear acrylic instead of a glue to avoid marring the clear surface. See Photos 16 and 17. I also had to reglue the arrestor hook that I broke off four times while handling and painting the model. I should have made that the very last step.
After taking the photos, wrapping up the work table, and putting away all the tools and unused parts, I found a clear part that I had missed. Rats! It was the head up display glass that attaches above the instrument panel. I popped off the canopy frame with a scalpel blade, glued on the overlooked clear part, replaced the canopy and admonished myself for not marking off all the parts on the instruction sheet as I usually do when I attach them. See Photo 18.
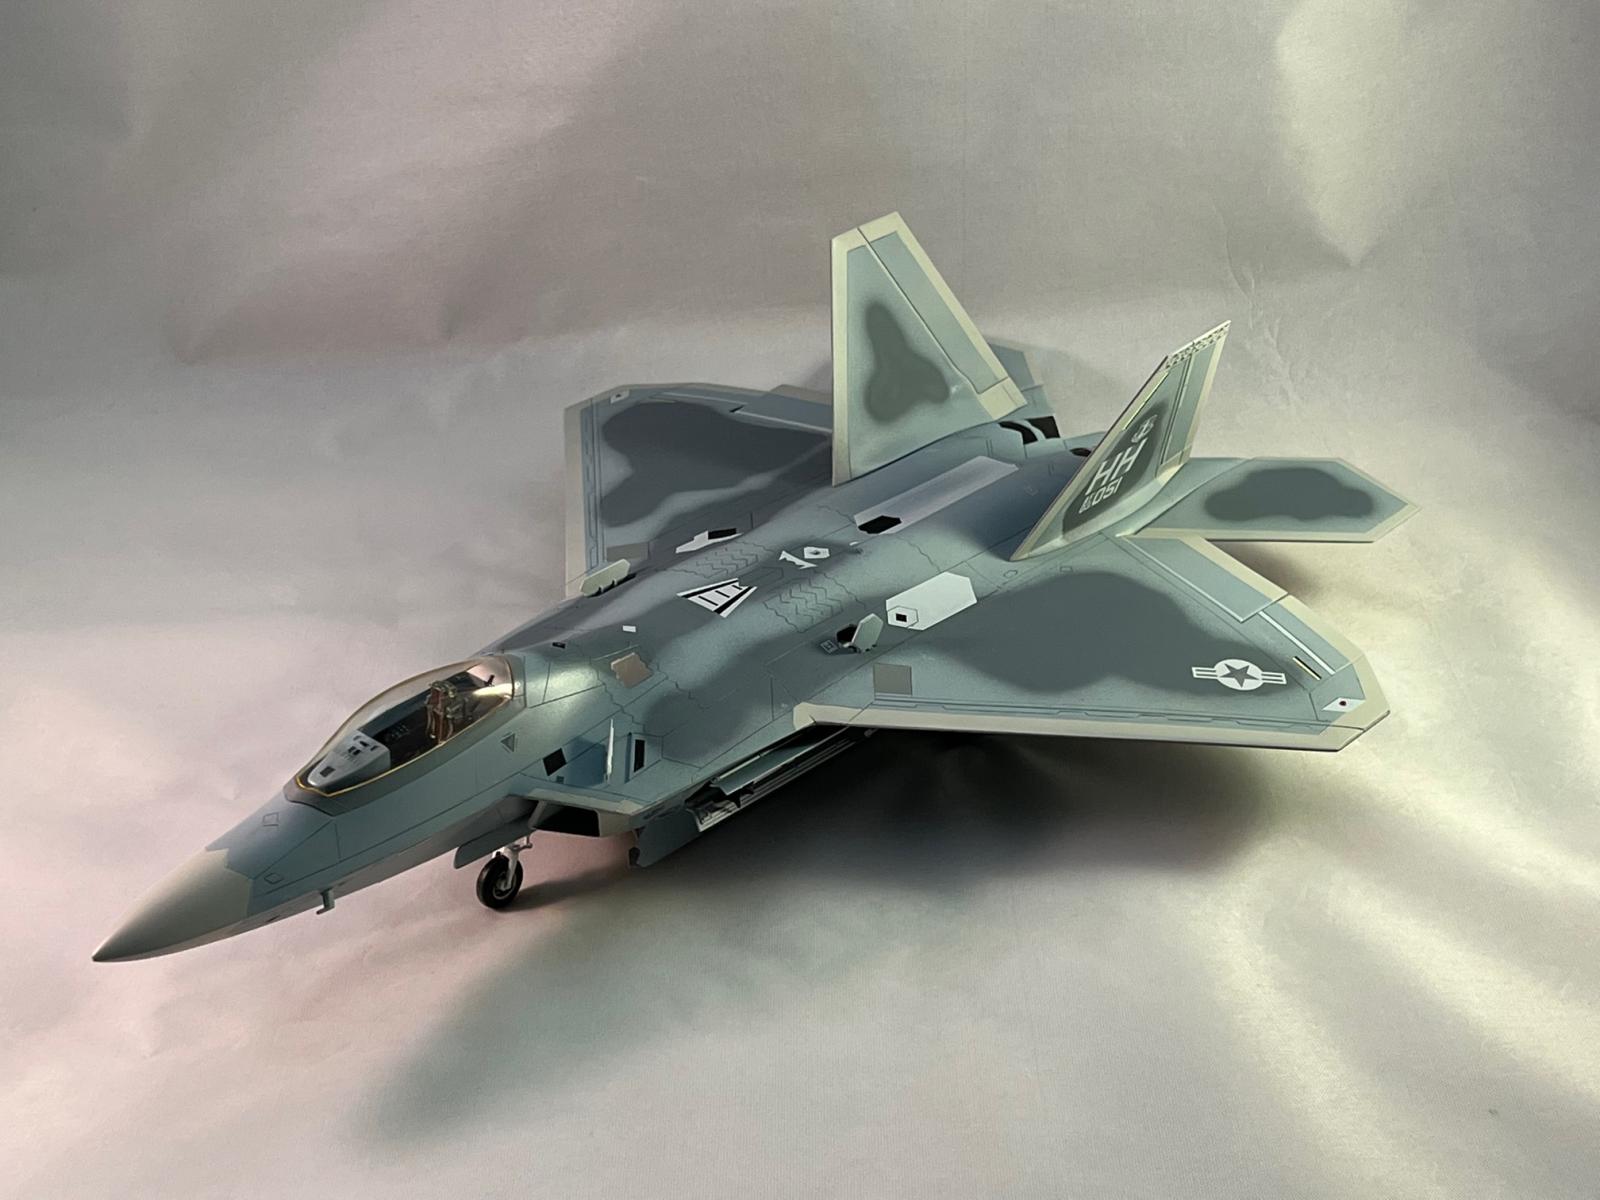
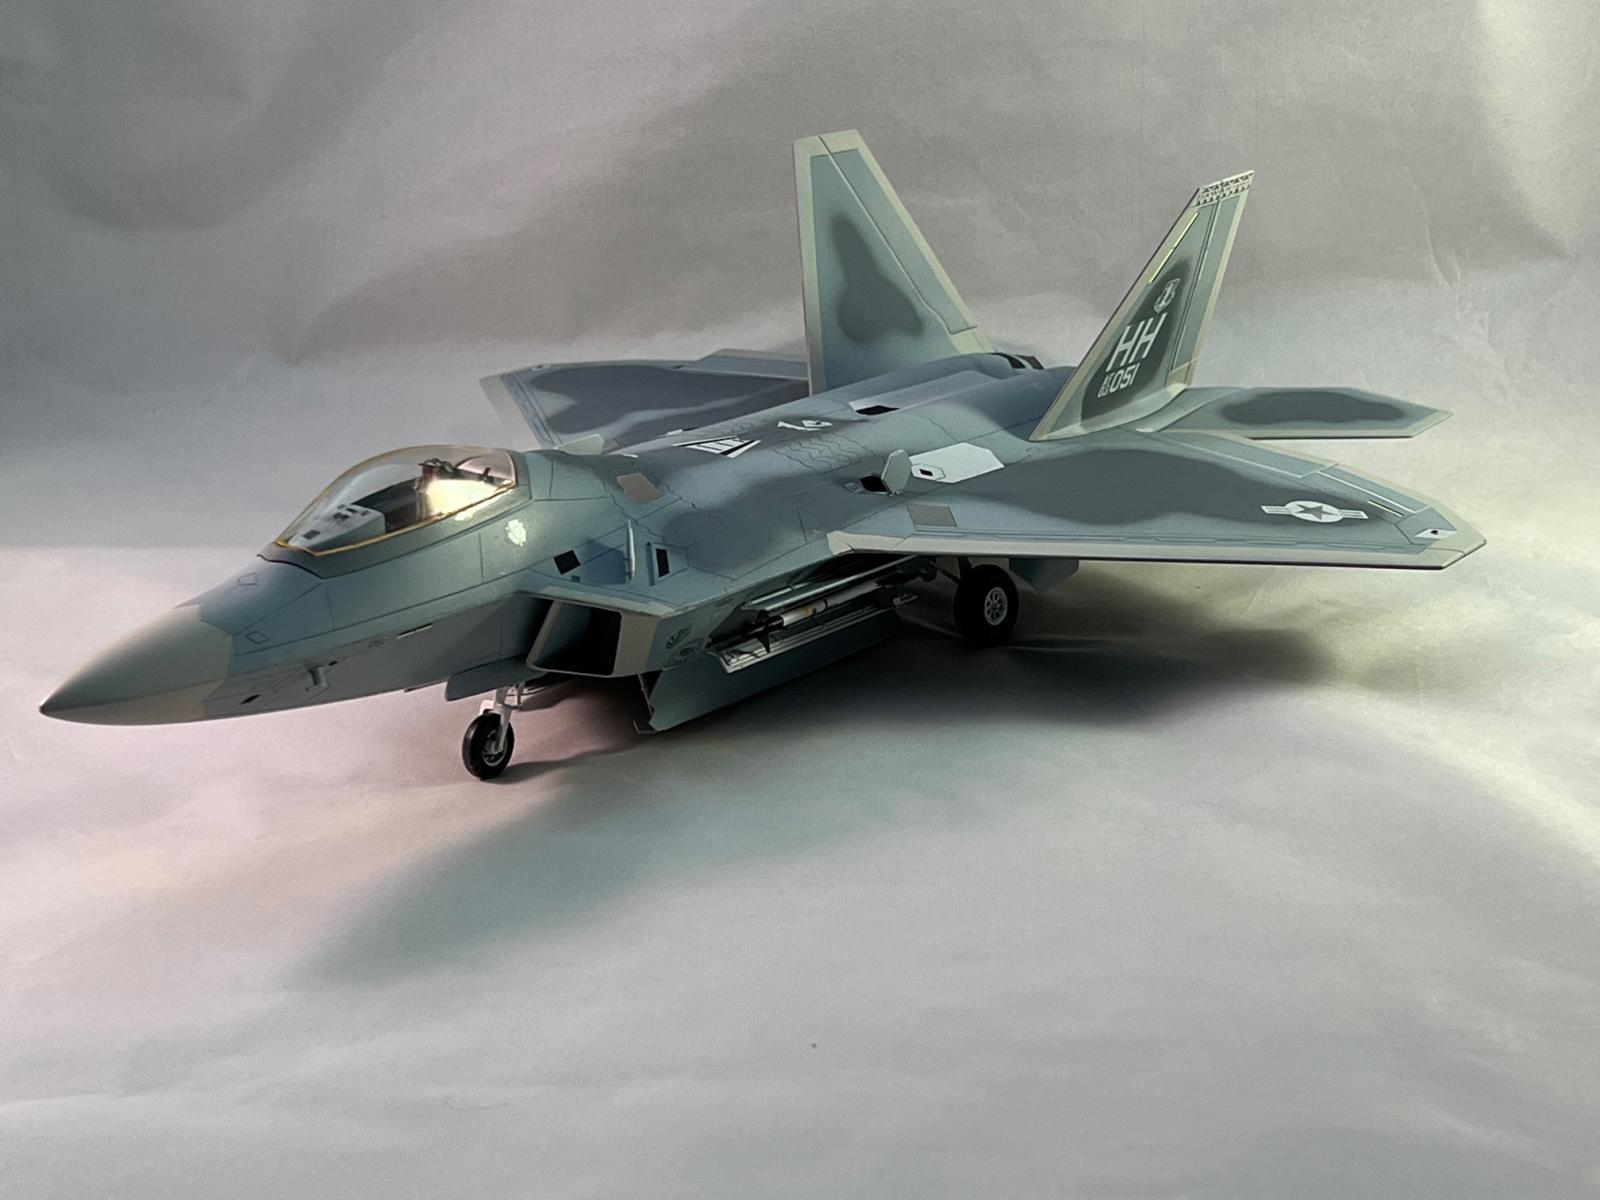
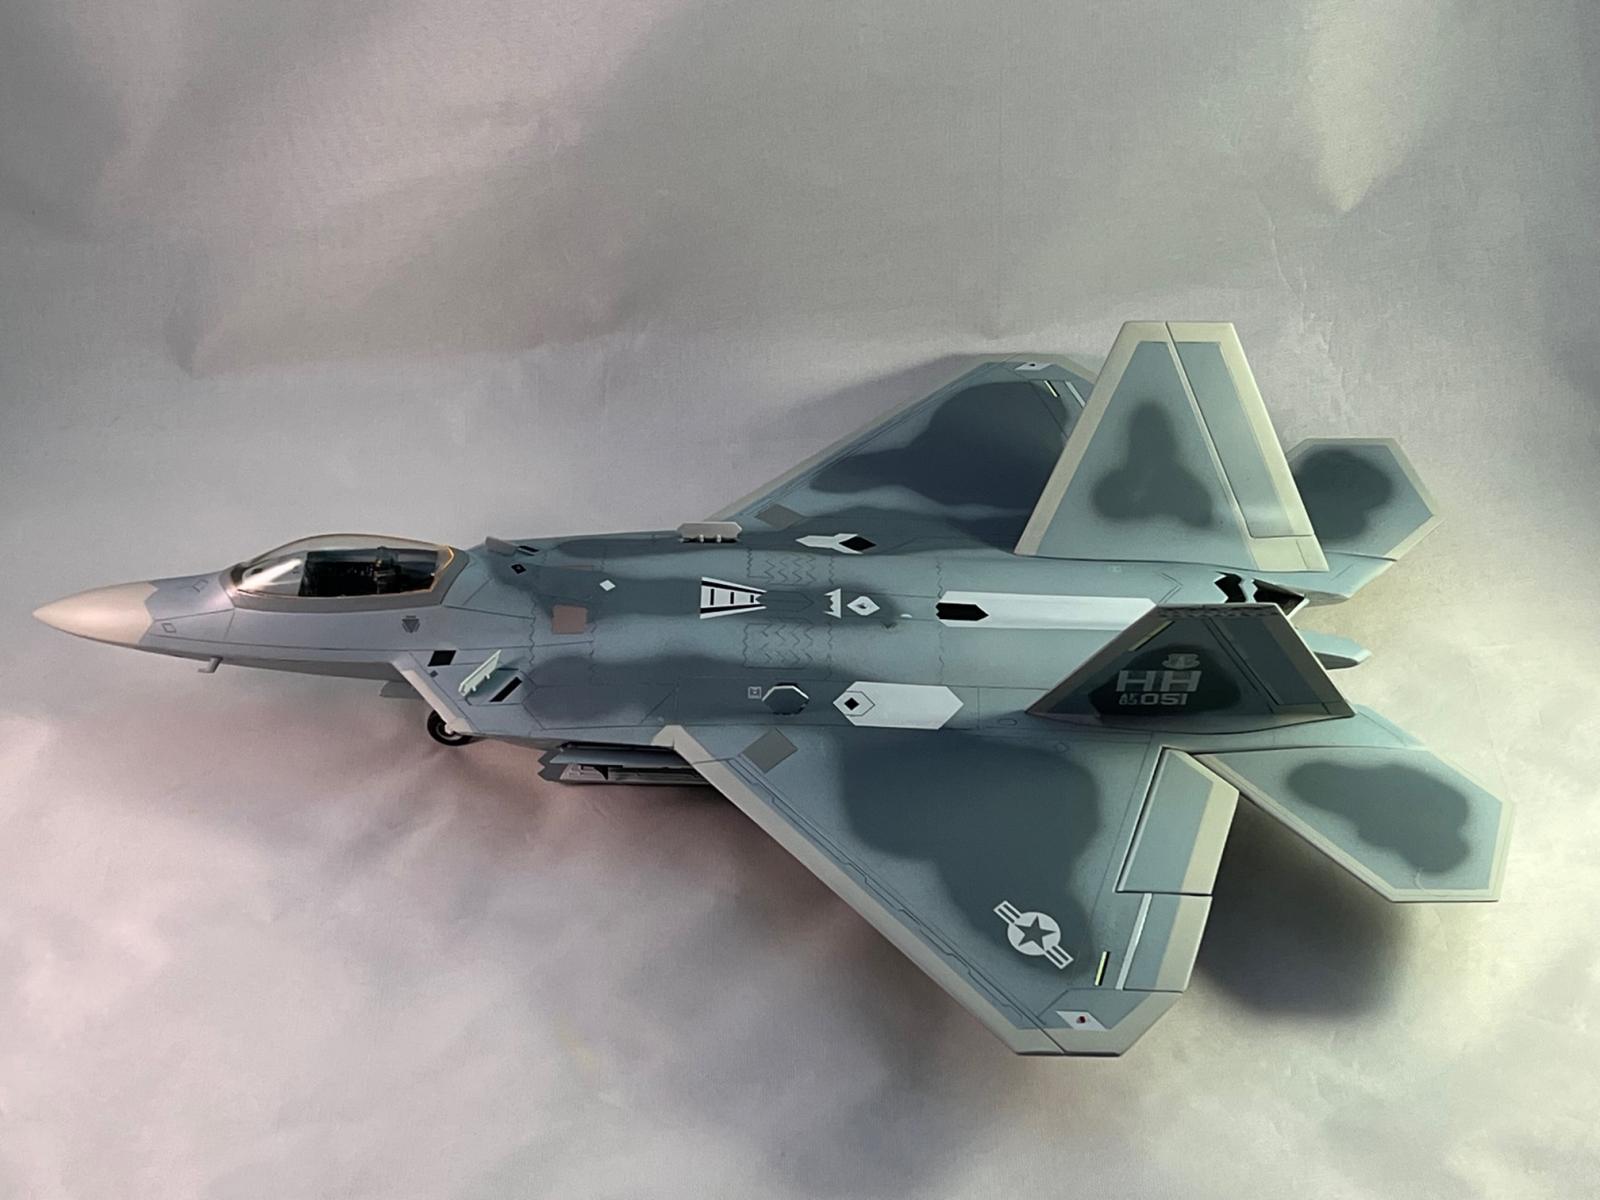
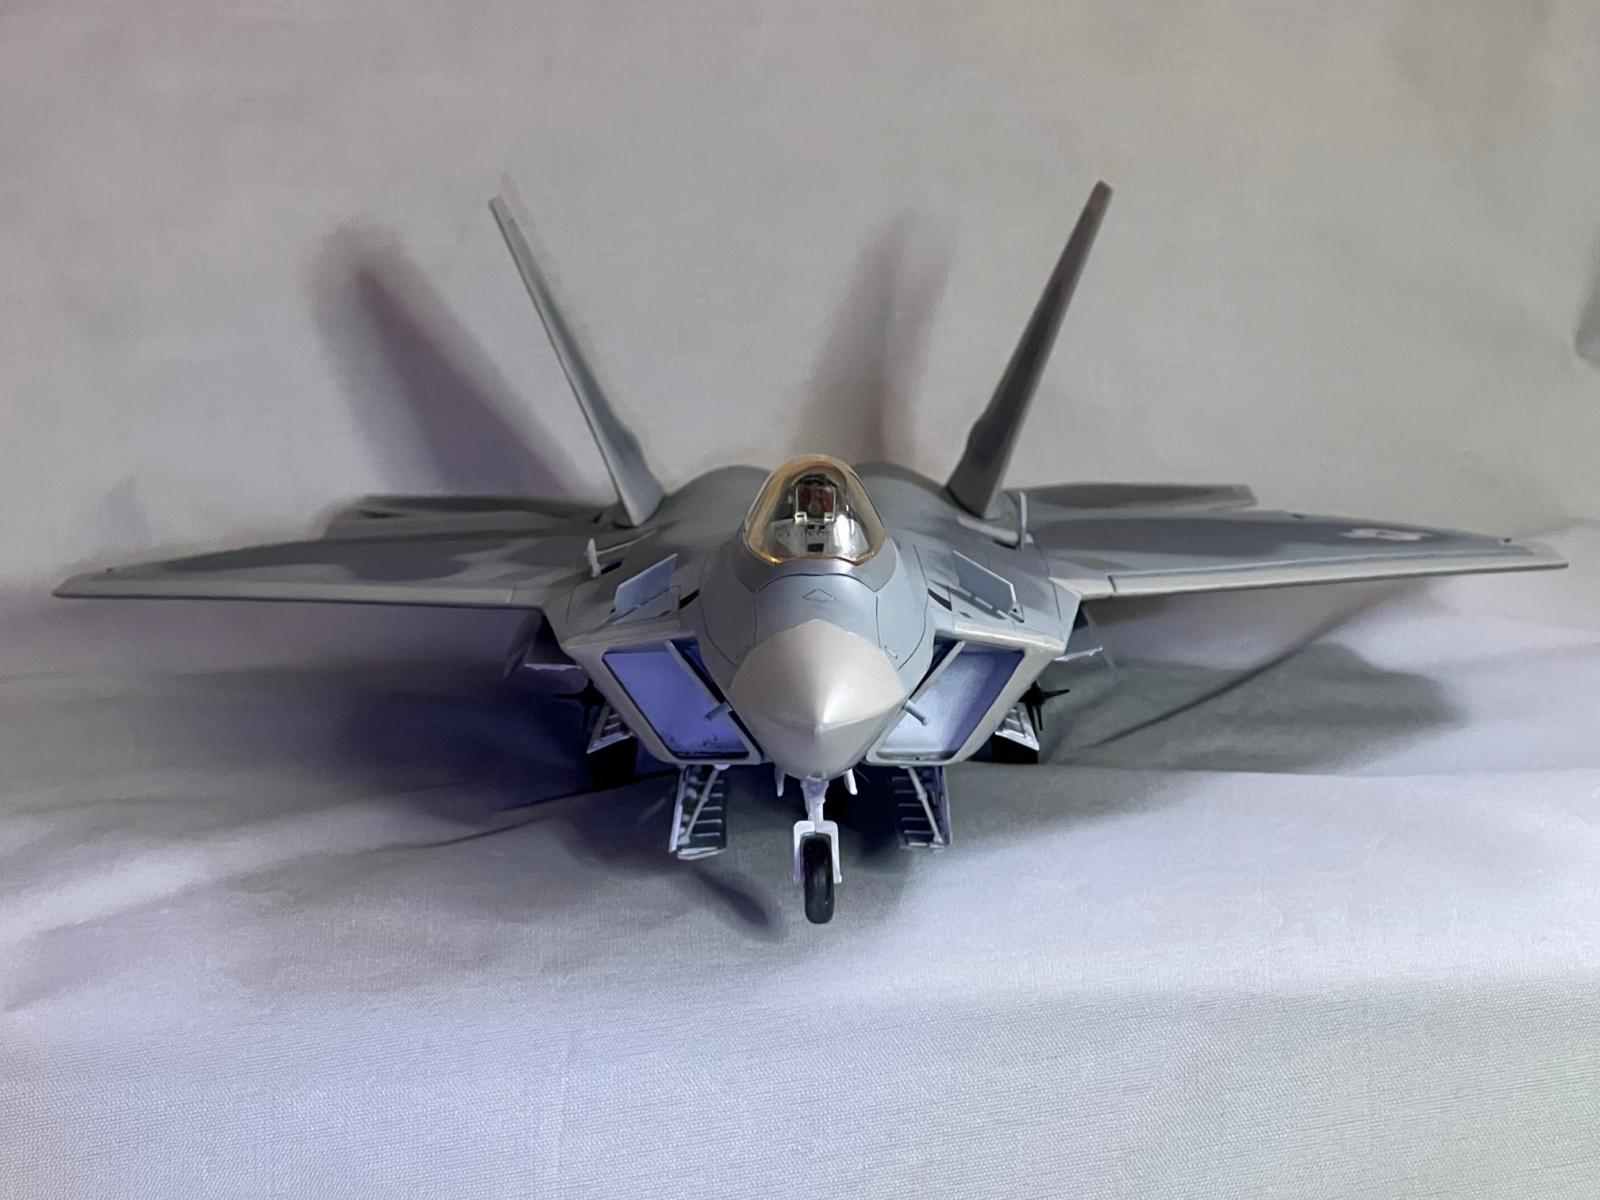
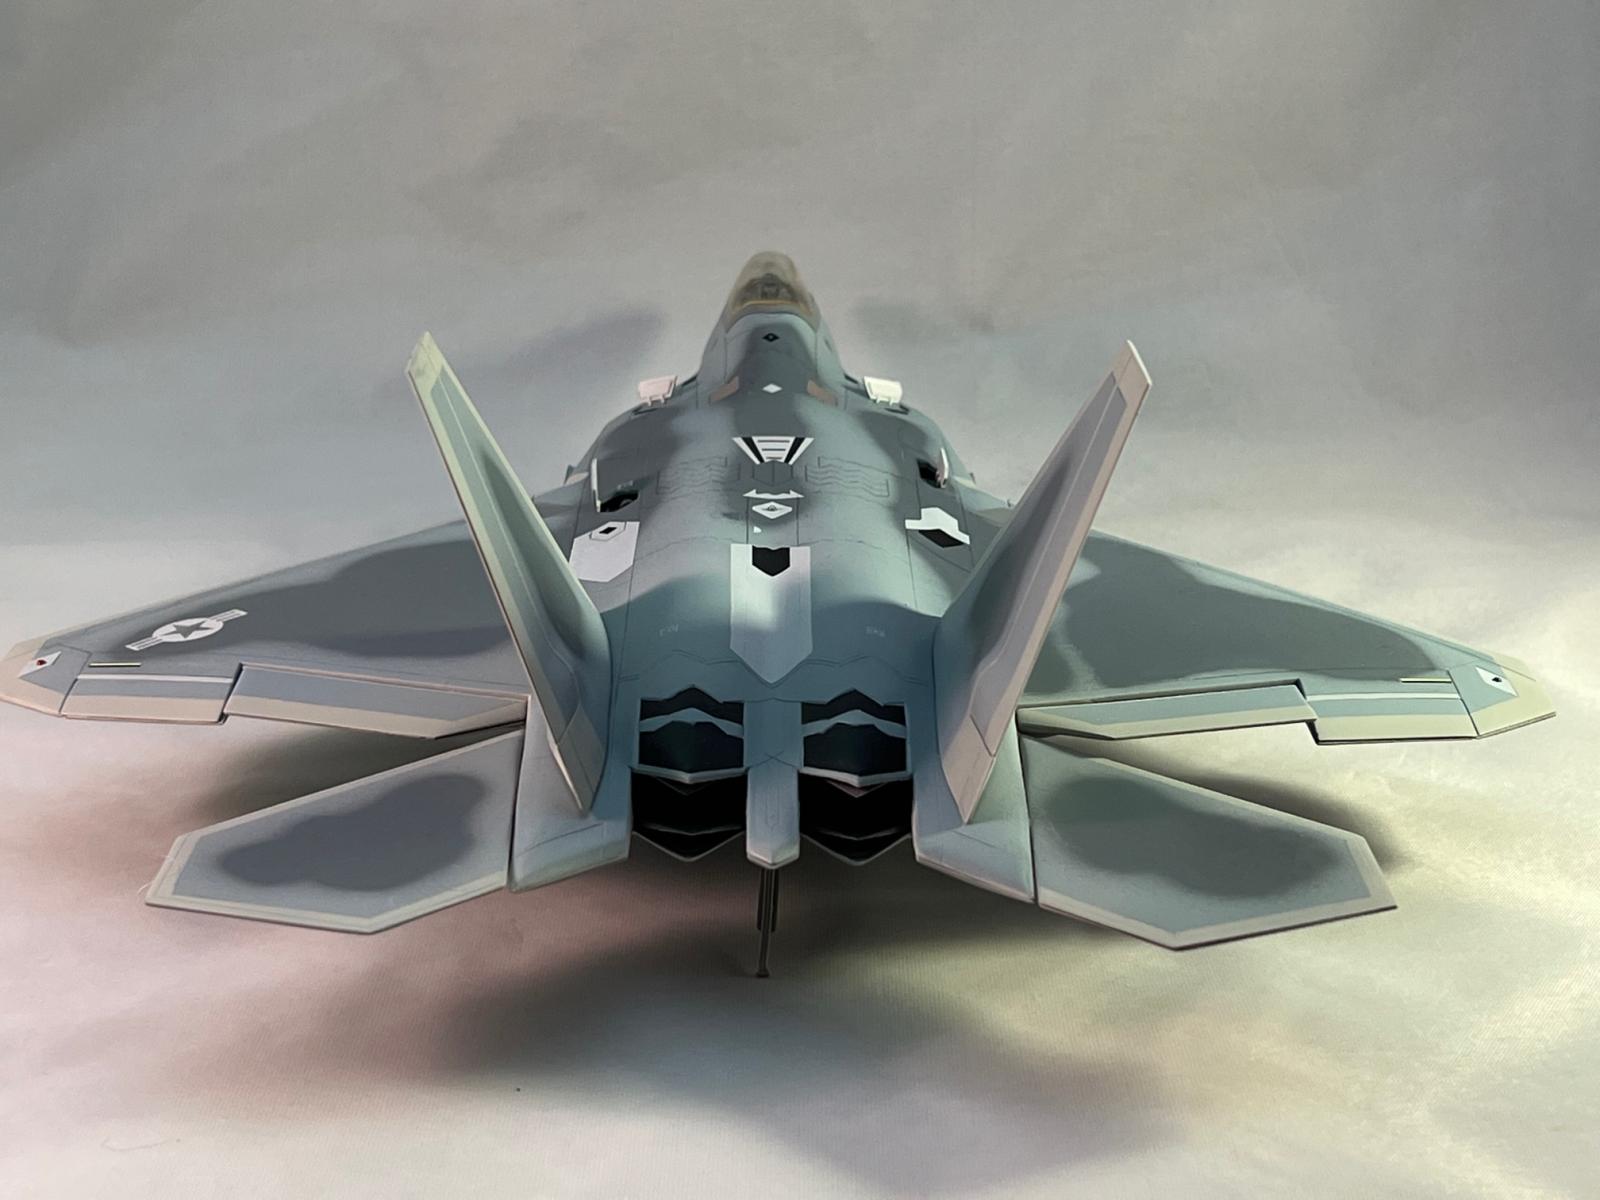
The final eight photos show the finished model (sans the head up display screen) from various angles and the underside. It is finished to depict an F-22A Raptor of the 154th Wing, 199th Fighter Squadron, Joint Base Pearl Harbor-Hickam, Hawaii, 2016.
The paint scheme wasn’t easy and there were times that the kit’s shortcomings and my own self-inflicted errors got me a little frustrated, but I have to admit that the final result is quite impressive. I’m glad I positioned the weapons bays open and did the extra work in the cockpit that is showcased by the best canopy I’ve ever come across. The model looks terrific on my shelf.
Many thanks to Italeri for providing the model and to the IPMS Review Corps for allowing me to do this review.


Comments
Add new comment
This site is protected by reCAPTCHA and the Google Privacy Policy and Terms of Service apply.
Similar Reviews