
Land of the Giants Spindrift
Background
Doll and Hobby GA is a specialized hobby distributor focusing on science fiction, fantasy, and comic related model kits. They carry the latest releases from Moebius Models, Round 2 (AMT, Polar Lights, MPC, Lindberg) and more. They focus on subjects like Star Trek, 2001, Space 1999, classic monsters, and comic book heroes. Their warehouse is located in Lawrenceville, GA, just east of Atlanta. Owned by Steve Iverson who purchased the company from Frank and Joanne Winspur in 2018. Steve Iverson might also be familiar since he also owns CultTVman’s Sci-Fi Modeling.
Their first kit was the Land of the Giants Snake Diorama that was originally released by Aurora in 1968. This release featured new box art and a two sided backdrop to display the completed model. Their second release was the Lost in Space Cylops and the Chariot Diorama that Aurora released in 1966. Future releases will include ex-Aurora kits The Hunchback of Notre Dame and The Guillotine.
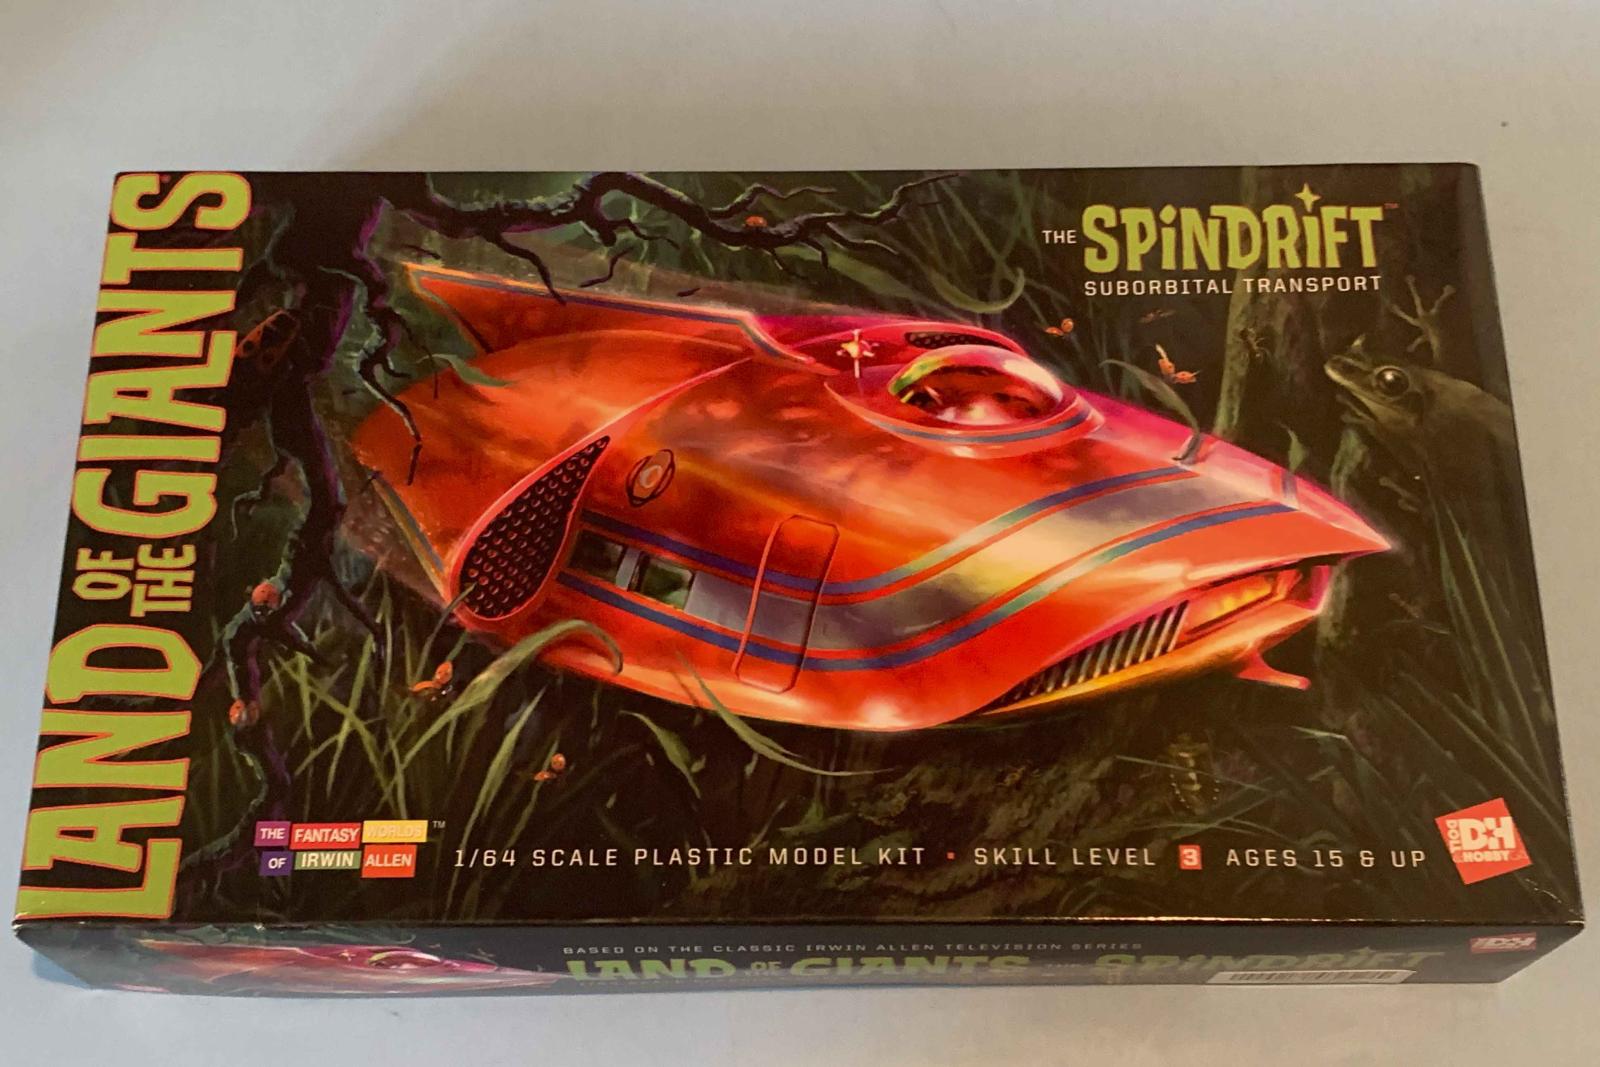
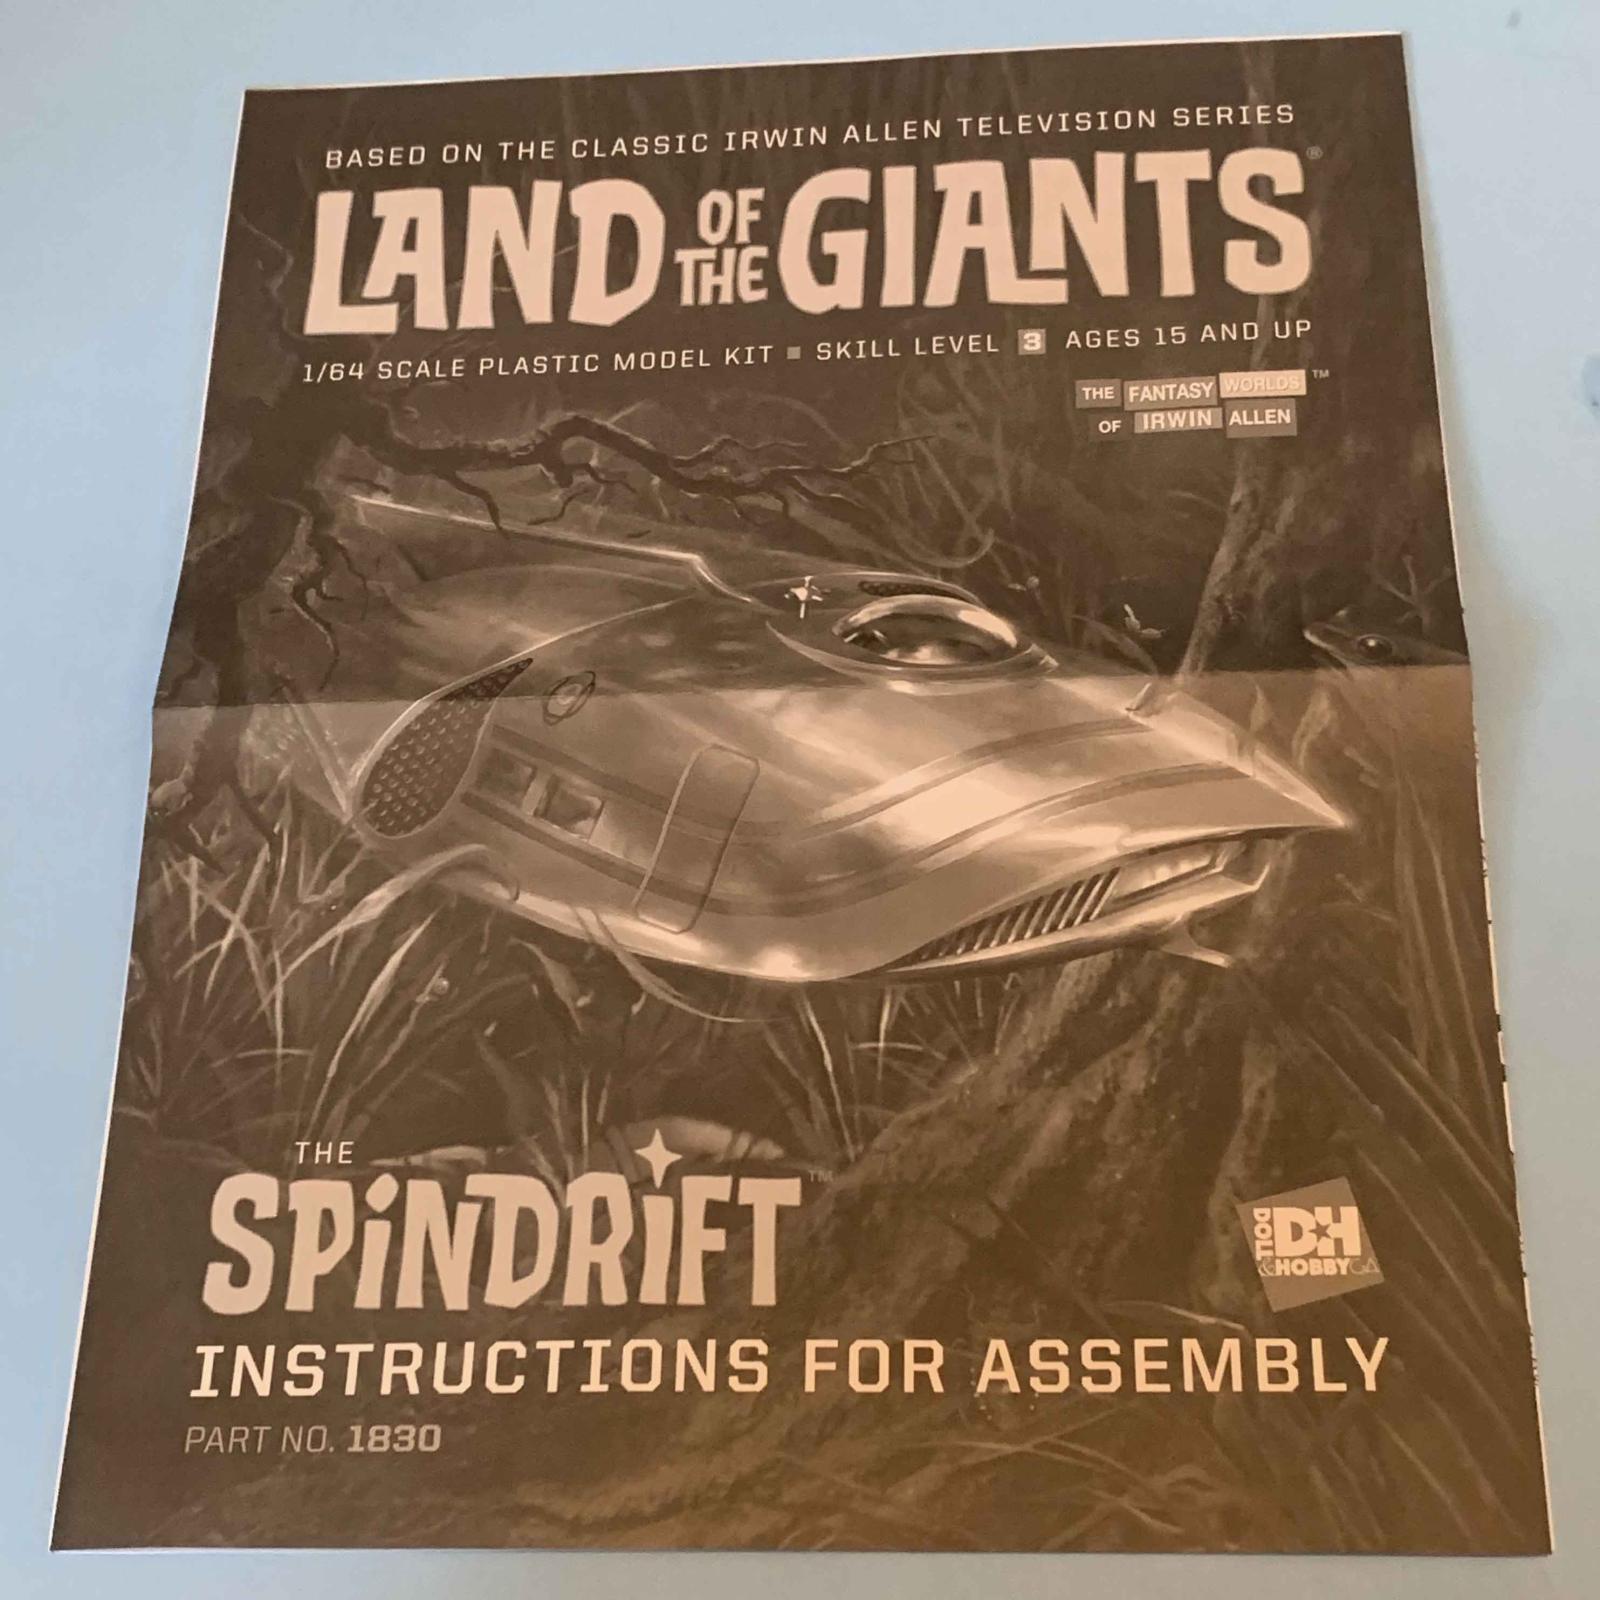
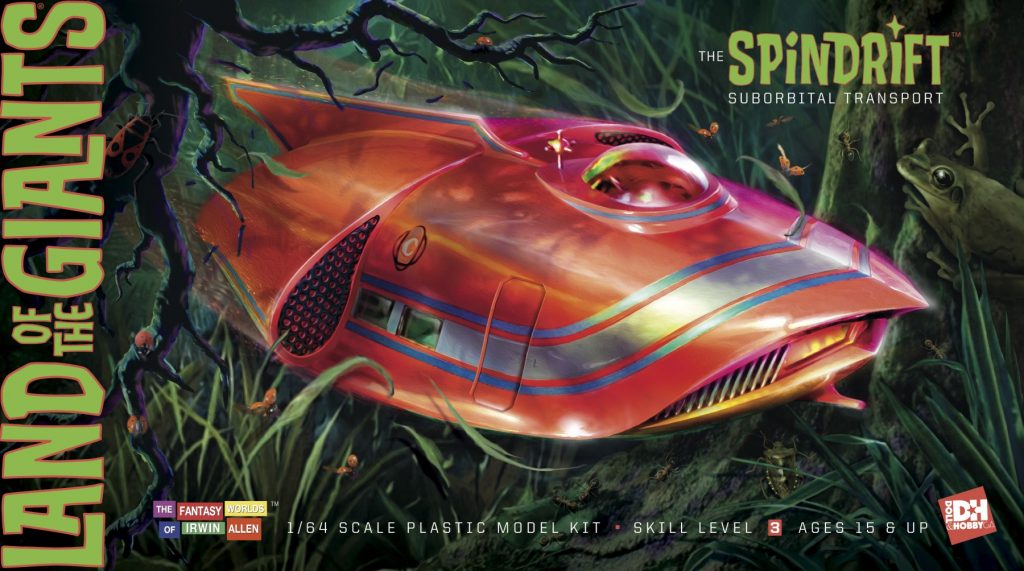
Land of The Giants: The Spindrift is the third release from Doll & Hobby. Land of Giants was a science-fiction classic TV show from Irwin Allen, airing 51 episodes from 1968 until 1970. In the (then) far future of 1983, a crew takes off for a sub-orbital trip from LA to London when they are hit by a space storm and mysteriously transport to an Earth-like world where everything is 12 times larger than on Earth, ala Gulliver’s Travels. This kit was originally issued by Aurora in 1968 during the show’s run. Polar Lights re-issued the Aurora kit in 2002, followed by this Doll & Hobby release in 2021. A big feature of this newest release is the inclusion of a large decal sheet.
The Spindrift model used for flight scenes is (or was) on display at the Science Fiction Museum and Hall of Fame in Seattle. There were at least two movie props that were used for the limited flight scenes, although they are in really pretty rough shape. Most of the show utilized a partial Full-Scale Spindrift set that would only be viewed from the starboard side where the crew door was.
The Kit
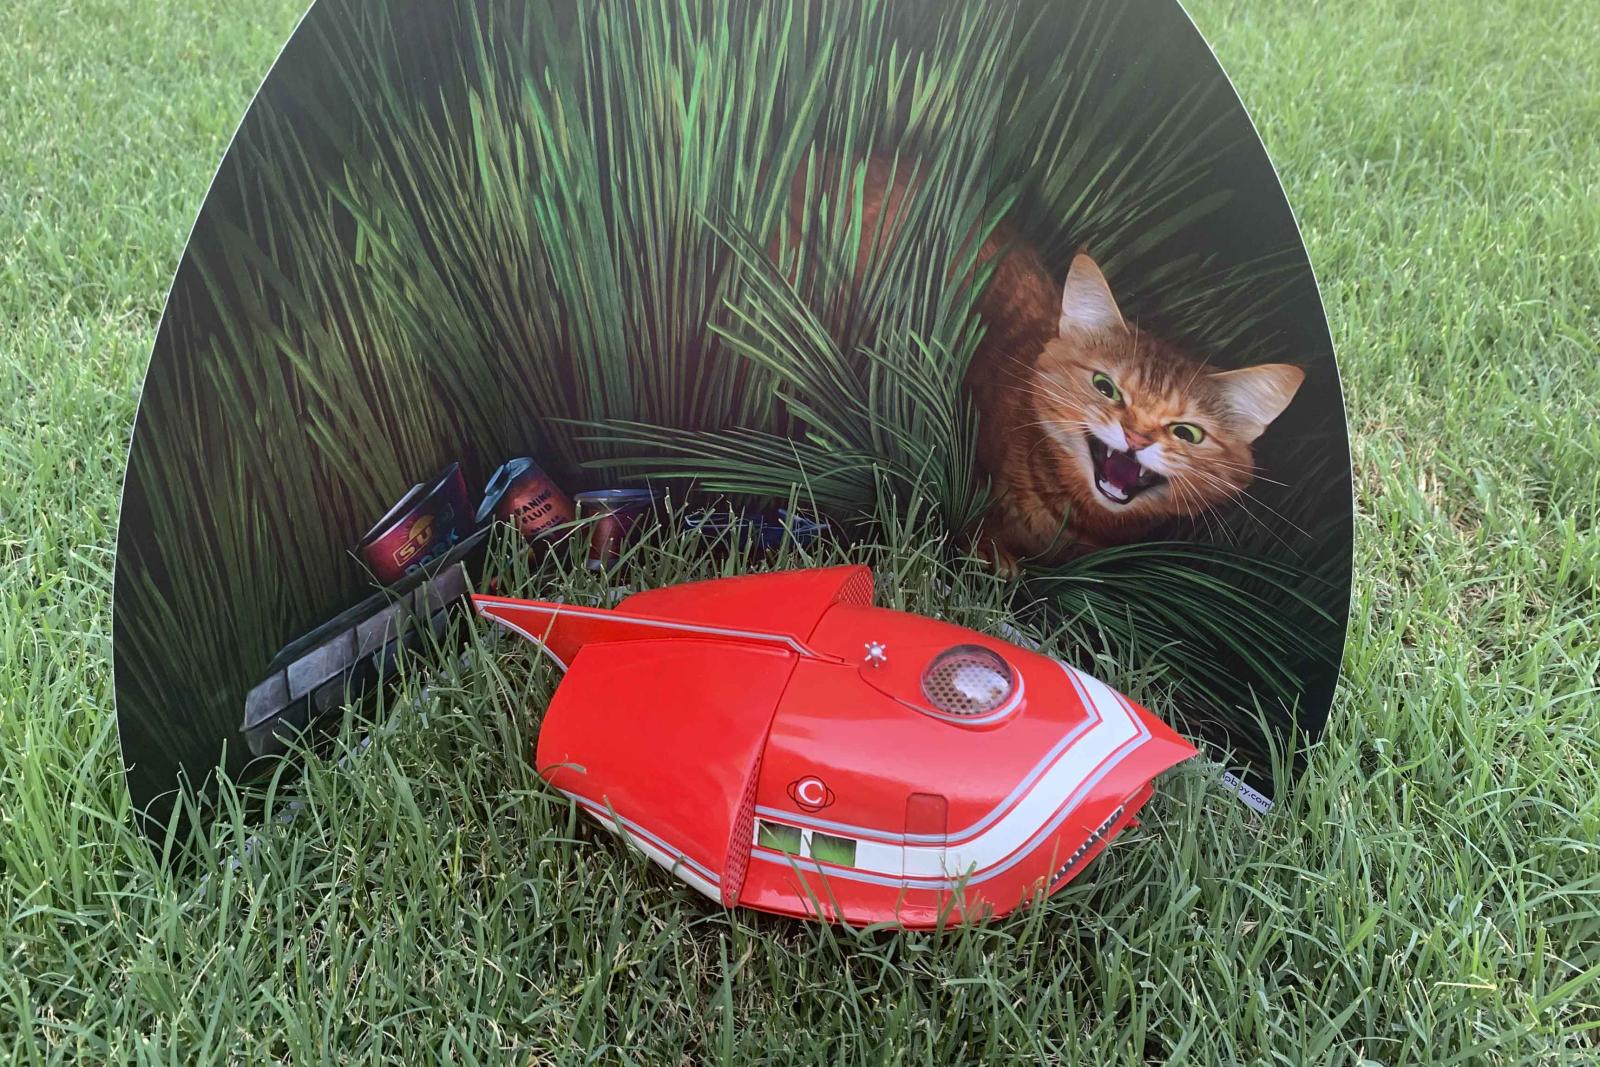
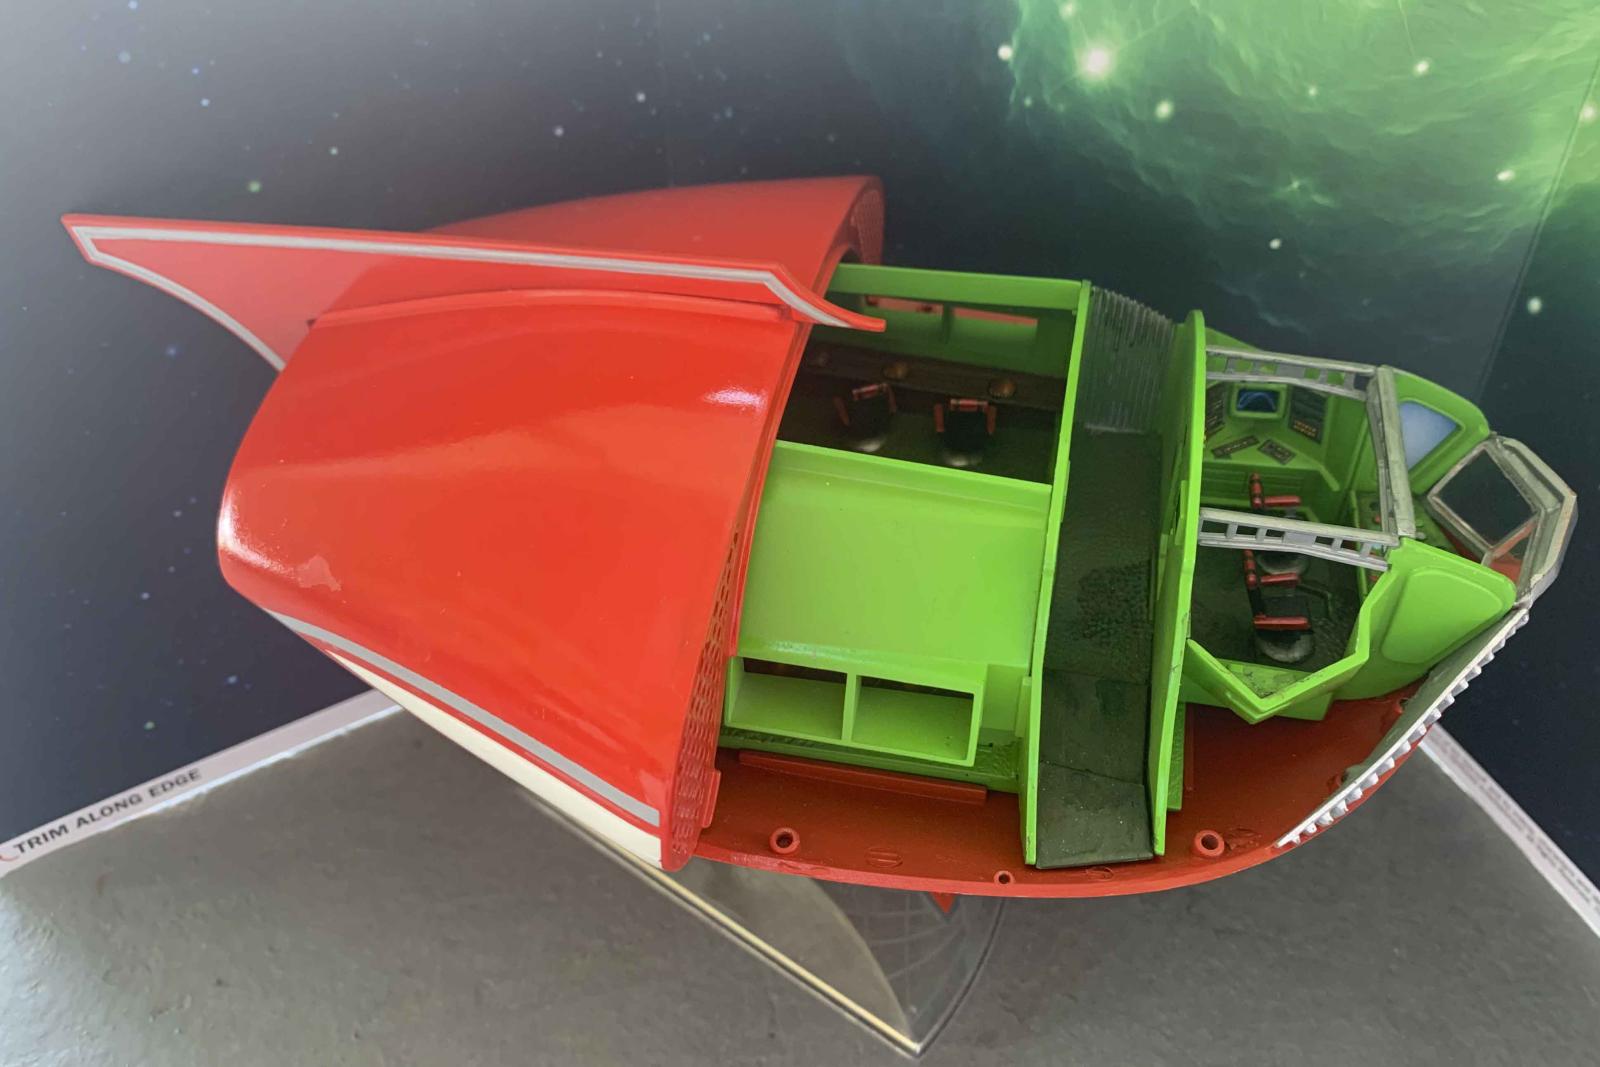
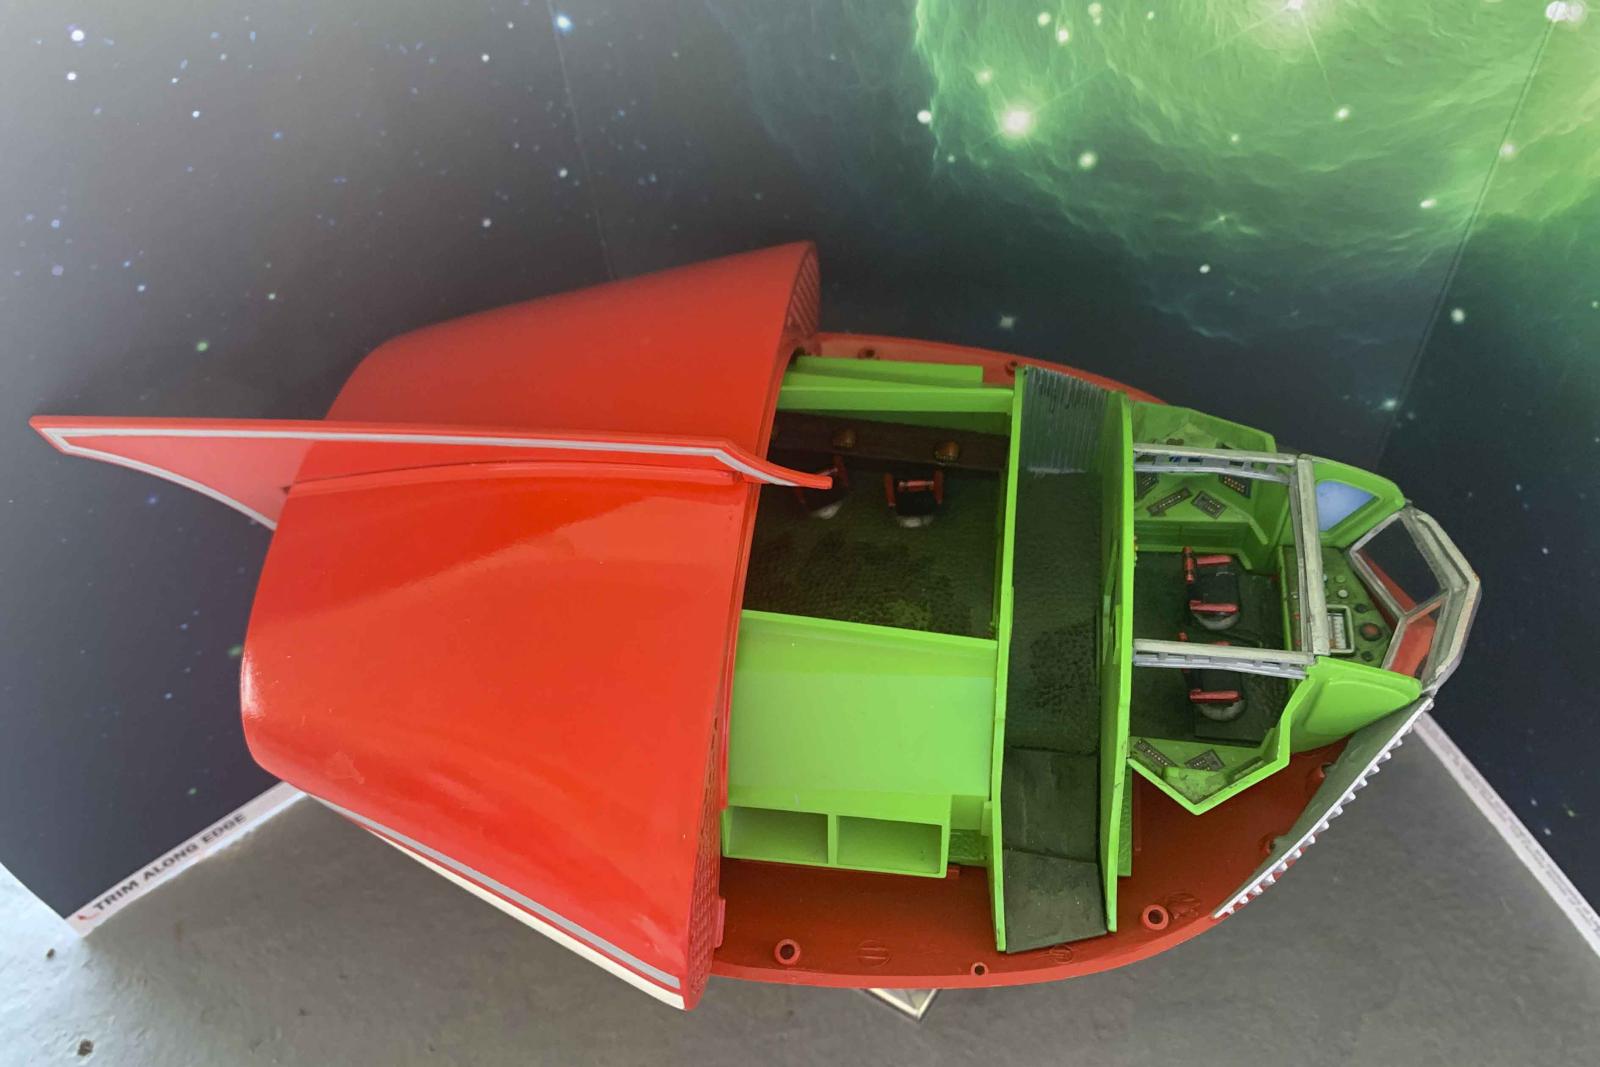
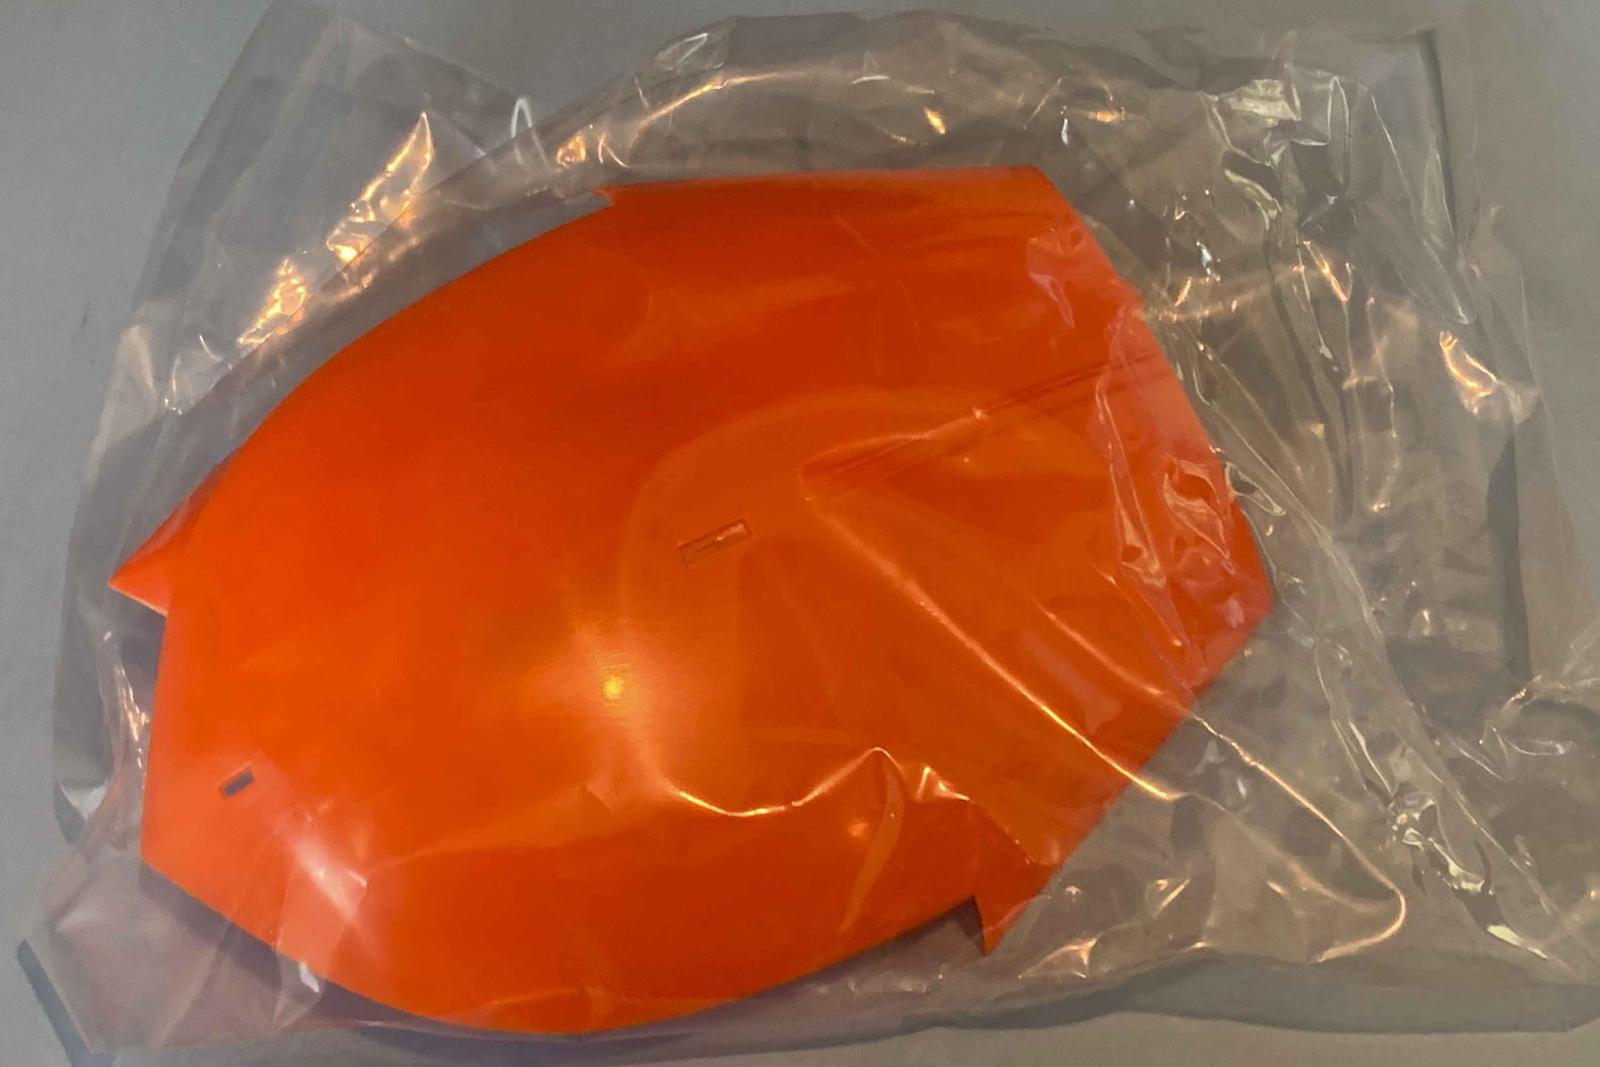
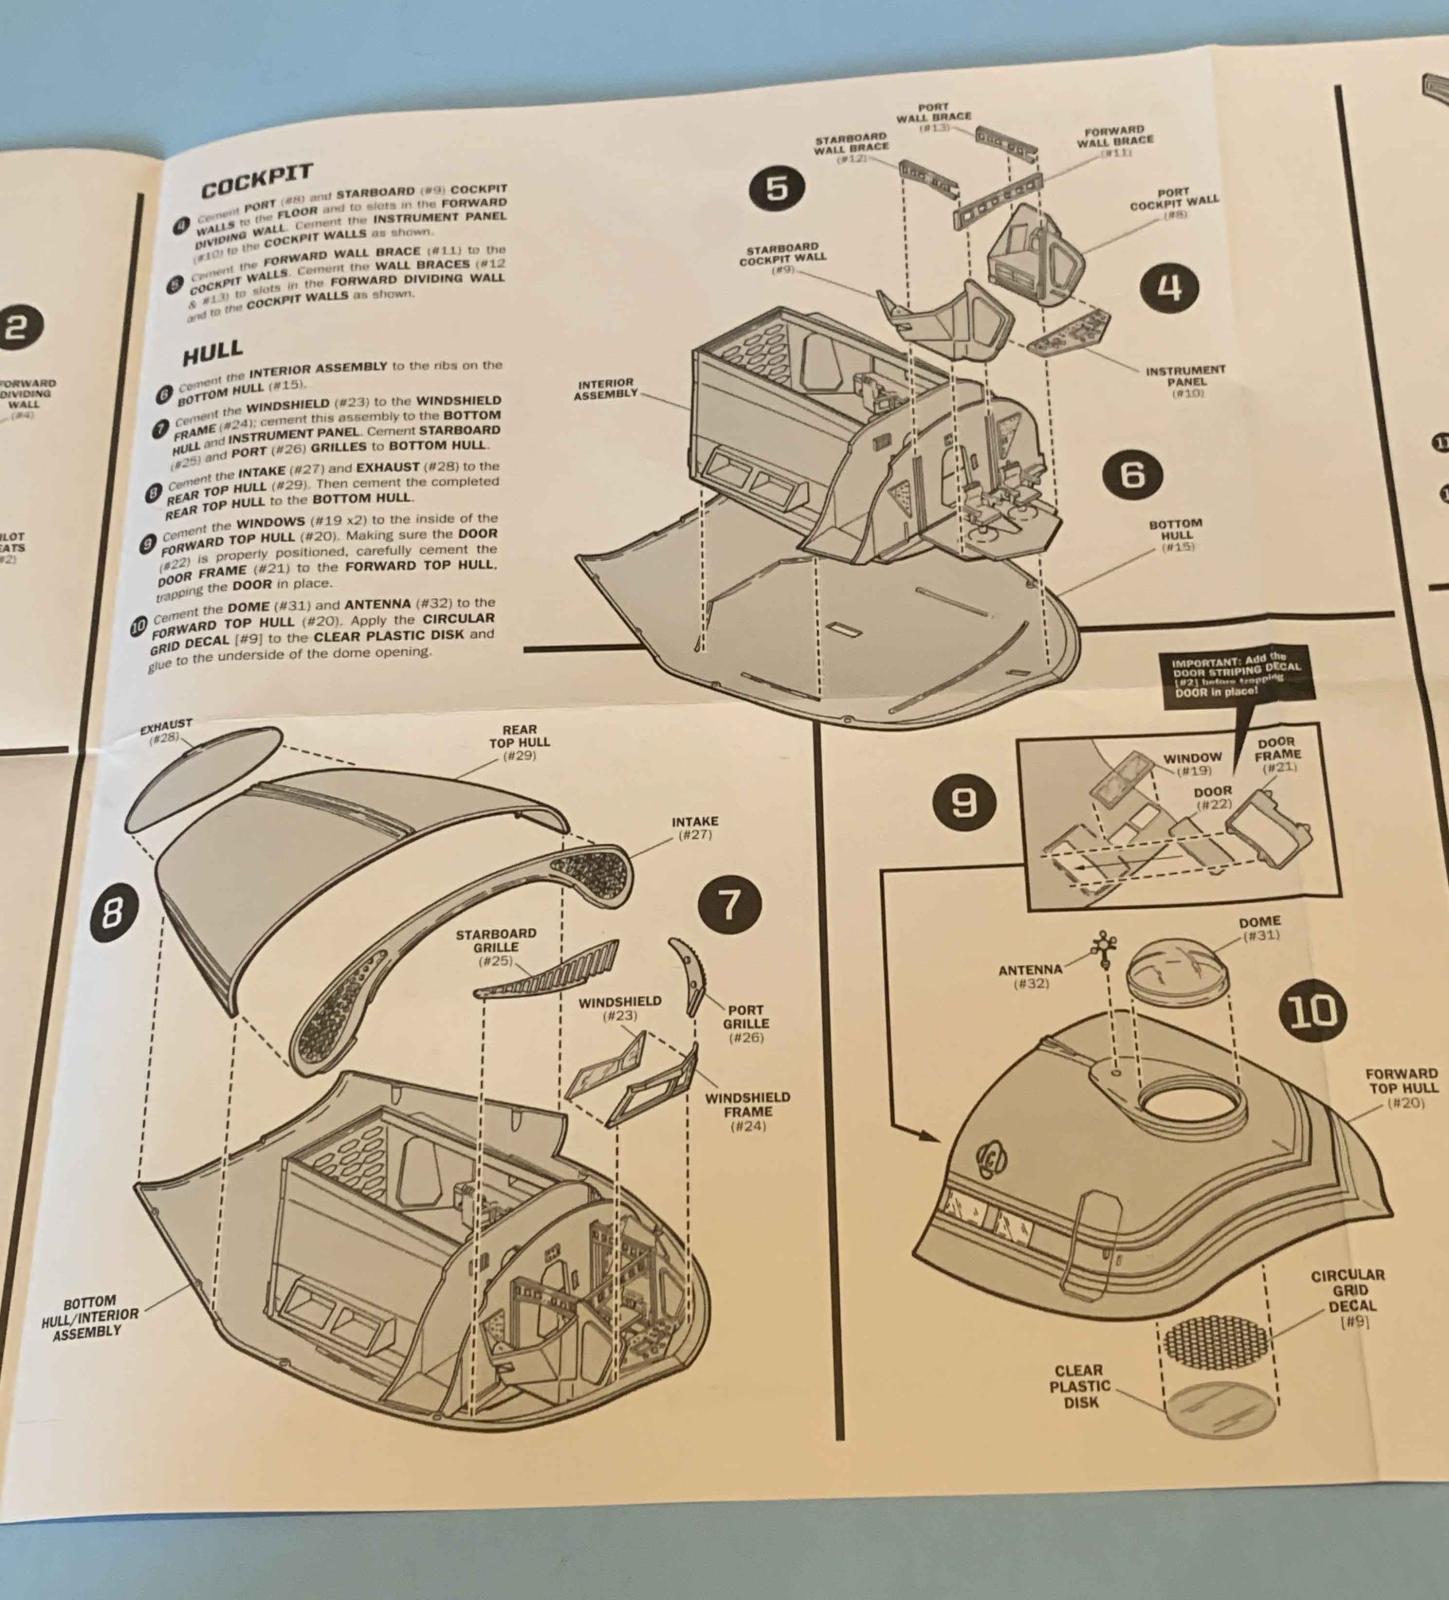
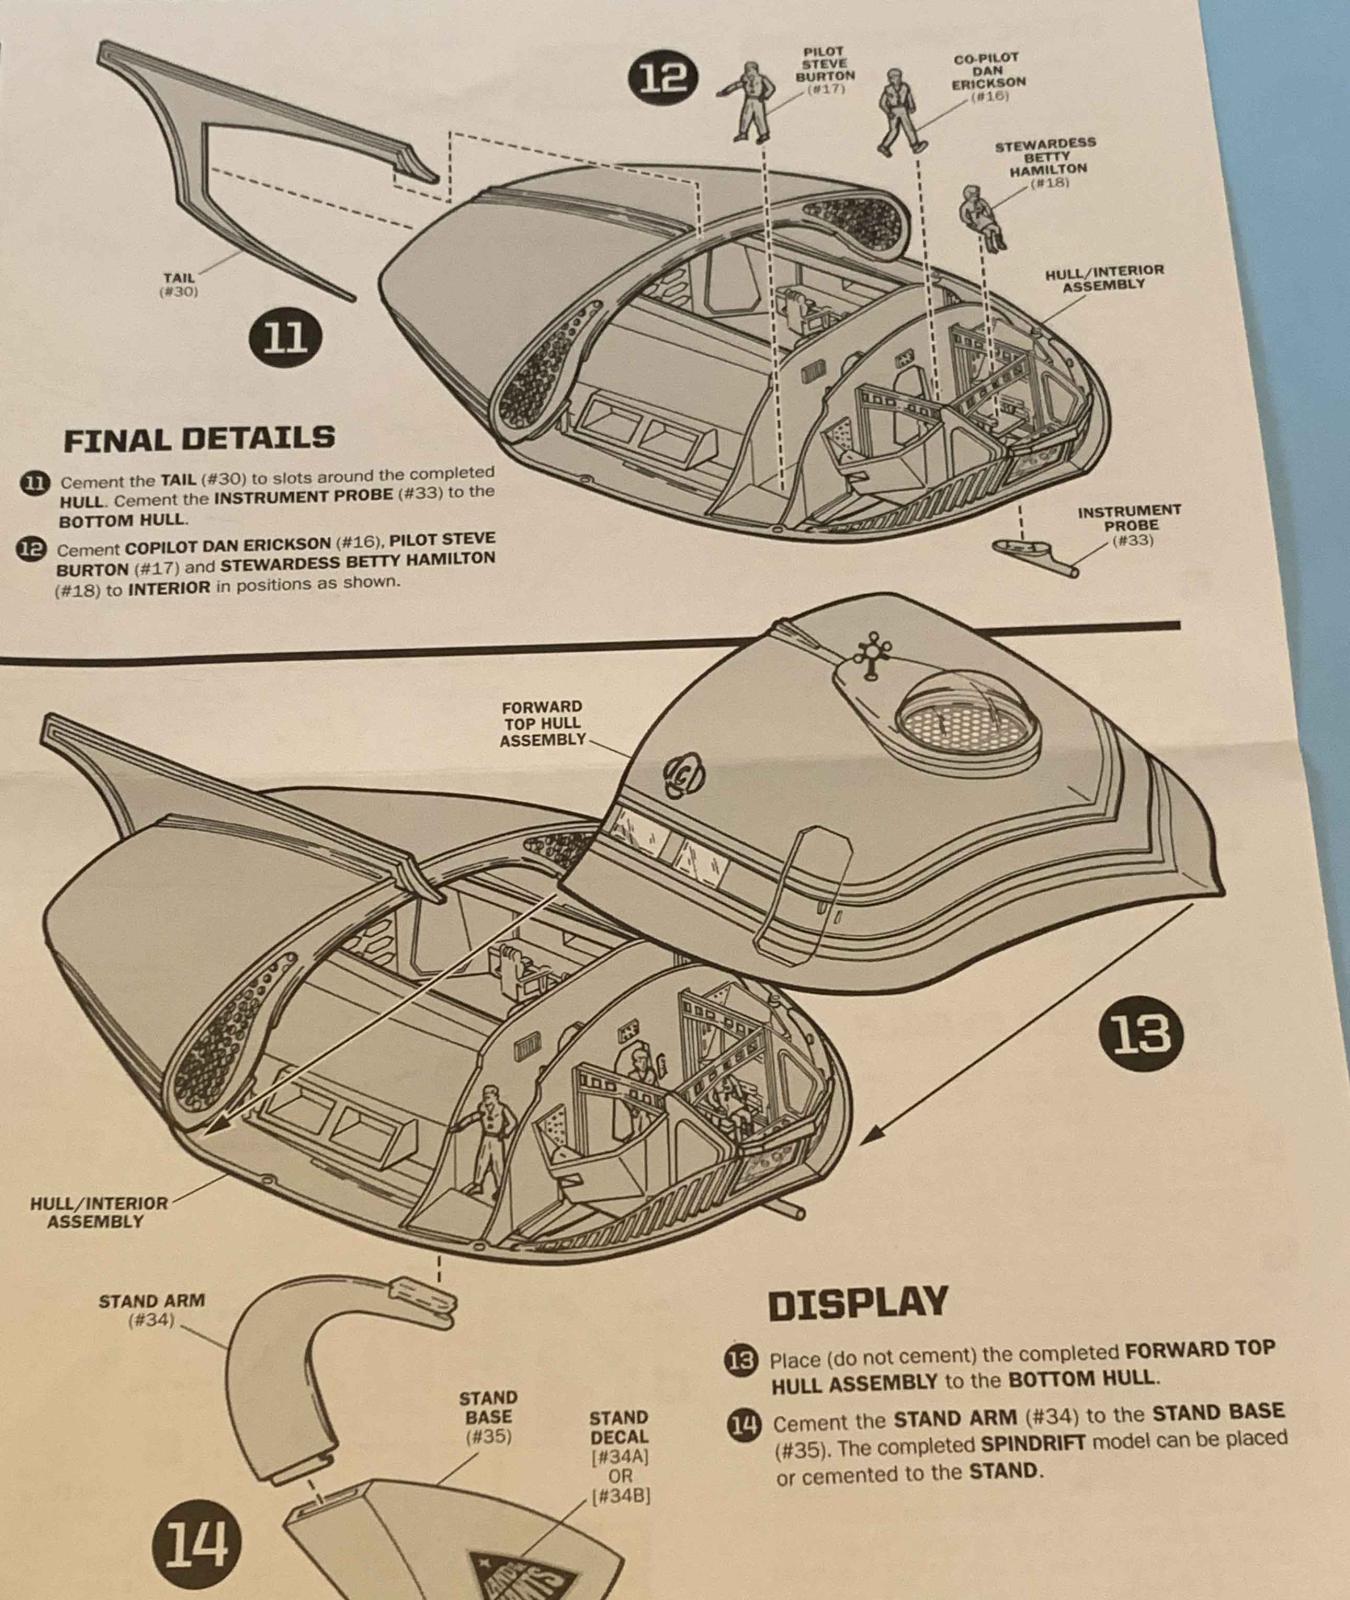
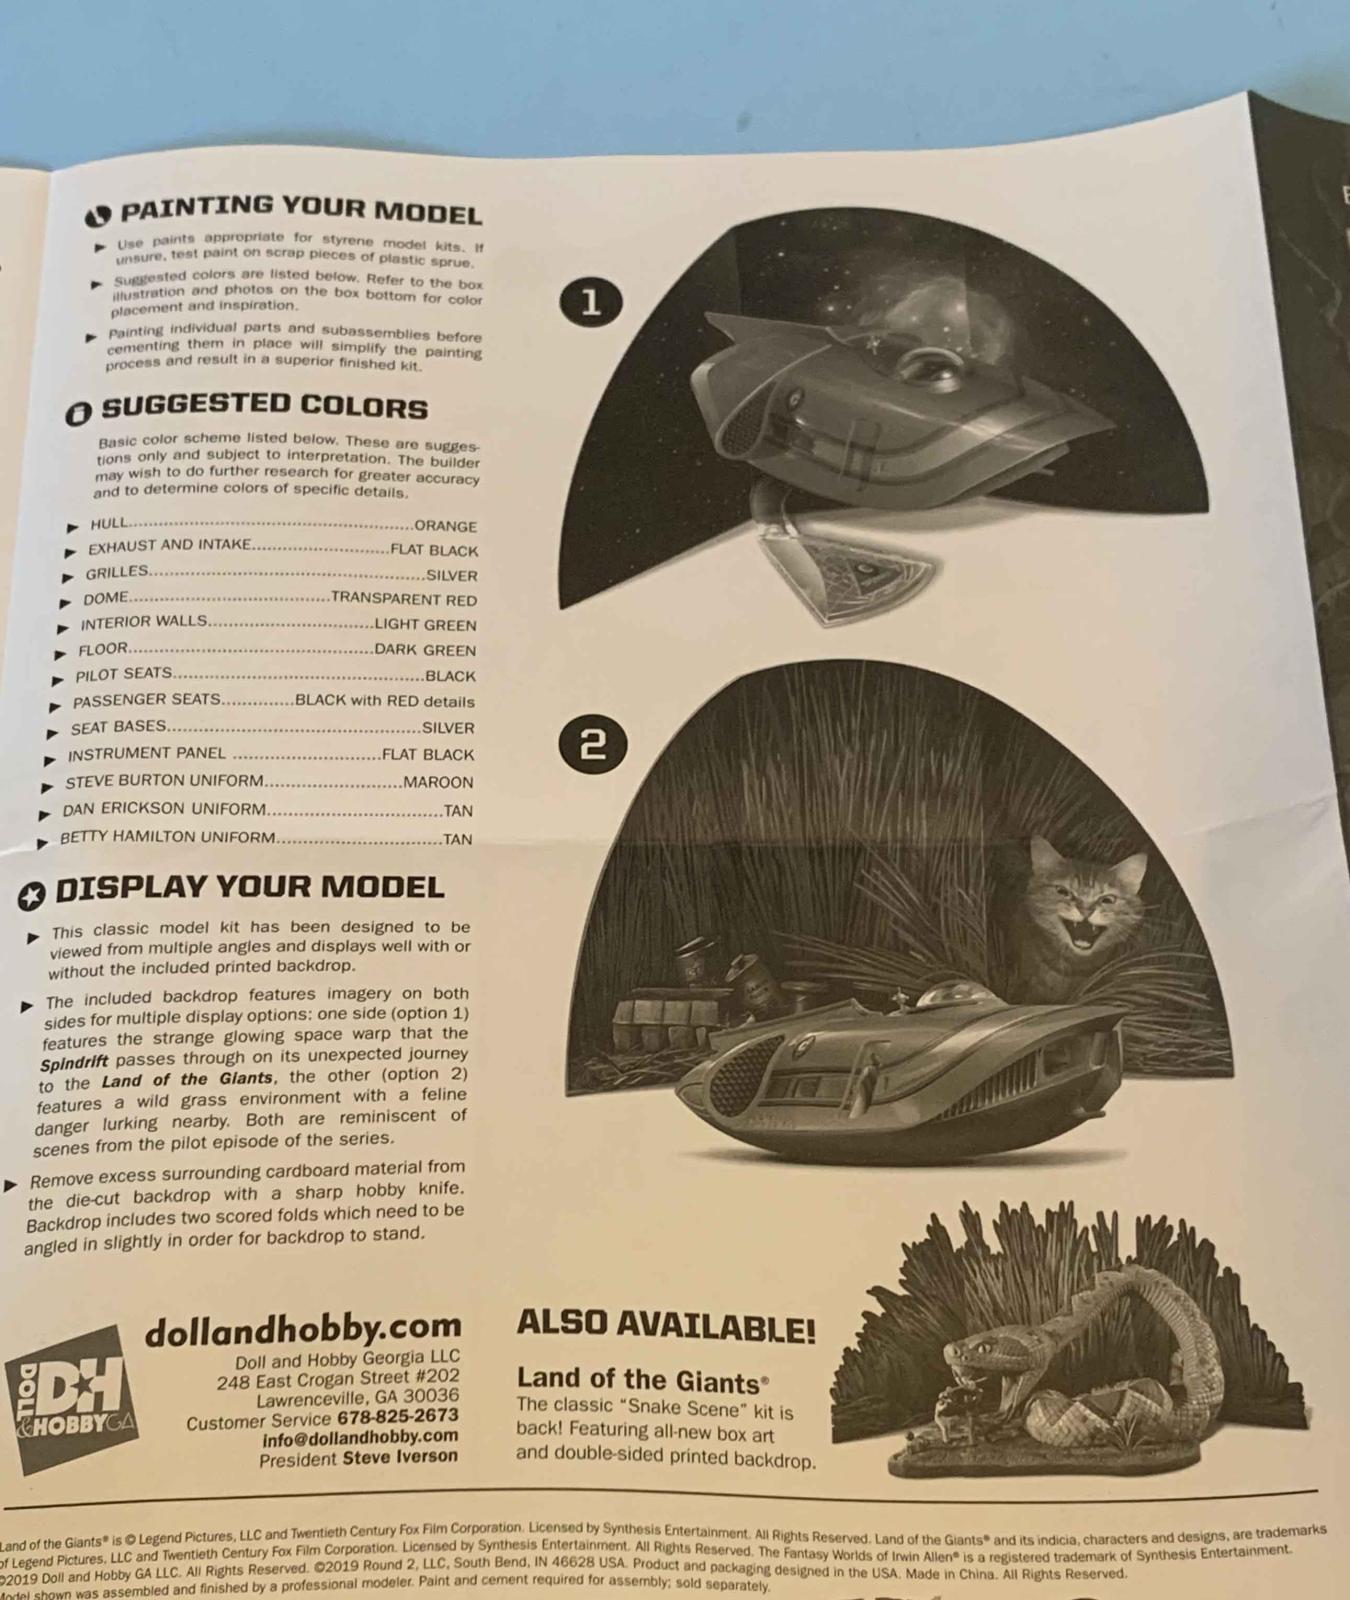
The Doll and Hobby Spindrift spaceship consists of 38 pieces of injected clear, light green, and orange injected plastic. The kit is nearly 10” in length and 6” wide. A full-color background is also included, with one side showing the Spindrift in space and the reverse side with a huge menacing cat ready to pounce. The instructions provide a detailed assembly and decal placement guide, along with color call-outs. The forward upper hull is designed so that it can be removed for viewing the interior, both the flight deck as well as the passenger compartment.
I started the build by washing all parts in Dawn and warm water to remove any mold release. I can’t tell if it is really needed on this kit, but once you have had paint peel off because you didn’t wash the parts is as good as a reason as any. I also painted the clear parts in clear acrylic Future and set them aside to dry on a paper towel in a sealed plastic container. All parts were primed with Tamiya Surface Primer to identify any issues. The base color for the interior was Tamiya TS-22 Light Green. Starting with the interior, I pre-painted many of the parts prior to assembly. Part of the reason for this is if you assemble the interior and then paint, you will have fun placing decals properly. Speaking of the decals, there is good and cautionary news. The good news is in many cases, there are extra decals. The other side is that I had several decals break apart. After experiencing that issue, I applied Microscale Liquid Decal Film to all the remaining decals. This product is advertised to be able to restore old decals and make custom decals. In this case the decals are new to this release, so they are not old, but Microscale Liquid Decal Film seemed to solve the breaking issue. I used Gunze Sanyo’s Mr. Mark Softer to snug the decals down. On some cases it took multiple applications, but in the end, they are down tight.
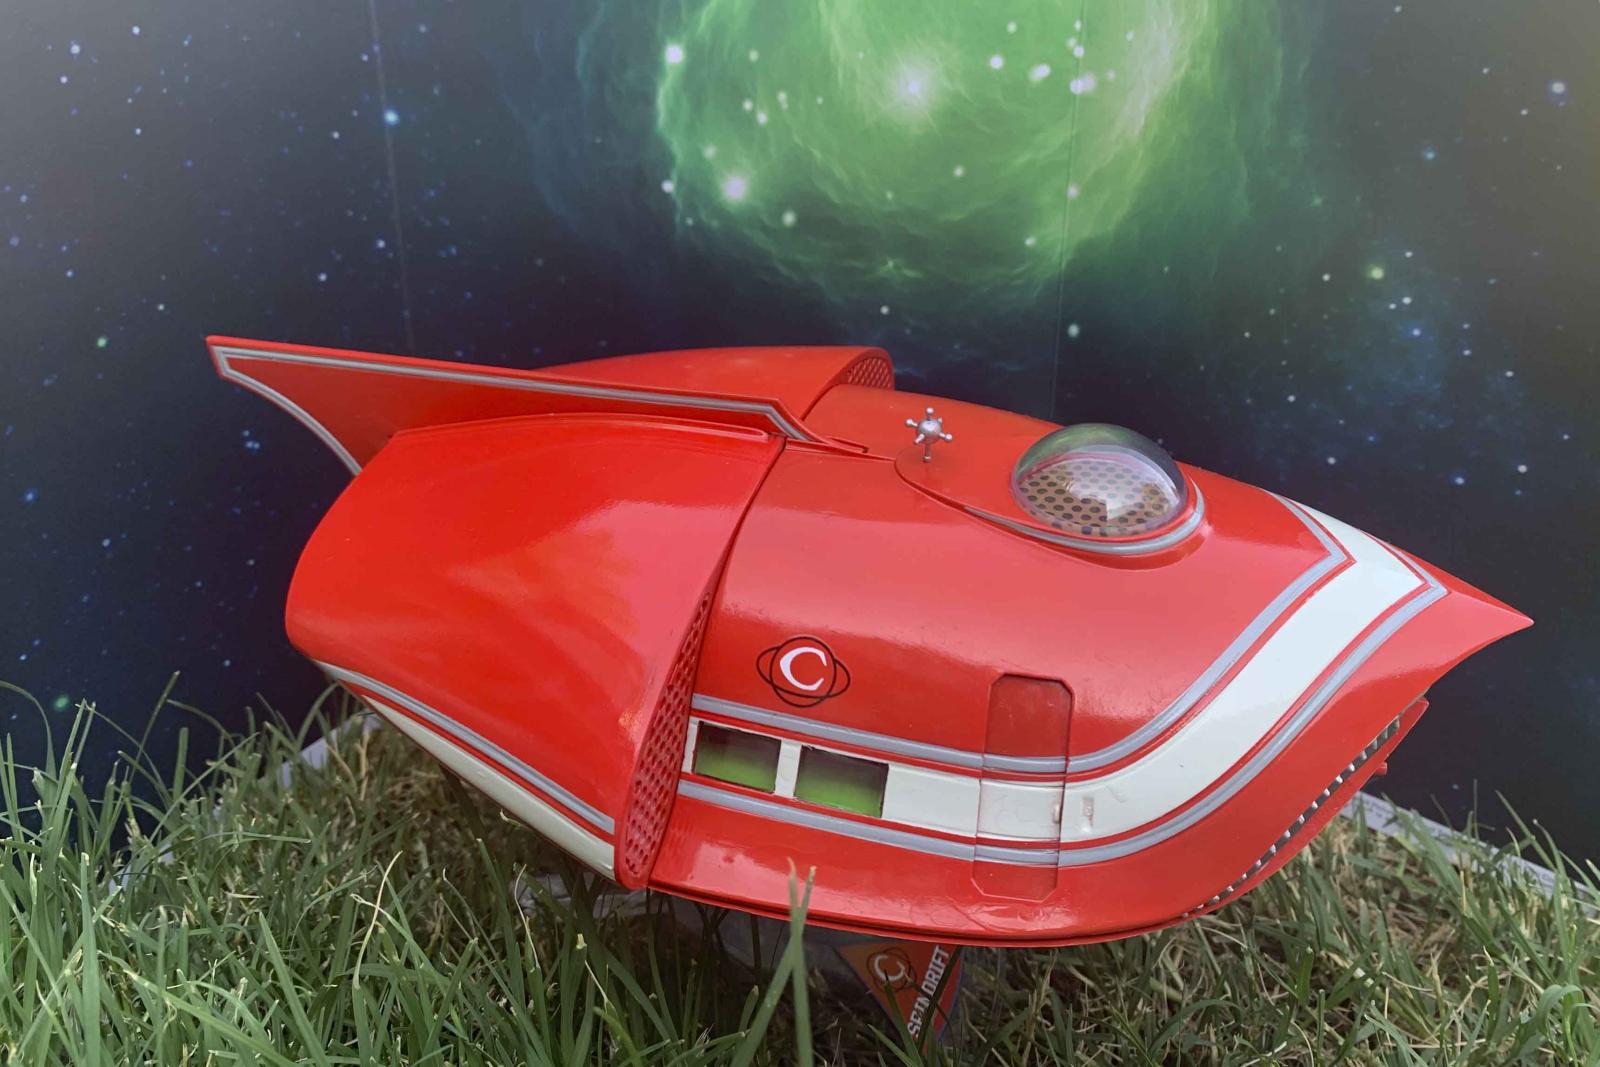
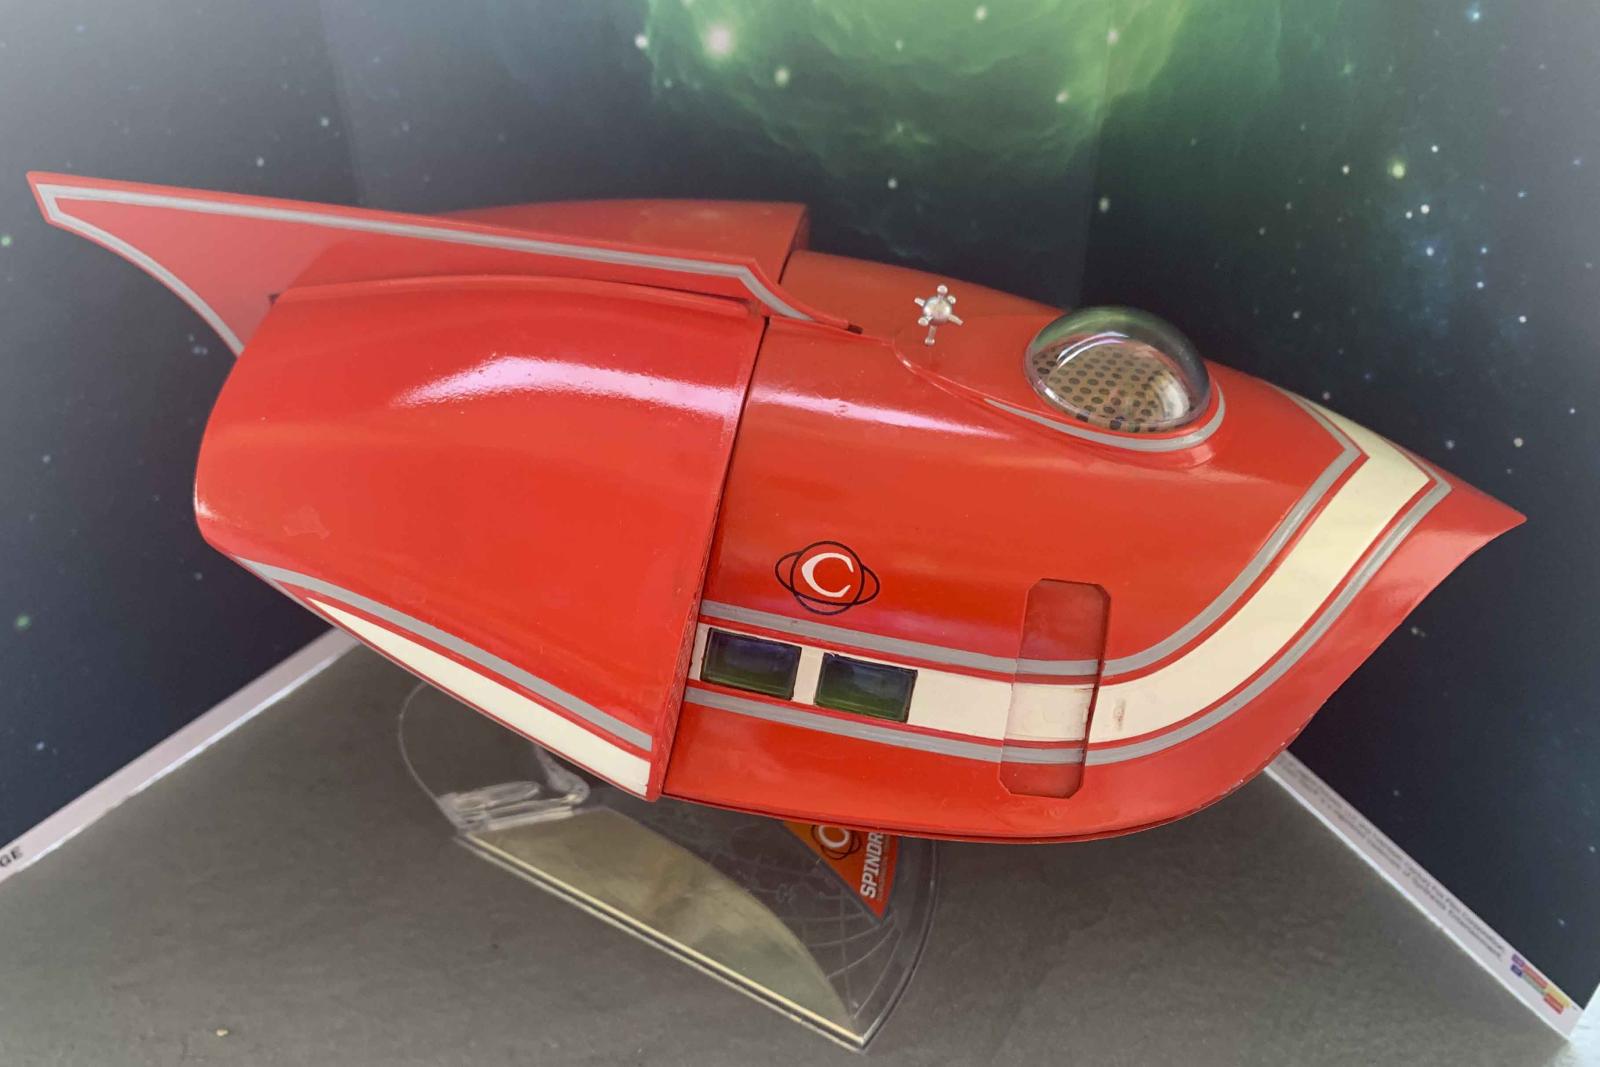
While the interior was awaiting paint to dry and decals to settle, the exterior was addressed. The lower and rear exterior was assembled, puttied, and sanded. I have to admit I started sanding off the molded stripes and company logos since the kit comes with nice decals to replace them. The company logos on the upper front exterior were easy. The molded on stripes turned into a real chore to the point where I sanded them to a point to make sure the exterior parts fit well and left the remaining molded on stripes on, although not quite as deep. I also entertained the idea of drilling out the intakes and exhausts, but since I no plans on installing a light kit, I again punted. Again Tamiya Surface Primer was used followed by a coat of Tamiya TS-31 Bright Orange. [You will find plenty of discussion online about the exterior being red or orange. All I can say is that the models in the Seattle museum were most definitely Orange.] I left the front windshield and port and starboard grilles till later. The front upper exterior was addressed next, primarily in addressing the sliding door assembly. Again surface primer and Bright Orange were applied. I left the clear plastic disc, grid decal, and clear dome to be added as a finishing touch along with the dorsal antenna. Test fitting showed that adding all these parts would be easily accomplished at the end of the build. I was worried about the decal stripes, even with the Microscale Liquid Decal Film, but they went on far easier than I had feared.
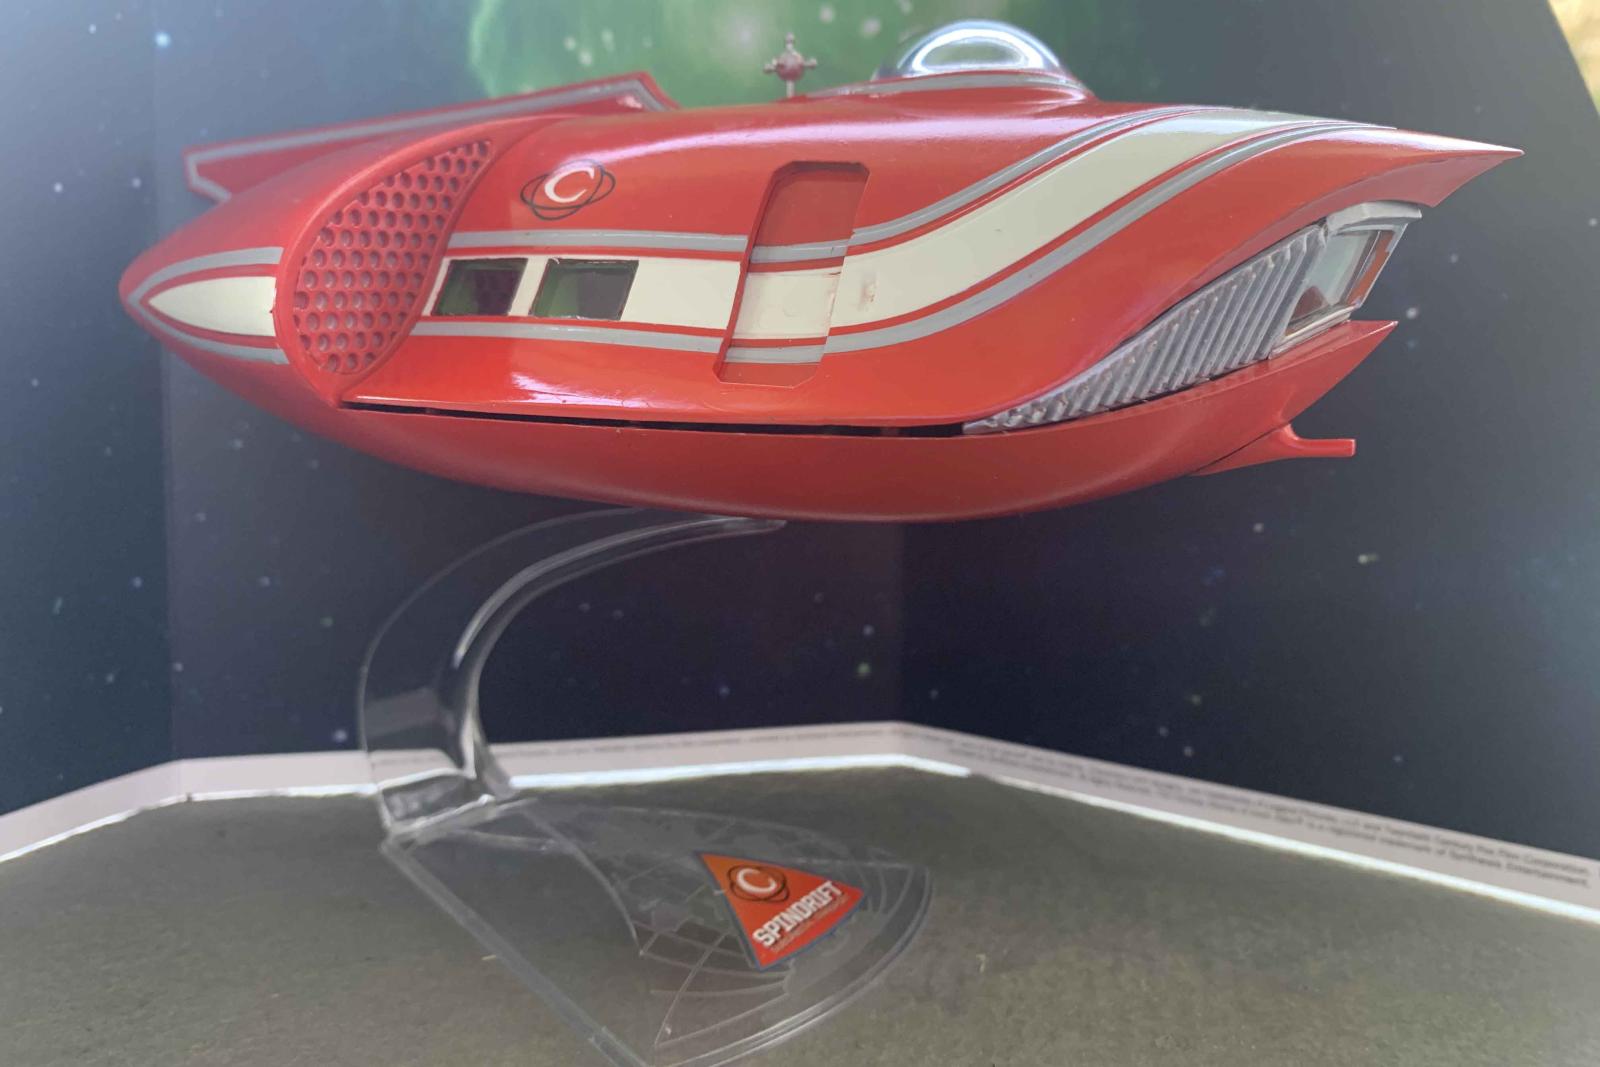
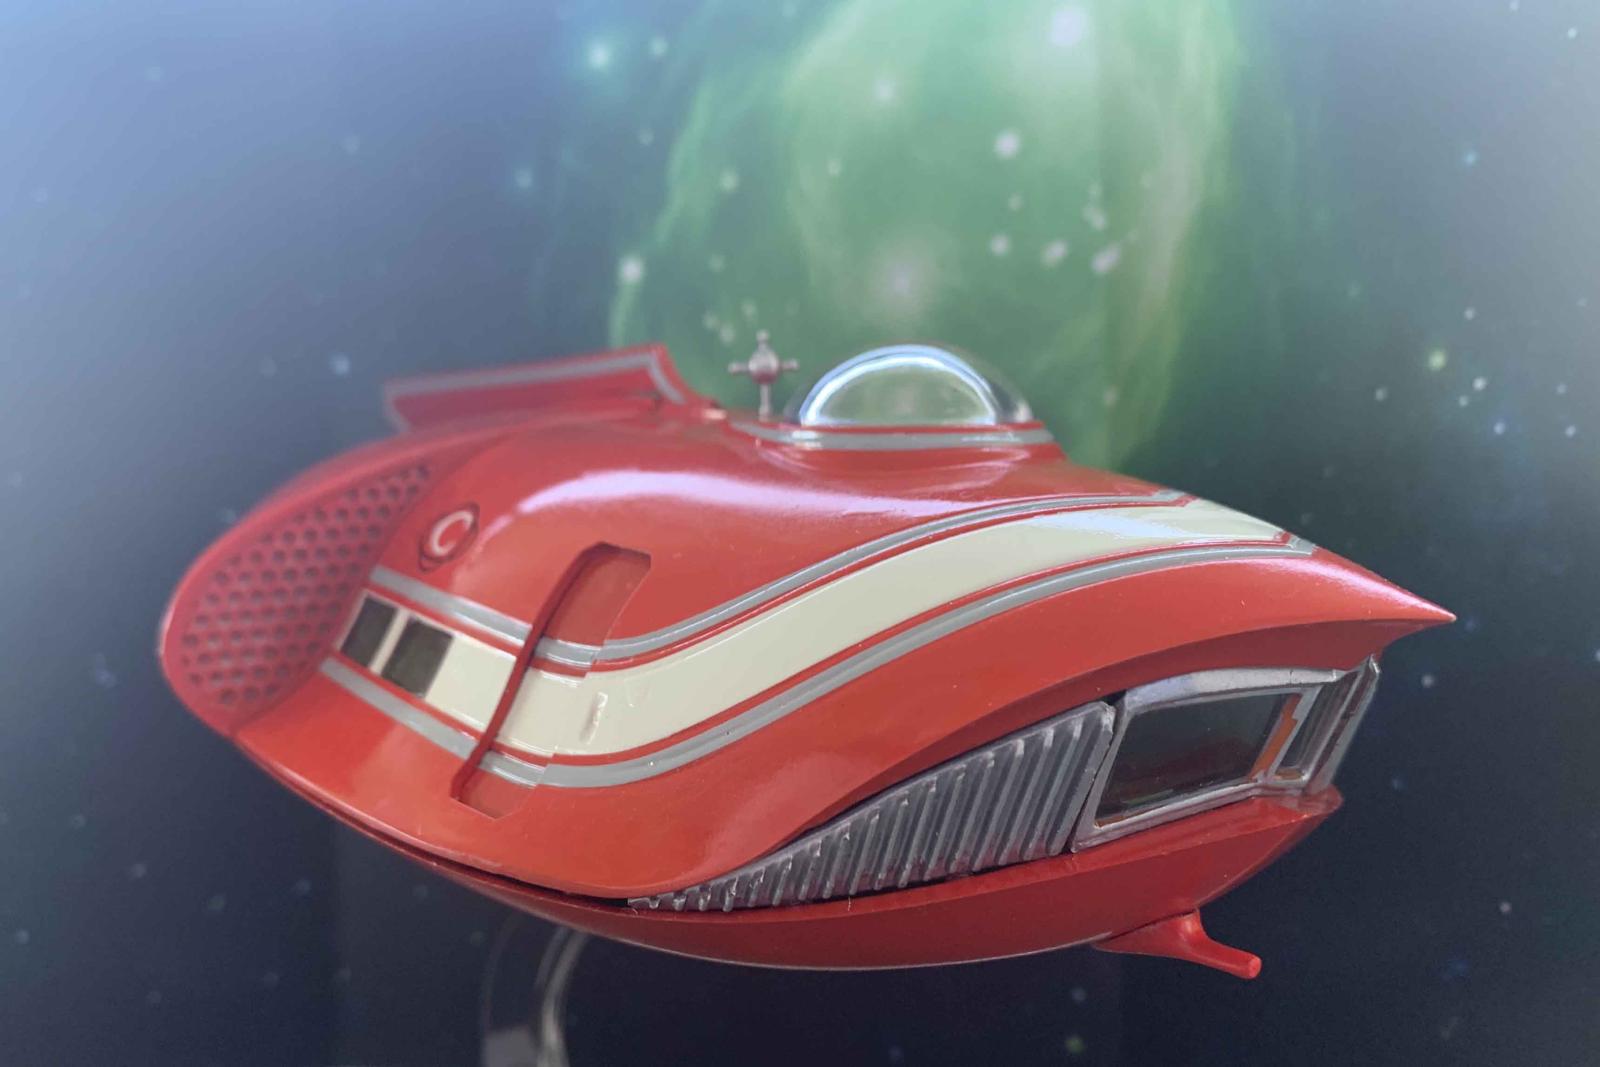
I assembled the clear display stand with a new product I wanted to try: Clear Gorilla Glue in a 1.75 fl oz bottle. This is a non-expansive glue, as opposed to their first release that was an expanding glue. This viscous glue seemed to work quite well. It gave some flexibility before setting up and it dried clear. Feeling emboldened, I also used it to install the side windows and the front grilles and windscreen. Again, it was flexible enough to get the clear parts exactly where I wanted, and it dried clear. One issue with the display stand was the top where it fit into the bottom of the Spindrift. I ended up sanding this tab considerably to get it to easily fit into the bottom slot. Not a huge problem, but just make sure you test-fit so you don’t break off the tab inside the Spindrift.
The kit comes with three figures: Pilot Steve Burton [played by Gary Conway], Co-Pilot Dan Erikson [played by Don Marshall], and Stewardess Betty Hamilton [played by Heather Young]. Of course my favorite on the show was Valerie Ames Scott (played by Deanna Lund). I spent a lot of time removing the flash and filling in a couple of sink marks. Internet references will highlight how each of the figures looked on the show. I used Vallejo Air paints to match those pictures as best as possible.
Overall Evaluation
If you desire, there is a lot one can do on this kit to improve its accuracy. Lighting kits, 3D printed, resin and photoetch sets for the cockpit, and even a ‘correct’ teardrop shaped clear dome instead of the round dome. All this is just to get it to look like one of the two models from the television show. To be honest, I actually thinks it good the way it comes, its not like the original model makes any sense with some of the details (How does the Spindrift’s power plant work?). I have no issues with round clear dome which I think looks just fine with the decal applied. The new decal sheet actually goes a long way to improving the look of this kit over the Aurora and Polar Lights variants. In the end, this kit just looks cool the way it comes. Being able to open up the front upper exterior to see the interior is a nice touch, along with the three figures. The reversible background was also a nice bonus that really helps to display the kit.
My thanks to Doll & Hobby / CultTVMan and IPMS/USA for the chance to review this great kit.
Highly Recommended !


Reviewer Bio
Frank Landrus

Frank retired from the Ophthalmic industry with over thirty-six years of Research and Development experience. Frank's first model kit was a 1959 Hawk 1/72 US Marines Vought AU-1 Corsair and has been building models for over sixty years. Frank's first encounter with IPMS was attending a North Central Texas ScaleFest show in 1984. Frank soon became more involved in Make-N-Take activities and became the IPMS Western Coordinator for Make-N-Takes [West of the Mississippi River]. Make-N-Takes quickly became a local model contest and airshow staple reaching a high of reaching over 1,300 children before the COVID shutdown. Frank has volunteered to assist in contest judging since 1985 and is currently the Nationals Head Figure Judge until he is dead or they find someone better.
Comments
Add new comment
This site is protected by reCAPTCHA and the Google Privacy Policy and Terms of Service apply.
Similar Reviews