
Junkers Ju87R-2/B-2 Stuka
Airfix has released a new-mold Ju-87B-2/R-2. Typical the recent releases of Airfix, you get state-of-the-art surface detail and fit, together with superb engineering that makes the construction of this model a very enjoyable experience.
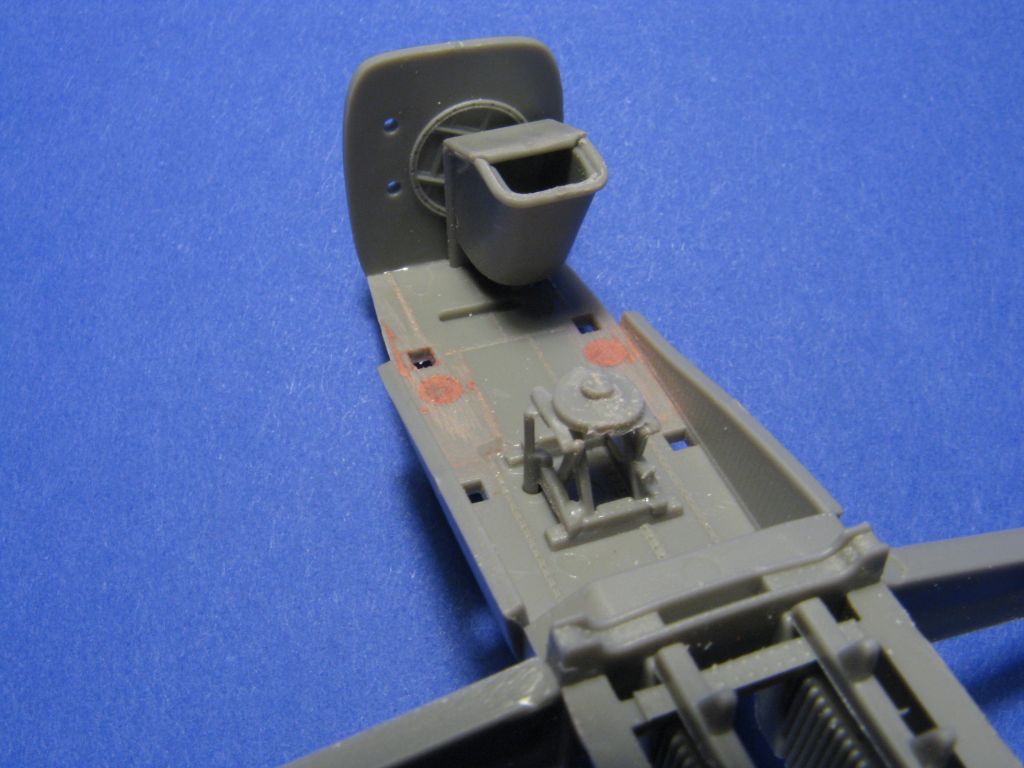
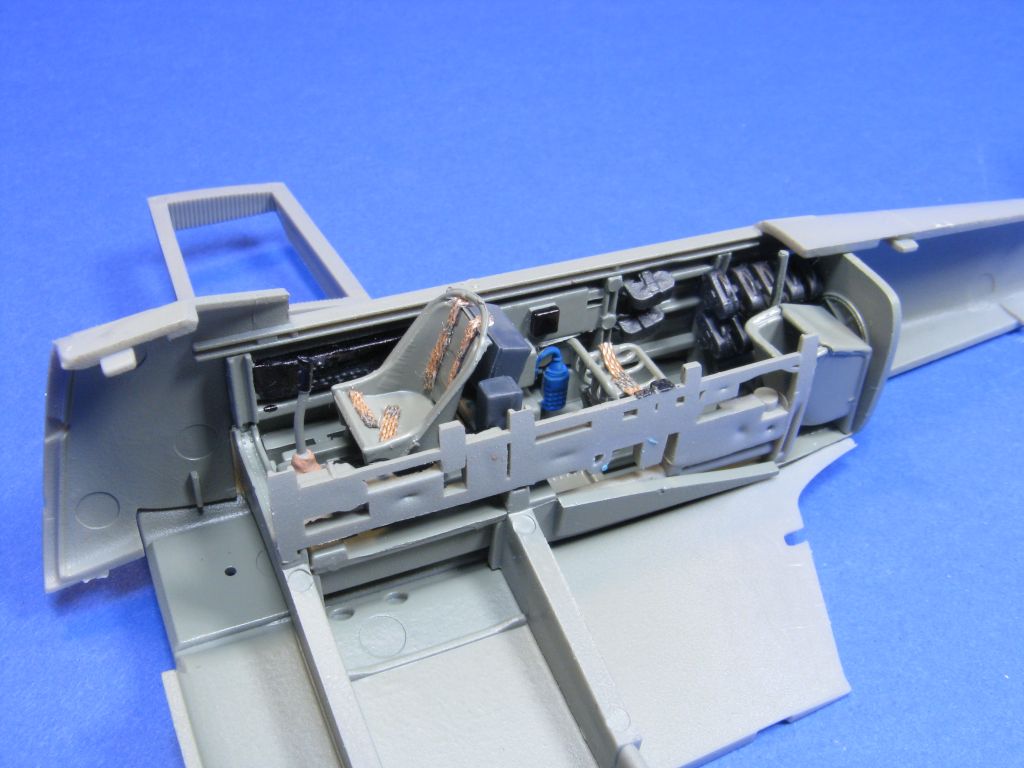
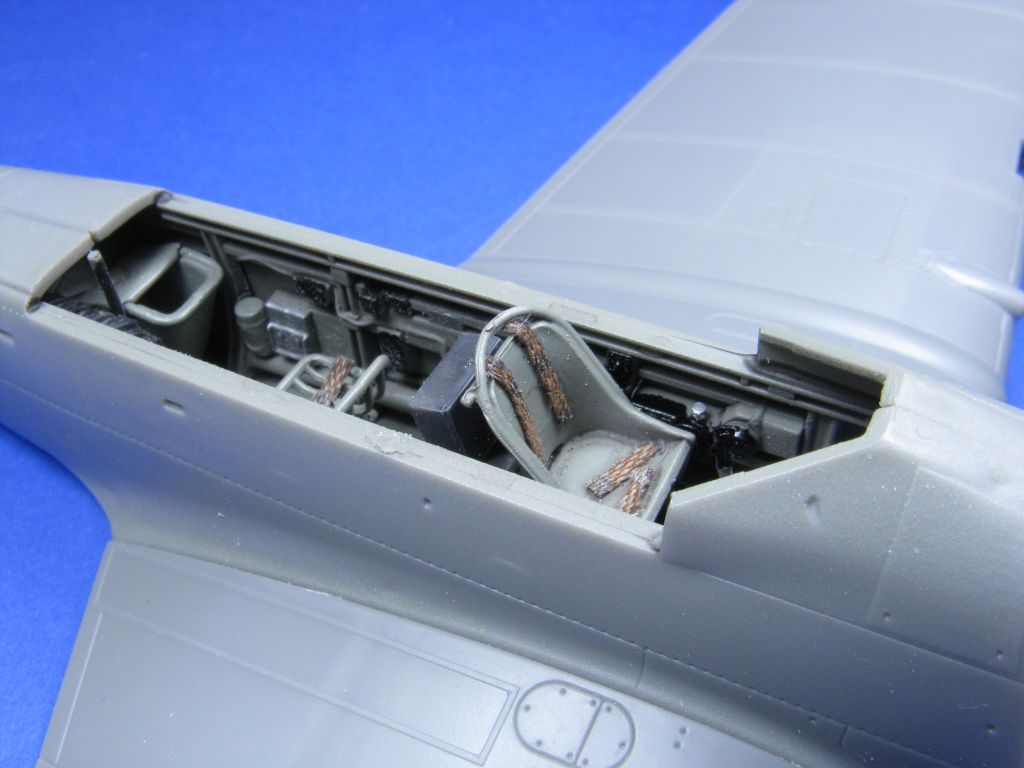
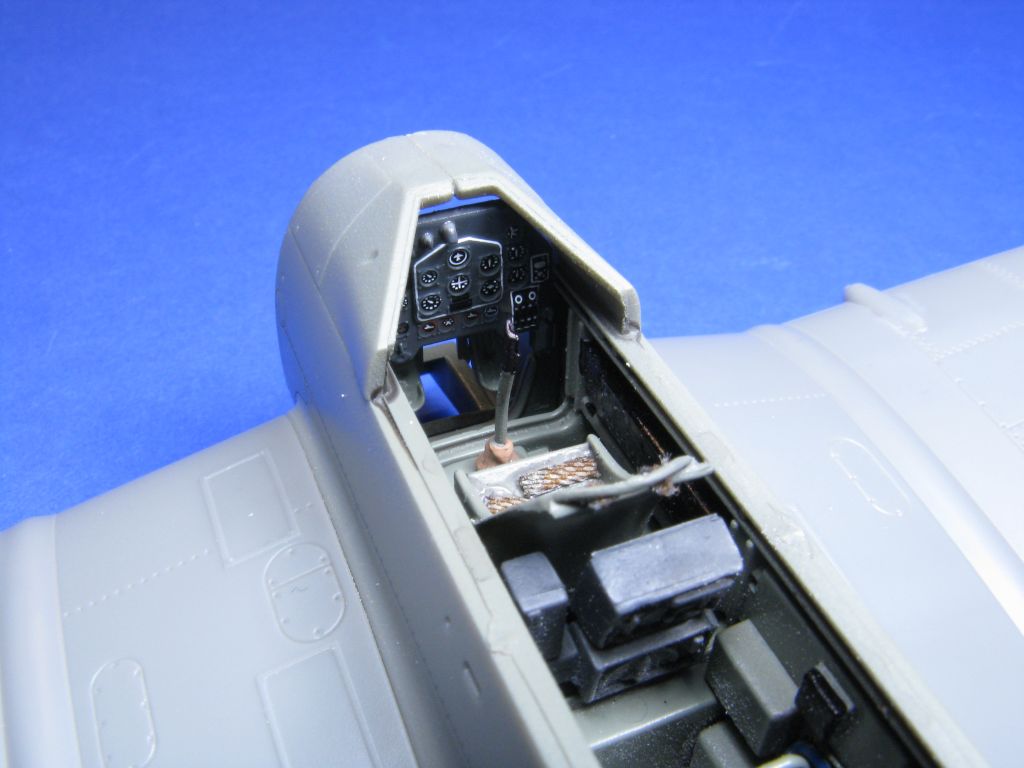
Like with most airplane models, construction starts with the cockpit. Being a two-seater, there is plenty of detail on it, including a radio, pilot and gunner seat, sidewall detail, extra ammo for the gunner, etc. Take your time and do some detailed painting, it will pay off later. Note that the instrument panel is provided as a decal (which looks very good) and no seatbelts are provided. I scratch-built the seatbelts being depicted in this model.
Also note that there are a few ejection pin marks in the cockpit floor area, near the gunner seat that could be visible. I choose to fill them out. Also, there are a few ejector pins on the fuselage inner sides, but are not visible, as the sidewall detail will cover them.
Once you have the cockpit painted and assembled, the instruction direct you to assemble the fuselage sides and then to slide and rotate the cockpit in place, from the underside fuselage opening. I honestly don’t know why they suggest you do it that way. It is much simpler to simply add the fuselage sides to the assembled cockpit one at the time. I did have to sand to fit the part A21 (the rear cockpit bulkhead). Nothing that a few swipes with a sanding stick couldn’t take care of.
Construction them moves into adding the instrument panel (via the open front fuselage, it is actually very easy to do) and to include the lower fuselage window, used by the pilot to locate their targets just before their dive. At this point, you have choices if you will be displaying the engine or to have the full nose assembled and therefore decide which part(s) to include in the lower fuselage to nose assembly area.
Please be aware that even if you choose to build your model with the full nose assembled, you still must place the fuselage/nose firewall in place. That is because both the engine or the nose assembly will use the firewall for alignment.
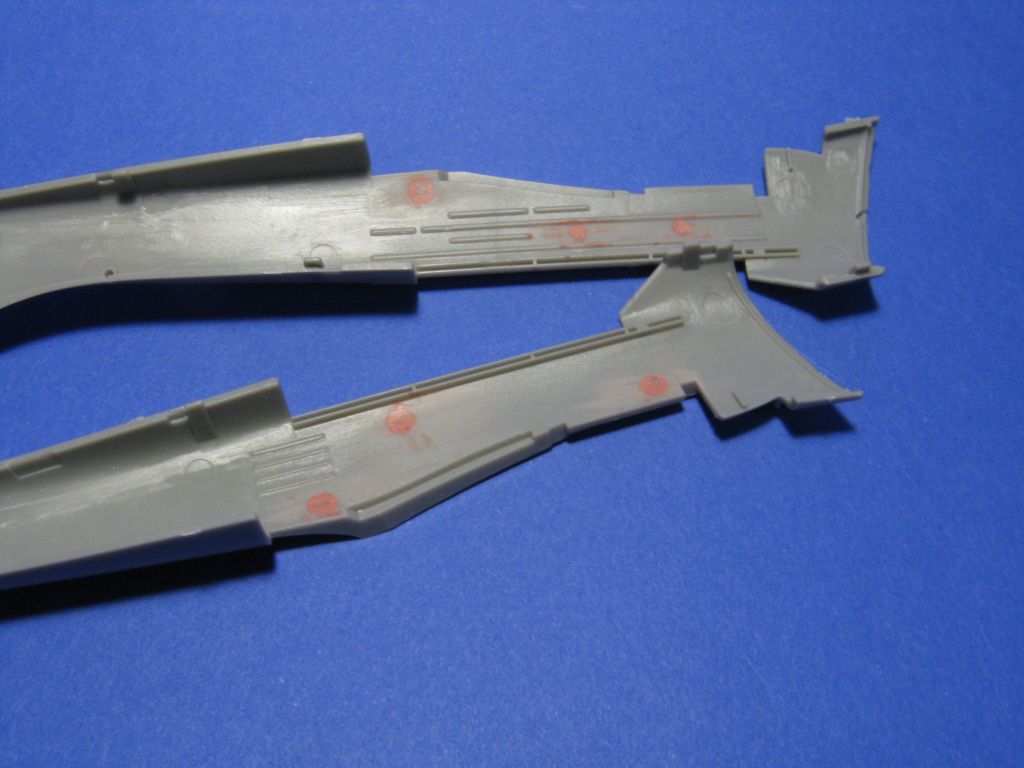
At this point you can start assembly of the wings, making sure you drill the holes for either the extra bombs or for the drop tanks. Also, you have the option to display the gun bays open or closed and to modify the lower wings for an in-flight stand (sold separately).
The engineering of the model is such that the cockpit (now firmly sandwiched between the fuselage sides) includes a set of wing spars which will ensure proper alignment of the wings and it has the added advantage of having a perfect wing root to fuselage fit. Kudos to the Airfix’s engineers!
Assembly of the tail surfaces is straightforward and again you must choose if you want the elevators/rudder to be offset or in the neutral position. Notice that different parts are needed depending on what position you choose for the elevators.
At this point the instructions are very clear that you have a choice between displaying the engine or building the nose, all buttoned-up. After some debate with myself I choose to modify things a bit, so even when the original design is for either the engine being displayed or the nose assembly to be displayed, I got away with an interchangeable design. More on that later.
Construction of the nose is straightforward. Again you have some options based on the position of the cowling flaps. Just know that part E01 (upper nose flap) will snap into place. Engine exhaust can be painted separately and added towards the end.
Once you have the fuselage, tail, and wings put together (which shouldn’t take you more than a couple of hours, that is how good the fit of the model is), you move into the landing gear. Airfix has done a very clever design here, as the length of the landing gear spats varied if the airplane was on the ground or in flight (it had an accordion-like feature). Therefore, you have yet another decision to make. If you choose the landing gear in the ground configuration you will have to remove a short part of the landing gear spat for which you have an inner groove on the plastic part.
Also, the tires were molded with a small tab to keep the wheel from rolling around its axis. Depending on which option you choose (on the ground/in-flight) you assemble the flattened tire facing down, or facing up (by being inside the spat, you won’t see the flattened part). While I certainly admire the engineering of the piece, I decided to remove the tab. My concern here is that the tab will keep the tire in a fixed position and if the model were to have a slightly different attitude than intended (due to the modification of the landing gear being a bit off, or any assembly error) then the tire could sit at the wrong angle and have the flat part not parallel to the ground.
The last assembly parts relate to mounting the landing gear, dive brakes, flaps and wing bombs/drop tanks. I strongly suggest you paint and finish all those parts independently and add them at the end. Not only will painting will be easier and some parts need to have decals applied under them before you add the drop tanks or dive brakes.
Given that the fit is so good, you can keep the nose assembly mounted to the fuselage as a friction fit mount (that is no need for glue). So, here was where I decided to modify a bit the model, so I could have both the option of the nose-assembly in place or the engine being displayed.
Carefully study the assembly manual shown that there are only a few parts in common for both options and in most cases, you can use an alternative part. For instance, you can mount the oil cooler using the open-position part in the nose assembly and then the oil cooler in the closed position for the engine assembly. There is only one part in common for both assemblies (Part @@@); the air intake for the turbo compressor and it is easy just to assembly in the engine and only uses the air intake scoop in the nose assembly.
The other modification was to extend the engine mounts by adding two small rods and to drill the locating pins for the engine mounts to accept the added rods. The extra rods will keep the assembled engine in place (otherwise it falls off).
As you can see, it is very easy to modify the original parts and now I can show the model either with the assembled nose or with the engine in its full glory.
Painting of the model was accomplished with enamels and decals were applied on top of a gloss coat. Decals were thin, in register, with great color density and responded well to Micro Set/Sol. Something that should be pointed out is that swastikas are not provided in the original decal sheet, so I raided my spare decal sheet for them.
Another acrylic gloss coat was airbrushed and an enamel wash applied to highlight all that fantastic surface detail. I used a brown shade for the undersurfaces and a black shade for the upper surfaces.
So far, this model was a pleasure to work with. Then was when I moved to the greenhouse canopy, which I left to the end (who enjoys masking such canopy?). Well, let me tell you I was in for quite a surprise.
Airfix molded the canopy with both internal and external detail. The longitudinal canopy braces were on the outside, while the vertical canopy braces were mounted in the inside of the plastic piece. Honestly that throw me off, as I was not sure what was going on. After doing some research I realized that Airfix has done its homework and reproduced the canopy the way it was in real life, with the longitudinal braces in the outside of the canopy and the vertical braces in the inside of the canopy.
However, that also means you need to mask both the inside and the outside of the canopy (a greenhouse canopy, to make it more time-consuming!) and to paint the inside color from the inside and the outside (camouflage color) form the outside. Look carefully at the pictures, you will see that some of the canopy braces are in RLM 02 and others in RLM 70@@@.
Having overcome the surprise (and time) that took to mask the canopy twice, the fit of it to the model was fantastic. I only used a bit of Future to “glued” it in place.
I did not do much in terms of weathering, just a bit of pigment here and there to break the colors a bit and give the airplane that “flown” look.
So, in summary: Airfix has done it again. It delivered a fantastic new mold of a historically significant airplane, with plenty of options to finish it: open/closed canopy, optional trailing edge parts, nose/engine displayed, etc. The fit is so good that you can have it assembled within a few hours, giving you time to work in the more artistic part of modeling: Painting and Finishing. Just beware that no swastika is provided and that the canopy has external and internal bracing, making the masking of it the most time-consuming task of the whole assembly.
Highly Recommended.
I would like to thank Airfix, Hornby and IPMS/USA for the review sample.

Interior construction
Injector pin filling
Interior assmbly
Finished cockpit
Finished cockpit

Wheel and wheel pants

Completed greenhouse

Underside of finished model
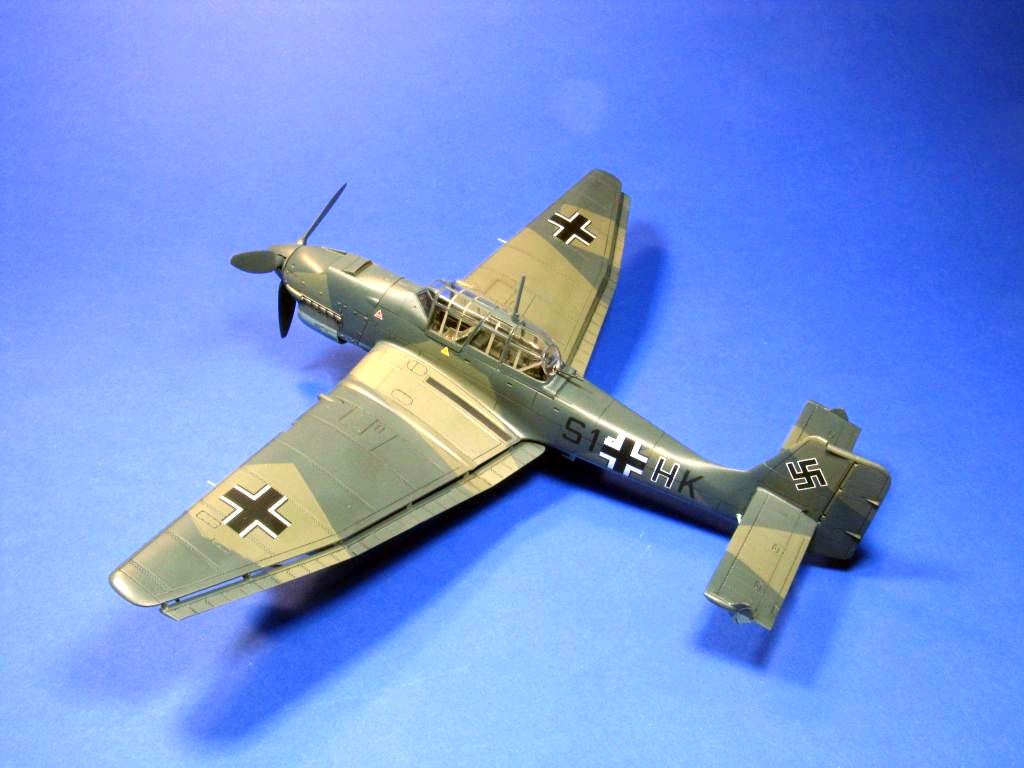
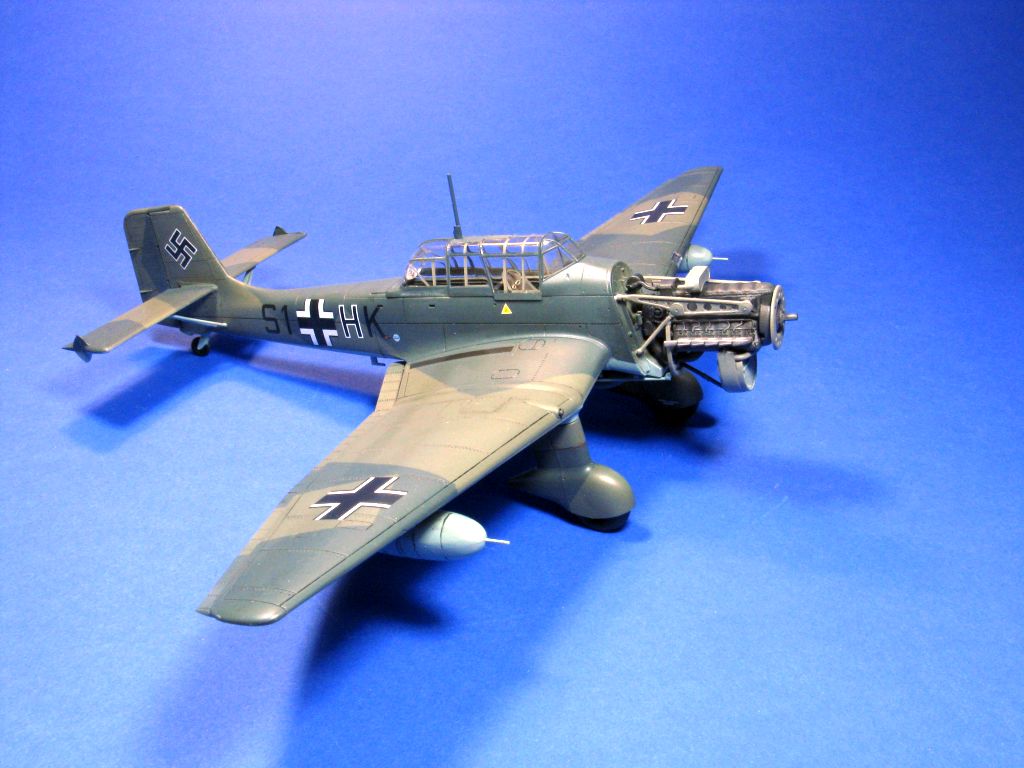
Completed model of Stuka
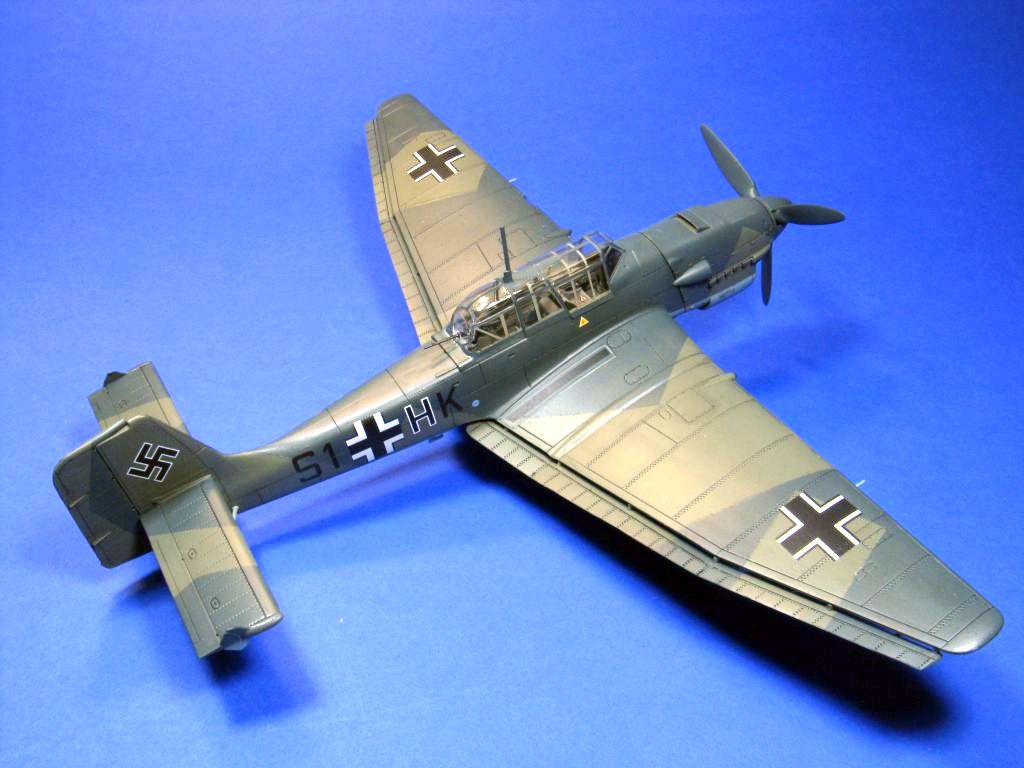
Completed model of Stuka

Completed model of Stuka
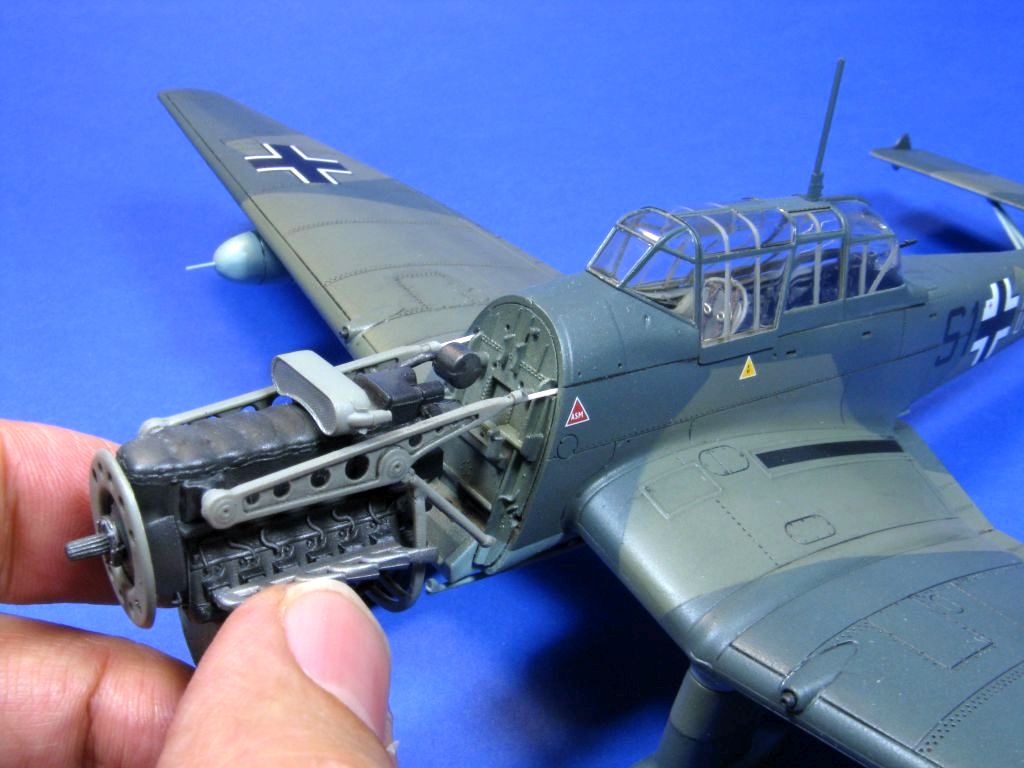
Engine assembly
Completed model of Stuka

Comments
Add new comment
This site is protected by reCAPTCHA and the Google Privacy Policy and Terms of Service apply.
Similar Reviews